SEARCH FINESCALE.COM

Enter keywords or a search phrase below:

painting modern u.s. soldiers tutorial (edited 8-28)

27240 views
32 replies
1 rating 2 rating 3 rating 4 rating 5 rating
  • Member since
    January 2009
  • From: clinton twp, michigan
painting modern u.s. soldiers tutorial (edited 8-28)
Posted by camo junkie on Thursday, August 13, 2009 11:32 PM

i was going to practically write a book for this but then i realized that no one cares whether or not i started using acrylics in the beginning or whatever. this tutorial is for painting the 3 tone desert u.s. camo NOT the a.c.u. pattern. until i myself can paint that, you guys are on your own! so, please keep in mind that this is my first tutorial and while i have like 100 pics, i obviously cant post them all so i will have to do what i think is best for this. by having to do so, i leave this with those of you who really want to know more about my painting in order to improve yours or copy mine or do both. please dont hesitate to contact me with any questions you might have. i want you to be able to do what i do...and if your interested in doing what i do, starting with this tutorial will help you i hope immensily!! mustangtom70@yahoo.com or p.m. me or whatever. Big Smile [:D] i hope no one will find fault in this as it is again the way i paint my figures.

im going to do this step by step and while some of it may not apply to what you are doing, the "core" of it is there. btw, all paints referenced in this tutorial are either windsor & newton oils, or humbrol. however, any enamel paints will work for this. no more talk...time to get on with the show...

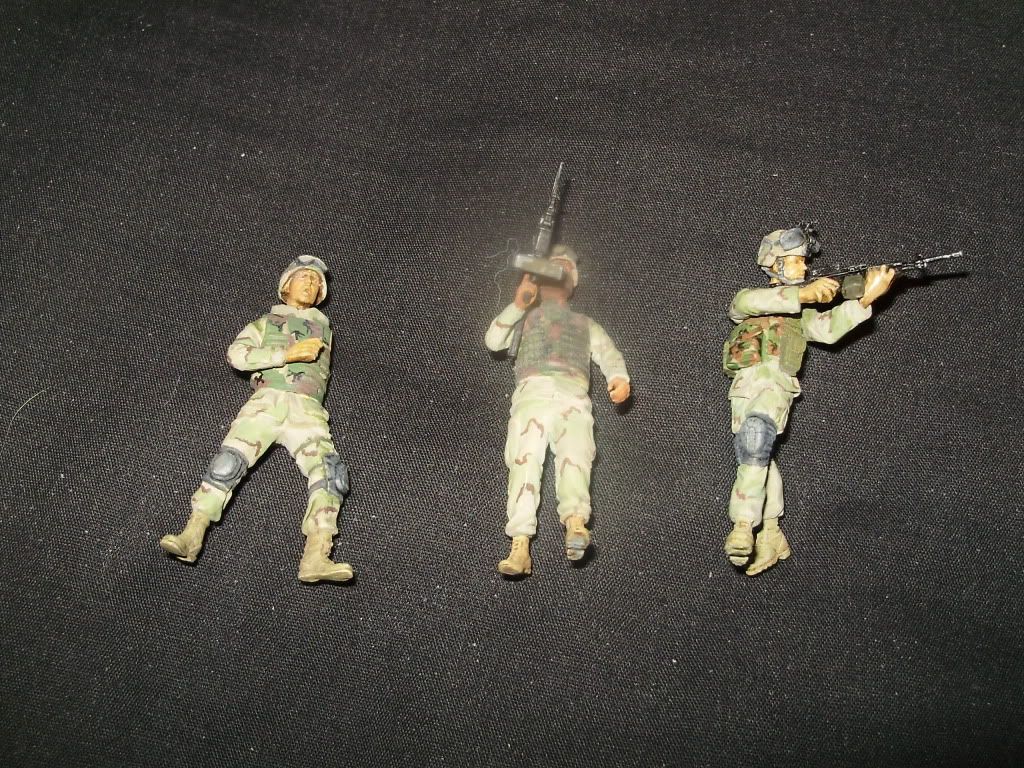
step 1: assemble your figure. whether plastic or resin your results will still be the same painting wise. in this first pic you will see 3 figures, 1st is a trumpeter figure (ignore his missing arm), second is a dragon figure and 3rd is a resin figure from new world miniatures. i also have to assume that you already are knowledgable on putting figures together.

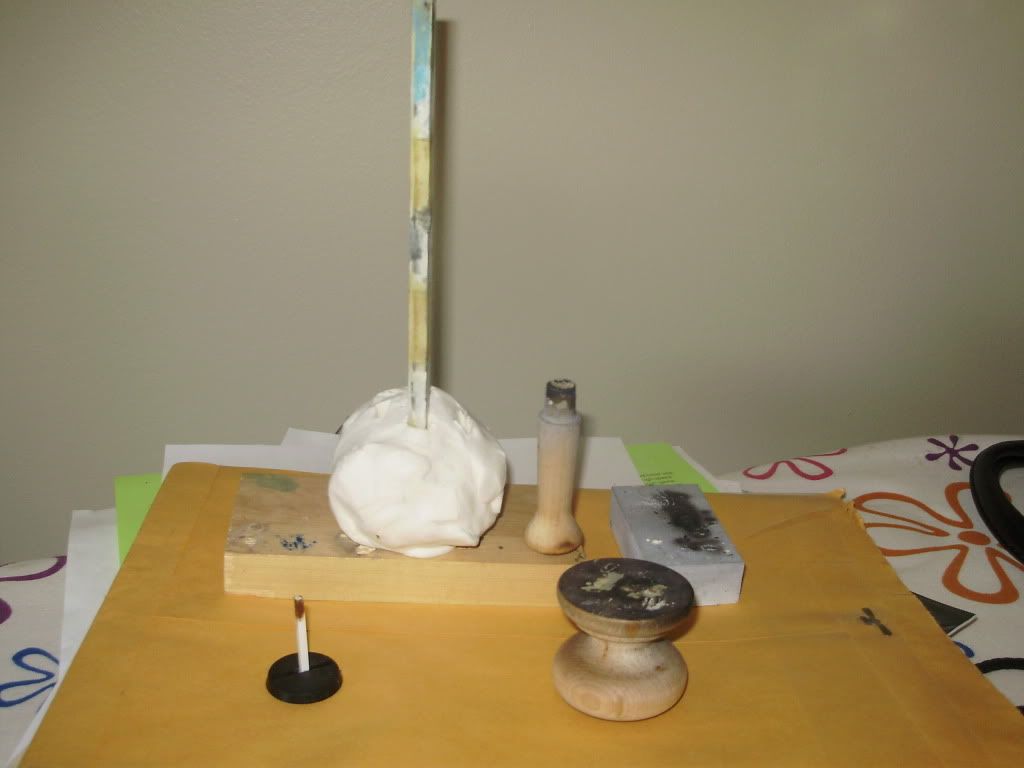
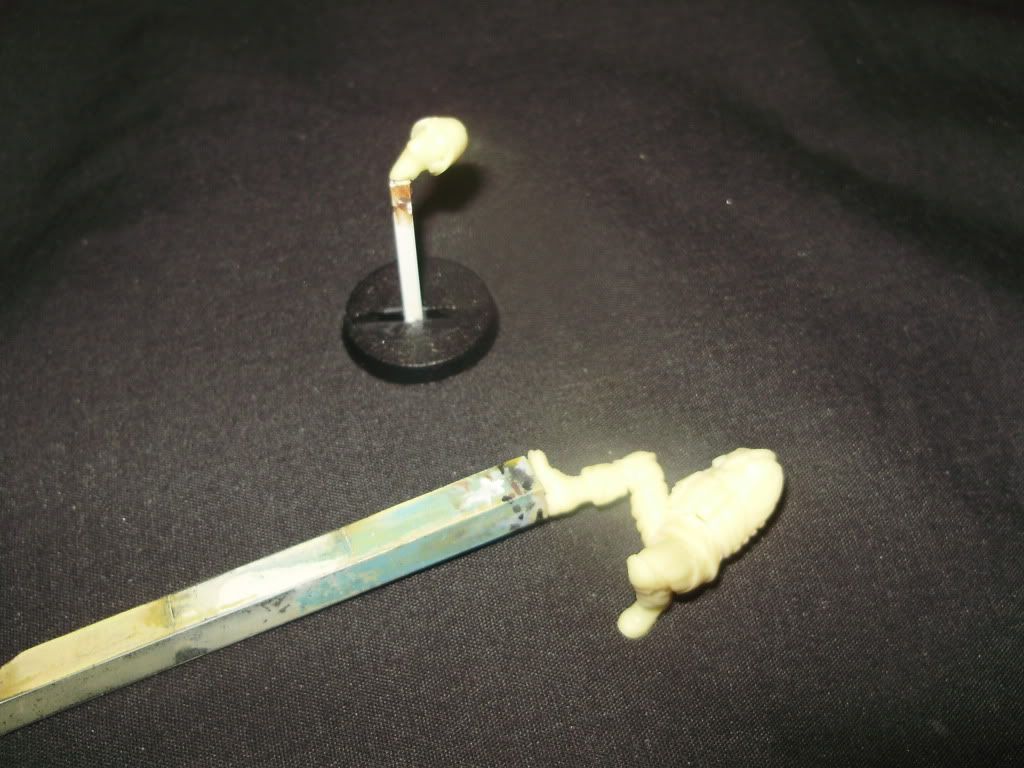
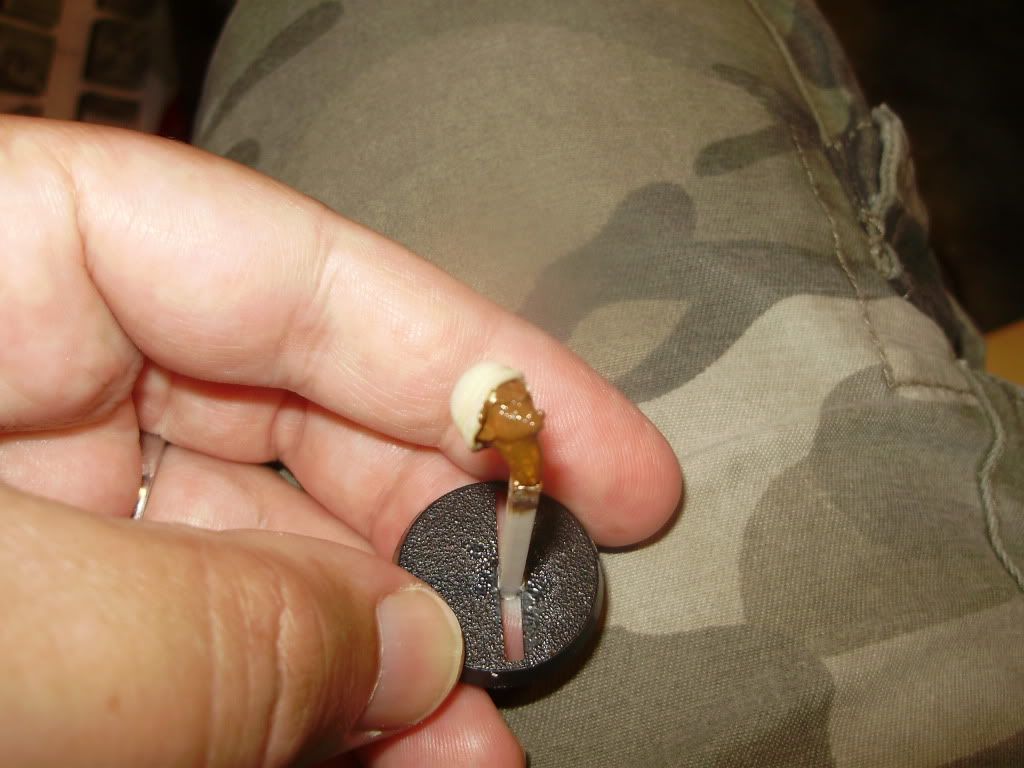
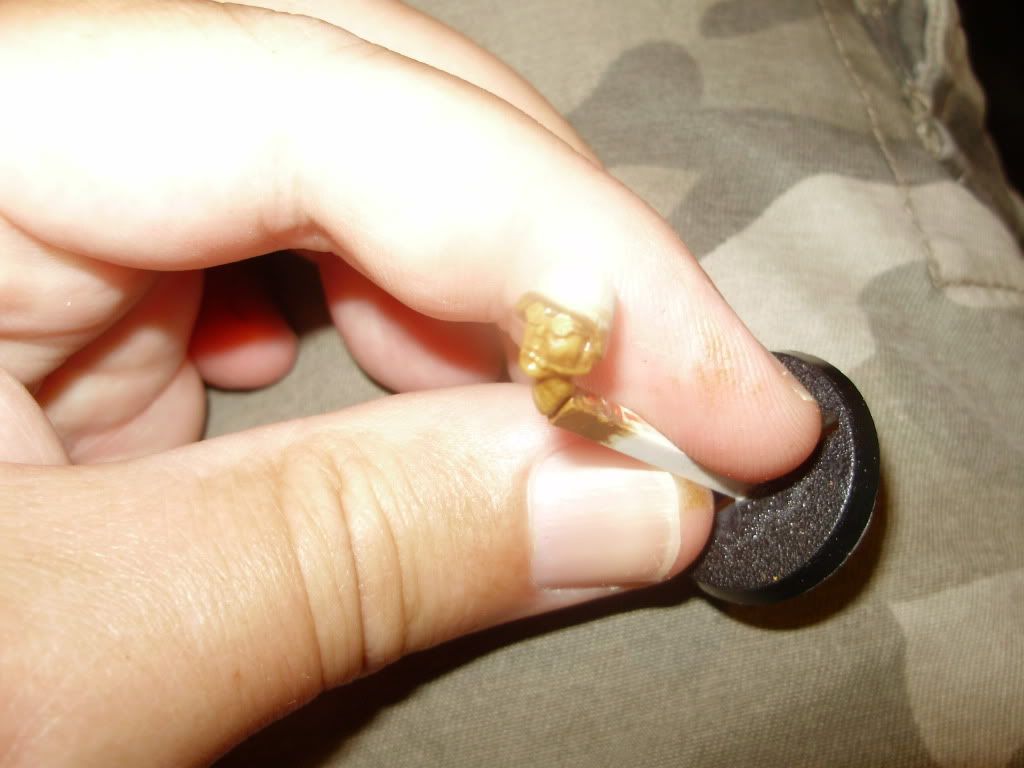
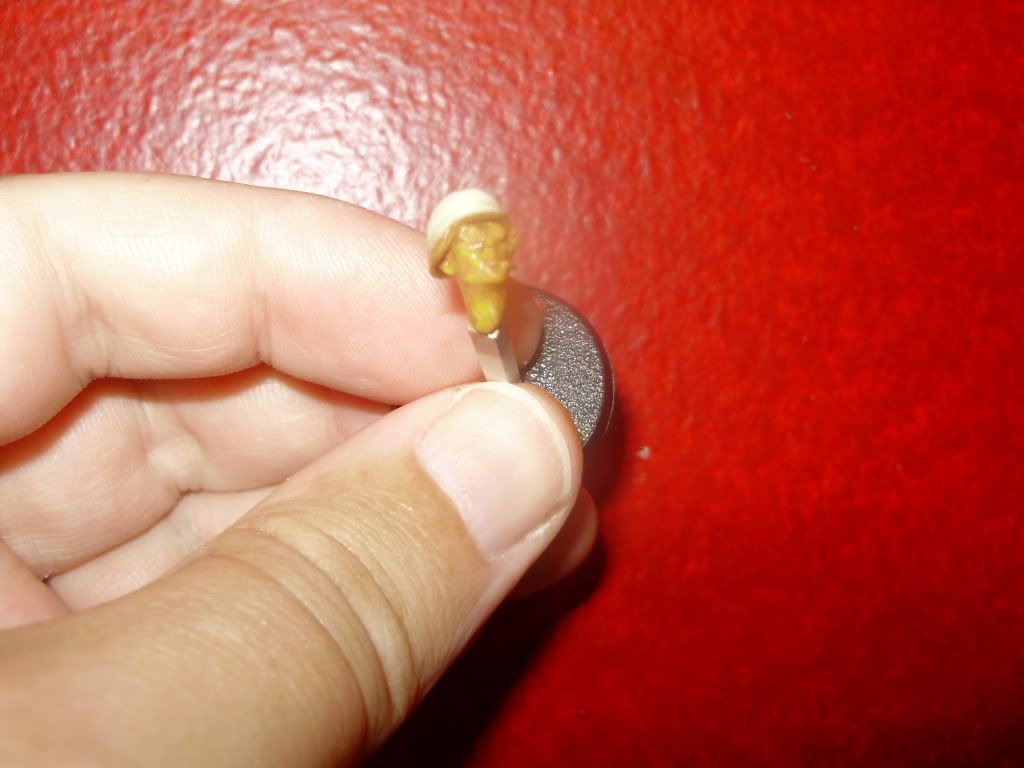
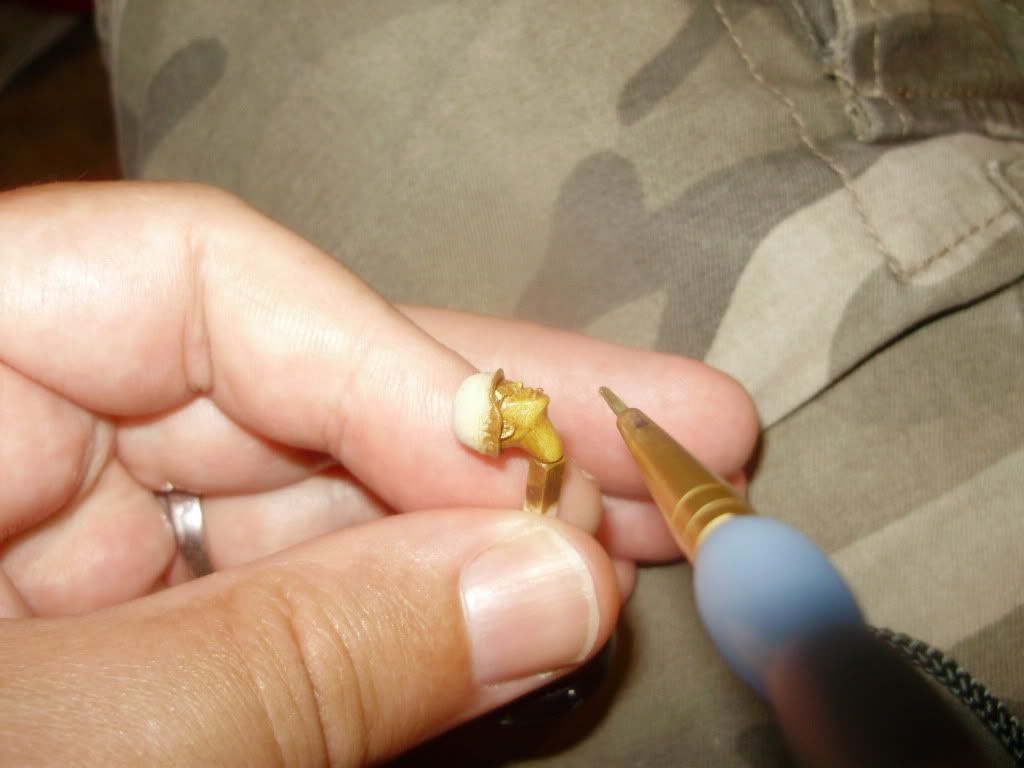
step 2: find a base to attach your figure. you can use just about anything and the logic behind this is to keep you from touching the figure during painting. i personally use a piece of sq. tubing from evergreen and place it into a piece of non hardening clay. in these next couple of pics you will see examples that i use all the time. to attach your figure use a drop of c.a. glue. just a drop is necessary as you dont want to permanently attach your figure. Whistling [:-^] if you use wood, i recommend you use a drop of elmers glue. the only draw back is you will have to wait until it is dry to proceed. the first time you go to paint your figure and the head falls off because u couldnt wait you'll kick yourself repeatedly.

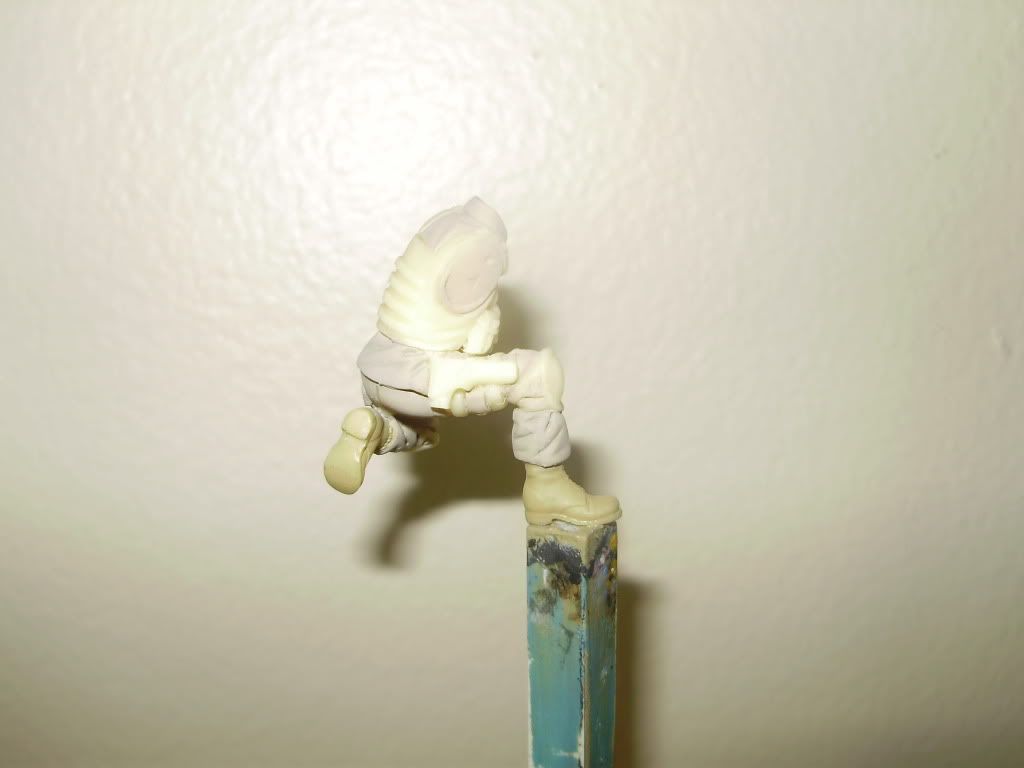
 you will notice in this tutorial that i didnt prime my figure. i dont normally. however, i dont think this is bad practice as it helps spot flaws and any missed areas. also i dont wash my figures, but, it too is good practice because of hand oils, demolding agents, etc.

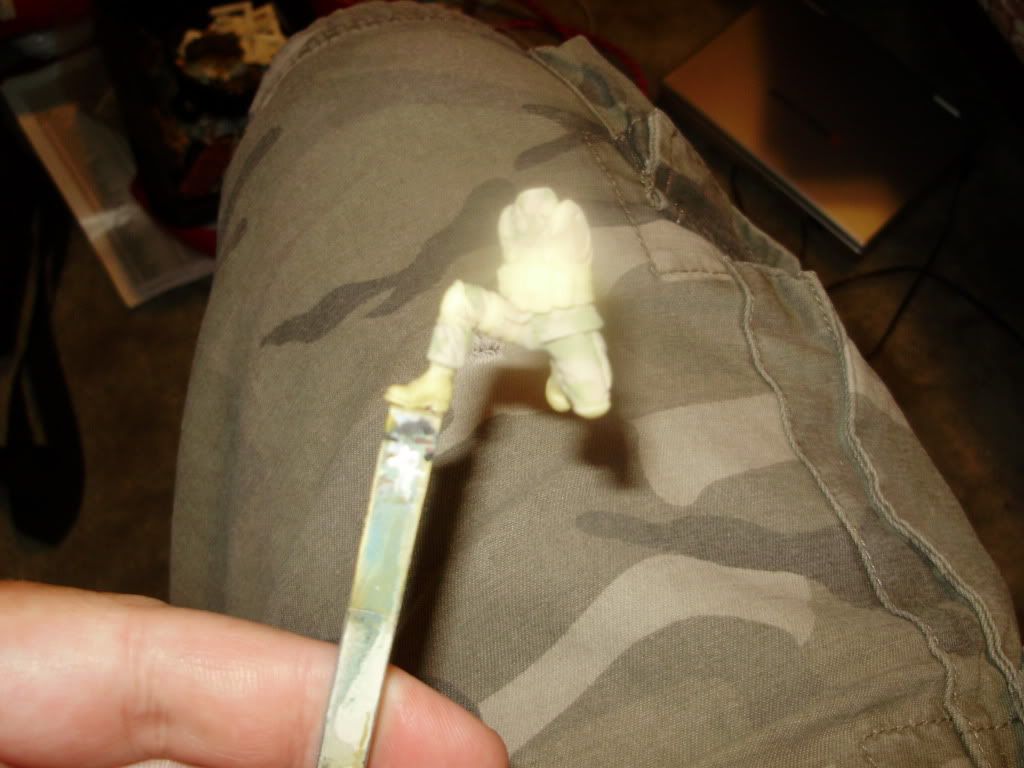
step 3: painting flesh isnt nearly as difficult as it may seem. i've got it down to a science and it works really well. first, i take some humbrol #103(cream) with a toothpick and place it on my pallet. i use a cheap .99 cents plastic pallet available at an art supply and some modeling stores. i think even michaels has them. i use an eyedropper and "drip" one drop of oderless mineral spirits onto my paint and mix it thoroughly. the reason for the thinning of paint is because you want it to just "cover" your figure. not doing so can result in visable brush strokes, covered detail if on too thick, and just an overall unattractive finish. thinning also lessens drying time and gives a clean even coating of paint over the entire figure. it is easy to over thin as well as under thin, but i usually use only one drop. the only time i use two is if i use alot of paint. you will notice when you do this wether you need one or two drops. if you thin it too much, add more paint. anyway, cover all visable flesh areas with humbrol #103 (cream) or any light color sand paint...even white as a primer will work.

a picture of my "pallets"...well used!

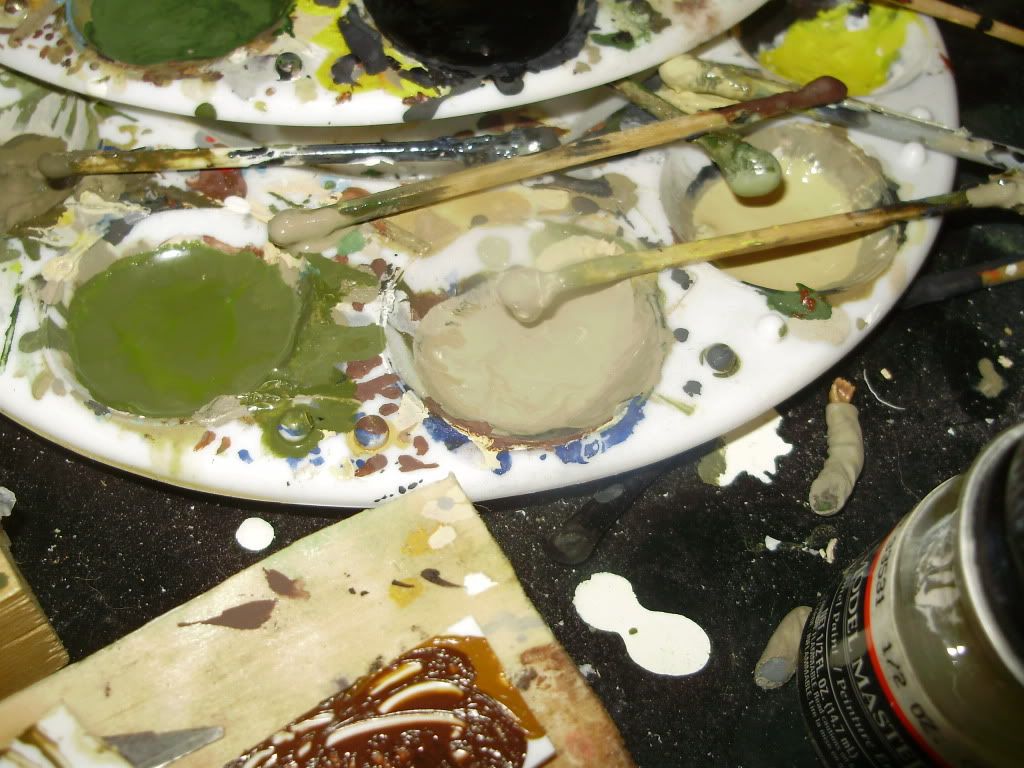
these are the basic colors you will need for any and all flesh in my opinion. yellow ochre, burnt sienna, raw umber, cadmium yellow, flesh tint, and titanium white. i had some old acadamy oils so i threw those in as i am still using them until they're gone!

add a mix of yellow ochre, burnt sienna, and raw umber. use less raw umber than the rest otherwise it will come out too dark.

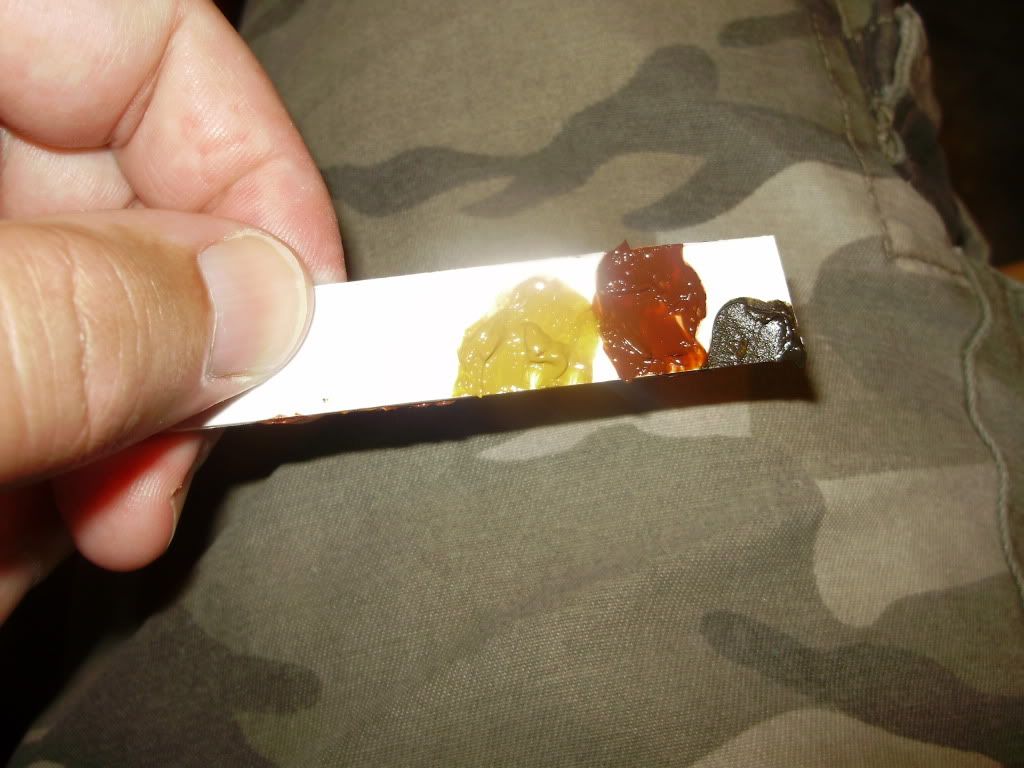
mix these together thoroughly until you get a mud mixture.

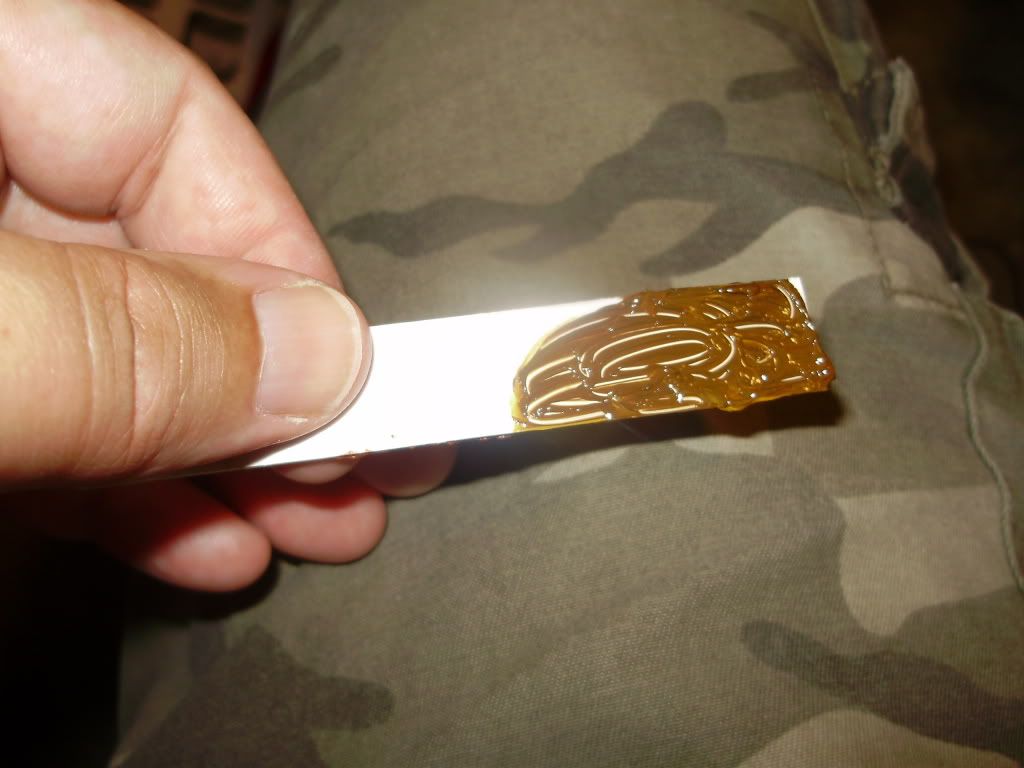
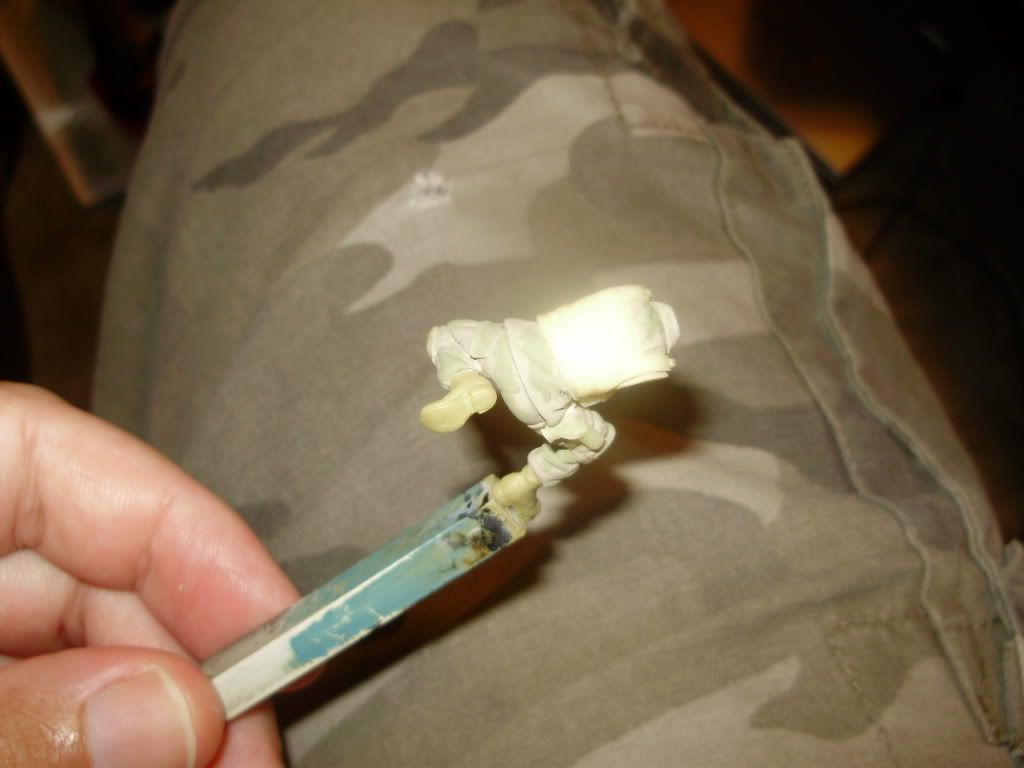
step 4: apply this mixture all over the flesh areas. put it on thick. while it looks like a mess it's actually what you want.

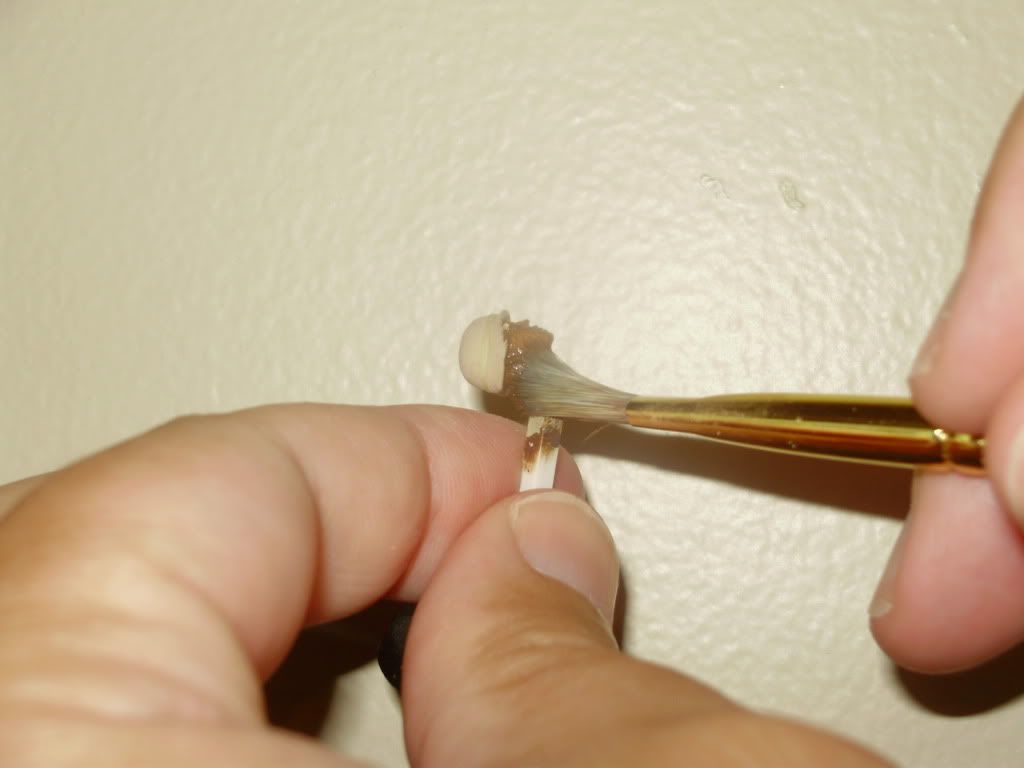
step 5: use a flat wide brush and in downward strokes remove the excess. after each stroke. wipe on a paper towel or clean rag. continue to remove the paint until it looks like its almost gone.

step6: i use a cheap detail brush for the brunt of my figure painting. you can get a pack of 4 for 4 or 5 dollars from hobby lobby. contrary to popular belief, cheap doesnt mean bad. my cheap blue brush (which i will refer to from here on out as my blue brush) does all of my detail work and is exceptional in my opinion. anyway, take this brush and apply cadmium yellow to all of the highlights on the face. if you noticed when you removed the base mixture, the humbrol #103 (cream) is showing through representing our "highlights". apply sparingly and lightly to the face and all flesh areas. the idea isnt to engulf these areas in a sea of yellow.

step7: now we play a waiting game. i usually wait 45 minutes, although i've waited as long as two hours, before we blend the cadmium yellow into our base mixture. the reason for this is we have to allow for the solvents to dissolve to make blending easier. take your detail brush, and gently blend it into your mixture. the key is not to "remove it" but lightly blend it.

step8: doing exactly what i did in step 6 i add flesh tint to all the highlight areas. (same as cad. yellow).

step9: repeat step 7 (only wait and blend flesh tint)

step10: repeat steps 6 and 8 but instead use titanium white to the same highlighted areas.

step11: repeat steps 7 & 9 (wait and blend titanium white)

step12: set aside and let dry for at least 48 hours or more depending on the humidity.

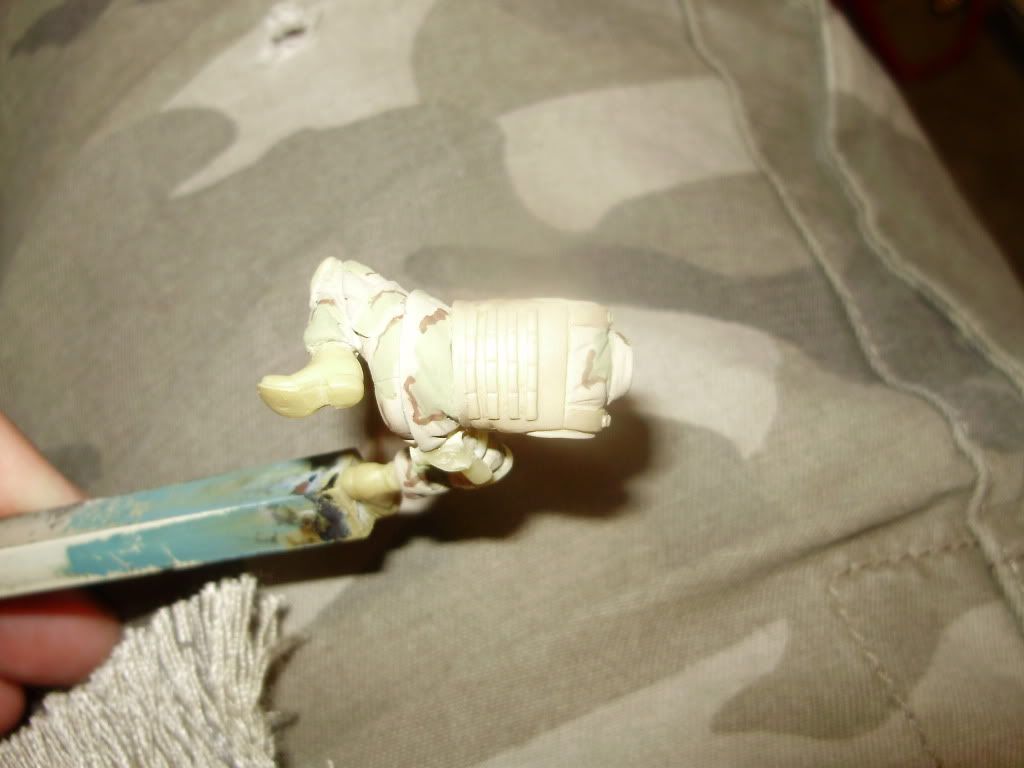
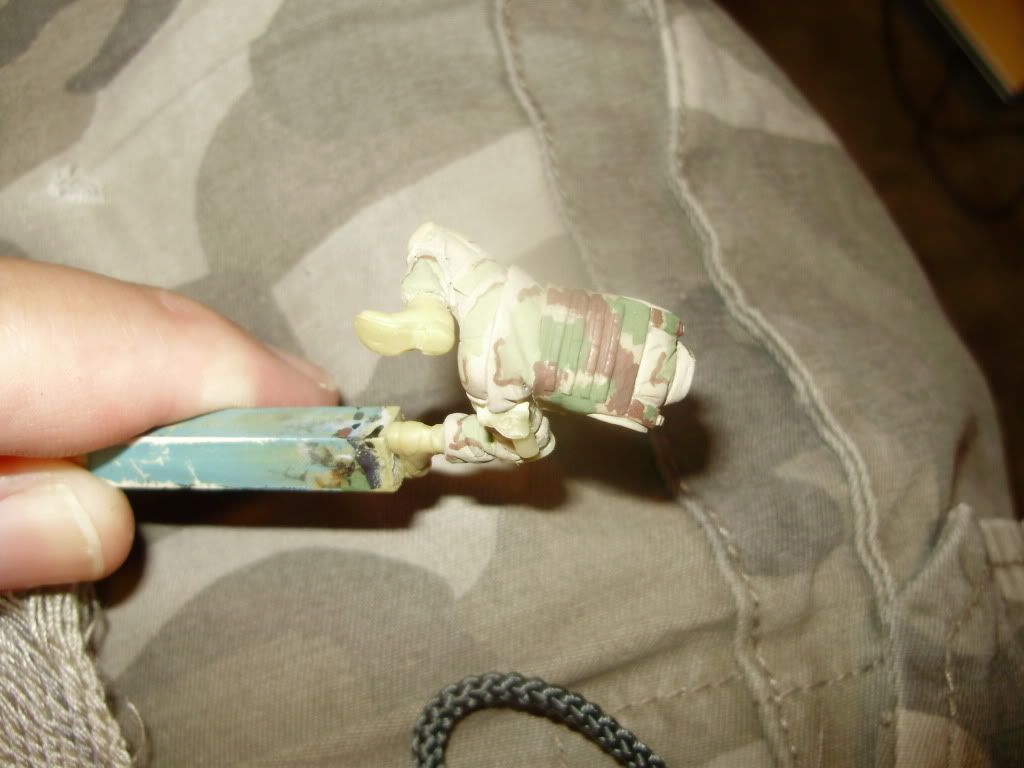
step13: painting the uniform: first i start by mixing humbrol khaki drill (#72) and humbrol white (#34) about a 50%-50%  or 1:1 mix. this will be our base coat and our first color for our 3 tone camo. (again all paints in this tutorial are thinned as stated above and i will not feel the need to continue to state the obvious). apply this color with a good brush being careful but not too careful to avoid small details. if you get paint on some, it really doesnt matter...just dont "try" to intentionally do this unless your eyes are better than mine and can pick up the details you covered. Whistling [:-^] i also let my paints dry for a minimum of 15 minutes between colors.

step14: i paint the boots with humbrol #83 (ochre). this is a good shot of how thinning my paint just covers the boots, uniform.

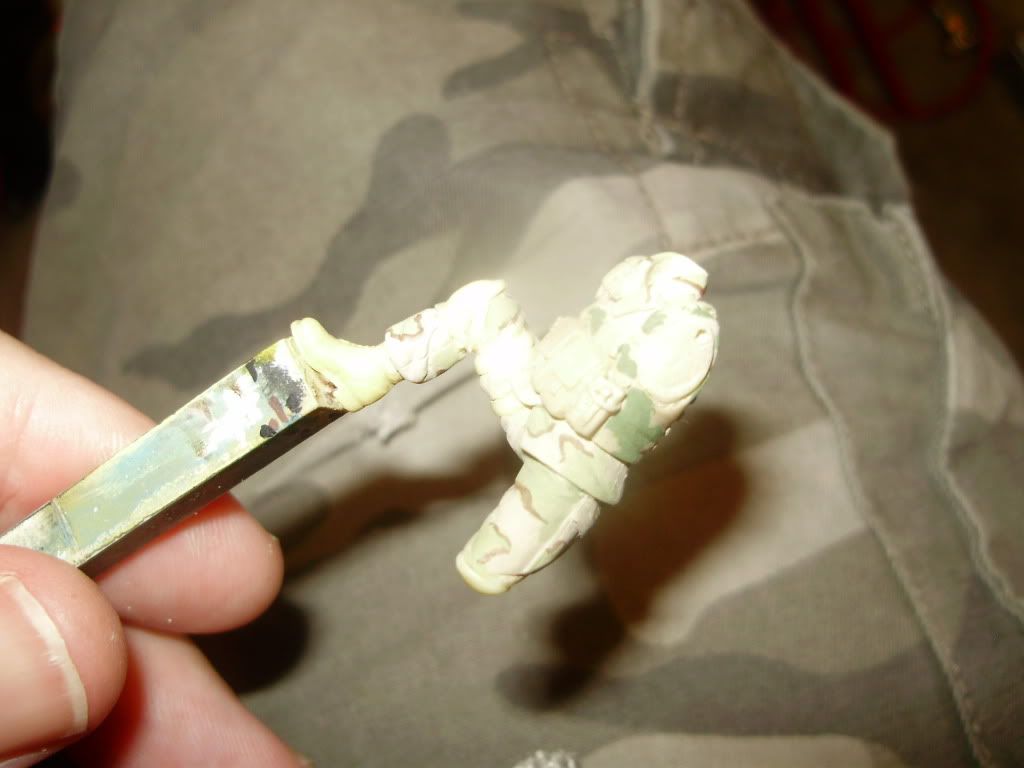
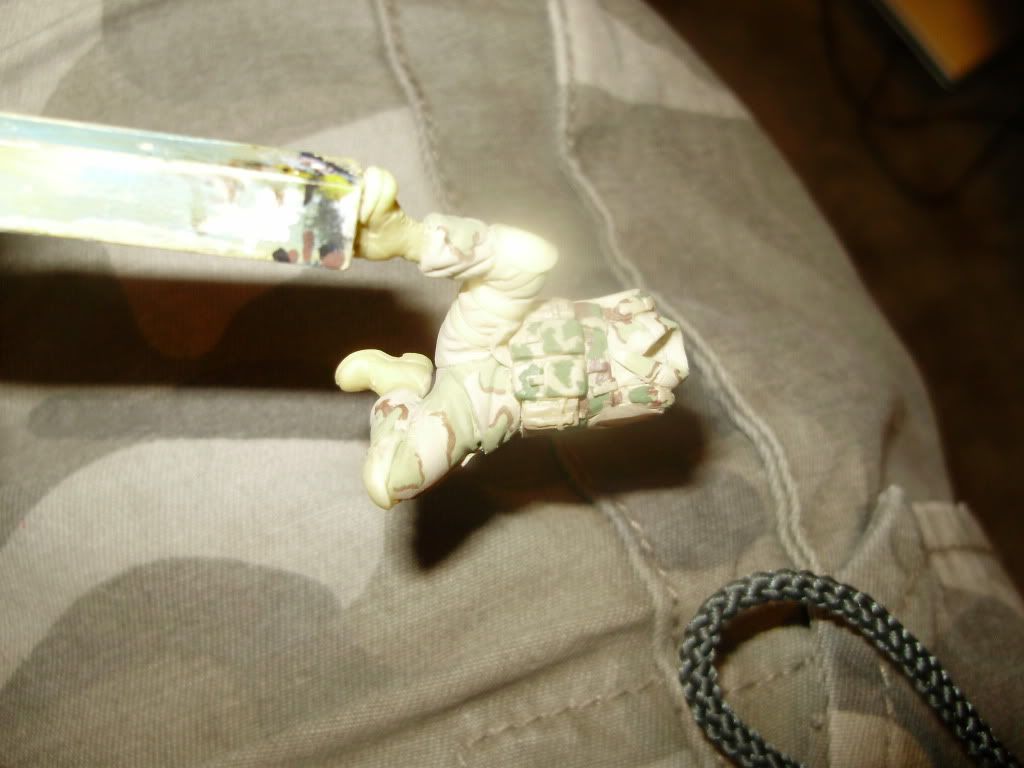
step15: using my blue brush i paint what i call "spinach" patterns next. these are the green colors or the 2nd of the 3 tone camo colors. these patterns are random. there is absolutely no ryme or reason to how i put them on. each figure like each b.d.u. is different. this color is a mixture of humbrol khaki drab (#159)(70%) and humbrol beige green (#90)(30%). you can add more or less of either two colors and still get pretty much the same results so exact measurements are not required.

step16: next using my same blue detail brush (cleaned in between steps obviously), i apply "worms" or "squiggly's" to the uniform. this is humbrol german red brown (#160). this is the 3rd color in our 3 tone camo. again, pattern recognition is irrelevant here. i randomly paint them in different areas around my "spinach" patches. this can be over done so if you feel its helpful, do a search on the internet to look at the actual pattern. i probably over do mine but in the end i think it looks good and works for me. you will find i like to paint what looks good to me and not try to "accurately portray" every single thing. if that's what you want...hey, more power to you.

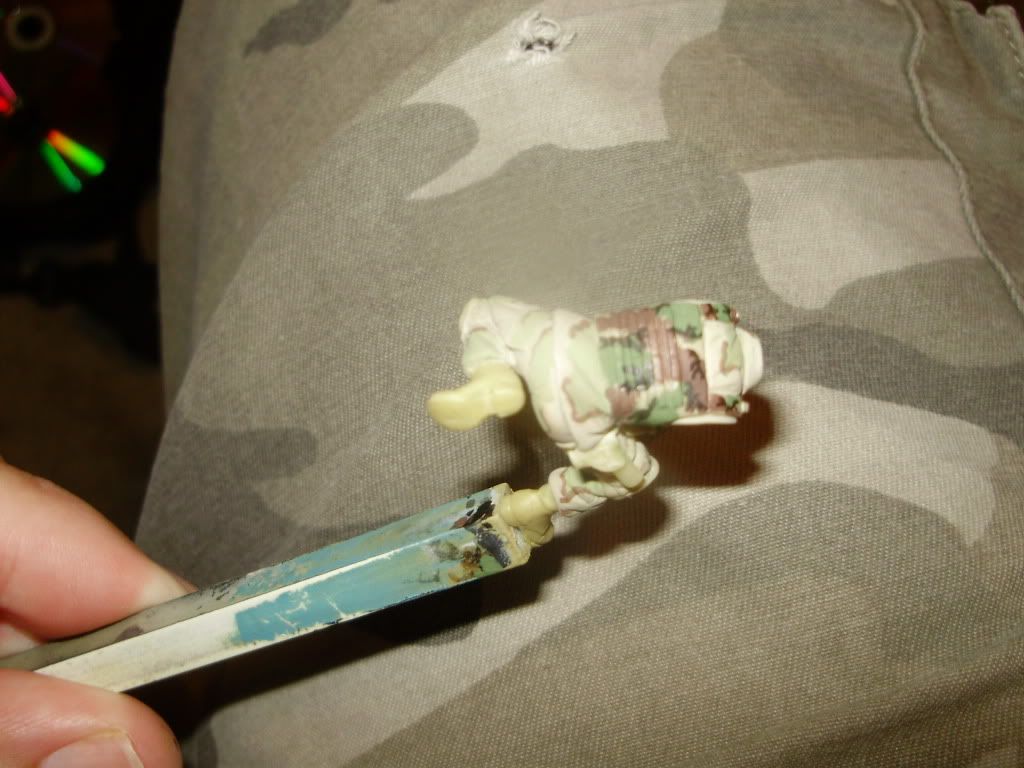
step17: body armor: this is also another 3 tone camo but this time i paint it in woodland camo. woodland camo is really one of the easiest patterns to paint in 1:35 scale. there doesnt have to be any "thinking" to doing it either. i begin by painting the entire armor in humbrol khaki drill (#72). then i apply green patches (exactly like we did with our "spinach pattern...just random "blotches" of paint). i use humbrol marine green (#105).

step18: like step 17, i randomly paint brown patches intertwined with the green ones but still leaving some of the original base color showing in areas. painted with humbrol german red brown (#160). you'll start to notice a pattern with me in that i try to make it as easy as possible and if there's no thinking involved the better so again, there is no "set pattern".

step19: again with no real set pattern, apply black "worms" to the uniform. these are simple squiggly's that i like to generally make to look like small "forks" or "3 pronged" worms. i use humbrol black (#33).

step20: using my blue brush, i apply humbrol olive drab (#155) to any straps, gear, packs, or anything that i feel i need to paint in this color. i generally dont like to have a monotoned soldier so i like to add color to the gear. sometimes its sand, sometimes its black, sometimes it o.d., sometimes its woodland, sometimes its 3-tones. i think its better to do it this way as it makes the figure more dynamic and less "dull"!

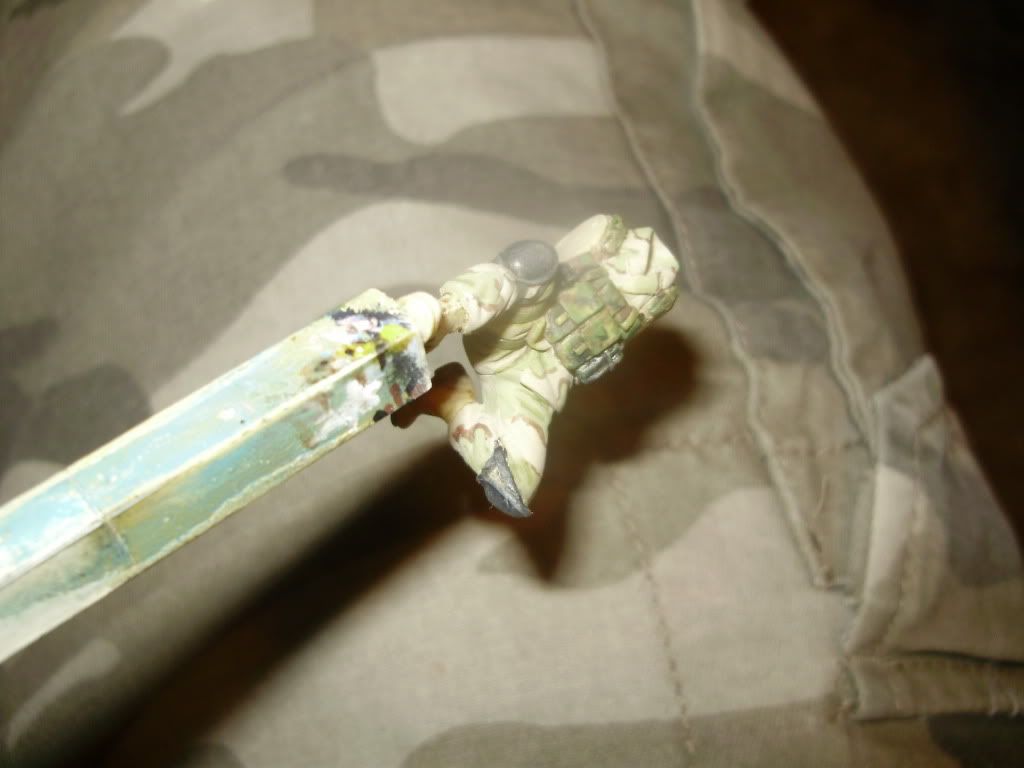
step21: the knee pads are painted in humbrol tank grey (#67) mixed with a little (#33). these can also be painted in tan or in o.d. for my figure in this tutorial, i also painted his gloves in tank grey/black. once dry i dry brush lightly over them with humbrol khaki drill (#72) mixed with white (#34) (our very first mix). i use black (#33) as a shadow for all tank grey items applied with my blue brush.

step22: i make and apply a brown wash of burnt umber oils to the folds and crevices of the boots. then apply a lighter wash over the rest of the boot. when this dries i dry brush humbrol khaki drill (#72) mixed with white (#34) (our very first mix) over the boots.

step23: making a wash of ivory black and raw umber oils, i apply this sparingly (with my blue brush) to my body armor and packs. the idea is to just let capillary action draw the wash into those areas rather than have the figure dripping in a wash that will ruin all the other colors painted. the desire is to make the armor, etc, slightly darker but that's all. once dry, i dry brush over the entire body armor, packs, etc, with humbrol lemon (#99) this accents green very well.

steps 24 and 25: final: paint any left over gear such as the weapon. in this case i painted it humbrol black (#33) and dry brushed it with a gun metal ink. however silver will work just as well. i just prefer the ink. once completed a final coating of testor's dull coat to protect our finished soldier.

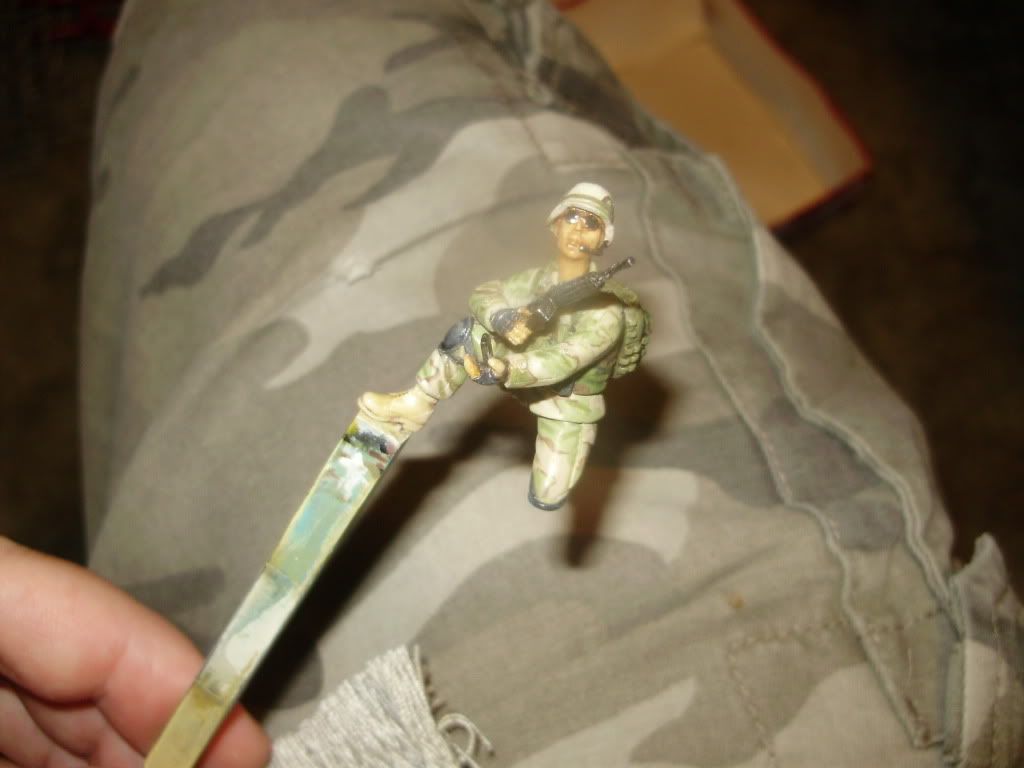
i hope this has been educational for you. and mostly i hope you will be able to paint fantastic figures from here on out. thanks guys. Bow [bow] btw, you will notice i didnt talk about the glasses (not all figures need or have glasses) but these are painted black (#33) and once dry, 3 layers of future was applied to the lenses. shadowing was done with my blue brush. the "spinach" shadow is khaki drab (#159) and the base color is dark stone (#84). just brushed into all the folds.

i edited this on 8/28. only things i changed were some wordings, and during the painting of the uniform part (step #15) i called humbrol #90 "sky" when it is in fact beige green! sorry for the mix up.


"An idea is only as good as the person who thought of it...and only as brilliant as the person who makes it!!"
  • Member since
    January 2012
Posted by I make stuff on Friday, August 14, 2009 1:34 AM

This is saveTASTIC!

Thanks for taking the time to put this out there, it is well photographed and clear.

Bill

  • Member since
    March 2004
Posted by Grimmo on Friday, August 14, 2009 2:07 AM
Thats awesome! I'll be trying the flesh painting when i get some oils this weekend! I've always hated doing skin but this has given me the courage to try!
  • Member since
    January 2009
  • From: clinton twp, michigan
Posted by camo junkie on Friday, August 14, 2009 6:47 AM
thanks cita. im sorry some of the photo's are a little fuzzy. i keep saying it and perhaps i need to actually "do it" but i need to learn the in's and out's of my camera. i had a nice one that i knew quite well, but the wife broke it and now i have this thing!! anyway, i hope people can learn from this and will make of it what it is. i may go back in there and add a thing or two (small things) but nothing that could stop someone from doing what's there. for instance i forgot to talk about adding shadows, and small stuff like that. i was waaaaayyyyy too worried that it would be super huge and there would be issues. i left alot of pictures out!! Wink [;)]
"An idea is only as good as the person who thought of it...and only as brilliant as the person who makes it!!"
  • Member since
    January 2009
  • From: clinton twp, michigan
Posted by camo junkie on Friday, August 14, 2009 6:48 AM
grimmo, go for it sir. this should give you the courage you need to try. this is so easy (even a caveman could do it). Laugh [(-D] that's a commercial here on t.v. Wink [;)] good luck though, i know you can pull it off!!!
"An idea is only as good as the person who thought of it...and only as brilliant as the person who makes it!!"
  • Member since
    December 2008
  • From: Northern Va
Posted by psstoff995's lbro on Friday, August 14, 2009 3:08 PM
Great tut camo! Thumbs Up [tup] I'll deffinitely be using this when I get around to painting my figs. Chris just picked up some oils a few days ago, but I don't know if he'll let me use them Sigh [sigh]. I'll post up some pictures when I get around to painting my mounted German a few threads down. (Should be a lot better than my previous paint jobs) Thanks! 
-Will young modeler Test fit master
  • Member since
    January 2009
  • From: clinton twp, michigan
Posted by camo junkie on Friday, August 14, 2009 4:51 PM
i hope so...that they'll be better than b4.  as far as chris...kick him in his butt and make him let you use them!!! its the least a big bro can do!! Wink [;)] ya here that chris...let him use them!!! anyway im glad you like it and i hope it can be used. look 4-ward to the pics!
"An idea is only as good as the person who thought of it...and only as brilliant as the person who makes it!!"
  • Member since
    March 2008
  • From: East TX
Posted by modelchasm on Friday, August 14, 2009 5:53 PM
Hell ... he's going back to school soon anyway right!?! Just makes them "magic" oils and see how they disappear. HAHA!!

"If you're not scratching, you're not trying!"  -Scott

  • Member since
    January 2009
  • From: clinton twp, michigan
Posted by camo junkie on Friday, August 14, 2009 6:09 PM

 modelchasm wrote:
Hell ... he's going back to school soon anyway right!?! Just makes them "magic" oils and see how they disappear. HAHA!!

see at least someone is thinking!!! and i didnt see anything. Blindfold [X-)] btw, lil bro, i have a thing on painting horses with oils too if you need it. i will have to scan it and p.m. you...but let me know (i cant do it until monday as im not home but still let me know!)

"An idea is only as good as the person who thought of it...and only as brilliant as the person who makes it!!"
  • Member since
    December 2003
  • From: Colorado
Posted by psstoff995 on Saturday, August 15, 2009 11:38 AM
haha Tom told me to let you use my oils over in his Mayhem thread- and I was like... Confused [%-)] Will doesn't use oils...

But yeah- if you want to use them, you should have just let me know. Scott's right, I packed them up and they're in the car- but I doubt I'll use them before Thanksgiving. Lucky I caught this before Sunday- would have been GONE! And I think Oils will blend real nice for the horse work you wanted to do- no need to airbrush it like you were thinking. Might take a while to dry, but you'll have forever to blend it all in.

No butt kicking required! Black Eye [B)]

I only have a few colors and I don't think they're 100% correct for flesh- it's Winton Oils #2 Burnt Sienna #27 Light Red and #29 Naples Yellow Hue

I got these to start trying flesh out, haven't done it yet- so Will, make sure Tom helps you out with all your questions, I'm not real good with oils on canvas so I'm worried that's going to translate to 1/35 faces as well. 

 modelchasm wrote:
HAHA!, thanks brother! I've been farting around w/ some oils if that makes you feel any better!?! Other than that, "no excuse, Sir".
It sounds like Scotts starting to turn to the dark side so maybe he can help you too. Wink [;)]

-Chris

US Army Infantryman

  • Member since
    January 2009
  • From: clinton twp, michigan
Posted by camo junkie on Saturday, August 15, 2009 8:46 PM
i can help ya sure...but his colors for oils just wont work. however, u read my tut so no need to repeat!!! might work for the horse i forget but like i said i cant get that to u until monday or tuesday when i get home!!! that said, chris, if i can do it (paint with oils....you can do it). i assure you 100% that the "system" works as it should!! as for scott...mmmuuuuuhhahahahaha...let the hate flow through you young one.... Evil [}:)]
"An idea is only as good as the person who thought of it...and only as brilliant as the person who makes it!!"
  • Member since
    December 2003
  • From: Colorado
Posted by psstoff995 on Saturday, August 15, 2009 10:22 PM
 camo junkie wrote:
i can help ya sure...but his colors for oils just wont work.
Yeah there were slim pickings at the art store- nothing that really jumped out as "flesh" so that's what I went with- as for the horse, I think the light red and burnt sienna will turn out real well. The light red is more of a rusty red orange color.

Thanks for the vote of confidence- sometimes my lil bro just needs that push though to get from base paint to actual shading and highlight work on figures. He's really getting the hang of it though. Heck- he has a figure painted up in 1/72 that looks on par with some of my 1/35 guys, so I don't know how much more help I can give him.

-Chris

US Army Infantryman

  • Member since
    January 2009
  • From: clinton twp, michigan
Posted by camo junkie on Sunday, August 16, 2009 8:50 AM
that's great chris. at least you can say you've helped him. as far as confidence, well, maybe that's all it takes to move forward, but i wouldnt say it if it wasnt true. if "I" can do it, i assure you ANYONE can. its really really simple. i dont use a color wheel or fancy brushes, or anything like that. i have one brush that i got from an art store and it costs me like $15. otherwise, i use cheap $6-$7 brushes and of course my cheapo hobby lobby 4 pack that do EVERYTHING for my figure painting wise (and ya see the results i get). keep it simple and make IT work for YOU.Smile [:)]
"An idea is only as good as the person who thought of it...and only as brilliant as the person who makes it!!"
  • Member since
    July 2009
Posted by Axel Smith on Sunday, August 16, 2009 4:02 PM

Awesome tut camo... can't wait to try out some oils and techniques on my next figure  Thumbs Up [tup]

- Alex

'Verily, this vichyssoise of verbiage veers most verbose, so let me simply add that it's my very good honor to meet you and you may call me V...'

  • Member since
    January 2009
  • From: clinton twp, michigan
Posted by camo junkie on Sunday, August 16, 2009 7:54 PM
very cool axel. glad you liked it and i hope it will help you. as i stated if ya have any questions, just let me know...i will answer them as thoroughly and as accurately as i can. Smile [:)]
"An idea is only as good as the person who thought of it...and only as brilliant as the person who makes it!!"
  • Member since
    December 2003
  • From: Colorado
Posted by psstoff995 on Monday, August 17, 2009 3:10 PM
 camo junkie wrote:
as far as confidence, well, maybe that's all it takes to move forward, but i wouldnt say it if it wasnt true. if "I" can do it, i assure you ANYONE can.


Yeah- I hear you. Sometimes though, it's not actually the skills one has or the paint/brushes/supplies etc. -it's more the mental ability to keep driving on through unexpected bumps, broken/missing parts and maybe a bad/blotchy paint job. I think the hardest part is taking that deep breath and starting up again after some unexpected problem sets one back a few steps in the process.

Haha or just resisting the urge to hurl the whole thing across the room Whistling [:-^]

-Chris

US Army Infantryman

  • Member since
    January 2009
  • From: clinton twp, michigan
Posted by camo junkie on Monday, August 17, 2009 4:14 PM
yeah very true chris. but the nice thing about the oils is if you screw it up...just apply another coat of paint and try again. you dont have to scrap the figure and buy or make another one!!! my last 120mm guy that delta guy, i must've repainted his face 3 or 4 times. my s.f. verlinden guy, i painted his 2 or 3 times. sometimes, it just doesnt cooperate but so long as you paint "thinly", multiple coats dont mean a thing...and no scrap!!! that's my motivation! Big Smile [:D]
"An idea is only as good as the person who thought of it...and only as brilliant as the person who makes it!!"
  • Member since
    June 2009
  • From: Joplin, Mo
Posted by figure freak on Monday, August 17, 2009 7:47 PM
YAY i have all the colors i need to use this tutorial!!!! cant wait to try it out and it beats painting a face over a period of like a week
  • Member since
    January 2009
  • From: clinton twp, michigan
Posted by camo junkie on Monday, August 17, 2009 8:41 PM
awesome f.f. im anxious to see your results!! just remember, take it slow and dont let it discourage you. thin coats of yellow, flesh, white, lightly applied. you'll get the "feel" for it in no time really. and, any questions, im here to help!!! Wink [;)]
"An idea is only as good as the person who thought of it...and only as brilliant as the person who makes it!!"
  • Member since
    December 2003
  • From: Colorado
Posted by psstoff995 on Friday, January 1, 2010 3:45 PM

Hey Tom, figured I'd go ahead and bump this one up from the depths as it's near impossible to find anything pre-update and you only have a link to this one on HLI. (if you could go into the main tut. post and copy everything and paste it over there that'd be cool with me! lol)

I'm working on a New Years Quick-build as I type, put in about 10 hours so far. Figured it was time to go ahead and post some shots before work at 5 as I wait for the oils to set up.

Here's where I am so far on the camo junkie figure painting with oils guide.

These guys are French Foreign Legion at Côte d'Ivoire btw- they're going to have the standard woodland CE Pattern

http://en.wikipedia.org/wiki/File:053_French_Foreign_Legion.JPG

Always a pleasure!

-Chris

US Army Infantryman

  • Member since
    January 2009
  • From: clinton twp, michigan
Posted by camo junkie on Friday, January 1, 2010 7:06 PM

they still seem a bit dark chris. are you mixing yellow ocre with the other two? might just be the pic of course. but it looks like you got it down bud!

"An idea is only as good as the person who thought of it...and only as brilliant as the person who makes it!!"
  • Member since
    December 2003
  • From: Colorado
Posted by psstoff995 on Friday, January 1, 2010 8:28 PM

Oh man! I don't know why I didn't check the pic before I went to work, they don't look half that dark, in fact, they don't look half that... red in real life either, I think it was the flash. Sorry about that. I'll try and fix that when I post it over in Figs

-Chris

US Army Infantryman

  • Member since
    January 2009
  • From: clinton twp, michigan
Posted by camo junkie on Friday, January 1, 2010 9:14 PM

no that's fine. if they dont look that bad then im sure you did it right. i suspected it might be the camera so no worries. lets just see the final result! Cool

"An idea is only as good as the person who thought of it...and only as brilliant as the person who makes it!!"
  • Member since
    December 2003
  • From: Colorado
Posted by psstoff995 on Friday, January 1, 2010 10:07 PM

Tell me what you think- here's another sneak peek but I gave it it's own thread her in F&M

Try to envision just the actual flesh parts on their own, it looks too dark if you take into account all the brown on the shoulder.

-Chris

US Army Infantryman

  • Member since
    January 2009
  • From: clinton twp, michigan
Posted by camo junkie on Saturday, January 2, 2010 5:23 AM

oh i agree about the brown but that happens with the technique. but this is a clearer pic and the flesh looks alot better from this pic. i think they will look great bud! congrats!

"An idea is only as good as the person who thought of it...and only as brilliant as the person who makes it!!"
  • Member since
    December 2003
  • From: Colorado
Posted by psstoff995 on Saturday, January 2, 2010 6:16 PM

Thanks a lot! Glad they pass the test

-Chris

US Army Infantryman

  • Member since
    January 2005
  • From: Portland, Oregon
Posted by fantacmet on Saturday, January 2, 2010 8:17 PM

I like this.  This needs to be stickied.  I'd be happy to put this all together into a pdf file for you.  Since I will probably do it anyway and keep it on my hard drive for my own personal reference, but would be happy to forward a copy to you when I do, so you can share it as such.


  • Member since
    January 2009
  • From: clinton twp, michigan
Posted by camo junkie on Saturday, January 2, 2010 8:48 PM

sounds like a plan sir... and glad you like it. Yes

"An idea is only as good as the person who thought of it...and only as brilliant as the person who makes it!!"
  • Member since
    December 2003
  • From: Colorado
Posted by psstoff995 on Saturday, January 2, 2010 10:00 PM

Me too- glad I brought it back from the dead!

What really shoud be stickied is the contest you wrote this up for Tom- had a whole bunch of figure tuts by a bunch of different people, featured oil and acrylics and quite a few styles that looked pretty good if I recall.

-Chris

US Army Infantryman

  • Member since
    March 2008
  • From: East TX
Posted by modelchasm on Wednesday, January 6, 2010 8:22 AM

Hey Chris .... or Tom ... I was looking for that thread where Tom was talking about "how to" do his method w/ oils, but I couldn't remember what it was called or where it was. I want to copy/ paste and save it for later. Let me know if you can point me in the right direction.

"If you're not scratching, you're not trying!"  -Scott

JOIN OUR COMMUNITY!

Our community is FREE to join. To participate you must either login or register for an account.

SEARCH FORUMS
FREE NEWSLETTER
By signing up you may also receive reader surveys and occasional special offers. We do not sell, rent or trade our email lists. View our Privacy Policy.