Fire Mission…….M50 Ontos
Introduction
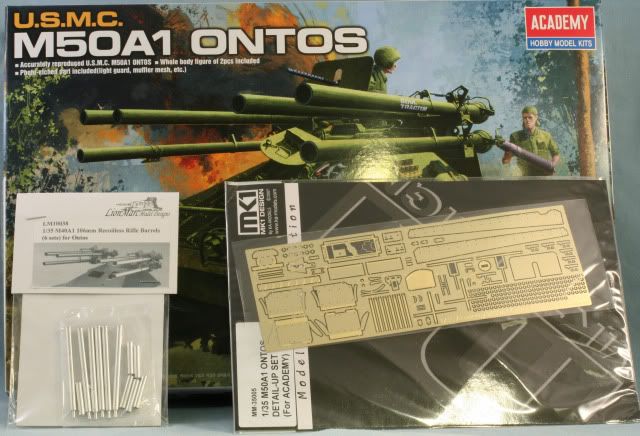
This will be the new Academy M50 Ontos. I will also be adding the Lion Mark Aluminum barrels and the new MK models M50 Ontos PE set.
Background
The M50 Ontos, which means the thing, is a unique vehicle. It mounts 6 – 106mm recoilless rifles. About 300 of these were built and saw service with the U.S. Marine Corps during the Vietnam War. For more details you can read up here:
http://www.militaryfactory.com/armor/detail.asp?armor_id=205
Here is a movie from You Tube showing the Ontos firing during the Tet Offensive at the Battle for Hue.
http://www.youtube.com/watch?v=T0t-0l0Zv0I
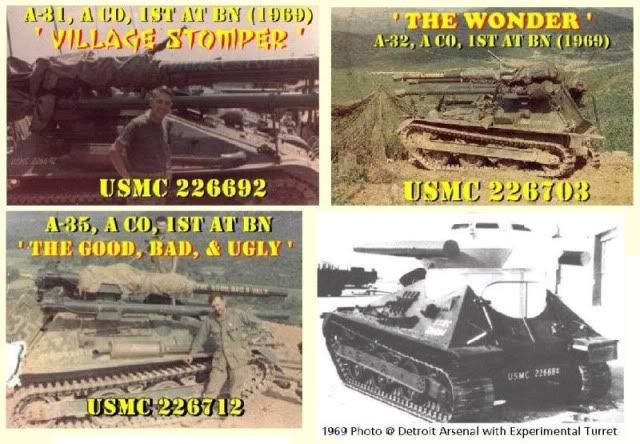
Here are a couple of other shots of M50 Ontos in Vietnam
The Build
The kit has 4 sprues, two of which are duplicates and contain the rifle parts and road wheels. Also there is the upper and lower hull, a small PE sheet and a small sheet of decals.
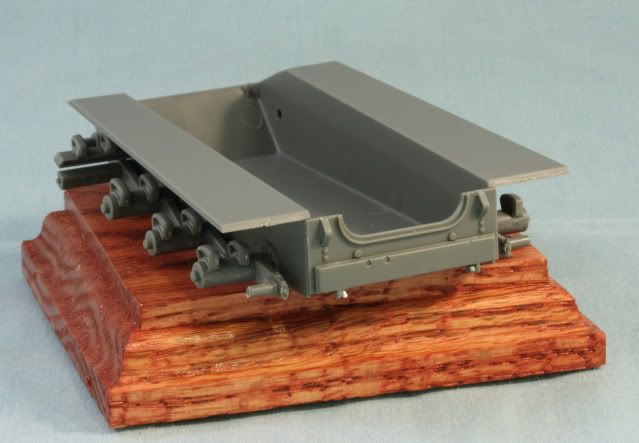
Step one mounts all the suspension arms to the lower hull
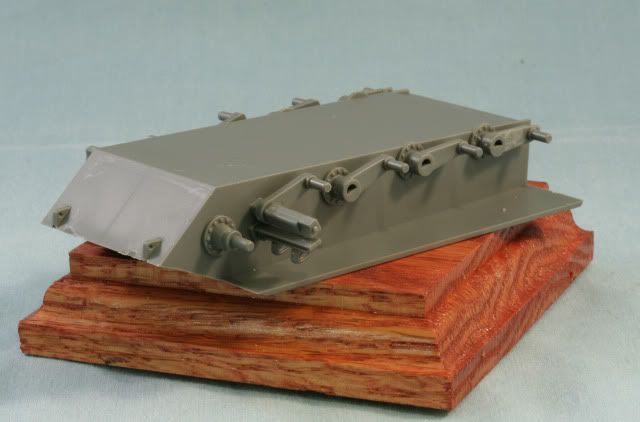
Next, step two mounts the outer connectors for the suspension
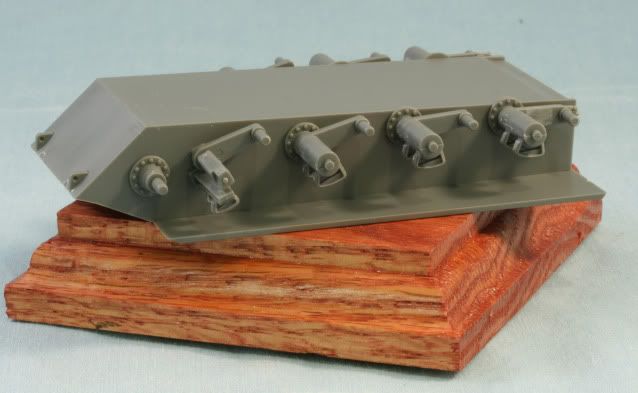
I will skip step 3 & 4 for now which are the assembly of the road wheels and connection of the outside suspension. Step 5 is the assembly of the rear panel of the lower hull. The hinges for the ammo storage door and VERY TINY and for the first time in a long while the floor devoured a part!! So out came the styrene sheet. I did not mount the handle on the door to keep it from getting broken off at this point in the build.
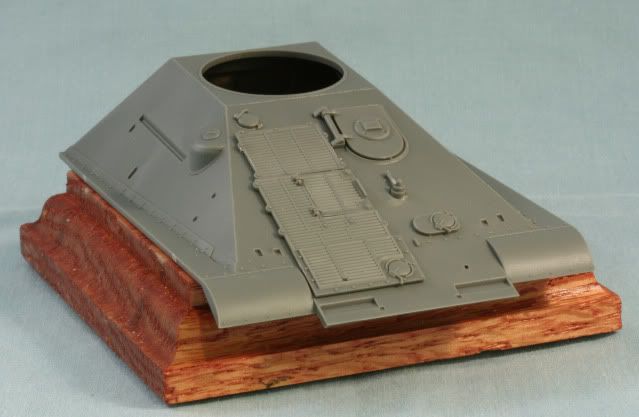
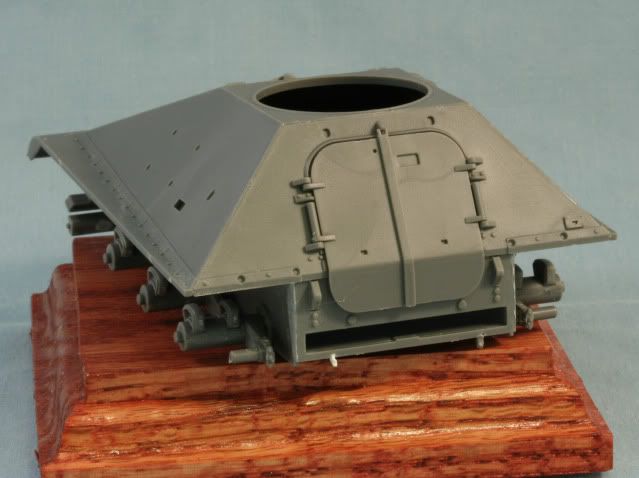
Step 6 & 7 would have you mount all the detail on the upper hull before joining to the lower hull. Based on the way the kit fits together, I thought this was a BIG mistake so I just mounted some of the larger flat hatch covers and caps from step 6.
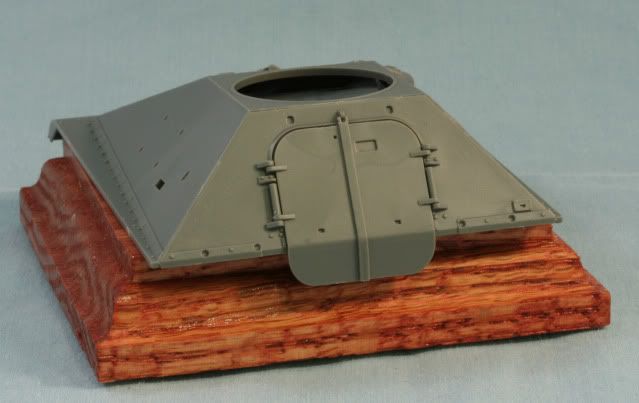
Next I went to step 8 and assembled the rear panel and doors, again leaving some of the small details off at this point. Then the rear panel is joined to the upper hull.
Once dry the upper hull is glued to the lower hull. The seam in the front requires a bit of seam work
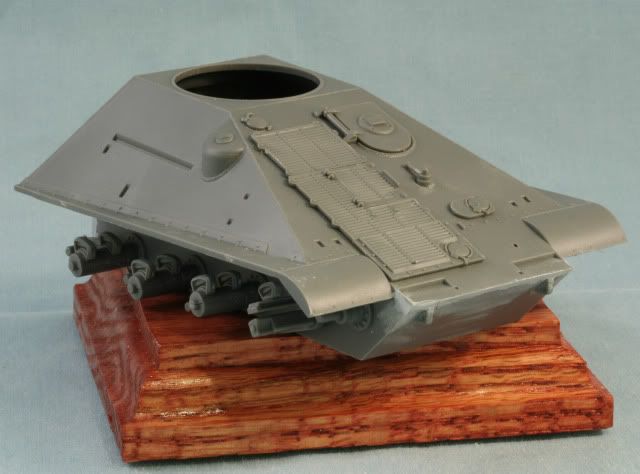
Also the seam in the rear for the lower hull rear section requires attention. The undersides of the fenders hide the main seam. It is so big it requires some filling. It need not be perfect as it will be hard to see when built but untouched may be noticeable.
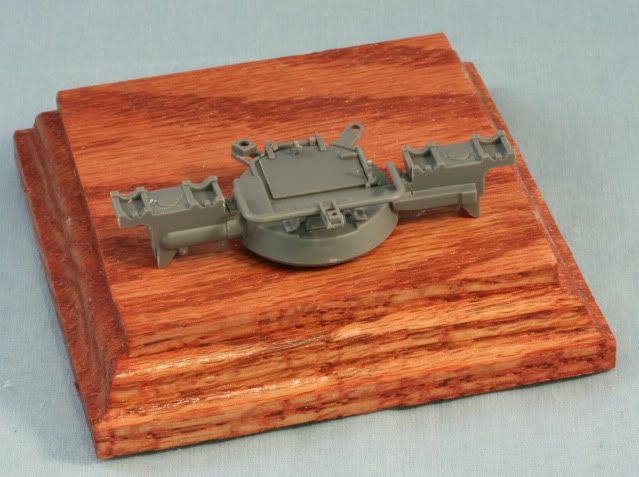
With all the putty work, I went to step 9 and assembled the turret. I left off the 30 cal and shield for ease of painting. The two parts hanging over the rear are for radio antennas.
One of the things missing is the antenna bases. The Ontos would sport an ANVRC 47 (RT 524 and an R442 Radios). This would have a tall mast for the RT (Radio Transmitter) 524 and a short mast for the R (Receiver) 442. I have ordered the antenna bases and will also mount them later
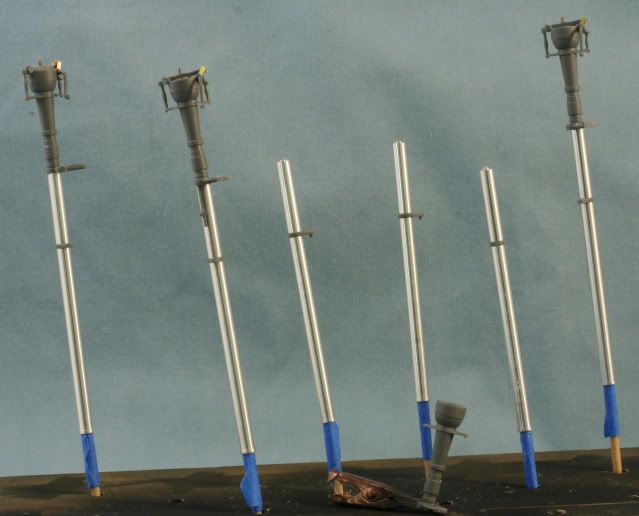
Moving on to step 10, I began the assembly of the 6 recoilless rifles. This involved the Lion Marc barrels, some small PE from the MV sheet and parts from the kit. The barrels are actually two parts which join through the kit supplied forward 50 cal mount. The Lion Marc halves fit very snug and required convincing from my small hobby hammer to assemble.
With all the small parts, I made two sub assemblies, front and rear before mounting the 50 cal barrel and joining. The directions show the 4 with 50 cal all having them mounted the same way. That is incorrect, 3 are as per the directions and 1 is rotated 180 degrees.
Here is the progress on the rifles which I have to say are a PITA to assemble.
In general, the kit is a good kit but does have a number of flaws. There are a number of ejector pin marks which will show and have to be filled. The seams in the front require work and are poorly designed. The road wheel and drive wheel placement are not correct and this the finished model will sit lower than it should. This problem cannot be fixed without a new lower hull.
With that said, we are modelers and not assemblers and everything cannot be handed to us. It is a quantum leap forward from the old Revell/Renwal kit and better detail and better assembly then the Hobby Fan resin kit. But….I will point out all the problems!!
That’s where I am at for now. I have to finish filling the seams and sanding the main hull, that’s why I skipped adding all the detail parts to the upper hull. In between I will be finishing up the rifles so they can head off to the paint booth for parkerization. More details to come.
As always your comments either good or bad are appreciated.
Rounds Complete!!