SEARCH FINESCALE.COM

Enter keywords or a search phrase below:

July 31, DML Hetzer WIP wheels and tracks

4690 views
13 replies
1 rating 2 rating 3 rating 4 rating 5 rating
  • Member since
    January 2007
July 31, DML Hetzer WIP wheels and tracks
Posted by the doog on Tuesday, July 31, 2007 12:16 PM

     Hey guys; well I've been working on the ol' DML Hetzer w/ Verlinden interior, and have gotten the tracks on and the suspension/wheels/tracks painted and weathered. I chose to do it this way because of the funky and permanent way that the Eduard PE skirts mount; they are pinned to the hull and it would have been nigh impossible to get in there and paint and weather it the way I wanted to if I had fixed them in place. It's for this same reason that I never paint tracks on the model; it seems impossible to accurately depict the wear along the inner wheel travel of the tracks, and to properly show bare steel wear on the guide horns. After this lower hull is done, I'll finish up the skirts and paint the rest of the whole...

But first, the build log, starting with a quick tutorial on how I build my tracks:

1. Fix a strip of masking tape sticky-side up with two strips holding either side down, and then take each individual track with tweezers and lay them together. The tape will serve to bind them until the glue is applied:

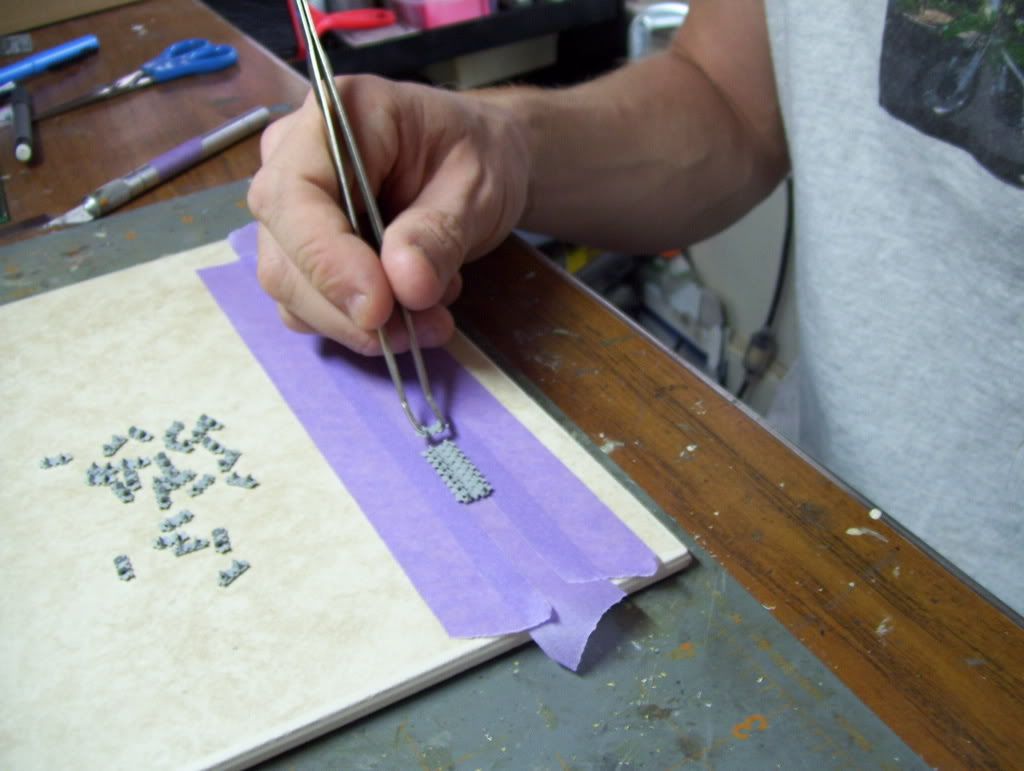
...then lay down the Testors glue--other liquid glues set too fast to allow working with the tracks...


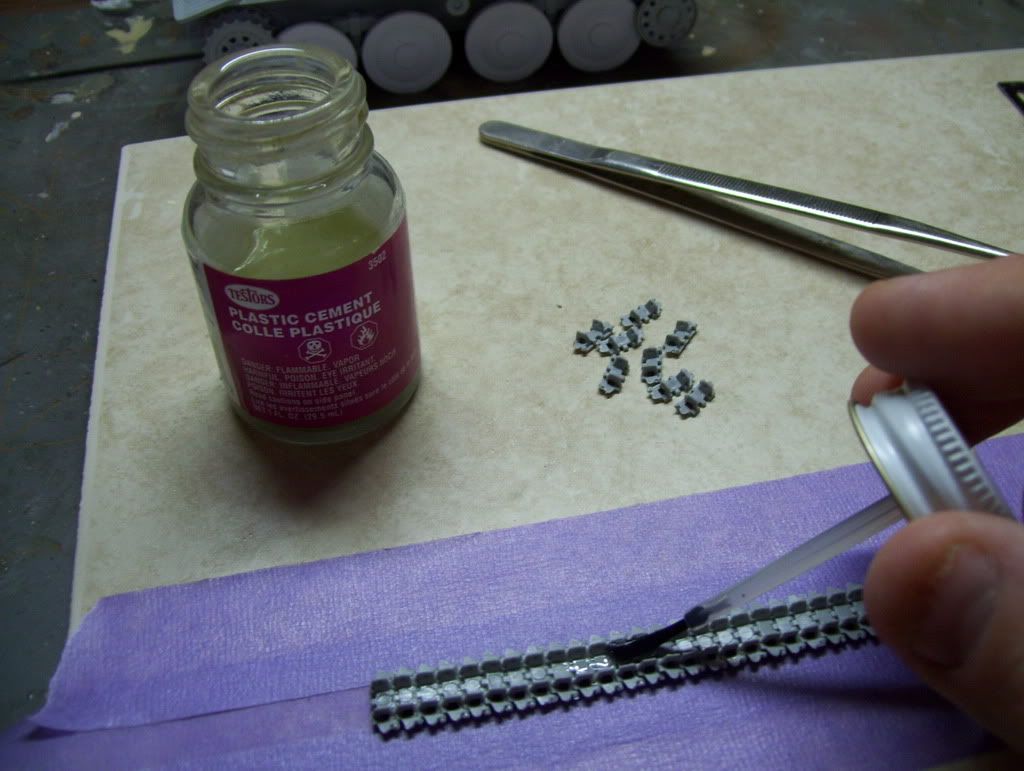
Let the glue set for about 10 minutes to allow the tracks to bind and become pliable. Then, wrap them around to about this length, and let them set. Don't use too much glue or they might stick to the wheels!. A shorter middle run can then be added to complete the run, and will ultimately be glued in place only after both runs have been painted. 

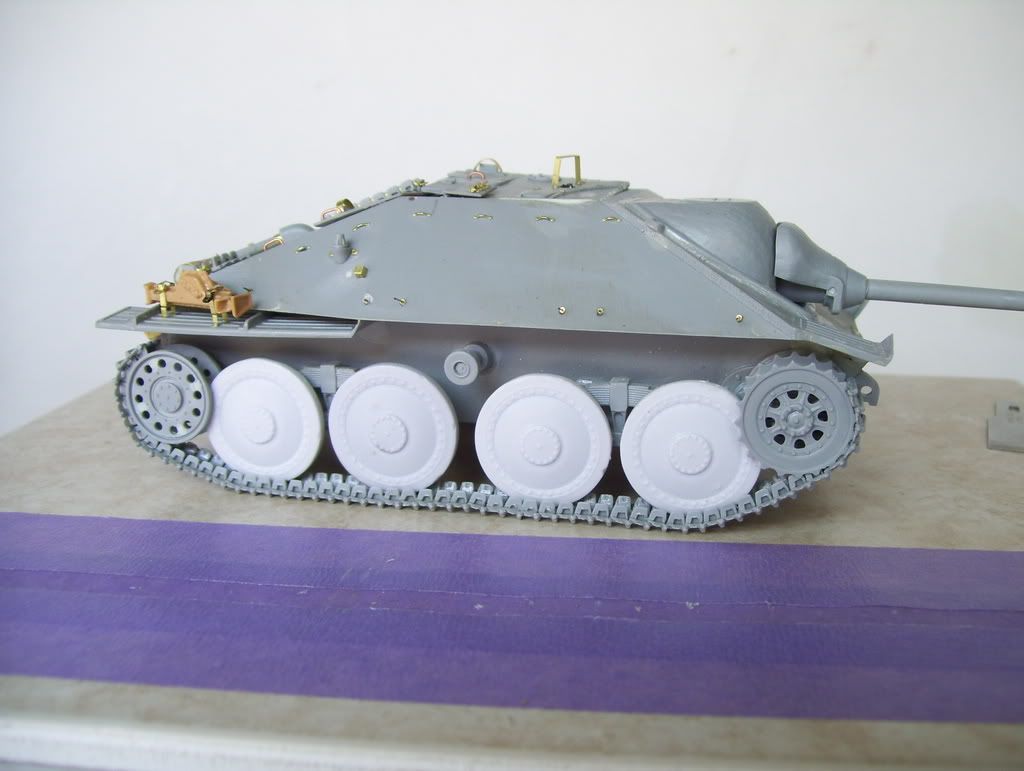
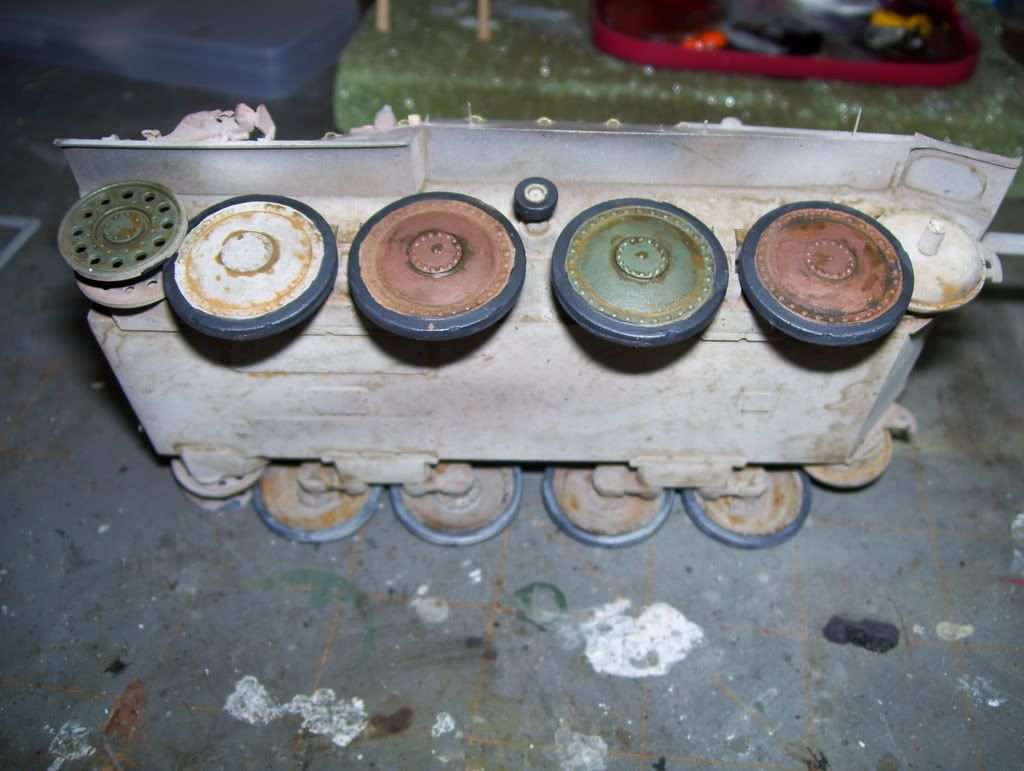
Ok, here the wheels have been painted...notice how drastically I lighten my Dark Yellow. The red is Tamiya's Red Brown, the green is Model Master acrylic. Still looks like a toy!...

The tires have been roughly painted with a mix of black/Pz grey/tan; they will be touched up later. A filter/wash of raw umber oils, a more specific, heavier wash of raw umber/orange/black is added...

...and chipping is done with a small piece of black packing foam found in some resin kits. This is basicaly the same as biffa's (Bow [bow]) kitchen sponge method. Not only can you dab the sponge into a mix of the same oil mixture as above, but when you've got most of the paint off it, you can drag it across the model like drybrushing, getting some nice "abrasions" and scrapes, as well as  transfering it to bolt heads, rims, etc...COOL!

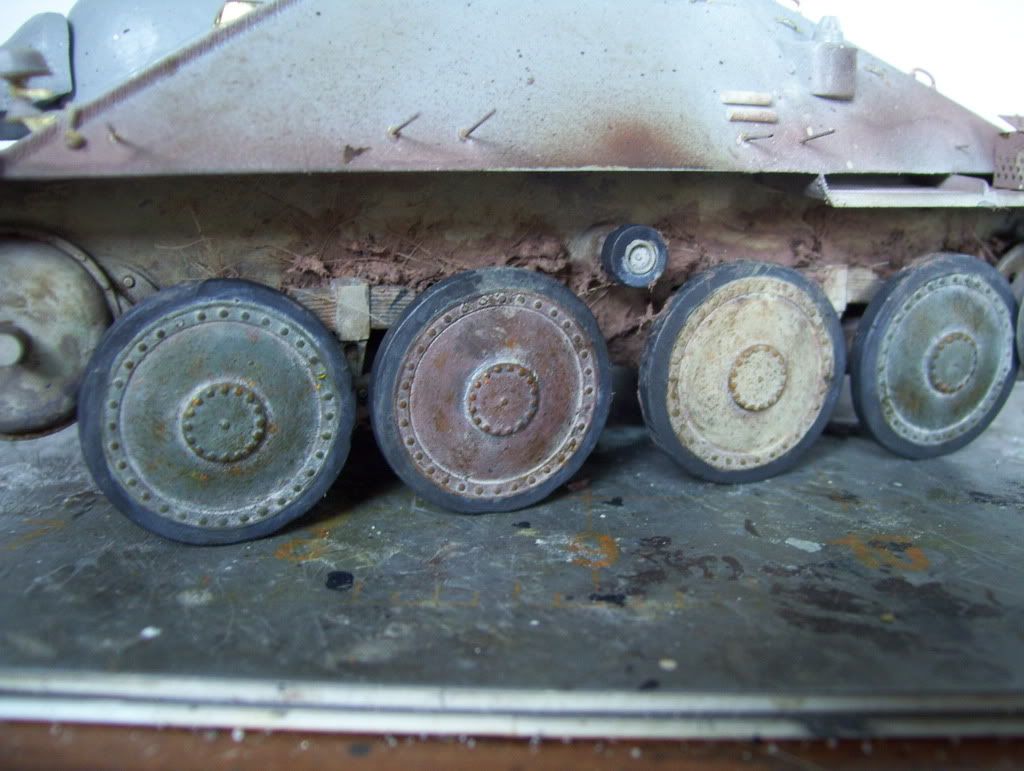
Now, after a wash of acrylic tan (acrylic to preserve the thinner-based oils) to age the tire rubber and impute a dusty haze, I mix up some celluclay, tinted with craft store acrylic paints, and a little white glue, add some cut-up Woodland Scenics grass and some real dirt for texture, and smush it (is that a word?!) in around the wheels...meanwhile, the tracks are being painted seperately on the side; chocolate brown base coat, followed by washes of tan, then rust, then blackish-brown; the inner tracks and guide horns will be drybrushed in steel and set aside for now...

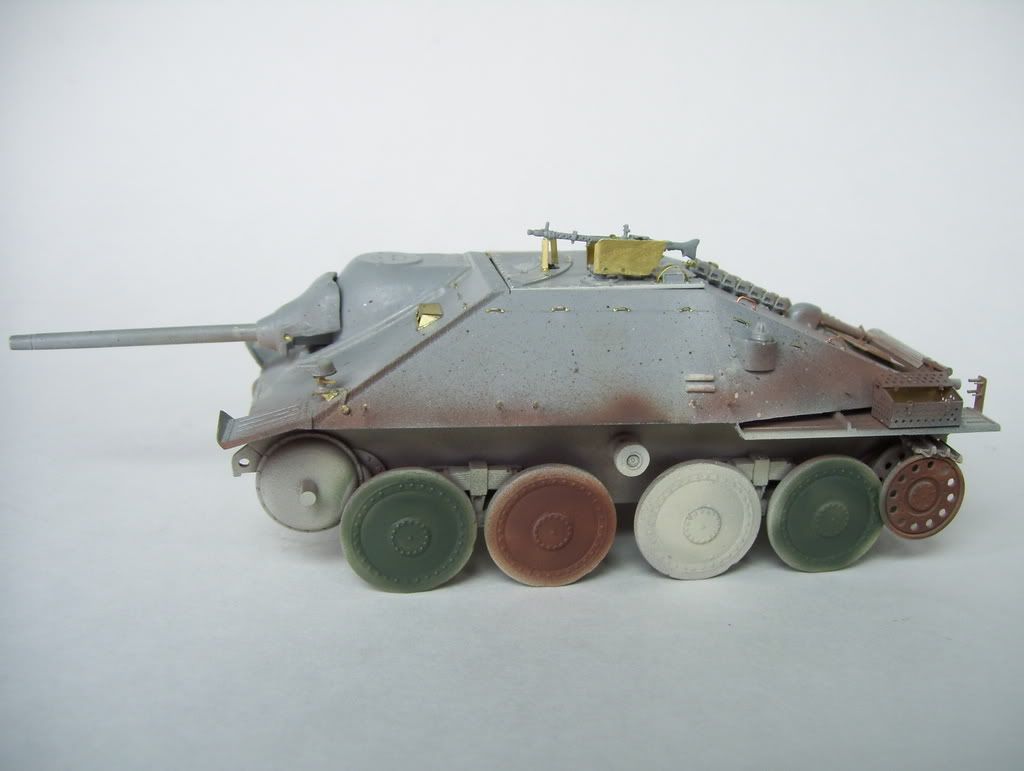
...after the tracks have been added, it's time to go to town with the MIG powders.Here's where the tracks and hull are made to come together, artistically. I used a mix of both MIG P232 Dry Mud with MMP 020 Worn Armor Yellow--a nice dusty brown mix...I swabbed it on with a very diluted mix of water and clear flat, then hit it overnight with a  LIGHT (!) coat of Dullcoat to secure it. Lastly, a few more pin washes of the aforementioned oil mixes, a light drybrushing of steel over the track faces, a further very light DB of dirt brown over the same track faces to provide even more depth, and --voila!--time to start on the "meat" of the hull!


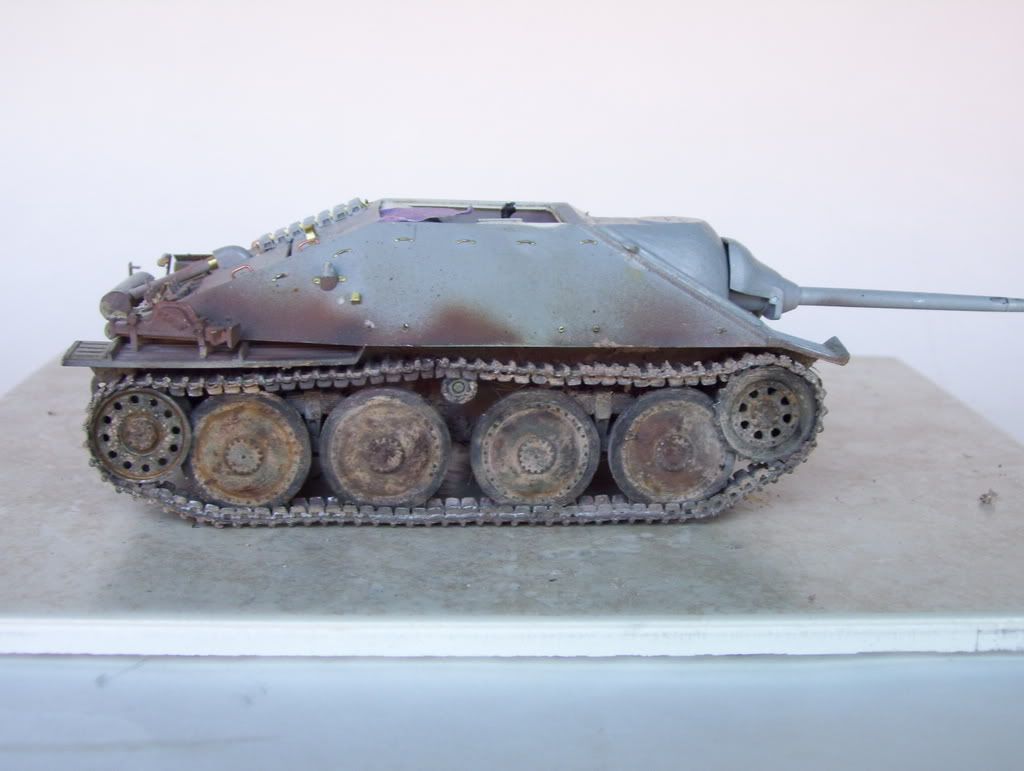
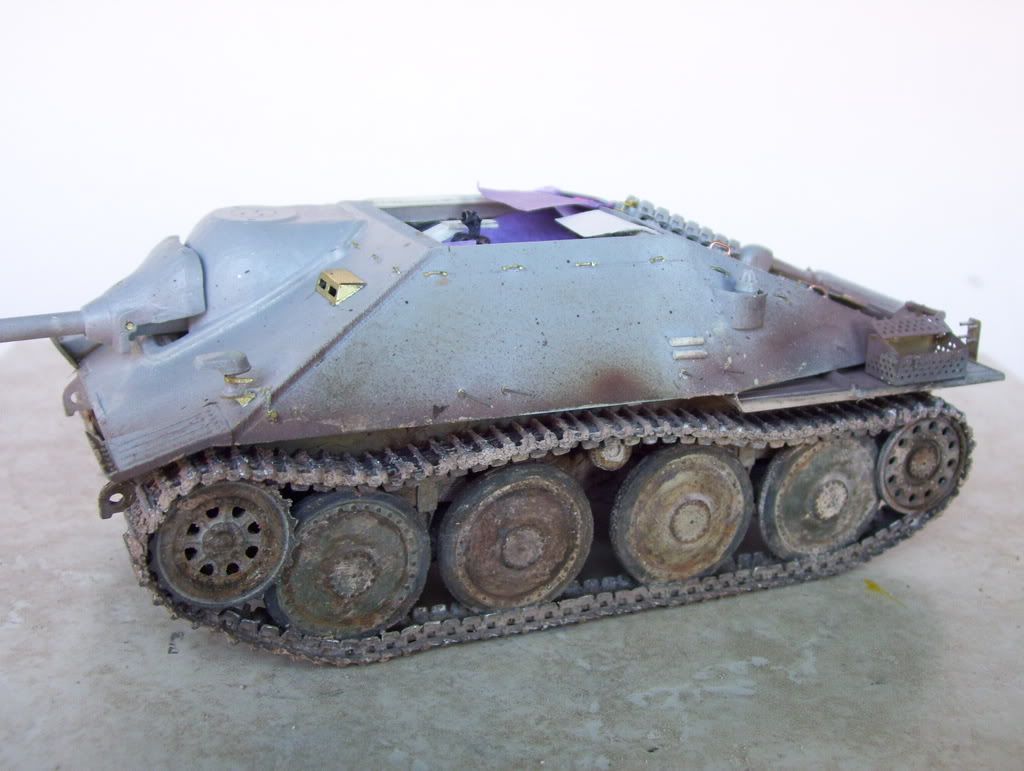
Looking pretty old and battle-weary; just like an early Hetzer should, IMHO! The key to getting this look is LAYERS! Layers of weathering, and patience! Now I'll have to finish the skirt mounts, add the skirts and some add'tl detailing under the top plate that I sawed off, and work on the base...I want to set it in it's element, in a type of viginette. Gotta find a good figure to keep my lil' deuce Hetz company!  Shouldn't be long now...!

Questions and comments always welcomed and appreciated! 

  • Member since
    February 2007
  • From: Bournemouth UK
Posted by Luftwoller on Tuesday, July 31, 2007 12:57 PM

Awesome Doogster, So much info to take in, im going to have to print it off lol. I love those Hetzers. There like the Tonka toy of the 3rd Reich.

Almost finished my current project (Its got a prop you wont be interested) then its on to my next. A King Tiger. Yours and Biffas 'How too's' are invaluable.

...Guy

PS Keep posting.

..'Your an embarrassment to the human genus, makes me ashamed to call myself Homo'.
  • Member since
    October 2011
Posted by koenigtiger on Tuesday, July 31, 2007 1:12 PM
great tutorial doog. I already bookmarked it for the day i work with indy tracks. It looks like it's coming along great! the chipping method you described is interesting i think i will give that a go on my current Panther. keep us posted
  • Member since
    April 2007
  • From: Bethlehem PA
Posted by crazygerman on Tuesday, July 31, 2007 1:21 PM

Those Hetzer wheels look like the real thing, and your walk through of how you do the Tracks will come in handy when i get to all the dragon kits in my stash. I'm finishing up all the old tamiya kits i have before i work on the better kits so i've never done individual tracks before.

I can't wait to see it finishedMake a Toast [#toast]

“It’s the unconquerable soul of man, not the nature of the weapon he uses, that insures victory.” -George S Patton Jr. On the Bench; 71 "Cuda
  • Member since
    March 2003
  • From: Rain USA, Vancouver WA
Posted by tigerman on Tuesday, July 31, 2007 1:41 PM
That's what sets (men) i.e you and other great weatherers, from the (boys) i.e me!, is the aggressive weathering. It would scare the willies out of me, but the results speak for themselves.

   http://i7.photobucket.com/albums/y269/wing_nut_5o/PANZERJAGERGB.jpg

 Eric 

  • Member since
    January 2007
Posted by the doog on Tuesday, July 31, 2007 4:26 PM

Hey guys, thanks for commenting, and for the Thumbs Up [tup]!!

Tigerman, DON'T BE SKEERED! Practice on an old kit, or a spare hull that you've got laying around. My methods took years to learn, with plenty of mistakes along the way. But it's really gratifying, finally, to be able to see something in my head, and to then be able to get that look! And I'm STILL learning! You ought to give it a go. You can't learn if you don't try! Big Smile [:D]

I just read a review of the new Tamiya Hetzer in 1/35...it figures, that they release the best Hetzer yet produced after I've started this one! It even has the correct detail inside the wheels. Hope they don't put R&J Products out of business! (the wheels I used) I'll be getting one as soon as I got the spare cash!

  • Member since
    March 2003
  • From: Rain USA, Vancouver WA
Posted by tigerman on Tuesday, July 31, 2007 4:32 PM
I got to check that review on the hetzer. Perth? Armorama?

   http://i7.photobucket.com/albums/y269/wing_nut_5o/PANZERJAGERGB.jpg

 Eric 

  • Member since
    January 2007
Posted by the doog on Tuesday, July 31, 2007 4:49 PM

I think it was Perth? I apologize; it was yesterday, as I was checking my bookmarks of hobby-related sites...actually, no...it was track-link's site....

                http://www.track-link.net/reviews/k1834
 

  • Member since
    September 2005
  • From: beacon falls , Ct.
Posted by treadwell on Tuesday, July 31, 2007 4:54 PM
FASCINATING DOOG! --man what a cool tutorial-- I like the sponge/foam thing you got going on-- it is a result that cannot be copied with a brush-- gonna try it on my next build--whatever it may be-- lol--how about some up-date shots of that interior,Doog?Smile [:)]--treadCool [8D]


  • Member since
    March 2003
  • From: Rain USA, Vancouver WA
Posted by tigerman on Tuesday, July 31, 2007 5:01 PM

Yup, it's Perth. It comes with link-and-lengths as well as vinyl. I like the preformed sag like my Trumpy KV. Dang, gotta dump my Dragon one and get the Tamiya one. Figures after I traded for the DML one, Tamiya announces theirs.

I wonder if the pattern with Tamiya will continue? This is the second instance that Tamiya took one of their 1/48's and pumped iy up to 1/35. StuG B, being the other.

   http://i7.photobucket.com/albums/y269/wing_nut_5o/PANZERJAGERGB.jpg

 Eric 

  • Member since
    January 2007
Posted by the doog on Tuesday, July 31, 2007 6:43 PM

 treadwell wrote:
FASCINATING DOOG! --man what a cool tutorial-- I like the sponge/foam thing you got going on-- it is a result that cannot be copied with a brush-- gonna try it on my next build--whatever it may be-- lol--how about some up-date shots of that interior,Doog?Smile [:)]--treadCool [8D]

Thanks, treadwell! I have to say that with your latest KV1 post, you're no slouch in the weathering department yourself! Thumbs Up [tup]

Alas, the interior is actually unchanged since last post; I did a whole series of WIP's a few months ago before leaving the States for a few weeks, but to refresh your memory, here's  a shot... 


I should have some more shots up in about a week or two--I'm still rebuilding my race bike...! Sigh [sigh]

  • Member since
    February 2007
  • From: NOLA
Posted by roosterpelo on Thursday, August 2, 2007 8:52 PM

sorry i haven't been on earlier doog. the wheels look fantastic! you really hit it on the head with the weathering. i can't wait to see the rest painted, when it comes alive! Evil [}:)] now i have to make sure i pay attention, because my hetzer is still in the 95% pile, and when i get to it, i don't want to embarass myself putting it side by side with yours. (although mine is a really beat up old battle weary tank).

 roo

chris d.
  • Member since
    January 2007
Posted by the doog on Thursday, August 2, 2007 9:55 PM

 Thanks, Roo!

Hey, last I remembered, your's was looking just fine! It was seriously well-weathered inside!

I.ve gotta work a race this weekend-the one that my club puts on, so I won't get to it til MOnday at least...I got the side skirts on tonight though, ans it's all ready to paint! FINALLY! I can't wait to start in on the home stretch!

I found the perfect figure too, and am working on the viginette base. Should be ready to post in about two weeks with the finished product if all goes well!Big Smile [:D]

  • Member since
    July 2004
  • From: Texas
Posted by wbill76 on Thursday, August 2, 2007 10:41 PM
Nice to see this one progressing, looking sharp doog. Thumbs Up [tup]
JOIN OUR COMMUNITY!

Our community is FREE to join. To participate you must either login or register for an account.

SEARCH FORUMS
FREE NEWSLETTER
By signing up you may also receive reader surveys and occasional special offers. We do not sell, rent or trade our email lists. View our Privacy Policy.