SEARCH FINESCALE.COM

Enter keywords or a search phrase below:

Post-Flu update and FINISHED PICS page 5--NeoGrade Bergepanzer III WIP

33259 views
154 replies
1 rating 2 rating 3 rating 4 rating 5 rating
  • Member since
    January 2007
Post-Flu update and FINISHED PICS page 5--NeoGrade Bergepanzer III WIP
Posted by the doog on Tuesday, April 21, 2009 10:16 AM

Hi Guys, Well, here's the new project--the NeoGrade Bergepanzer III. NeoGrade is a new South Korean company, and i saw this on eBay when I was searching for a Pz III. I decided to give it a go. Even though it's resin, and I hate working with resin....well, not really.....just resin tracks! (nightmares of Jagdpanzer Kanone build! )

In 1944 all remaining Pz III's were ordered to be converted to Bergepanzers. So I'll be using the M/N model as a base model.

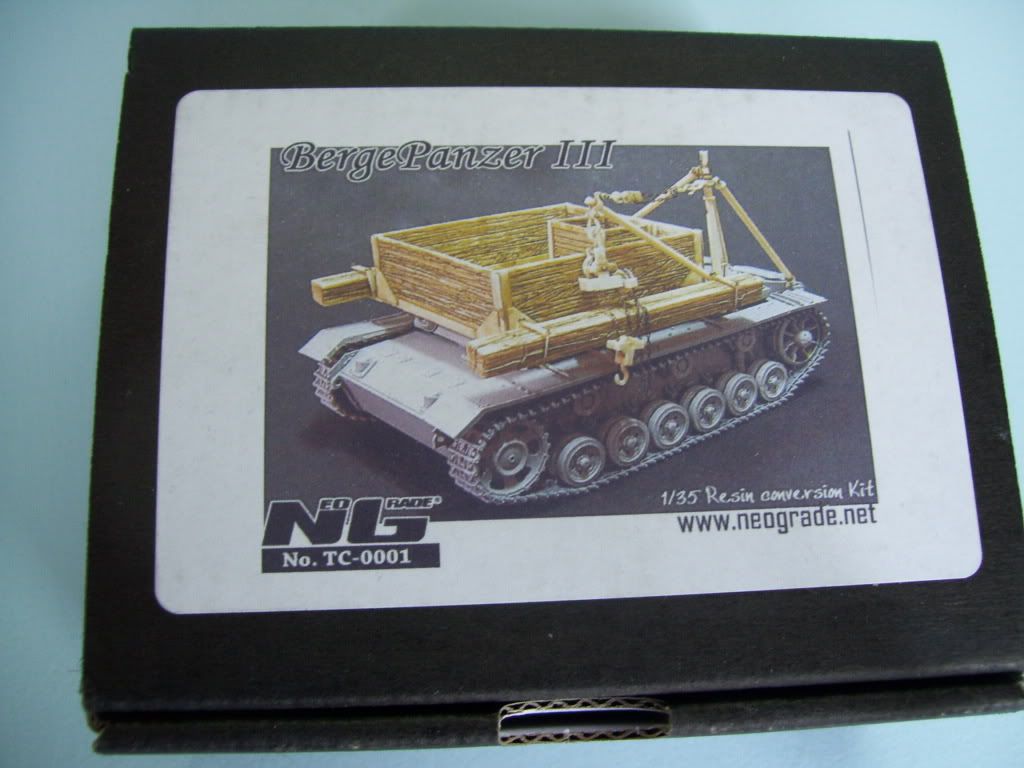
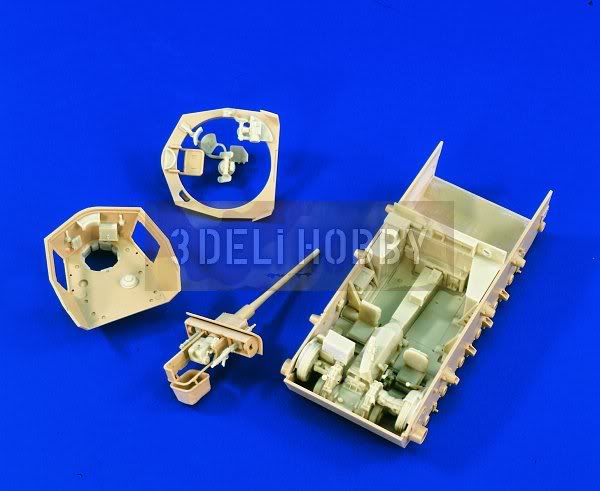
And here is the NeoGrade kit.

Here's how it builds up....

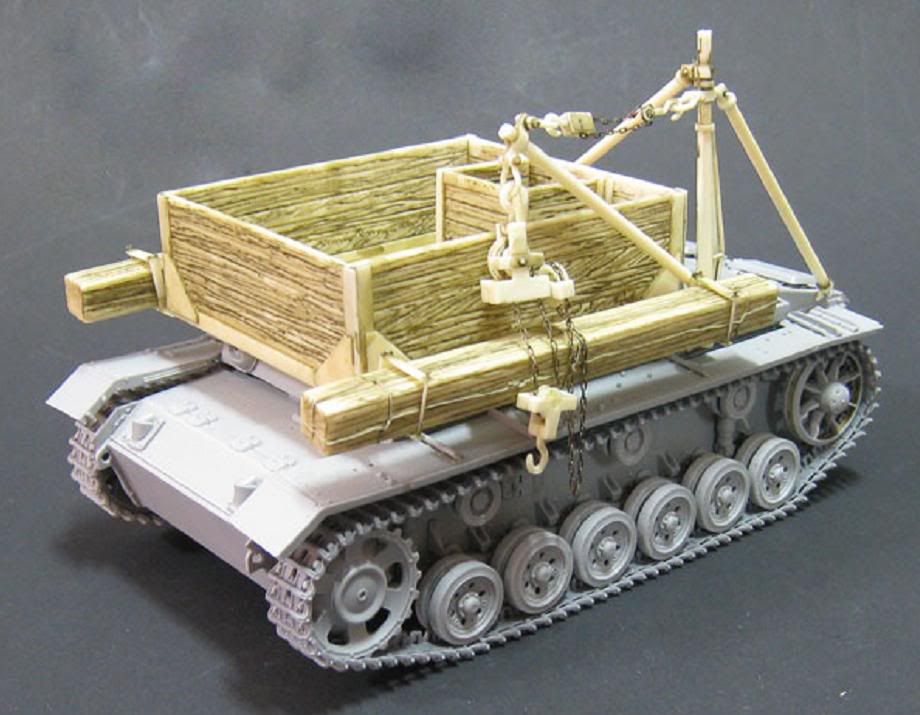
The parts, in a stiff plastic double-bag..

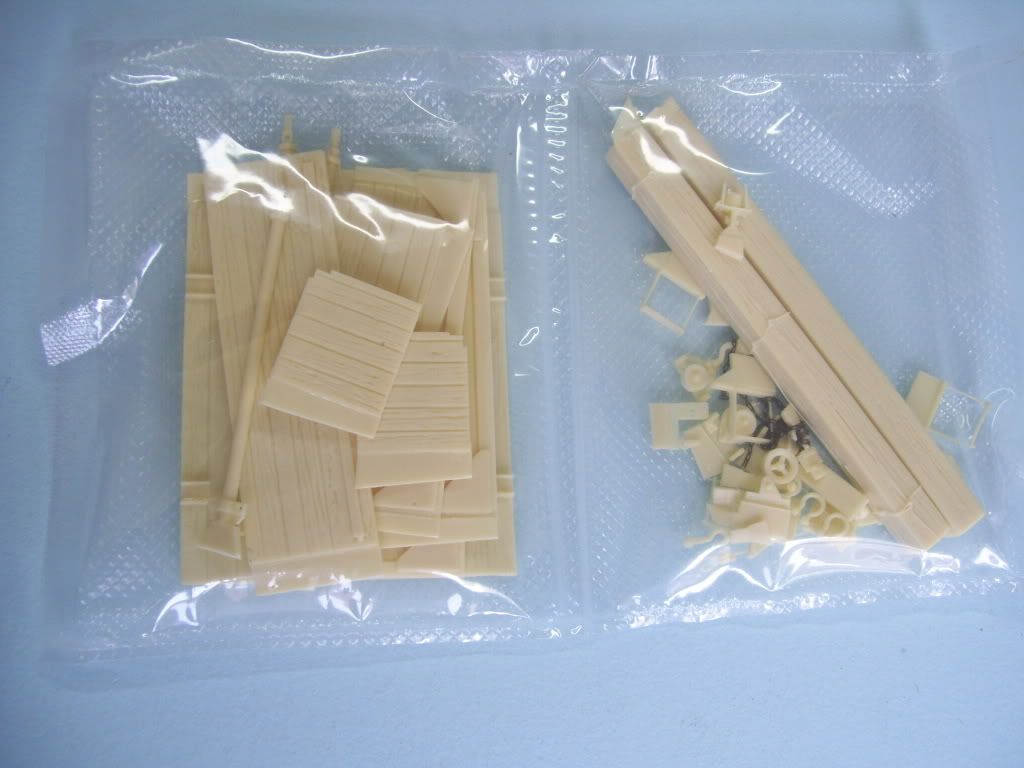
ANd what you get--there was some minor warpage, mostly in the floor panel, and the crane jibs but remarkably, no breakage in some of the delicate parts. Yes, you also get the nice little chain...

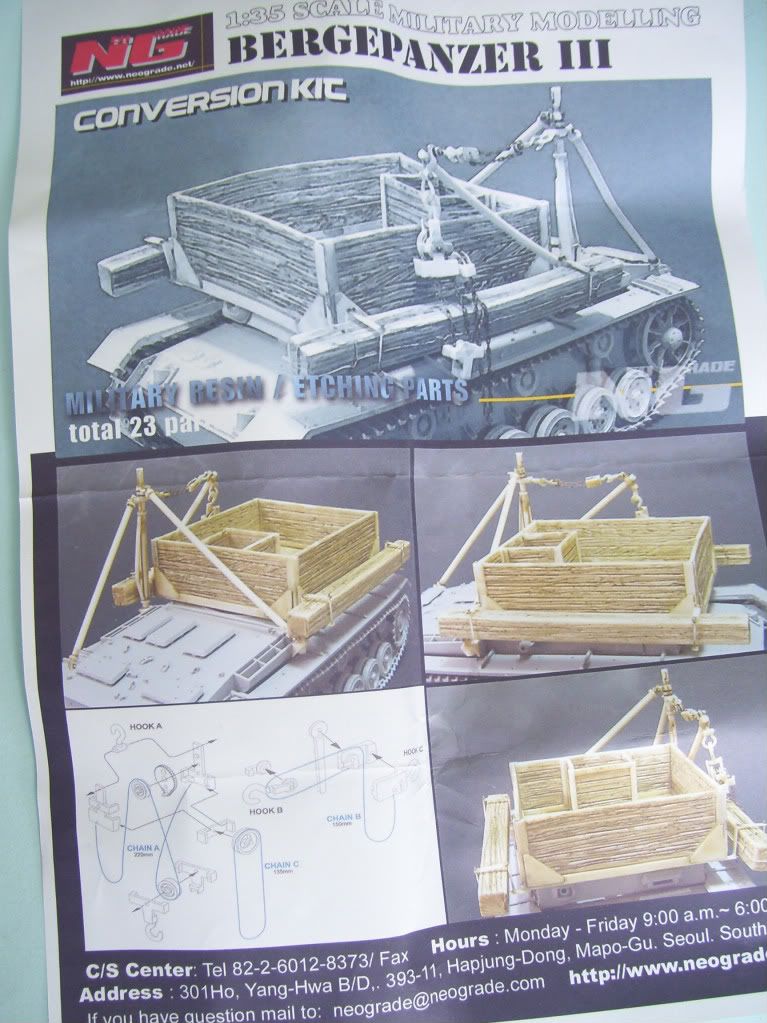
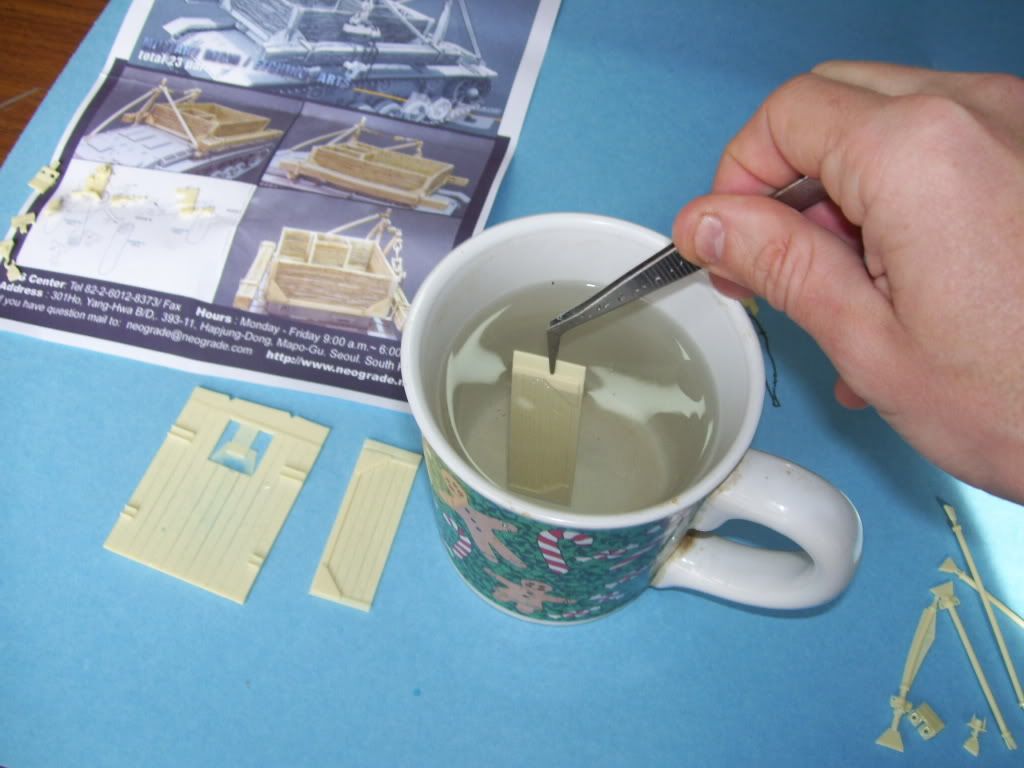
Here's all you get for directions--the shortcoming of most resin kits. The small diagram is to assemble the pulleys.

I started by heating up some water in a cup in the microwave, and dipping the resin piece in to straighten them; 10 seconds is plenty enough to make them pliable.

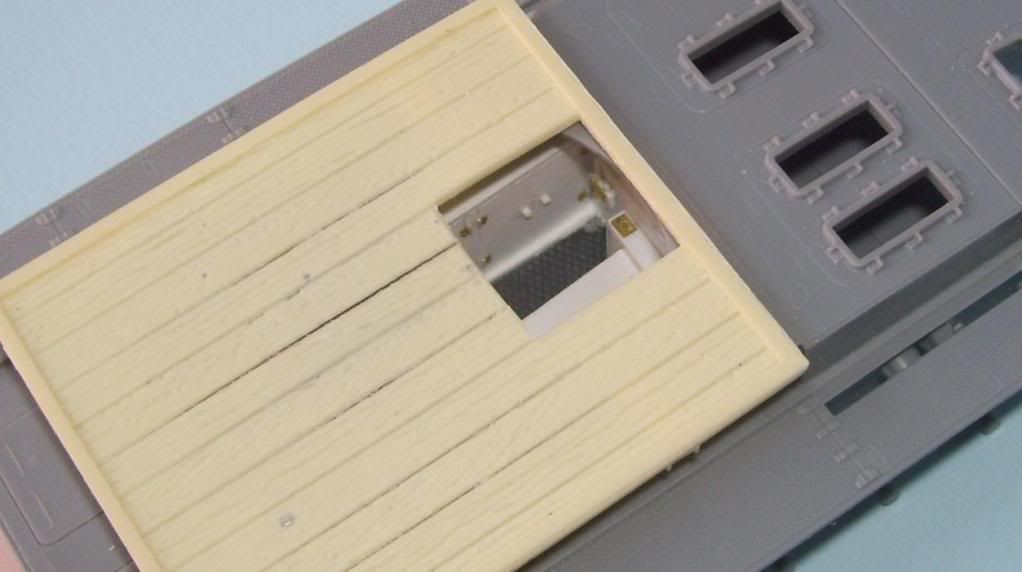
Now, in the floor of the wooden base, there is a hole that goes down to the hull.

Well, you know what that means...

                                        ....some bugger is going to look down into it! Shock [:O]

So, I had to put something down there...I thought about an entertainment center and a fridge, but then decided I'd best do a reasonable interior--here was Verlinden's Pz III set--nope, I didn't buy this, just used the photo...

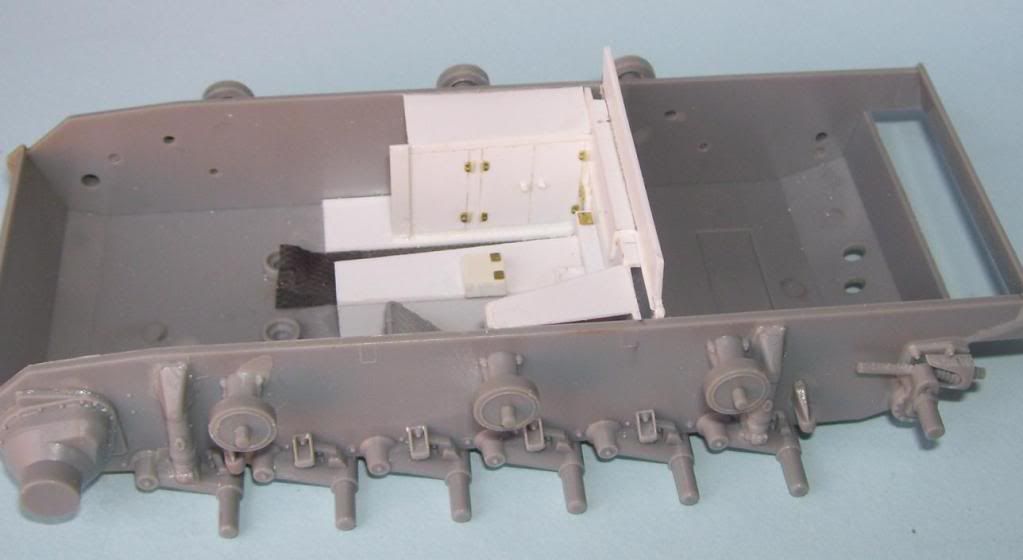
Inspired by our own Hans Von Hammer's frugal, creative approach, I figgered that I could build a reasonable facsimile for the limited field-of-view that you would have looking down there...I started cutting....

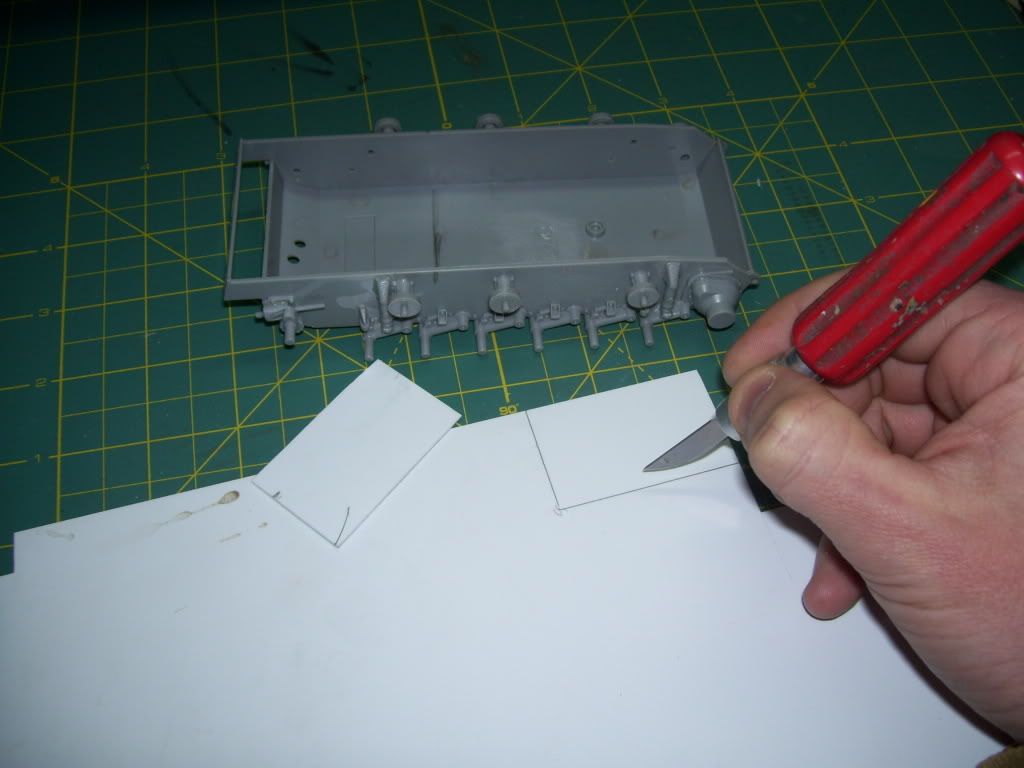
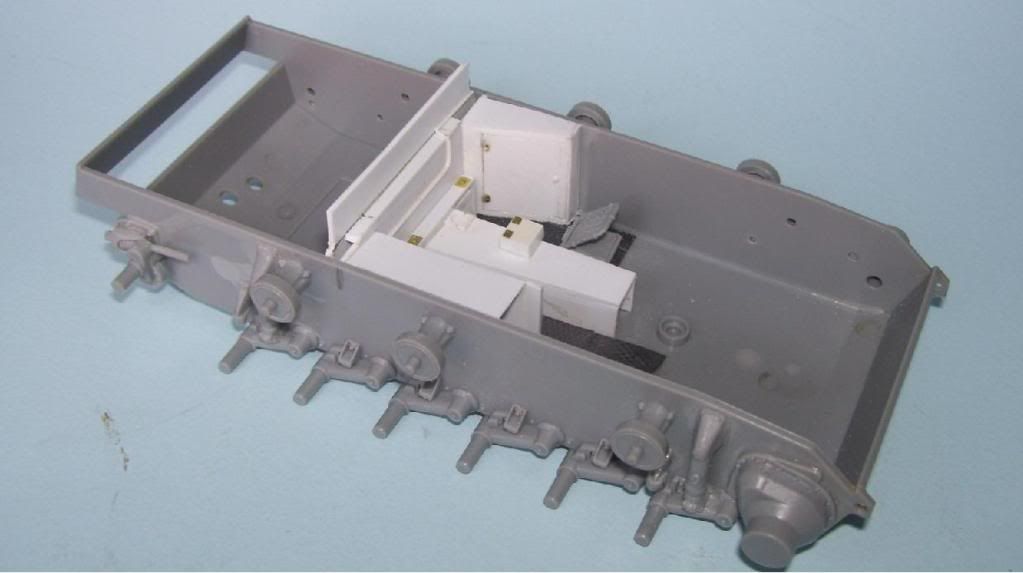
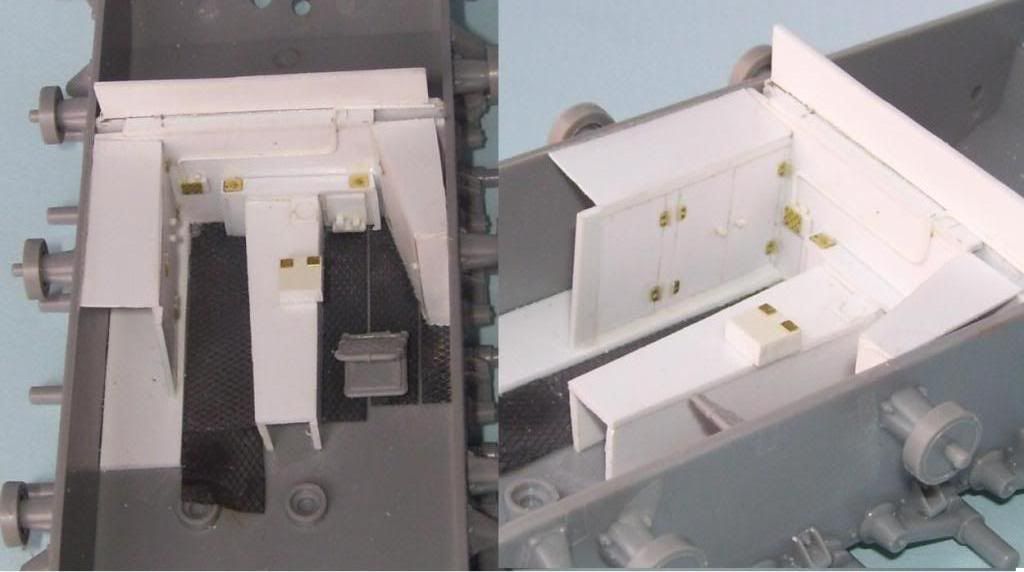
And here's where I am with it before painting....I'm really kinda both flying by the seat of my pants, according to what I can make out there, and improvising; in fact, I haven't decided yet on keeping the seat in there, but I figured that they wouldhave stripped out some of the ammo storage, and added mods; at least there are no interior shots that I could find to prove me definitively wrong?

I improvised with some scrap PE, and scribed in the doors...

The little toilet-hole (Shock [:O]) you look down into--I'll also be adding a tube-ladder down into here, but with the walls of the superstructure as well, you won't be able to see much--but enough to say "There's something down there!!" 

That's it so far! Any suggestions? Do you think I should keep the seat?! Big Smile [:D]


  • Member since
    November 2005
Posted by Anonymous on Tuesday, April 21, 2009 10:21 AM
Wow, doog---you are getting good with that sheet styrene!...doing that kinda scratching that quickly w/ sheet styrene would have made you a Grand Master just 15 years ago. Nice work !!! I say, leave the seat...doesn't look like it can be seen from the angles anyway...I did notice that the wood-grain on the resin parts looks a little heavy-handed....Have you considered using real wood as a replacement---basswood or balsa strips? Cool project...
  • Member since
    December 2008
  • From: Las Vegas, Nevada
Posted by model maniac 96 on Tuesday, April 21, 2009 10:23 AM
WOW! doog, this is just like your other work, amazing! this is truly wonderful, and I absolutely think that you should keep the seat!

Jim
"Veni, Vidi, Vici" Julius Caesar: I came, I saw, I conquered.
  • Member since
    April 2003
  • From: 41 Degrees 52.4 minutes North; 72 Degrees 7.3 minutes West
Posted by bbrowniii on Tuesday, April 21, 2009 10:26 AM

doog,

That is really sweet!  I really admire your courage (and credit HvH for the inspiration) to tackle that interior - although I think you coulda got away with a recliner, widescreen, and bowl o' pretzels...Evil [}:)]


'All that is necessary for the triumph of evil is for good men to do nothing' - Edmund Burke (1770 ??)


  • Member since
    July 2004
  • From: Texas
Posted by wbill76 on Tuesday, April 21, 2009 1:17 PM
I've been curious to see some of the Neograde stuff in use so will be following this one with interest. They have a pretty good line of offerings for a wide range of subjects and the Berge III ought to be just right in your hands Karl. Thumbs Up [tup]
  • Member since
    April 2008
  • From: Kristiansund, Norway
Posted by Huxy on Tuesday, April 21, 2009 1:34 PM

Looking very good so far! Love the scratchbuilding!  As for the seat, save it for another project, as I highly doubt you can even see it, without the use of hightech spy-equipment Smile,Wink, & Grin [swg]


One thing however...

 the doog wrote:

In 1944 all remaining Pz III's were ordered to be converted to Bergepanzers.


You sure about that? I doubt all Panzer III's were converted... And I don't mean that as in 3 were left original.  But here in Norway, even Panzer I tanks were left with their original MG turret till the end of the war. As I've said numerous times, Norway isn't suited for tank warfare (Todays Norwegian Royal Army got just 10 Leopards, other than that, some IFV's) and the only German tankdivision that was stationed here was the Z.B.V. 40. There were another one, but they left summer of '42.

So I'm asking, hence the Z.B.V.40 left even Panzer I's alone troughout the war, were all Panzer III's converted?  Or did these tanks in Norway get some kind of exeption?


Looking forward for more!!

-Lasse

"Every War Starts And Ends With An Invasion".

  • Member since
    July 2004
  • From: Texas
Posted by wbill76 on Tuesday, April 21, 2009 2:03 PM
Huxy, not all Pz IIIs were ordered for conversion into Berge IIIs but all Berge IIIs were built from reconditioned Pz III hulls as opposed to new vehicles. There were still Pz III gun tanks in use in Norway at the end of the war as you mention as well as others serving as Beobachtungswagens, munitionspanzers, etc. However quite a few of the older Pz III chassis were converted into Berge IIIs in 1944 and I think that's what Karl means in his post. Only 176 were built between March '44-May '45.
  • Member since
    January 2007
Posted by the doog on Tuesday, April 21, 2009 3:03 PM

Thanks, guys!

Manny-- I think I'll just go with the resin pieces--I actually like the grain on the parts. Plus, oneof them has some kind of wire/rope on it that has a certain look I like.

Thanks, too, Jim and Boyd!

Bill--they DO have soe nice stuff, huh? I am tempted by some of their other offerings as well! Thanks for stopping in! 

Huxy--Bill is correct; of course, there would be some Pz III's left "as is"--in fact, probably a mojority of them---but the order was given--not necessarily carried out in full.Thanks, Bill, for your input!

Well, I've laid down some paint inside--black, then neutral gray for an undercoat.

Then white in the panels and from the right, "top down" angle.

I tried to think of the natural light diminishing in appropriate places,and painted accordingly, eathering it to black toward the front of the hull. Honestly, most of this you'll probablynever see...Sigh [sigh]

I'll be finishing the weathering tonight, I'm sure. And adding some things like fire extingusher, and yes, the seat will stay.

Stay tuned for more! Big Smile [:D]


  • Member since
    December 2007
  • From: Bridgeview, Illinois
Posted by mg.mikael on Tuesday, April 21, 2009 5:25 PM

Great looking conversion project so far, doog, gotta love the scratch interior!Thumbs Up [tup] Dang these small companies that produce conversion and aftermarket parts seem to spring up like weeds, never heard of NeoGrade.

"A good plan executed now is better than a perfect plan next week." - George S. Patton

  Photobucket 

  • Member since
    June 2005
  • From: San Tan Valley,AZ
Posted by smokinguns3 on Tuesday, April 21, 2009 5:33 PM
looking good Karl.
Rob I think i can I think i can
  • Member since
    June 2008
  • From: Iowa
Posted by Hans von Hammer on Tuesday, April 21, 2009 5:44 PM

Outstanding idea, even if I do say so m'self, Doog.. I love the sound of scribing & snapping styrene in the mornin'... Looking forward to this one..


  • Member since
    January 2008
  • From: Bournemouth UK
Posted by Bodge on Tuesday, April 21, 2009 5:52 PM
You guys are like machines as where modelling is concerned, lookin good DoogThumbs Up [tup] .I thought i did quite a bit of modelling but you guys on the forum here are like robots. Does modelling take up all your spare time?Whistling [:-^]
  • Member since
    October 2007
  • From: N.H.
Posted by panzerguy on Tuesday, April 21, 2009 8:52 PM

      Karl nice to see some more of the work horse panzers getting built. I've got the Bergtiger E that I plan on doing soon.

   The interior really is well done its to bad so much will be hidden. Looking forward to seeing what you have in store for us in terms of cammo.

  Don't know how some of you guys can work so fastConfused [%-)]

"Happiness is a belt fed weapon"

  • Member since
    January 2006
  • From: Pineapple Country, Queensland, Australia
Posted by Wirraway on Tuesday, April 21, 2009 10:06 PM

Karl,  Inspirational stuff !!  Just Great !!

I have seen some NeoGrade stuff on e-bay, notably their IV Lang and Ferdinand 1/16 kits.  But, at $500 + its a bit out of my league.

"Growing old is inevitable; growing up is optional"

" A hobby should pass the time - not fill it"  -Norman Bates


GIF animations generator gifup.com

  • Member since
    December 2005
  • From: Syracuse, NY
Posted by lexesbenz on Wednesday, April 22, 2009 12:11 AM
Mmmm cool.
The flying hamster of doom rains coconuts on your pitiful city!!!!
  • Member since
    January 2007
Posted by the doog on Wednesday, April 22, 2009 10:01 AM

Thanks guys, to all who have taken the time to comment, and who are following this build! Big Smile [:D]

I worked on some of the weathering for the interior last night--I think I'll call this "done" and start working on the outside. Weathered with MIG oils--not much really; a lot of it was a result of the painting helping portray the look you see here.

Thanks again for looking in guys!!! 

  • Member since
    April 2008
  • From: Kristiansund, Norway
Posted by Huxy on Wednesday, April 22, 2009 10:47 AM

That is very, very nice!

Hope this model is a gift to me for letting you get to this magnificent country to play? Mischief [:-,]

"Every War Starts And Ends With An Invasion".

Dre
  • Member since
    June 2007
  • From: here, not over there
Posted by Dre on Wednesday, April 22, 2009 1:46 PM
Dood, you sir are a machine!   That interior looks as good or better than many kit-supplied stuff.  I've never seen a Bergepanzer III, so this will be interesting to see completed.
  • Member since
    May 2005
  • From: Dublin Rep Of Ireland
Posted by terry35 on Wednesday, April 22, 2009 3:35 PM

Hi, Karl, the build looks great so far. Nice bit of scratching. Should have saved quite a few bucks there.

Terry.

  • Member since
    January 2008
  • From: Bournemouth UK
Posted by Bodge on Wednesday, April 22, 2009 4:41 PM
Karl i would like you to stop now, put down your brushes and hang up your modelling skills. enough is enough, your just takin the p11s now. that is lookin far to good for the likes of me to come close to achieving. Just leave it a couple of years,No wait i will let you Know when to start again. (10 years later, oh sorry mate i forgot to tell you you can start again)Wink [;)]Whistling [:-^]
  • Member since
    May 2006
  • From: Queensbury,NY
Posted by panzer88 on Wednesday, April 22, 2009 6:35 PM
Some beautiful work here Karl. Awesome job on the scratched interior and top notch weathering the interior. You're chugging right along on these builds lately. You better get as much building done as possible because this weekend looks awesome, can I hear Brrrrappp braaappp in the woods of western NY.LOL


  • Member since
    December 2008
  • From: Goffstown, NH
Posted by New Hampshire on Wednesday, April 22, 2009 7:02 PM

For a scratchbuilt "quickie" job that thing looks amazing!  I am grabbing the popcorn and getting ready for this one.....

Brian

  • Member since
    January 2007
Posted by the doog on Wednesday, April 22, 2009 7:10 PM

Thanks again, guys!

Huxy---ha ha, sure bud....NOT! lol! Laugh [(-D] I appreciate the thought though....I think?!

Terry, thanks sincerely for the nice comments yet again!

Andy---ha ha, you crack me up! It's funny; that's the same thing I think about you when I see your 1/72 diorama over there in Dio's! Excellent work!!

David--YES!!! BRRRAAAAP!!! I really do want to get out there! I'll be looking for somewhere to rise for sure! Thanks for the kind words!

Brian, thanks for looking in and taking the time to comment! Big Smile [:D]

  • Member since
    June 2008
  • From: Iowa
Posted by Hans von Hammer on Wednesday, April 22, 2009 7:21 PM
So is this one a display model or are ya gonna "put it to work" in a dio?

  • Member since
    February 2009
  • From: mass,USA
Posted by scratchmod on Wednesday, April 22, 2009 7:47 PM

Awe scratchbuilding and painting Doog.  I can imagine how the rest will turn out. Looking forward to seeing this model progress into another masterpiece.


Rob

  • Member since
    January 2007
Posted by the doog on Wednesday, April 22, 2009 7:48 PM
 Hans von Hammer wrote:
So is this one a display model or are ya gonna "put it to work" in a dio?
Display only, Hans--got no more room for Dio's unless they're 1/72, until I get a new display bookcase and figure out what the heck to get rid of in order to fit it in my already-cramped apartment!
  • Member since
    January 2012
Posted by I make stuff on Wednesday, April 22, 2009 11:26 PM

Very nice work, Karl.  Your modest "I threw this together" belies the talent you posess.  Really, the building, and amazing painting of an area that a careful veiwer MIGHT get a decent look at, is a testament to your dedication and amazing ability.  Thank you for constantly being in sharing mode.

Really intersting subject, too.

Bill

  • Member since
    July 2003
  • From: On my kitchen counter top somewhere in North Carolina.
Posted by disastermaster on Thursday, April 23, 2009 6:03 AM

http://i10.photobucket.com/albums/a144/parisienne-moonlight/emoticon/asdcattivo.gif  Good!

Rather see 'ya building a nasty 'ol tank than a "Stooka".

http://img480.imageshack.us/img480/1662/doh4jw.gif(Oh what the heck, it's good to see you build anything!) Such astuteness. Looks like another great workout here doog.

http://www.innovationbyinstinct.com/services/hosting/clients/accountyp/status/DisasterMaster/%23t1-4.jpg

Sherman-Jumbo-1945

"I was so much older then, I'm younger than that now"


  • Member since
    January 2007
Posted by the doog on Saturday, April 25, 2009 10:12 AM

Thanks Bill and Steve! Glad you guys are enjoying this build!

Well, I had a busy week, but I'm plugging away here. I have assembled much of the hull--there's no turret to speak of, of course. Did some mods here and corrections....I had a weird problem with the molding on the muffler, but fixed the flange here with some sprue. Sharp-eyed readers will also notice that I deliberately put the towing pintle on at an incorrect 90' angle, just to sharpen my corrective skills and provide a little more "interest"to the build....Whistling [:-^] (Yup, had topry this off and correct it later! Angry [:(!])

Unfortunately, (as a cost-cutting measure I'm sure) the instructions have you cut off the light bases, which leaves a horendous mar on the fenders. Ah, hell--I probably could have gotten PE fenders for it, but for now, I'll just put ye ol' venerable "Oily Rag" over the scar; this IS an engineer's vehicle, after all...

I deceided to try something different here with the lights. Figuring that maybe a tow at night would have needed more light, and the lights maybe having been uncorked, I decided to try to fill in thelights to make them look a litttle more realsitic. I bored them out with a Dremel tool..

....painted the interior Chrome Silver...

...and hit each one with a drop of epoxy.

Not a bad effort? You have to make sure that you sand away all the molded-on details if you do this--the real light "cans" were featureless, smooth, round-ish half-cups.

I had to reinforce the bottom of the box, becasue the resin molding was so thin between the boards that the boards actually started to sag from being "loose" on one end.

A bummer--one of the inner box's walls were too short--it wouldn't match up flush with the outer wall. You would be able to see the perimeter of the "toilet hole" going to the hull there under the box once assembled, so I had to lengthen it with strip. I also took the liberty of engraving "woodgrain" into the strip as well, to match it. I also had to add verious ittle spacers and whatnot to get it all to look sano.

Once assmebled, you can see that it's passable...I can always occlude this area with addeed junk inside anyway.

The box so far. I'm thinking that I might leave the box unglued, and paint it separately from the hull? Have to see how that will figure when the crane is assembled?

Sadly, you can't see Censored [censored] inside the hole, really! Sigh [sigh]

That's it so far! I don't know if I'll get much done today-it's the first day that it's above 80 degrees here and I'm going BRAPPING!!!!! 

bbrrrrRRAAAAAAAAPPPPP!!!! Big Smile [:D]Big Smile [:D]Big Smile [:D]Big Smile [:D]Big Smile [:D]


  • Member since
    December 2008
  • From: Goffstown, NH
Posted by New Hampshire on Saturday, April 25, 2009 10:25 AM

Hey Karl, looking good.

I am curious what epoxy you used for the headlight.  My next armor build will probably be the 1/35 Abrams I bought, and it comes with 2 figures that I was thinking of trying to make lenses for the goggles for.  I think boring the goggles out a little and adding some epoxy might be just the ticket.....

Brian

JOIN OUR COMMUNITY!

Our community is FREE to join. To participate you must either login or register for an account.

SEARCH FORUMS
FREE NEWSLETTER
By signing up you may also receive reader surveys and occasional special offers. We do not sell, rent or trade our email lists. View our Privacy Policy.