SEARCH FINESCALE.COM

Enter keywords or a search phrase below:

WIP Tree Phrog - Academy CH-46A/D Sea Knight 1/48

12900 views
50 replies
1 rating 2 rating 3 rating 4 rating 5 rating
  • Member since
    July 2003
  • From: Cincinnati, Ohio
WIP Tree Phrog - Academy CH-46A/D Sea Knight 1/48
Posted by ridleusmc on Monday, March 12, 2018 1:14 AM

Hello Everybody,

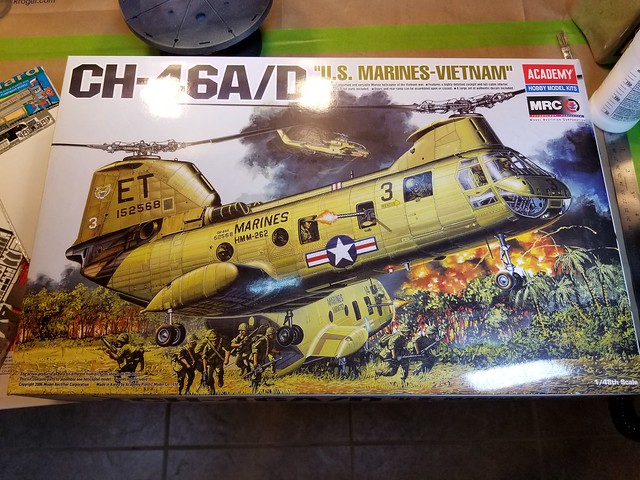
It's time to build the CH-46A/D "US Marines - Vietnam."  It's been in my stash for a while.  At some point, I aquired an Eduard Big Ed set and resin pilots from CMK.  I doubt I'll use the pilots.  They look a little "Army" for this build.  Plus, I can't find a suitable crew chief and aerial observer, which would be necessary with pilots in their seats. 

I haven't yet decided whether to build an A or D model.  The D has a larger and taller tail rotor mast than the A.  I'm not a Phrog expert, but I can resource Popasmoke.com and three of my coworkers.  (I think they all served together in HMM-263.) 

I rode in a Phrog E once.  It was built in 1968.  It was in the Marine Corps before my father was.  Here's the kit:

 20180312_005240 by Christopher Ridle, on Flickr 

It's a great deal of PE.

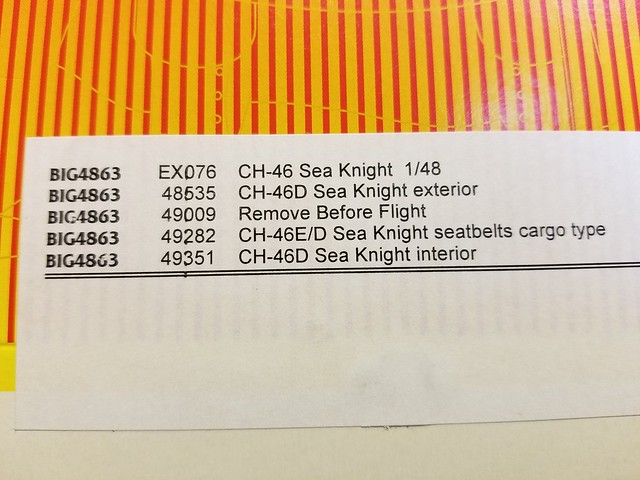
 20180312_005146 by Christopher Ridle, on Flickr

I started with the rotor heads.  They took a while, but the PE really makes a pop. 

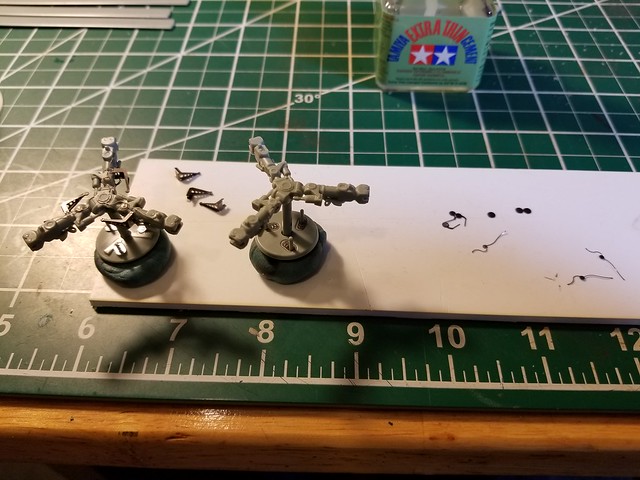
 20180311_222219 by Christopher Ridle, on Flickr 

I'll be working on the interior next.  I expect this to take some time, and I expect it to require a great deal of research.  Plus, look at those ejector pin marks!

 20180312_005129 by Christopher Ridle, on Flickr

Thank you for looking, 

I'll be having fun with this one.  

Semper Fi,

Chris

  • Member since
    April 2003
  • From: USA
Posted by keavdog on Monday, March 12, 2018 1:22 AM

I'll be watching this one!  I've done several helos- the only thing that distracts me is the canopy masking.  Had a good friend that was an airframe guy in the corps for the phrog both during active service and a contractor later  - he loves that chopper!

Thanks,

John

  • Member since
    July 2003
  • From: Cincinnati, Ohio
Posted by ridleusmc on Monday, March 12, 2018 1:30 AM

I'd see the Phrog E's on the next flightline.  I liked them, and I liked their crews.  As far as the masking.  Big Ed came with masks, so that'll make things a little easier.  It's listed as EX076.  

Thank you keavdog

  • Member since
    April 2003
  • From: USA
Posted by keavdog on Monday, March 12, 2018 1:53 AM

My dad was Airforce, both my brothers were Airforce.  I was so close to going Army to fly Helos ( to the point of ASVAB testing, civil flight training etc) until the recruiter told me that I'd be a rifleman if I washed out of flight school.  So I went back to college and decided to be a math major...lol. 

Thanks,

John

  • Member since
    July 2003
  • From: Cincinnati, Ohio
Posted by ridleusmc on Monday, March 12, 2018 2:53 AM

Nice!  I remember the First Sergeant at Pensacola threatened the assembled Airwing Marines with infantry.  They cheered.  There are fates worse than infantry.  There's a porta-john MOS.  


  • Member since
    May 2009
  • From: Poland
Posted by Pawel on Monday, March 12, 2018 4:51 AM

Hello!

I'll be watching this one, too! I plan building the Phrog but in 1:72. Researching this one isn't easy - as with all gear that was heavily upgraded before the internet came around. The problem is that 95% of the photos available online show the machines after the upgrade - in this case you get lots of photos of the -E variant and almost no photos of the -A/-D/-F variants.

Good luck with your build and have a nice day

Paweł

All comments and critique welcomed. Thanks for your honest opinions!

www.vietnam.net.pl

  • Member since
    February 2013
Posted by tomwatkins45 on Monday, March 12, 2018 5:28 AM

I'll be watching this with a lot of interest. I've got a good many miles in the back of 46's, a long time ago.

Tom

  • Member since
    February 2003
  • From: East Bethel, MN
Posted by midnightprowler on Monday, March 12, 2018 6:23 PM

I'll be watching. Have one in the works myself.

Hi, I am Lee, I am a plastiholic.

Co. A, 682 Engineers, Ltchfield, MN, 1980-1986

1 Thessalonians 4:13-18 1 Corinthians 15:51-54

Ask me about Speedway Decals

  • Member since
    July 2003
  • From: Cincinnati, Ohio
Posted by ridleusmc on Tuesday, March 13, 2018 12:00 AM

The cabin walls have a whole lot of ejector pin marks.  

 20180313_005528 by Christopher Ridle, on Flickr

  • Member since
    September 2012
Posted by GMorrison on Tuesday, March 13, 2018 12:36 AM

Watching with interest. I had one, gave it to Fermis. I think that kit came with both rear rotor towers, right?

IIRC, the big PITA is that the portholes are sandwiched in between the outer hull and inner liners, which makes painting each/ both a big masking chore.

And the M2's kind of suck, but with 1/48 armor coming on now, that's not so hard.


 Modeling is an excuse to buy books.


  • Member since
    July 2003
  • From: Cincinnati, Ohio
Posted by ridleusmc on Tuesday, March 13, 2018 6:54 PM

Yes Sir, 

Both rear rotor towers are supplied.  I'm thinking I'll use the smaller, A model ones.  

You're right about the portholes, but the Big Ed set came with masks.  I hope those masks alleviate difficulty in masking the windows.  

The M2's do not look very good, but the interior PE set from Big Ed has parts for those too.  

I'm really glad that I got that Big Ed set all those years ago.  I forget how much I paid for it, but I'm sure it wasn't cheap.  


  • Member since
    July 2003
  • From: Cincinnati, Ohio
Posted by ridleusmc on Saturday, March 17, 2018 7:09 PM

Slow progress so far.  I'm concentrating on the cabin.  I have some sub-assemblies together.  I've prepped the doors, the pilot/copilot seats, the troop seats, the instrument panels, and the cockpit bulkhead.  Now, I've decided to add some wire and solder in the cabin to model wiring and hydraulic lines.  I found a couple of period reference pictures.  

 Vietnam-Aircraft_Specific-CH_46-3050 by Christopher Ridle, on Flickr

 welsh-d02 by Christopher Ridle, on Flickr

The cabin's forward bulkhead could benefit from some detailing.  Electronics are mounted on the portside shelves, and the hydraulic motor for the overhead hoist is much more complex than molded.  

 20180317_182225 by Christopher Ridle, on Flickr

I very much like the Eduard instrument panel.  

 20180317_182246 by Christopher Ridle, on Flickr

The seat supports seem a little thick to scale.  They may be replaced with brass rod.

 20180317_195354 by Christopher Ridle, on Flickr

I added some avionics cabling and hydraulic lines where I thought appropriate.  

 20180318_000035 by Christopher Ridle, on Flickr

 20180317_235821 by Christopher Ridle, on Flickr

Thanks for looking,

Chris

  • Member since
    July 2003
  • From: Cincinnati, Ohio
Posted by ridleusmc on Sunday, March 18, 2018 11:00 PM

Tonight, I worked the PE on one .50 cal.  It was work, but it looks so much better than the bare kit parts.  

Kit gun on the right with PE updates on the left:

 20180318_214021 by Christopher Ridle, on Flickr

Looking better:

 20180318_222045 by Christopher Ridle, on Flickr

 20180318_222057 by Christopher Ridle, on Flickr

 20180318_222108 by Christopher Ridle, on Flickr

This is the gun mount with integrated brass-catch.

 20180318_235223 by Christopher Ridle, on Flickr


  • Member since
    May 2009
  • From: Poland
Posted by Pawel on Monday, March 19, 2018 2:03 AM

Hello!

Those Brownings look a lot better now, hands down!

Actually, why are there no machine guns in 1:72 or 1:48 to be had as aftermarket items? Guns like Browning M2s or M60s in different versions should be available to dress up helicopters and AFVs.

As for the hydraulic lines for the winch, maybe you should consider using thinner wire. In this case, copper wire would be the way to go. The electric connections are better, because they represent bundles of wires.

Good luck with your build and have a nice day

Paweł

All comments and critique welcomed. Thanks for your honest opinions!

www.vietnam.net.pl

  • Member since
    July 2003
  • From: Cincinnati, Ohio
Posted by ridleusmc on Sunday, March 25, 2018 12:02 AM

Thank you Pawel, 

Maybe the hydraulic lines are a little thick.  I have a Lowe-Depot nearby, and I can easily pick up a spool of thin copper wire for future use.  I think I'll leave what I've done already.  It looks decent to my eye. 

I've been continuing with the interior.  Black Rust-Oleum Flat Protective Enamel was used for primer.  A few modellers like to use it, and I figured it was worth a try.  It covers well, but it can be tempermental.  I give it a test shot every 3rd to 5th pass.  It requires a quick pass, more so than most aerosol cans. 

I decided to use Tamiya Light Grey (XF-66) for the interior.  I'm happy with the results. 

 20180325_001414 by Christopher Ridle, on Flickr

 20180325_001422 by Christopher Ridle, on Flickr 

 20180325_001439 by Christopher Ridle, on Flickr

 20180325_001514 by Christopher Ridle, on Flickr

 20180325_001530 by Christopher Ridle, on Flickr

Thanks for looking,

Chris

  • Member since
    February 2003
  • From: East Bethel, MN
Posted by midnightprowler on Sunday, March 25, 2018 7:03 AM

Wow!

Hi, I am Lee, I am a plastiholic.

Co. A, 682 Engineers, Ltchfield, MN, 1980-1986

1 Thessalonians 4:13-18 1 Corinthians 15:51-54

Ask me about Speedway Decals

  • Member since
    July 2003
  • From: Cincinnati, Ohio
Posted by ridleusmc on Sunday, March 25, 2018 4:31 PM

Thanks Lee.  I'm going keep working the interior by applying decals and weathering.  This kit definately has two aspects, interior and exterior. 

  • Member since
    July 2003
  • From: Cincinnati, Ohio
Posted by ridleusmc on Sunday, April 1, 2018 12:13 AM

I think I've had my fill of interior fun.  The kit's seat supports were pretty chunky, so I replaced them with 0.020 inch brass rod.  The Eduard cockpit PE is great.  I love the look of the control panels and seat-belts.  She's all closed up now.  I'll be working the exterior tomorrow, baby steps. 

 20180331_230914 by Christopher Ridle, on Flickr   

 20180331_231912 by Christopher Ridle, on Flickr

 20180331_231936 by Christopher Ridle, on Flickr

 20180331_231945 by Christopher Ridle, on Flickr

 20180331_231954 by Christopher Ridle, on Flickr

 20180331_231954 by Christopher Ridle, on Flickr

 20180401_004911 by Christopher Ridle, on Flickr

 20180401_004915 by Christopher Ridle, on Flickr

 20180401_004922 by Christopher Ridle, on Flickr

Thanks for looking,

Chris

  • Member since
    July 2003
  • From: Cincinnati, Ohio
Posted by ridleusmc on Friday, April 6, 2018 2:05 AM

I'm just plugging away at a rate of about an hour a night.  I've been working to smooth out the seams.  The kit's fit is quite good, but it takes a little sanding.  I've had to choose my seam a couple of times.  For instance, I've lined up the top of the fuselage to have a minimal seam, and I dealt with a slightly larger seam step on the bottom.  I did the same with sponsons.  Both sponsons go together as an assembly, which forms a saddle that mates to the bottom of the fuselage.  It didn't take too much work, but I'm happy with the seams and panel lines.  External PE and details need attention before primer and paint.  She looks like a Phrog. 

 20180406_024436 by Christopher Ridle, on Flickr

 20180406_024455 by Christopher Ridle, on Flickr 

I will build the model with an open ramp and overhead door.  The kit supplies a one piece ramp/door which is useful as a mask.  

 20180406_024509 by Christopher Ridle, on Flickr

I think the PE intake screens look better, but the plastic filtered intakes are more appropriate for Vietnam service CH-46A's. 

 20180402_010832 by Christopher Ridle, on Flickr

  • Member since
    July 2003
  • From: Cincinnati, Ohio
Posted by ridleusmc on Monday, April 9, 2018 12:40 AM

Nearly done with assembly.  (The primer pointed to a couple of spots that will need some additional sanding and scribing.) 

 20180409_012720 by Christopher Ridle, on Flickr

I hear the Rolling Stones.

https://www.youtube.com/watch?v=5wCUlPNlQuA


  • Member since
    January 2015
Posted by PFJN on Monday, April 9, 2018 6:50 AM

Hi,

Your build looks amazing so far.  Can't wait to see more Smile

Pat

1st Group BuildSP

  • Member since
    July 2003
  • From: Cincinnati, Ohio
Posted by ridleusmc on Tuesday, April 10, 2018 2:20 AM

Thank you Pat, 

I fixed the remaining seams tonight, and I reapplied some primer.  I'll try to lay some Marine Green tomorrow night.  

  • Member since
    July 2003
  • From: Cincinnati, Ohio
Posted by ridleusmc on Friday, April 13, 2018 12:23 AM

I've been adding paint, a little at a time.  The black basing technique has delivered good results in the past.  I started by lightened my base color, Tamiya Olive Green (XF-58), with Yellow Green (XF-4).  This mix was used to make airbrush squiggles.  

 20180411_013300 by Christopher Ridle, on Flickr

 20180411_013316 by Christopher Ridle, on Flickr

I layered over the squiggles with thin layers of XF-58.  

 20180412_014605 by Christopher Ridle, on Flickr

 20180412_014614 by Christopher Ridle, on Flickr

 20180412_014624 by Christopher Ridle, on Flickr

 20180412_014635 by Christopher Ridle, on Flickr

This is the point where I'm happy with the result.

 20180413_010536 by Christopher Ridle, on Flickr

 20180413_010546 by Christopher Ridle, on Flickr

 20180413_010551 by Christopher Ridle, on Flickr

 20180413_010558 by Christopher Ridle, on Flickr

Thank You for Looking

  • Member since
    February 2013
Posted by tomwatkins45 on Friday, April 13, 2018 7:25 PM

Definitely starting to look like a 46. It really looks good so far.

Tom

  • Member since
    May 2013
  • From: From the Mit, but live in Mason, O high ho
Posted by hogfanfs on Saturday, April 14, 2018 7:53 PM

Chris,

Wow! That interior turned out really nice. I'm looking forward to seeing this one finished! 

Just curious, who makes the engines on the 46?

 Bruce


 On the bench:  1/48 Eduard MiG-21MF

                        1/35 Takom Merkava Mk.I


  • Member since
    July 2003
  • From: Cincinnati, Ohio
Posted by ridleusmc on Sunday, April 15, 2018 9:22 PM

Thank you Bruce, 

I didn't work it much this weekend.  Family came to town, and the 1:1 scale auto needed attention.  The car will likely cost me more build time when the parts come in on Tuesday or Wednesday, but I enjoy swinging wrenches occasionally.    

-Chris

  • Member since
    July 2003
  • From: Cincinnati, Ohio
Posted by ridleusmc on Tuesday, April 17, 2018 3:16 AM

I've been working on painting details.  The ramp got some attention, so did the blades and the tires.  The primer for this project was Rust-Oleum, which was a new thing.  I don't know if the primer fell short or if I didn't clean the parts thoroughly.  I was using Tamiya masking tape.  

 20180417_025437 by Christopher Ridle, on Flickr

 20180417_025401 by Christopher Ridle, on Flickr

 20180417_025352 by Christopher Ridle, on Flickr

Academy's instructions indicate that the undersides of the blades be flat black, and the upper sides of the blades be olive drab.  This didn't strike me as correct, so I asked a facebook group of Marine Corps helicopter veterans.  Most of those gentlemen said flat black all over is appropriate.  However, two gentlemen said that their unit had OD blades.  Several Marines said that their aircraft had at least two blades painted with white stripes on the upper sides (one on the forward head and one on the aft head).  This was to prevent one aircraft from landing in the rotor arc of another in a landing zone.   

I also painted the black area aft of the exhaust.  

 20180417_040014 by Christopher Ridle, on Flickr

 20180417_040006 by Christopher Ridle, on Flickr

Just little bits at a time.  Thanks for looking,

Chris

  • Member since
    July 2003
  • From: Cincinnati, Ohio
Posted by ridleusmc on Friday, April 20, 2018 10:17 PM

I found a little problem with Academy's kit.  The kit blades have fillets on the leading edge-outboard and trailing edge-outboard corners.  However, all pictures I've seen show them as flat across the outboard tip.  

 30688708_2069285830016026_2689178022705379939_n by Christopher Ridle, on Flickr

I had already painted the blades, but I couldn't leave them like that.  So, I chopped off the ends.  I don't know if building up the outboard profile would've been more accurate, but it looks more correct now.  

 20180420_225056 by Christopher Ridle, on Flickr

I'll be working to correct my blades and their paint.  

  • Member since
    May 2013
  • From: From the Mit, but live in Mason, O high ho
Posted by hogfanfs on Saturday, April 21, 2018 7:49 AM

Chris,

Sorry hear about the paint peeling. But, I'm confident you'll bounce back quickly. Nice catch on the blades. 

 Bruce


 On the bench:  1/48 Eduard MiG-21MF

                        1/35 Takom Merkava Mk.I


  • Member since
    July 2003
  • From: Cincinnati, Ohio
Posted by ridleusmc on Sunday, April 22, 2018 8:07 PM

Thanks Bruce,

I missed your question from before.  The -46 uses GE T58 turboshafts.  They were probably all made in Lynn, Massachusetts.  

JOIN OUR COMMUNITY!

Our community is FREE to join. To participate you must either login or register for an account.

SEARCH FORUMS
FREE NEWSLETTER
By signing up you may also receive reader surveys and occasional special offers. We do not sell, rent or trade our email lists. View our Privacy Policy.