SEARCH FINESCALE.COM

Enter keywords or a search phrase below:

WIP Tree Phrog - Academy CH-46A/D Sea Knight 1/48

12896 views
50 replies
1 rating 2 rating 3 rating 4 rating 5 rating
  • Member since
    July 2003
  • From: Cincinnati, Ohio
Posted by ridleusmc on Tuesday, April 24, 2018 12:28 AM

The decals may take a while.

 20180424_012341 by Christopher Ridle, on Flickr

  • Member since
    March 2011
  • From: Ottawa,Ontario,Canada
Posted by modeler#1 on Tuesday, April 24, 2018 6:47 AM

Wow, really impressive build so far. Love the interior details and experior paint.


Looking forward to seeing it completed.

On the Bench: Nothing atm

  • Member since
    July 2003
  • From: Cincinnati, Ohio
Posted by ridleusmc on Tuesday, April 24, 2018 11:57 PM

Thank you Modeler#1.  I'm going to be doing decals for a while.


  • Member since
    July 2003
  • From: Cincinnati, Ohio
Posted by ridleusmc on Friday, April 27, 2018 11:55 AM

I'm just slowly adding decals.  The left side stencils are done.  The non-skid panels are applied.  There's still alot left to apply.  The stencils and service markings add a great deal of visual interest.  

 20180427_023256 by Christopher Ridle, on Flickr

  • Member since
    May 2013
  • From: From the Mit, but live in Mason, O high ho
Posted by hogfanfs on Friday, April 27, 2018 12:56 PM

Seriously?? That is all you have gotten done?? LOL

It looks great with all those stencils! I applaud your effort. This build is really shaping up nicely.

 Bruce


 On the bench:  1/48 Eduard MiG-21MF

                        1/35 Takom Merkava Mk.I


  • Member since
    July 2003
  • From: Cincinnati, Ohio
Posted by ridleusmc on Wednesday, May 2, 2018 2:14 AM

Thank you Bruce,

I thought I'd give an update.  I'm done applying decals, but I think some of them will need more setting solution.  Academy decals are OK, but they are a bit thick.  They tend to need a few applications of Micro Sol along with some strategic slits from a blade.  The decal placement instructions for this kit could use some improvement.  The general aircraft markings and stencil instructions are on page 9, and the specific aircraft marking instructions are on page 10.  The panel lines on page 9 are inaccurate.  Page 10 appears to be more accurate, but all of the little stencil decals aren't called out.  Overall, I'm happy with my decals, but some of them will take some extra effort to lay flat without silvering. 

 20180427_023256 by Christopher Ridle, on Flickr

 20180502_025041 by Christopher Ridle, on Flickr

 20180502_025052 by Christopher Ridle, on Flickr

 20180502_025057 by Christopher Ridle, on Flickr

 20180502_025103 by Christopher Ridle, on Flickr

It may be some time before I show any progress.  It's time for a vacation.  

See you soon,

Chris

  • Member since
    July 2003
  • From: Cincinnati, Ohio
Posted by ridleusmc on Tuesday, May 15, 2018 1:07 AM

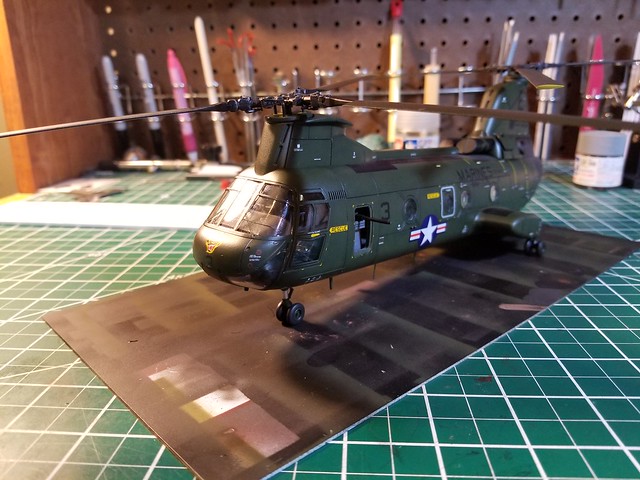
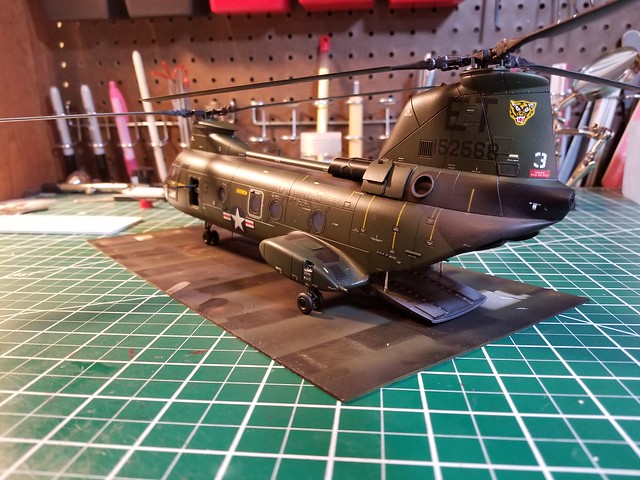
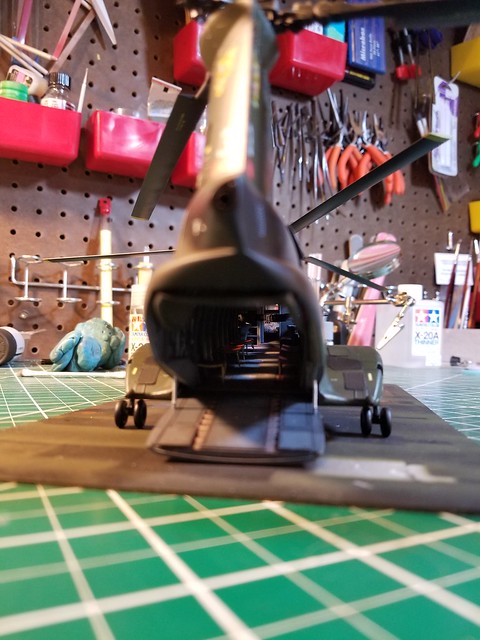
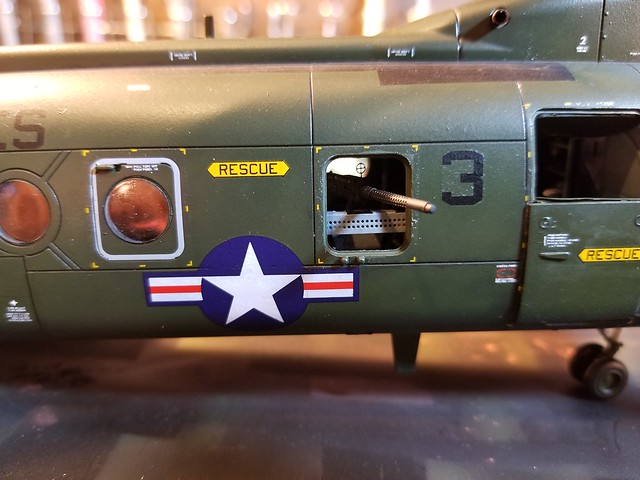
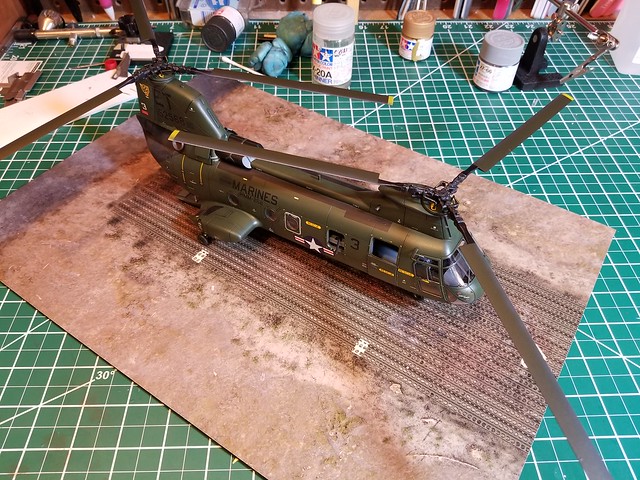
It's time to call this one done.  The decal battles lasted a very long time.  I had to take a vacation from them.  In the end, there was no working out the silvering.  I'm quite happy with the model despite the silvered decals.  If I were to build it again, I'd add some detail forward of the instrument panel.  There's a little area that can be viewed through the front windscreen.  

 20180515_010821 by Christopher Ridle, on Flickr

 20180515_010832 by Christopher Ridle, on Flickr

 20180515_010838 by Christopher Ridle, on Flickr

 20180515_010852 by Christopher Ridle, on Flickr

 20180515_010901 by Christopher Ridle, on Flickr

 20180515_010912 by Christopher Ridle, on Flickr

 20180515_010917 by Christopher Ridle, on Flickr

 20180515_010924 by Christopher Ridle, on Flickr

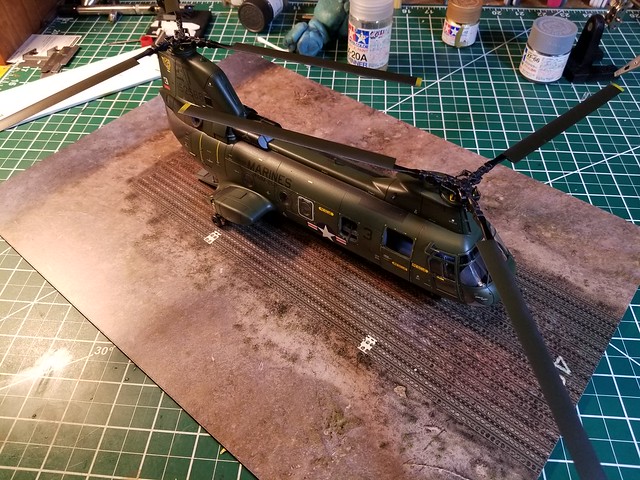
The display base is from www.coastalkits.co.uk.  I thought it was worth a try.

 20180515_011143 by Christopher Ridle, on Flickr

 20180515_011204 by Christopher Ridle, on Flickr

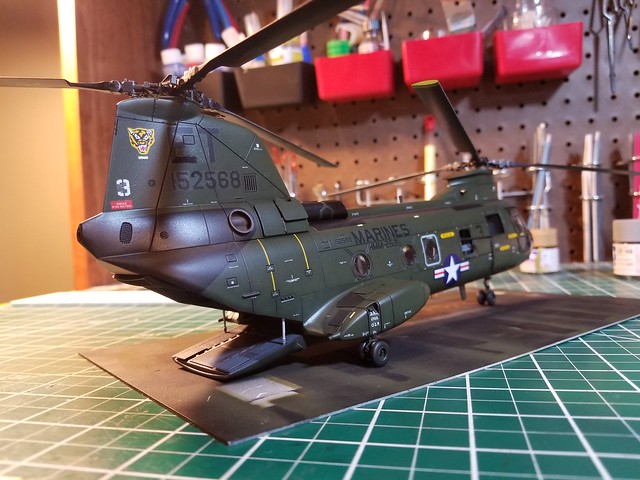
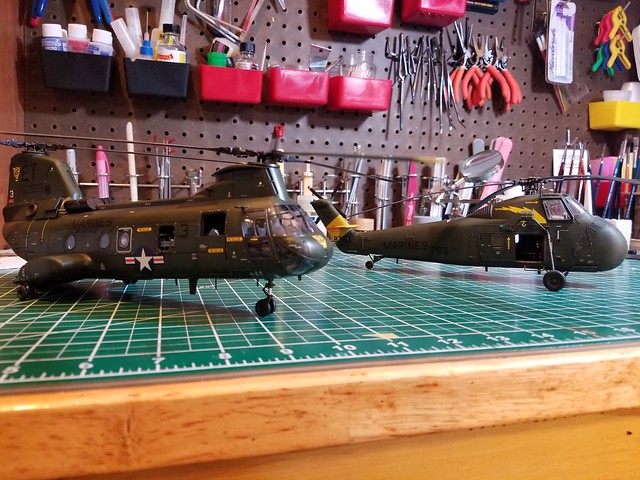
Marine medium helicopters of Vietnam.

 20180515_011336 by Christopher Ridle, on Flickr

 20180515_011401 by Christopher Ridle, on Flickr

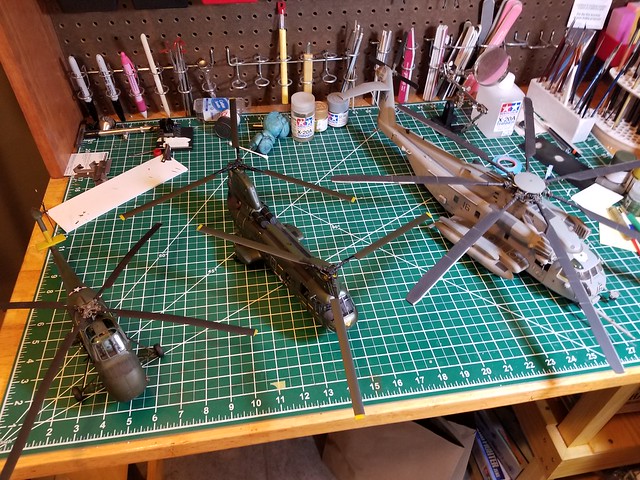
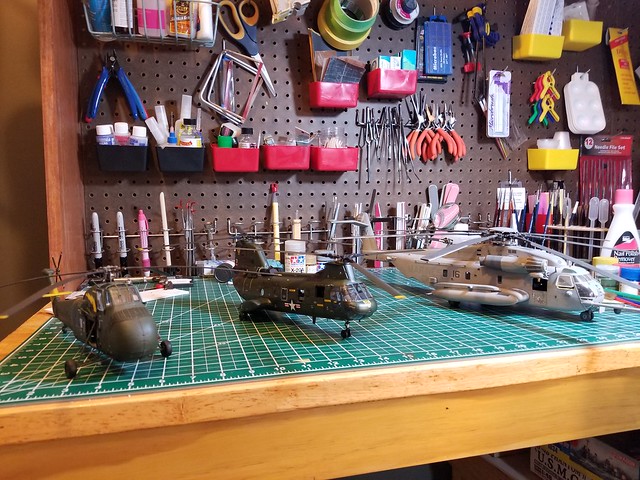
The Rotor-heads of my Marine Air Wing.  We'll call it the 48th MAW.  

 20180515_011643 by Christopher Ridle, on Flickr

 20180515_011654 by Christopher Ridle, on Flickr

Thanks for looking,

Chris


  • Member since
    April 2003
  • From: USA
Posted by keavdog on Tuesday, May 15, 2018 1:51 AM

Turned out really nice!  Nice collection you have going there of the big ones.   I have couple helo's in the stash.  You're inspiring me to build one.  Great job.

Thanks,

John

  • Member since
    July 2003
  • From: Cincinnati, Ohio
Posted by ridleusmc on Tuesday, May 15, 2018 5:56 PM

Thanks John, 

You should definately build the helos.  They have a majestic look about them.  It's like they have halo's.  

I think this will be my next project.  It's not a helo, but it keeps with the MAW theme.

 20180511_122159 by Christopher Ridle, on Flickr

  • Member since
    February 2003
  • From: East Bethel, MN
Posted by midnightprowler on Tuesday, May 15, 2018 6:17 PM

Well done. Did you apply the decals over flat or gloss?

Hi, I am Lee, I am a plastiholic.

Co. A, 682 Engineers, Ltchfield, MN, 1980-1986

1 Thessalonians 4:13-18 1 Corinthians 15:51-54

Ask me about Speedway Decals

  • Member since
    May 2013
  • From: From the Mit, but live in Mason, O high ho
Posted by hogfanfs on Tuesday, May 15, 2018 7:51 PM

Chris,

Great job on the 46! It looks outstanding with the back door dropped!  

And thanks for taking a comparison picture. I had no idea the 53 was that much bigger than a 46?

 Bruce


 On the bench:  1/48 Eduard MiG-21MF

                        1/35 Takom Merkava Mk.I


  • Member since
    July 2003
  • From: Cincinnati, Ohio
Posted by ridleusmc on Wednesday, May 16, 2018 3:01 AM

Lee, Yes Sir, it had a couple of coats of future applied to it.  It was a pretty smooth surface.  I used Micro Set and Micro Sol, and I usually get very good results.  They were just thick and stubborn decals.  I tried to get them settled down by poking holes in them at the points of silvering/bubbles, then adding more Micro Sol.  That method was starting to tear the decals.  So I left it.  I didn't want to get too aggressive.  I decided at some point to give up the fight.  They aren't too terrible, so I can live with them. 

Bruce, Yeah, the 53 is a big beast.  I was surprised to see that the fuselage of the UH-34 was about the same size as sthe 46.  I know the capacity of the 46 is about twice that of the 34.  That seems to be a function of layout and engine power. 

Thanks for looking Gentlemen,

Chris


  • Member since
    February 2013
Posted by tomwatkins45 on Wednesday, June 13, 2018 3:50 PM

That is a good looking 46. It turned out great !

Tom

  • Member since
    July 2003
  • From: Cincinnati, Ohio
Posted by ridleusmc on Wednesday, June 13, 2018 10:40 PM

Thank you Sir,  
I fight Academy kits, but I like the way they look.

  • Member since
    March 2009
  • From: Yorkville, IL
Posted by wolfhammer1 on Friday, July 20, 2018 11:13 PM

Nice looking kit.  If I may be so bold to offer a suggestion, try putting a puddle of Future down before placing the decal.  I just did that for my A-36 in progress and the decals worked perfectly.  

John

  • Member since
    July 2003
  • From: Cincinnati, Ohio
Posted by ridleusmc on Saturday, August 11, 2018 5:32 PM

I can give that a go!  Honestly, I usually don't have problems with decals.  I seem to struggle with Academy decals for some reason.  

  • Member since
    June 2014
  • From: New Braunfels , Texas
Posted by Tanker - Builder on Thursday, October 18, 2018 1:00 PM

Hmmm;

 I like Phrogs a lot . I have two in the stash . Maybe I'll get up off my duff and build one .  I have that Big French bird to build first !

  • Member since
    June 2004
  • From: East Stroudsburg, PA
Posted by TigerII on Saturday, October 20, 2018 12:53 AM

Excellent work Chris. As a Marine veteran that has had the priviledge of riding in a CH-46, I want to say 'Thank you' for putting this Phrog together.

Achtung Panzer! Colonel General Heinz Guderian
  • Member since
    March 2019
Posted by Knight_Flyer on Friday, March 22, 2019 6:22 PM

ridleusmc

I can give that a go!  Honestly, I usually don't have problems with decals.  I seem to struggle with Academy decals for some reason.  

Not just you, Academy decals are generally garbage unless they're Cartograf. Anyway, great looking model and thanks for posting as it's helped me out with the color of the rotor blades.

  • Member since
    November 2008
  • From: Central Florida
Posted by plasticjunkie on Wednesday, April 24, 2019 8:01 AM

Chris

The black basing and paint marbling really add to the tonal variation just like the real thing. Sorry about the paint lifting, that's a bummer. For that same issue I restrict my paint and primer selection to those strictly designed for modeling such as solvent based primers from Alclad, Tamiya, etc that will provide excellent bonding qualities. Sure they are more expensive but no unwanted surprises with them.

Academy decals are notorious for issues but you did a great job with them. I recommend using Solvaset which is extra strong and does a heck of a job. You could use a new #11 blade and lightly score the silvered areas then apply the Solvaset. You'll be surprised how much silvering you can get rid off. 

A friend bought a built 1/48 Tomcat on ebay in the black VX4 markings. The build and paint were good but man the decals had tons of silvering and specially showed over the black paint. I used my method and got rid of at least 95% of the silvering.

Your finished model looks fantastic so well done. 

 GIFMaker.org_jy_Ayj_O


Too many models to build, not enough time in a lifetime!!

  • Member since
    July 2019
Posted by Dancerhat on Friday, July 12, 2019 4:05 PM

Is this finished. I flew in 46's in Vietnam and just starting to build one.

JOIN OUR COMMUNITY!

Our community is FREE to join. To participate you must either login or register for an account.

SEARCH FORUMS
FREE NEWSLETTER
By signing up you may also receive reader surveys and occasional special offers. We do not sell, rent or trade our email lists. View our Privacy Policy.