SEARCH FINESCALE.COM

Enter keywords or a search phrase below:

'Close Contact' - Iraqi Street Fight Scene (WIP)

19866 views
107 replies
1 rating 2 rating 3 rating 4 rating 5 rating
  • Member since
    September 2007
  • From: Truro Nova Scotia, Canada
Posted by SuppressionFire on Saturday, March 29, 2014 7:01 AM
The last photograph looks real! Outstanding job and looking forward to more. I will post pictures soon of the figure I have been working on, one thing I noticed was the 'skin mix' looked just like foundation makeup. Also learned the hard way Mona Lisa odorless thinner is for oil paints, NOT enamels! Once I have my hobby room set-up a new set of model paints in long over due, threw out several that succumb to time.

http://i6.photobucket.com/albums/y211/razordws/GB%20Badges/WMIIIGBsmall.jpg


  • Member since
    July 2003
  • From: Sweden
Posted by Tiking on Saturday, March 29, 2014 7:08 AM

I hear you Suppression fire. I have already ordered paints from Tamiya that are close to the 3-color pattern camo. They should arrive soon. I also bought a new pack of figures to replace the ones I ruin trying to remove the paint. We'll see how that turns out. I also adding more details to the roof and over head electrical wiring. So still some things to do...

Charles King ----------------------- You may think you know...but you don't

  • Member since
    September 2007
  • From: Truro Nova Scotia, Canada
Posted by SuppressionFire on Saturday, March 29, 2014 7:26 AM

Well you are starting figure painting on a difficult camouflage pattern!

Its been a while but I will post a photo of a older figure I painted:

^ I hope it worked, I like to mix on glass, pulling paint to the center and changing for different figures.

Once again the 3 enamel colors. Acrylic red-brown wash for features.

http://i6.photobucket.com/albums/y211/razordws/GB%20Badges/WMIIIGBsmall.jpg


  • Member since
    July 2003
  • From: Sweden
Posted by Tiking on Saturday, March 29, 2014 7:57 AM

That looks really good. Got a question. What color wash do you use if you have a red dress on a figure?

Charles King ----------------------- You may think you know...but you don't

  • Member since
    September 2007
  • From: Truro Nova Scotia, Canada
Posted by SuppressionFire on Saturday, March 29, 2014 8:21 AM

A dark red but never straight black. The upper surfaces should be highlighted brighter but avoid using white to lighten the red or a pink color will result, try a tan instead.

http://i6.photobucket.com/albums/y211/razordws/GB%20Badges/WMIIIGBsmall.jpg


  • Member since
    December 2013
Posted by schmidty on Saturday, March 29, 2014 9:39 AM

Wow Tiking!  You are doing an outstanding job on this!  And I really like how you are doing it all with a minimum of cost.  Great job!

Between your wonderful explanations, and the helpful comments others have left, this is a very educational thread.  I will be copy-and-pasting a lot of this into my personal "how-to" document.

--Mike

On the Bench: 1:72 Academy P-51B

On Deck: 1:72 Hobby Craft DHC-3 (U-1A) & 1:72 Academy Ju 87G-1

  • Member since
    July 2003
  • From: Sweden
Posted by Tiking on Saturday, March 29, 2014 10:33 AM

Thanks.  My colot blending knowledge is lousy. Do i mix a little black to the red to get a darker mix?  Also if i am going to do a wash on a woodland camo vest, what wash should i use?

Charles King ----------------------- You may think you know...but you don't

  • Member since
    July 2003
  • From: Sweden
Posted by Tiking on Saturday, March 29, 2014 10:35 AM

Thanks for the kind words Mike. Feels good to hear it.

Charles King ----------------------- You may think you know...but you don't

  • Member since
    September 2007
  • From: Truro Nova Scotia, Canada
Posted by SuppressionFire on Saturday, March 29, 2014 4:57 PM

There is a Tamiya acrylic color caller 'Hull red' it would be perfect for the shadows on the red dress. If not try a dark brown to deepen the red. Less is more on something light colored like red, look at reference photographs of a similar garment, the wash and highlights are to mimic the effect of light and shadow in scale. The woodland vest would look good with a dark green, being a wash it shouldn't loose the painted camouflage detail underneath.  

http://i6.photobucket.com/albums/y211/razordws/GB%20Badges/WMIIIGBsmall.jpg


  • Member since
    July 2003
  • From: Sweden
Posted by Tiking on Saturday, March 29, 2014 10:40 PM

Thanks for the tip.

Charles King ----------------------- You may think you know...but you don't

  • Member since
    July 2003
  • From: Sweden
Posted by Tiking on Sunday, March 30, 2014 1:07 PM

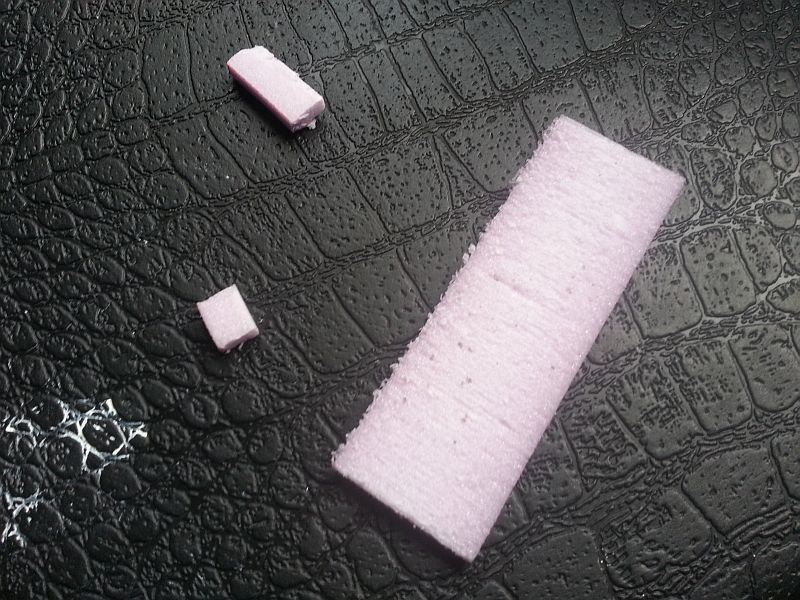
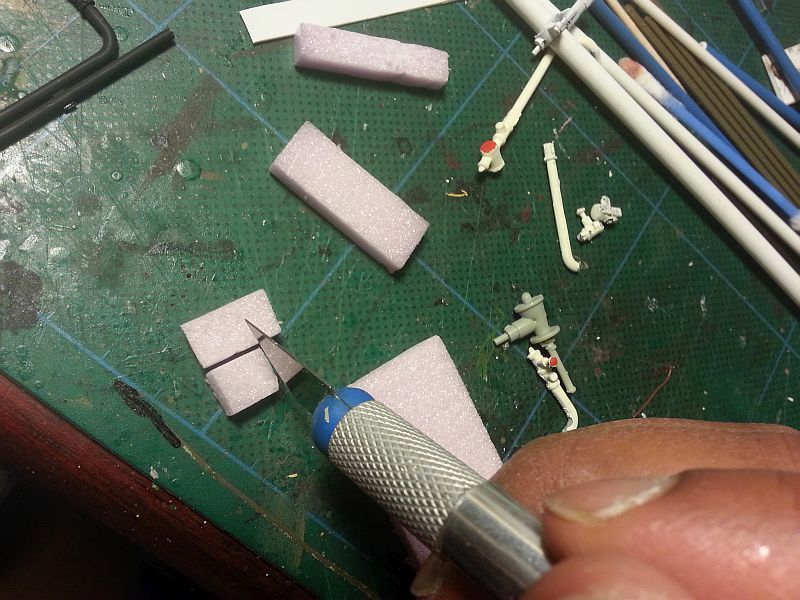
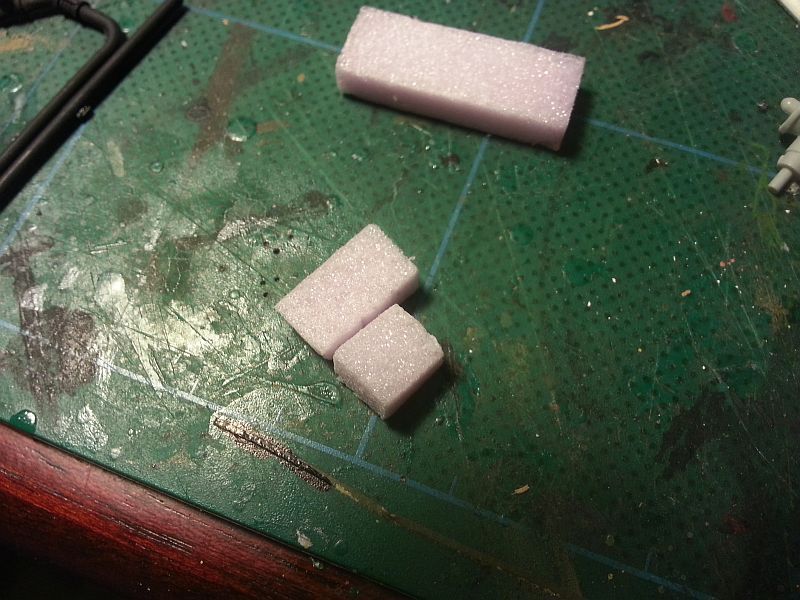
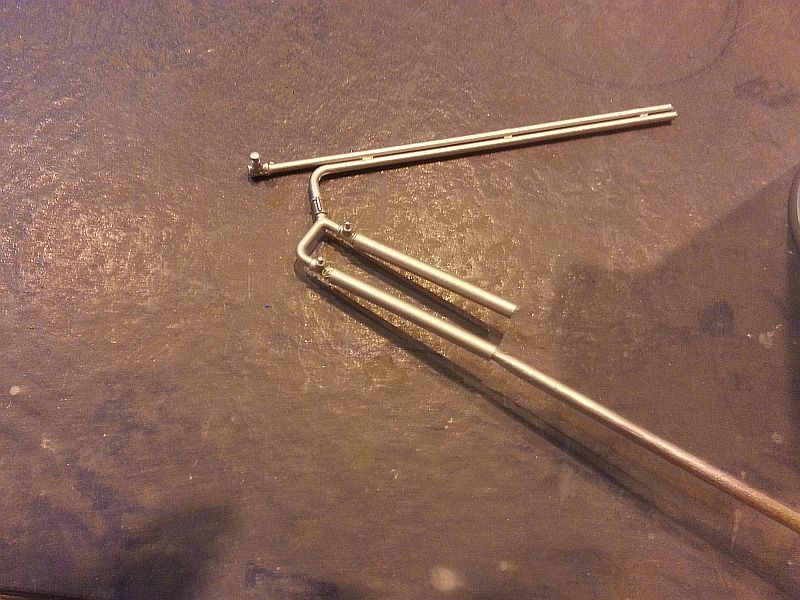
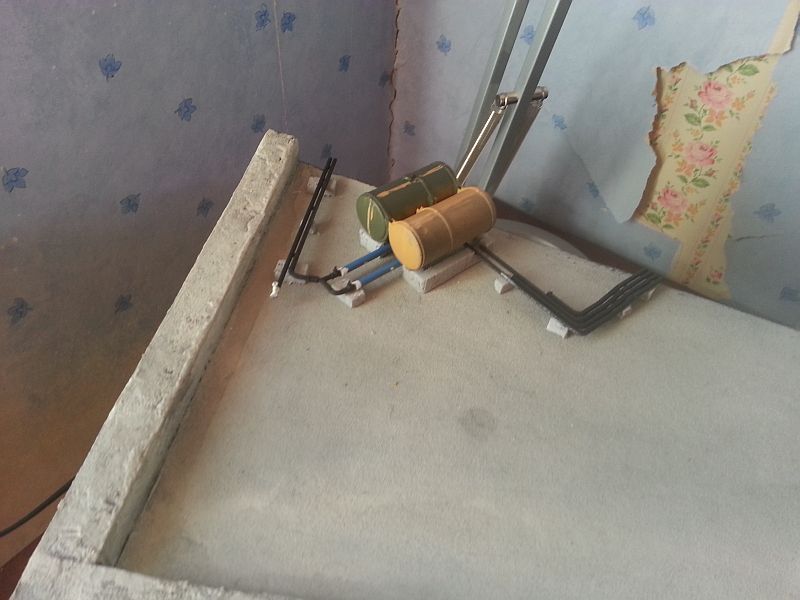
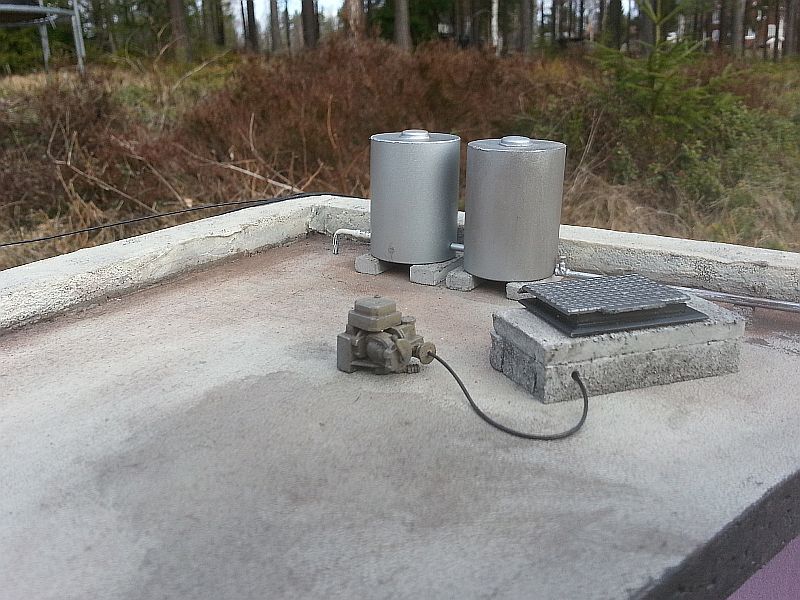
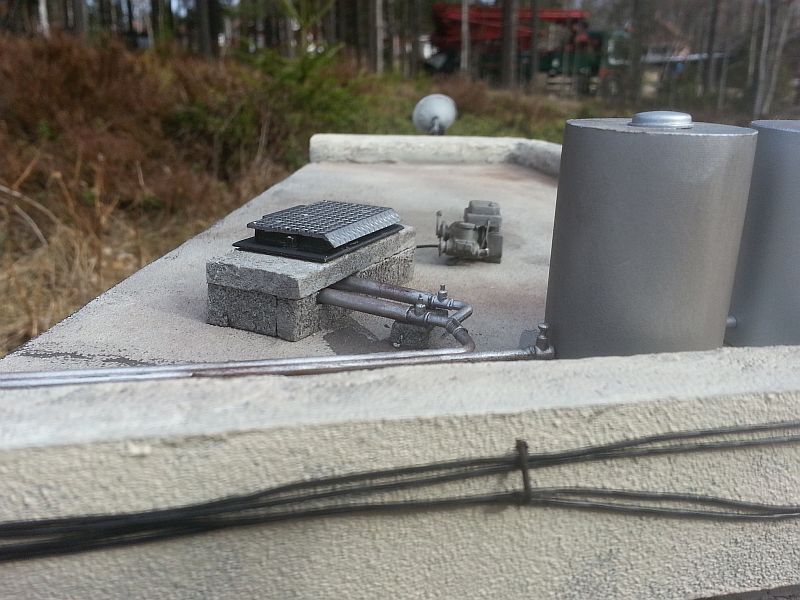
Well, things have been progressing slowly as you all know. Less time for building due to everything around the family. But I do a little each time I get a chance. Here are some pics of the roof details and little additions I have added so far. Made some water tanks and piping taken from my box of tricks. The concrete support blocks were made from the same pink material, Styrofoam

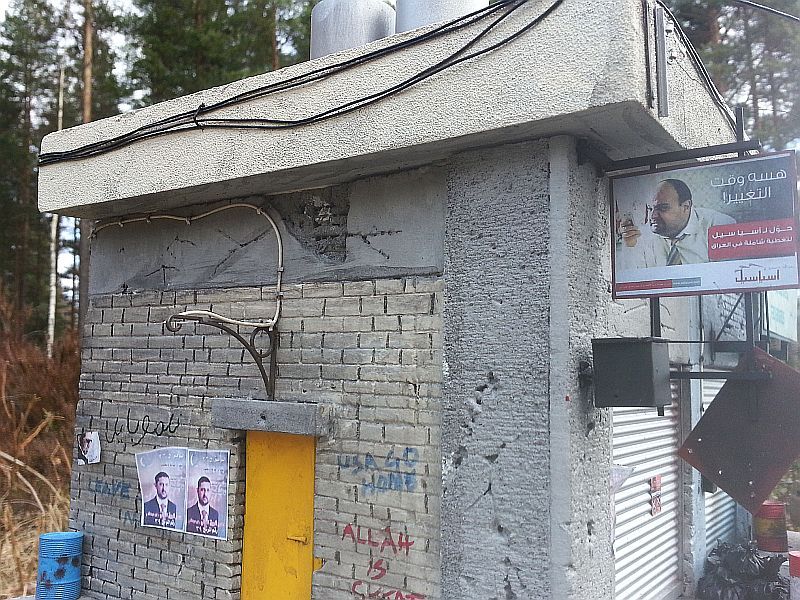
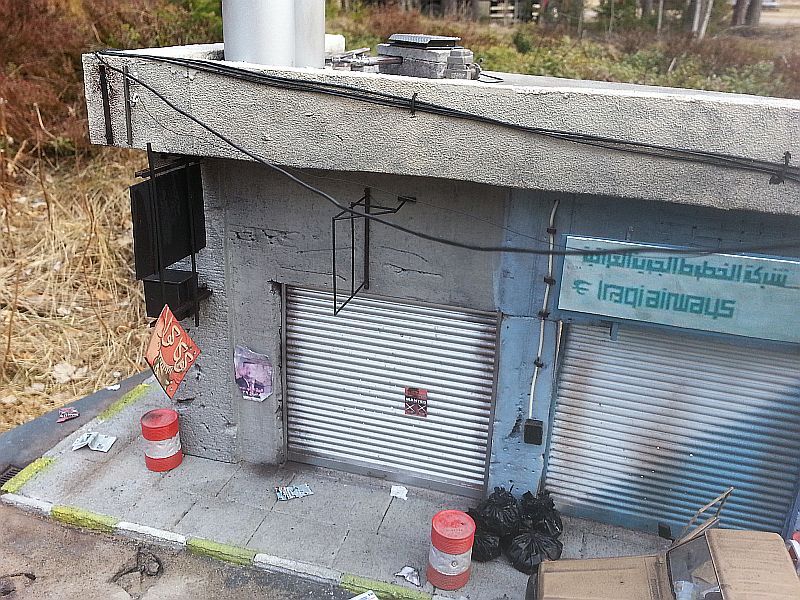
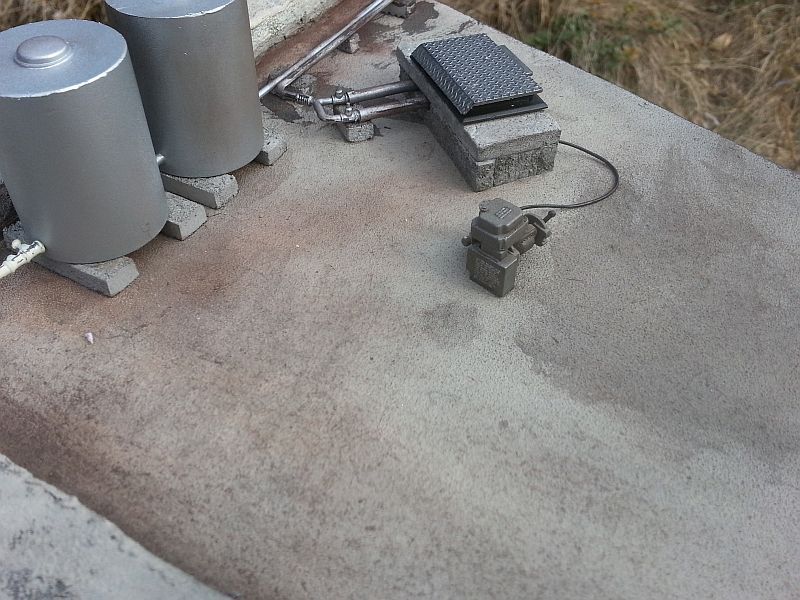
Remember, I am trying to do everything on a budget without putting holes in my pockets. I added a small generator from odd pieces from my bag of tricks. AS long as it looks the part, I am fine with it. Not a huge difference but details none-the-less. Will be doing some painting and refining of the details as I go along. I also added electrical cables around the building in a some-what sloppy manner as I was told this is common over there. 

I have just bought another set of USMC soldiers and awaiting Tamiya paints. I lost the right arm of Blast resin figured I had already painted. It got lost in the snow. Could not find it since then. So, here we go again for another round of painting figures. DAMN!!! I'm getting tired of this.

Oh well. So sorry if you were expecting my next update to be figures but these things happen, for some, more often than others. More weathering on the facade will be in order as well.


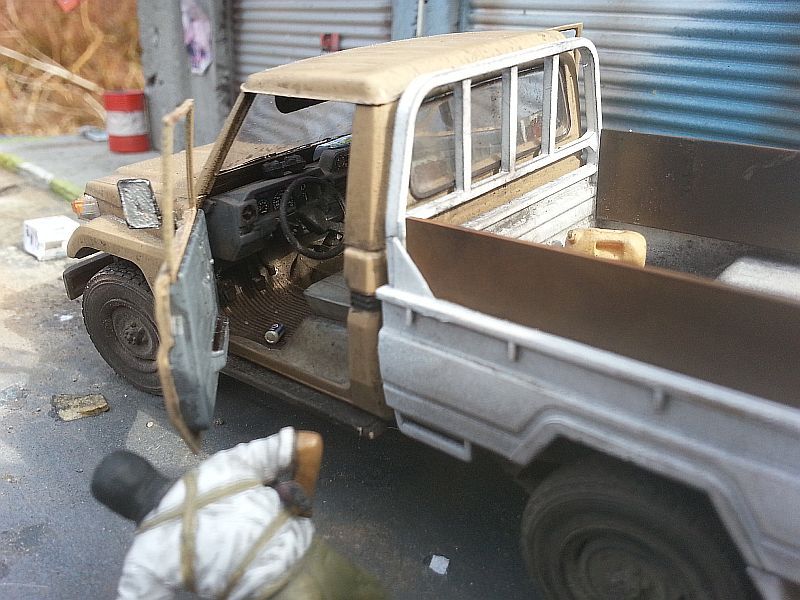
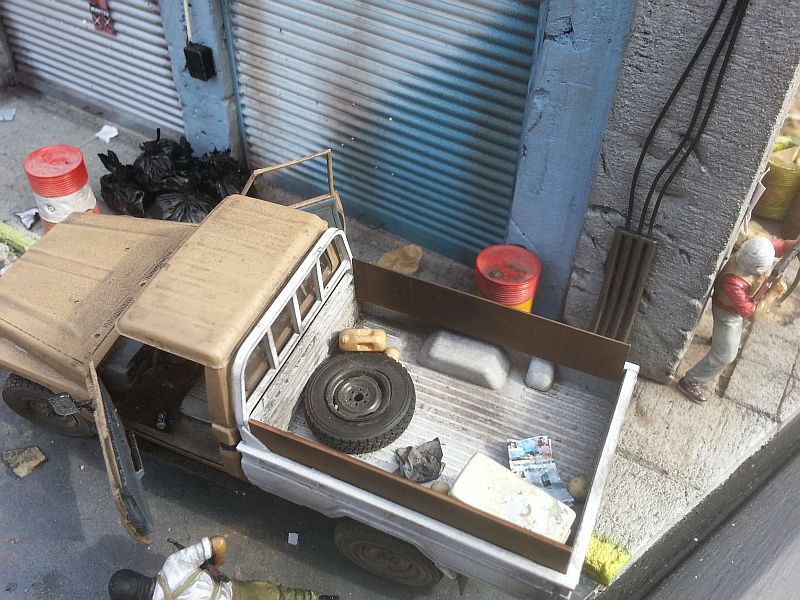
Decided to repaint the cargo bay of the pickup, white and added extra armor to the sides to make it more interesting:


Charles King ----------------------- You may think you know...but you don't

  • Member since
    September 2007
  • From: Truro Nova Scotia, Canada
Posted by SuppressionFire on Sunday, March 30, 2014 5:28 PM

excellent scratch building! Once again the photographs look real, one I had to look twice to see if was not a reference photo.

http://i6.photobucket.com/albums/y211/razordws/GB%20Badges/WMIIIGBsmall.jpg


  • Member since
    July 2003
  • From: Sweden
Posted by Tiking on Sunday, March 30, 2014 10:26 PM

Thank you kindly.

Charles King ----------------------- You may think you know...but you don't

  • Member since
    March 2012
  • From: Corpus Christi, Tx
Posted by mustang1989 on Friday, April 11, 2014 6:15 AM

I"m coming in late here but good god man!!! What detail and what finesse in pulling this all off!! Looks real to me!


 Forum | Modelers Social Club Forum (proboards.com) 

  • Member since
    December 2013
Posted by CodyJ on Wednesday, April 16, 2014 12:38 AM

Looks really awesome!  The posters,debris, equipment on the ground makes a great touch among many many other awesome details!

  • Member since
    July 2003
  • From: Sweden
Posted by Tiking on Sunday, May 18, 2014 10:37 AM
Things have been going slow as I have been busy with work and my family. Also, I had not been so impress with the US paint job on the uniforms. So, I have renamed the dio and will discard the US figures altogether until I am satisfied with the results of my camo painting.I just do not want to bring the dio down just because the camo looks like a 3-year old had painted them.  I am a somewhat of a perfectionist, in a way. Not to say that the insurgent figures are any better but they do not crave the complex camo design as that of the US figures do. I will add them eventually when I am totally satisfied with the results.

I have added a couple more details to the building and added a third insurgent figure and a kid. The new name of the dio will be called, '...around the corner'. Unfortunately it will be the insurgents that get the spot- lights on this dio. I have also decided to remove the pickup vehicle and replaced it with Diopark's new mercedes civilian car. I  will be adding garbage bins, street lights and few other details. Will post pics shortly. Thanks for all the great support fellows. I do appreciate it

Charles King ----------------------- You may think you know...but you don't

  • Member since
    November 2009
  • From: SW Virginia
Posted by Gamera on Wednesday, May 21, 2014 11:21 AM

Just fantastic work so far!

Btw: You could just stick the US figures on the base using a piece of wire driven into their heels without glue. Then you can always remove them for repainting or replacement without any muss or fuss.

"I dream in fire but work in clay." -Arthur Machen


  • Member since
    April 2006
Posted by Irish3335 on Thursday, May 22, 2014 7:19 PM

Great build, if I didn't know better the building looks like it was taken out of the Middle East!  Love the build keep it up

  • Member since
    May 2009
  • From: Poland
Posted by Pawel on Friday, May 23, 2014 3:10 AM

Charles - you sure set the bar high for yourself! I can understand that, and I also respect that. I just worry that you might be a little harsh for yourself - many modellers look at those figs and think "that's better than anything I'll ever be able to do". Whatever the way you go with this build I hope you can complete it with satisfaction. Good luck with your build and have a nice day

Paweł

All comments and critique welcomed. Thanks for your honest opinions!

www.vietnam.net.pl

  • Member since
    July 2003
  • From: Sweden
Posted by Tiking on Saturday, June 14, 2014 10:58 AM

Ok, here are pics of the diorama, which name has been changed to "...around the corner". The dio is pretty much done for the exception of one more figure to be added. The last figure will be a boy pointing to the corner of the building, alerting the insurgents that they( us troops) are coming around the corner. I am in the process of painting the figure, so will add that when it is completed and will post the pics. 
 
As you can see there have been some changes and addition to the diorama. As mentioned in my previous post, the insurgents get the spotlight for this diorama. As I was not completly happy with the outcome of the US camo, I decided to put it aside until such time I can improve on it. So, I hope you can still find it in your heart to like the dio, regardless of the sudden change.
 
As you can see, the pick-up truck has been replaced with the new mecedes from Diopark. Not a bad kit. A big plus with this kit, is that the doors can be closed or open in real-time. That's right. You can have the option to keep it shut or if you so desire you can open them on demand. Two thumbs up for this little addition. The downside is, it is not so easy to put together ans glue the part that makes this to work. Not a kit for the beginner, I can tell you that. Lots of mistakes and mishaps trying to get the doors to work perfectly. Unfortunately I only succeeded having one door work( the passenge side) The rest were glue into their respective position. Als ogot to mention that you need lots of patience, something I am striving to maintain.
 
The next addition is the concrete canopy on the right. I simply used a piece of pink styroform and glued it in place and painted it a concrete color. No biggy there. I also added another canopy made of corrugated material. Made the bracing of some pieces of white styrene and glued that in place after painting it blue. I think the variation of these two objects adds a little spice to the dio.
 
I added a small sign which I took off the internet. That is in fact a pic of a real sign that one of the US soldiers were posting up. I just downloaded it and re-sized it in photoshop. I thought it was a cool sign.
 
As you can see I added another satilite dish and a mast for a antannae array on the top of the building. I was given a pic which showed many of these on one building alone but decided to limit the amount as I did not want to risk cluttering the diorama. 
 
I added another insurgent figure from Blast models. I hand bought it and saved it for a rainy day. I guess that rainy day came.
 
I included MIG street lights, which are pretty good. I also went ahead and bought a dumspter to place the garbage in it at the side of the building. All resin and are pretty good products. I thought it added life and variation. Variation is the key. But you all know that already.
 
Anyways, enjoy the pics and thanks for being patience and giving me tips to finally ( almost) bringing this project to a close.
 
Lots of pics!!!!


Charles King ----------------------- You may think you know...but you don't

  • Member since
    May 2013
  • From: From the Mit, but live in Mason, O high ho
Posted by hogfanfs on Saturday, June 14, 2014 3:28 PM

I am blown away at how great this dio looks! Extremely impressive! I can only hope to come somewhat close to this result with my first dio. Yes

 Bruce


 On the bench:  1/48 Eduard MiG-21MF

                        1/35 Takom Merkava Mk.I


  • Member since
    July 2003
  • From: Sweden
Posted by Tiking on Sunday, June 15, 2014 1:12 AM

Thanks for the kind words.

Charles King ----------------------- You may think you know...but you don't

  • Member since
    March 2012
  • From: Corpus Christi, Tx
Posted by mustang1989 on Sunday, June 15, 2014 5:34 AM

I cant tell you anything about this build that hasn't been said already so I'll say this: This work is inspiring and one of these days I"ll get off my duff and do some REAL modeling.. This thing belongs in a museum somewhere dude.


 Forum | Modelers Social Club Forum (proboards.com) 

  • Member since
    July 2003
  • From: Sweden
Posted by Tiking on Sunday, June 15, 2014 5:41 AM

Too kind of you. appreciate you inspiring comment.

Charles King ----------------------- You may think you know...but you don't

PVI
  • Member since
    May 2014
  • From: Wisconsin
Posted by PVI on Tuesday, June 24, 2014 8:18 PM

WOAH. That is, in a word, incredible. It looks absolutely photo real- amazing work sir!

  • Member since
    July 2003
  • From: Sweden
Posted by Tiking on Wednesday, June 25, 2014 10:00 AM

Thanks pvi. It is all in the lighting. 

Charles King ----------------------- You may think you know...but you don't

  • Member since
    March 2014
Posted by BarrettDuke on Wednesday, June 25, 2014 10:23 AM

Truly exceptional work! And, the lighting helps, but the light has to have something to work with. You made the light's work easy. Thanks for taking the time to do this and for sharing it with us. Really fantastic stuff. Congratulations.

  • Member since
    January 2014
  • From: Toronto
Posted by Rob S. on Wednesday, June 25, 2014 12:24 PM

Yup, mind blown...just incredible!!

______________________________________________________________________________


On the Bench: Nothing on the go ATM

  • Member since
    July 2003
  • From: Sweden
Posted by Tiking on Wednesday, June 25, 2014 1:13 PM

Thanks to the both of you. Glad you like the results.

Charles King ----------------------- You may think you know...but you don't

  • Member since
    June 2014
Posted by deltakilo on Wednesday, June 25, 2014 4:10 PM
Amazing Tiking! Got a question, when you got one side of the foam caved w/ bricks, and the mock mortar on the wall I assume is putty right?
JOIN OUR COMMUNITY!

Our community is FREE to join. To participate you must either login or register for an account.

SEARCH FORUMS
FREE NEWSLETTER
By signing up you may also receive reader surveys and occasional special offers. We do not sell, rent or trade our email lists. View our Privacy Policy.