SEARCH FINESCALE.COM

Enter keywords or a search phrase below:

Making My own Turned Metal Barrels

7351 views
16 replies
1 rating 2 rating 3 rating 4 rating 5 rating
  • Member since
    June 2011
  • From: Detroit
Making My own Turned Metal Barrels
Posted by garylee on Sunday, March 11, 2012 6:36 PM

Hey Fellas,

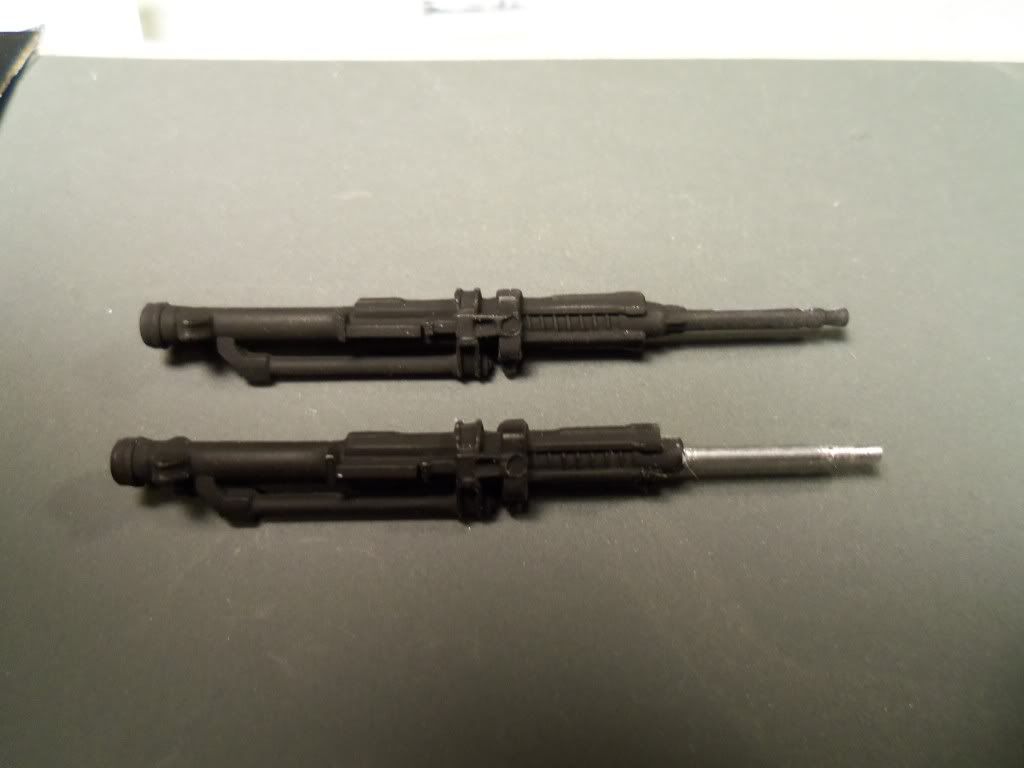
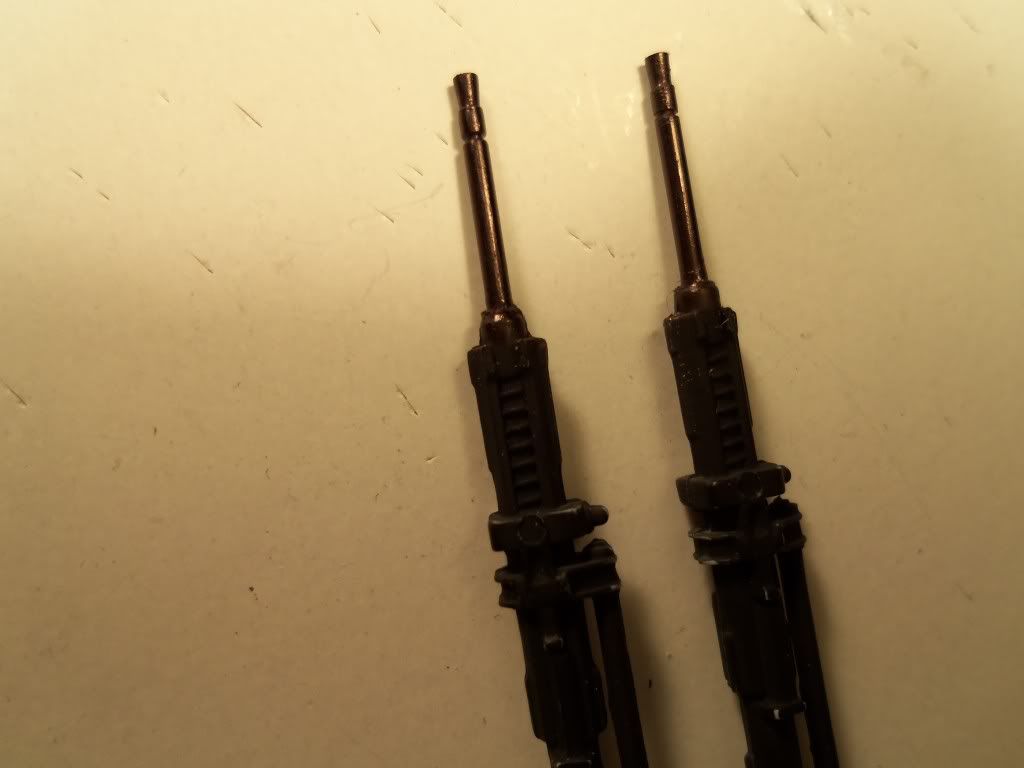
I showed some of this to my pal Bish and he said i should do a post so I guess we'll give this a shot. I'm building the old Airfix 1/24th scale Bf 109E-3 and the guns that come with the kit are pretty horrible. The barrels aren't round, they have horrible mold lines and of course they're solid styrene so the muzzles have to be opened. I can get a nice set of MG17 barrels for the nose guns from Master Model, but I couldn't find any MGFF barrels for the wings. I have them in 1/32nd scale, but couldn't find them in 24th so I decided to make my own. The top gun in this shot is from the kit, just primed flat black.

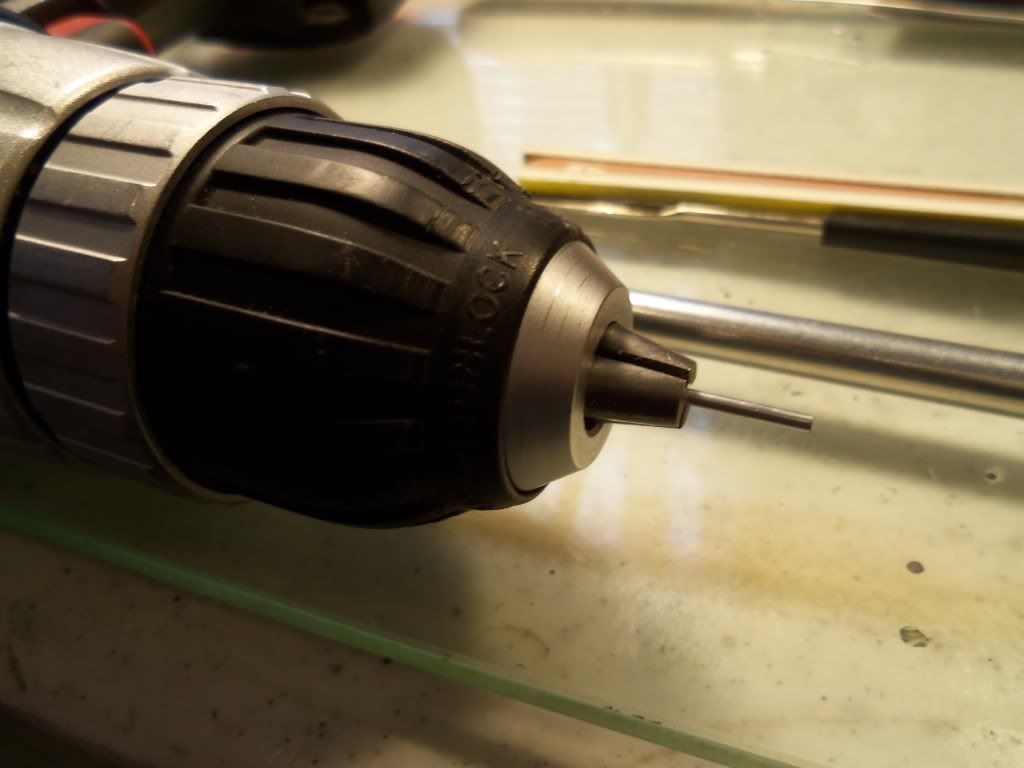
Here are the tools I used

In the foreground you can see the piece of 1/16th steel tubing I got at the local hobby shop. I also have the same size in copper tubing and styrene rod, which would also work OK but I decided to go with the steel. The 1/16th inch matched the 24th scale gun barrels pretty well, but you could use other sizes for other scales. I used a pair of model railroad rail nippers to cut a piece of tubing longer than I needed and chucked it up in a variable speed drill. If you have a drill with a trigger lock or a vise you can gently grab the drill with that would work even better but I have niether of those so I had to hold the drill and the tools at the same time. A little more difficult but not too bad.

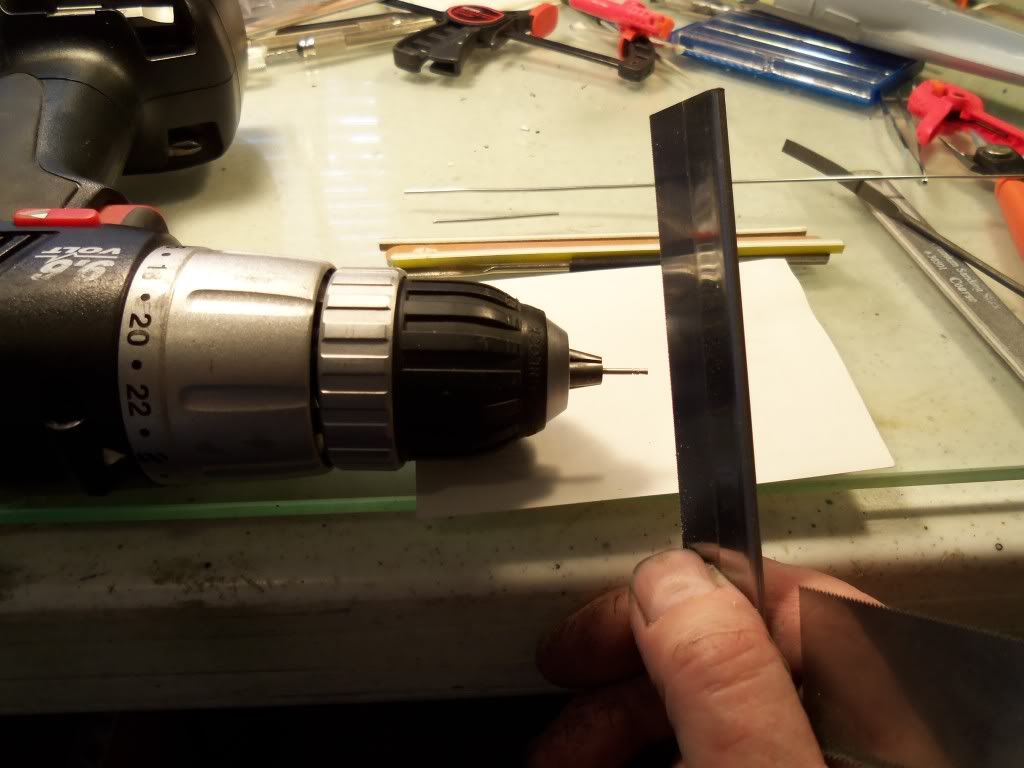
I used a flat file and just held it against the tubing at an angle to get the front of the muzzle

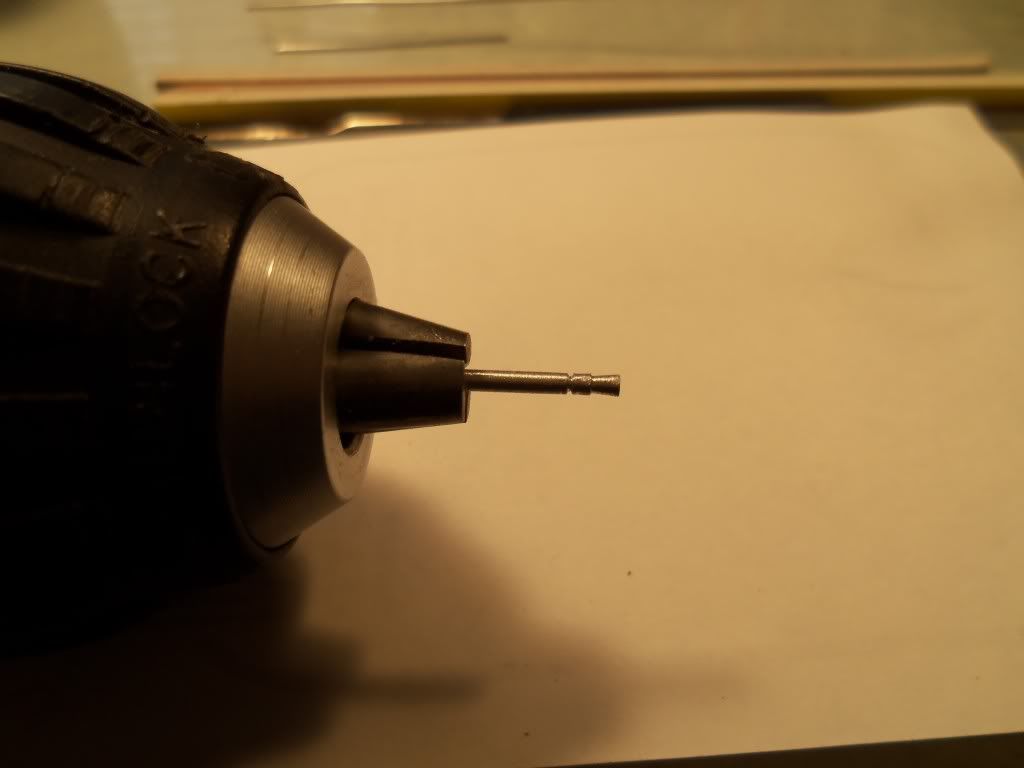
It turned down fairly quickly and after a little practice I was able to get a convincing muzzel cone. Then for the groove behind the muzzel cone I gently applied a thin razor saw blade until I had the depth right. And I only had to start over once because i went too far and cut off the whole tip. Also be sure to check the teeth on your saw so you can spin the drill in the right direction. My saw cuts on the backstroke so I had to run the drill in reverse to get a bite.

I used a number 11 blade gently inserted into the muzzel to get the cone shape there. Once again, as with all of this stuff, a little experimentation and practice was required before I got the hang of it, but I think they came out all right.

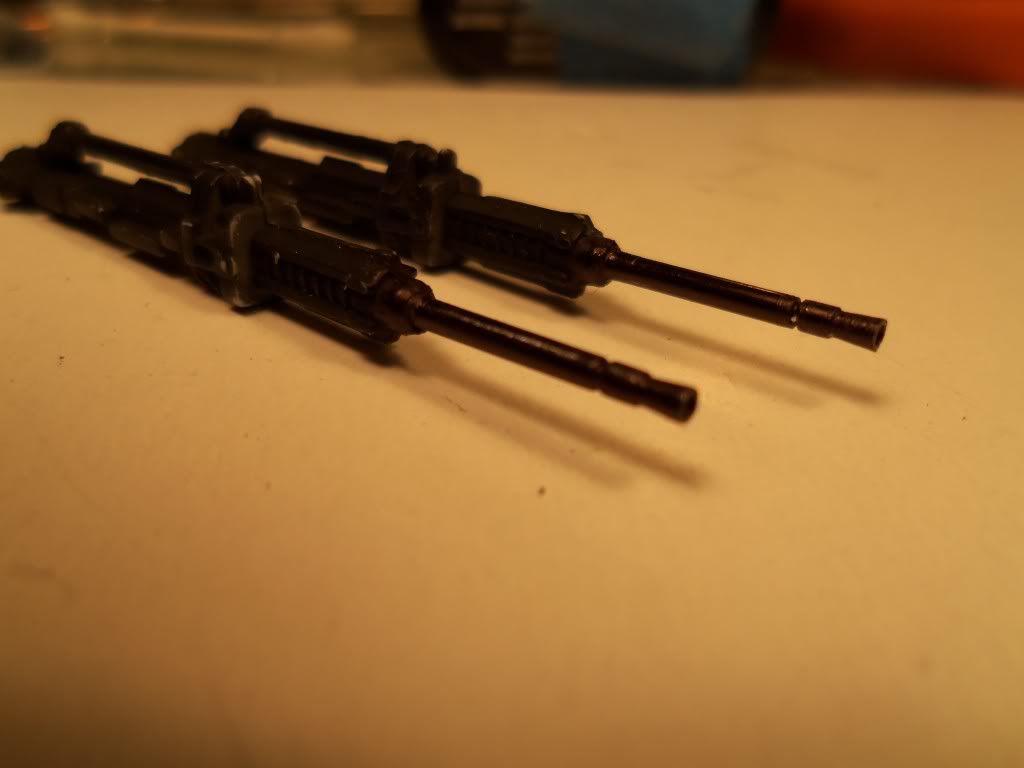
I then cut the barrel off one of the kit guns and drilled a hole in the body, and trimmed the barrel a little bit at a time until it matched the kit length. Cutting the gun barrel and drilling the hole was just the same as it would be for most aftermarket gun barrels. Only cut one gun at a time so you can use the other for a guide. Then I colored them and they're ready to install. Later I'll post a pic of them in the 109, just in case anyone is interested. I'm sure others have done this before, but maybe it will help someone out a little.

And if there's anyone out there that has built this particular kit I'd really like to hear about it.


Gary


Detroit, where the weak are killed and eaten. Bwahahaha

cml
  • Member since
    March 2007
  • From: Brisbane, Australia
Posted by cml on Sunday, March 11, 2012 7:23 PM

Thanks for sharing Garylee - that's a great idea.

One question - how did you find snipping the tubing?  Did you get a nice flush cut, or did it crimp the tubing?

I'm looking at doing something similar for 1/48 and am worried that any pliers/cutters will crimp the end.  I'm guessing you could just file away any crimp if that occurred?

Look forward to your thoughts.

Chris

dmk
  • Member since
    September 2008
  • From: North Carolina, USA
Posted by dmk on Sunday, March 11, 2012 7:31 PM

Cool trick. Nice job on the improvised lathe.

  • Member since
    January 2003
  • From: Washington, DC
Posted by TomZ2 on Sunday, March 11, 2012 7:46 PM

Plastic is a crutch for people who can’t cope with metal. [Nice execution!]

Occasional factual, grammatical, or spelling variations are inherent to this thesis and should not be considered as defects, as they enhance the individuality and character of this document.

  • Member since
    August 2006
  • From: Neenah, WI
Posted by HawkeyeHobbies on Sunday, March 11, 2012 7:51 PM

I have turned barrels for my own and for others, some aircraft but mostly for armor and ships. I have a lathe, which I hardly ever use.


Gerald "Hawkeye" Voigt

http://hawkeyes-squawkbox.com/


"Its not the workbench that makes the model, it is the modeler at the workbench."

  • Member since
    June 2011
  • From: Detroit
Posted by garylee on Monday, March 12, 2012 6:24 AM

Chris, the nippers do crimp the tubing (worse on one side than the other) but that's one of the reasons I cut the tube longer than I need. It's easy to remove the crimped part with a coarse sanding stick and then it looks good.

That's a nice little lathe, Hawkeye. I'm a machinist for a living and I run the lathe department at a gear shop. I thought about doing these at work but they're pretty tiny for the equipment we have so I just did it at home. I think if I had a vise I could wrap the drill in a rag and hold it in the vise and that would make things a lot easier. I was also thinking about one of those sewing machine foot pedals for speed control. If I could wire that with an outlet I could use it to control speed on just about any kind of drill or mototool. Has anyone ever hooked one of those up? I'd sure like to hear some suggestions. That might even make me break down and buy a vise. :-)

Detroit, where the weak are killed and eaten. Bwahahaha

  • Member since
    June 2008
  • From: Iowa
Posted by Hans von Hammer on Monday, March 12, 2012 6:42 AM

That's outstanding, Garylee! I too use a variable-speed drill for a lathe..  A vise is required, IMHO though.. If you use one, you'll find that it's a hundred times easier to turn a piece.. I use a tube-cutter instead of nippers though.. It leaves a bit of metal inside the tube, but that's easily cleaned-up with a drill-bit..

If I could wire that with an outlet I could use it to control speed on just about any kind of drill or mototool. Has anyone ever hooked one of those up?

Haven't done a foot pedal, but I used a rheostat that I wired into an extension cord for speed-cntrol for my Dremel..  Can plug the drill into it too... I just lock it in "on" and then adjust the speed with the knob...

  • Member since
    June 2011
  • From: Detroit
Posted by garylee on Monday, March 12, 2012 4:21 PM

Those are a couple of great ideas, Hans. I can pick up a rheostat and an electrical box at the hardware store, and I already have a heavy duty 10' grounded extension cord so that should work great. I like the tube cutter idea but I don't have one that small. I also wanted to thin the walls inside the cone so I found that my seam scraper works pretty good for that since it's three sided and has pretty much the right angle, and it would work well for removing the burr left by the tubing cutter. I probably should have removed a little more material there as they still look a little on the thick side, but I think they're a definite improvement over the kit barrels. As you can see here in this test fit, not much shows once they're installed. You might also notice that I took care of the slant at the end of the one muzzle. Once I saw the photos I realized that wasn't quite straight. :-)

Detroit, where the weak are killed and eaten. Bwahahaha

  • Member since
    June 2008
  • From: Iowa
Posted by Hans von Hammer on Monday, March 12, 2012 5:38 PM

I like the tube cutter idea but I don't have one that small.

I got a small one for cutting brass tube down to 1/16th at Hobby Lobby... Need a vise though..  There's a pointed reamer available for Dremel tools too, wherever you get your stuff for it.. I got it at Ace, but I lost it a few moths ago, need to go get another.. That thing makes pretty short work of the burrs in tubing..

cml
  • Member since
    March 2007
  • From: Brisbane, Australia
Posted by cml on Monday, March 12, 2012 7:10 PM

Garylee: thanks for the tip.  That had crossed my mind - to snip then file off any offending crimp.

Will definitely give it a try.

Again, great thread, especially seeing the way you've carved the muzzle, looks great.

Chris

  • Member since
    June 2008
  • From: Iowa
Posted by Hans von Hammer on Tuesday, March 13, 2012 12:03 AM

You might also notice that I took care of the slant at the end of the one muzzle. Once I saw the photos I realized that wasn't quite straight.

No sweat.. Actually, I didn't notice, I was just lookng at the barrels, lol..

A little inward slant is ok, since most fighter pilots had their wing-guns set to converge at 300 yards/meters..  Jabos had their guns angled slightly down, as did a lot of P-47s.. It allowed them to strafe without diving as steep as they would have to if the guns were level with the center-line..

  • Member since
    June 2011
  • From: Detroit
Posted by garylee on Tuesday, March 13, 2012 8:12 AM

I know what you mean about having the guns angled, Hans, but what i was talking about is the flatness of the face of the muzzle. On the one it was a little off and you can see what  I mean in the first pic of the two guns after I blackened them. See how the one on the right is a little hinky? But in the last photos you can see that I went back and fixed that. Sometimes I think all of us modelers have a really strong perfectionist gene or something. :-)

Detroit, where the weak are killed and eaten. Bwahahaha

  • Member since
    February 2011
  • From: St louis
Posted by Raualduke on Tuesday, March 13, 2012 9:36 AM
As an alternative to nippers, you can try rolling the tube on your cutting mat with a new # 11 blade. Scoring it. Should snap of cleanly.works like a charm for me.
  • Member since
    December 2002
  • From: Bury St Edmunds, Suffolk, England
Posted by Bish on Sunday, March 18, 2012 4:41 PM

There looking really nice. And the thread came out great to. You see, i do have the odd good idea. And never keep a tip to yourself.

I did try replying to your e-mail, but it was easier to do it here. Only another week, and i am back to civilisation and decent internet.

I am a Norfolk man and i glory in being so


On the bench: Airfix 1/72nd Harrier GR.3/Fujimi 1/72nd Ju 87D-3

  • Member since
    June 2010
  • From: Spokane, WA
Posted by Hun Hunter on Sunday, March 18, 2012 5:09 PM

Those look fantastic, and they really add a lot in 1/24.

I just wrapped this kit up a couple of weeks ago and I really enjoyed it, I had generally good fit. Just required a little sanding around the cowling.

There are some that call me... Nash

  • Member since
    June 2011
  • From: Detroit
Posted by garylee on Sunday, March 18, 2012 5:41 PM

Yeah, i guess you do get it right sometimes, Bish. Bow Down And I had fun doing the post. Here's where we're at right now. The wing halves are joined but we're still test fitting the fuselage. Excuse the mess on the bench. You guys know how it is.

So did you get any photos, Hun Hunter? I'm enjoying pretty good fit, too, but I'm still really taking my time and testing everything about eleventy-billion times (yes, that's the official number).

Hurry back, Bish, and get with the rotor installation!!

Gary

Detroit, where the weak are killed and eaten. Bwahahaha

  • Member since
    December 2002
  • From: Bury St Edmunds, Suffolk, England
Posted by Bish on Sunday, March 18, 2012 7:55 PM

Bloody hell, that makes my bench look tidy.Big Smile

Its a week on Tues before i get back to the bench. But i am geared up to get the chopper all done.

I am a Norfolk man and i glory in being so


On the bench: Airfix 1/72nd Harrier GR.3/Fujimi 1/72nd Ju 87D-3

JOIN OUR COMMUNITY!

Our community is FREE to join. To participate you must either login or register for an account.

SEARCH FORUMS
FREE NEWSLETTER
By signing up you may also receive reader surveys and occasional special offers. We do not sell, rent or trade our email lists. View our Privacy Policy.