SEARCH FINESCALE.COM

Enter keywords or a search phrase below:

1/32nd Hasegawa Focke-Wulf Fw-190D-9 - FINISHED ON 01 Sept 2014!!

11031 views
42 replies
1 rating 2 rating 3 rating 4 rating 5 rating
  • Member since
    March 2005
  • From: Lancaster, South Carolina
Posted by Devil Dawg on Monday, September 1, 2014 12:36 AM

Texgunner

Gary, I think she looks great!  Very well-done indeed. Beer

Gary

Thanks, Tex! Greatly appreciated!

Devil Dawg

On The Bench: Tamiya 1/32nd Mitsubishi A6M5 Model 52 Zeke For Japanese Group Build

Build one at a time? Hah! That'll be the day!!

  • Member since
    March 2005
  • From: Lancaster, South Carolina
Posted by Devil Dawg on Monday, September 1, 2014 12:38 AM

sanderson_91

Hey Gary, sweet 190!!  I just finished this same aircraft except it was the Tamiya 1/48 kit.  I hope to post some photos tomorrow.

Steve

Thanks for the compliment, Steve. I haven't built a Tamiya 190 yet. Actually, this 1/32nd Hasegawa kit is my first-ever Fw-190 of any kind. Hope yours comes out great!

Devil Dawg

On The Bench: Tamiya 1/32nd Mitsubishi A6M5 Model 52 Zeke For Japanese Group Build

Build one at a time? Hah! That'll be the day!!

  • Member since
    March 2005
  • From: Lancaster, South Carolina
Posted by Devil Dawg on Monday, September 1, 2014 12:40 AM

TREYZX10R

Looks great Gary,nice job on the mottle!

Thanks, Trey! My first-ever attempt at a mottle camouflage paint scheme. I'm decently pleased with it, although I know it could've been better. Looking forward to getting her finished soon.

Devil Dawg

On The Bench: Tamiya 1/32nd Mitsubishi A6M5 Model 52 Zeke For Japanese Group Build

Build one at a time? Hah! That'll be the day!!

  • Member since
    March 2005
  • From: Lancaster, South Carolina
Posted by Devil Dawg on Monday, September 1, 2014 12:42 AM

Chanter

Gary that looks great!  Really really sharp paint work.

I love the look of those JV44 birds.

Allen

Thanks for the kind words, Allen. I like the paint scheme, too, which is why I chose it. Quite pleased with the results.

Devil Dawg

On The Bench: Tamiya 1/32nd Mitsubishi A6M5 Model 52 Zeke For Japanese Group Build

Build one at a time? Hah! That'll be the day!!

  • Member since
    March 2005
  • From: Lancaster, South Carolina
Posted by Devil Dawg on Monday, September 1, 2014 6:50 PM

Well, Dora is finished, as per my definition of "finished", anyways. Lots of problems with this one, especially with the decals silvering, and then disintegrating once I hit it with Alclad II Lacquer Flat Coat. I wonder if the lacquer flat coat ate away the decals? Anyways, below are the pictures. The only thing I still need to add is the antenna wire that runs from the canopy to the aerial on the top of the vertical stabilizer.

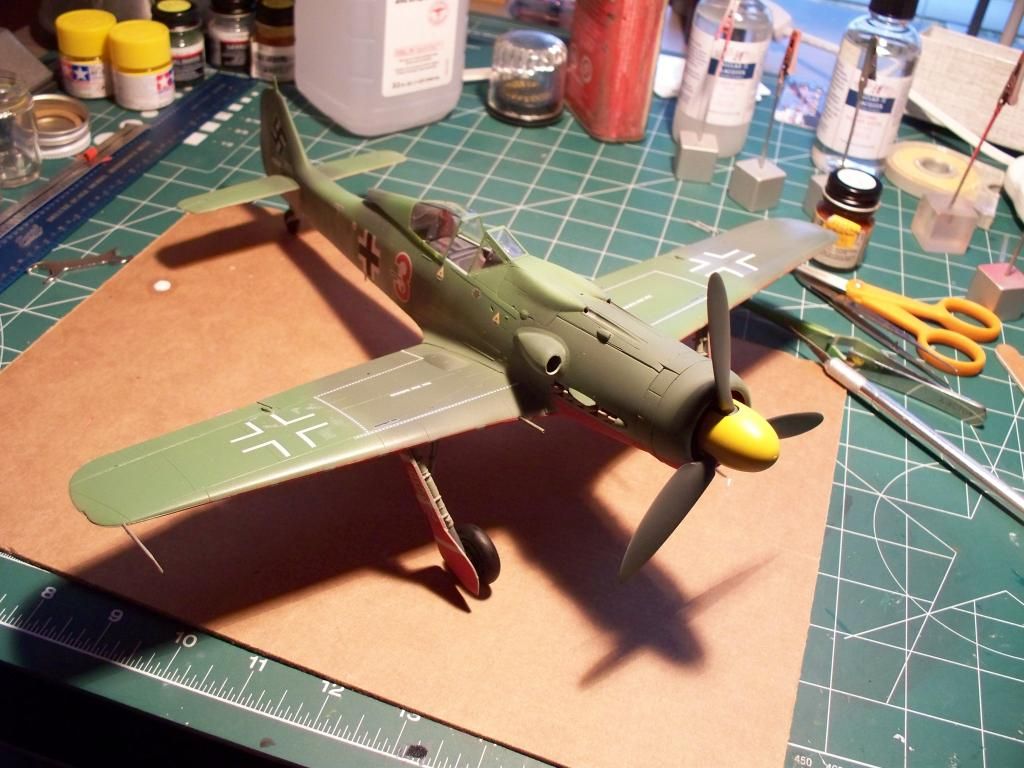
In this shot, you can see the silvering on the fuselage "3", and on the swastika on the vertical stabilizer. I used Future Floor Wax (or Pledge FloorCare Multi-Surface Finish, as it's called now), and I think it has acrylic in it, but I'm not too sure about that. If it doesn't, that would explain the severe silvering that occurred with the decals. I know alot has been talked about on the forums about Johnson & Johnson's newest packaging of this product. Makes it hard to know what you're getting nowadays.

.

.

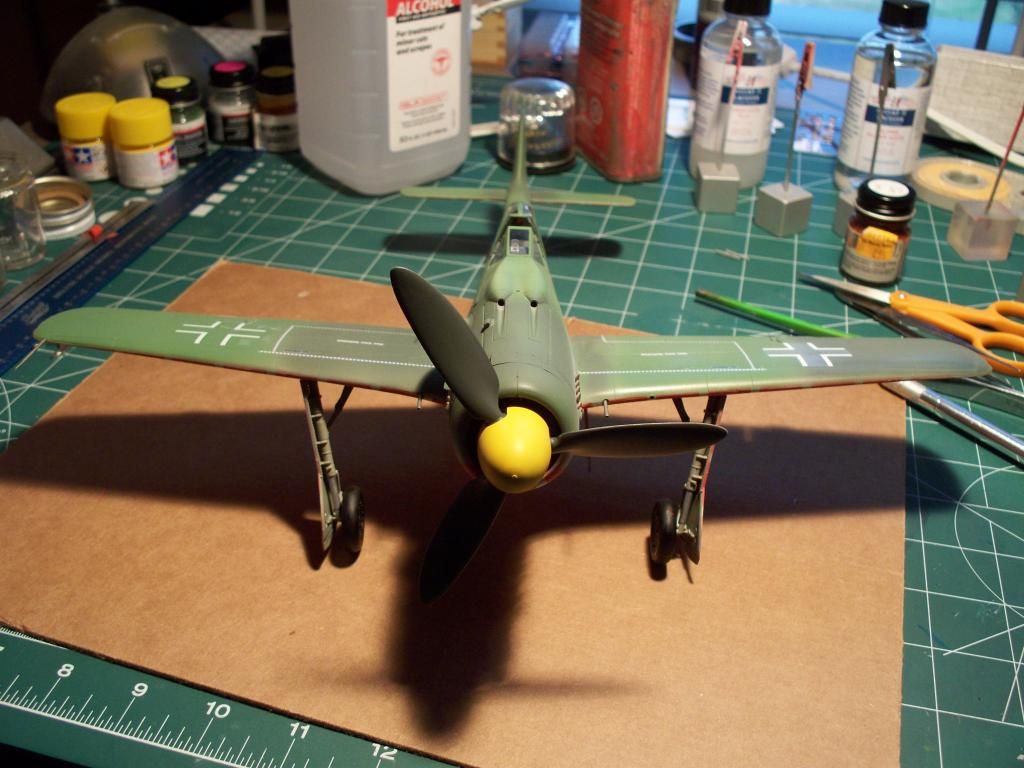
Frontal shot. If you'll notice, I mistakingly left the two cannon barrels out of the cowling. They both have to be attached from the inside, and by the time that I discovered my error, it was too late to fix it. If anyone that has built this kit in the past can give me some pointers on how to attach the cannon barrels without destroying the plane, I'm open to any suggestions. You can also see some silvering on the cross on the right wing, too.

.

.

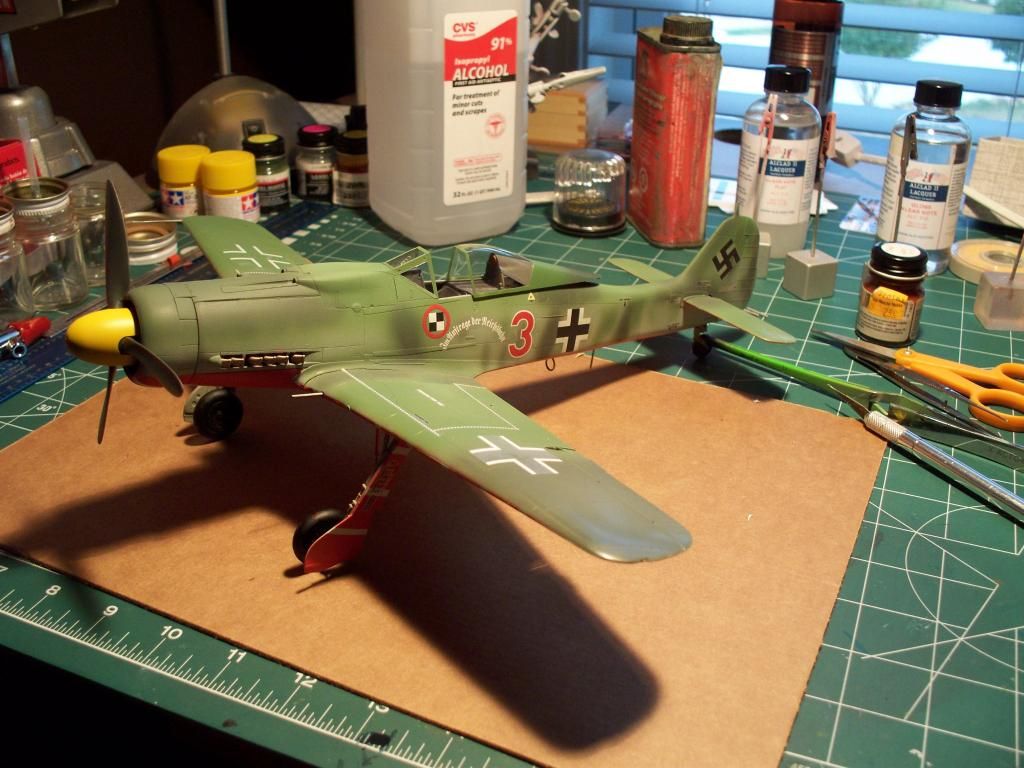
She doesn't look too bad from this angle. Depending upon how the light is shining on her, the silvering may or may not be noticeable. 

.

.

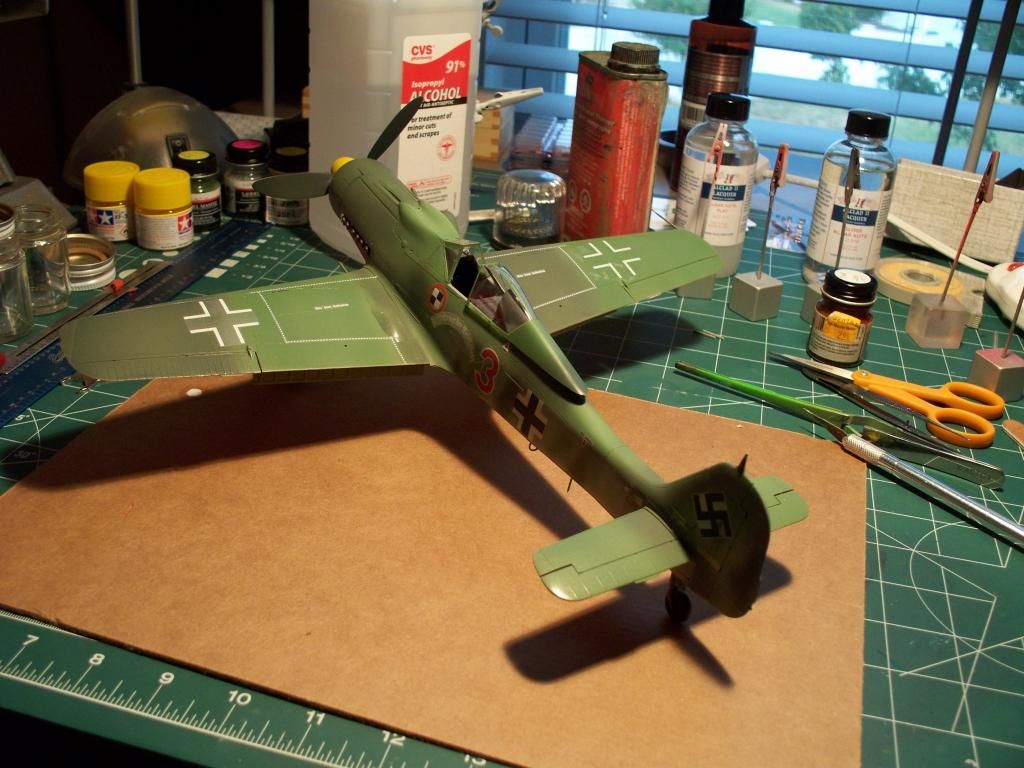
From this angle, you can definitely see the silvering on the decal just below the cockpit, on the wing crosses, and on the swastika, plus the various stencils. This will definitely be a 6-foot model....... 

.

.

Bottom view that shows the two crosses coming apart/disintegrating. Not sure why this happened. After applying decals last night, I waited about three hours for them to dry, then shot a couple of coats of Alclad II Lacquer Flat Coat to seal up everything, hoping that this would take care of the silvering as well (it didn't). I examined it all, and didn't notice anything odd with the decals, so I figured I'd let her sit overnight, and finish her up today. When I looked at her again around noon today, I noticed that the decals on the bottom had started to come apart, and I couldn't find the missing pieces of the decals at all, as though they had just "disintegrated". Anybody have this happen before? And it's only the crosses on the wing bottoms that did this - all the others are ok, other than the aforementioned silvering decals. And, if you'll look even closer, you'll see that I masked the flaps incorrectly (masked them for the wrong sides), and accordingly, the white stripes don't line up - AT ALL!!! I discovered this as I was gluing them in-place this afternoon.

You know what? I'm glad this one is finished. The paint job came out very well, but all the other little problems, including the self-inflicted ones, made it a slight pain to build. Hopefully, my next one will be a lot easer and relaxing. 

Folks, let me know whatcha think. Thanks for giving her a look.

Devil Dawg

On The Bench: Tamiya 1/32nd Mitsubishi A6M5 Model 52 Zeke For Japanese Group Build

Build one at a time? Hah! That'll be the day!!

  • Member since
    November 2003
  • From: State of Mississippi. State motto: Virtute et armis (By valor and arms)
Posted by mississippivol on Monday, September 1, 2014 7:21 PM

Looks great!

  • Member since
    February 2003
  • From: Cameron, Texas
Posted by Texgunner on Monday, September 1, 2014 7:58 PM

Yeah, I think so too "Dawg.  Bow Down

Gary

btw- As far as I know, Future is clear gloss acrylic.Big Smile


"All you mugs need to get busy building, and post pics!"

  • Member since
    August 2009
  • From: Borlando Fla home of the rat
Posted by TREYZX10R on Monday, September 1, 2014 9:51 PM

Been a long time coming but worth the wait,it looks really sharp Dawg! I too have forgotten the cannon barrels before,was able to cut them short and with some thin foam safe c/a(it wo'nt fog) was able to sneak them in without hurting my build,hope that helps. As for the decal silvering sometimes I use the point of a fresh #11 blade and poke holes gently in the decals and then saturate them with decal solv, sometimes it does the trick. The paint work you've done looks nice and crisp ,no bleed thru's or creep,very nicely done Sir!!!

  • Member since
    June 2003
  • From: Rowland Heights, California
Posted by Duke Maddog on Tuesday, September 2, 2014 10:29 AM

Very nicely done Dawg! I also use Trey's technique of poking the decals with a very sharp/new No. 11 blade and adding either decals solvent or Future to them to allow it all to bleed under the decal and seal it down better. This is a most impressive model, especially given the scale and complexity of it. Well done!

  • Member since
    May 2013
  • From: Indiana, USA
Posted by Greg on Tuesday, September 2, 2014 11:28 AM

Very nicely done, indeed! She's a beaut.

On the cowling barrels, I'd do what Trey said. Or another option might be aftermarket brass barrels. I used them on my last 190, and gluing them on was one of my last steps.

  • Member since
    June 2014
Posted by BrandonK on Tuesday, September 2, 2014 11:53 AM

I love it. I will have to add this version to my stash. I really love the red and white belly. Nice job, it looks fantastic.

On the bench:

A lot !! And I mean A LOT!!

2024 Kits on deck / in process / completed   

                         14 / 5 / 2  

                              Tongue Tied

  • Member since
    February 2007
  • From: Brunswick, Ohio
Posted by Buckeye on Wednesday, September 3, 2014 11:22 AM

Very nice work!  Love the colors on this one.

Mike

  • Member since
    March 2005
  • From: Lancaster, South Carolina
Posted by Devil Dawg on Thursday, September 4, 2014 10:49 AM

Mississippi, Tex, Trey, Duke, Greg, BrandonK, & Buckeye,

Thanks to all of you for the kind words and suggestions on my Dora. I will certainly give them all a try to see if she can look a little better.

As far as all Future being clear gloss acrylic - well, it used to be, but not anymore. There are now different formulas for it, depending upon what type of surface you have (wood, linoleum, etc.). Gotta pay close attention to the bottle to make sure that you get whatcher thinkin' yer gettin'. Think I'll start using the Testor's Gloss Coat Lacquer from now on, just to make sure that I'm spraying the right stuff......

Devil Dawg

On The Bench: Tamiya 1/32nd Mitsubishi A6M5 Model 52 Zeke For Japanese Group Build

Build one at a time? Hah! That'll be the day!!

JOIN OUR COMMUNITY!

Our community is FREE to join. To participate you must either login or register for an account.

SEARCH FORUMS
FREE NEWSLETTER
By signing up you may also receive reader surveys and occasional special offers. We do not sell, rent or trade our email lists. View our Privacy Policy.