SEARCH FINESCALE.COM

Enter keywords or a search phrase below:

1/32 F-14B BombCat

23627 views
86 replies
1 rating 2 rating 3 rating 4 rating 5 rating
  • Member since
    October 2012
Posted by bimski on Wednesday, April 23, 2014 10:29 PM

Here's the answer Dre.........

prep the part to be cut

the Zactomodel intake kit included some extra support

saved me a lot time re-shaping the trumpe intake

Then dry fitted all the parts that goes inside the main fuselage


still need to do second  coating on the intake before glueing

enjoy........

Dre
  • Member since
    June 2007
  • From: here, not over there
Posted by Dre on Thursday, April 24, 2014 10:57 AM

Cool, thanks for showing us that, Bimski.   Bookmarked for later references....

  • Member since
    October 2012
Posted by bimski on Friday, April 25, 2014 6:26 PM

Slowing down  on the build needed to shop for some reference book (Uncovering Grumman F-14 by Danny Coreman ) a very useful guide if you really want to add detail on this bird plus I need to let the CA glue cure, mending plastic with resin is not easy had to use baking soda to speed-up the weld

  • Member since
    April 2007
  • From: Twin Towns, MN
Posted by MAgather on Sunday, April 27, 2014 10:44 AM

Beautiful build bimski.  Lots of good guidance here.

Good Modeling,
  • Member since
    October 2012
Posted by bimski on Monday, April 28, 2014 4:21 PM

@MAgather .....thanks

Zactomodel intake blade on the left and trumpeter on right

after painting the intake blade looks great no re shaping needed

Not gonna be seen when instaled.............still enjoyed painting this powerplantGeeked

  • Member since
    June 2013
Posted by bvallot on Monday, April 28, 2014 8:40 PM

These...are A-MAZING!!!  I wish they made more things like this for the 1:48.  Even the AM stuff.  All the F-4 Phantom AM stuff out there...and nothing in the 1:48!?!  Really?

Anyhow...These are great.  Excellent work here.  =]

On the bench:  

Tamiya F4U-1  Kenneth Walsh


Dre
  • Member since
    June 2007
  • From: here, not over there
Posted by Dre on Tuesday, April 29, 2014 11:54 AM

Great work on those engines!

  • Member since
    April 2007
  • From: Twin Towns, MN
Posted by MAgather on Thursday, May 1, 2014 12:59 AM

Love those engines.  I've got the 1/32 Tamiya I've been dragging around for almost 30 years. Actually described the raised details 6 months ago or so, but got caught up in a couple of GB's and it went back to the dugout for a bit.

Good Modeling,
  • Member since
    October 2012
Posted by bimski on Thursday, May 1, 2014 11:48 AM

Build update..........

did the final gluing of the intake & wheel bay the bulk of the CA was applied inside to keep the outside clean

here a delrin plastic was glued on the end shaft of horizontal stabilizer to make them movable

result after closing the main fuselage

Just to show the size of the F14 next to a mig killer F4

enjoy

Dre
  • Member since
    June 2007
  • From: here, not over there
Posted by Dre on Thursday, May 1, 2014 2:08 PM

How did the rear gear wells fit into the fuselage?  I see a gap all the way around yours, but dry fitting them on mine shows that I'll have to do a little cutting and shaving... and I'm not entirely sure of how they're supposed to sit in there anyhows.

  • Member since
    October 2012
Posted by bimski on Thursday, May 1, 2014 3:10 PM

@Dre........the instruction on the Aires box says you need to thin out the outside/back of the rear wheel bay ( remove the shaded part) but doing this will leave the part wall too thin and will warp anytime the weather goes up ......took me a while to figure out how to avoid this ...CA(super glue) will require complete drying before you can apply force ,using accelerator or household baking soda will speed the process and welding one side at a time will give you a good fit......the space/gap you see on the picture is just the angle of the camera/lens but on a straight shot the gap are just minimal

  • Member since
    October 2012
Posted by bimski on Thursday, May 1, 2014 3:33 PM

Geeked..........

Dre
  • Member since
    June 2007
  • From: here, not over there
Posted by Dre on Thursday, May 1, 2014 5:47 PM

OK, thanks!   The resin instructions I have don't mention any shaded part, just a diagram showing 'this goes there'.   I was also unsure if the wheel well walls were to sit flush with the exterior plastic or not, but that pic certainly tells me otherwise.

I was planning on using a 2-part epoxy to set mine (when I get back to it)- surely that will do?

You might feel that you've remotely built a second Tomcat by the time I get done asking dumb questions about this one, sorry.

  • Member since
    June 2012
  • From: Canada
Posted by tates on Friday, May 2, 2014 4:31 PM

I'm in the same boat as dre. I'm following your build closely as I plan to be starting my trumpy bombcat soon. Got my am parts, including the wolfpack cockpit. And I just ordered 2 sets of corrected intakes. (I have two trumpy tomcats)

  • Member since
    October 2012
Posted by bimski on Saturday, May 3, 2014 4:41 PM

Progress.........

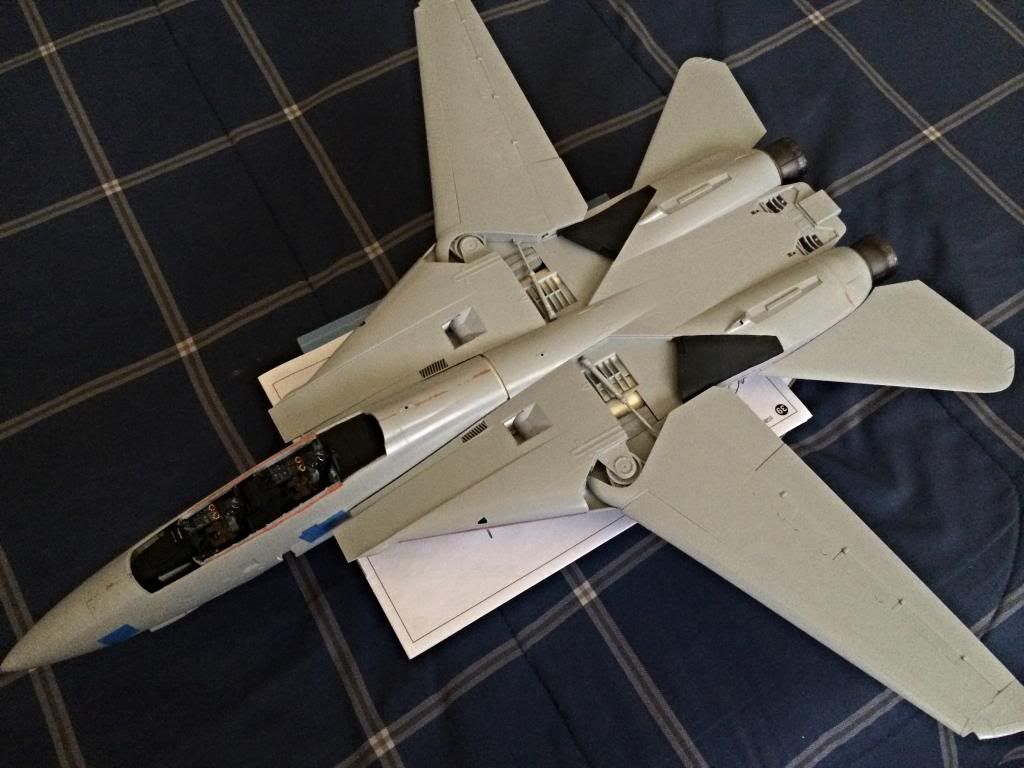
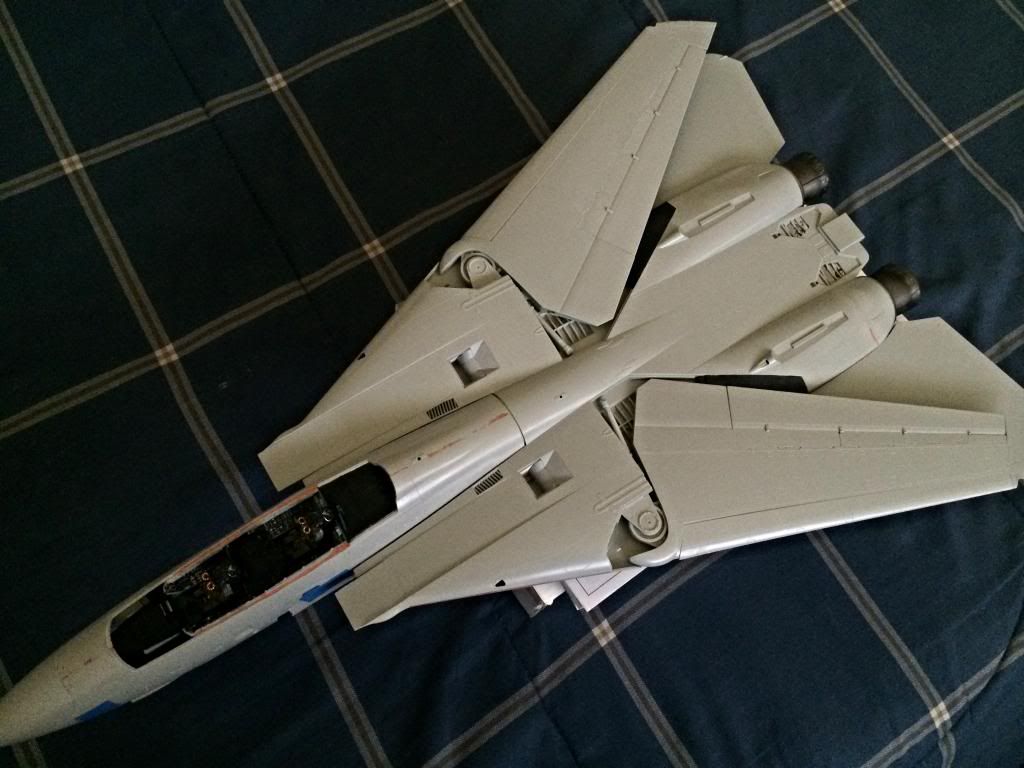
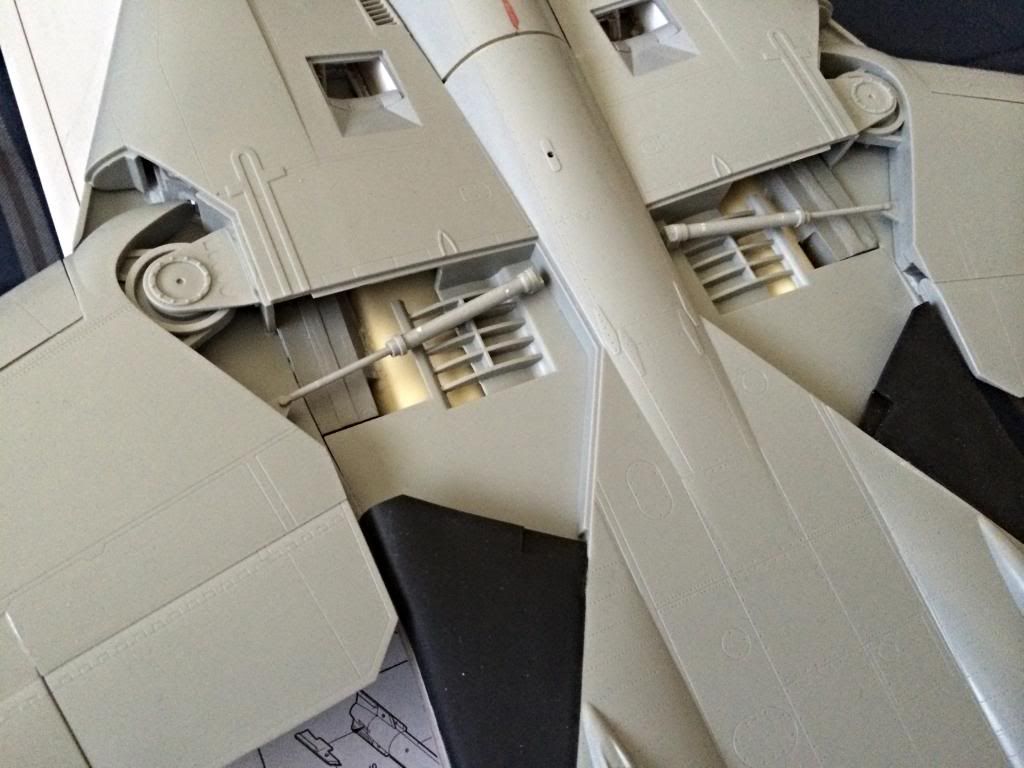
the beast is now taking shape........decided to go with a flat wing so i can move them open/close

PE parts was added on the 20mm vulcan cannon .....just need to figure out how to make them open and close

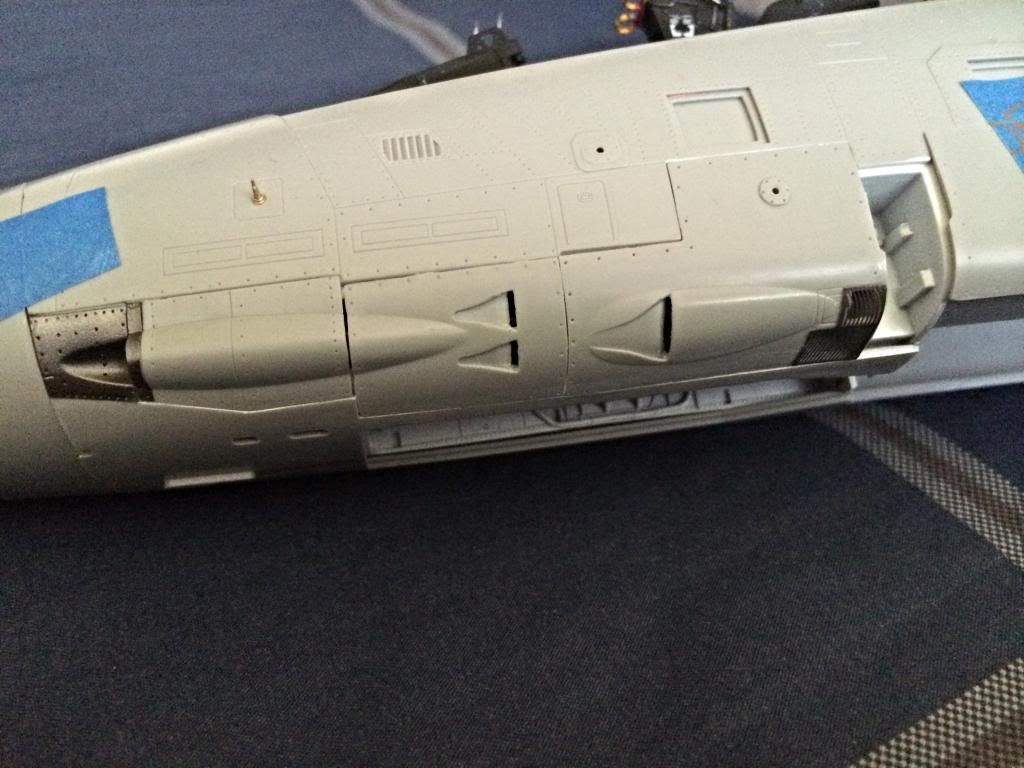
fixing the gap will mean keeping the gun bay closed for good

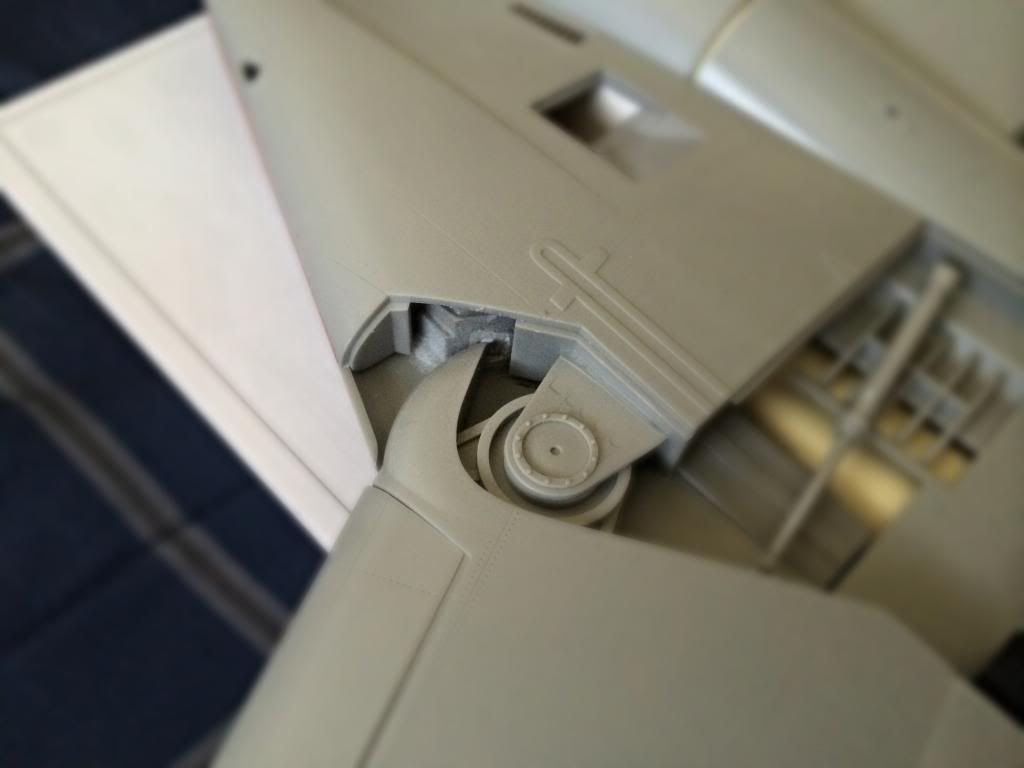
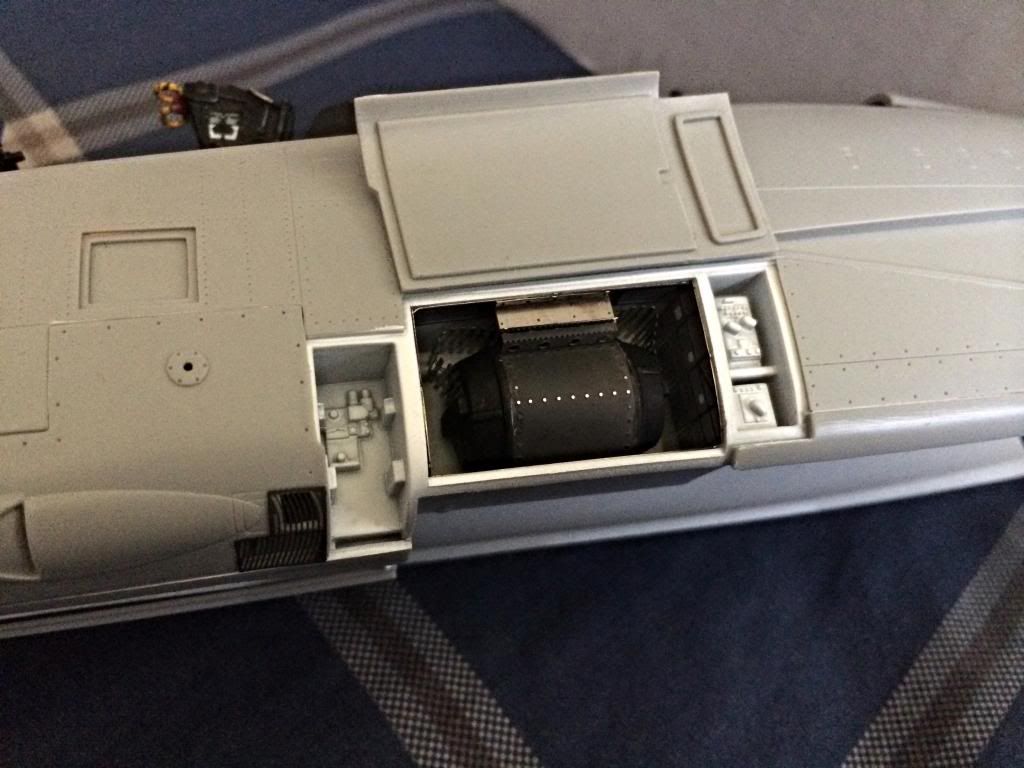
heads-up for those using the Aires wheel bay ....if you open up the wings all the way a section of the wheel bay will come in contact shaving this area extra thin will help

love the trumpeter for making this extra effort instead of correcting what can be seen Zip it!

Dre
  • Member since
    June 2007
  • From: here, not over there
Posted by Dre on Saturday, May 3, 2014 5:42 PM

Looking good!   I guess that their priorities lie elsewhere....

  • Member since
    June 2013
Posted by bvallot on Saturday, May 3, 2014 7:35 PM

Amazing!! I'm listening to Kenny Loggins right now!! I can't wait to build my own. =D

On the bench:  

Tamiya F4U-1  Kenneth Walsh


  • Member since
    February 2014
Posted by T3chDad® on Tuesday, May 6, 2014 7:01 AM

Georgeous work.  Looking forward to more updates.


  On the bench: Between Builds...

  • Member since
    October 2012
Posted by bimski on Tuesday, May 6, 2014 11:54 AM

 Encountered another bump ....was trying to complete and close the cockpit when i dry fitted the canopy this is how it end up Angry

Dre
  • Member since
    June 2007
  • From: here, not over there
Posted by Dre on Tuesday, May 6, 2014 5:42 PM

What's causing the mis-fit?   I had a similar issue on their 1/32 Su-27 and it took careful gluing and a very strong tape to get it sit properly.

  • Member since
    October 2012
Posted by bimski on Tuesday, May 6, 2014 9:04 PM

This 2 parts(part# G5,G3) are the one causing problem ....had to grind the latch on the canopy and will re-create using styrene

guess the trumpe people did not want the canopy closed.......Geeked

  • Member since
    October 2012
Posted by bimski on Tuesday, May 6, 2014 9:31 PM

looking much better now...............

  • Member since
    February 2014
Posted by USMC6094 on Wednesday, May 7, 2014 7:23 AM

I heard the Trumpeter kits were kind of quirky, guess thats one of the quirks  

  • Member since
    October 2012
Posted by bimski on Thursday, May 8, 2014 9:24 PM

more update.........

Able to shrink the gap on the canopy by shaving the underside of part#G5 and G3.......the trumpe bomb rack will be replaced with wolfpack resin ......tried to fix the lifeless looking  trumpe bomb rack with PE parts.....not happy with the resultCrying

Zactomodel intake are on the spot.........very happy with the result

enjoy.......

  • Member since
    June 2013
Posted by bvallot on Thursday, May 8, 2014 11:36 PM

You're absolutely right about those intakes! They make this shape work. =]

On the bench:  

Tamiya F4U-1  Kenneth Walsh


  • Member since
    February 2012
  • From: Olmsted Township, Ohio
Posted by lawdog114 on Friday, May 9, 2014 1:24 AM

I'm not too into jets, but this is great work.  I look forward to the finished product......and those engines are nothing short of spectacular....

Joe

 "Can you fly this plane and land it?...Surely you can't be serious....I am serious, and don't call me Shirley"


  • Member since
    October 2012
Posted by bimski on Friday, May 9, 2014 10:13 PM

update...........worked on the landing struts added some lines/PE to make it acceptable with the Aires wheel bay

dry fit was a success ...........no fitting issue here

Did some minor re-shaping on the trumpe parts so it can snap in with the aires bay

same with the front struts

enjoy...........

  • Member since
    October 2012
Posted by bimski on Sunday, May 18, 2014 9:00 PM

Update..........

The wolfpack bomb rack showed up, work on the F14 continues ........

the beast is starting to look and feel heavy ........

enjoy........

cml
  • Member since
    March 2007
  • From: Brisbane, Australia
Posted by cml on Sunday, May 18, 2014 10:52 PM

Great progress Bimski - I'm really enjoying this WIP thread.

I have the A version in my stash - it's on the backburner until I feel confident enough to tackle it.

Picking up some great pointers from your build though.

Chris

Dre
  • Member since
    June 2007
  • From: here, not over there
Posted by Dre on Tuesday, May 20, 2014 11:26 AM

I bet that its quite heavy now, what with all that resin.    Great work all around and those landing gear tweaks are very sharp!  

JOIN OUR COMMUNITY!

Our community is FREE to join. To participate you must either login or register for an account.

SEARCH FORUMS
FREE NEWSLETTER
By signing up you may also receive reader surveys and occasional special offers. We do not sell, rent or trade our email lists. View our Privacy Policy.