SEARCH FINESCALE.COM

Enter keywords or a search phrase below:

Sopwith Snipe(s)-WNW 1/32 9/3 A pair of completions

10557 views
56 replies
1 rating 2 rating 3 rating 4 rating 5 rating
  • Member since
    April 2005
  • From: Piscataway, NJ!
Posted by wing_nut on Friday, July 4, 2014 12:06 AM

I keep forgetting how different summer building is so different from winter build.  Maybe cuz I have yet to figure out why hot=less.

Be that as it may, work has been done. Every part that need clean up has had it and just waiting there turn.  Most are sitting on a big Styrofoam block and their own little alligator clip waiting for paint.  WHICH HAS BEGUN!  I am starting on E8015 which has a green (PC10) fuselage, brown (PC12) upper wing, and clear doped linen lower wings.  This is why the wings are being done separately.  The other bird is all sliver doped so the lower wing has already been attached.

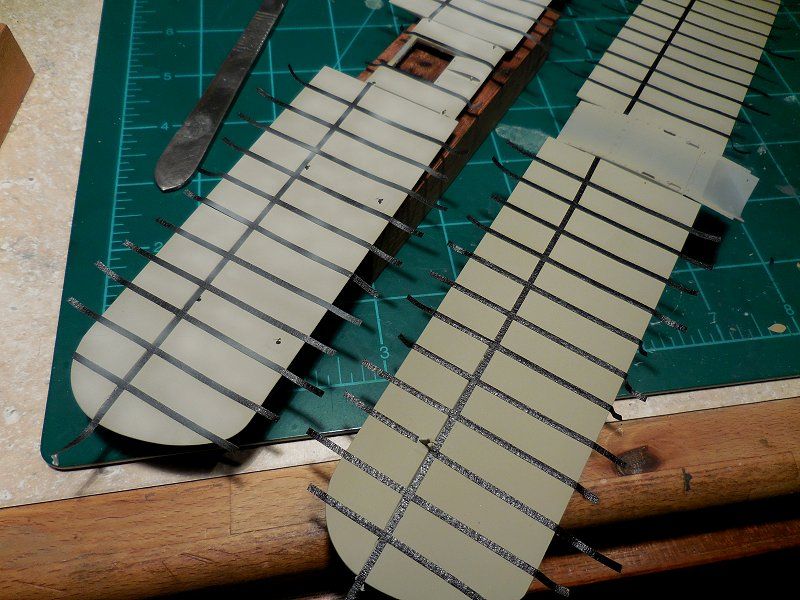
Since the brown wraps around the LE a tiny bit the wings were used to make tape masks.
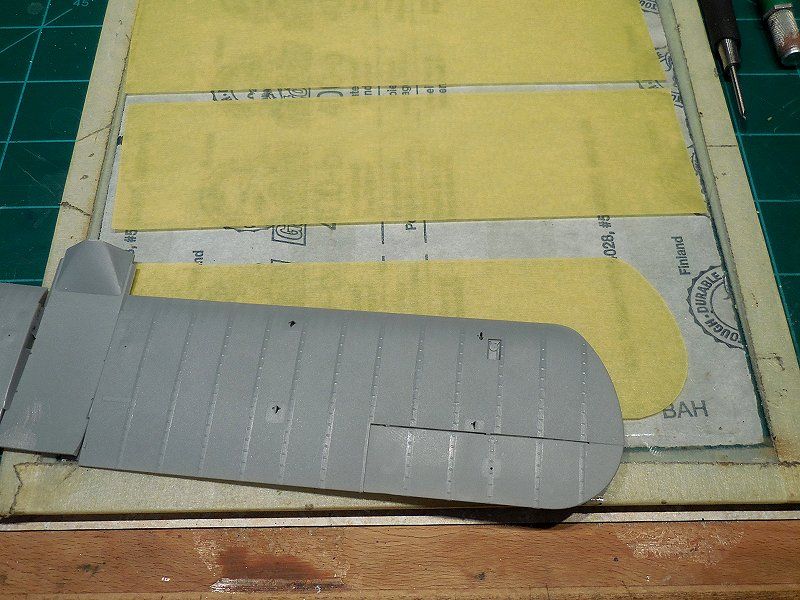
 

First is a base coat of Tamiya deck tan with the tiniest drop of black to darken.  The ribs and spar are taped and an uneven coat of deck tan made fairly light fills in all the spaces.  Then some straight deck tan was sprayed following the tape hold the AB far enough away to just straddle the tape with overspray.
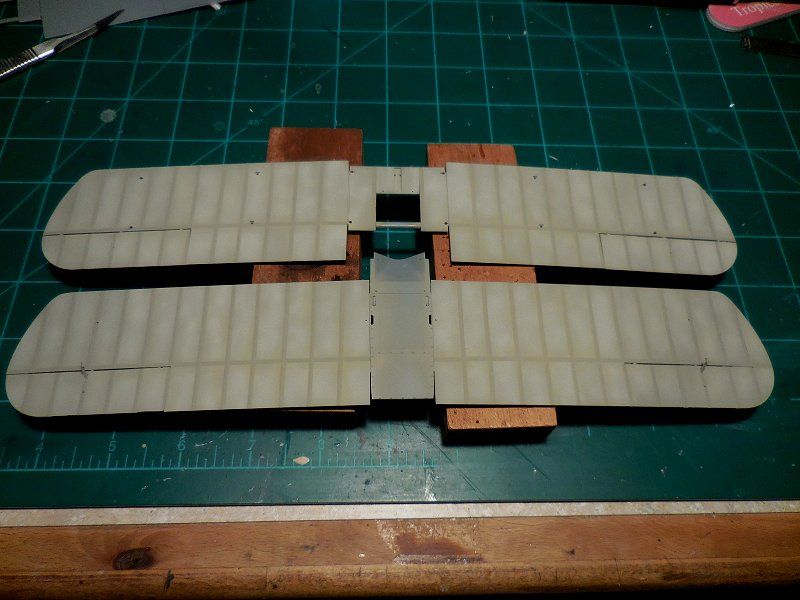
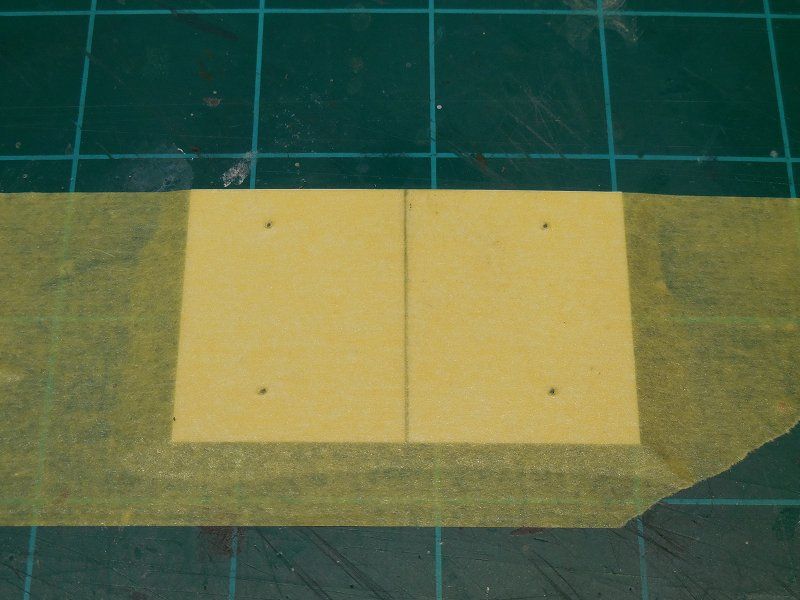
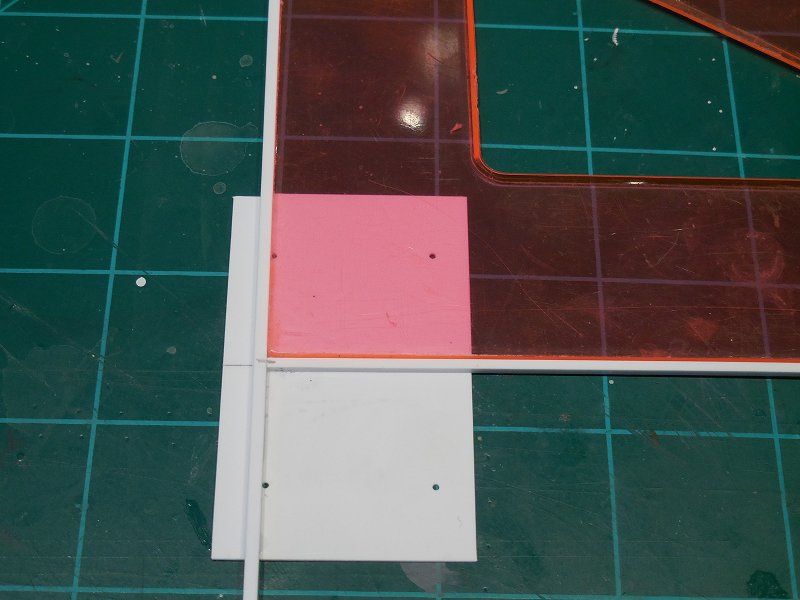
My cabane jig worked so well on the Albatros and the Roland I figured… what the heck.  Let’s give it a go again.

Tamiya tape was used to transfer the cabane strut holes to a piece of sheet plastic.
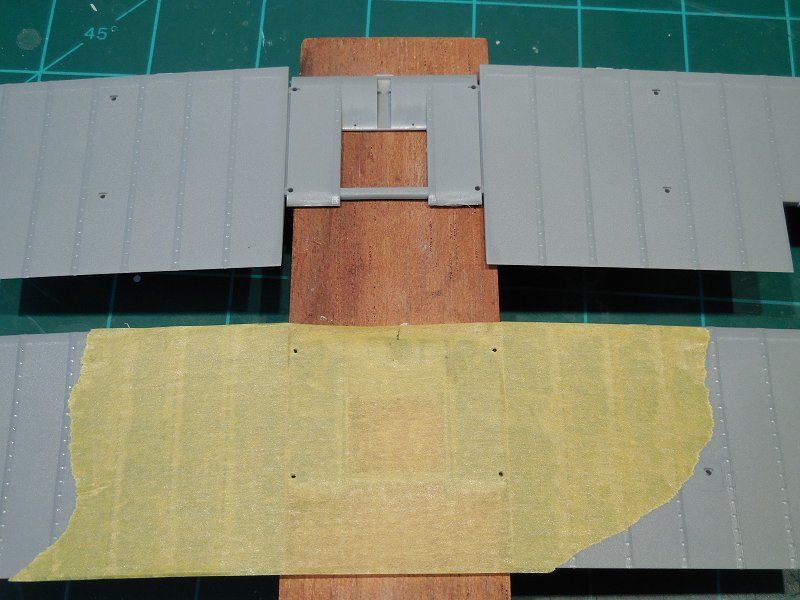
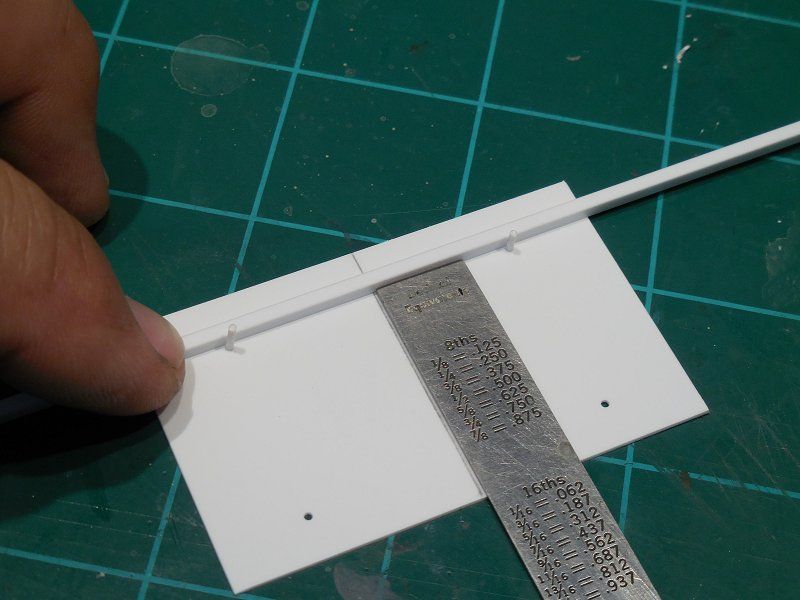
Plastic rod starts the process of keeping everything square.
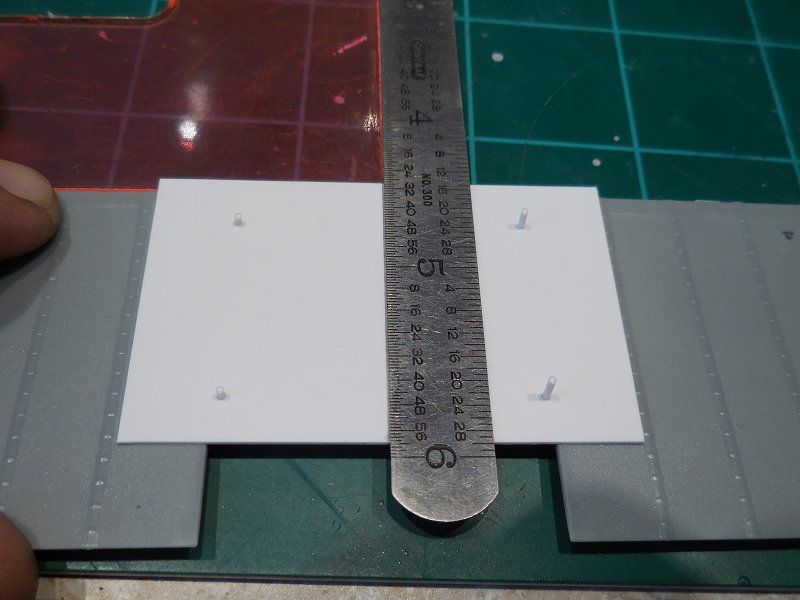
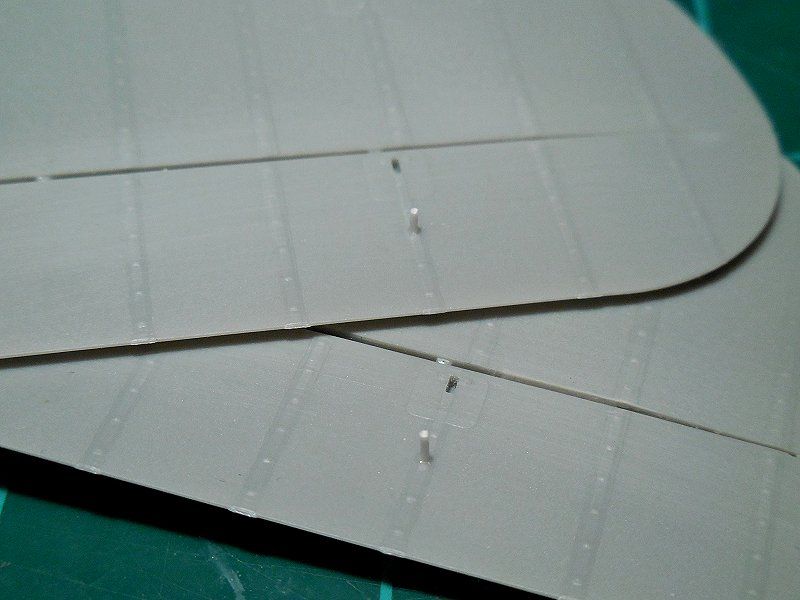
To make the rigging easier I plan to run a single line from wing to wing through the control surfaces.  But the hole did not line up when I drilled though 1 of the molded holes.  So I filled one side with plastic rod that was chiseled of so only one hole showed after I drilled through.
A little bit more painting and the wings will be going on his guy.

Marc  

  • Member since
    October 2013
Posted by Big Blue on Saturday, July 5, 2014 10:53 AM

Looking good Marc.

I am interested to learn about what you are doing with the cabane jig.  When I mounted my upper wing, I let the glue dry while resting the leading wing edges across the edges of the open kit box (as if the plane was nose-diving into the box).  This seemed to keep everything square.  Did I just get lucky, or does your jig deal with some other issue?

Paint job looks lovely so far.

Blue

  • Member since
    April 2005
  • From: Piscataway, NJ!
Posted by wing_nut on Saturday, July 5, 2014 12:02 PM

Hey blue... thanks.


I guess it doesn't really do too much different.  No other issues. Once the cabanes are "locked" in place the upper has no choice but the be square.  I saw method you used on the WNW site.  1st time I used this I was worried about moving it once the wing is on so this way I didn't have to.


Gettin' ready to go to a big BBQ so I tried to get as much in as I could before the hands are too shaky to trust ;)  A quick photo before th elbow bending begins.

This can sit for awile and really cure while I work on it's brother.

Marc  

  • Member since
    October 2013
Posted by Big Blue on Tuesday, July 8, 2014 7:16 AM

Very nice Marc.  Looking forward to seeing its sibling.

  • Member since
    January 2014
  • From: Toronto
Posted by Rob S. on Tuesday, July 8, 2014 5:10 PM

Wicked work so far Marc

______________________________________________________________________________


On the Bench: Nothing on the go ATM

  • Member since
    April 2005
  • From: Piscataway, NJ!
Posted by wing_nut on Tuesday, July 8, 2014 6:56 PM

Blue, Rob... thanks for looking in guys... and the kind words.

Marc  

  • Member since
    March 2013
Posted by Ssasho0 on Thursday, July 10, 2014 3:02 AM

I Just found your build and read all the pages. It looks very good and the fun just begins ;) I especially liked how you added additional wood texture to the cockpit walls!

Waiting for more photos

  • Member since
    April 2005
  • From: Piscataway, NJ!
Posted by wing_nut on Friday, July 11, 2014 8:51 AM

Thanks sasho.  I barely have time to say "Thanks sasho" but I will get there.Wink

Marc  

  • Member since
    April 2005
  • From: Piscataway, NJ!
Posted by wing_nut on Friday, July 18, 2014 9:41 AM

The painting continues… finished really and the gloss coats are dry as we speak…er...type.


1st to do was spray the lighter toned silver, taping the ribs then the color coat it was time for some shading.  The perfect tool for that is the trusty Post-It.  But… put the airbrush, down… place the post-it… pick up the AB…spray a little darker tinted silver… put AB down again… move the post-it… 44 TIMES. I think I did 3 ribs before I said the heck with that.  It took just a few minutes to overlap them so all I had to do was peel the next one off and keep going. 


A quick spray centered over the mask and Bob’s your uncle.  Shading done.


As I was clear coating I noted a gash in the paint on one of the fuselage.  Nothing sanding, painting and cursing can’t handle.  Gonna get a few decals down tonight.

Marc  

  • Member since
    October 2013
Posted by Big Blue on Saturday, July 19, 2014 11:39 PM

Getting there Marc.  Looking forward to seeing them with some decals!  

Not too much longer before you're rigging.

  • Member since
    April 2005
  • From: Piscataway, NJ!
Posted by wing_nut on Monday, August 4, 2014 6:01 PM
Hi gang. Finally got something to post. The alignment jig worked it magic once again. The cabanes were inserted into their respective hole in the fuselage and left loose. On a WNW "loose" only means not glued since they are anything but loose. The jig is put in place and some minor adjustments made. Looking from a few angles to confirm the extensions are straight and square a drop of thin CA is pout at the base of each strut. The upper wings just drops n place perfectly.   A few mock up pick with the upper wing set in place. 8015 has the wings faded with a dot filter and some streaking on the fuselage with some AK Streaking Grime. Hard to see in the pics. The silver bird needs some of that next. It'll be time for rigging before you know it.

Marc  

  • Member since
    April 2014
Posted by r13b20 on Monday, August 4, 2014 8:05 PM

Very nice work! And, I am somebody's uncle! Bob

  • Member since
    October 2013
Posted by Big Blue on Monday, August 4, 2014 9:23 PM

Oh man, they both look great, Marc.  Very nice.

  • Member since
    April 2005
  • From: Piscataway, NJ!
Posted by wing_nut on Tuesday, August 5, 2014 7:49 AM
r13b20

Very nice work! And, I am somebody's uncle! Bob

LOL. And glad you like 'em so far. Thanks Blue. Can't remember if I asked this before or not but do you have WIP pics of your rigging? I need some inspiration.

Marc  

  • Member since
    October 2013
Posted by Big Blue on Tuesday, August 5, 2014 4:42 PM

Not too many WIP rigging pics, Marc.  What are you looking for?  I  have one close up of the tail rigging, and one or two of the wings mid-process.

Edit:

Here's what I have:

Probably not much help...

  • Member since
    April 2005
  • From: Piscataway, NJ!
Posted by wing_nut on Wednesday, September 3, 2014 10:38 AM
Barely time for building so less time for posting but did manage to get the 2 Snipes built. I just need to fix the rigging on the trainer at the front since it's coming out of the wrong hole in the fuselage.

Marc  

  • Member since
    November 2009
  • From: SW Virginia
Posted by Gamera on Wednesday, September 3, 2014 11:26 AM

WOW, Marc- those are friggin' gorgeous!!! Heart

"I dream in fire but work in clay." -Arthur Machen


  • Member since
    April 2006
  • From: ON, Canada
Posted by jgeratic on Wednesday, September 3, 2014 11:51 AM

Marc  - beautiful work! Yes

Your client should be extremely happy with these.

regards,

Jack

  • Member since
    December 2002
  • From: Northern California
Posted by jeaton01 on Wednesday, September 3, 2014 7:03 PM

Wow, Super, Marc!  I've been so tied up with other projects that my bench probably doesn't know who I am.

John

To see build logs for my models:  http://goldeneramodel.com/mymodels/mymodels.html


  • Member since
    October 2013
Posted by Big Blue on Wednesday, September 3, 2014 11:51 PM

Oh man, they came out great, Marc!  Well worth the wait!

Love them both.

  • Member since
    March 2003
  • From: Western North Carolina
Posted by Tojo72 on Thursday, September 4, 2014 12:25 AM

Looks great over here too Marc

  • Member since
    April 2005
  • From: Piscataway, NJ!
Posted by wing_nut on Thursday, September 4, 2014 7:16 AM

thanks so much guys.  I really appreciate the comments.

Marc  

  • Member since
    March 2005
  • From: Lancaster, South Carolina
Posted by Devil Dawg on Thursday, September 4, 2014 4:46 PM

In the immortal words of Steve Martin: Wow. All I can say is "Wow". Beautiful jobs!

Devil Dawg

On The Bench: Tamiya 1/32nd Mitsubishi A6M5 Model 52 Zeke For Japanese Group Build

Build one at a time? Hah! That'll be the day!!

  • Member since
    April 2005
  • From: Piscataway, NJ!
Posted by wing_nut on Friday, September 5, 2014 7:27 AM

Thanks Dawg.  

Marc  

  • Member since
    February 2003
  • From: Cameron, Texas
Posted by Texgunner on Friday, September 5, 2014 7:47 AM

That is some beautiful work Marc!  Bow DownBow DownBow Down

Gary


"All you mugs need to get busy building, and post pics!"

  • Member since
    October 2003
  • From: Southern California
Posted by ModelNerd on Saturday, September 6, 2014 1:16 AM

Hey Wing, long time. Those came out awesome. Great work as always!

- Mark

  • Member since
    April 2005
  • From: Piscataway, NJ!
Posted by wing_nut on Saturday, September 6, 2014 7:25 AM

Greg, Mark... thanks guys.  Good to see ya Mark.

Marc  

JOIN OUR COMMUNITY!

Our community is FREE to join. To participate you must either login or register for an account.

SEARCH FORUMS
FREE NEWSLETTER
By signing up you may also receive reader surveys and occasional special offers. We do not sell, rent or trade our email lists. View our Privacy Policy.