SEARCH FINESCALE.COM

Enter keywords or a search phrase below:

Improving the Revell 1:48 P-40B (Complete)

24224 views
109 replies
1 rating 2 rating 3 rating 4 rating 5 rating
  • Member since
    June 2013
Posted by bvallot on Tuesday, March 10, 2015 3:05 PM

Thanks Joe & Joe. =]

Lawdog, I would probably try to twist your arm to do this kit if you think you could put up with it.  For a few extra bucks on a cockpit and maybe exhausts you come out with a better kit for the same price as Hobbycraft/Academy or Trumpeter.  It takes a little extra love, but I think it makes a difference.

In my haste over the weekend, I forgot this little tidbit.  My wife was rushing me to bed before the time change since we had an early day the next morning and I didn't see that I hadn't dropped this last little piece into place for the Main Gear strut.

This guy, who's name escapes me, seems to be responsible in some part for the wheel hub as well as a tie down point.  It was made with Albion's aluminum 0.8 mm tube.  I drilled a hole straight through and cut for the length while pinching down on the outside edge and filing it smoother. Viola!!  The aluminum is more malleable than brass or some other metal and lends itself better to things like this.  Give it a try.

 Untitled by brittvallot, on Flickr

I've since found better photos than I had previously.  The way the kit originally fashioned this part could probably be left alone.  I elected to cut it off completely as you see here (which I think works better to scale) but if you didn't want to bother with so much fuss, I believe it'd be possible to drill your hole and sand down to something more appropriate. 

On the bench:  

Tamiya F4U-1  Kenneth Walsh


  • Member since
    June 2013
Posted by bvallot on Thursday, March 26, 2015 11:15 PM

I've finally wrapped up the tail gear and had hoped to have the canopy finished as well for this next part, but it seems I'll have to redo the windscreen and canopy from Squadron.  I was unable to get the raised framing out and sanded clear.  The Novus mostly worked, but just not quite well enough.  Perhaps, I just need more practice with it.

For now, I can shut the book on the landing gear. =]

I've redone the tail gear doors that were modified for the B version.  Curtiss cut into the gear door a hub for the tire to fit better.  Revell has something to represent this and it's not too bad.  I decided to spruce it up a bit and make my own.  I cut one of the doors off the kit part as a reference for my size and sanded the door to shape.  I used the very thin 0.10 in plastic sheet to make up both parts...Tamiya ETC to bond them, Yellow-Green [XF-4] to paint, and the ETC to set them on the fuselage.  I hand painted a light coat of clear to dirty them up with the Detailer.  Pretty cut and dry.  The turnbuckles (I believe is how they're referred) were done the same as the main gear struts... thin brass wire slipped through brass tube 0.40 mm. 

 by brittvallot, on Flickr

The lighting on these next two didn't come out quite as I intended.  I'll have to tinker with this for the darker OD green.  I've included these four to help show how this comes together.

 Untitled by brittvallot, on Flickr

 by brittvallot, on Flickr

That's a wrap on the landing gear/bay and tail gear.  Not too bad.  I realize I've chopped these sections up a bit, but you could basically put these together however you want.  It's really up to you and how you go about your build.  

Questions, comments...enjoy.  =]

On the bench:  

Tamiya F4U-1  Kenneth Walsh


  • Member since
    February 2012
  • From: Olmsted Township, Ohio
Posted by lawdog114 on Friday, March 27, 2015 7:25 PM

Gorgeous Britt.........nah, I have two Trumpy kits in the stash I'd build first.  I don't have your incredible scratch building skills to bring this turkey up to date.  At minimum I would scribe the lines but I told myself along time ago I would never endure to that torture again.....I look forward to the finish...  

Joe

 "Can you fly this plane and land it?...Surely you can't be serious....I am serious, and don't call me Shirley"


  • Member since
    June 2013
Posted by bvallot on Monday, March 30, 2015 3:00 PM

Well...I think you might be missing out. =]  It isn't so bad really.  Just takes being brave enough to try and definitely having the patience. That's what I keep telling myself anyhow, lol.  Work has kept me from being able to do like I want with this one, but it really shouldn't take one long.  The gear bay/flaps are the only real thing that ought to be fixed about this kit.  The rest is up the modeler.

Hopefully I can wrap this one up in the next two weeks.  I do plan to have a little grass scene something like you've done in the past.  So we'll see how that turns out.  Fingers crossed.  =]

On the bench:  

Tamiya F4U-1  Kenneth Walsh


  • Member since
    June 2013
Posted by bvallot on Tuesday, April 7, 2015 10:02 PM

And Finally!  Finished the canopy/windscreen.  =D  Took me long enough and a few tries, but now I'm able to call it complete.

So without backtracking over failed attempts too much, I did remember to catch a couple of pictures for some in-between moments to illustrate what I've done here.  Now, I don't think this is absolutely necessary to come out with a satisfying Hawk, but I wanted to go the extra mile with mine since it'll be the last one I do for quite a while I'm guessing.  

Below you see the scratchbuilding of the bullet-proof glass deflector that was angled in on the inside of the windscreen.  My first attempt was about 20% too big so I began on the one you see here.  Two holes were first drilled into the top border with an exacto blade (no. 11) to keep the holes tiny.  They were placed where the sides would meet up underneath so as to be up against the inside of the border.  This will also serve as a means of dropping in the clear piece of acetate I'm using for glass.  I've placed one side with the top and one side with the bottom so I can match them both at once.  Tamiya ETC was used to bond them.  A tiny brass wire was placed in each hole a glued with CA to the insides of the side borders.  I allowed them to stick out of the top some what long so that I can fold them over in order to make my hinge that will join it to the cross bar at the top of the windscreen.  This method will keep it all one piece and make it stronger and less to fuss with when setting it on the crossbar.  =]  With a good pair of tweezers, you can squeeze these ends down pretty tightly so that they won't appear as separate ends.  Also, a drop of CA will fill these gaps when you go to paint them.

Untitled by brittvallot, on Flickr

For the windscreen...here's where brave meets stupid as I had mentioned earlier in this thread.  I personally wanted to create the gun reflector that was crudely placed on the -B variant only I wasn't sure I'd get a second chance to get it right should I make a mistake.  So measure twice, then measure again. With my no. 11 exacto blade, I made four tiny holes over an area of Tamiya tape (at the corners) that I cut to be the size of the gun reflector.  These holes are to accept the pins that hold them to the windscreen.  Originally, I tried brass wire, but ultimately they proved to be to flimsy to manipulate and secure the other parts.  I moved on to 0.4mm brass tube from Albion that I used earlier for the landing gear and they were just the thing I needed.  I placed the whole length of tube through the upper holes first and clipped them with a sprue cutter and place a drop of white glue from Micro Sol to help secure them in place.  The brass color will also represent the cap on top of the windscreen as seen from outside the plane.  I did the same with the lower pins and with a drop of CA on each pin on the left side, I applied one thin strip of plastic cut to hold one side of the reflector.  The other thin strip was glued with the Micro Sol white glue to the clear acetate and allowed to dry.  Then, two drops of CA were place on the right two pins and married to complete the assembly.   Not terribly difficult...just a pain in the neck trying to pull off.  Take your time with this.  It's not so tough...it just takes patience!  and probably a healthy vocabulary of curse words.  =]

A small diameter brass rod was bent into place to serve as a mold for the plastic strip I cut out for the interior of the windscreen.  It worked to give me both the outside and inside to cut.  This was sanded down prettier and riveted to dress up the detail.  A small plastic rod was sanded down on the sides to a taper and bonded with Tamiya ETC to the border around the windscreen.  This rod will be the crossbar for the bulletproof glass.

 Untitled by brittvallot, on Flickr

 Untitled by brittvallot, on Flickr

url=https://flic.kr/p/s1mQmr] [/url]Untitled by brittvallot, on Flickr

 Untitled by brittvallot, on Flickr

 Untitled by brittvallot, on Flickr

The left side of the canopy had an escape hatch that flexed up.  I have very simply taken a small brass wire to represent the hinge for it.  I may go back afterwards to clean this up a little.

 Untitled by brittvallot, on Flickr

 Untitled by brittvallot, on Flickr

A few shots showing the bigger picture:

 Untitled by brittvallot, on Flickr

 Untitled by brittvallot, on Flickr

The back look-out panels of glass I will place on last for the sake of final weathering.  They will be a bit too delicate for tape to mask with on and off...so I'll just leave them for last.

And that's that! =]

Tags: 1:48 , P-40B canopy

On the bench:  

Tamiya F4U-1  Kenneth Walsh


  • Member since
    November 2003
  • From: State of Mississippi. State motto: Virtute et armis (By valor and arms)
Posted by mississippivol on Tuesday, April 7, 2015 10:16 PM

Wow, that's some great work!

  • Member since
    September 2012
Posted by GMorrison on Wednesday, April 8, 2015 8:42 AM

I read this just now from beginning to end without skipping to the final result. A wonderful thread, thanks!I kept thinking "OD with big numbers!", and there you have it.

Great job.

 Modeling is an excuse to buy books.


  • Member since
    June 2013
Posted by bvallot on Wednesday, April 8, 2015 12:13 PM

Thanks MSvol and GMorrison!  I'm glad you liked it.  Yeah I did that Hawk Boyington flew and really felt I wanted a US version from Pearl Harbor...something very early on since I'm trying to keep a wide array of paint schemes from the PTO.  I used the Montex mask to do the number but it only offered "300" as an option.  So I used the "3" to help create a "5" by making a 45 degree angle towards the bottom as it loops around and just cornering off the other parts to 90 degrees.  I sprayed a pattern on some Tamiya tape and used that as my two "5's" and just left the "1' as a simple blocked off line such as it was.  =]

 Untitled by brittvallot, on Flickr

Of course I used more tape to completely mask off the area, but this is the strip I used to paint the numbers.  I think it allows for a more believable appearance this way.  I went back and made some notches and knicks to weather and dirty up the paint to give it some character.  Wasn't too difficult at all.  =]

On the bench:  

Tamiya F4U-1  Kenneth Walsh


  • Member since
    January 2015
  • From: Tumwater, WA.
Posted by M. Brindos on Wednesday, April 8, 2015 1:52 PM

Ha! I thought that was a decal! LOL.

Nicely done!  :)

- Mike Brindos "Lost Boy"

  • Member since
    June 2013
Posted by bvallot on Wednesday, April 8, 2015 4:25 PM

Now that you mention it Mike, I was just about to say how there aren't any decals on here...but I just realized that I do still need to add my "FUEL DRAIN" and "PRESTONE" decals.  I'll take care of that this evening.  But everything else was painted on.  

On the bench:  

Tamiya F4U-1  Kenneth Walsh


  • Member since
    September 2012
Posted by GMorrison on Wednesday, April 8, 2015 4:47 PM

You painted the stars...Bow Down

 Modeling is an excuse to buy books.


  • Member since
    August 2013
Posted by Jay Jay on Wednesday, April 8, 2015 5:59 PM

All I can say is WOW.  I recently finished my Pearl Harbor P-40 in 1/48 and I was kind proud of it....until I saw yours.


 I'm finally retired. Now time I got, money I don't.

  • Member since
    January 2015
  • From: Tumwater, WA.
Posted by M. Brindos on Wednesday, April 8, 2015 9:19 PM

You painted those?! Wow! That is really good work mate. I'm really in awe over that.

Do you have a template for the star? How did you lock in the registration? I'd love to know! Please?

- Mike Brindos "Lost Boy"

  • Member since
    February 2007
  • From: Brunswick, Ohio
Posted by Buckeye on Thursday, April 9, 2015 11:25 AM

Very impressive work there!

Mike

  • Member since
    June 2013
Posted by bvallot on Thursday, April 9, 2015 5:20 PM

Of course Mike.

I do have a vinyl mask from Montex this time around.  These really go a long way to keeping things more standard.  They last a good while and they are cut with precision.  This allows you to eyeball some things without worry that some other part of your mask is mis-cut and now has mis-registered.

What I've done for you in the pictures below is just a simple way of lining up the different masks involved in painting this particular insignia.  I have excluded the first two strips of tape to lay down so as to find your top and bottom of where the insignia should lie.  Since I'm painting this on a brown paper bag...I didn't feel it necessary.  You can omit the red meatball if needed due to the year your plane flew, but I've included it here just to show the steps.  The lengths of tape are mostly here to keep the masks square, to 90 degrees in other words.  I've placed the first square for the meatball on my cutting mat, lined up a piece of Tamiya tape on both the top and bottom and cut along the sides so as to remove the parts that will be in the field of paint that goes down next.  When lining up the tape, I'll start with the short ends along the top and bottom sides of the mask and place the long ends down accordingly.  I'll remove the short ends once everything is even.  The vertical strips of tape need to run parallel down the vertical sides of the mask.  The mask itself is "square" so as long as the strips are parallel...you're good. =]  Once you're finished painting the meatball, mask it off with the smaller circle mask they provide and line up the larger circle mask for the blue field.  When laying down the next mask, pay attention to your original lines of tape to denote the top and bottom.  Obviously, you'll be masking the rest of the area off with more tape to keep overspray off, so be mindful of where your guide strips are.  The next color to put down is white.  Load up your brush and put your coat down. After allowing adequate time for drying, place the star mask down and be careful to center it over the meatball.  Note that five points of the stars should be exactly resting along the perimeter of the circle.  So long that is the case, you should be right on the mark.  Once you're lined up, load up the blue and spray it down.  Simple as that.

A few things to keep in mind: 1. Allow for time to dry between coats.  2. Be sure to have the mask all the way down but not so hard you may pull up the paint.  3. Paint straight down onto your surface.  That's pretty much all there is to it.

 Untitled by brittvallot, on Flickr

 Untitled by brittvallot, on Flickr

You can do the same with a mask you cut yourself, but I'll tell you...for the time and frustration you save...a Montex mask set is well worth the $10 or $15 you'll spend.   And it'll last you a good while if you take care of it.

Hope that helps.  =]

On the bench:  

Tamiya F4U-1  Kenneth Walsh


  • Member since
    December 2013
  • From: Greenville, TX.
Posted by Raymond G on Thursday, April 9, 2015 5:39 PM

Wow, she's really come a long way! The work you've done with the glasswork in the cockpit is remarkable! I'm thinking about mirroring what you've done with the tail wheel assembly on my cub, though I will not need to be near as complicated. I'll have to see though. Some of the plastic I'm working with is very old and brittle. That said,you're truly making it difficult for me not to pick the other Warhawk up so I can try my hand at it!  

On the Bench:

U.S.S. Arizona (Revell)

P-51D Tribute (Revell)

57 Chevy Bel Air


  • Member since
    January 2015
  • From: Tumwater, WA.
Posted by M. Brindos on Thursday, April 9, 2015 6:23 PM

Thank you for showing us how to do that! It's much simpler than I had assumed and I'm really keen on trying that. So far I've managed Japanese markings in a similar fashion, but I was thinking that stars would be far more elusive to get in good register.

Seems Montex masks will be very handy indeed. Thank you.

- Mike Brindos "Lost Boy"

  • Member since
    June 2013
Posted by bvallot on Friday, May 15, 2015 11:55 PM

It's been very difficult trying to get these lasts few things in order. Trying to complete the flap assembly, the back plexiglass, and work up the cypress base all of this is going to rest on seems to have taken longer than the entire construction of the plane. =P But I've just turned a corner. I don't believe I'll be able to move my flaps up and down like I had planned on trying to do, but I do have one completed. And now with the shape figured out I can duplicate it without chewing my nails off. 

So here's a peek at that. I should have the rest complete within the next two weeks. Wood working is a skill I'm still improving...I'm finding it can't be rushed.  =]

 Untitled by Britt Vallot, on Flickr

More to come...

On the bench:  

Tamiya F4U-1  Kenneth Walsh


  • Member since
    June 2013
Posted by bvallot on Sunday, May 17, 2015 12:38 AM

So I realized in my haste I didn't post anything about the construction of this part.  I've updated this section to reflect some of what's going into the lower flaps.

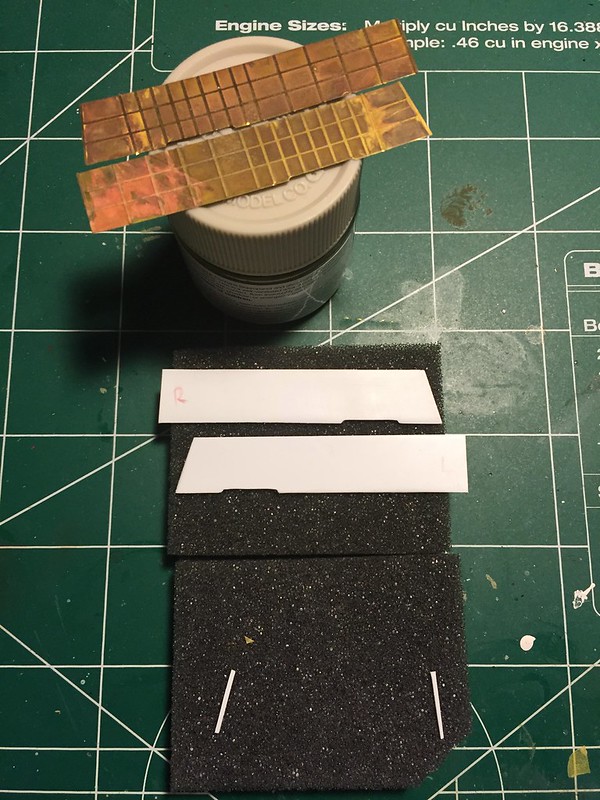
Here's where I started.  Some plastic sheet cut to fit.  I borrowed the kit's flaps to help find the shape and the rest is cut based on photos.  Here's a match up from the AM parts I bought on Ebay from Eduard.  ...They're a little off... =[  

 2015-04-23 22.57.26 by Britt Vallot, on Flickr

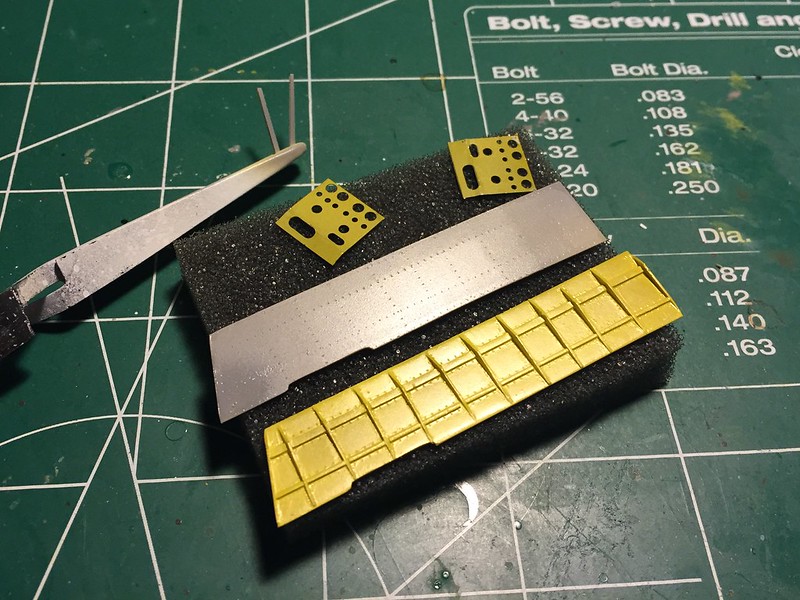
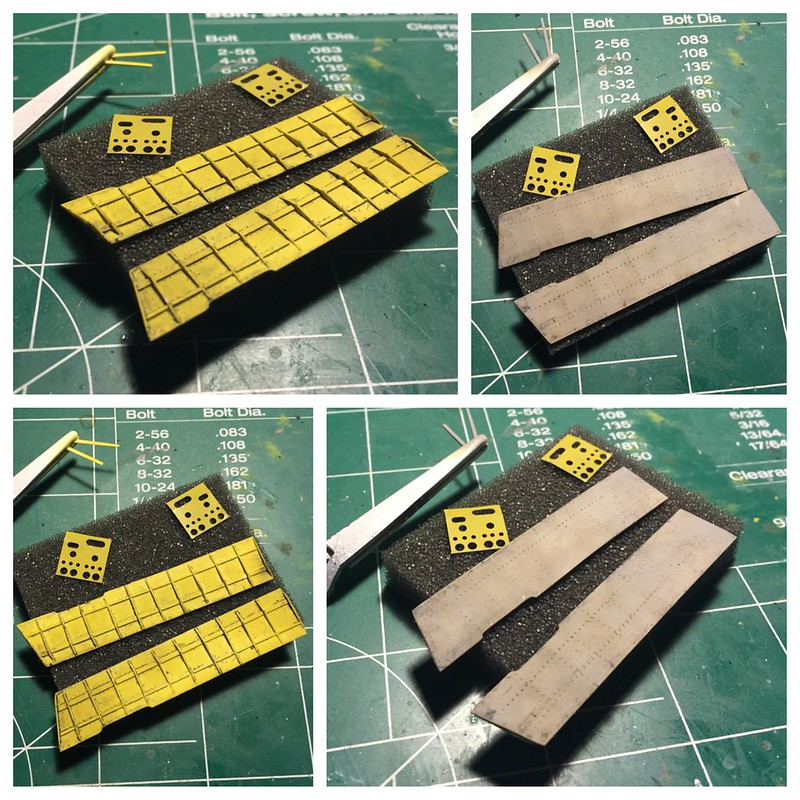
I don't have pictures of the steps in between but I don't feel it's too necessary for something this simple.  Two different strips went to down to make up some of the horizontal ribbing (I'll have the sizes tomorrow).  This time around I got smarter and cut into the strips for the bracing to fit into instead of cutting out a bunch of notches from tiny bits of plastic.  All of this was welded together with Tamiya ETC to make a nice complete, seamless look.  I think it came out a lot neater than anything I'd have put together with PE brass.  You'll note that this outdated Eduard brass is more than a little incorrect.  At first I was concerned I wouldn't be up to the task of completing something like this on my own, but the truth is...it's really not so bad.  Just keep on keeping on and I promise you won't find it as daunting either. =]

Here's the completed Flap assembly.  Next is to place the actuating arms that guided it up and down.  I've settled to place these in a fixed position.  I've seen practically every P-40 at rest with the flaps up.  A very, very few have been photographed with them down...my guess is that they'd be under maintenance but either way I've put the effort into fixing this part of the kit so I'm going to keep them down.  =]  Maybe next time.

Scratched. Painted. Clear-coated with Alclad Aqua Gloss Klear Kote

Untitled by Britt Vallot, on Flickr

Detailer/Valejo pigments. Alclad Klear Flat.

Untitled by Britt Vallot, on Flickr

Before placing the triangular bracing, I brought out Rosie the Riveter to place the riveting that went into building the flaps up.  Simple.  None of this was terribly difficult.  Just takes some patience and a few good references.  =]

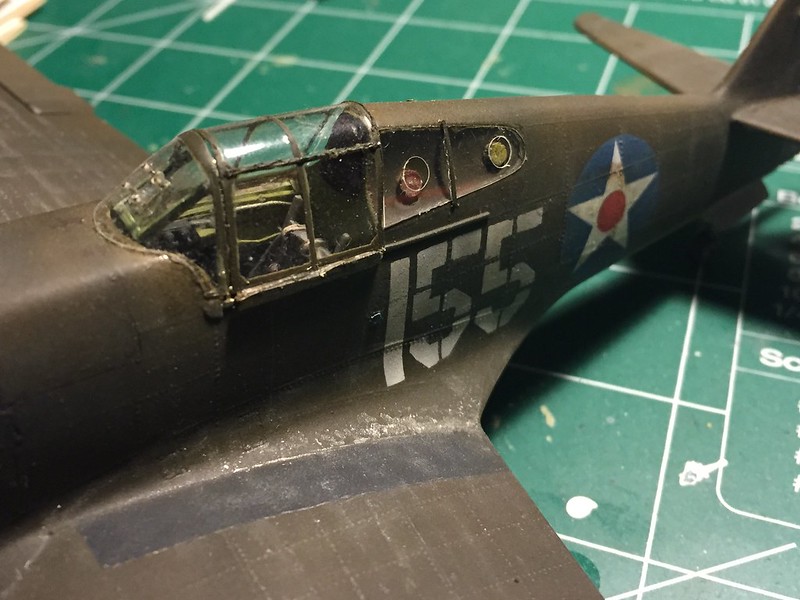
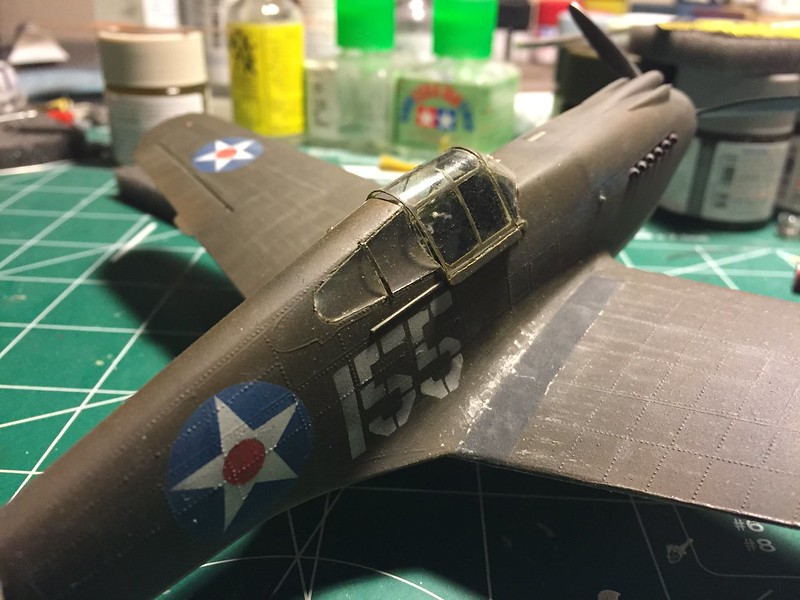
I also thought I'd take this moment to show the back plexiglass windows and the glass for the landing light.  It's really not that complicated either, but I think it merits a quick walkthrough.

I used a thin sheet of clear plastic (I believe mine is acetate) and used the kits back glass windows as a template to cut my pieces out.  Now this is delicate work.  One slip and you'll scratch into your "glass" and there's no fixing it.  Trust me.  Just start over.  I must've gone through about a dozen of these little sob's before getting it just right.  For the holes over the fuel and oil caps, I used a small pin vise drill to start a hole over where it was needed.  A needle file about the width of the hole was used to slowly widen it to something I felt was appropriate based on photos.  I could've measure better but I'll be honest that this was mostly trial and error.  By the time i had done this for the 5th or 6th time I pretty much knew where it needed to be. =P  Anyhow, the faintest touch of Micro white glue for clear parts and Voila!  I came back with some Tamiya Olive Drab and thinned it down some to lightly paint over the very tops of the glass.  This way it blends in very seamless with the fuselage.  The support in the middle of the glass is made from very thin brass sheet.  I chose this as I didn't want it returning to a more original flat shape like plastic might decide to do.  It was cut, primed, and painted and glued with the same Micro white glue.  Simple.

 Untitled by Britt Vallot, on Flickr

 Untitled by Britt Vallot, on Flickr

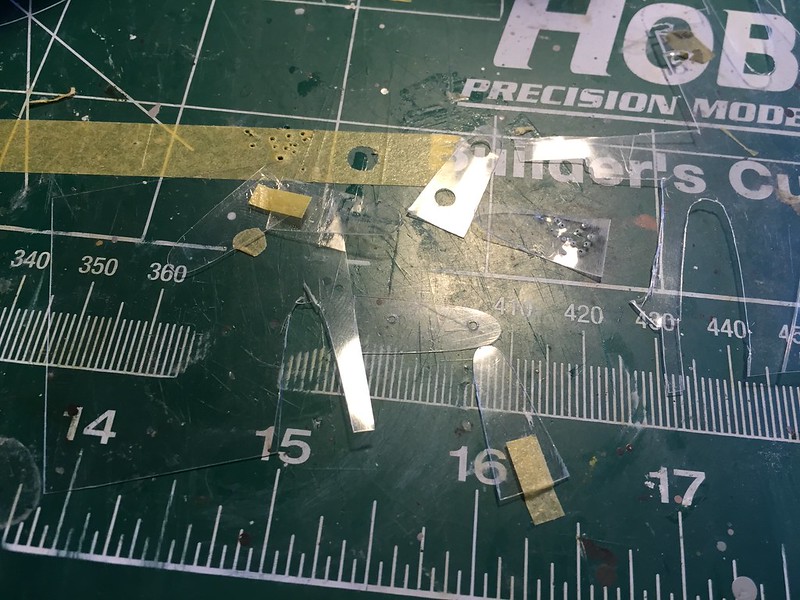
Just to show you what I mean about be patient =]  ...It looks nice when you nail it, but...

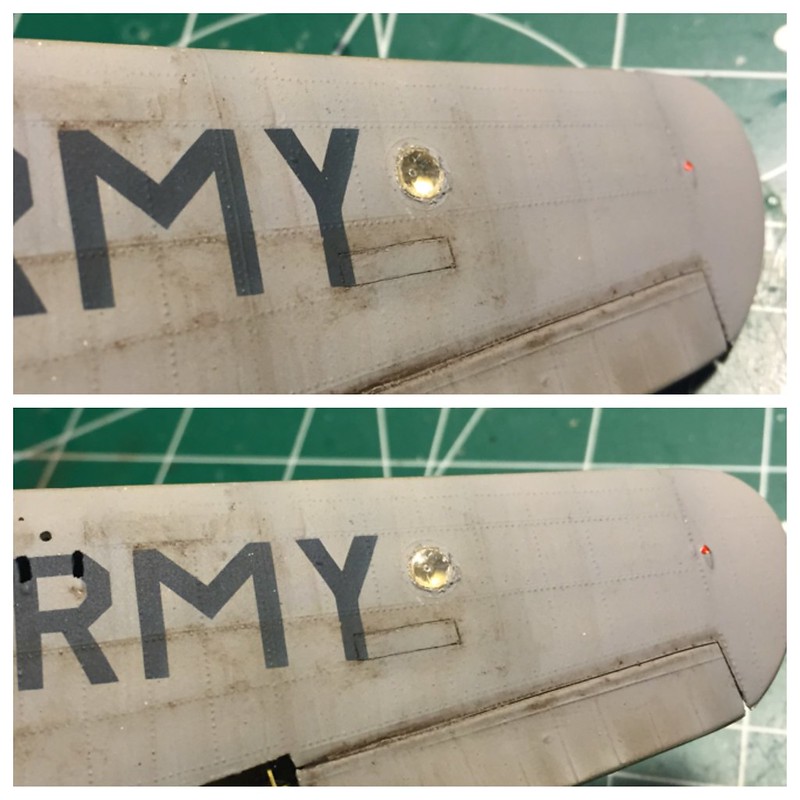
 2015-05-05 09.51.59 by Britt Vallot, on Flickr

I'm still finding some of these around the house.  The static has them sticking to me I think. 

The landing light was a circle cut and sanded more true to shape and placed down again with the Micro white glue.

 Untitled by Britt Vallot, on Flickr

That wraps most of that up.  I'll show the landing flaps up and fixed to the plane and then film the plane complete with machine guns, pitot tubes, and aerials.

On the bench:  

Tamiya F4U-1  Kenneth Walsh


  • Member since
    February 2012
  • From: Olmsted Township, Ohio
Posted by lawdog114 on Monday, May 18, 2015 7:48 PM

This is looking fantastic Britt.  Your attention to detail is simply incredible...

Joe

 "Can you fly this plane and land it?...Surely you can't be serious....I am serious, and don't call me Shirley"


  • Member since
    June 2013
Posted by bvallot on Monday, May 18, 2015 11:24 PM

Thanks Joe.  It's certainly taking me long enough.  I'll be back on track with that Dauntless finally and a Mustang just so I don't feel like I'm in such a rut. Lol

On the bench:  

Tamiya F4U-1  Kenneth Walsh


  • Member since
    December 2003
  • From: 37deg 40.13' N 95deg 29.10'W
Posted by scottrc on Tuesday, May 19, 2015 8:26 AM

Hi Brit,

I built this same kit a few years ago for a group build and had a lot of fun with it.  You are doing a superb job of showing us what you can do with a $13 kit.

Congrats!

Scott

  • Member since
    April 2015
  • From: New Hampshire, USA
Posted by UKguyInUSA on Tuesday, May 19, 2015 10:45 AM

Wow, cracking build on a terrible cheap kit that is as flimsy as paper when handling it. Fabulous scratch building work additions! Some of the additions will undoubtedly give it some rigidity, strength and weight that this kit so much lacks. I look forward to seeing this come to fruition! Cheers, Martin : )

  • Member since
    February 2003
  • From: Cameron, Texas
Posted by Texgunner on Tuesday, May 19, 2015 11:03 AM

UKguyInUSA

Wow, cracking build on a terrible cheap kit that is as flimsy as paper when handling it. Fabulous scratch building work additions! Some of the additions will undoubtedly give it some rigidity, strength and weight that this kit so much lacks. I look forward to seeing this come to fruition! Cheers, Martin : )

While it might be relatively cheap, in my opinion, it's not a "terrible" kit.  In fact, I believe it's widely acknowledged that the Monogram kit is the most accurate representation (shape-wise for sure) of a P-40B in 1/48 scale.  Britt has shown what can be done with it in the hands of a great builder.  

Gary


"All you mugs need to get busy building, and post pics!"

  • Member since
    June 2013
Posted by bvallot on Tuesday, May 19, 2015 10:20 PM

Damn guys! Many thanks on such high praise.  Although I don't think I could quite count myself in that number.  If you stared long enough you'd eventually find a spot here and there worth redoing.

Martin, you're right about the kit having some serious drawbacks and being a bit of a bear to tackle, but I do agree with Gary that you just can't get a better P-40B currently out there these days.  That was really the whole motivation for this post.  I felt I could take a kit with some good "bones" and help to show how to easily improve some of the key problem areas.   I do hope you all enjoy the finish.  I am kind of bummed about not finding a better solution to moving the flaps up and down.  Next time Gadget....  =]

Home stretch.

On the bench:  

Tamiya F4U-1  Kenneth Walsh


  • Member since
    June 2013
Posted by bvallot on Tuesday, May 26, 2015 11:26 PM

Here's the last update concerning the flaps for this build.

The actuating arms are built from 0.6mm aluminum tube and 0.4mm brass tube.  These slid to fit and the total length are cut to a 3/16in.  They are first fit into the upper flap assembly into the holes of the aluminum tube parts that are fit on the main rod.  The taped lower flap has already been set to 40 degrees and the tubes are just set to fit just above and onto the upper horizontal ribbing of the lower flap.

 Untitled by Britt Vallot, on Flickr

 Untitled by Britt Vallot, on Flickr

 Untitled by Britt Vallot, on Flickr

A drop of CA on each end and viola! You should be set to go.

 Untitled by Britt Vallot, on Flickr

And that's that.  Homemade flaps!  That pretty much concludes updating and improving our Revell P-40B.

Next to follow are completed pictures of the machine guns, pitot tube, and aerials.

Critiques, comments, questions.... =]

On the bench:  

Tamiya F4U-1  Kenneth Walsh


  • Member since
    November 2008
  • From: Central Florida
Posted by plasticjunkie on Wednesday, May 27, 2015 7:26 AM

Improved is an under statement! Some of the old Monogram kits can be improved with a little detailing but you have done a labor of love on this one. The scratch work is simply outstanding. Toast

 GIFMaker.org_jy_Ayj_O


Too many models to build, not enough time in a lifetime!!

  • Member since
    June 2013
Posted by bvallot on Wednesday, May 27, 2015 7:57 AM

Well thanks for saying so PJ. =]   I think you're right...a little bit of love and she comes around for you.  I am very happy with this Hawk.  I finally feel redeemed over a few points I didn't address with the AVG Hawk.

On the bench:  

Tamiya F4U-1  Kenneth Walsh


GAF
  • Member since
    June 2012
  • From: Anniston, AL
Posted by GAF on Wednesday, May 27, 2015 8:42 AM

Britt,

Just goes to show what you can do with a $13 kit.  IF you want to put the detail into it, you can.  If not, then it's only $13.

bvallot

Looking at these images, I'm impressed by the amount of "weathering" already present.  This looks like an aircraft that has been used.  I doubt any post work (except for some minor touch-up) will be needed.

Well done!

Gary

  • Member since
    February 2003
  • From: Cameron, Texas
Posted by Texgunner on Wednesday, May 27, 2015 8:48 AM

Very impressive Britt!   You've done a fantastic job on her, thanks for taking us along on the journey.

Gary


"All you mugs need to get busy building, and post pics!"

JOIN OUR COMMUNITY!

Our community is FREE to join. To participate you must either login or register for an account.

SEARCH FORUMS
FREE NEWSLETTER
By signing up you may also receive reader surveys and occasional special offers. We do not sell, rent or trade our email lists. View our Privacy Policy.