SEARCH FINESCALE.COM

Enter keywords or a search phrase below:

1:48 SBD-2/3 Dauntless (Complete)

17170 views
85 replies
1 rating 2 rating 3 rating 4 rating 5 rating
  • Member since
    August 2013
Posted by Jay Jay on Tuesday, October 20, 2015 10:27 AM

Thanks BV, I'll definately give the Dulcote a little laquer thinner next time .


 I'm finally retired. Now time I got, money I don't.

  • Member since
    February 2012
  • From: Olmsted Township, Ohio
Posted by lawdog114 on Tuesday, October 20, 2015 6:28 PM
Stunning. Lovin' the bomb work....

 "Can you fly this plane and land it?...Surely you can't be serious....I am serious, and don't call me Shirley"


  • Member since
    June 2013
Posted by bvallot on Wednesday, October 21, 2015 4:06 PM
You are very welcome Jay. Thanks Joe. Hopefully soon here I'll be done with this turkey so I can make room for the next one. I'm shopping around for a block of cypress right now. I look to get started on that and the decking within the next two weeks. We have the WW2 Air Expo in town this weekend at the Lakefront Airport in New Orleans...so I'm sure between that and work I'll be getting little else done. =[

On the bench:  

Tamiya F4U-1  Kenneth Walsh


  • Member since
    February 2011
  • From: Bent River, IA
Posted by Reasoned on Friday, October 23, 2015 10:12 PM

knox

    Your work is simply stunning!!  


Ditto

Science is the pursiut of knowledge, faith is the pursuit of wisdom.  Peace be with you.

On the Tarmac: 1/48 Revell P-38

In the Hanger: A bunch of kits

  • Member since
    February 2012
  • From: Olmsted Township, Ohio
Posted by lawdog114 on Wednesday, October 28, 2015 7:22 PM

I use Testors Dull as well. Have for years. I may try the Alclad flat someday.

 "Can you fly this plane and land it?...Surely you can't be serious....I am serious, and don't call me Shirley"


  • Member since
    June 2013
Posted by bvallot on Tuesday, December 1, 2015 4:42 PM

I decided I might as well take some time now to go step by step with scratching out the flap assembly as it gets a little tedious without using kit parts.  I didn't want to compress this section later and leave anything important out.  The first few pictures I later found to be a little out of scale but they show the general idea and they're easier to see so I've included them anyhow.

The control arms are going to be very tiny at 1:48.  I found myself somewhat limited on options.  Or at least options that I'm able to pull off.  I wanted to keep them clean and neat and not gobbed up with CA so I settled for this.

 Untitled by Britt Vallot, on Flickr

Above you will see strips of a square rod (.20in x .20in) cut to shape and strips of plastic (.10in x .20) to make the upper that attaches to the wing.  These are bonded together with Tamiya ETC.  The rod they attach to is plastic (I'll double check the size) with brass tube fittings sliding onto it to provide the fittings for the upper yoke arms to attach.  I used the same size plastic rod for the tiny slices that make up that connection.  These are attached with CA.  The yoke arms are bonded with the Tamiya ETC.  Next, came attaching a brass rod that fixes onto the flap itself.  It goes on with a drop of CA. Not too bad, but a bit tedious.  Still, once I figured out how I wanted to set out, it wasn't too difficult.  The work will pay off.

 Untitled by Britt Vallot, on Flickr

 Untitled by Britt Vallot, on Flickr

Above in the top left picture, you can see the difference in size from my first take...to my correction.  What I ended up with was 1.5mm for the length of strips for the arms and just over a 1mm for square rod strip it attaches to.  Very tiny!! =]  The other pics are for reference as to how they'll fit onto the wing.  Not perfect, but not too bad.  I've also slid a brass rod into place which does help to give some stability to these smaller plastic parts.  I'm not completely sure how it functioned, but I might imagine it's there for a similar purpose of adding stability to the flaps while in a dive.

Here's where I am currently:

 Untitled by Britt Vallot, on Flickr

 Untitled by Britt Vallot, on Flickr

[updated]

 Untitled by Britt Vallot, on Flickr

I may go back and dress these up a bit more, but this is essentially it.  I think it's still a step up from the kit parts and I'm happier for having made it myself.  One thing that's noteworthy to mention is to wait to install the parts attaching the all of this to the wing itself.  They are quite fragile and if you've noticed I've already had to repair a few.  It also makes sliding the rods into place a whole lot easier as well. Hindsight is always 20/20 though, isn't it.  =] 

I will be able to make some progress over the weekend and much of this will be largely completed.  But of course I'm always the masochist...I've decided to try to build up part of the flight deck.  Sooooo......=D

Comments, questions...always welcome. 

On the bench:  

Tamiya F4U-1  Kenneth Walsh


  • Member since
    June 2003
  • From: Cavite, Philippines
Posted by allan on Tuesday, December 1, 2015 7:38 PM

That is insane! But absolutely rewarding

No bucks, no Buck Rogers

  • Member since
    March 2015
  • From: Streetsboro, Ohio
Posted by Toshi on Tuesday, December 1, 2015 9:06 PM

allan

That is insane! But absolutely rewarding


Your detail work is absolutely stunning!  You're doing a fantastic job.

Toshi

On The Bench: Revell 1/48 B-25 Mitchell


Married to the most caring, loving, understanding, and beautiful wife in the world.  Mrs. Toshi


  • Member since
    September 2014
Posted by rooster513 on Wednesday, December 2, 2015 11:17 AM

Awesome scratchbuilding! Can't wait to see it finished up!

-Andy

  • Member since
    June 2013
Posted by bvallot on Wednesday, December 2, 2015 1:33 PM

Thanks guys.  It absolutely is rewarding.  I'm anxious to wrap this up myself.  

On the bench:  

Tamiya F4U-1  Kenneth Walsh


  • Member since
    April 2005
  • From: Piscataway, NJ!
Posted by wing_nut on Wednesday, December 2, 2015 4:19 PM
Beautiful detail work there Britt. The finale should be quite a sight.

Marc  

  • Member since
    May 2006
  • From: Chapin, South Carolina
Posted by Shipwreck on Thursday, December 3, 2015 8:20 AM

Bvalot, I do not know how I missed this thread, but I just came across it yesterday. I would want to follow your build; and this one is certainly up to your standard of excellence. In addition I have the AM kit which will be part of my next project! BTW, I just finished reading the entire thread!

On the Bench:

Revell 1/96 USS Constitution - rigging

Kinetic 1/48 YF-104A 5-2957

Trumpeter 1/350 USS Hornet CV-8

Revell 1/48 B-1B Lancer Prep & Reasearch


  • Member since
    August 2013
Posted by Jay Jay on Thursday, December 3, 2015 8:41 AM

Amazing detail !

I 'd be  afraid that the whole pieced together ass'y would be too fragile.  My take on the flap actuator arms is to make the long part out of 1 piece of plastic then use tiny strips of tape to simulate the joints you made from tubing.  Sure, that's easy for me to say...lol


 I'm finally retired. Now time I got, money I don't.

  • Member since
    September 2013
Posted by blackdog62 on Thursday, December 3, 2015 10:29 AM

Wow that's is just amazing work.

  • Member since
    June 2013
Posted by bvallot on Thursday, December 3, 2015 2:46 PM

Jay Jay

Amazing detail !

I 'd be  afraid that the whole pieced together ass'y would be too fragile.  My take on the flap actuator arms is to make the long part out of 1 piece of plastic then use tiny strips of tape to simulate the joints you made from tubing.  Sure, that's easy for me to say...lol


Yeah, either way works just fine.  I've done the tape route before and like it just fine.  This time around I had the brass tube so I just decided to go for it.  Both work equally well. =]

Shipwreck, I see you have a Doolittle Raider on deck!  I have one in mind myself to do sooner or later...likely later. 

And thank you all.  Sorry I haven't been around more.

On the bench:  

Tamiya F4U-1  Kenneth Walsh


  • Member since
    June 2014
Posted by BrandonK on Thursday, December 3, 2015 4:12 PM

WOW !

BK

On the bench:

A lot !! And I mean A LOT!!

2024 Kits on deck / in process / completed   

                         14 / 5 / 2  

                              Tongue Tied

  • Member since
    November 2009
  • From: SW Virginia
Posted by Gamera on Friday, December 4, 2015 10:20 AM

How did I miss this, spectacular work!

"I dream in fire but work in clay." -Arthur Machen


  • Member since
    September 2015
Posted by TempusFugit on Wednesday, December 16, 2015 3:49 PM

Bvallot, this is some truly wonderful work!

The detail and craftsmanship are really something, and your paint weathering is particularly convincing to my eye. Nicely done! Bow Down I just discovered this thread a few minutes ago (haven't been on much lately what with work and the impending holidays), but I will be watching this one. Big Smile


TF

  • Member since
    June 2013
Posted by bvallot on Wednesday, December 30, 2015 1:54 PM

Thanks TF.  I've been pretty busy as well.  She's practically done right now.  I'm just trying to finish with the mock up of a flight deck to place on top the wooden base I've cut for her.  I hope to have some photos up soon.

On the bench:  

Tamiya F4U-1  Kenneth Walsh


  • Member since
    January 2015
  • From: Tumwater, WA.
Posted by M. Brindos on Wednesday, December 30, 2015 2:18 PM

You mean to tell us that this is almost finished?? Sah-weet! I'm looking forward to seeing the final reveal!!  :D

- Mike Brindos "Lost Boy"

  • Member since
    June 2013
Posted by bvallot on Saturday, January 2, 2016 11:13 AM

That's right.  Nearly there...it feels like I find less and less time to spend to get anything accomplished lately.  I haven't spoken about it on the forum before really, but other than work being busy, I've also got a wife who's pregnant with our first and a new home that we're building.  We even just found out it's a boy over New Years.  So I'll be real happy to finally toss a few airplanes in his room and plant some good seeds.  =] 

In the meanwhile, I thought I'd share what I'm doing with this flight deck I'm working on in case there are others out there with similar aspirations.  I've been watching Lawdog put together his bases for the last couple of years.  They definitely inspire me to try to do more.  Every diorama I've ever seen leaves me thinking, "I can absolutely pull something like that off if I just tried."  Some times it just takes getting over the intial troubleshooting of what it is you're trying to do.  That's what always keeps me from taking the first step.

With my base, I've picked out a nice piece of pine from a local lumber company (who I recently even found out is related to me) and sized it to leave a 1 inch border according to the length of the wheel base.  On top of this, the mock up of the flight deck will sit.  Most of the troublehooting here is about balancing weight and timing of assembly.  Since I wanted to show some of the on goings underneath the decking, I chose to park the plane on the far left side of the Yorktown towards the back of the carrier where it would have been found shortly before take off.  I incorporated the left wall so I can block off some of what will anchor the carrier deck to the block of pine.  Two large brass tubes will make up most of what carries the weight of the flight deck itself and of course the plane.  I'll make the brass tubes appear to be part of the plumbing of the ship so as to camoflauge their purpose.

Here's the gest:

 Untitled by Britt Vallot, on Flickr

 Untitled by Britt Vallot, on Flickr

This is the basic idea.

 Untitled by Britt Vallot, on Flickr

And here's where I am currently.  None of this is terribly difficult.  The planning it out is probably the hardest part...making sure things are primed (and able to be painted later) and assembled in an order and so on.  It builds up like anything else.  I-beam was made not bought.  I wanted it to be closer to scale. The scaffolding for the lighting and plumbing was built first and then fixed to carrier.  All of this was put together with Tamiya Extra Thin Cement to provide a strong weld between parts.  It's fairly accurate for the most part with exception to the spacing for the wall itself and the parts fixed to it.  Also, there are certain liberties taken for the spacing of scaffolding, the scale of all these objects and how they spread out.  The plumbing is based off of photos, but improvised to create a busy appearance and help add some life in this very limited cross-section of the ship.

So that's pretty much that.  Hopefully all this helps to spark an interest for those like me that were a little too intimidated to take on something like this.  Nowadays, your imaginiation is really your only limit.

This will just about be wrapped up in the next week or so.  If there's any questions or comments, by all means drop 'em here.  That's what the forum is for. =] If you have any suggestions too...let me know.  I'm always interested in learning a better way.


=]

On the bench:  

Tamiya F4U-1  Kenneth Walsh


  • Member since
    March 2015
  • From: Close to Chicago
Posted by JohnnyK on Saturday, January 2, 2016 11:25 AM


The plane is just awesome!! I like to build planes with weathered finishes too, but yours is just so much better. Well, just some more techniques that I need to learn.

 I was not expecting you to build the flight deck. What other surprises do you have up your sleeve?


Your comments and questions are always welcome.

  • Member since
    June 2013
Posted by bvallot on Saturday, January 2, 2016 11:02 PM

Thanks JohnnyK.  Hey, you learn as you go.  I've come away with a lot from watching these guys on here the last couple of years.  As for surprises, I guess you'll know when I do. lol.  I usually try to do something I haven't done before on each build.  I think that's what keeps me in the hobby.

=]

On the bench:  

Tamiya F4U-1  Kenneth Walsh


  • Member since
    June 2014
Posted by BrandonK on Saturday, January 2, 2016 11:32 PM

Its funny you mention doing the bases, as I have also noticed Joe's bases and thought the same thing. It's got me to thinking I may build a catapult for my Kingfisher. Oof. That may be a bit of work. But, what kit isn't anymore, right? Nice work on this too. Can't wait to see the finished product. Congrats on the son, I have two and it's truly an amazing thing.

BK

On the bench:

A lot !! And I mean A LOT!!

2024 Kits on deck / in process / completed   

                         14 / 5 / 2  

                              Tongue Tied

  • Member since
    January 2015
  • From: Tumwater, WA.
Posted by M. Brindos on Sunday, January 3, 2016 12:09 AM

Building bases seems to be the one thing I can never bring myself to get in motion. Except for that Braille Churchill I'm working on and I'm simply stalled on picking a plinth. Why? I'm not really sure. I've got everything else ready to go.

Your statements ring with absolute truth in my mind. I often think "I could do that" but then just let the thought go out the window. Pretty much the same thought process I used to have about figure painting, but I seem to have overcome that blockage rather well.

This will be a real treat to see this build completed. Your reasoning behind it is very well thought out and this just has to be a stunner when its done.


.... for the record I have three boys. One is like me, an obstinent little bugger, another who is far too into himself far too early, and my youngest who is autistic. My youngest is by far the easiest to understand. His life revolves around "do I like it, or do I not like it". The other two... meh, you'll find out for yourself lol. My single daughter was better before hormones kicked in. I'm not looking forward to these next ten or so years lol. She's going to be built like her mother and I'm surely going to prison eventually for manslaughter.

Fun times, fun times.


Anyways, congratulations! You are going to love being a father!! oh, except when they start repeating your swear words in front of other people when its least expected. That part sucks. Mind your tongue lol!!


Looking forward to seeing more!!  :D

- Mike Brindos "Lost Boy"

  • Member since
    June 2013
Posted by bvallot on Tuesday, January 26, 2016 1:55 PM

Thanks for the words of encouragement Mike.  I'm anxiously looking forward to it.  It's beginning to get a little scary the more I think about it, but between me and my wife I'm sure we'll do just fine.  I was lucky enough to get me a good one. =]

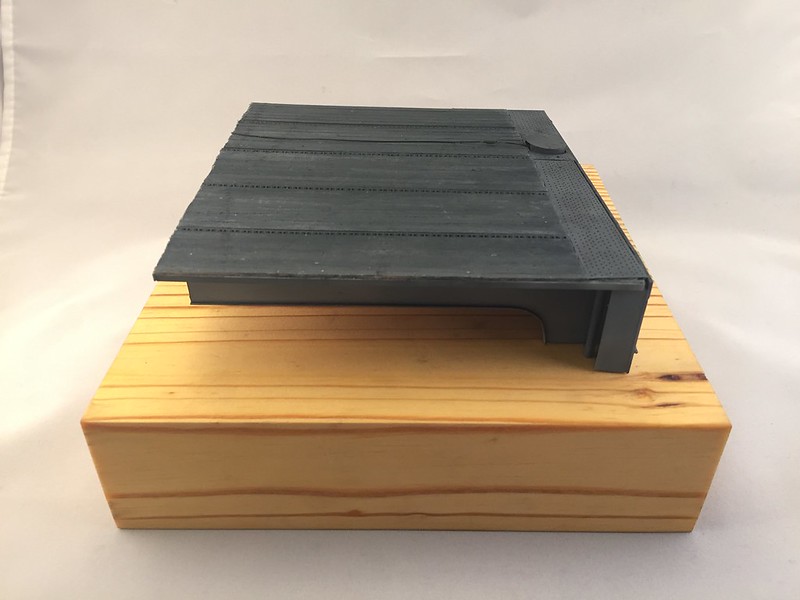
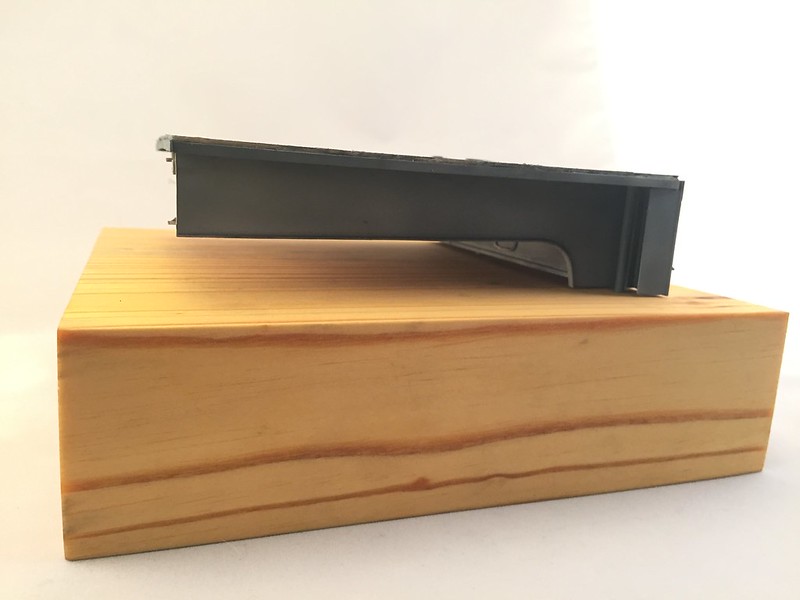
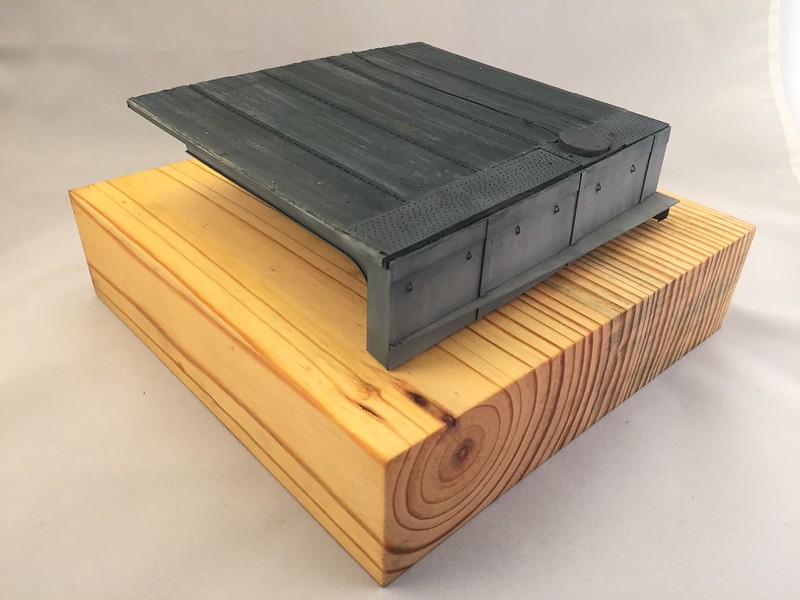
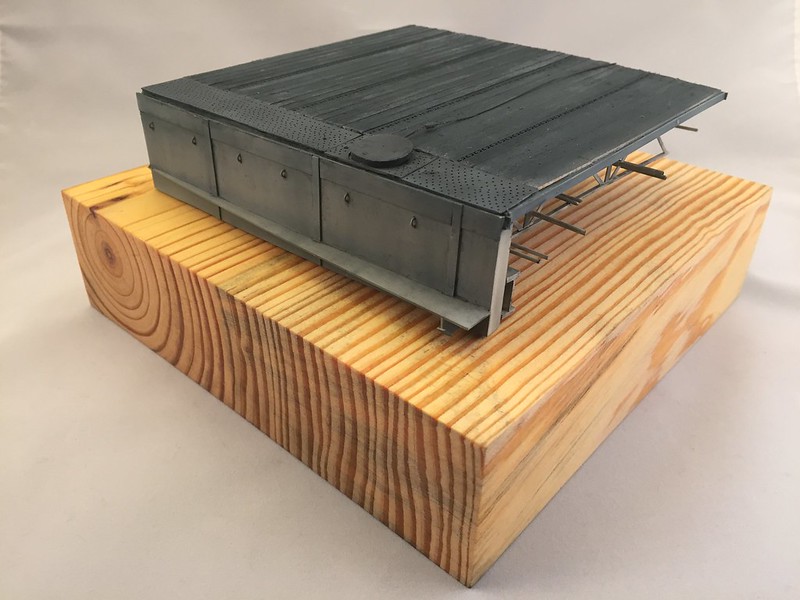
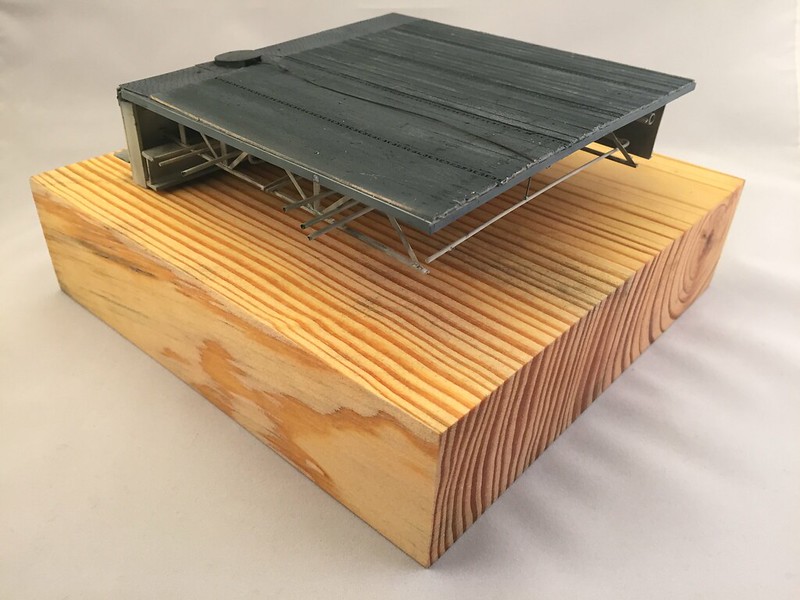
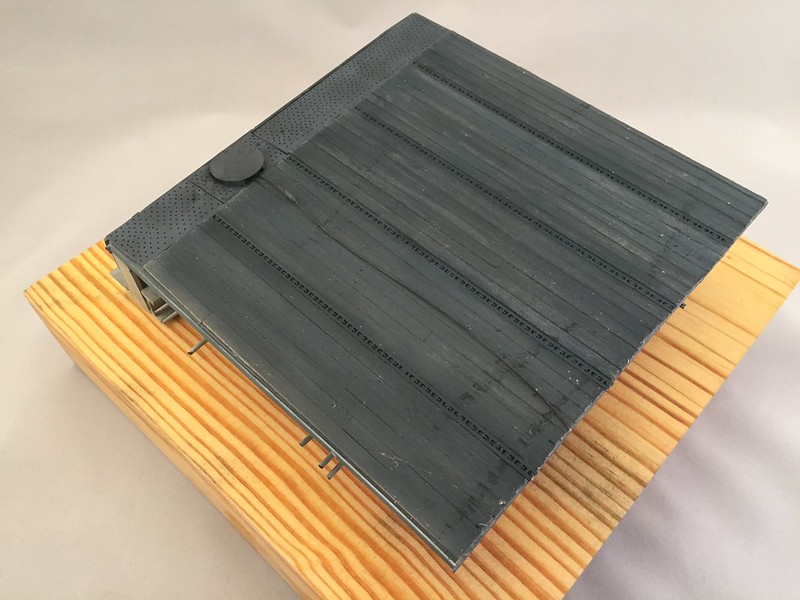
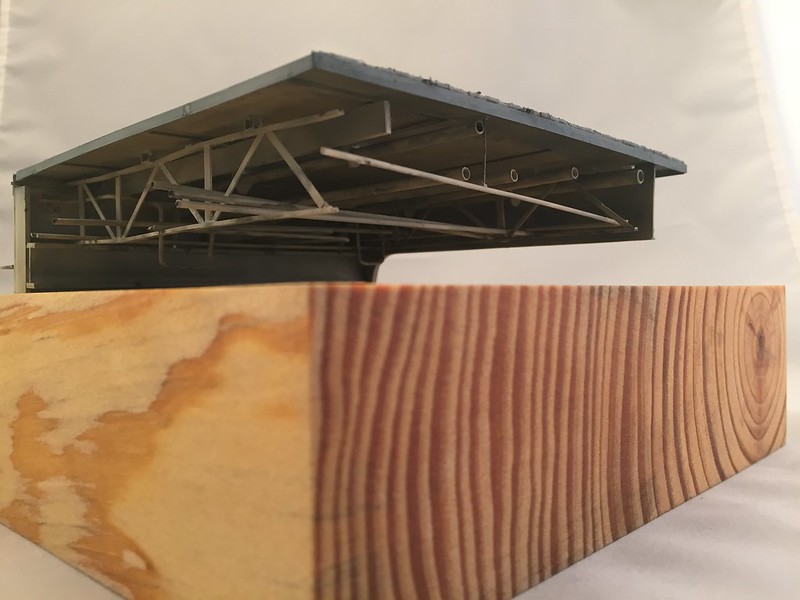
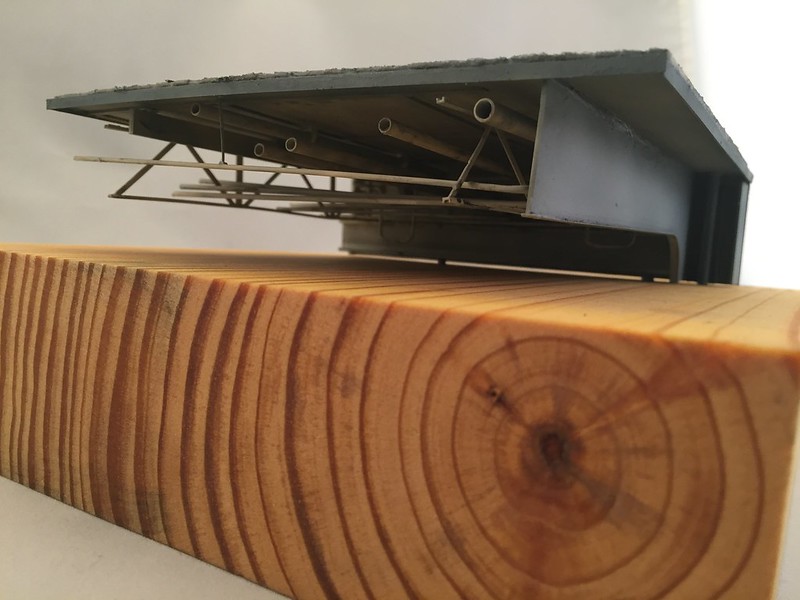
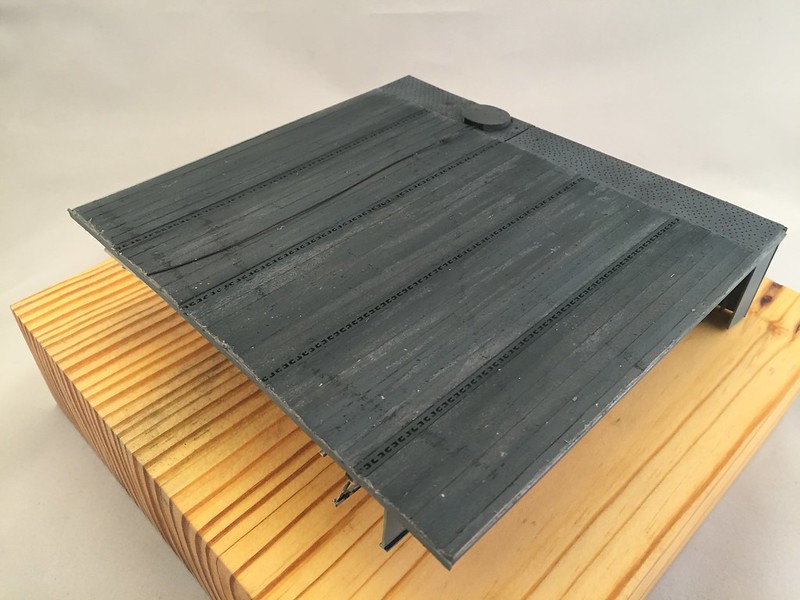
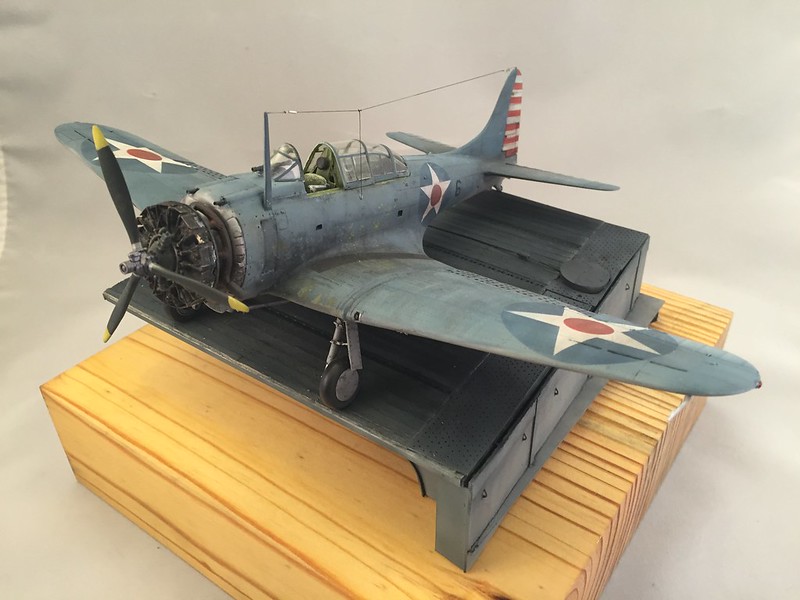
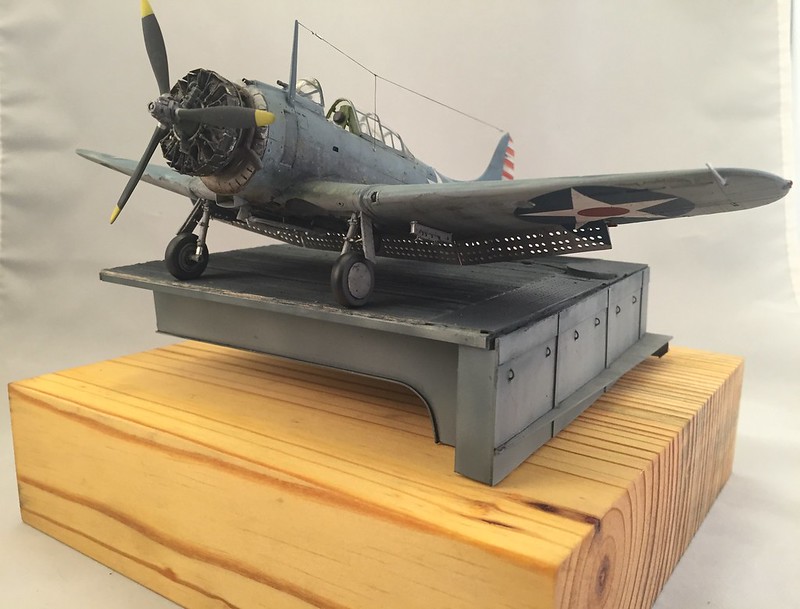
So.  Finally.  Progress.  I'm just about ready to put this bad boy behind me and move on to the next project.  I finished the last on the list for the flight deck.  I was just starting to have second guesses about having built this section up.  I thought maybe it was getting too busy and distracting from the actual plane.  But with the Deck Blue camo applied and all the touch ups, I think I'm getting used to it and I'm happy I gave it try.

Here's a few without the Dauntless in the way for those interested in seeing how it came together:

 Untitled by Britt Vallot, on Flickr

 Untitled by Britt Vallot, on Flickr

 Untitled by Britt Vallot, on Flickr

 Untitled by Britt Vallot, on Flickr

 Untitled by Britt Vallot, on Flickr

 Untitled by Britt Vallot, on Flickr

 Untitled by Britt Vallot, on Flickr

 Untitled by Britt Vallot, on Flickr

 Untitled by Britt Vallot, on Flickr

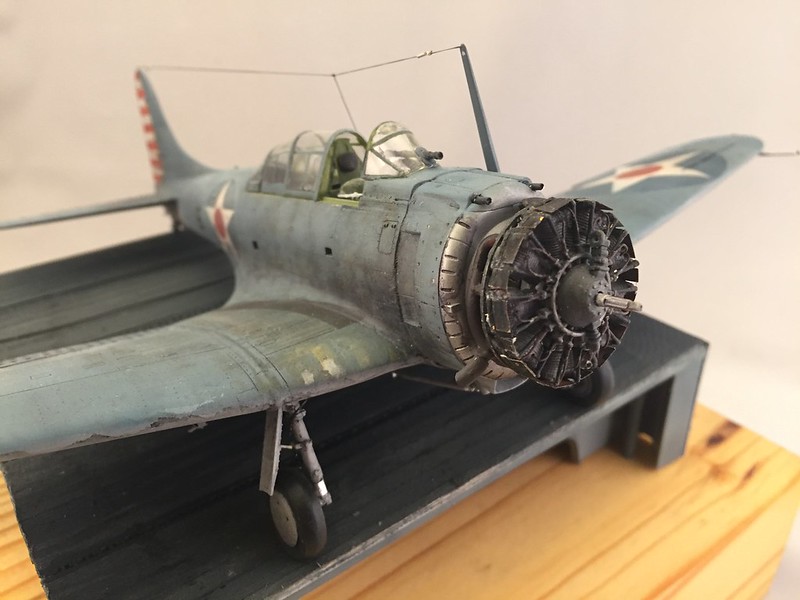
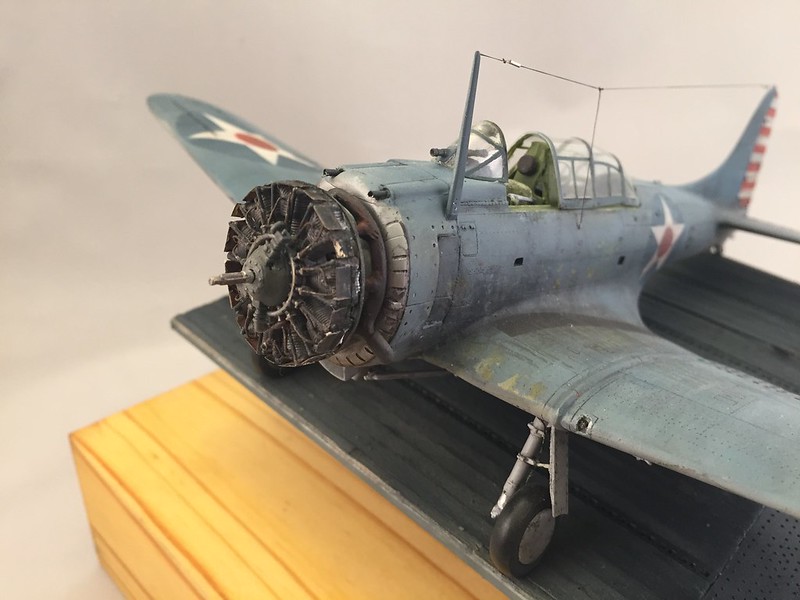
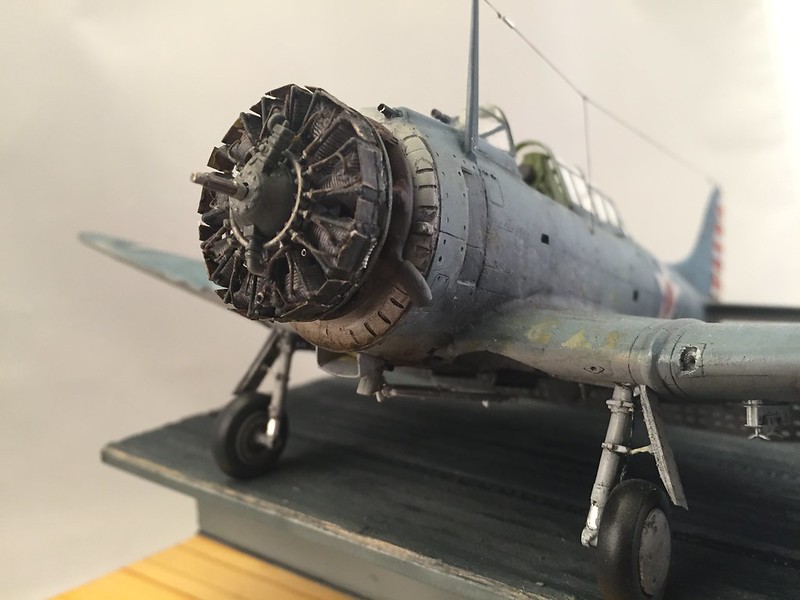
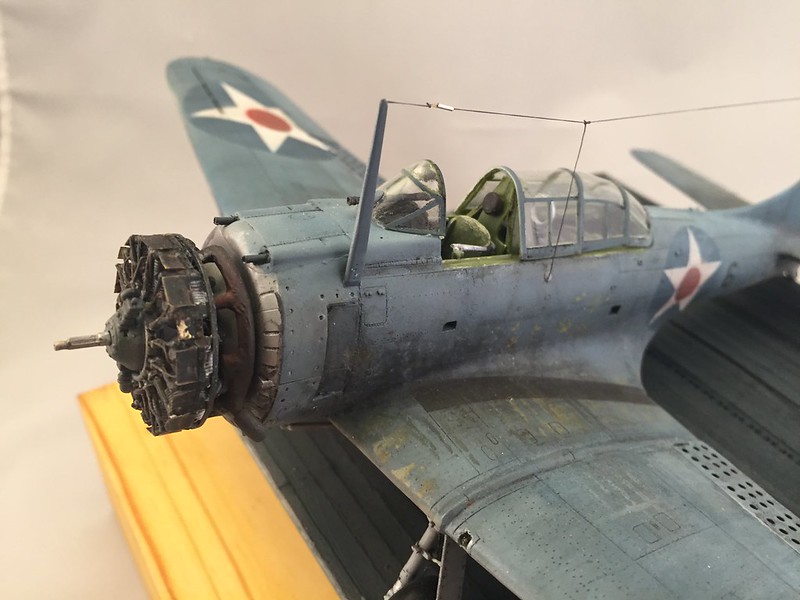
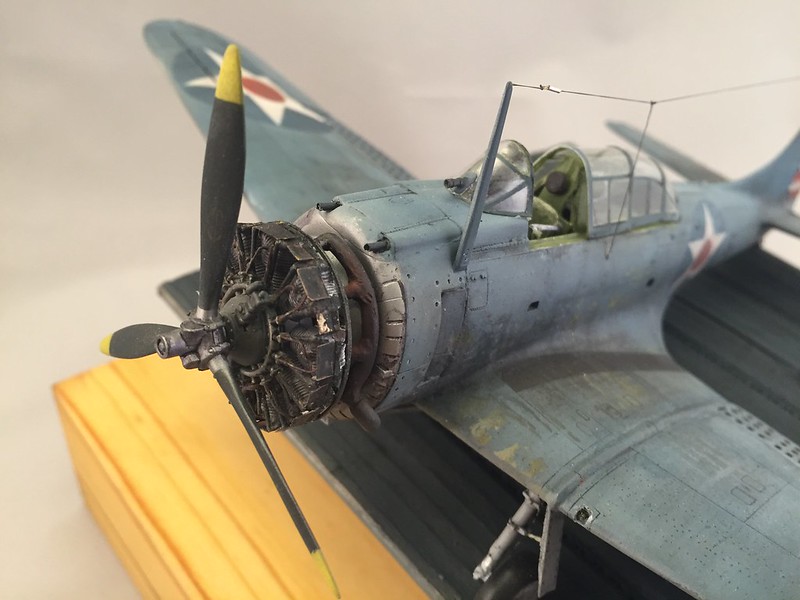
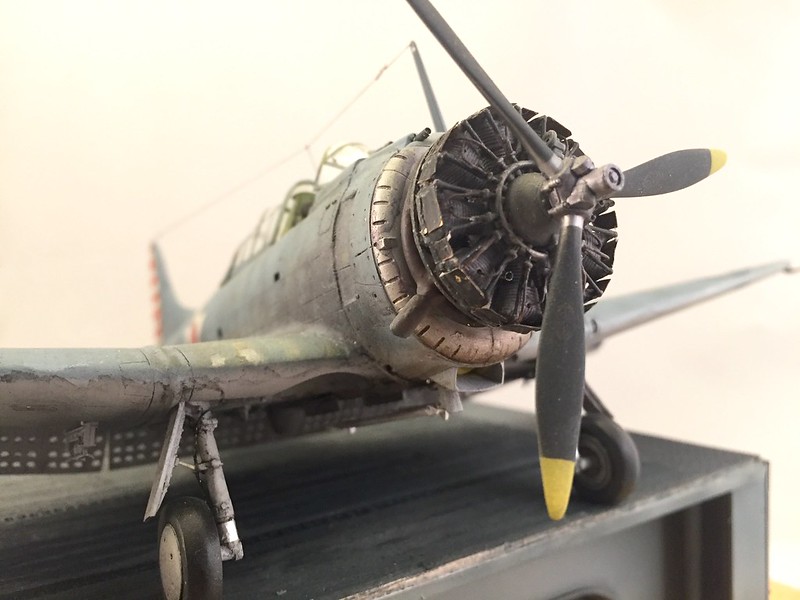
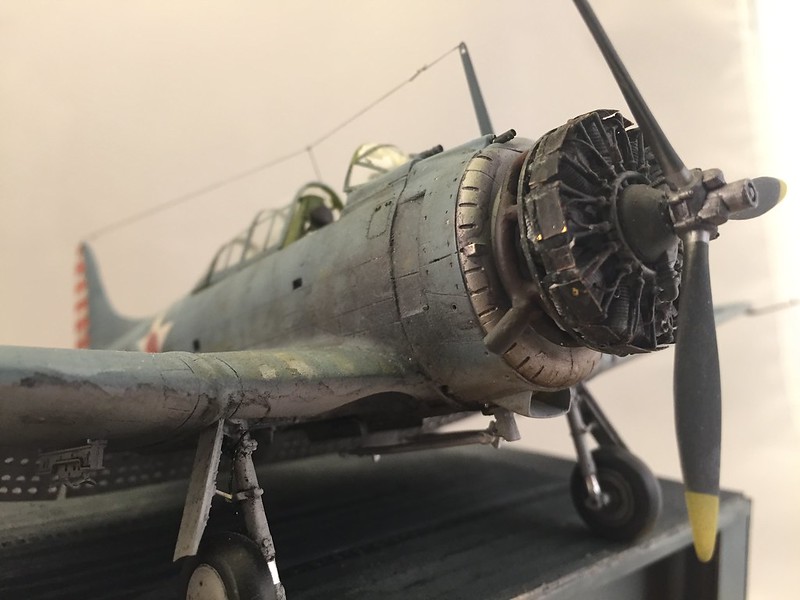
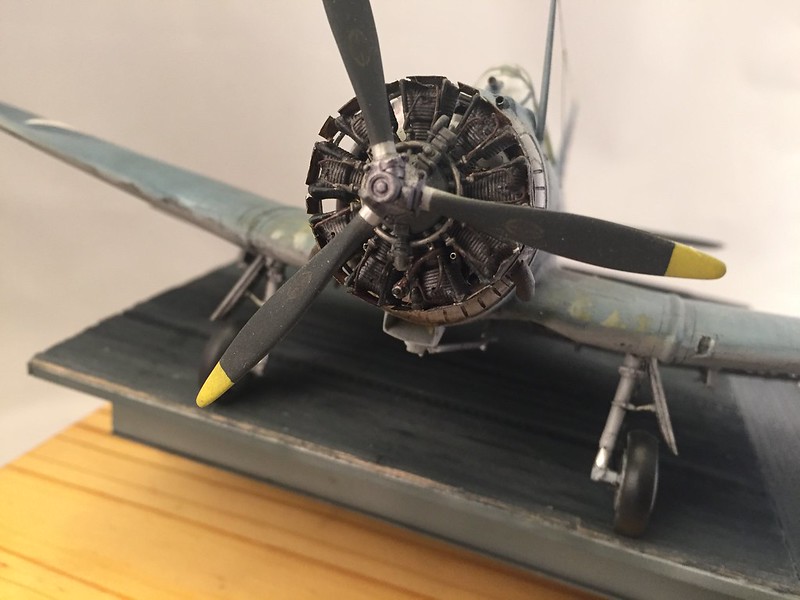
I ran out of time earlier and haven't quite gotten to putting the cowling on over the engine. Since it won't come off again after it's on, I wanted to take the opportunity to film the engine with it off as I put a lot of work into building up the intake/exhaust manifold and the various inlets and wiring harness.  So here's a few pictures of that.  I'll be tied up with work the next couple of days and I won't be able to complete her till later in the week.  So I figured I'd put these up for now.

 Untitled by Britt Vallot, on Flickr

 Untitled by Britt Vallot, on Flickr

 Untitled by Britt Vallot, on Flickr

 Untitled by Britt Vallot, on Flickr

 Untitled by Britt Vallot, on Flickr

 Untitled by Britt Vallot, on Flickr

 Untitled by Britt Vallot, on Flickr

 Untitled by Britt Vallot, on Flickr

 Untitled by Britt Vallot, on Flickr

 Untitled by Britt Vallot, on Flickr

 Untitled by Britt Vallot, on Flickr

 Untitled by Britt Vallot, on Flickr

 Untitled by Britt Vallot, on Flickr

And that's that for now.  Sorry if it's a bit picture heavy.  This spot will never see the light of day like this again so I wanted to make it count. =]

Comments, questions, and suggestions are always welcomed.  Thanks for looking.

On the bench:  

Tamiya F4U-1  Kenneth Walsh


  • Member since
    September 2014
Posted by rooster513 on Tuesday, January 26, 2016 2:03 PM

Looks great bvallot! Love the paint and the base looks really good!

-Andy

  • Member since
    May 2006
  • From: Chapin, South Carolina
Posted by Shipwreck on Wednesday, January 27, 2016 8:14 AM
Britt, your SBD is a work of art. I am particularly impressed with your engine. Great detail! I am struggling with four 18 cylinder R-3350 engines for my B-29. If I were to try to attach all 144 wires like you did I would end up in an insane asylum.

On the Bench:

Revell 1/96 USS Constitution - rigging

Kinetic 1/48 YF-104A 5-2957

Trumpeter 1/350 USS Hornet CV-8

Revell 1/48 B-1B Lancer Prep & Reasearch


  • Member since
    August 2013
Posted by Jay Jay on Wednesday, January 27, 2016 9:40 AM

I re-read evrything you posted here for the umpteenth time trying to absorb at least some of this amazing information. 

I'm doing an Acurate Miniatures TBF 1C Avenger in 1/48 scale and it is an incredable kit worth my best and then some.  The "and them some" is where your generous sharing of techniques comes in and I thank you so much again for the priceless info. 

I'm nearly done with the very detailed interior. It took 4 days just to do the detail painting on all the bits and bobs included in the kit. To my surprise, a resin Verlinden engine and exterior PE was in the box and I hafta figure out how to make the engine fit.  i guess I should do a WIP .


 I'm finally retired. Now time I got, money I don't.

  • Member since
    June 2013
Posted by bvallot on Wednesday, January 27, 2016 11:10 PM

Thanks Rooster.  Very much appreciated.

Shipwreck, I certainly understand your hestitation.  It sounds like an undertaking.  I tell you what though, the engine wasn't too bad fixing up.  The planning took longer than the execution.  Doing the flaps from scratch, that was a bit nerve-wrecking.  Keeping all the holes lined up proper was a bit daunting.  But it's like anything else, you do one and then you do another.  Before you know it you're on a roll.  I say you should go for it.  By the time you get to the second engine you ought to be a pro! =D  I'd love to see it personally. You could even have one the engines being serviced! *nudge

Jay Jay, I'm glad to know it's helped you out. I absolutely think you should get a post started.  I'd like to see how that's turning out.  I did Hobby Boss's kit a few years back and was happy with it, but I think I'd try another one next go around. 4 days of painting out the details...hot damn. =]  Don't keep us waiting too long. 

On the bench:  

Tamiya F4U-1  Kenneth Walsh


JOIN OUR COMMUNITY!

Our community is FREE to join. To participate you must either login or register for an account.

SEARCH FORUMS
FREE NEWSLETTER
By signing up you may also receive reader surveys and occasional special offers. We do not sell, rent or trade our email lists. View our Privacy Policy.