SEARCH FINESCALE.COM

Enter keywords or a search phrase below:

Airfix 1:72 P-40B Build By Kyle Lord For Tim Connelly

4823 views
58 replies
1 rating 2 rating 3 rating 4 rating 5 rating
  • Member since
    December 2005
Airfix 1:72 P-40B Build By Kyle Lord For Tim Connelly
Posted by PTConsultingNHR on Monday, February 13, 2017 3:36 PM
One of the three builds that Kyle Lord is building for me – the 1:700 Dragon USS ESSEX, a scratch-built MIAMI SHIPBUILDING 63-foot PTC and an Airfix 1:72 P-40B as one of the two famous P-40s which got up and saw action on December 7, 1941.  This is what he sent me today, “This is the Airfix kit, the black is primer waiting for chromate green not including instrument panel or prop which were primed and painted flat black.  I started working on the cockpit last night. The adhesive PE went onto the instrument panel, I folded the PE seat then glued the instrument panel. I don't have pictures but the left cockpit side panel went in as well. It appears I've entered a new realm of tiny!”
Here are five pictures:


Tim
  • Member since
    March 2015
  • From: Streetsboro, Ohio
Posted by Toshi on Monday, February 13, 2017 3:40 PM

A daunting task, 1/72 PE?  Looks fantastic!

Toshi

On The Bench: Revell 1/48 B-25 Mitchell


Married to the most caring, loving, understanding, and beautiful wife in the world.  Mrs. Toshi


  • Member since
    December 2005
Posted by PTConsultingNHR on Tuesday, February 14, 2017 10:11 AM
Toshi, Yeup, that is 1:72 PE, and it's pre-painted. Tim
  • Member since
    December 2005
Posted by PTConsultingNHR on Monday, February 20, 2017 9:28 AM
Kyle sent me an update on my P-40B build. This is what he has said; “First off, my other photo etch bender stopped pinching the metal enough to bend. I splurged and got a heavy-duty metal one, so far, I love it. A bit pricey but it'll last me a lifetime. I finished the sidewall sections if the P-40 and glued the halves together. I also started the flap wells. Don't mind that short one it gets covered by another piece of brass. The lower wing half went on as well as the horizontal stab and rudder. I got the other flap well assembled and is shown here ready for fitting. They require some surgery to fit in, so I won't glue the upper halves in until they fit properly.” Here are some photos:  P40BUILD9 by Tim Connelly, on Flickr  P40BUILD10 by Tim Connelly, on Flickr  P40BUILD11 by Tim Connelly, on Flickr  P40BUILD12 by Tim Connelly, on Flickr  P40BUILD13 by Tim Connelly, on Flickr  P40BUILD14 by Tim Connelly, on Flickr  P40BUILD15 by Tim Connelly, on Flickr  P40BUILD16 by Tim Connelly, on Flickr  P40BUILD17 by Tim Connelly, on Flickr  P40BUILD18 by Tim Connelly, on Flickr  P40BUILD19 by Tim Connelly, on Flickr Tim
  • Member since
    March 2015
  • From: Streetsboro, Ohio
Posted by Toshi on Monday, February 20, 2017 7:01 PM

This is moving along just beautifully!

Toshi

On The Bench: Revell 1/48 B-25 Mitchell


Married to the most caring, loving, understanding, and beautiful wife in the world.  Mrs. Toshi


  • Member since
    January 2015
  • From: Tumwater, WA.
Posted by M. Brindos on Monday, February 20, 2017 7:07 PM

That's a weird texture on the cockpit side walls, but otherwise it's looking splendid.  :)

- Mike Brindos "Lost Boy"

  • Member since
    December 2005
Posted by PTConsultingNHR on Wednesday, February 22, 2017 12:54 PM
Kyle sent me a couple of updates on my P-40B. Here’s what he said, “Here are the brass flap parts for your P40. Tonight I'm hoping to start fitting them into the wing. I plan on taking my time as these could could be fiddly and I'd like to get them to fit as cleanly as possible. I got the first flap well installed last night. This required multiple fits to get it in properly. The first three pictures demonstrate just how much material was removed to achieve this. I actually used superglue to set the wing gap to the fuse, glued in the well, then clamped the remainder of the wing and wicked in Tamiya thin cement.” Here are some photos:  P40BUILD26 by Tim Connelly, on Flickr  P40BUILD25 by Tim Connelly, on Flickr  P40BUILD24 by Tim Connelly, on Flickr  P40BUILD23 by Tim Connelly, on Flickr  P40BUILD22 by Tim Connelly, on Flickr  P40BUILD21 by Tim Connelly, on Flickr  p40BUILD20 by Tim Connelly, on Flickr Tim
  • Member since
    December 2005
Posted by PTConsultingNHR on Monday, February 27, 2017 2:24 PM
Kyle sent me two updates on my P-40B … Here’s what he said, “I got the second flap bay glued into your P40. This one gave me a little more trouble as I knocked off almost every rib on that side. Here they are re-glued in and checked for strength. I have a few more etch pieces to glue in and seems to fill then I'll be onto primer. Starting working on the fills on the P40. Here is my technique, first I tape around the line to be filled. Then I pack putty into the seams, and wash away with a Q-tip dampened with acetone. Next I pull the tape up and wash the remaining putty off with a lightly wet Q-tip. This fills the gap but leave a small indentation where the panel like should be. On the turtle-deck area I mask for the putty, but don't wash the putty off. This way I can sand it smooth and eliminate the gap.” Here are some pictures:  P40BUILD32 by Tim Connelly, on Flickr  P40BUILD31 by Tim Connelly, on Flickr  P40BUILD29 by Tim Connelly, on Flickr  P40BUILD33 by Tim Connelly, on Flickr  P40BUILD26 by Tim Connelly, on Flickr  P40BUILD25 by Tim Connelly, on Flickr Tim
  • Member since
    December 2005
Posted by PTConsultingNHR on Sunday, March 12, 2017 6:54 PM
Kyle sent me a couple of updates over the weekend on my P-40B and here is what he said, “Chipping along. I'm splitting my time between the P40 and my friends Jug. Can't start one jug until I finish the other one! I got the photo etch wheel wells in place, and prepared the wheel hubs for silver. Im trying the frisket film I got for Saucy, I used a circle template to cut the mask out. Fingers crossed I'll shoot it tonight or tomorrow with silver. Here's an update as promised. I had a little time yesterday to paint some silver so I hit the wheel hubs, prop and gear. Funny the prop is specified as aluminum in the Pearl Harbor color scheme.” Here are some photos:  P40BUILD42 by Tim Connelly, on Flickr  P40BUILD41 by Tim Connelly, on Flickr  P40BUILD40 by Tim Connelly, on Flickr  P40BUILD39 by Tim Connelly, on Flickr  P40BUILD38 by Tim Connelly, on Flickr  P40BUILD37 by Tim Connelly, on Flickr  P40BUILD36 by Tim Connelly, on Flickr
  • Member since
    December 2005
Posted by PTConsultingNHR on Monday, March 13, 2017 8:02 PM
Kyle sent me another update on my Pearl Harbor P-40B (#155) and this is what he said, “Not much to share but I got the spinner on the prop and filled the underside of the stabilizer and the wing root gap. Will try to get the wing root faired out tonight and maybe clean up the rest of the seams remaining.” Here are some photos:  P40BUILD43 by Tim Connelly, on Flickr  P40BUILD44 by Tim Connelly, on Flickr  P40BUILD45 by Tim Connelly, on Flickr  P40BUILD46 by Tim Connelly, on Flickr  P40BUILD47 by Tim Connelly, on Flickr Tim
  • Member since
    December 2005
Posted by PTConsultingNHR on Thursday, March 16, 2017 2:54 PM
Kyle has sent me a couple of updates on my P-40B from Pearl Harbor build, here is what he said to me; “Not too bad today for snow. I decided to shoot the fillets with some primer to check the putty work. I had a bit of an airbrush malfunction unfortunately and splashed a drop of primer on the aileron. I'll go back in and re-sculpt the lines when the primer is dry. I don't have a photo but I also blended to the front of the cowling into the spinner. It stuck up about 1/64". I'll get a picture later to show you what I'm talking about. I got a little time on the 40 last night. Here is the spinner blending into the fuselage. I also sanded out my mistake. I took down the rest of the raised detail of both ailerons and will rebuild using styrene or putty, I'm not sure yet.” Here are some photos:  P40BUILD55 by Tim Connelly, on Flickr  P40BUILD56 by Tim Connelly, on Flickr  P40BUILD50 by Tim Connelly, on Flickr  P40BUILD51 by Tim Connelly, on Flickr  P40BUILD52 by Tim Connelly, on Flickr  P40BUILD53 by Tim Connelly, on Flickr  P40BUILD54 by Tim Connelly, on Flickr Tim
  • Member since
    July 2014
Posted by modelcrazy on Thursday, March 16, 2017 5:35 PM

Looking good Tim. How's that Essex comming along anyway?

Steve

Building a kit from your stash is like cutting a head off a Hydra, two more take it's place.


http://www.spamodeler.com/forum/

  • Member since
    December 2005
Posted by PTConsultingNHR on Friday, March 17, 2017 2:06 PM
Hi Modelcrazy, You know, my brother who takes care of me now calls ME model crazy, ha-ha. The ESSEX, ... Well, Kyle has said that he' been busy with work, the 1:72 P-40 for me, and a 1:48 USAAC P-47 Razorback for a friend of his, he hasn't done much on her, though he did say when he has photos of it, he'll pass them along to me. He's also doing a 1:72 P-47 Razorback for me in RAF markings. Another project he'll do for me is a semi-scratch-built 1:72 63-foot AIR RESCUE BOAT (ARB) that our Navy used for special operations in WW2. It's a really cool looking boat. I got the hull from Christian Capurro from Gibraltar, Kyle needs to make everything else. I got some fittings from SHAPEWAYS. That's the project I'm interested in the most of my ESSEX, P-40, and the P-47 at Kyle's now. What he did with my 1:144 FLOWER as USS SAUCY and the Merit G-5 MTB, I bet he'd do a bang-up job on my ESSEX and my ARB-22. Tim
  • Member since
    July 2014
Posted by modelcrazy on Friday, March 17, 2017 5:29 PM

I peeked in on the Saucy build the other day. He's got a lot on his plate. 

Steve

Building a kit from your stash is like cutting a head off a Hydra, two more take it's place.


http://www.spamodeler.com/forum/

  • Member since
    December 2005
Posted by PTConsultingNHR on Friday, March 17, 2017 7:48 PM
The SAUCY is sitting over my right shoulder - in its case - on the shelf as I typed this.
  • Member since
    May 2016
Posted by Kyle Lord on Friday, March 17, 2017 8:39 PM
Hey Guys, What can I say Tim keeps me pretty busy. I am thoroughly enjoying the process. He's right though been averaging 50-70 hours a week so I can't seem to find much time to to build lately. It'll slow down though it's just the time of the season. Kyle
  • Member since
    December 2005
Posted by PTConsultingNHR on Monday, March 20, 2017 10:50 AM
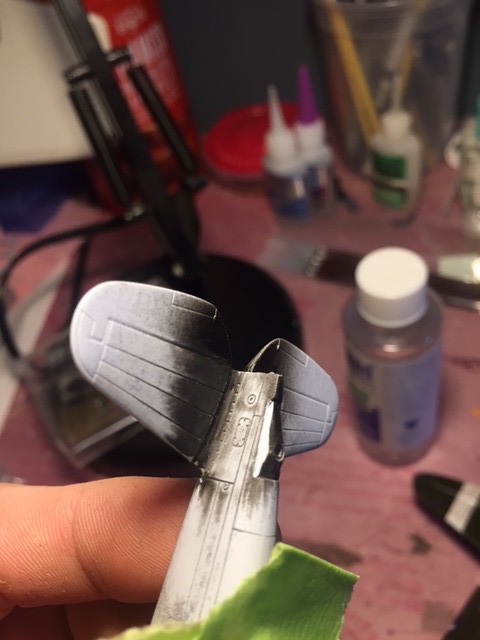
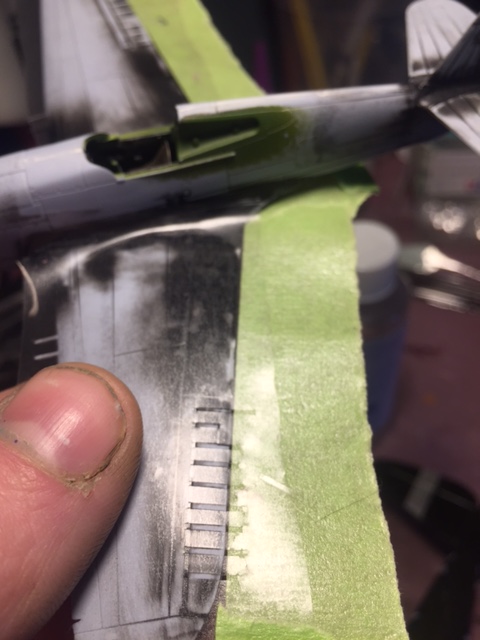
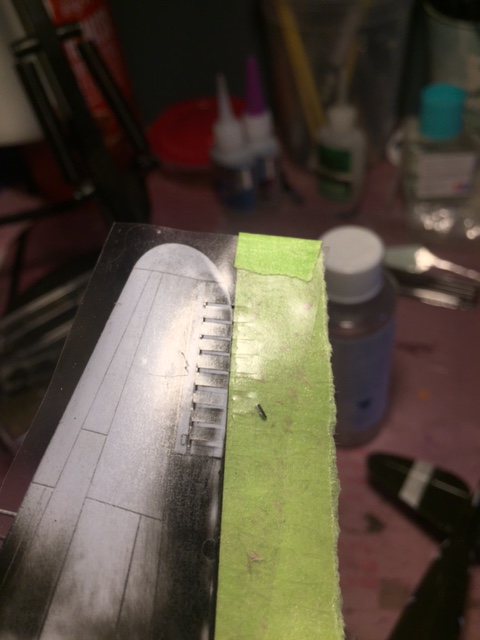
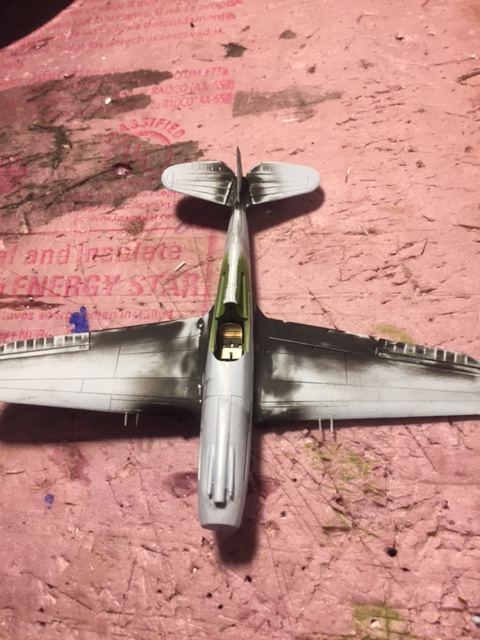
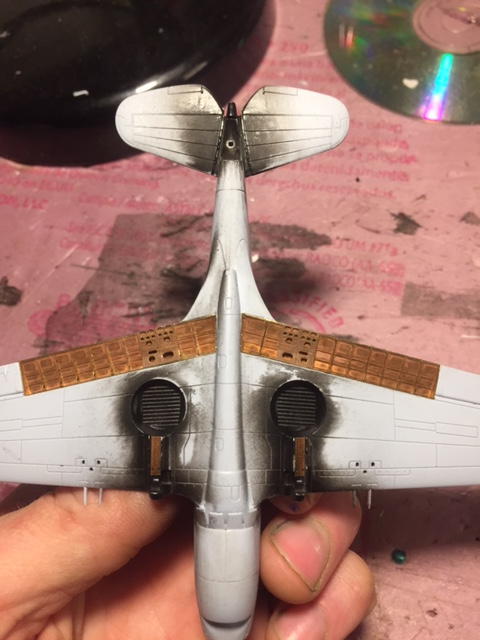
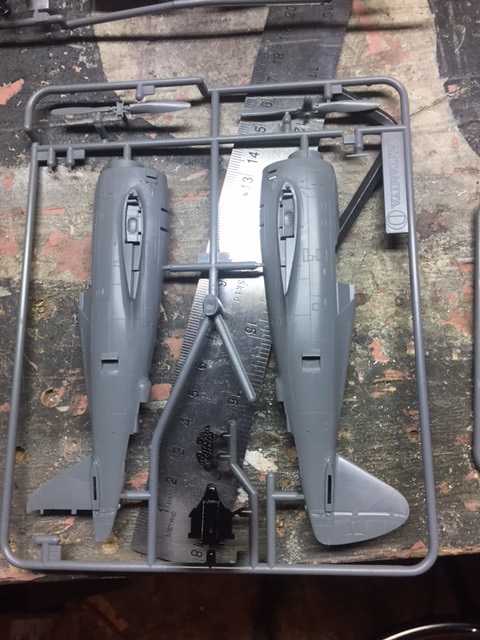
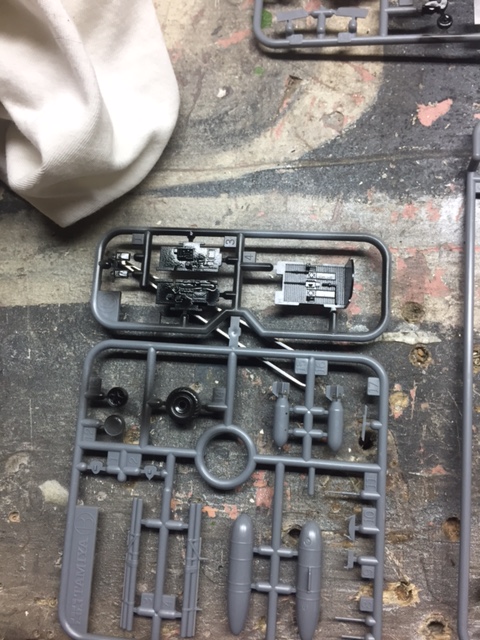
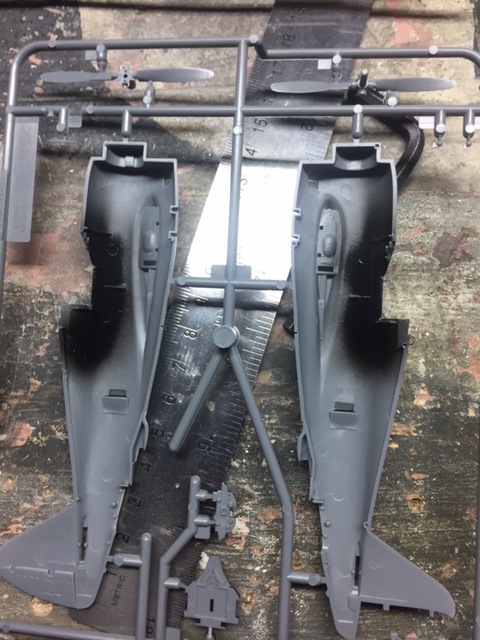
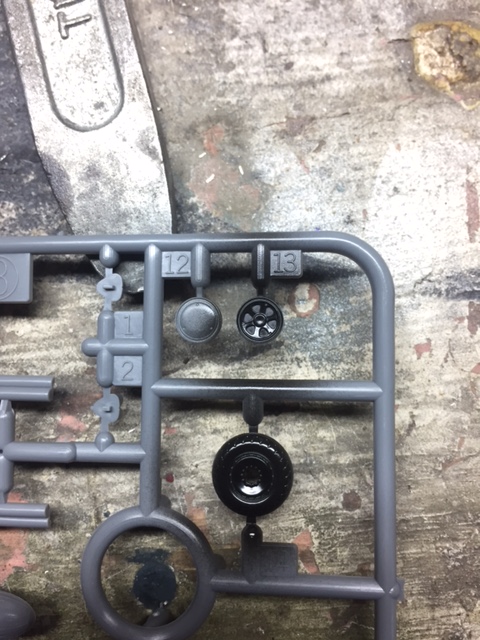
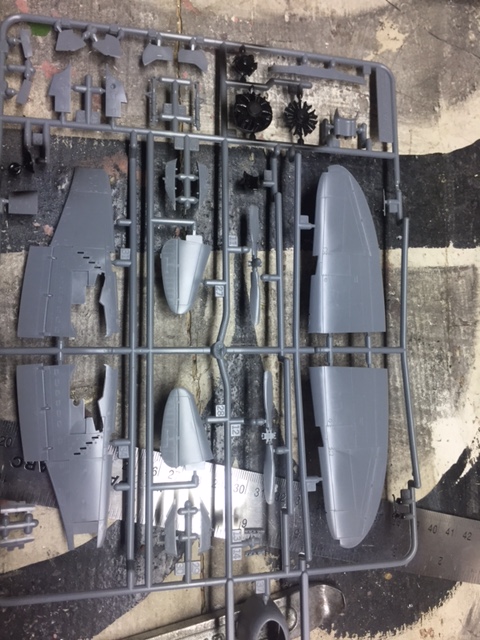
Over the weekend, Kyle sent me three updates on my Pearl Harbor P-40B, and now the RAF P-47 Razorback Thunderbolt. Here is what he said in those updates, “I sanded the fillets, wings and tail surfaces on the P-40. Basically, I'll need to fit the tail gear doors, mask the cockpit and do a minor fill where the flaps meet the wing. Feels like it's just inching along right now, I'm itching to get it into primer and paint. So, I finally got to making a recess for the photo-etch tail-gear doors. Not as tricky as I thought it only took about 15 minutes. I also came up with how I'm going to fix the aileron detail. I used frisket film again to see where the lines used to be, then trimmed away where the highs will be. I'll shoot these with a couple coats of that black primer to rebuild. I sprayed primer onto the ailerons of the P-40. I also painted the exhaust stacks, I'll get a photo of that out later. Because I was doing primer, I figured why the heck not shoot some parts for your 1:72 Jug.” Here are some photos:  P40BUILD57 by Tim Connelly, on Flickr  P40BUILD58 by Tim Connelly, on Flickr  P40BUILD59 by Tim Connelly, on Flickr  P40BUILD60 by Tim Connelly, on Flickr  P40BUILD61 by Tim Connelly, on Flickr  P40BUILD62 by Tim Connelly, on Flickr  P40BUILD63 by Tim Connelly, on Flickr  P40BUILD64 by Tim Connelly, on Flickr  P47BUILD by Tim Connelly, on Flickr  P47BUILD1 by Tim Connelly, on Flickr  P47BUILD2 by Tim Connelly, on Flickr  P47BUILD3 by Tim Connelly, on Flickr  P47BUILD4 by Tim Connelly, on Flickr Tim
  • Member since
    December 2005
Posted by PTConsultingNHR on Monday, March 27, 2017 3:13 PM
Kyle sent me an update this morning on my Pearl Harbor P-40, here is what he said, “I buckled down and masked the P-40. Wasn't as bad as I thought to do. I also glued the rudder back on as I accidentally popped it off a while back. All that is left is to fill where the inner flap meets the wing and smooth over the ailerons. Hopefully I'll be able to shoot some primer after work tomorrow.” Here are some photos:  P40BUILD66 by Tim Connelly, on Flickr  P40BUILD67 by Tim Connelly, on Flickr  P40BUILD68 by Tim Connelly, on Flickr Tim
  • Member since
    January 2015
  • From: Tumwater, WA.
Posted by M. Brindos on Monday, March 27, 2017 8:13 PM

Hey, let Kyle know that the sections behind the glass aft of the pit are body color and not cockpit color.

That was something I did on two builds before I was told it was incorrect lol.

Give him a head's up!

- Mike Brindos "Lost Boy"

  • Member since
    December 2005
Posted by PTConsultingNHR on Tuesday, March 28, 2017 11:17 AM
Right, sir, I will do that. Thank you. Kyle sent me an update last night on my Pearl Harbor P-40, and on my RAF P-47, here is what he said, “The P-40 is officially ready for primer. I knocked back my aileron repair with some 1200 wet until the lines felt softer. I carefully taped and filled the flap gap, washed back to the tape with acetone then sanded smooth with 600 wet. I'm hoping to shoot the primer tomorrow, then I'll have to wait until I can get some sky gray from the hobby store to start the color coats. On the P-47 I glued a panel to the underside of the wing. Oddly this panel didn't fit too well and I had to shorten it a tad. I sanded the putty on the belly pan that I applied the other day up to 600 grit wet. I also painted the tires flat black. I actually took pictures yesterday only to see in the pictures my lines were off, so I went back with that Windsor Newton 0000 brush and got as close to the hub as I could. I have a few more pieces to add to the wing, and I have to open up the holes for the rocket tubes and I'll be ready to do more putty on it.” Here are some photos:  P40BUILD70 by Tim Connelly, on Flickr  P40BUILD71 by Tim Connelly, on Flickr  P40BUILD73 by Tim Connelly, on Flickr  P40BUILD74 by Tim Connelly, on Flickr Tim
  • Member since
    December 2005
Posted by PTConsultingNHR on Wednesday, March 29, 2017 10:10 AM
Kyle sent me an update last night on my Pearl Harbor P-40, and here is what he said,”I shot some primer this evening. The first picture is after one coat, the next two are after a second coat. The panel lines are very, very deep, at first I thought about getting the primer to bridge the lines, but decided against it because that much primer would cause other issues. This is fresh out of the can, I'll evaluate it tomorrow after it's dried and go from there. At the very least I'll be re-scribing the lines where they intersect the wing fillet.” Here are some photos:  P40BUILD71 by Tim Connelly, on Flickr  P40BUILD72 by Tim Connelly, on Flickr  P40BUILD73 by Tim Connelly, on Flickr Tim
  • Member since
    July 2014
Posted by modelcrazy on Wednesday, March 29, 2017 10:18 AM

Yeah, that's typical of the new Airfix, nice detail but deep panel lines. 

Steve

Building a kit from your stash is like cutting a head off a Hydra, two more take it's place.


http://www.spamodeler.com/forum/

  • Member since
    December 2005
Posted by PTConsultingNHR on Thursday, March 30, 2017 10:45 AM
Kyle sent me an update last night on my Pearl Harbor P-40 and my RAF P-47 builds, and here is what he said, “Made some progress in the past two days. The P-40 was primed. The first shot is of when it's still wet. I got the remaining panels and gun mounts into the Jug. I test fit the engine into cowling. I also test fit the gear on the plane. Today after the primer was dried, I re-scribed the lines into the top of the wing. I decided to scribe a line on the wing running parallel to the wing fillet. It looked off just having the wing lines end nowhere. Lastly, I took a shot of both your 1:72 planes. Slow but steady they're moving along.” Here are some photos:  P40BUILD71 by Tim Connelly, on Flickr  P40BUILD72 by Tim Connelly, on Flickr  P40BUILD73 by Tim Connelly, on Flickr  P40BUILD72 by Tim Connelly, on Flickr  P40BUILD73 by Tim Connelly, on Flickr  P40BUILD74 by Tim Connelly, on Flickr  P40BUILD76 by Tim Connelly, on Flickr  P40BUILD77 by Tim Connelly, on Flickr  P40BUILD78 by Tim Connelly, on Flickr  P40BUILD79 by Tim Connelly, on Flickr  P40BUILD80 by Tim Connelly, on Flickr  P40BUILD81 by Tim Connelly, on Flickr  P40BUILD82 by Tim Connelly, on Flickr  P47BUILD38 by Tim Connelly, on Flickr  P47BUILD39 by Tim Connelly, on Flickr  P47BUILD40 by Tim Connelly, on Flickr  P47BUILD41 by Tim Connelly, on Flickr  P47BUILD42 by Tim Connelly, on Flickr Tim
  • Member since
    July 2014
Posted by modelcrazy on Thursday, March 30, 2017 10:58 AM

Those are some deep lines! My guess is they will fade some after the flat is applied.

Steve

Building a kit from your stash is like cutting a head off a Hydra, two more take it's place.


http://www.spamodeler.com/forum/

  • Member since
    January 2015
  • From: Tumwater, WA.
Posted by M. Brindos on Thursday, March 30, 2017 1:03 PM

Those panel lines will catch a wash, almost no matter how much paint you apply. They can sometimes get filled like my Academy P-40E (shallow lines) and it is a nightmare to have to repair.

Those deep panel lines are a blessing in my opinion lol.

Looking great thus far.  :)

- Mike Brindos "Lost Boy"

  • Member since
    December 2005
Posted by PTConsultingNHR on Saturday, April 1, 2017 10:16 AM
Kyle sent me an update this morning on my Pearl Harbor P-40, and this is what he said, “I got the gray and OD Green on the P-40. I will try to get some gloss clear on today in preparation for decals. I’ll have to let the clear cure for 3-4 days before I can decal.” Here are some photos:  P40BUILD83 by Tim Connelly, on Flickr  P40BUILD87 by Tim Connelly, on Flickr  P40BUILD87 by Tim Connelly, on Flickr  P40BUILD86 by Tim Connelly, on Flickr  P40BUILD84 by Tim Connelly, on Flickr  P40BUILD85 by Tim Connelly, on Flickr  P40BUILD88 by Tim Connelly, on Flickr Tim
  • Member since
    January 2015
  • From: Tumwater, WA.
Posted by M. Brindos on Saturday, April 1, 2017 10:28 AM

Now she's looking good! :D

- Mike Brindos "Lost Boy"

  • Member since
    December 2005
Posted by PTConsultingNHR on Saturday, April 1, 2017 2:14 PM
Thanks, Mike,......
  • Member since
    December 2005
Posted by PTConsultingNHR on Saturday, April 1, 2017 6:08 PM
Kyle sent me an update this afternoon on my Pearl Harbor P-40, and this is what he said, “Here is the P-40, if my test holds up this evening to decal solvent then I can start applying decals. If not I'll give it a couple days to dry.” Here are some photos:  P40BUILD93 by Tim Connelly, on Flickr  P40BUILD91 by Tim Connelly, on Flickr  P40BUILD90 by Tim Connelly, on Flickr Tim
  • Member since
    January 2015
  • From: Tumwater, WA.
Posted by M. Brindos on Saturday, April 1, 2017 7:21 PM

Nice and shiney, smooth! 

- Mike Brindos "Lost Boy"

JOIN OUR COMMUNITY!

Our community is FREE to join. To participate you must either login or register for an account.

SEARCH FORUMS
FREE NEWSLETTER
By signing up you may also receive reader surveys and occasional special offers. We do not sell, rent or trade our email lists. View our Privacy Policy.