SEARCH FINESCALE.COM

Enter keywords or a search phrase below:

Tammy's 1/48 - Whole lotta Zero going on here.

6489 views
93 replies
1 rating 2 rating 3 rating 4 rating 5 rating
  • Member since
    June 2014
Posted by BrandonK on Thursday, September 7, 2017 9:05 AM

Looking great. I agree that the chipping is looking awesome.

BK

On the bench:

A lot !! And I mean A LOT!!

2024 Kits on deck / in process / completed   

                         14 / 5 / 2  

                              Tongue Tied

  • Member since
    July 2003
  • From: Cincinnati, Ohio
Posted by ridleusmc on Thursday, September 7, 2017 10:13 AM

Thank you all very much gentlemen,

This is a fun project.  Sometimes it makes me nervous, but trying a new method is making this an enjoyable project.  I should have time to work on the fuselage tonight.  I'm on my lunch-break right now, and I can't help but think about my Zero.

  • Member since
    December 2010
  • From: Salem, Oregon
Posted by 1943Mike on Thursday, September 7, 2017 11:03 AM

"I'm on my lunch-break right now, and I can't help but think about my Zero."

Chris, Just remember when you sit back down at your air traffic control screen that there should be no more thinking about the zero until you're off work Big Smile.

Seriously, a wonderful thread to follow. I've been hesitant about trying the chipping techniques that include what you're doing. They intimidate me a bit. However, looking at what you're doing and watching your progress I may end up trying it one day. I'm really enjoying this WIP and hope to learn a bit from watching your fine work.

Mike

"Le temps est un grand maître, mais malheureusement, il tue tous ses élèves."

Hector Berlioz

  • Member since
    November 2009
  • From: SW Virginia
Posted by Gamera on Thursday, September 7, 2017 12:09 PM

Superb job! 


I've been using Lawdog's streaking technique for a while now. I can't get it to look anywhere as good as his but I still really like the look of it.

"I dream in fire but work in clay." -Arthur Machen


  • Member since
    July 2003
  • From: Cincinnati, Ohio
Posted by ridleusmc on Thursday, September 7, 2017 9:58 PM

Thank you Mike, Thank you Gamera,

The positive feedback from everyone on this thread is keeping me motivated.  The model is helping too.  I'm having fun and enjoying the results.  Additionally, these forums tend to make me think more about various techniques and subjects.    

Thursday night update, 

I worked on the upper fuselage in the area around the engine, wings, and pit.  These are the areas in which the zero would have seen the most traffic from pilots, maintenance crews, and armorers.  I beat it up a little bit, but I don't think I went overboard.  This should be the most heavily worn section of the aircraft.  I think it turned out well.

 IMG_2262 by Christopher Ridle, on Flickr

 IMG_2263 by Christopher Ridle, on Flickr

 IMG_2264 by Christopher Ridle, on Flickr

I've noticed one side effect of the plastic polish technique.  Wiping the excess plastic polish away with a cotton swab creates slight variations in the base paint.  It's subtle, but it looks good to my eye.  I wipe the excess away in the direction of airflow.  Now is a good time to set it down.  I'll get back to on the weekend.  

Cheers Beer  

  • Member since
    November 2009
  • From: SW Virginia
Posted by Gamera on Friday, September 8, 2017 1:48 PM

She's looking just amazing- I'm going to have to steal some of your techniques here. As I said I have that book somewhere, I glaced though it but haven't applied anything yet. You're convincing me! 

"I dream in fire but work in clay." -Arthur Machen


  • Member since
    July 2003
  • From: Cincinnati, Ohio
Posted by ridleusmc on Friday, September 8, 2017 9:04 PM

^ Honestly Gamera, there are so many modeling books out there that are short of useful information.  This book is the quite the opposite.  There's a wealth of useful stuff in there.  The technique is fun.  I want to do more chipped birds!

Friday Night update, 

Model night!  Wifey has to work early tomorrow, so I got some good plastic time.  

I'm calling the chipping, scratching, and wearing done for the green parts of the bird.  I'll work on the grey underside tomorrow.  I added another variation to the process.  I run a metal scribe along the panel lines to wear them slightly.  I give it an extra couple of scratches at random panel lines to break things up .  The leading edges of the verticle and horizontal stabilizers got some wear with the polish compound cotton swab.  I'm pretty happy with the results.  

Brad Keselowski does the best burnouts.

Cheers Beer

 IMG_2265 by Christopher Ridle, on Flickr

 IMG_2266 by Christopher Ridle, on Flickr

 IMG_2267 by Christopher Ridle, on Flickr

 IMG_2268 by Christopher Ridle, on Flickr

 IMG_2269 by Christopher Ridle, on Flickr


  • Member since
    July 2003
  • From: Cincinnati, Ohio
Posted by ridleusmc on Saturday, September 9, 2017 11:40 PM

Saturday Night Update, 

I worked on the underside of the Zero today.  I decided to really beat up the area forward of the tail wheel.  It'd recieve some harsh treatment taking off and landing on an unimproved airfield.  Maybe I overdid it a little, but I like it.  

Tomorrow, I'll beat up the landing gear doors.  I think I'll use pencils to beat up the canopy frames.  I think I'll repaint aft side of the propeller blades.  

 IMG_2282 by Christopher Ridle, on Flickr

 IMG_2281 by Christopher Ridle, on Flickr

 IMG_2279 by Christopher Ridle, on Flickr

  • Member since
    February 2012
  • From: Olmsted Township, Ohio
Posted by lawdog114 on Monday, September 11, 2017 11:46 PM
I dig! Those painted on hinos are awesome. Will be so much easier to run a wash into as well. A streak tutorial would be tough...but I'll try on my Mossie which is next.

 "Can you fly this plane and land it?...Surely you can't be serious....I am serious, and don't call me Shirley"


  • Member since
    July 2003
  • From: Cincinnati, Ohio
Posted by ridleusmc on Tuesday, September 12, 2017 8:28 AM

That's great LawDog, 

I'll be sure to watch for your Mossie.  I like Mosquitos.  They're interesting birds, and they look cool.  

Sunday and Monday I worked some little things.  It was all about getting some of the detail parts ready for installation.  I beat up the auxiliary fuel tank.  It got some scratches to mimic handling damage, but not weathering.  I doubt they had much chance to weather.  I added some paint to the antenna, landing gear struts, landing lights, and gun-sight.  

I had overdone the wear and chipping on the propellers.  They are aluminum on the forward sides, but flat black on the aft sides.  I removed the remaining flat black from the aft sides, and I repainted them.  Then, I used a tooth-pick to wear away some of the aft sides at the leading edge.  I don't have a before picture, but this is how they look now.

 IMG_2287 by Christopher Ridle, on Flickr

I'm much happier with it now.  

Next up will be installing the antenna and the canopy.  I still have some paint to apply for the landing lights.  It's time to work some little things.  Decals will present a new challenge.  Some markings will need to be cut/torn where they meet worn areas of the paintwork.  

Cheers Beer

  • Member since
    July 2003
  • From: Cincinnati, Ohio
Posted by ridleusmc on Tuesday, September 12, 2017 9:49 PM

Tuesday Night update:

I've been working a few things.  I've worked the tail light, wingtip lights, formation lights, canopy, antenna, propeller, and landing gear doors.  The landing gear are assembled, but I'll wait to attach them permanently.  The wing cannon barrels, aleron horns and pitot tube have been left off.  I've done some paint touch-ups here and there, so I'll wait a day before I apply a gloss coat for the decals.  I'm loving the way this bird is looking.  There was a slight imperfection of the paint on the spinner cone.  The imperfection created a small detent in the gloss aluminum.  I applied three small dots of my primer color in and around the detent.  Then I scraped most of the paint away, but I allowed some of it to smear.  Here's how she's looking tonight.  

 IMG_2299 by Christopher Ridle, on Flickr 

 IMG_2298 by Christopher Ridle, on Flickr

 IMG_2297 by Christopher Ridle, on Flickr

 IMG_2296 by Christopher Ridle, on Flickr

 IMG_2295 by Christopher Ridle, on Flickr

 IMG_2294 by Christopher Ridle, on Flickr

 IMG_2293 by Christopher Ridle, on Flickr

 IMG_2292 by Christopher Ridle, on Flickr

 IMG_2291 by Christopher Ridle, on Flickr

Cheers Beer

  • Member since
    December 2002
  • From: Northern California
Posted by jeaton01 on Tuesday, September 12, 2017 10:11 PM

Pretty darn nice, Chris.

John

To see build logs for my models:  http://goldeneramodel.com/mymodels/mymodels.html


  • Member since
    July 2003
  • From: Cincinnati, Ohio
Posted by ridleusmc on Friday, September 15, 2017 6:25 PM

Thank you John, 

I haven't done much but apply decals.  I'll give it a day or two before moving on.  In the meantime, I'll work on the pilot.  

 IMG_2303 by Christopher Ridle, on Flickr

 IMG_2304 by Christopher Ridle, on Flickr

 IMG_2305 by Christopher Ridle, on Flickr

 IMG_2306 by Christopher Ridle, on Flickr

 IMG_2307 by Christopher Ridle, on Flickr

 IMG_2308 by Christopher Ridle, on Flickr

 IMG_2309 by Christopher Ridle, on Flickr

Cheers Beer

  • Member since
    November 2008
  • From: Hatboro, PA
Posted by Justinryan215 on Saturday, September 16, 2017 7:53 AM

Looking really good!  I'm really getting anxious to get started on mine!

"...failure to do anything because someone else can do better makes us rather dull and lazy..."

Mortal as I am,I know that I am born for a day.  But when I follow at my pleasure the serried multitude of the stars in their circular course, my feet no longer touch the Earth...


  • Member since
    June 2017
Posted by Chemteacher on Saturday, September 16, 2017 8:52 AM
Looks awesome. Great job!

On the bench: Revell-USS Arizona; Airfix P-51D in 1/72

  • Member since
    March 2005
  • From: Lancaster, South Carolina
Posted by Devil Dawg on Saturday, September 16, 2017 8:35 PM

ridleusmc

Brad Keselowski does the best burnouts.

Cheers Beer

He does some great ones, I'll give you that. Anytime Kyle Busch DOESN'T win is always a great race!!

I've heard a rumor that MOPAR will be back in NASCAR Monster Cup next year, and Mr. Brad will be driving one of them again. But, it's just a rumor......Whistling Toast 

Devil Dawg

On The Bench: Tamiya 1/32nd Mitsubishi A6M5 Model 52 Zeke For Japanese Group Build

Build one at a time? Hah! That'll be the day!!

  • Member since
    July 2003
  • From: Cincinnati, Ohio
Posted by ridleusmc on Saturday, September 16, 2017 9:00 PM

^  OH NO!

I'm a Ford fan, and Penske racing was the only competitive team carrying the banner for a couple of seasons.  It wasn't until Steward/Haas switched to Ford that they had some support.  I agree about Kyle Busch, and I'm always hoping Danica's wreck takes him out.  

Saturday update,

I found a base, and I started to prep it.  It's from Michael's, and I think it's intended to be a clock face.  It's a wood circle at about 11 inches in diameter, which is about the wingspan of the zero.  It looks like a Hinomaru, so I used Minwax's Sedona Red stain to give it a red look.  I'll be putting some ground work on it.  I want to try to recreate the dusty airstrip at Buin, Bougainville as it looked in the summer of 1943.  

 IMG_2314 by Christopher Ridle, on Flickr

I started painting figures in 1/35 scale late last year, but it's not easy.  This is my first attempt in 1/48.  I'd be lost without my Vallejo set.  I'm happy with how my pilot is looking so far.  The pilot still needs some paint for parachute straps and other details.  I guess it kinda looks like Lt. Cmdr. Saburo Shindo.  

 IMG_2320 by Christopher Ridle, on Flickr

Now it's time for a Beer

Cheers Beer

  • Member since
    July 2003
  • From: Cincinnati, Ohio
Posted by ridleusmc on Tuesday, September 19, 2017 10:10 PM

Tuesday Night update,

Things are rolling nicely.  I completed a wash using Windsor and Newton's Artist Oil Burnt Umber.  I like the effect.  It just seems a little grimy.  It's most prominent on the green/gray underside, but it has a good effect on the green as well.  

 IMG_2323 by Christopher Ridle, on Flickr

 IMG_2325 by Christopher Ridle, on Flickr

 IMG_2326 by Christopher Ridle, on Flickr

I finished the painting on the pilot.  

 IMG_2328 by Christopher Ridle, on Flickr

Tomorrow, I'll use some pastel chalk and pigment powder to simulate exhaust and gun-fire staining.  

The base has been stained and sealed.  It just needs some simple ground-work.  It should be done soon.  

I stopped at the hobby shop after work today, and I was just going to get supplies.  However, I couldn't help it.  I purchased my next project.  It's a Trumpeter 1/350 USS Cole (DDG-67).   

Cheers Beer!

  • Member since
    November 2009
  • From: SW Virginia
Posted by Gamera on Wednesday, September 20, 2017 7:39 AM

Love how she's coming along and the pilot ain't half bad either. Yes

"I dream in fire but work in clay." -Arthur Machen


  • Member since
    June 2013
Posted by bvallot on Wednesday, September 20, 2017 2:11 PM

Nice job Chris! She's shaping up into a beautiful Zero. =] If I can offer one quick tip it would be this. I noticed on your exhausts you can see how thick the plastic is from the how the kit part is molded. Certain molding processes can only make the plastic so thin and some parts might need a little help here and there. I learned this from a guy who owns a Hobby Shop near where I live and he used to judge a bunch of IMPS shows all the time. He talked a lot about the scale thickness of objects to me. Everything he mentioned afterwards was like one continuous Christmas string of lights going off. It seems very obvious once pointed out, but some times it is difficult to really see something you've been staring at forever.

So when it comes to something like the exhaust on your car or truck, you'll note that it's a very thin metal. To represent this at 1:48 would be virtually impossible to do with 100% accuracy as it needs to be razor thin, but we can get it most of the way there and make it work for us. Plenty of ways to get there and pull it off. Most times it's better to do it during construction so you're not messing up your paint and finish. Don't forget this can apply to anything. It could be a cowling panel or flap that is seen straight on--sand it down thin. It could be the trailing edge of a wing that's molded to thick--sand it thin. That's basically the take away here. =] I think what you've got is perfectly fine, but I wanted to offer some input in the instance that you're looking to make things pop a bit more. You seem like someone who goes the distance ;).

Looking forward to seeing her complete!

On the bench:  

Tamiya F4U-1  Kenneth Walsh


  • Member since
    July 2003
  • From: Cincinnati, Ohio
Posted by ridleusmc on Wednesday, September 20, 2017 8:59 PM

Yeah, I guess the scale thickness of the exhausts is about a 1/4 to 1/2 an inch.  That'd be a heavy exhaust.  Yes, you're right, I should be thinking more about scale thickness more often.  Exhausts are a great place to start.  Thank you for the suggestion and the input.  I'll scrape and file such things on my next project.  

Cheers Beer

  • Member since
    June 2013
Posted by bvallot on Wednesday, September 20, 2017 9:34 PM

Hey, not a problem bud. Just sharing the love. =] I mention it here because just like you mentioned exhausts are a great place to start. And once you do, you'll start looking at all kinds of areas that need a little TLC here and there to ship-shape them into something more appropriate to whatever scale you're working in. 

There's ways of using color to diminish or highlight an object or shape as well. People do it with makeup all the time. To lower the profile of something, you're really looking to keep reflectivity down and make use (in this case) the dark as best you can. Dark as in color. So for something like exhausts what I would do in lieu of sanding late in the game is to make that lip as dark as possible without making it too sharp a transition that it still looks like its own shape. The idea is to erase the shape...prevent the eye from reading it well...keeping it dark and not allowing light to show it well. Just drybrushing a near black color or very dark version of whatever you've already applied to the interior of the exhaust. Maybe that can be of some use if you're interested.

Looking forward to the rest! 

Oh! and I meant to ask what color did you use to come up with the primer color for the Zero. I know you mentioned it earlier, but I figured I'd ask you while I'm posting. Thanks.

On the bench:  

Tamiya F4U-1  Kenneth Walsh


  • Member since
    February 2012
  • From: Olmsted Township, Ohio
Posted by lawdog114 on Thursday, September 21, 2017 3:14 AM
Looking great Chris. Pilot too...Those pilots are one of Tamiya's better efforts..

 "Can you fly this plane and land it?...Surely you can't be serious....I am serious, and don't call me Shirley"


  • Member since
    July 2003
  • From: Cincinnati, Ohio
Posted by ridleusmc on Thursday, September 21, 2017 8:37 AM

bvallot - The red primer was a mix of Tamiya's Hull Red XF-9 and Red XF-7.  It was close to a 50/50 split.  I used reference pictures from the previously mentioned book to fine-tune the color.    

I may try that drybrush technique to obscure the size of the exhaust pipe walls.  I'll be away from my bench for a couple of days, so I'll have to finish the zero sometime next week.  

LawDog, you're right.  The figures are amazing.  Initially, I didn't even think about them.  However, I decided to build, paint, and display one after seeing them.  I'll have four left for my spares box.     

  • Member since
    March 2005
  • From: Lancaster, South Carolina
Posted by Devil Dawg on Thursday, September 21, 2017 8:13 PM

She's lookin' good, Marine!

One question for you that I'm surprised no one has asked yet: Just how in the heck are you keeping that work bench so clean while building a model???!!!! Bow Down

Devil Dawg

On The Bench: Tamiya 1/32nd Mitsubishi A6M5 Model 52 Zeke For Japanese Group Build

Build one at a time? Hah! That'll be the day!!

  • Member since
    July 2003
  • From: Cincinnati, Ohio
Posted by ridleusmc on Monday, September 25, 2017 6:47 PM

Devil Dawg

Just how in the heck are you keeping that work bench so clean while building a model???!!!! Bow Down


I use my right arm to push all of my paints, glues, brushes, tweezers, knives and sanding sticks to the far right side of my workbench.  Then I take pictures.  Then everything migrates across the workbench again.  I did just purchase a Yuuuuuge cutting mat, and it still has that new cutting mat smell.  

I finished my Zero.  My original plan was to get the base, pilot and plane together before I posted pictures.  However, the base warped like a Pringle's potato chip.  I only used one coat of polyurethane to seal the base, and I used a very wet mix of Celluclay for ground texture.  So, I'm starting over with the base.  It won't be ready for a few days.  This time it'll get two coats of polyurethane and no Celluclay.  

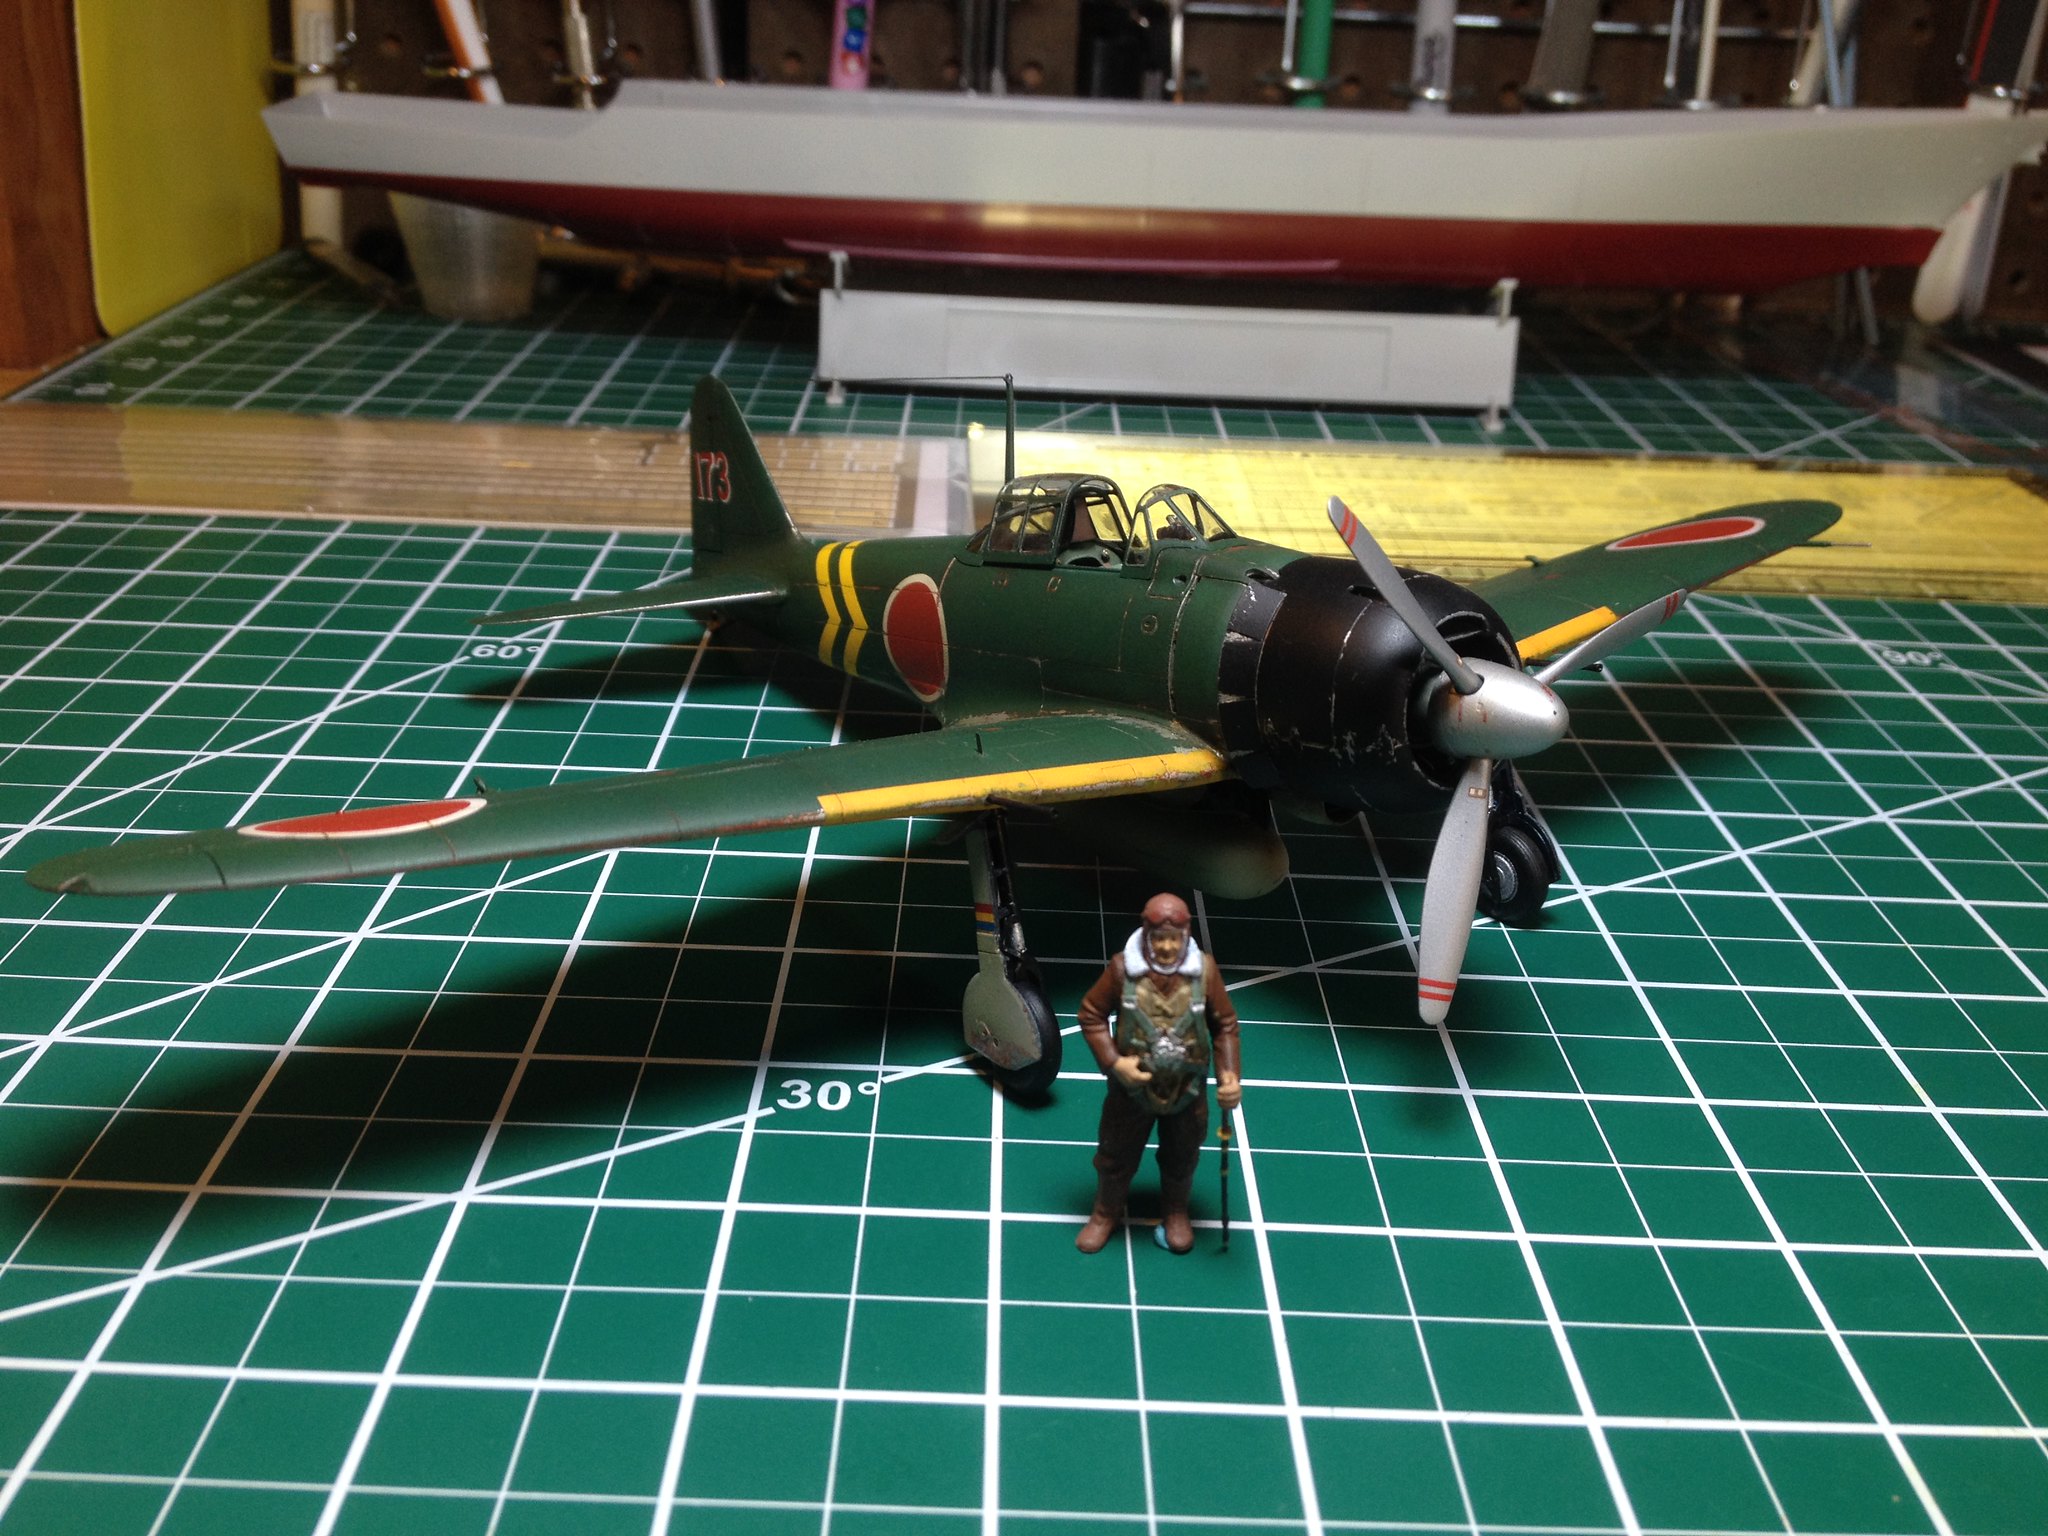
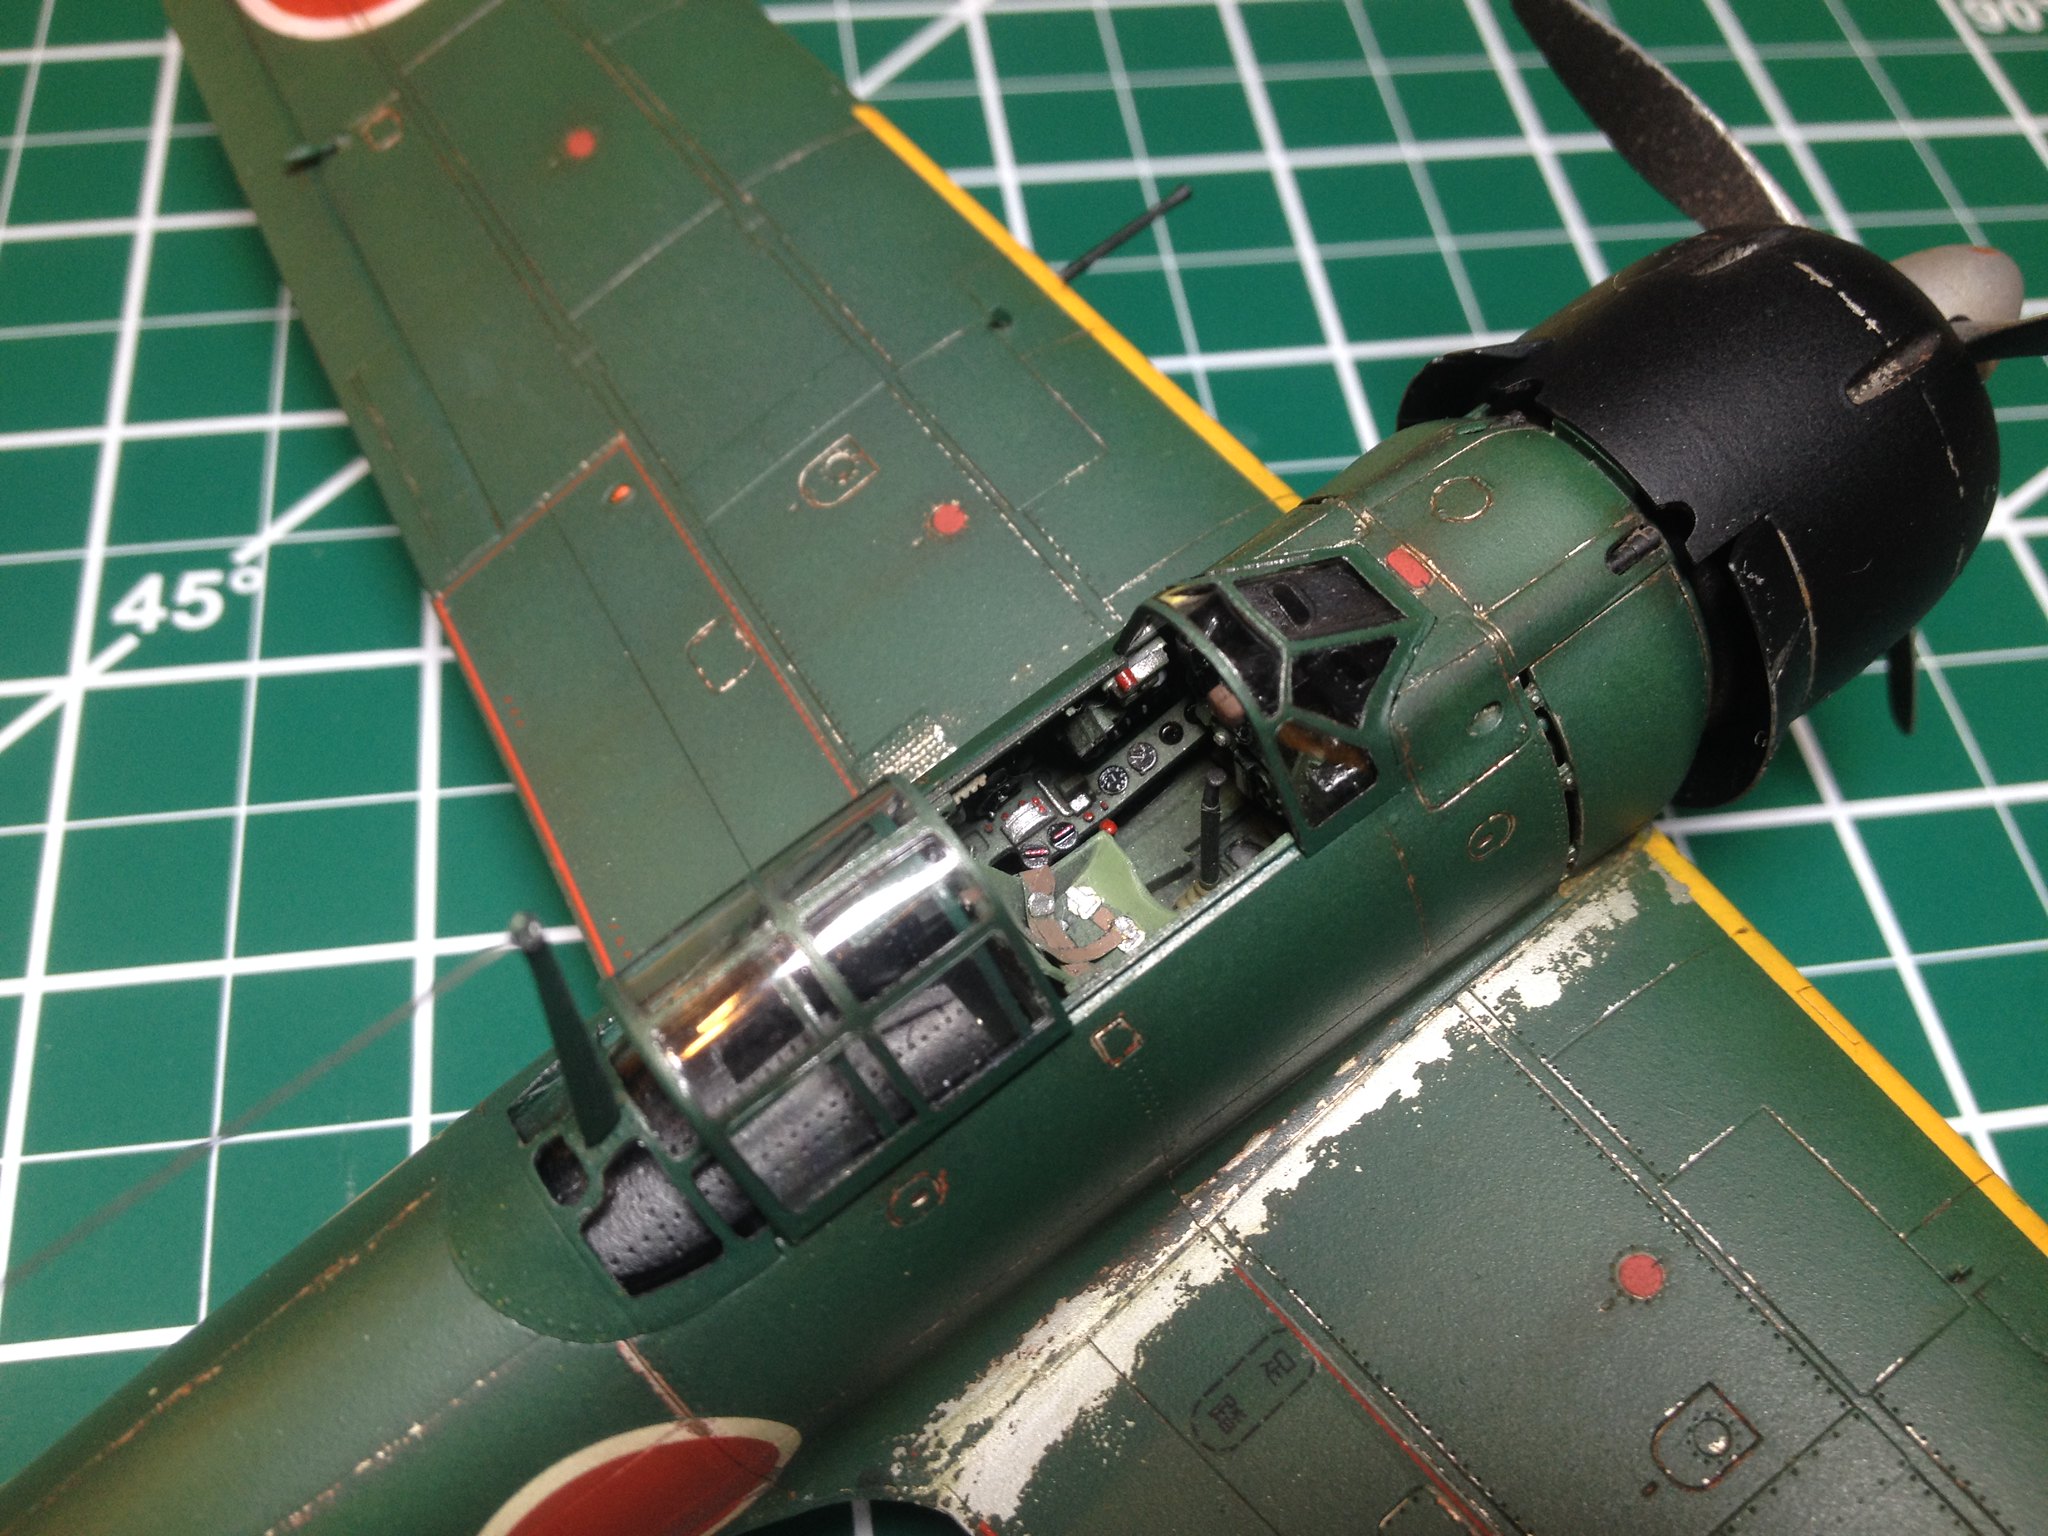
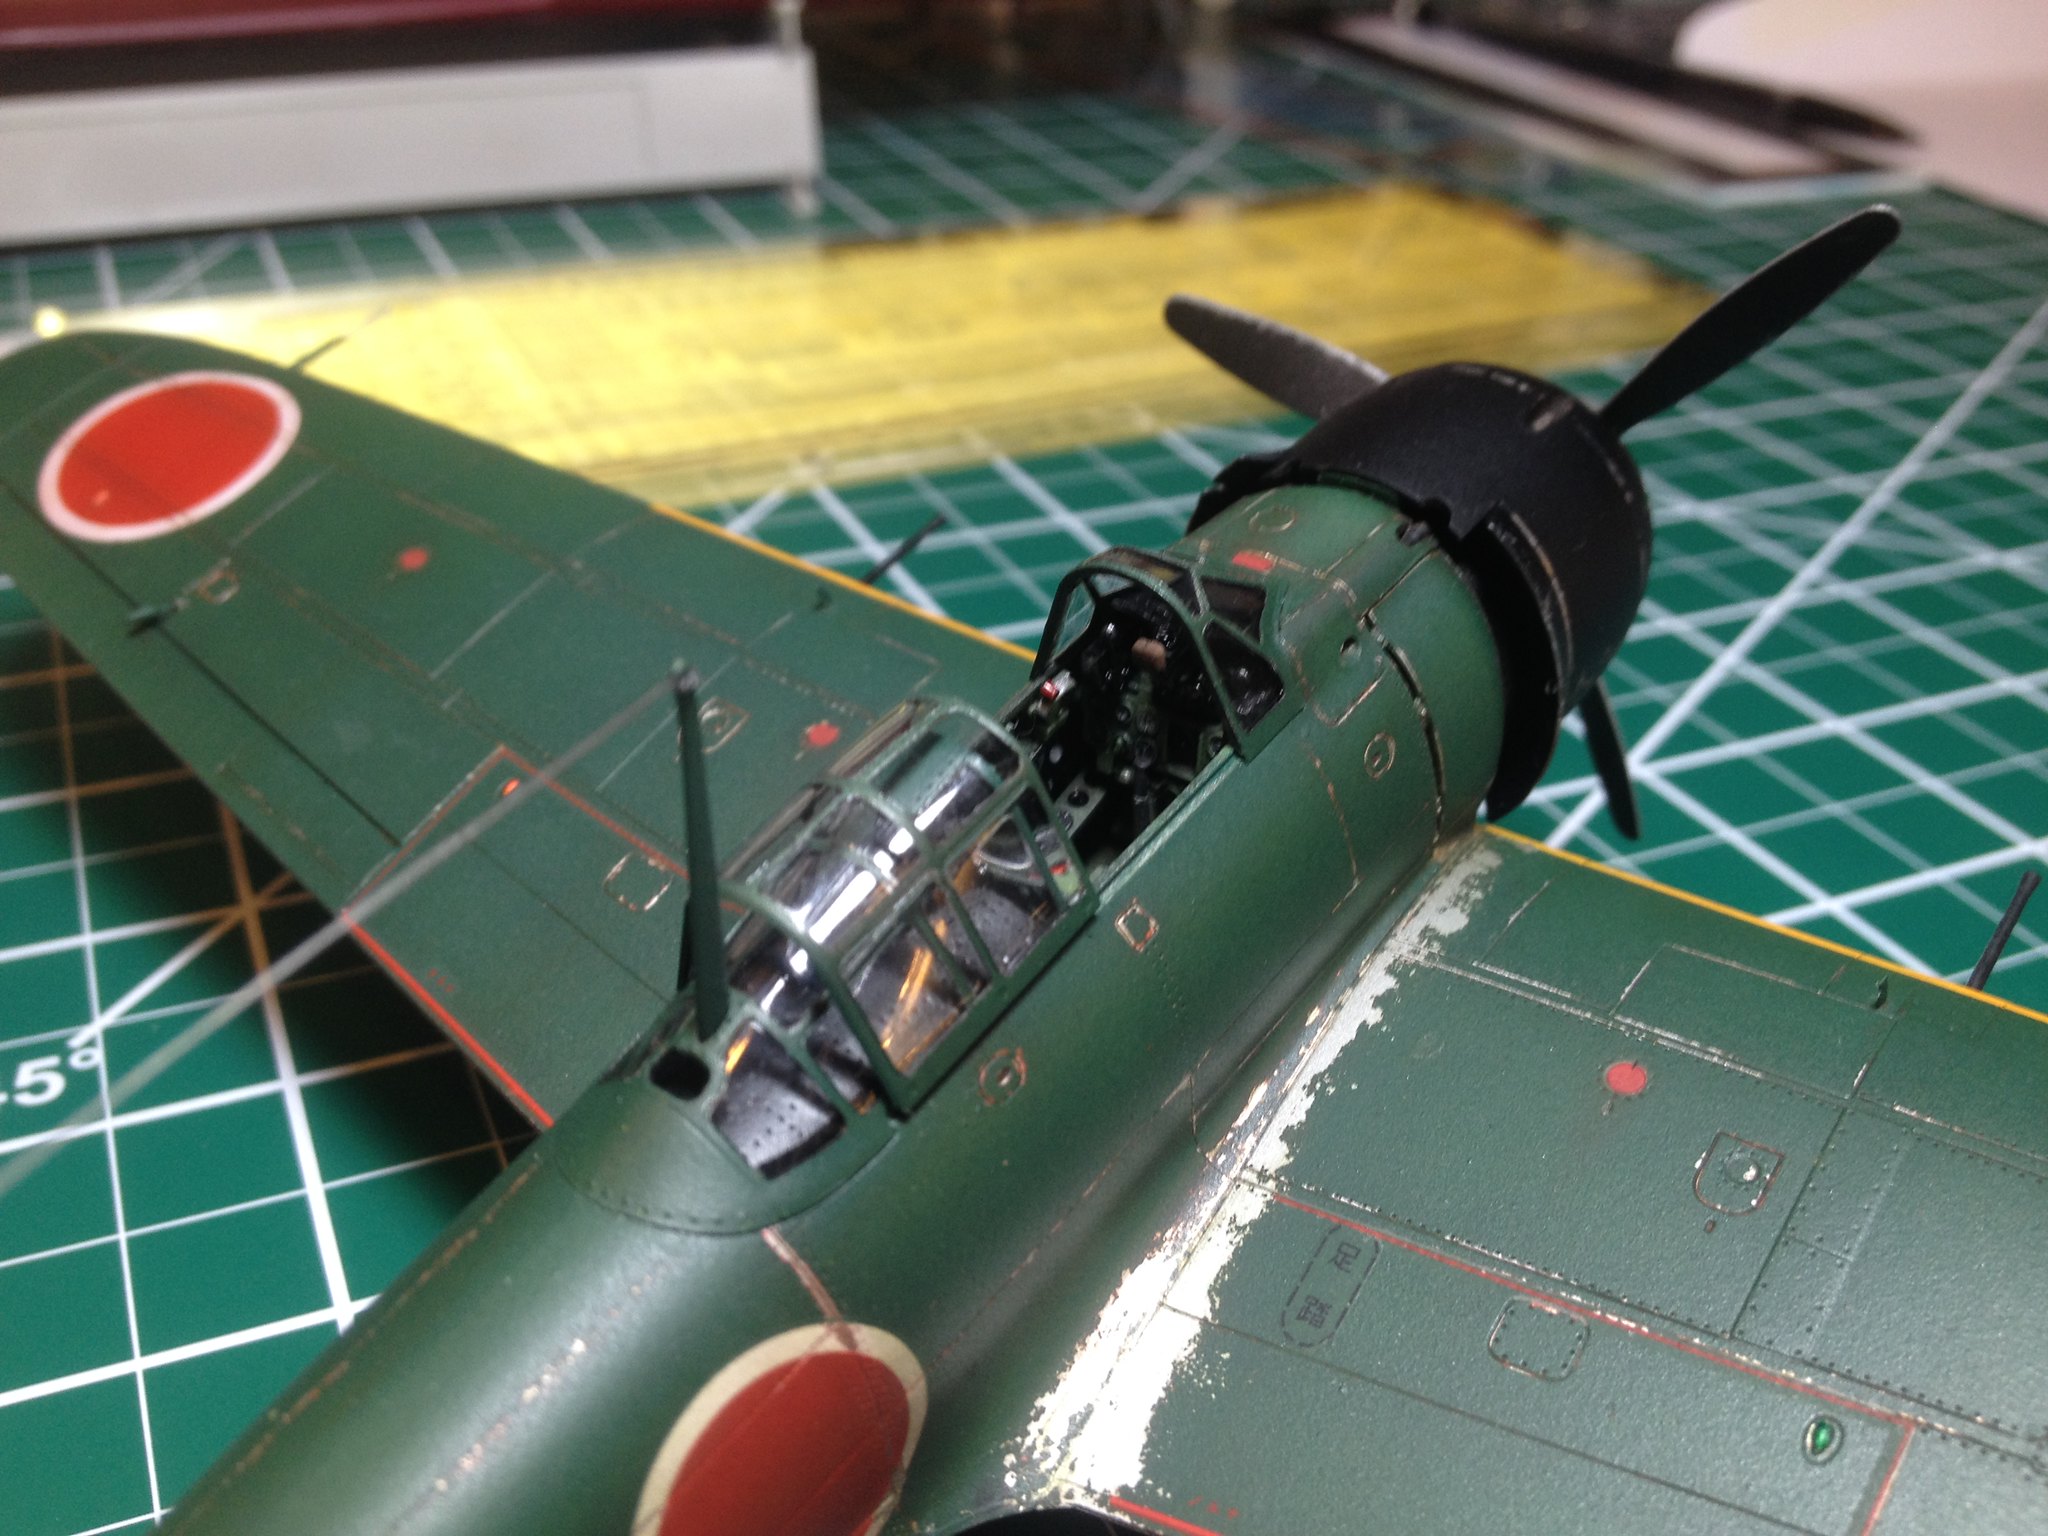
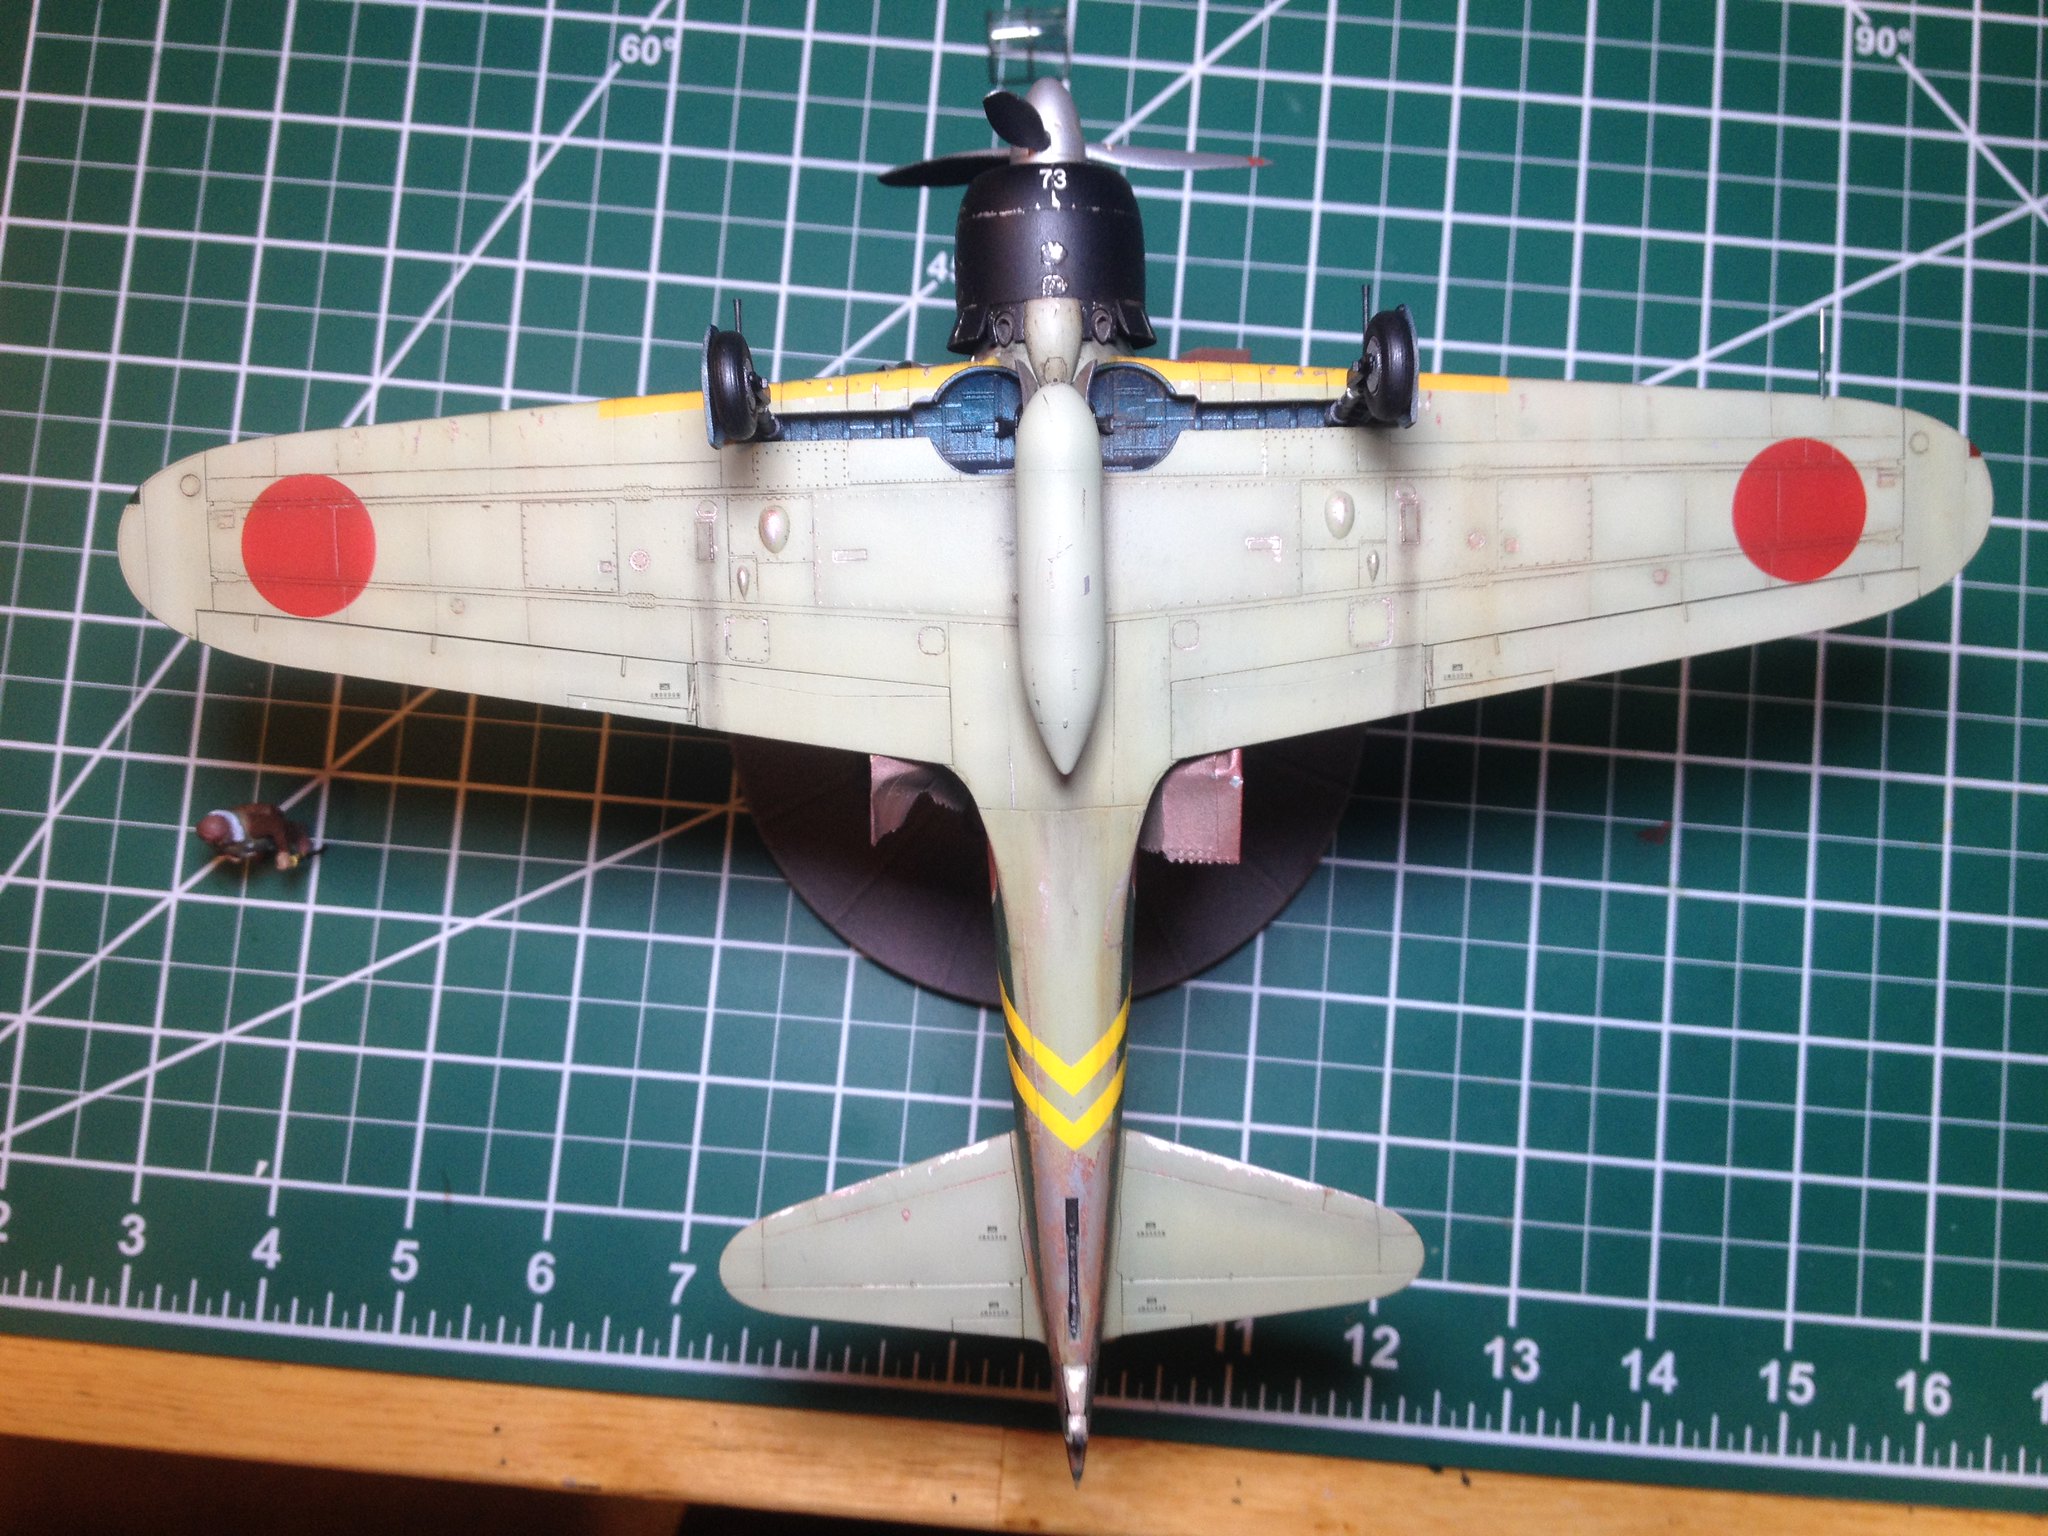
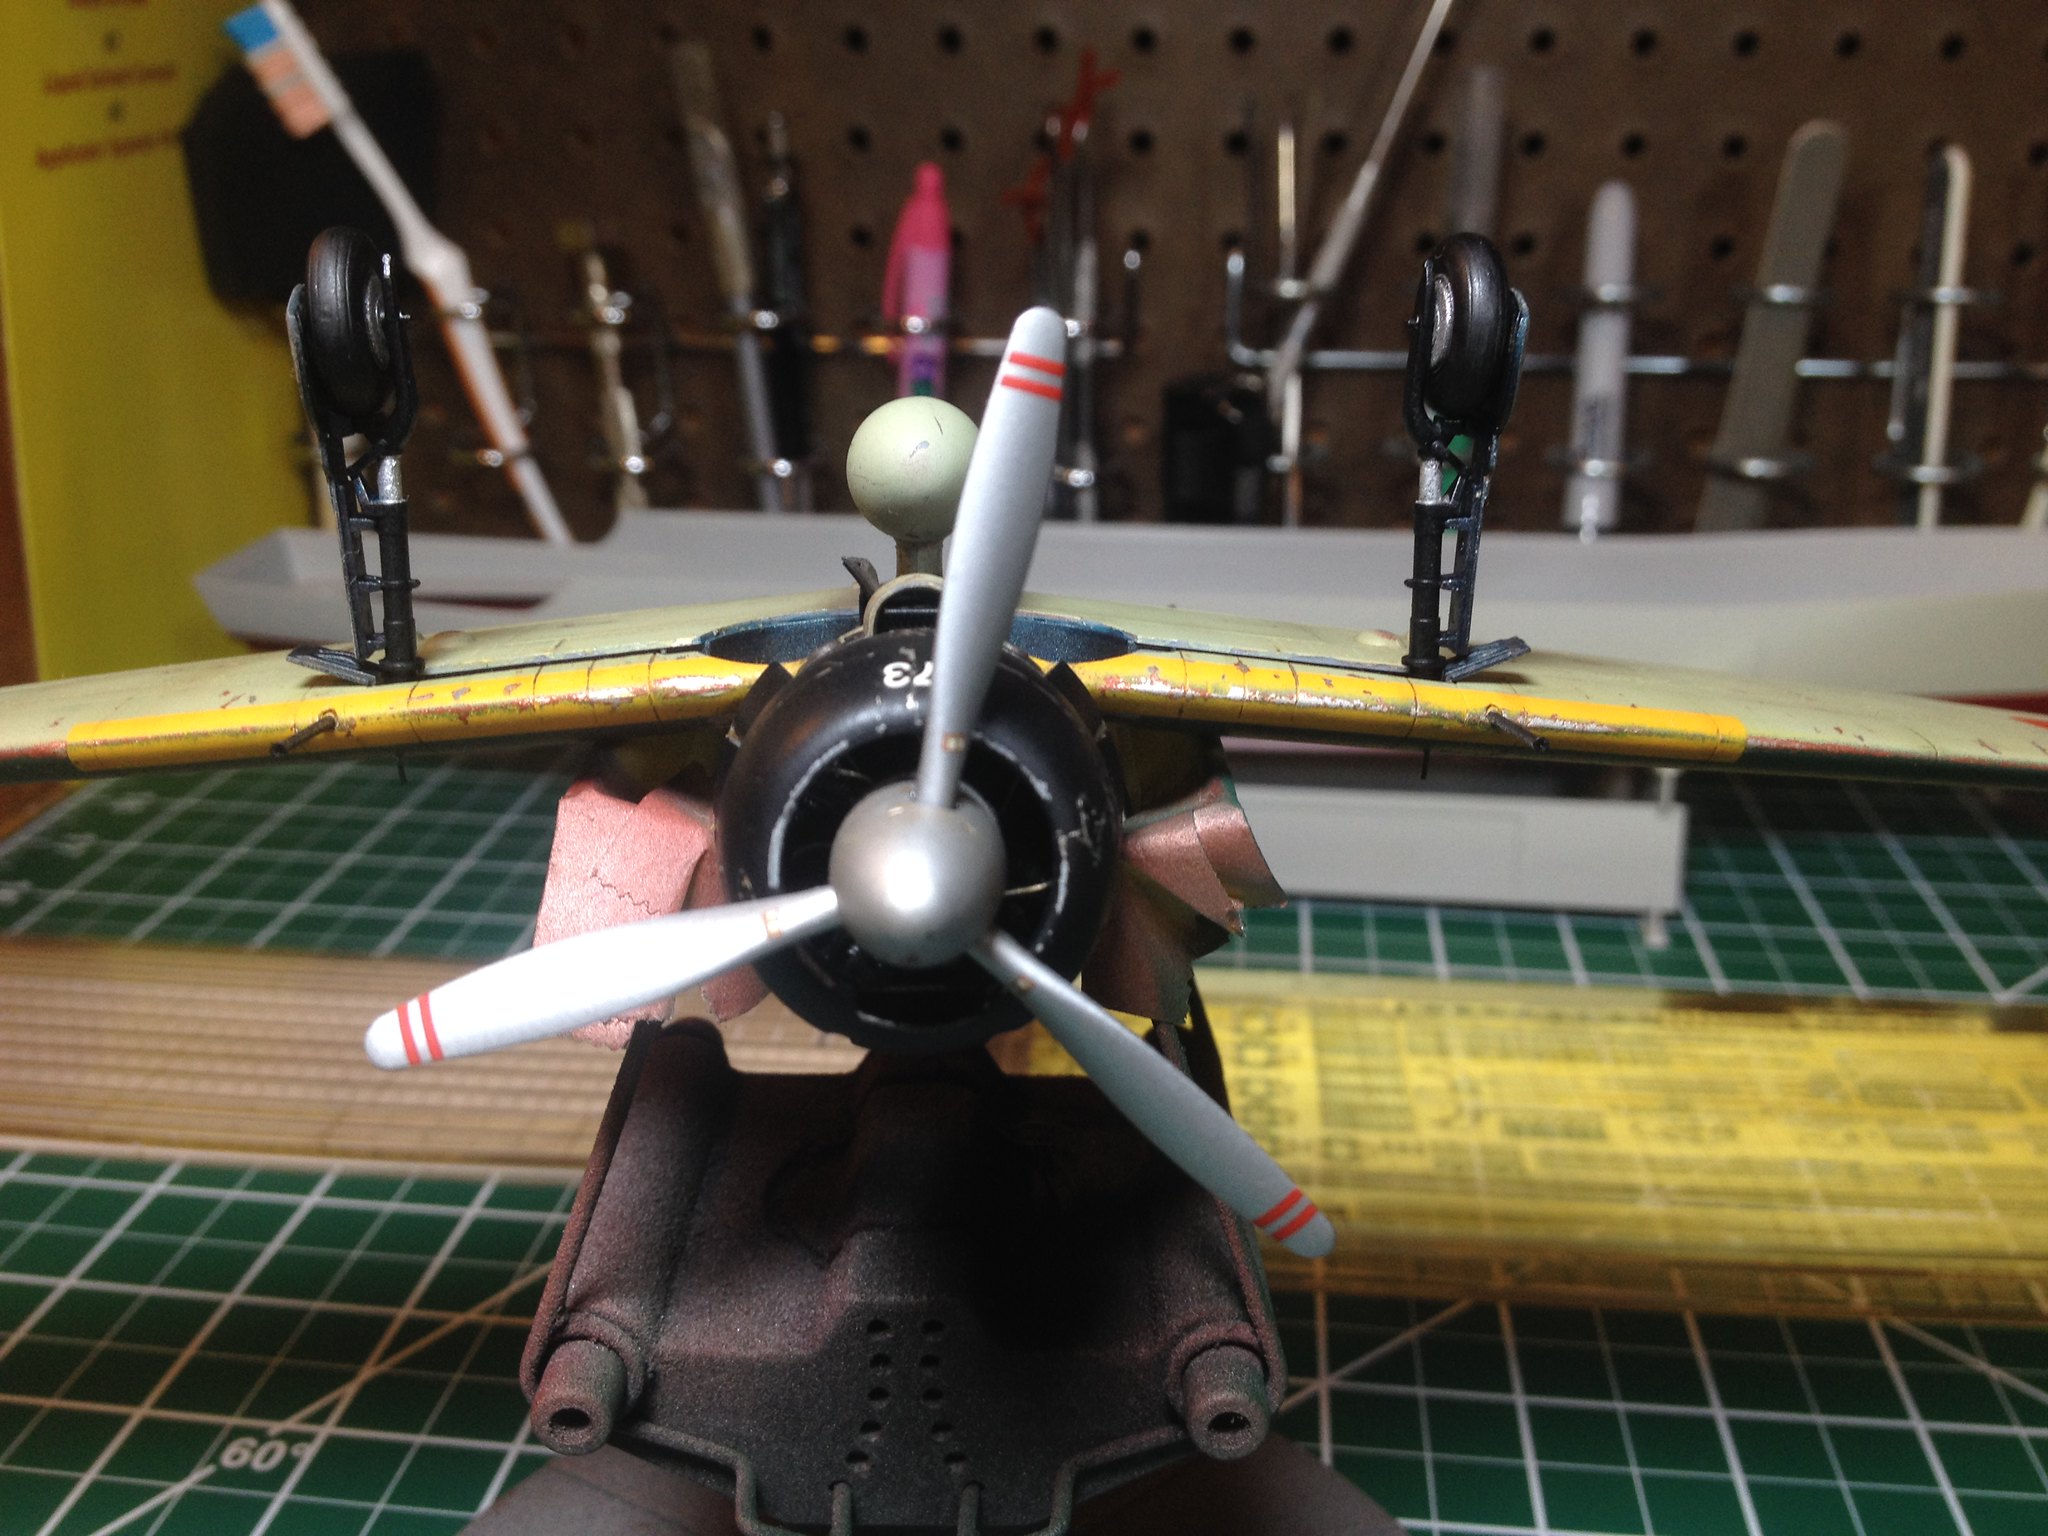
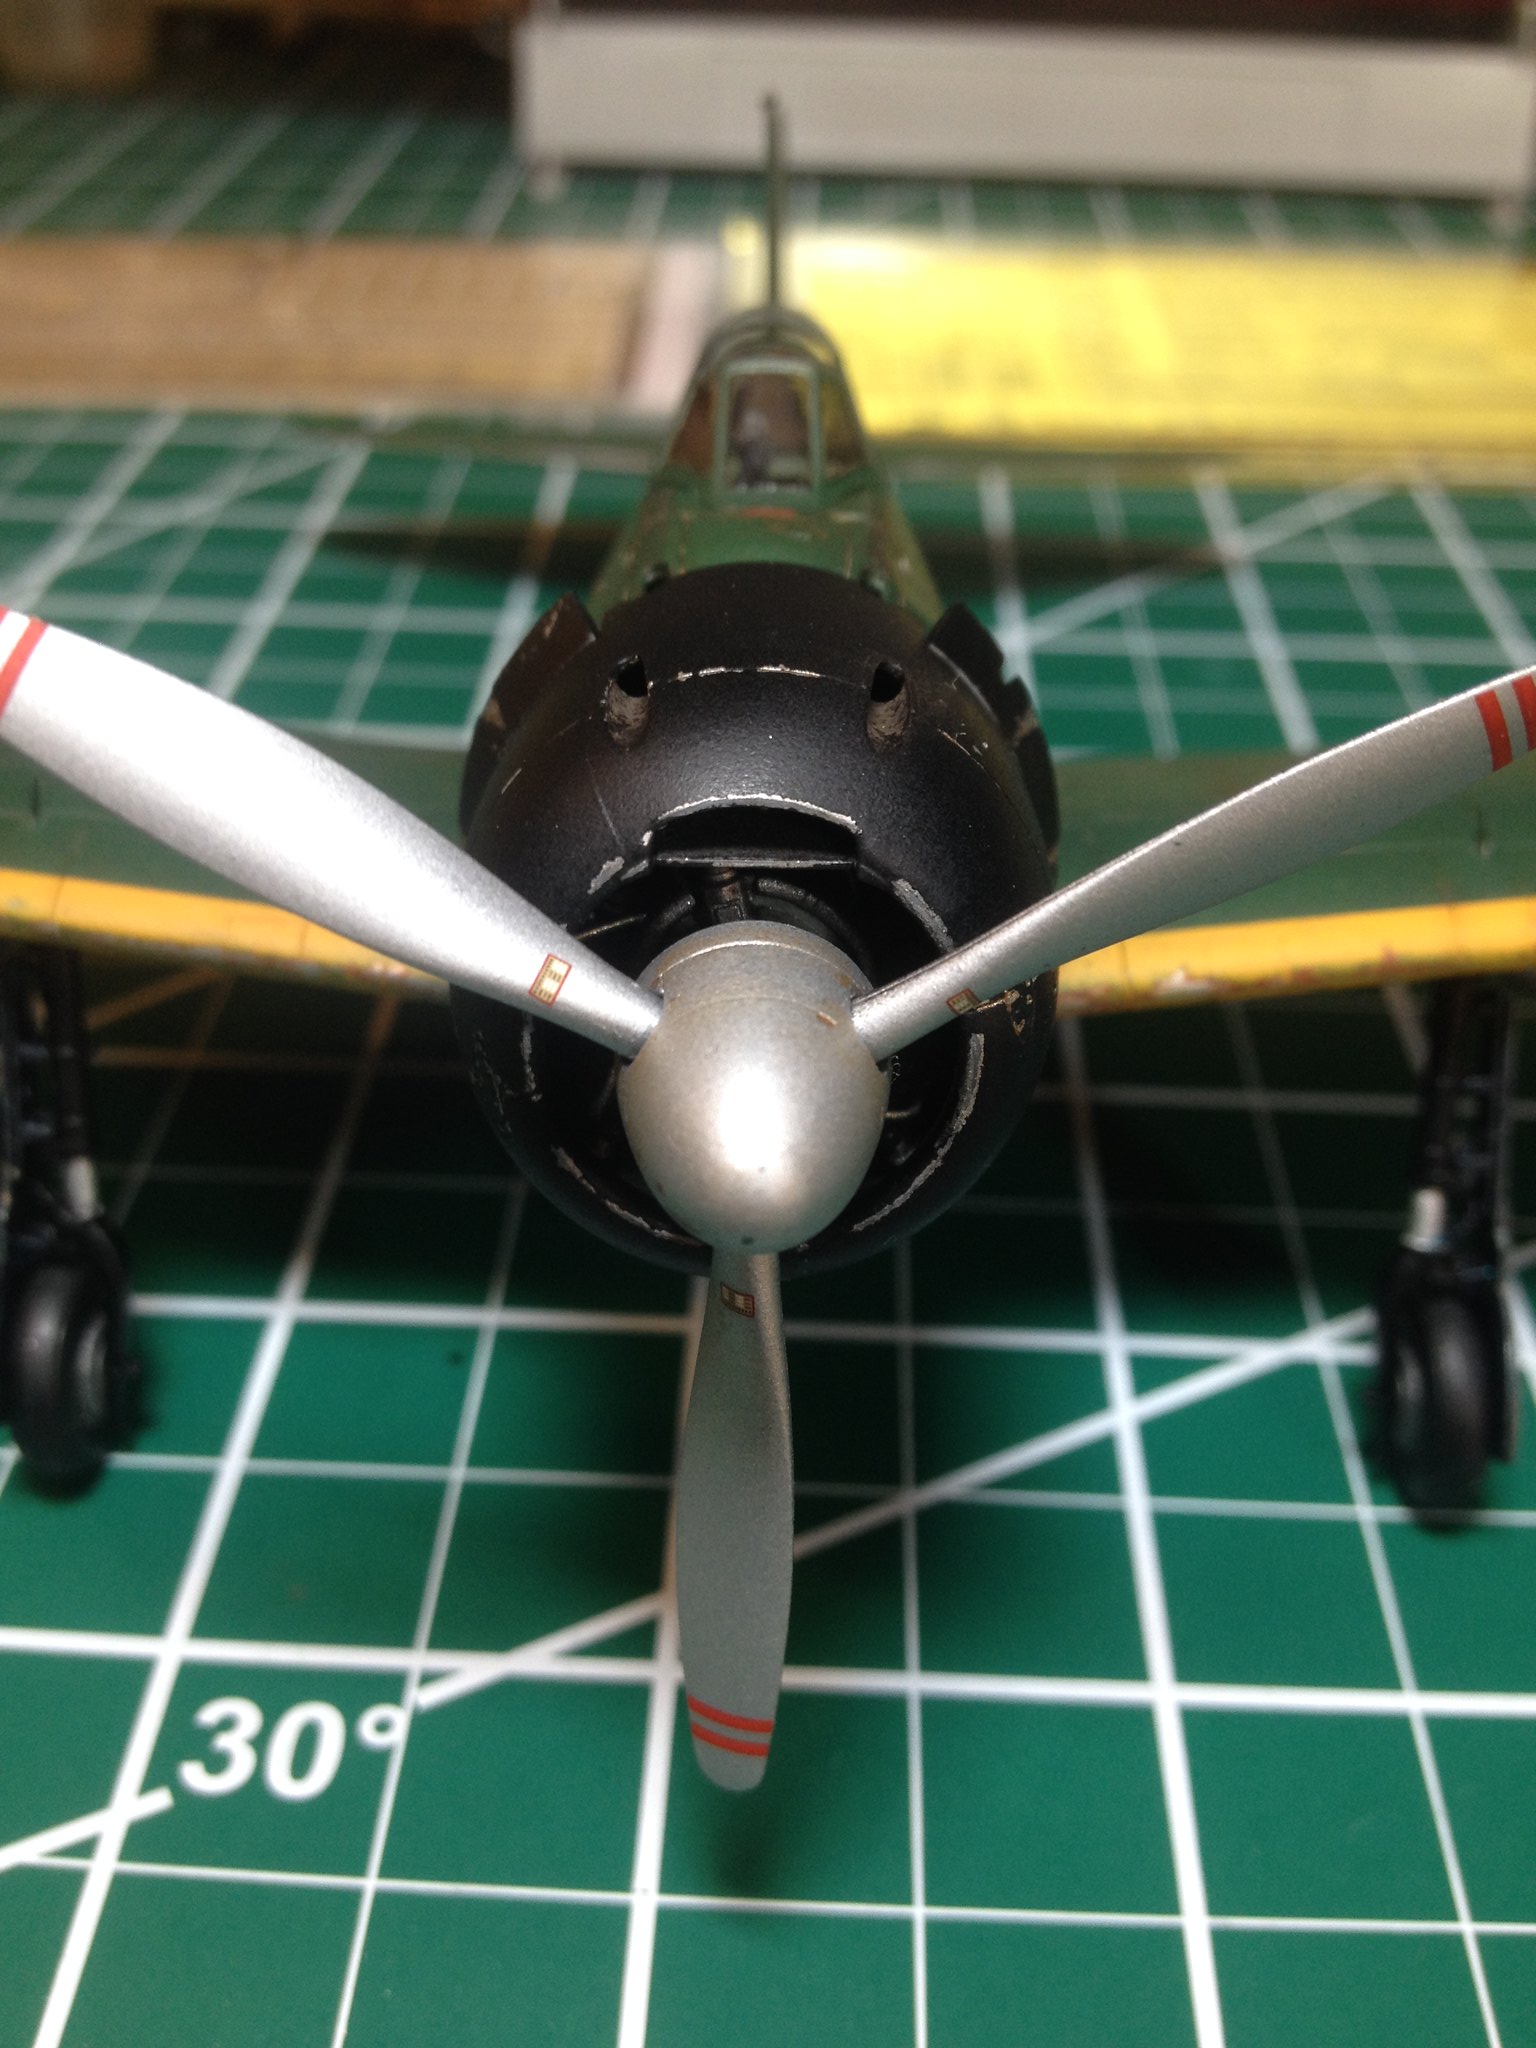
Here' my Finished Zero, sans base.

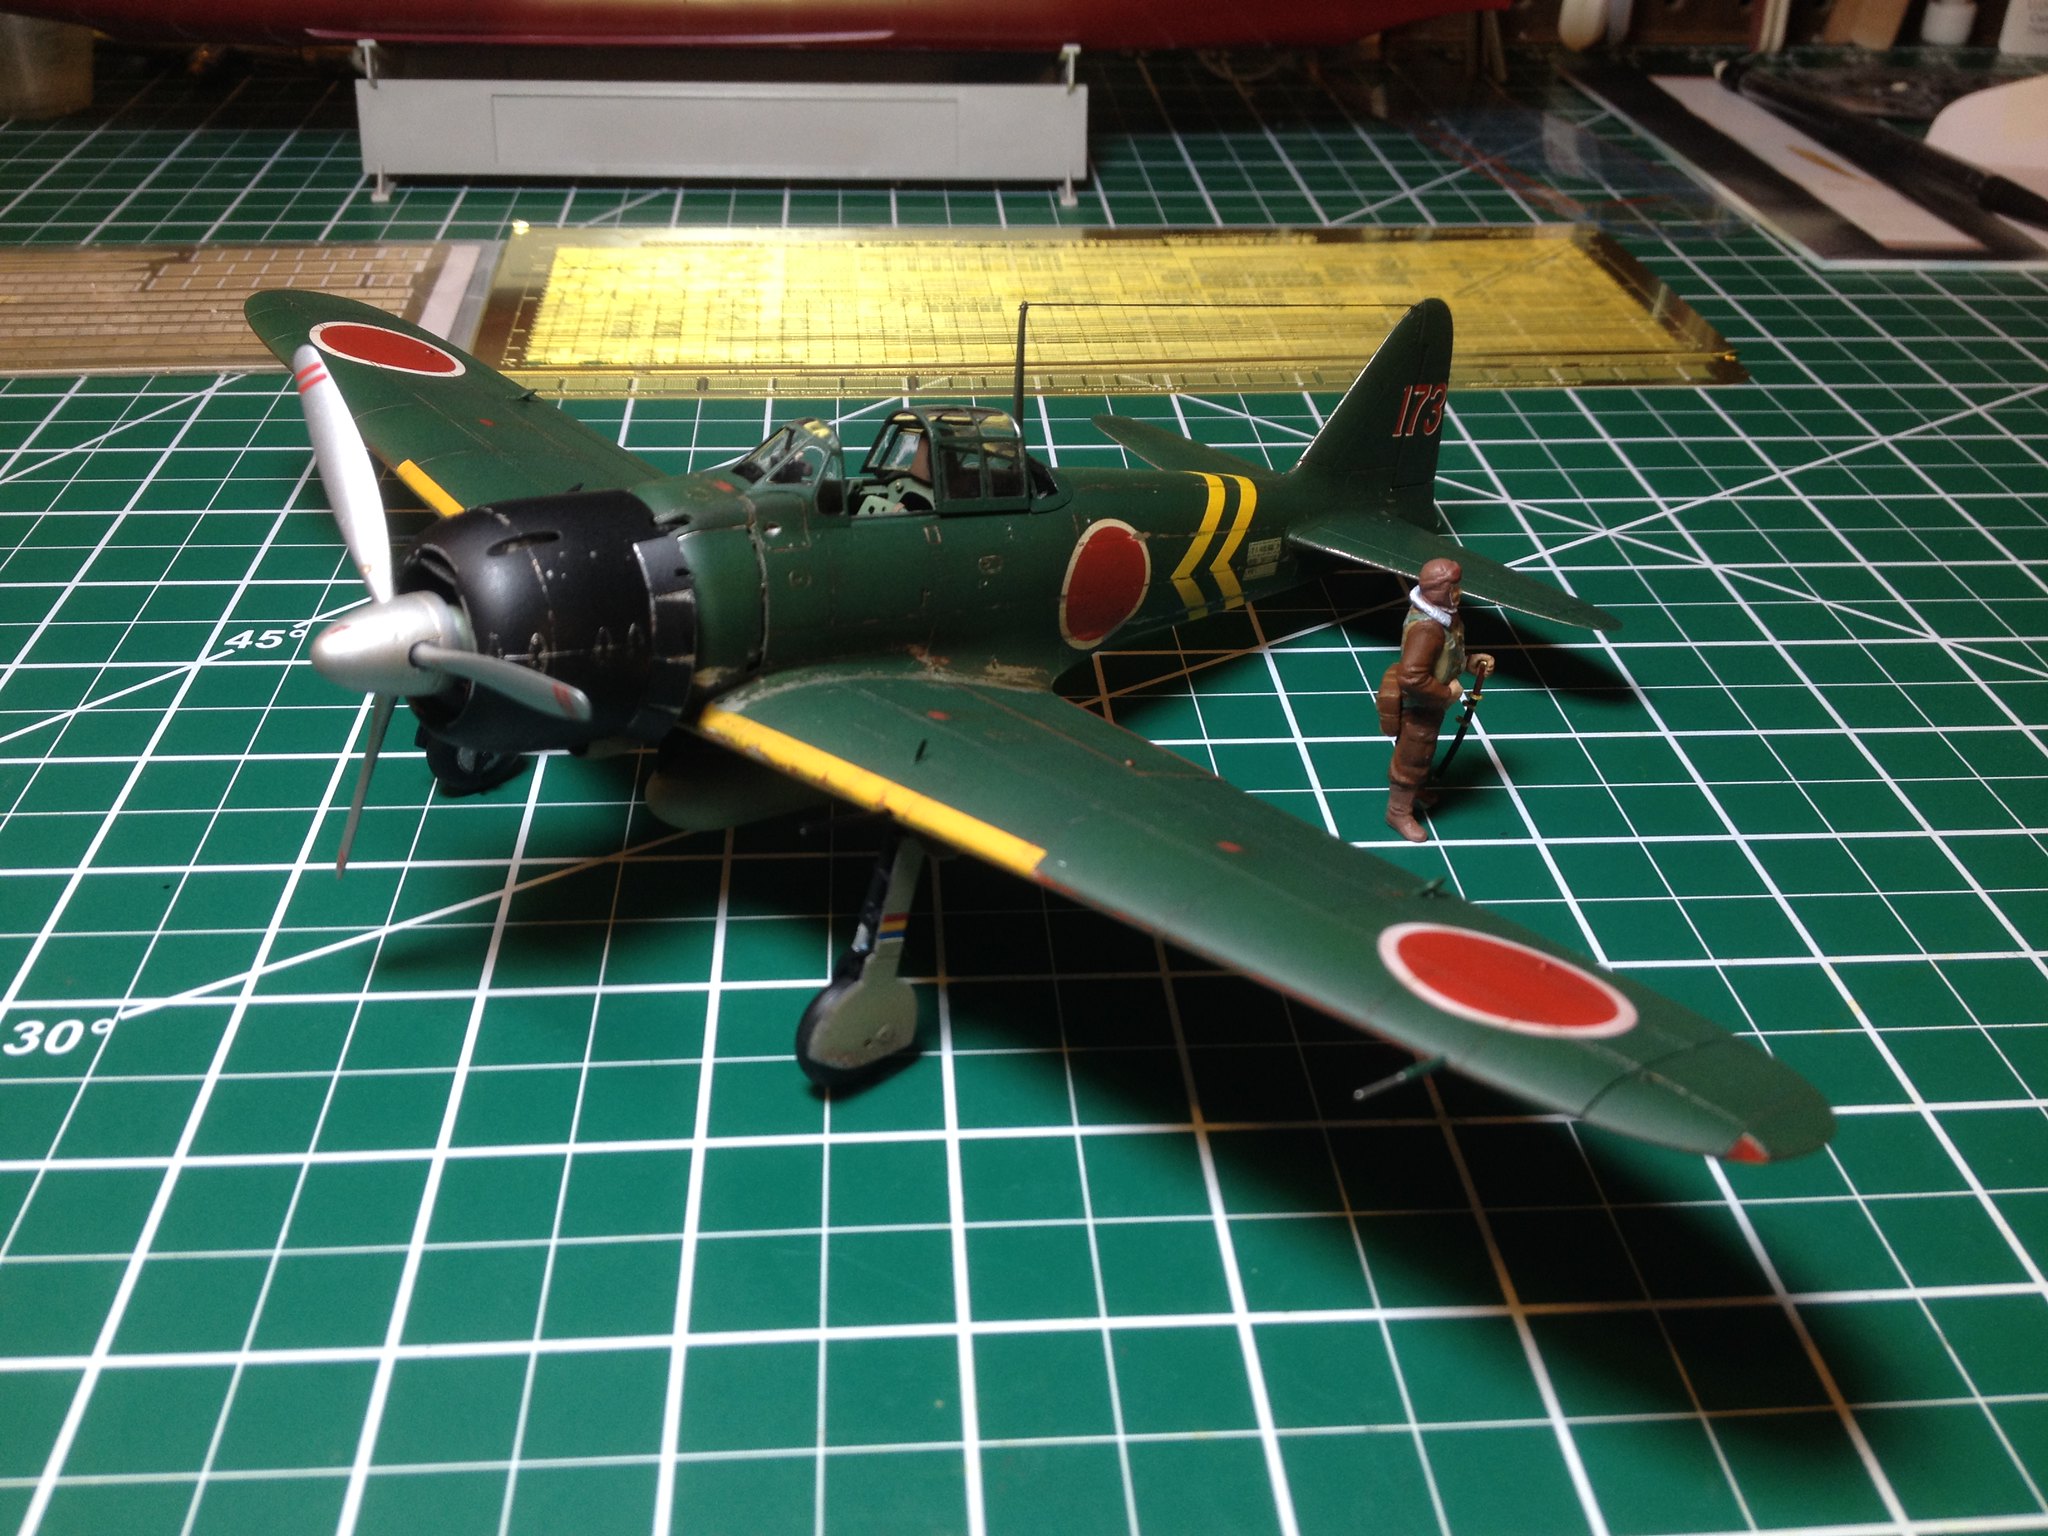
 IMG_2336 by Christopher Ridle, on Flickr

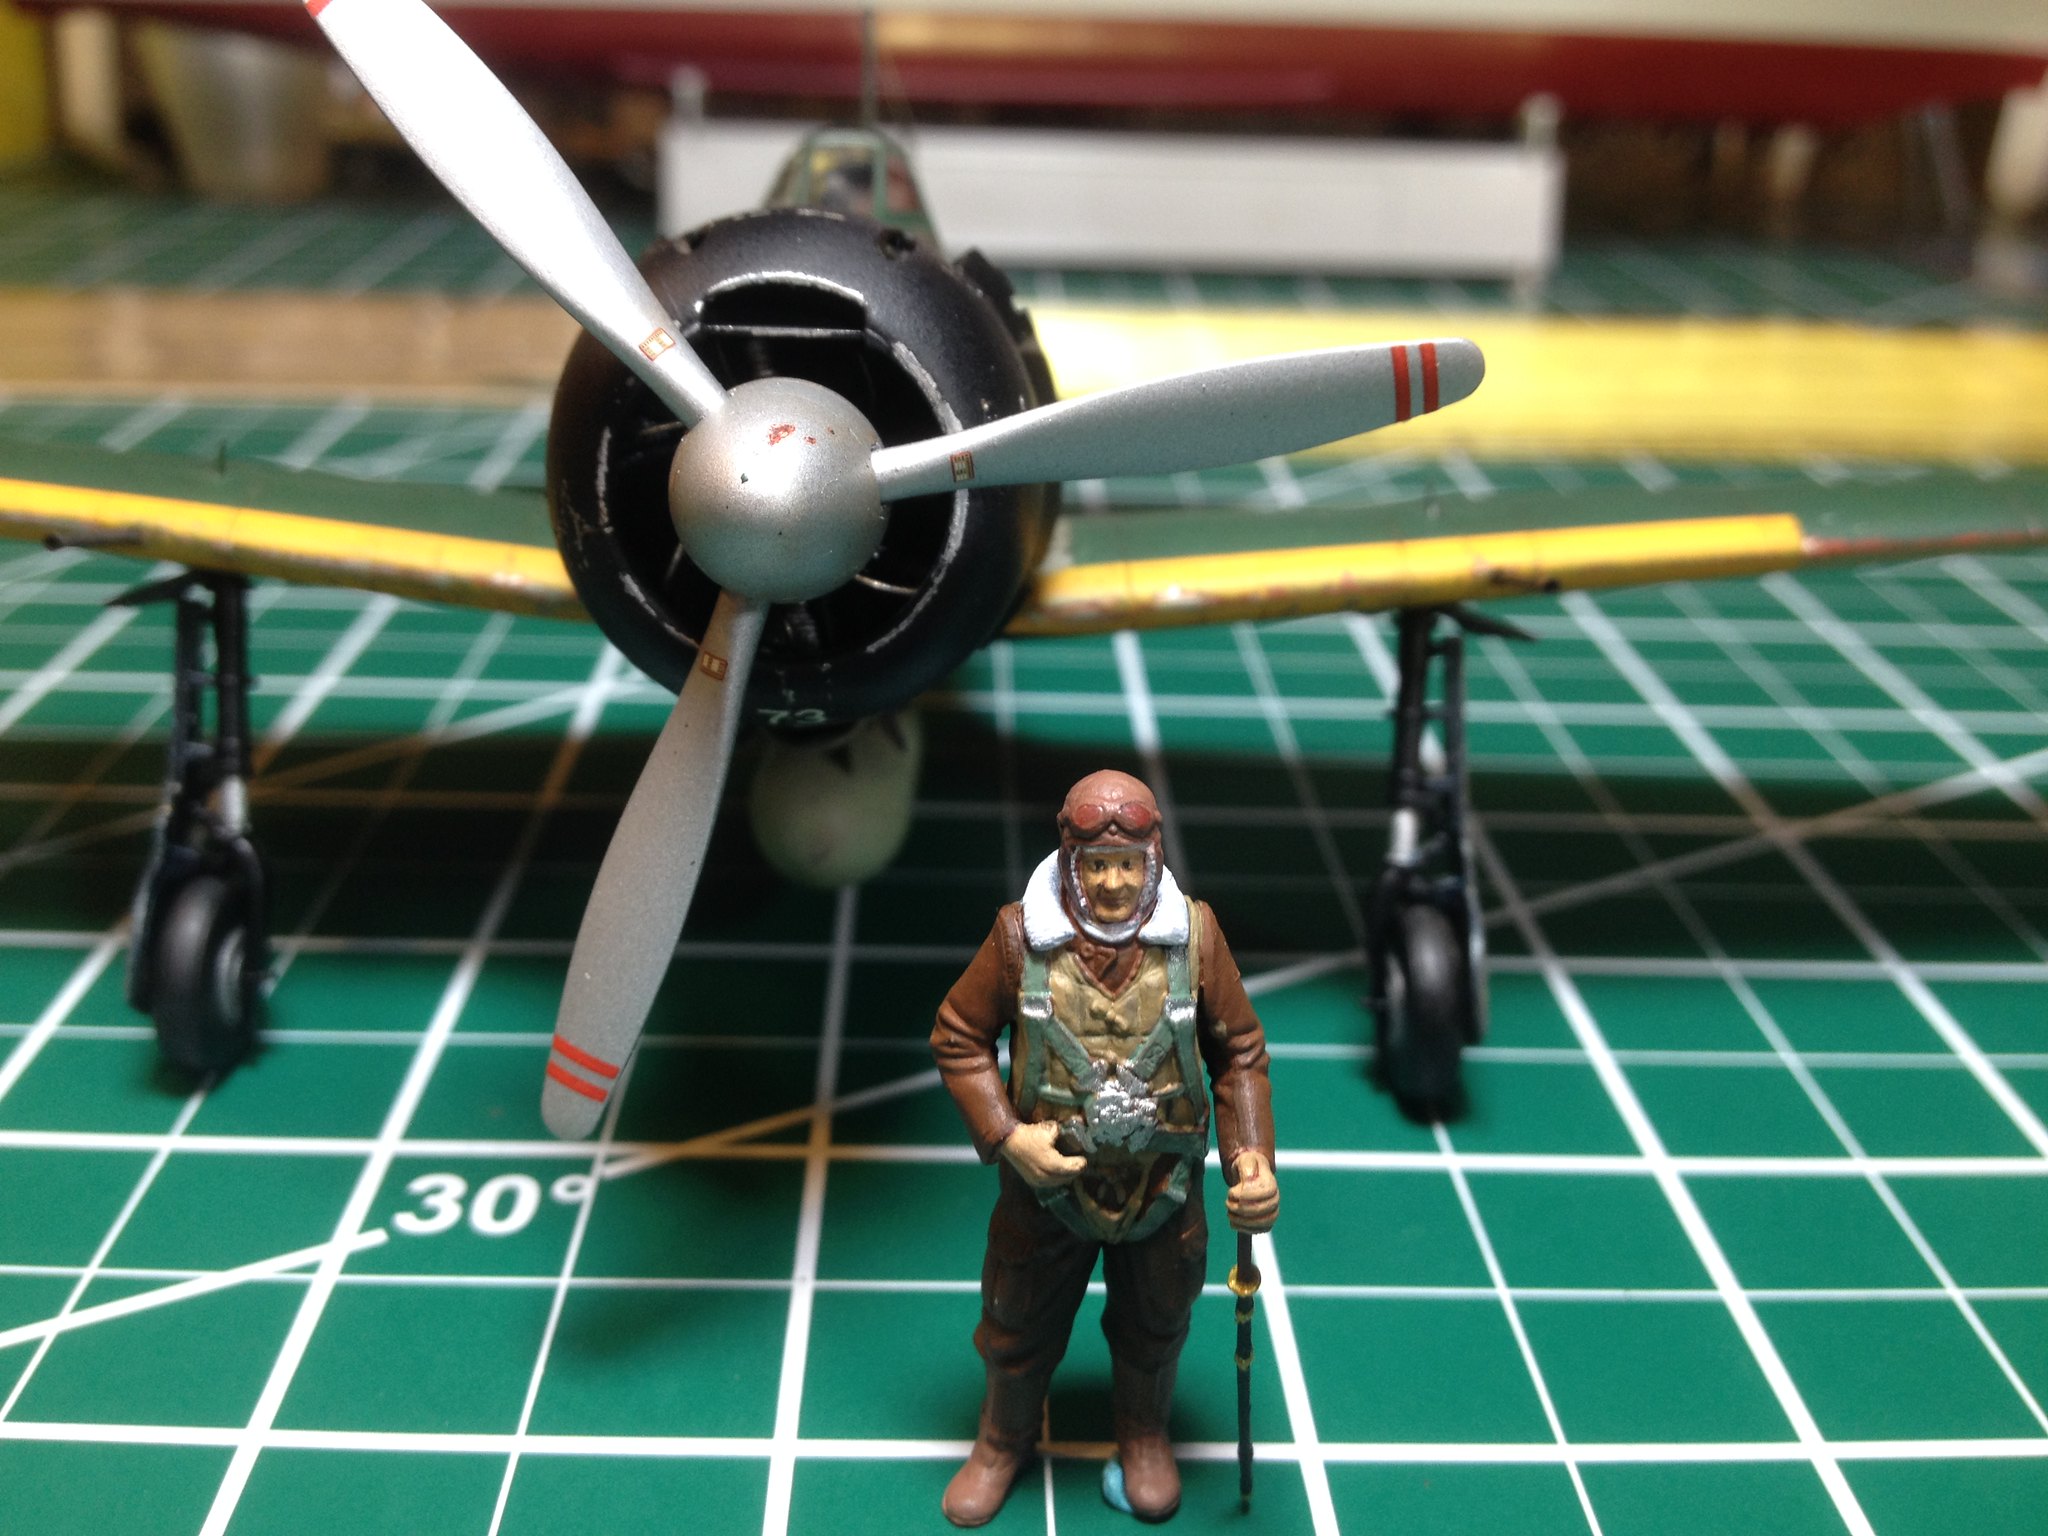
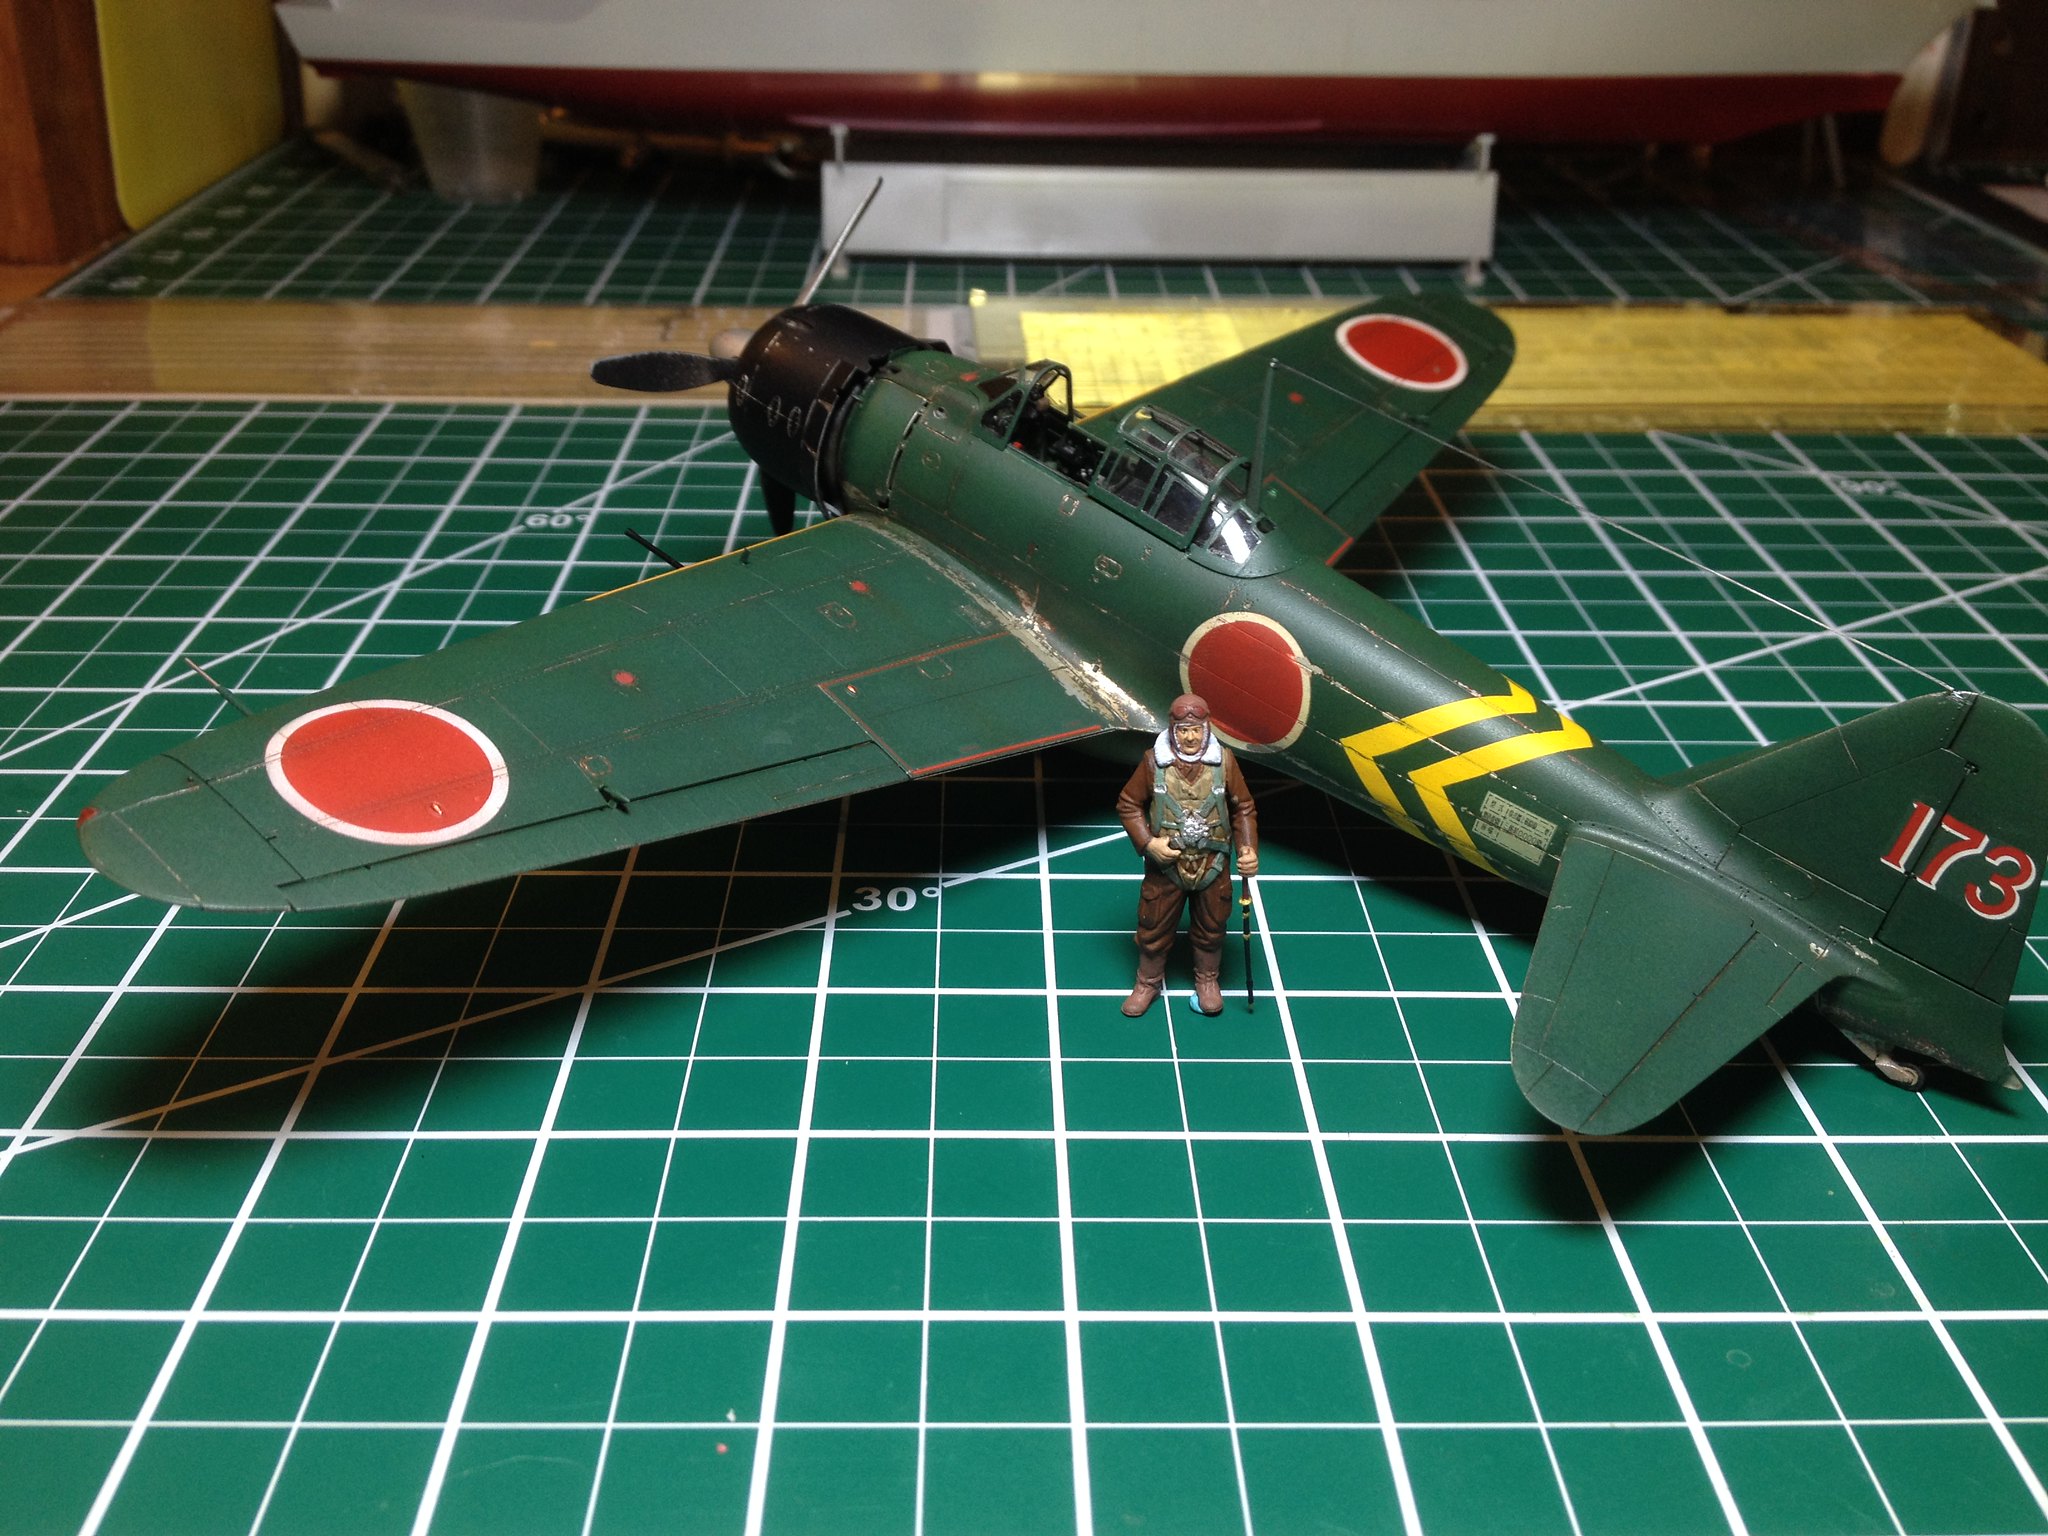
 IMG_2337 by Christopher Ridle, on Flickr

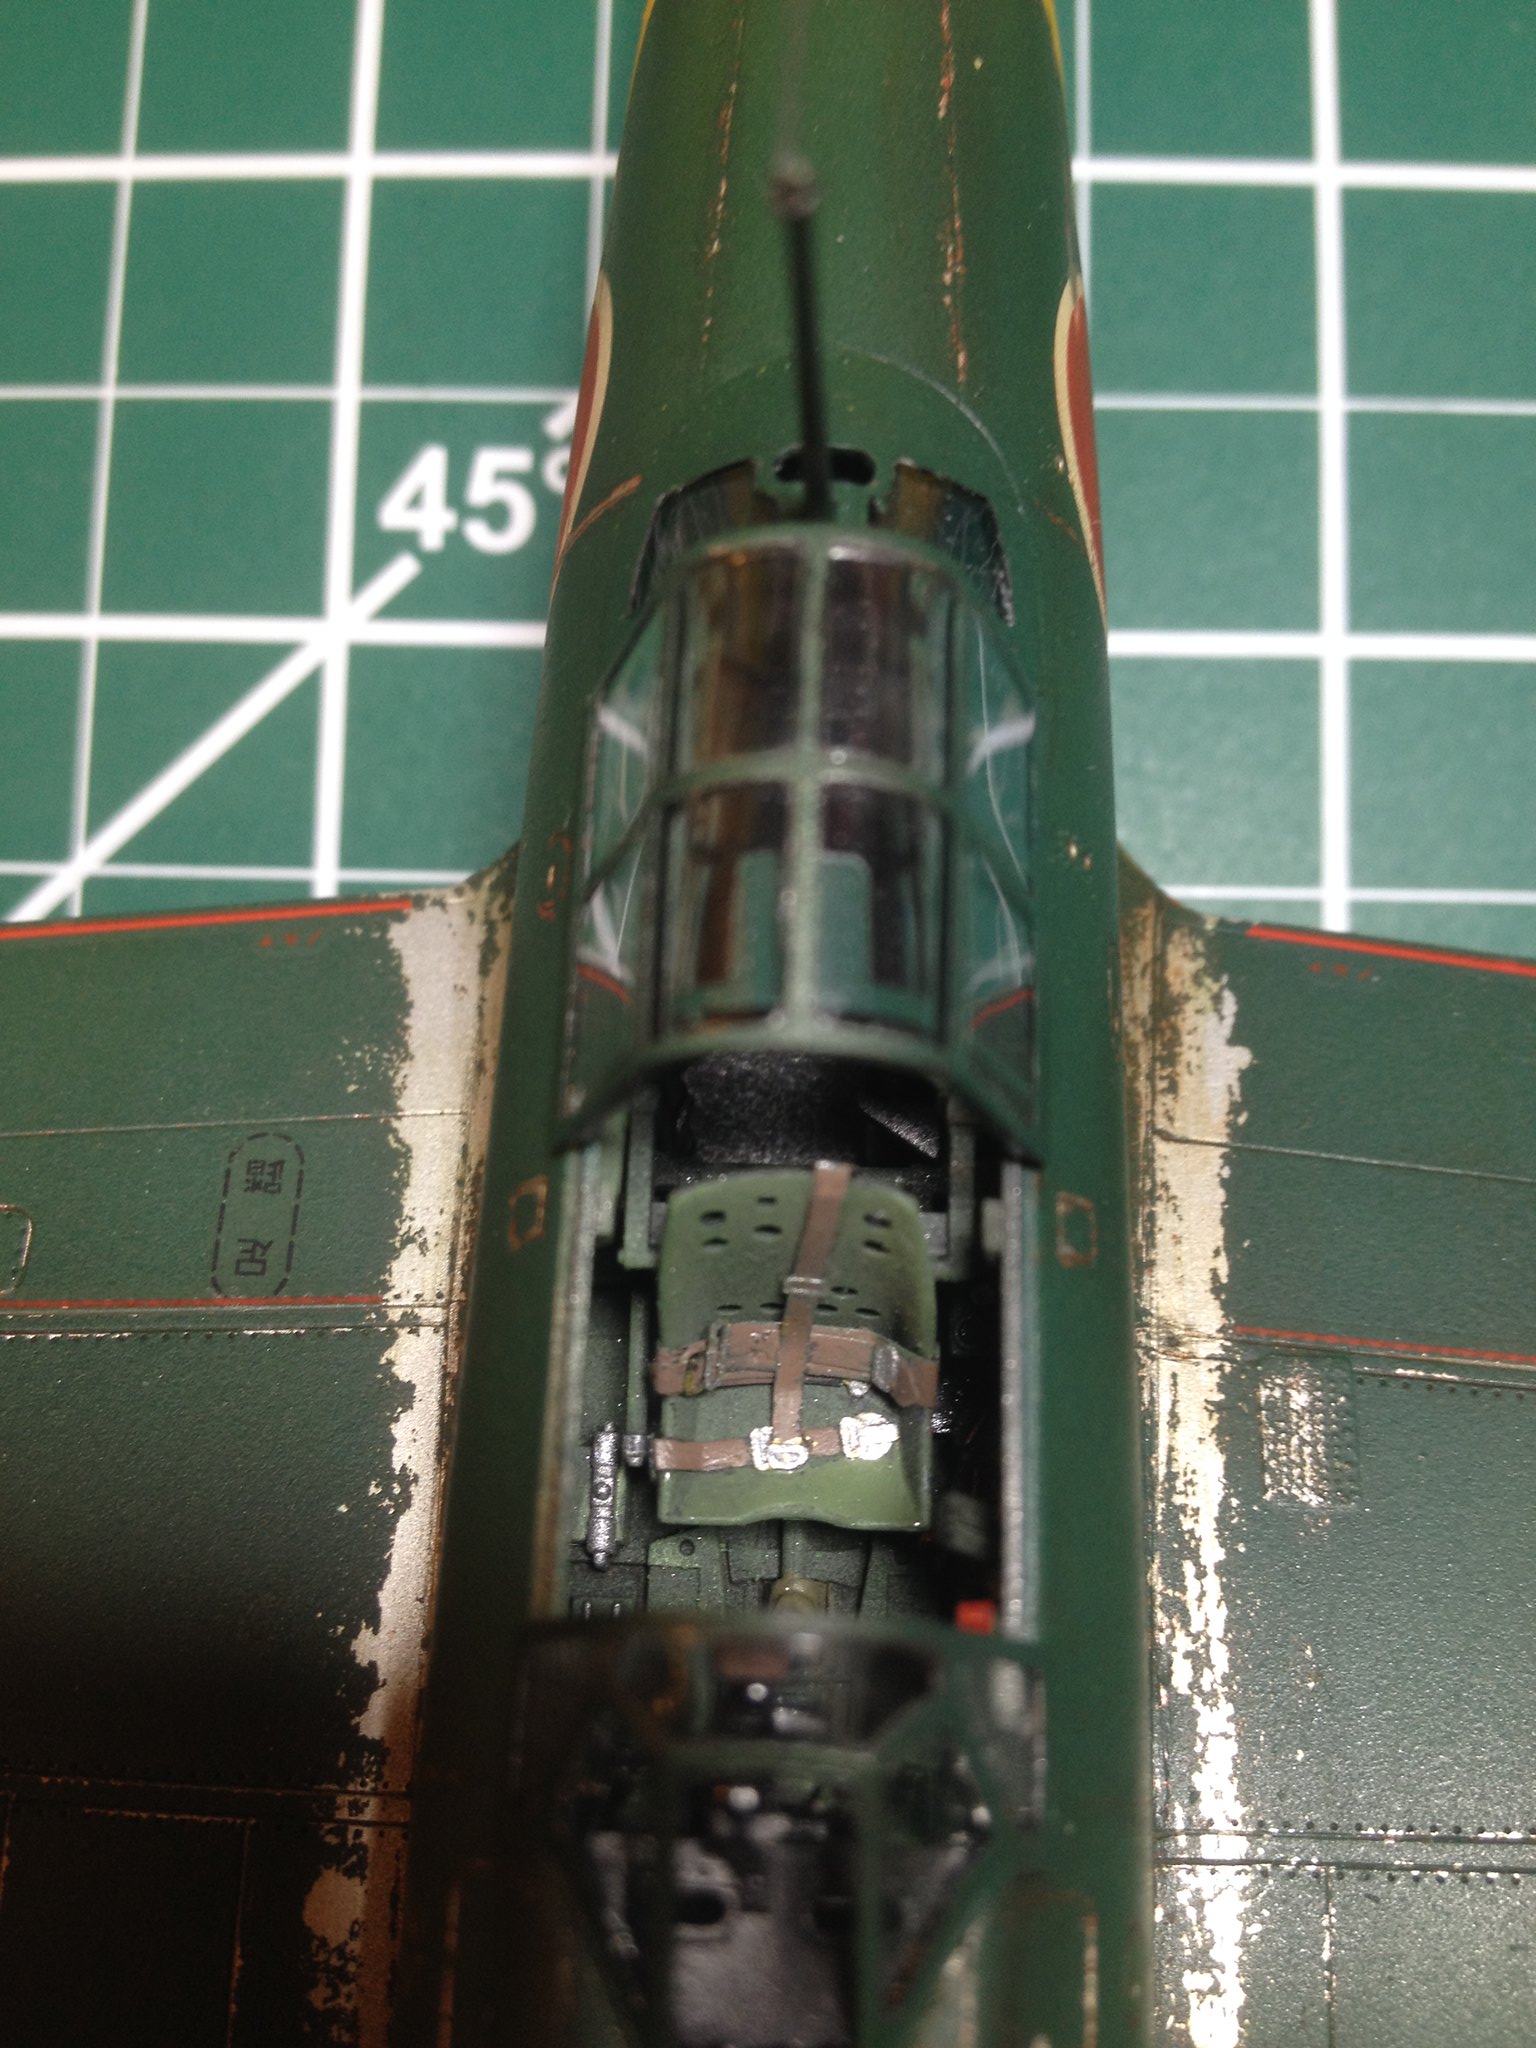
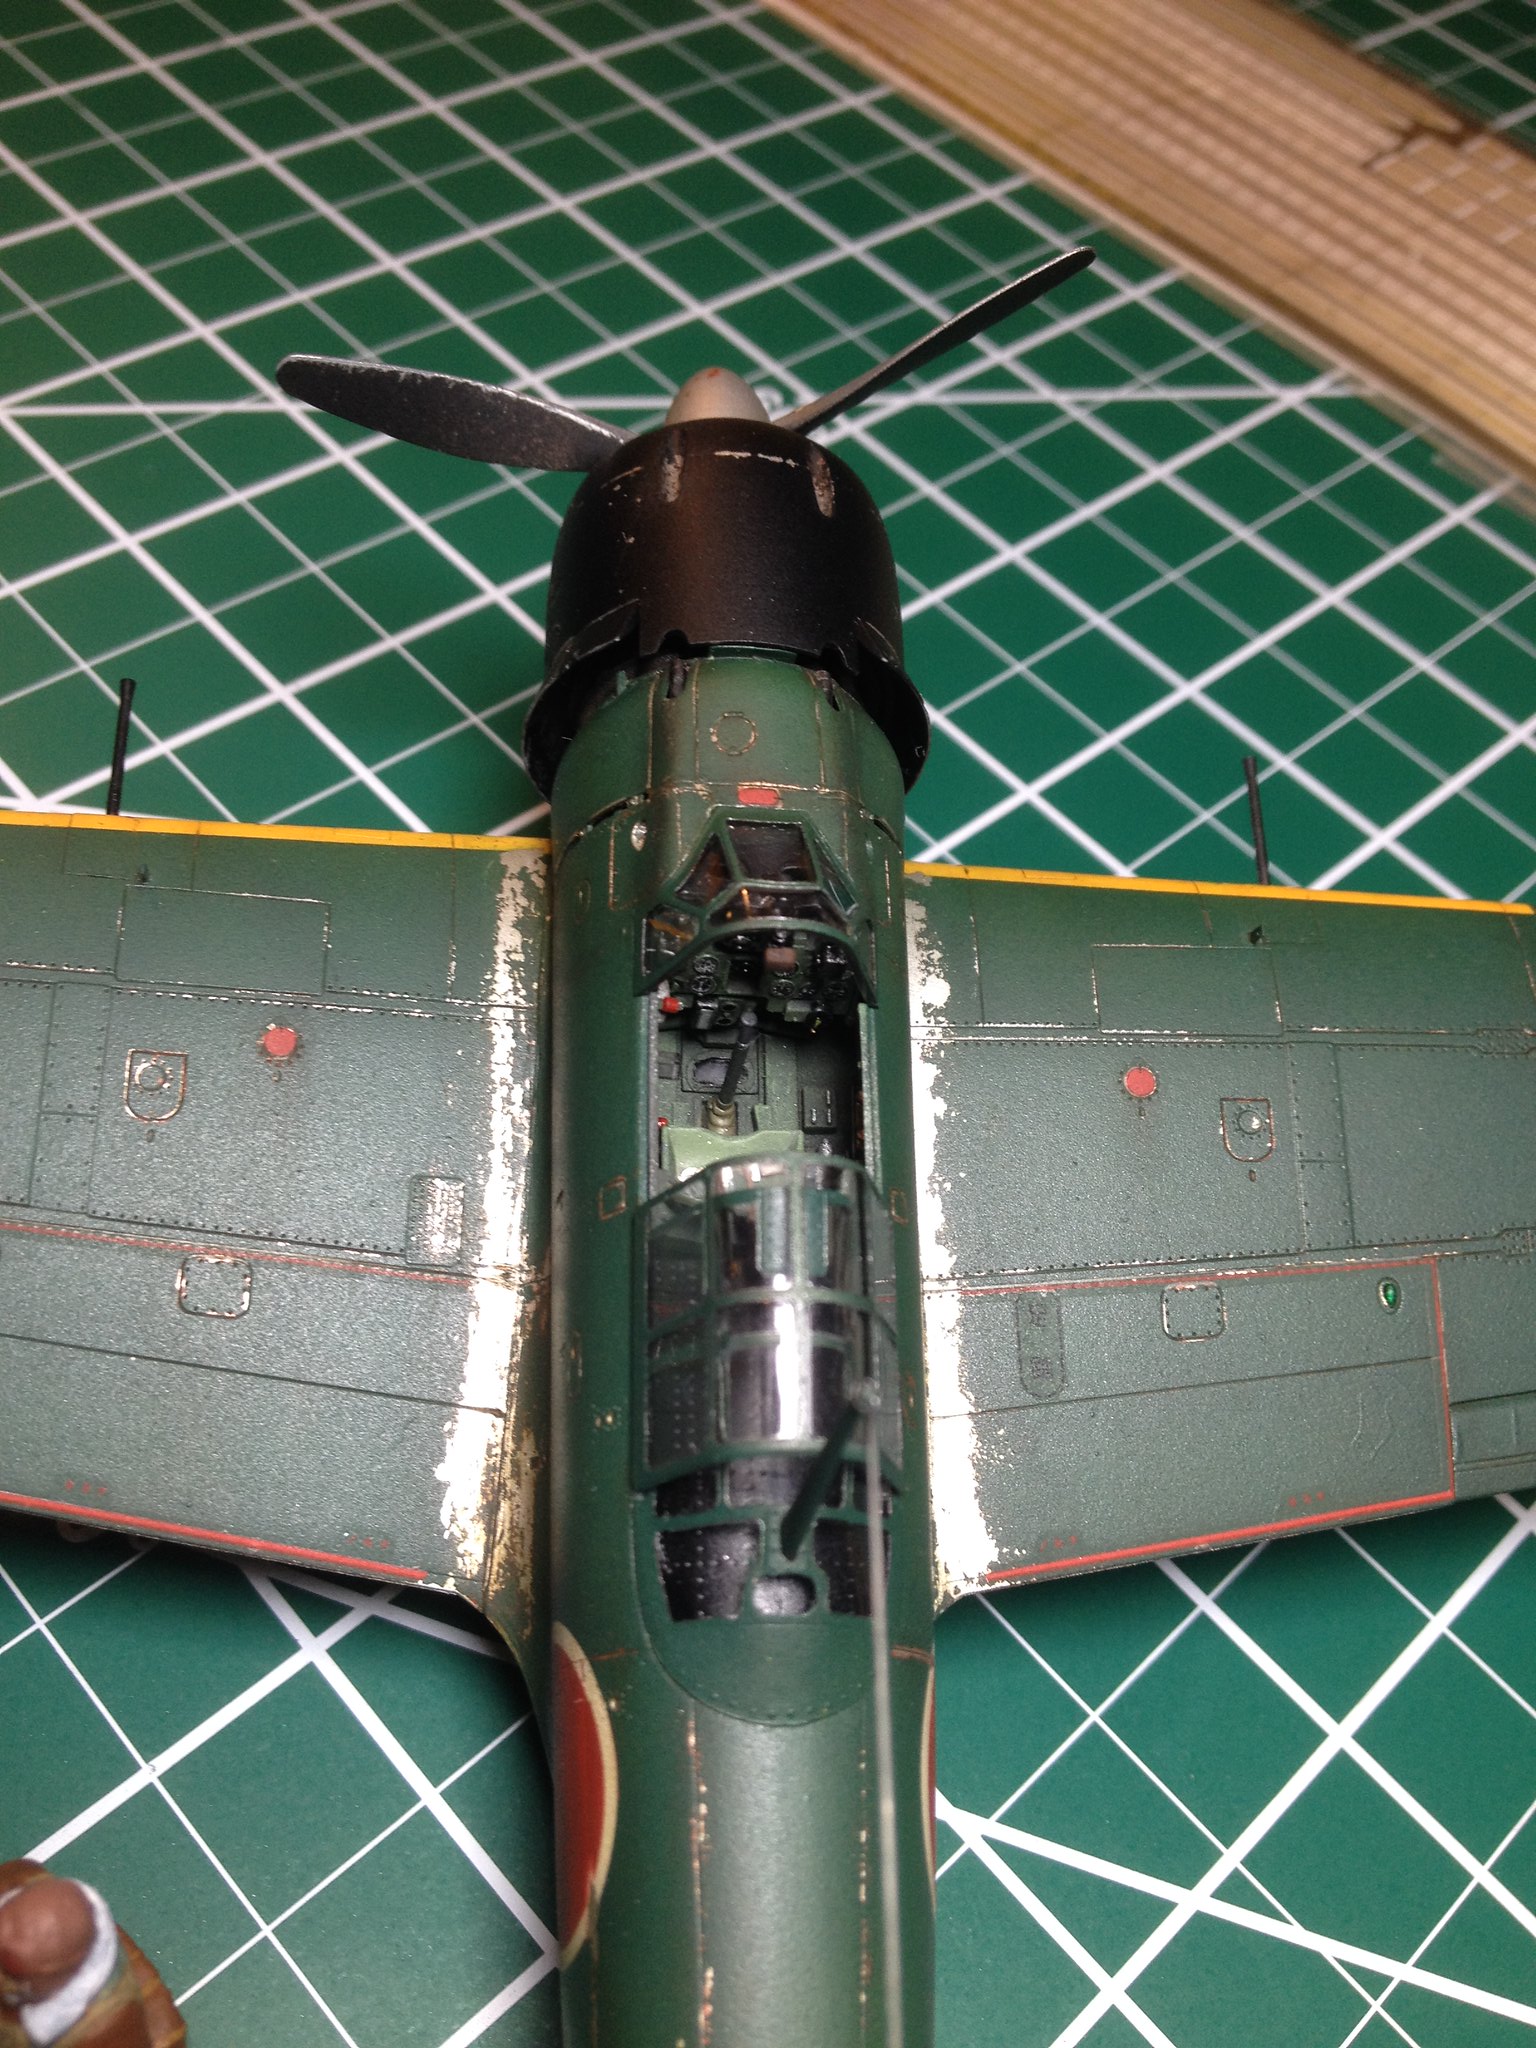
 IMG_2338 by Christopher Ridle, on Flickr

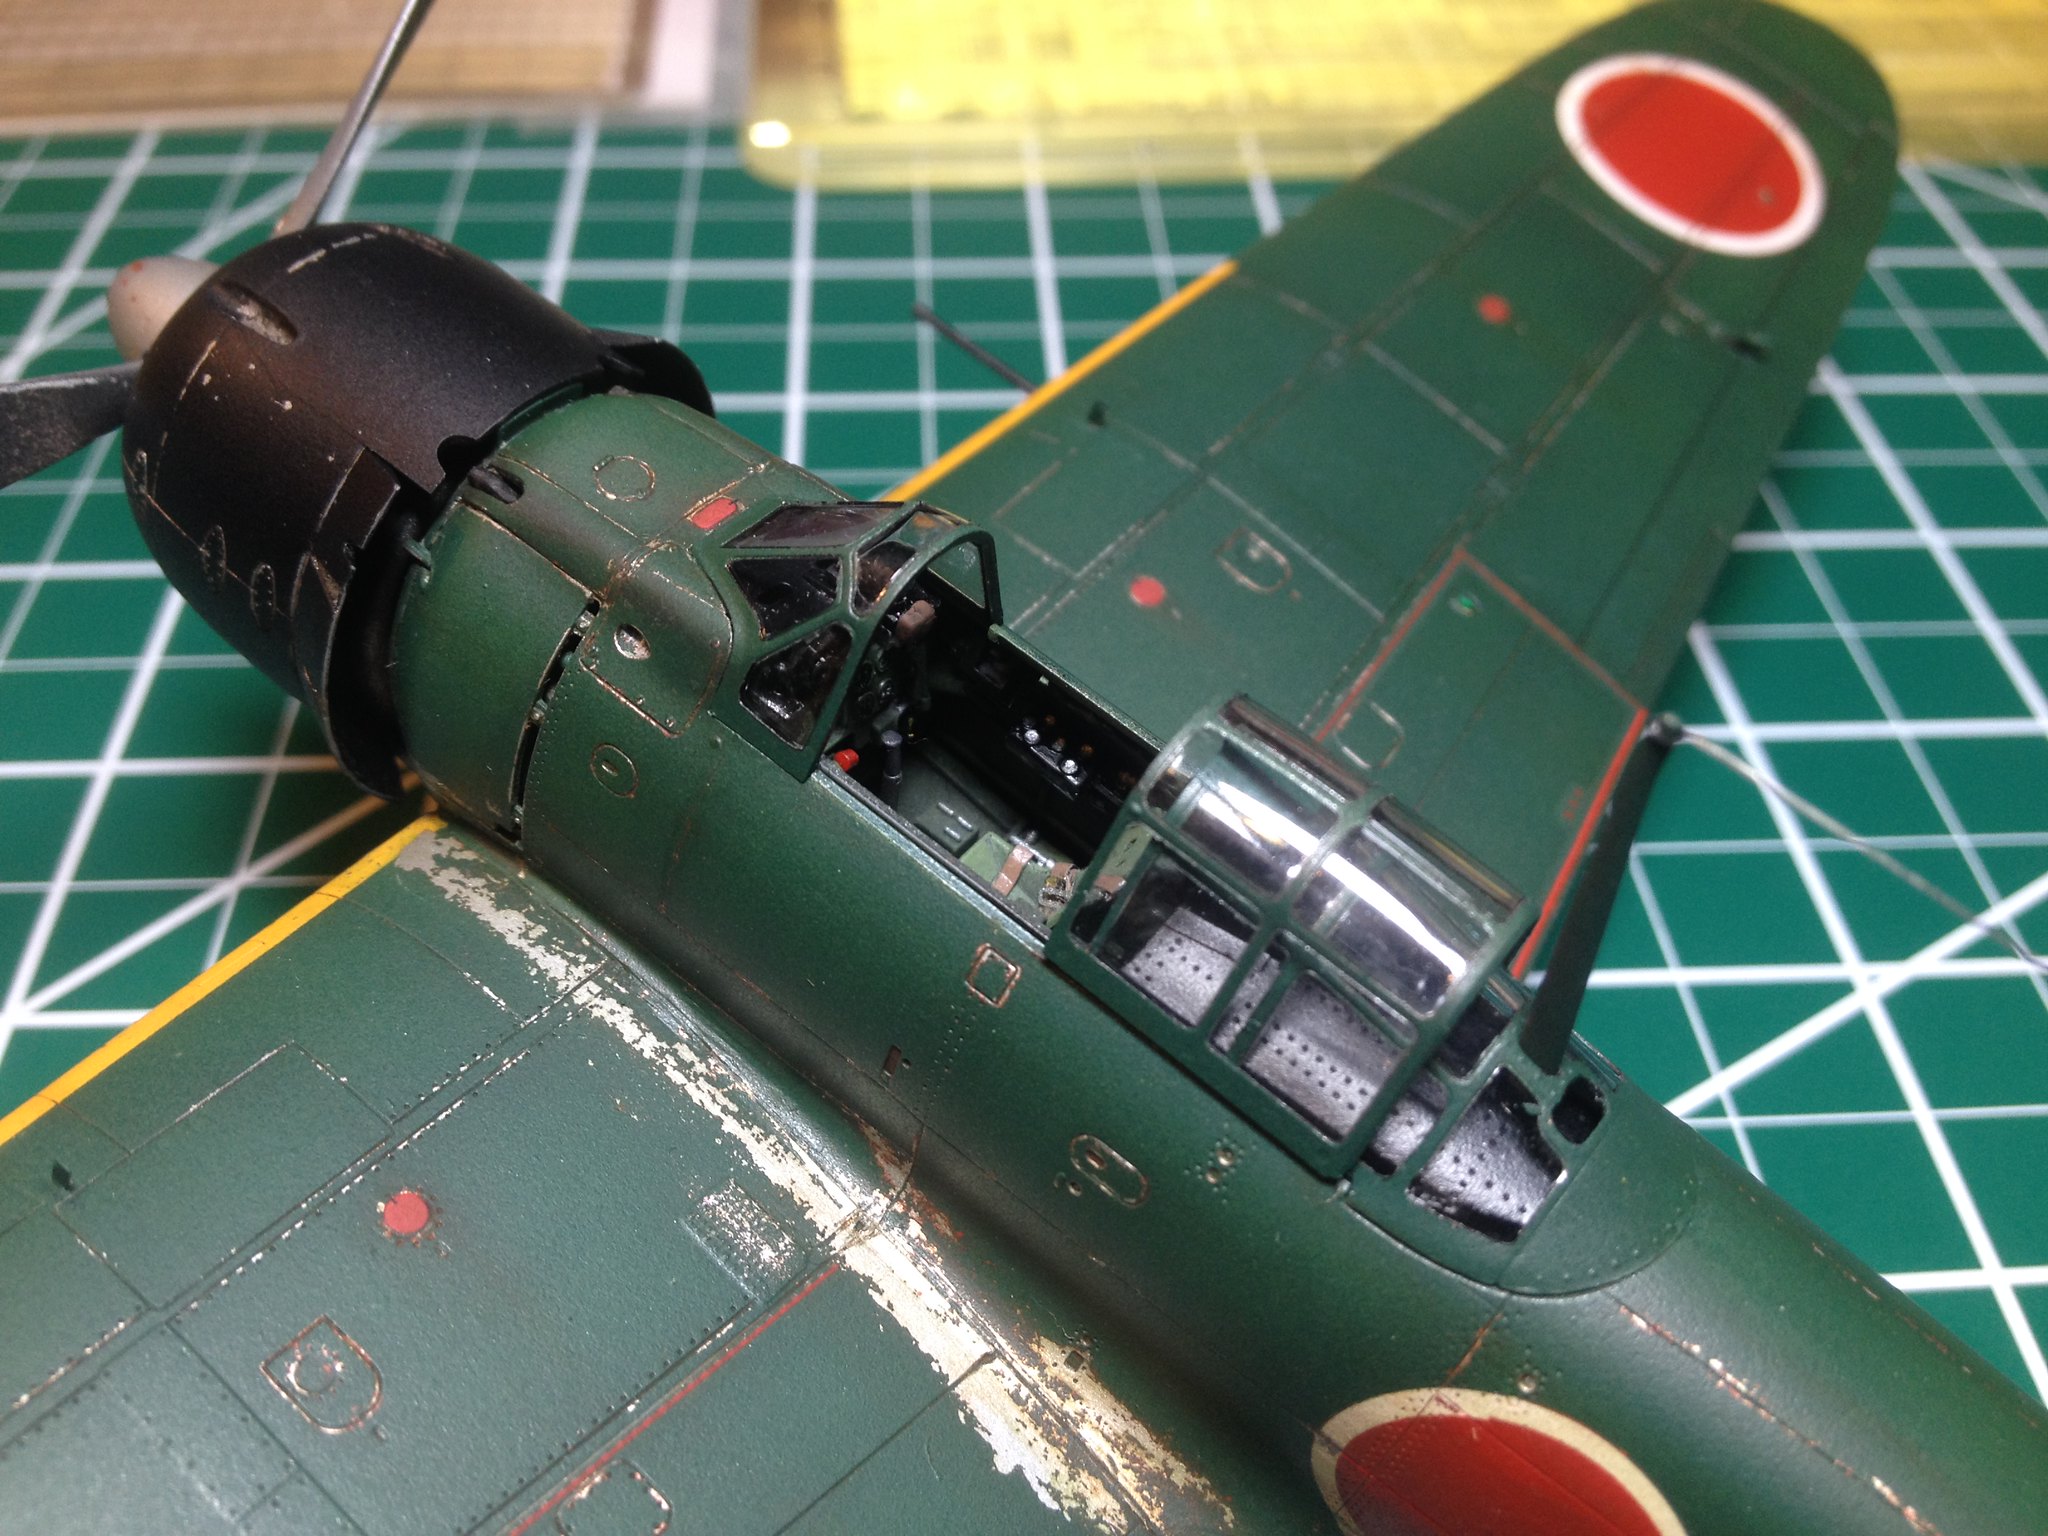
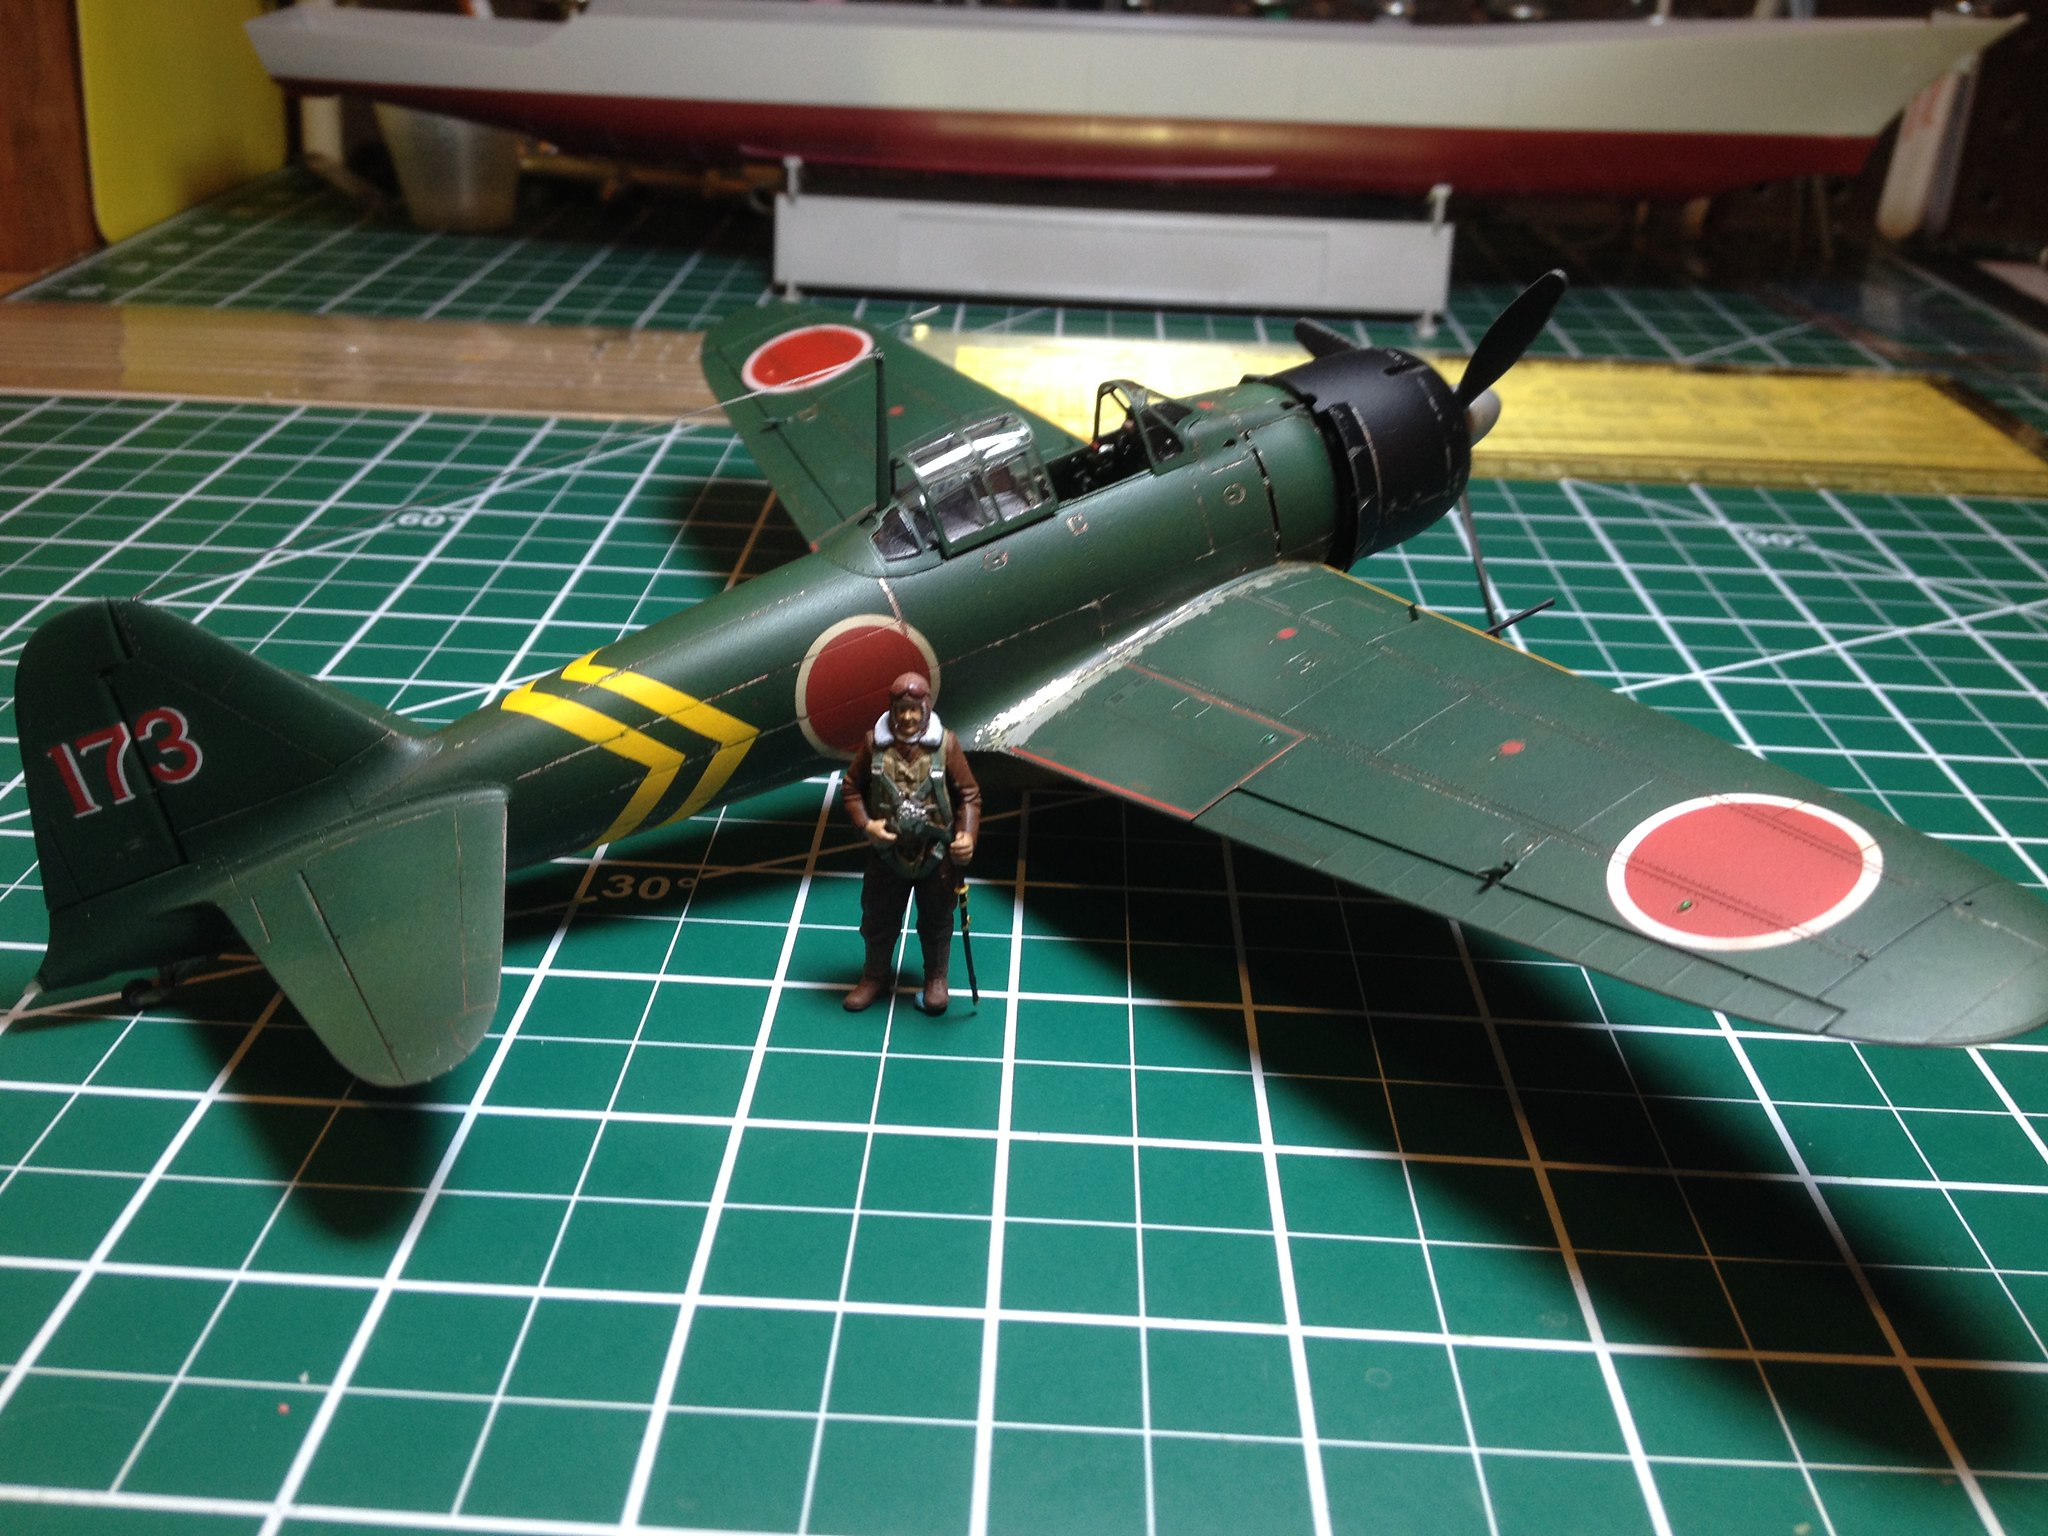
 IMG_2339 by Christopher Ridle, on Flickr

 IMG_2340 by Christopher Ridle, on Flickr

 IMG_2341 by Christopher Ridle, on Flickr

 IMG_2342 by Christopher Ridle, on Flickr

 IMG_2343 by Christopher Ridle, on Flickr

 IMG_2344 by Christopher Ridle, on Flickr

 IMG_2345 by Christopher Ridle, on Flickr

 IMG_2347 by Christopher Ridle, on Flickr

 IMG_2348 by Christopher Ridle, on Flickr

 IMG_2349 by Christopher Ridle, on Flickr

Cheers Beer

  • Member since
    May 2013
  • From: From the Mit, but live in Mason, O high ho
Posted by hogfanfs on Monday, September 25, 2017 8:19 PM

Wow, Chris! the Zero and the figure look fantastic! 

 Bruce


 On the bench:  1/48 Eduard MiG-21MF

                        1/35 Takom Merkava Mk.I


  • Member since
    June 2013
Posted by bvallot on Tuesday, September 26, 2017 10:54 AM

Very nice Chris! =] I wish my first Zero looked as good. One day I'll have to get back around to doing a few Jap planes. I hope you still post a few pics once you get your base up and running. I'd very much like to see what you come up with.

Great looking Zero!

On the bench:  

Tamiya F4U-1  Kenneth Walsh


  • Member since
    July 2003
  • From: Cincinnati, Ohio
Posted by ridleusmc on Tuesday, September 26, 2017 9:57 PM

bvallot

I hope you still post a few pics once you get your base up and running.  

Thank you bvallot!  Yes sir, the polyurethane on the base is drying in the garage now.  I'm taking a simpler approach this time.  

  • Member since
    March 2005
  • From: Lancaster, South Carolina
Posted by Devil Dawg on Tuesday, September 26, 2017 10:12 PM

OUTSTANDING WORK, Chris!! Great job! 

I never thought about using my right arm to clean my bench. Might hafta give that a try once....... Stick out tongue

Devil Dawg

On The Bench: Tamiya 1/32nd Mitsubishi A6M5 Model 52 Zeke For Japanese Group Build

Build one at a time? Hah! That'll be the day!!

JOIN OUR COMMUNITY!

Our community is FREE to join. To participate you must either login or register for an account.

SEARCH FORUMS
FREE NEWSLETTER
By signing up you may also receive reader surveys and occasional special offers. We do not sell, rent or trade our email lists. View our Privacy Policy.