SEARCH FINESCALE.COM

Enter keywords or a search phrase below:

Eduard 1/48 Airacobra WIP

5804 views
25 replies
1 rating 2 rating 3 rating 4 rating 5 rating
  • Member since
    April 2013
Posted by SchattenSpartan on Wednesday, January 15, 2014 1:10 PM

Thank you sir! I like to paint my aircraft models with the paint showing a lot of fading. I think it jsut makes the model look a lot better. I'm no fan of perfectly clean looking planes...

  • Member since
    June 2012
Posted by Compressorman on Wednesday, January 15, 2014 9:32 AM

I have never liked this plane but that is nothing against your model. I am loving that splotchy and faded olive drab paintjob on this model. Very nice job!

Chris

  • Member since
    April 2013
Posted by SchattenSpartan on Tuesday, January 14, 2014 1:12 PM

John: I heard about that. We can't get any Gunze lacquer paints here though. Their leveling thinner is almost impossible to buy in Austria as well... Model Master is also extremely rare here...

  • Member since
    April 2013
Posted by SchattenSpartan on Tuesday, January 14, 2014 1:11 PM

I'm sorry, but I don't know anything about the Revell kit. It looks like it has raised panel lines though and I personally don't like that fact TBH... However, I can tell you that the Eduard kit builds up nicely and most of the fit issues were caused by me being too dumb to properly test fit the fuselage halves and the cockpit with the IP in place before assembling everything...

  • Member since
    November 2003
  • From: Naples, FL
Posted by tempestjohnny on Tuesday, January 14, 2014 1:03 PM

Clemons. I too like gunze but here in the states its been getting harder and harder to get ahold of.  John


  • Member since
    February 2003
  • From: Green Bay, WI USA
Posted by echolmberg on Tuesday, January 14, 2014 10:14 AM

I'm following this thread with great interest!  In your opinion, how does the Eduard kit compare to the Revell offering?  I built the Revell P-400 last year and loved it.  I've never built an Eduard kit before but I'm curious to try one.  

Eric

  • Member since
    April 2013
Posted by SchattenSpartan on Tuesday, January 14, 2014 2:27 AM

Many thanks, Joe!

I don't really like Tamiya that much compared to Gunze acrylics TBH. The Gunze paints just spray way better IMO and they also have a lot more colors in their line-up. The slightly longer drying time also helps me to blend all the colors together when post-shading (I'm not too experienced with that) What do you use as the final finishing coat? I have Alclad flat clear, but I don't really like the completely flat finish it produces...

  • Member since
    February 2012
  • From: Olmsted Township, Ohio
Posted by lawdog114 on Monday, January 13, 2014 8:32 PM

Looking great Clemens.  I tend to leave "forensic evidence" behind when I use Gunze paint.  I'm used to Tamiya which dries much quicker.  The control surfaces look great.  I do the same to mine.  Makes it look more realistic. Once you give them a wash, dull coat, it will be fine.  Nice scheme by the way.  

Joe  

 "Can you fly this plane and land it?...Surely you can't be serious....I am serious, and don't call me Shirley"


  • Member since
    April 2013
Posted by SchattenSpartan on Saturday, January 11, 2014 1:53 PM

Thanks, Nathan! I spent roughly 5 hours on the faded OD and 2 more on the gray, but I think it's really worth the effort. I'd either get the Hasegawa kit or one of the Eduard dual combos (same price as Hase, but 2 kits). The Hasegawa Cobra is probably the better kit of the two, but it's pretty damn expensive...

Gary: I don't even know how I'm going to tackle the weathering on this one yet. I'll start off with a Flory wash (probably the dark wash), but I'm not sure if I'm going to do anything else except some chipping on the wing roots/leading edges...

GAF
  • Member since
    June 2012
  • From: Anniston, AL
Posted by GAF on Saturday, January 11, 2014 10:31 AM

Clemens,

I think the OD on the control surfaces sets the fabric covers off well.  Weathering should blend the colors at the end, so it might be (IMO) okay to leave as is.

Gary

  • Member since
    March 2010
  • From: MN
Posted by Nathan T on Friday, January 10, 2014 11:53 PM

Good repair Clemens. I'm still torn between this or the Hasegawa kit for when I finally get around to building an Airacobra. You've got some good shading and weathering going on so far.


  • Member since
    April 2013
Posted by SchattenSpartan on Friday, January 10, 2014 8:13 PM

I finallly managed to complete today's painting session. After removing that fingerprint, I had to restore the post-shading everywhere i did some touch-ups.

Door without fingerprint: Big Smile

The grainy "texture" in the pic is only caused by the bad lighting. I fixed that issue before taking more photos...

These pics look a bit more like the real model compared to the ones I posted earlier:

I also tinkered around with the OD on the wings, adding more color to them:

This picture shows the color difference a bit better:

The different shades of OD are easier to make out in person, but my camera isn't that good with subtle color differences...

The main reason for this update are the control surfaces, so here are some pics of them:

I guess the OD on the control surfaces is a bit too light (I sprayed some highly thinned OD on top of them because they were even lighter than they are now), but I like how they look and I don't feel like masking and spraying everything again. I'll just leave them as they are now.

The pic of the tailplane shows the OD how it really looks BTW...

Cheers, Clemens

  • Member since
    April 2013
Posted by SchattenSpartan on Friday, January 10, 2014 5:00 PM

Well I WAS going to post the update now, but I have to report a little boo-boo:

I was about to take a few pics, but suddently...

...a wild FINGERPRINT appeared!

  • Member since
    April 2013
Posted by SchattenSpartan on Friday, January 10, 2014 4:53 PM

Nathan: I'm curious as well. I never heard of AML before but I thought I'll give it a try because I liked that one scheme so much!

Eric: Thanks for chiming in! I really appreciate the nice words!

BV: My feelings... Hmm... It is a good kit, but by far not perfect: The amount of detail is nice and it is fairly easy to build, but the larger parts don't have a very good fit. I had a large step at the leading edges of both wings when the trailing edges were aligned. The fuselage halves are no perfect fit either. I had to do a lot of sanding, but I think it was worth the effort. I'll definitely build the 2nd kit (it is a dual combo after all), but my 3rd Cobra (if I decide to build a 3rd one) will be the Hasegawa kit. The biggest strength of this kit is the price though: It costs less than the Hasegawa offering and includes 2 Airacobras and masks, PE parts and nose weigths(!) as well as some interesting marking options (desert camo!) It is one of Eduard's earliest kits AFAIK, so it's´not as good as their Hellcats or Fw 190s, but I like it!

  • Member since
    June 2013
Posted by bvallot on Friday, January 10, 2014 4:12 PM

Clemens, what are your feelings so far on this Eduard kit?  

On the bench:  

Tamiya F4U-1  Kenneth Walsh


  • Member since
    December 2006
  • From: N. Georgia
Posted by Jester75 on Friday, January 10, 2014 2:41 PM

Excellent work so far Clemens, lovin it bro!

Eric


  • Member since
    March 2010
  • From: MN
Posted by Nathan T on Friday, January 10, 2014 2:28 PM

Nice scheme Clemens! Looking forward to seeing how those AML Decals preform. I'm gonna use them real soon on my La-5f. Just waiting for the gloss to dry another 2 days or so.


  • Member since
    April 2013
Posted by SchattenSpartan on Friday, January 10, 2014 1:32 PM

I just finished masking the areas around all the surfaces and I'm ready to spray them in their base color mixed with some white to depict the stronger fading of paint on the fabric-covered surfaces:

I told you already that she's going to be a Russian bird, so here are the decals I'll dress her up with:

My snake of choice is Major Sirotin's aircraft:

The decals themselves look really nice and are printed well:

A nice bonus is the addition of PE seatbelts. I used the kit-supplied belts already, but additional AM seatbelts are never a bad ting to have Wink

 I'll post some pics as soon as the control surfaces are painted...

Cheers, Clemens

  • Member since
    April 2013
Posted by SchattenSpartan on Friday, January 10, 2014 1:14 PM

Stu: Thaks for pointing that out! You learn something new here every day! I agree on the thick trailing edges. I tried to thin them down a little bit, but only with minor success. I might get the Hasegawa kit as well (it has thinner wings AFAIK)

John: Thank you! I think you get the same sprues with every Eduard P-39 kit. It seems like the only things different in each kit are the instructions and the decals...

Psycho: Sure. There's no intake directly under the nose, so I assume you were referring to the wing-root intakes?


  • Member since
    December 2009
Posted by ww2psycho on Monday, January 6, 2014 8:15 PM

I have two Eduard molded P-39s and it seems the intakes under the nose is molded wrong or weird, Can you take a picture of yours?

  • Member since
    November 2003
  • From: Naples, FL
Posted by tempestjohnny on Monday, January 6, 2014 6:01 PM

Great work Clemons. I have the AM P-400 in the stash


  • Member since
    January 2006
  • From: Earth
Posted by DiscoStu on Monday, January 6, 2014 9:19 AM

SchattenSpartan

Thanks a lot, guys!

Joe: Yeh, it's the reboxed AM kit with added nose ballast and all the profipack goodies. The colored PE caused a lot of truoble though, because the IP was too big to fit the cockpit (that's why I had all those fit issues in the cockpit)

Actually it's the other way around.  The Eduard kit came first.  AM did a re-boxing of it.  Wonderful kit though, no matter who makes it.  The only gripe I ever had was the trailing edge was a bit too thick.  Otherwise it was fine.  It was one of those kits that got me turned on to Eduard.  I was hesitant to try anything that wasn't Tamiyagawa/Monogram and this kit got me out of that rut and opened my eyes to other companies.

"Ahh the Luftwaffe. The Washington Generals of the History Channel" -Homer Simpson


  • Member since
    April 2013
Posted by SchattenSpartan on Monday, January 6, 2014 5:48 AM

Thanks a lot, guys!

Joe: Yeh, it's the reboxed AM kit with added nose ballast and all the profipack goodies. The colored PE caused a lot of truoble though, because the IP was too big to fit the cockpit (that's why I had all those fit issues in the cockpit)

I thin my Gunze paints with "Mr. Color Thinner" (I use the Acrylics). I think I know what caused the paint splatter though: I sprayed highly thinned gray paint at kinda high pressure (about 30-35 PSI) to get sharper demarcation lines between the OD and the NG. I some of the paint that didn't hit the model where I sprayed might have laid down on the fuselage side, causing those specks...

  • Member since
    June 2013
Posted by bvallot on Monday, January 6, 2014 2:02 AM
Nice Clemens. Every now and then I learn the hard way about something too. Can't wait to see more.

On the bench:  

Tamiya F4U-1  Kenneth Walsh


  • Member since
    February 2012
  • From: Olmsted Township, Ohio
Posted by lawdog114 on Sunday, January 5, 2014 8:31 PM

Looks great Clemens.  Is that a re-boxing of the old Accurate Miniature Kit?  I have one of those in the stash that I may try eventually in Guadalcanal markings.  Nice pit and I like the map idea.  I thought about putting one in the pocket of my recent Bf 109, but I forgot.   Interesting on the white flecks, what did you use to thin the Gunze?  That sometimes happens to me when I spray down Testor's dull coat.  Anyways, nice recovery and I'll be following your progess.

Joe

 "Can you fly this plane and land it?...Surely you can't be serious....I am serious, and don't call me Shirley"


  • Member since
    April 2013
Eduard 1/48 Airacobra WIP
Posted by SchattenSpartan on Sunday, January 5, 2014 5:07 PM

Hi there Guys! I started this kit for the 1943 GB, but I wanted to build it as a russian lend-lease aircraft. After I got the decal sheet with the russian markings, I found out that the only Airacobras i can build using it are 1945 machines. I decided to post this WIP thread for those of you who are still interested in this build:

First of all, please don't get me wrong, this is a nice kit, but it was fighting me all the way to where I'm at now. It was a very frustrating build during the aerly stages of assembly (that's why I put it on hold for several months), but it's a great opportunity for me to learn how to build more difficult kits and It's growing on me TBH. I got another one of those Cobras anyway (dual combo), so I'm using this one as a test-build of some sort...

Here's what I'm talking about:
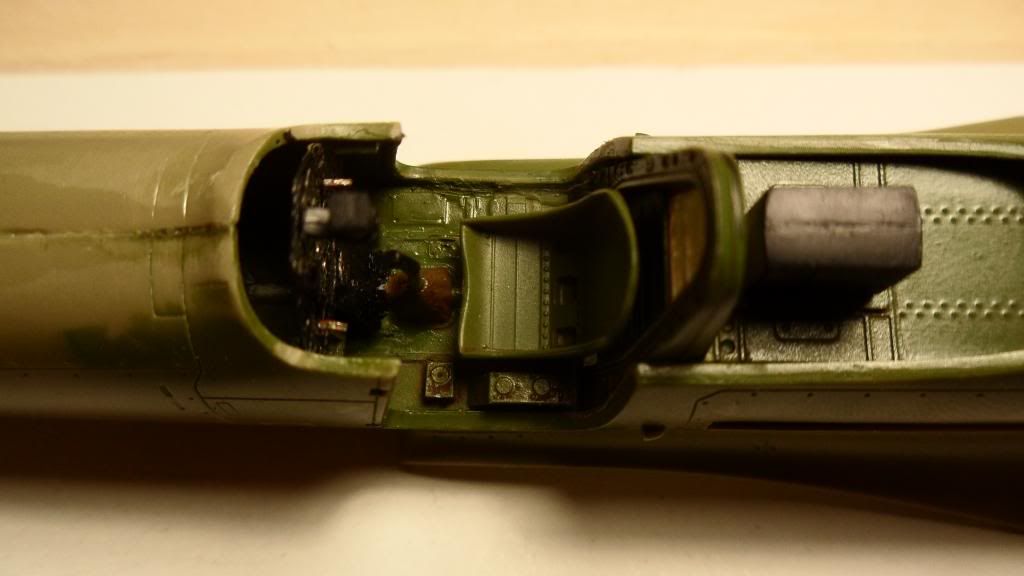
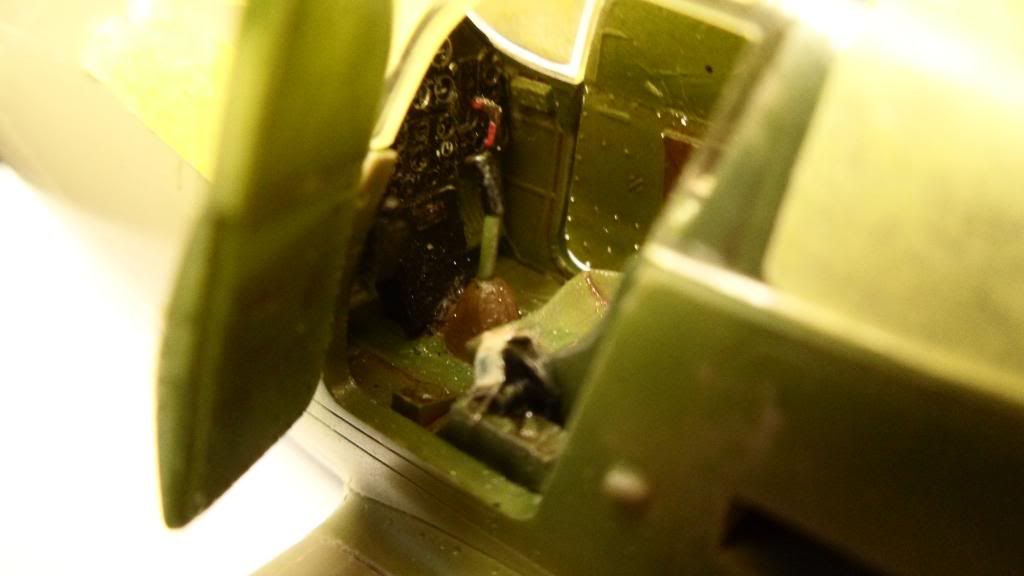
I managed to damage the cockpit floor quite badly while trying to make everything align properly. the right door will be closed, so most of it won't be seen and I'll cover up the rest of the damage by adding a folded map to the cockpit...

Here are a few more pics of the 'pit:
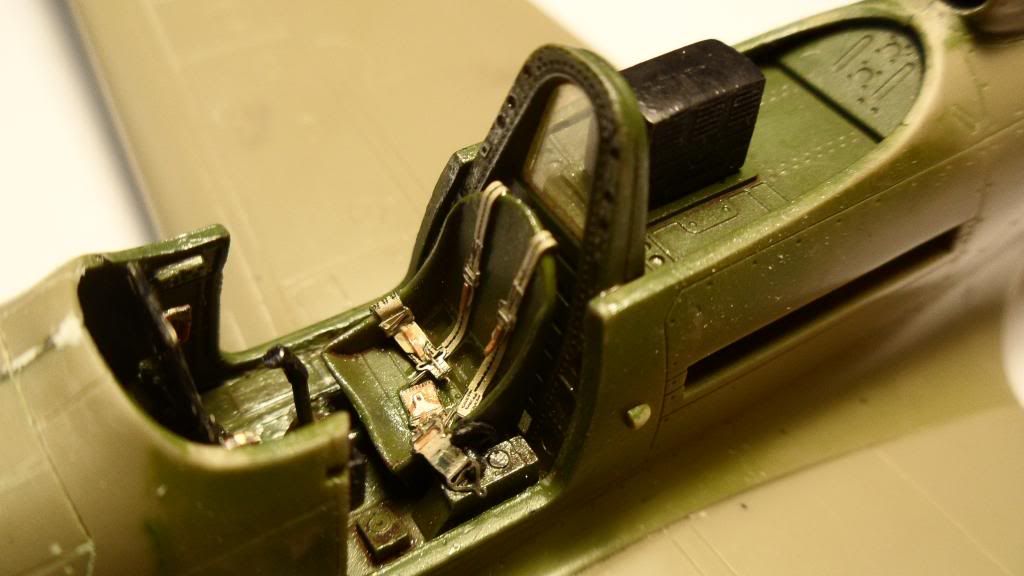
Fuselage and wings assembled:
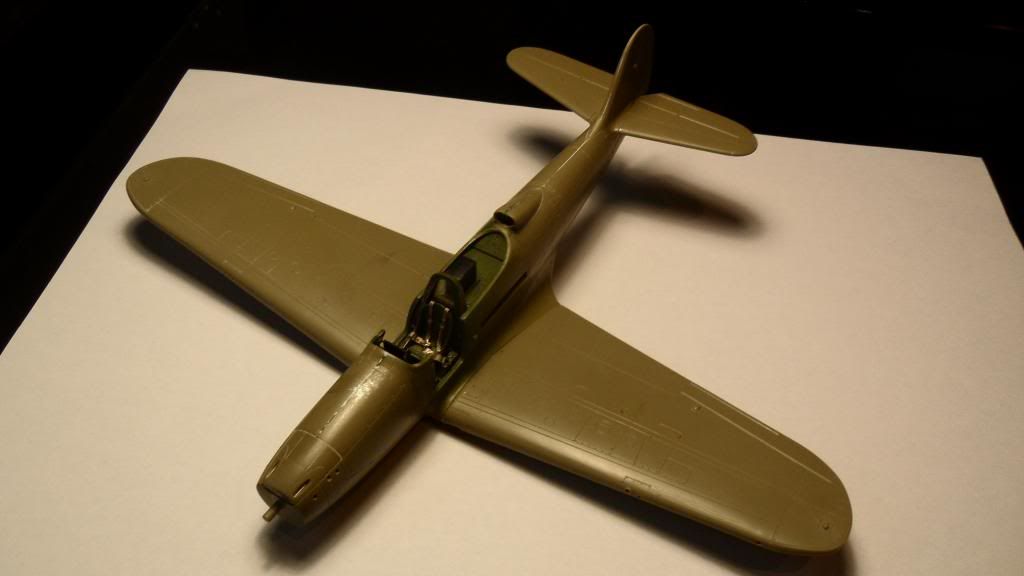
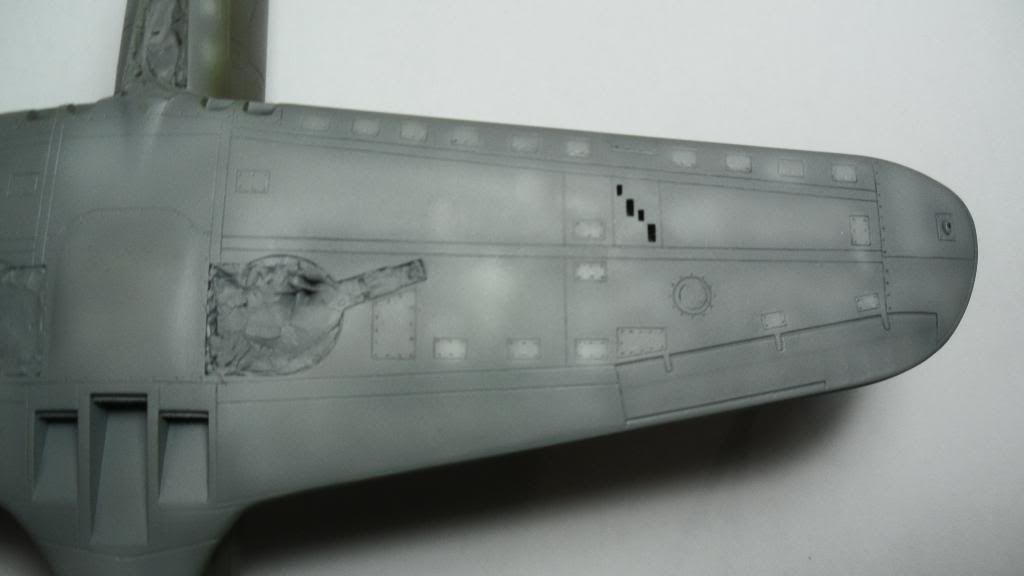
Primer (Alclad microfiller) and preshading (kinda heavy-handed as an attempt to make her look dirtier):
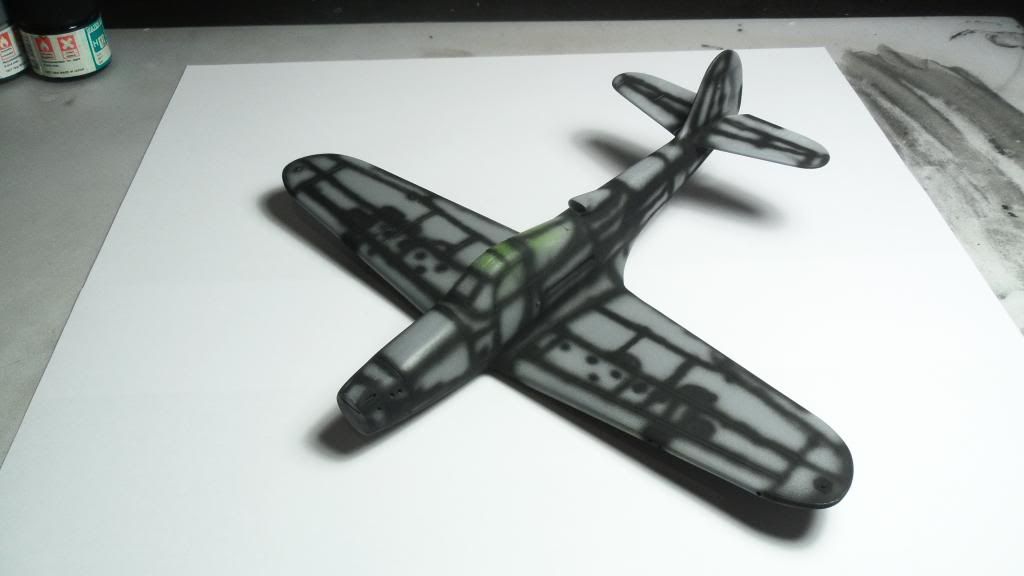
Lower surfaces painted with light coats of Gunze Neutral Gray:

Then I painted all the upper surfaces with Gunze Olive Drab 1:

I had to do some touch-up work on the nose and wing tips and kinda messed up. Here's the result (I have no idea how I managed to do that):

That meant that a few more coats of OD were necessary which partially killed the preshading effects.

After fixing my little paint-problem I decided to weather the paint a bit by applying different shades of OD and Gray to the model in very light coats staying at panel centers and highlighting access panels. I got a lot of inspiration from Aaron Skinner's P-39 painting tutorial in the december issue of FSM.
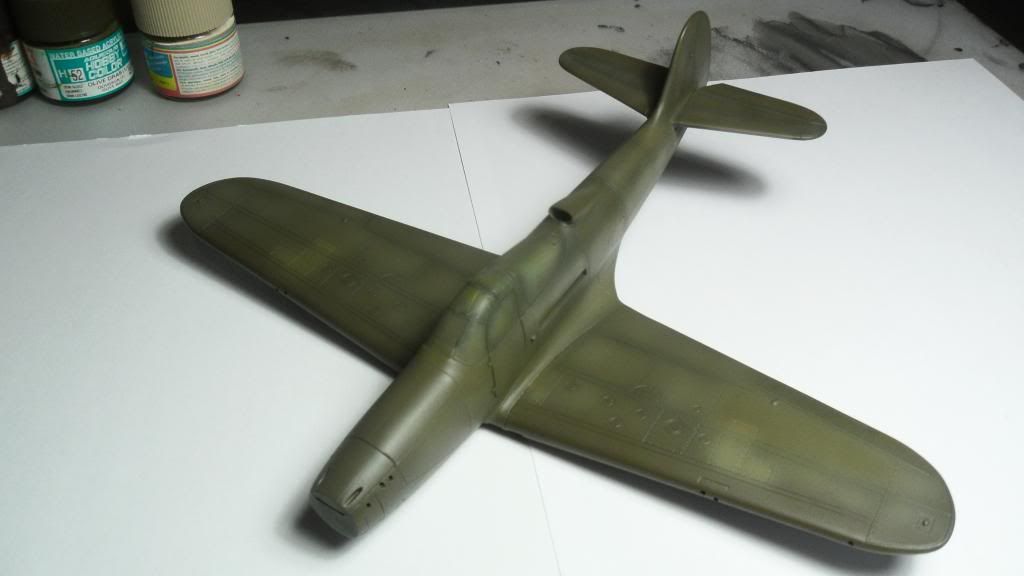


I sprayed some panels on the the nose in OD mixed with a bit of Chocolade Brown to add a bit more interest to the model:
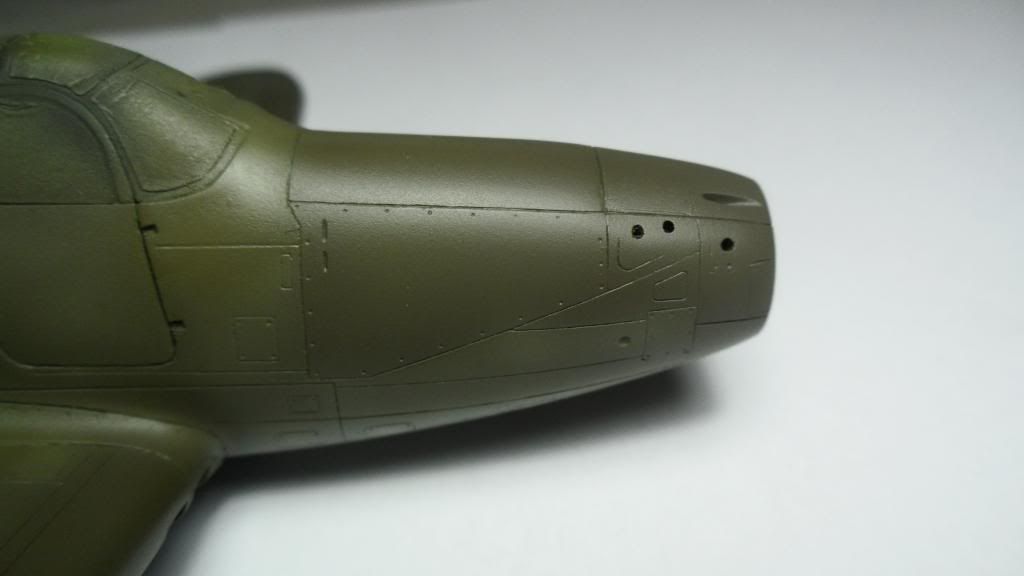
My camera didn't pick up all the shades of OD, but here's a shot of the right wing:

There's more color variation visible on the real thing, but it doesn't show in the pics....

The lower surfaces got a similar treatment with Light gray (FS 36495) as the highlighting color:
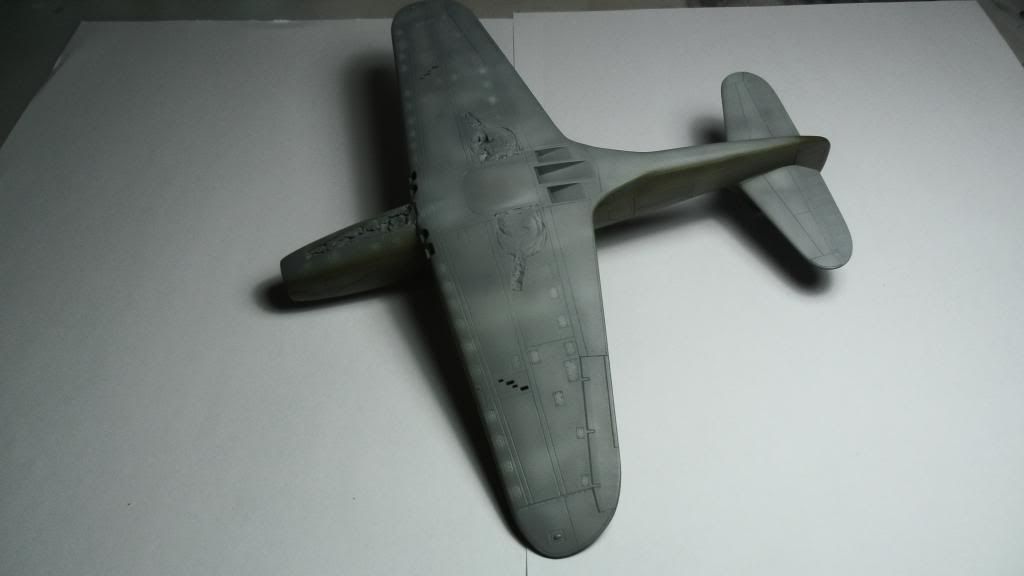
 

The OD looks more brownish in person, but I can't get my damn camera to pick up the colors properly. The mediochre lighting doesn't help either...

Cheers, Clemens


JOIN OUR COMMUNITY!

Our community is FREE to join. To participate you must either login or register for an account.

SEARCH FORUMS
FREE NEWSLETTER
By signing up you may also receive reader surveys and occasional special offers. We do not sell, rent or trade our email lists. View our Privacy Policy.