SEARCH FINESCALE.COM

Enter keywords or a search phrase below:

AFV Club F-5 WIP

1680 views
4 replies
1 rating 2 rating 3 rating 4 rating 5 rating
mgh
  • Member since
    May 2011
  • From: Utah County, Utah
Posted by mgh on Tuesday, April 1, 2014 12:36 PM

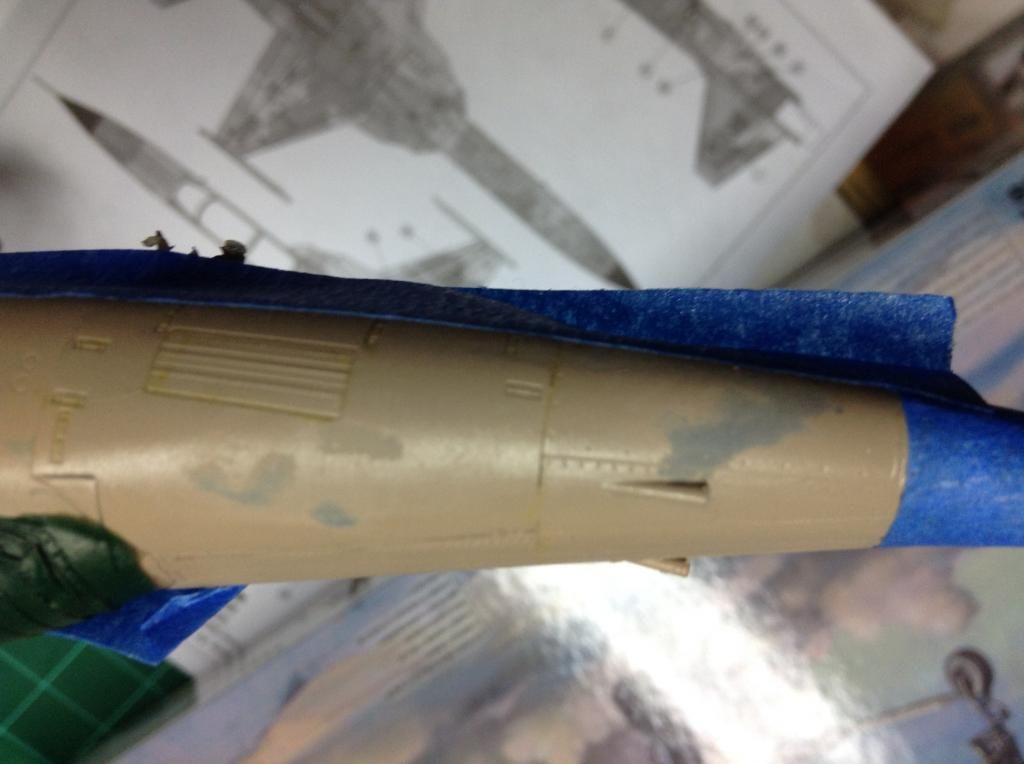
Sunday I started decals, and ran into a big problem.  When applying water to the surface of the kit, it acted like a solvent, and went right through to the primer below.  This happened to me once before, and I started a thread about it.

http://cs.finescale.com/fsm/tools_techniques_and_reference_materials/f/18/t/153025.aspx

It makes no sense whatsoever, but it did happen.  The gray that can be seen in the photo is the rattle-can primer I applied before painting.  Both times I was using Tamiya thinned with alcohol, and Aqua Gloss, thinned a little with water.  I touched up the affected areas Sunday, let it cure until today, and gave it a coat of Future, and I will let that cure 2 days before attempting decals again.
mgh
  • Member since
    May 2011
  • From: Utah County, Utah
Posted by mgh on Wednesday, March 26, 2014 10:37 AM

I went back over the area around the canopy, primed it again and airbrushed the Wooden Deck Tan again.  It looks better, but still not great.  Hopefully I can disguise some of it with weathering.

Here it is with bays and exhausts masked. I have never been able to paint the bays and then fill them with tissue paper or the like and get good results, so here I painted the fuselage and then masked for the bays.


  • Member since
    March 2005
  • From: Lancaster, South Carolina
Posted by Devil Dawg on Friday, March 21, 2014 8:41 PM

I've also read in numerous places about using a very fine-tipped pencil to highlight panel lines. Just keep it as sharp as possible at all times, and lightly run the pencil through all your panel lines.

Devil Dawg

On The Bench: Tamiya 1/32nd Mitsubishi A6M5 Model 52 Zeke For Japanese Group Build

Build one at a time? Hah! That'll be the day!!

  • Member since
    February 2014
Posted by dflu78 on Friday, March 21, 2014 12:16 PM

Looks very nice so far. Leave it to FSM to give out amateurish tips though. The best way to highlight panel lines by far is with washes...whether pin washes or sludge. If you're having trouble with the traditional oil pin wash I'd recommend trying some Promodeler Wash by Flory. It's a clay based product. You sludge it over a gloss surface..allow it to dry a bit and then just wipe away with a damp cloth.

mgh
  • Member since
    May 2011
  • From: Utah County, Utah
AFV Club F-5 WIP
Posted by mgh on Friday, March 21, 2014 10:51 AM

I am quite a way into this project, but will post of what I have done so far.

The kit is very nice, with very good to excellent fit, with the exception of the canopy to interior, and canopy to fuselage.  Recessed lines are very fine, so I expect to have some problems getting a wash to flow nicely in them.  For some reason I have really be struggling with pin washes lately.

I started with Tamiya surface primer, thinned with hardware store lacquer thinner.  Next order I make I will try some of their lacquer thinner.  The primer went down nicely.

In Finescale magazine there was a kit in which the builder had used a pigment pin to mark panel lines.  I though that was a cool idea, so went up to Hobby Lobby to see what I could find.  Could not find a pigment pen, just artists pens.  Bought a 01, which is .1mm.  Thought I would experiment on my primed kit.  Pretty much a disaster, the pen acts like a sharpie, the ink just flows out everywhere.  So I thought, well maybe it will act as a pre-shade.

I had decided to do the Iranian AF color scheme, and used Tamiya Wooden Deck Tan as what the kit called out as "Radome".  It was not covering the above experiment, so I rattle-canned the upper surface with cheap gray primer. Below is the kit done up in the Deck Tan.  The gray under-coat changed the color of the tan, but I thought it looked a little better.

It was about this time that I figured out that canopy open was not going to work for me.  The fit was poor, and the linkages that were to be glued on to the canopy were very fragile.  Add to that that I had not thought about painting the camo over the canopy, which would be a much greater challenge with it open.

Here is a picture after the brown has been put down, and masked again for the green.  The brown is Tamiya Nato Brown.  I tried dark green, but over the brown it looked pretty bad.  I finally used plain green, and it came out better.  Maybe to stark?

So here it is with the camo done, but the canopy needs touching up, as it was put on later, not as originally planned.

Now the terrible results of touching up the deck tan.  Ouch!  Not sure what I am going to do from here.

JOIN OUR COMMUNITY!

Our community is FREE to join. To participate you must either login or register for an account.

SEARCH FORUMS
FREE NEWSLETTER
By signing up you may also receive reader surveys and occasional special offers. We do not sell, rent or trade our email lists. View our Privacy Policy.