SEARCH FINESCALE.COM

Enter keywords or a search phrase below:

Fokker E. III, 1/72 Eduard

6411 views
24 replies
1 rating 2 rating 3 rating 4 rating 5 rating
  • Member since
    April 2005
  • From: Piscataway, NJ!
Fokker E. III, 1/72 Eduard
Posted by wing_nut on Saturday, January 24, 2015 12:14 PM

Now that I've finished my sub I'can move on to my little Fokker.  It's an E. III kit but I'll be doing a color scheme form and E. I just cuz I like it.

Got the engine wired and with some cockpit farming added.  Starting with the painting.  A few tiny little scratched etailsi nthe cockpit that I have no idea hot to photograph. 

Marc  

  • Member since
    September 2013
Posted by AdeB on Sunday, January 25, 2015 2:15 AM

That looks superb so far! I shall be watching this with interest.

  • Member since
    April 2005
  • From: Piscataway, NJ!
Posted by wing_nut on Monday, January 26, 2015 4:55 AM

Thanks adeb, glad to have you along for the ride

Marc  

  • Member since
    April 2005
  • From: Piscataway, NJ!
Posted by wing_nut on Monday, January 26, 2015 6:12 AM

I never would have believed you if you said how tedious it was going to b masking this Fokker. 

But it did get masked and painted.  Decanted Tamiya gloss from a rattle can I think is my new favorite.  Scheme and marking is a mash up.  At first I thought the kit was an E.I when in fact  it is an E. III  and the marking are from that decal sheet.  The color scheme however is an E.I that I found on the Wingnut Wings site and I liked it.  So I hereby invoke the "What If Protocol" 


Engine and prop ready to be mounted.


Marc  

  • Member since
    November 2014
Posted by STX440 on Monday, January 26, 2015 6:17 PM
That is really cool lookin and small.You have done a real nice job so far.
  • Member since
    April 2005
  • From: Piscataway, NJ!
Posted by wing_nut on Tuesday, January 27, 2015 8:19 PM

Thks STX.

Made good use of the snow day.  Flat coat and a mock up before rigging. Can't add the tail until I get the elevators rigged. Need some room to work Whistling

Marc  

  • Member since
    March 2010
  • From: MN
Posted by Nathan T on Tuesday, January 27, 2015 10:24 PM

Wow Marc! I've seen what you can do in 32nd now here you are duplicating it in 72nd. Amazing paintwork and perfect weathering. Looks right on for this small Fokker.


  • Member since
    December 2002
  • From: Northern California
Posted by jeaton01 on Tuesday, January 27, 2015 10:35 PM

Sweet!

John

To see build logs for my models:  http://goldeneramodel.com/mymodels/mymodels.html


  • Member since
    April 2005
  • From: Piscataway, NJ!
Posted by wing_nut on Wednesday, January 28, 2015 8:02 AM

Thanks Nathan.  I am looking forward to starting my 1/32 F4u-1a so i can un-cross my eyesWhistling

Thanks John.

Marc  

  • Member since
    June 2012
Posted by Compressorman on Wednesday, January 28, 2015 12:42 PM

Holy cow!! That wing must be the size of a stick of gum. Really nice job so far!!

Chris

  • Member since
    April 2005
  • From: Piscataway, NJ!
Posted by wing_nut on Wednesday, January 28, 2015 3:37 PM

Hi Chris.   Same length... just a bit widerWink  And thanks.

Marc  

  • Member since
    July 2014
Posted by modelcrazy on Wednesday, January 28, 2015 3:44 PM

Great weathering on the ribs. i'm going to be building a Fokker Dr1 soon, did you drybrush for that effect?

Steve

Building a kit from your stash is like cutting a head off a Hydra, two more take it's place.


http://www.spamodeler.com/forum/

  • Member since
    April 2005
  • From: Piscataway, NJ!
Posted by wing_nut on Wednesday, January 28, 2015 4:56 PM

Thanks MC.  The shading is thinned Tamiya Smoke.

The steps were...

Base coat of color then tape the ribs.

Lightened base coat applied and a splotchy random manner.

Use a Post-It on the tape and spray the thinned smoke so it just gets over the edge of the paper.

Gloss and decals then the posy-it/smoke again for the decaled areas.

Peel the tape and smileBig Smile

Marc  

  • Member since
    July 2014
Posted by modelcrazy on Wednesday, January 28, 2015 5:03 PM

Huh! I never would have thought of that. I certainly give it a try.

Thanks

Steve

Building a kit from your stash is like cutting a head off a Hydra, two more take it's place.


http://www.spamodeler.com/forum/

  • Member since
    April 2005
  • From: Piscataway, NJ!
Posted by wing_nut on Thursday, January 29, 2015 8:00 AM

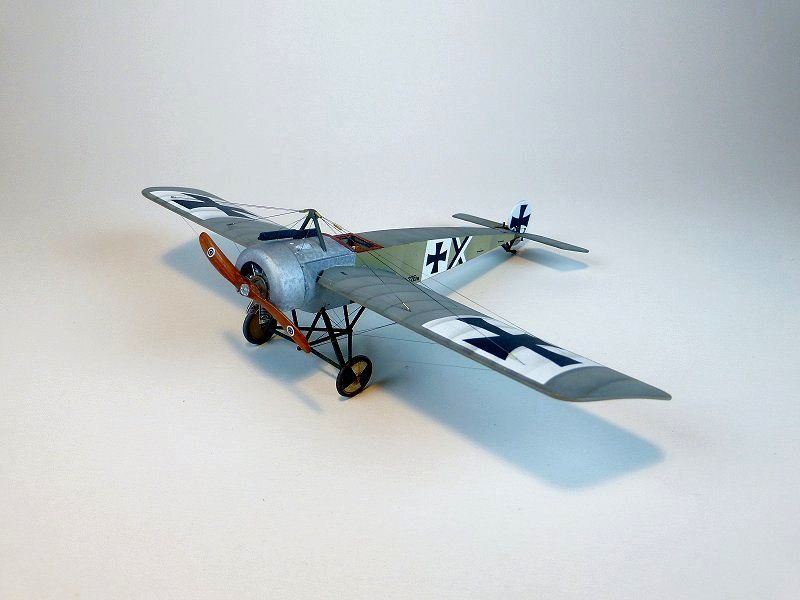
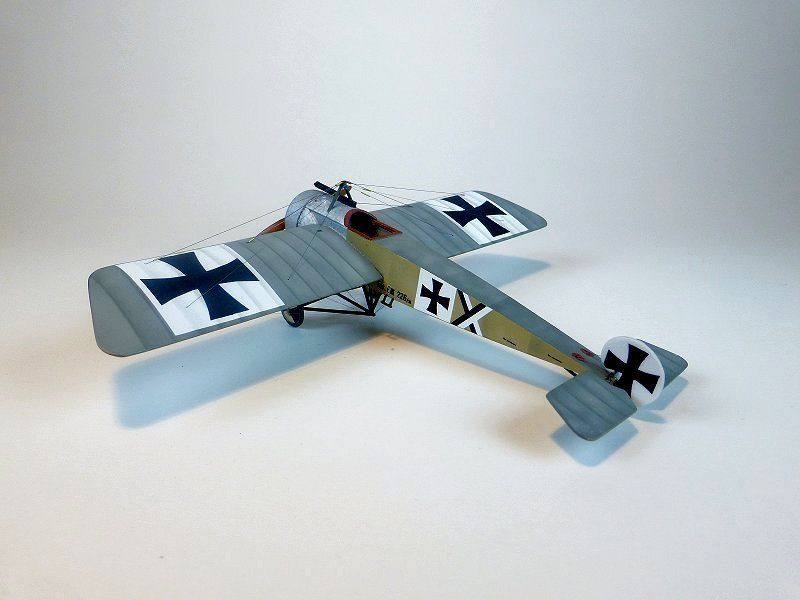
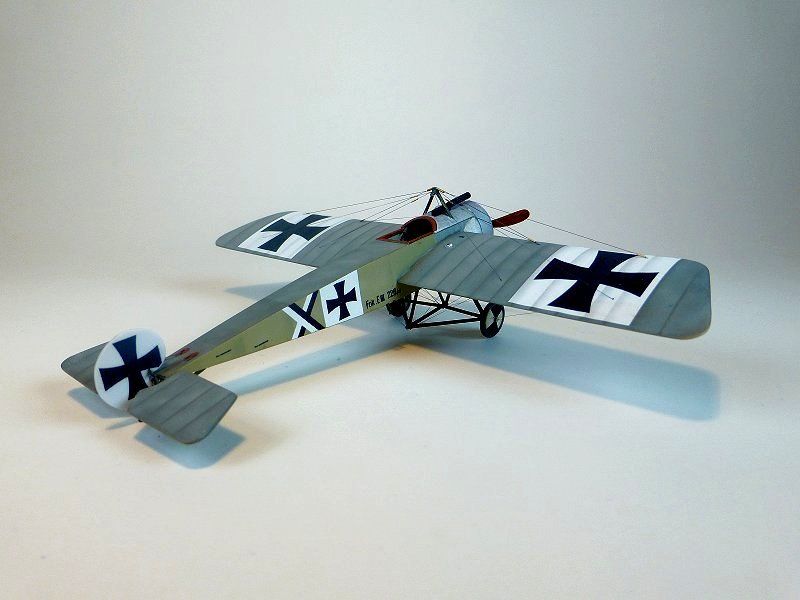
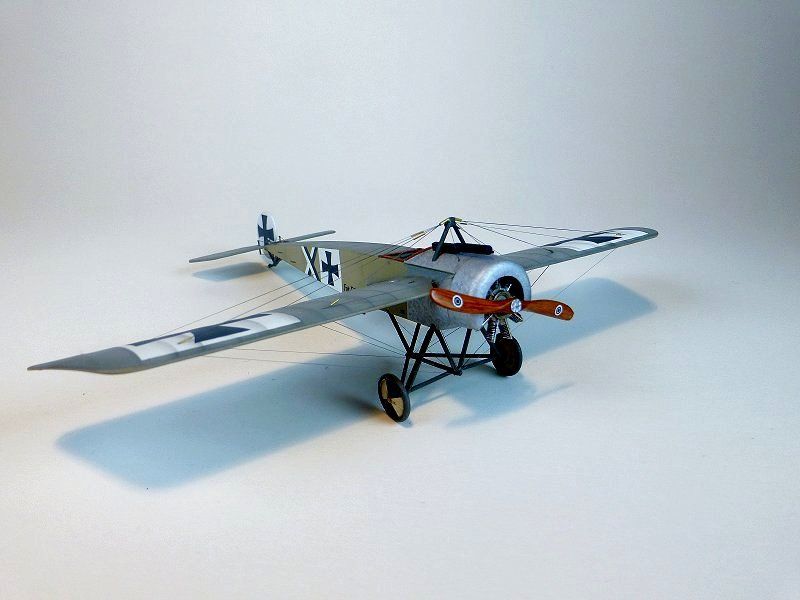
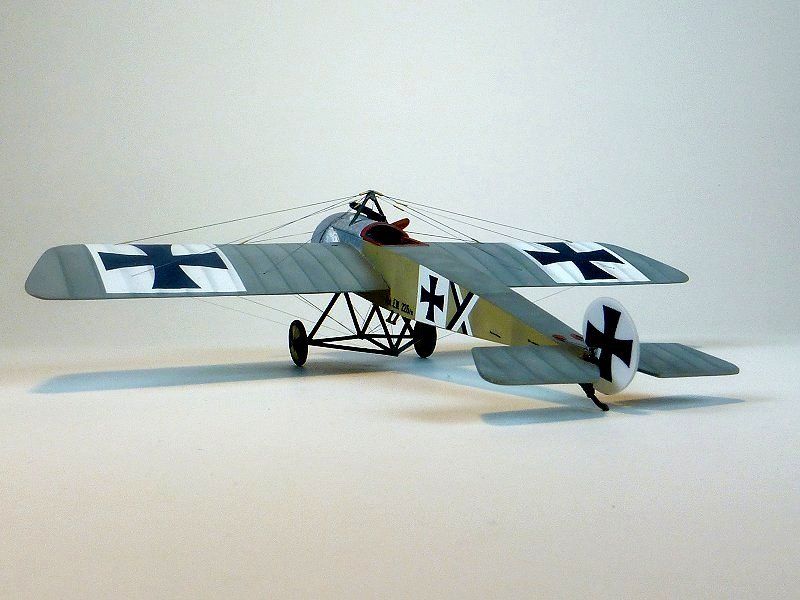
Finished up the Fokker last night.  Rigging was tedious but not as bad as I thought it would be.  Whistling  Using the stripped down EZ Line was the perfect choice.  The 2 things that made it go smoothly was making a teeny tiny hook from real thin wire to reach between the lines to pull a through to where I needed it to go and little pieces of tape as a 3rd hand.  Fortunately there's not a lot.  A 1/72 DH.2 would likely push one to the edge of insanity.

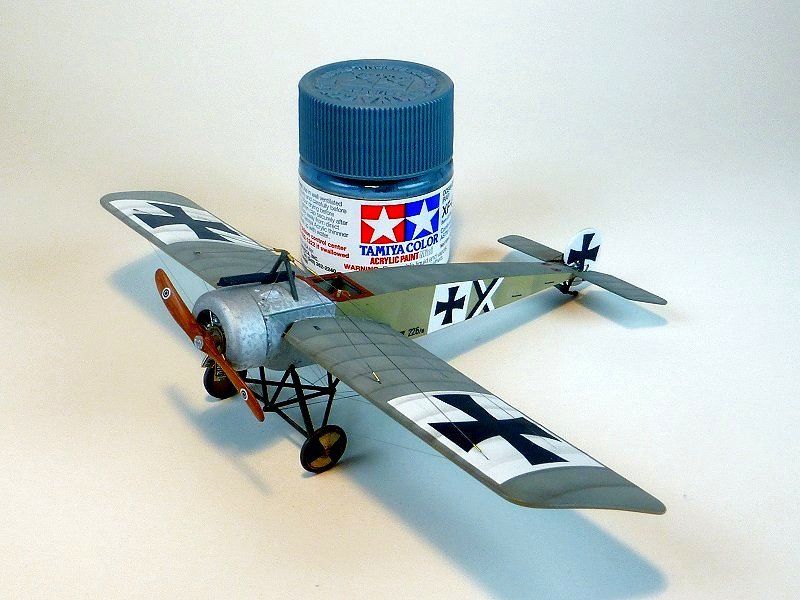
 The tough part was getting the turnbuckles on the line.  .3mm OD brass tubing was used.  For those of us that see "MM" and think of something that "melts in your mouth, not in your hand" that .012" OD with a .005" ID.  A #80 drill bit is .0135 for comparison.

 I've prattle don long enough..  Here's the completed Fokker E.III in 1/72 with a WIF scheme.


Marc  

  • Member since
    July 2014
Posted by modelcrazy on Thursday, January 29, 2015 8:19 AM

Wow! That looks sweet!. Fantastic job WingNut.

Steve

Building a kit from your stash is like cutting a head off a Hydra, two more take it's place.


http://www.spamodeler.com/forum/

  • Member since
    April 2005
  • From: Piscataway, NJ!
Posted by wing_nut on Thursday, January 29, 2015 9:13 AM

Thanks MC

Marc  

  • Member since
    September 2013
Posted by AdeB on Thursday, January 29, 2015 11:32 AM

Just fantastic!

I am toying with a 1/32 WW1 plane and putting off because of the intricacies - that in 1/72 is just amazing!!

Skill.

  • Member since
    April 2005
  • From: Piscataway, NJ!
Posted by wing_nut on Thursday, January 29, 2015 3:48 PM

Thanks AdeB.  And don't put it off.  It's huge fun.

Marc  

  • Member since
    December 2002
  • From: Bury St Edmunds, Suffolk, England
Posted by Bish on Thursday, January 29, 2015 3:54 PM

Sorry I didn't notice this one sooner. Love the look of this, great work on the bare metal and that prop is really well done. It could easily be one of the WnW kits.

I am a Norfolk man and i glory in being so


On the bench: Airfix 1/72nd Harrier GR.3/Fujimi 1/72nd Ju 87D-3

  • Member since
    April 2006
  • From: ON, Canada
Posted by jgeratic on Thursday, January 29, 2015 4:14 PM

Marc - gorgeous job! Yes

The forced shadow through painting techniques really belies the true scale presented.  Again, beautiful work.

regards,

Jack

  • Member since
    May 2013
  • From: Indiana, USA
Posted by Greg on Thursday, January 29, 2015 4:34 PM

Wow, that is awesome.

Amongst lots of other things, splendid job on that 1/72 wood prop. And thanks for sharing your painting method, very effective. Looks great.

  • Member since
    April 2005
  • From: Piscataway, NJ!
Posted by wing_nut on Thursday, January 29, 2015 6:24 PM

Thanks for all the nice comments fellas.  

Bish, no worries on being late.  Glad ya stopped by in the end.

Marc  

  • Member since
    June 2014
Posted by BrandonK on Friday, January 30, 2015 9:14 AM

Great job, I'm really diggin the early bird.

On the bench:

A lot !! And I mean A LOT!!

2024 Kits on deck / in process / completed   

                         14 / 5 / 2  

                              Tongue Tied

  • Member since
    April 2005
  • From: Piscataway, NJ!
Posted by wing_nut on Friday, January 30, 2015 3:37 PM

Thank you Brandon.

Marc  

JOIN OUR COMMUNITY!

Our community is FREE to join. To participate you must either login or register for an account.

SEARCH FORUMS
FREE NEWSLETTER
By signing up you may also receive reader surveys and occasional special offers. We do not sell, rent or trade our email lists. View our Privacy Policy.