SEARCH FINESCALE.COM

Enter keywords or a search phrase below:

1/72 PM Hawker Sea Fury

6562 views
19 replies
1 rating 2 rating 3 rating 4 rating 5 rating
  • Member since
    October 2009
  • From: Turkey
Posted by Clausewitz on Thursday, March 26, 2015 3:57 PM

Didn't bother with weathering. Just a little exhaust stains with brown and black acrylics, then model master dullcote. A few more shots:

That's all, folks! Thanks for looking. Any critique is welcome.

_

  • Member since
    October 2009
  • From: Turkey
Posted by Clausewitz on Thursday, March 26, 2015 3:52 PM

Done. Here's how it looks:

_

  • Member since
    January 2015
  • From: Tumwater, WA.
Posted by M. Brindos on Tuesday, March 24, 2015 8:42 PM

Indeed! It looks really good!  :)

- Mike Brindos "Lost Boy"

  • Member since
    February 2007
  • From: Brunswick, Ohio
Posted by Buckeye on Monday, March 23, 2015 11:19 AM

Looking really good!

Mike

  • Member since
    October 2009
  • From: Turkey
Posted by Clausewitz on Sunday, March 22, 2015 4:18 PM

A few shots after everything is glued together:

After the photos, I sprayed tamiya x-22. Decals will follow tomorrow.

_

  • Member since
    October 2009
  • From: Turkey
Posted by Clausewitz on Sunday, March 22, 2015 4:13 PM

Wing walks masked:

Kleinigkeiten altogether:

PM did not care to drill holes for undercarriage leg supports, so I had to do it myself:

_

  • Member since
    March 2005
  • From: Lancaster, South Carolina
Posted by Devil Dawg on Sunday, March 22, 2015 1:37 AM

Great job on a challenging kit, Clausewitz!

Devil Dawg

On The Bench: Tamiya 1/32nd Mitsubishi A6M5 Model 52 Zeke For Japanese Group Build

Build one at a time? Hah! That'll be the day!!

  • Member since
    November 2009
  • From: SW Virginia
Posted by Gamera on Friday, March 20, 2015 12:57 PM

Yeah, the invasion stripes turned out fantastic. Great job all around.

"I dream in fire but work in clay." -Arthur Machen


  • Member since
    June 2013
Posted by RobGroot4 on Friday, March 20, 2015 3:17 AM

As much as you may dread them your invasion stripes look great.

Groot

"Firing flares while dumping fuel may ruin your day" SH-60B NATOPS

  • Member since
    June 2004
  • From: 29° 58' N 95° 21' W
Posted by seasick on Thursday, March 19, 2015 10:00 PM

I built that kit once. It was very inexpensive. I spent a lot of time sanding the parts.

Chasing the ultimate build.

  • Member since
    January 2015
  • From: Tumwater, WA.
Posted by M. Brindos on Thursday, March 19, 2015 10:27 AM
The build stage looked as formidable as my Testors Corsair. Looks amazing now however! :)

- Mike Brindos "Lost Boy"

  • Member since
    September 2005
  • From: Illinois: Hive of Scum and Villany
Posted by Sprue-ce Goose on Thursday, March 19, 2015 8:41 AM

Nice work on that kit !

I wondered what the kit looked like.

  • Member since
    November 2003
  • From: State of Mississippi. State motto: Virtute et armis (By valor and arms)
Posted by mississippivol on Thursday, March 19, 2015 7:50 AM

Nice work!

  • Member since
    October 2009
  • From: Turkey
Posted by Clausewitz on Thursday, March 19, 2015 5:05 AM

Edgar

They're access panels to the wing folding hydraulic cylinder.

The museum photo was just to show the raised line along the fuel tank, but thank you for the info, Edgar.

_

  • Member since
    October 2009
  • From: Turkey
Posted by Clausewitz on Thursday, March 19, 2015 5:03 AM

So, now we're here:

Spinner and undercarriage legs already painted. Maybe I'll add brake hydraulic lines, and we're done.

_

  • Member since
    October 2009
  • From: Turkey
Posted by Clausewitz on Thursday, March 19, 2015 5:00 AM

Then came the dreadful black/white recognition stripes. I chose one of two ways. Black over white would be easier to paint, but three parallel stripe masks of equal width looked more difficult.

Fortunately, nowhere leaked when all was done. But I haven't been careful enough while unmasking and fingered a few fresh painted points, had to fix them and caused further damage while doing that etc. Stripes caused me a lot of trouble, but still, it's better than decals.

_

  • Member since
    May 2006
Posted by Edgar on Thursday, March 19, 2015 3:43 AM

They're access panels to the wing folding hydraulic cylinder.

  • Member since
    October 2009
  • From: Turkey
Posted by Clausewitz on Thursday, March 19, 2015 3:42 AM

Preshading.

I read somewhere that wheel wells were cobalt yellow, not interior green, so I found Tamiya yellow green to be ugly enough and used it.

Main colours. Dark color is Gunze 333. I didn't have the specified sky blue in stash, so I mixed remains of an old RLM 65 with some white and added a little light grey. Seemed fine to me.

I had made the fuel tanks two years ago, and sanded them smooth. Well, that came out to be wrong, so I added 0.20 mm fishing line with Tamiya green glue. 

_

  • Member since
    October 2009
  • From: Turkey
Posted by Clausewitz on Thursday, March 19, 2015 3:36 AM

So I primed with Tamiya, checked for faulty spots, tried to fix them, and looped. 

I gave it an overall sanding, too, to even up the deepness of lines, but that was in vain.

Anyway, wingtip lights out of stretched clear sprue followed. 

Well, I thought these red-circled thingies here...

...were landing lights as in modern jets. After all was done, I noticed that I haven't seen anything like that in any photos. Well, the guy who flew this must have been a redneck Confused

_

  • Member since
    October 2009
  • From: Turkey
1/72 PM Hawker Sea Fury
Posted by Clausewitz on Thursday, March 19, 2015 3:29 AM

Hi everyone!

I'm back after a two-year break, in which I fixed a few Dual turntables, had a few finished kits broken and built nothing. Now that my second boy is 3 years old, it's time!

This is what I started last, so I get back to it first:
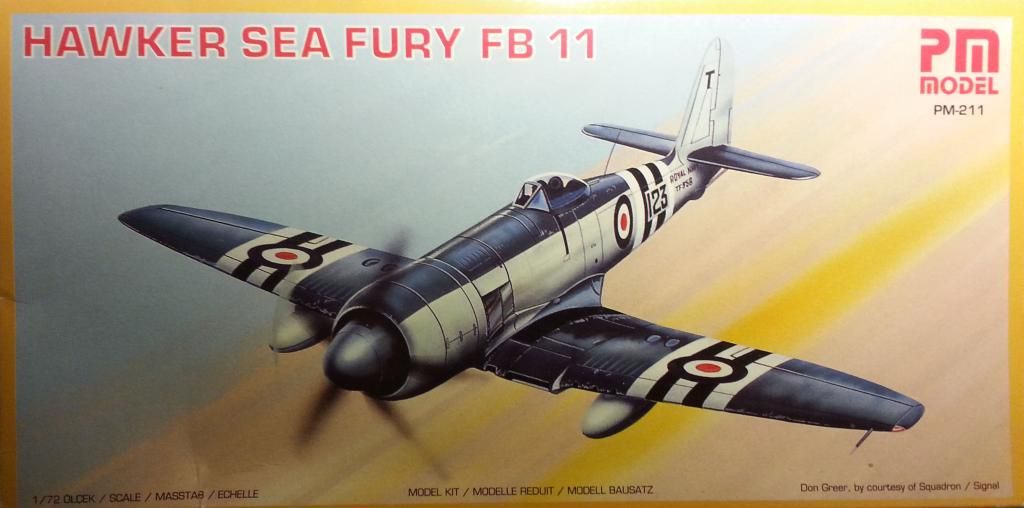
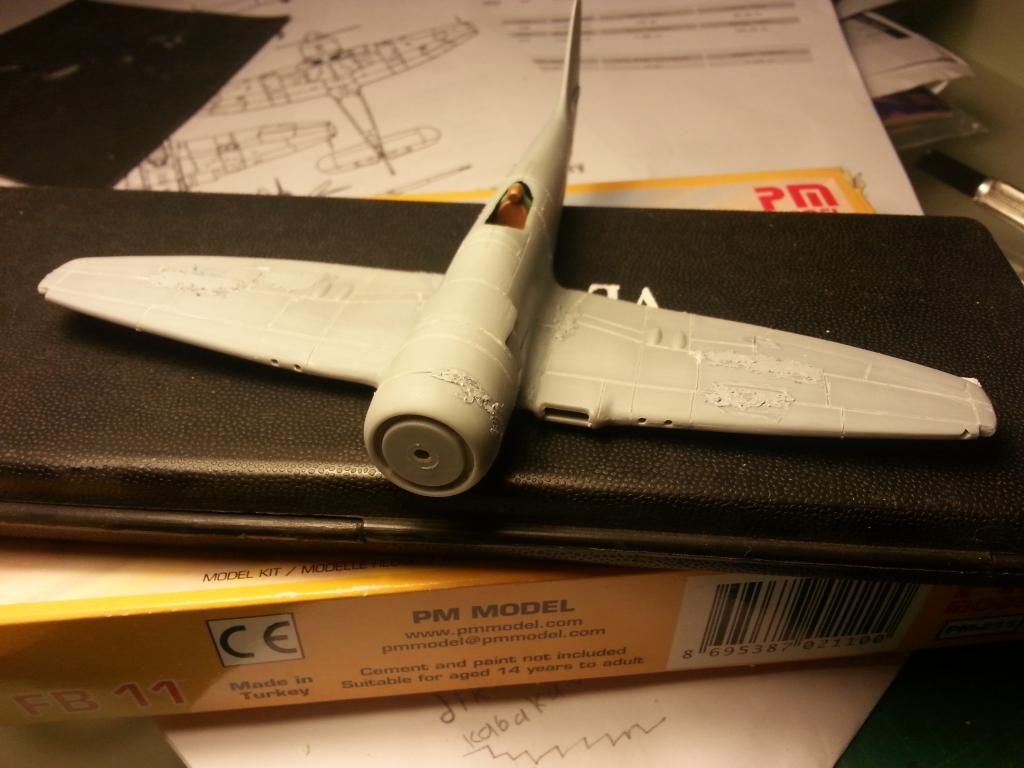
Funny kit with recessed lines. Cowling fit was a disaster, it needed heavy sanding.
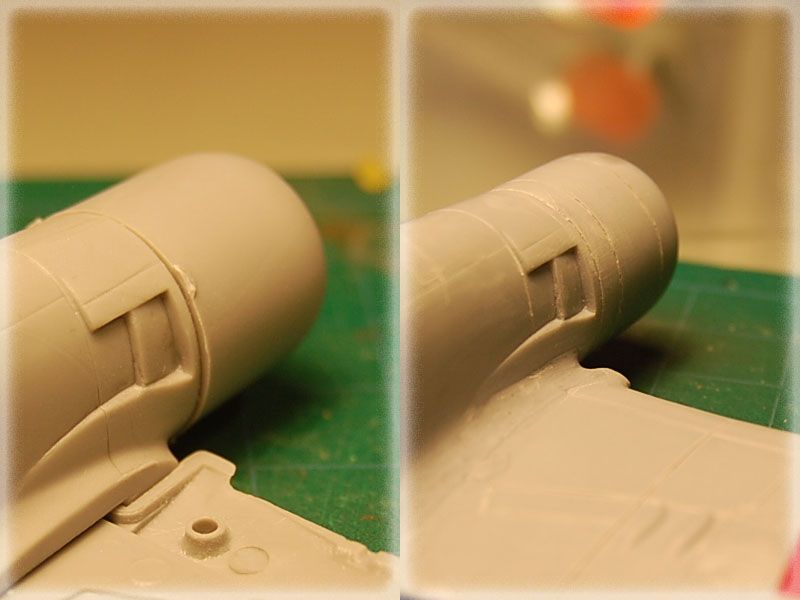
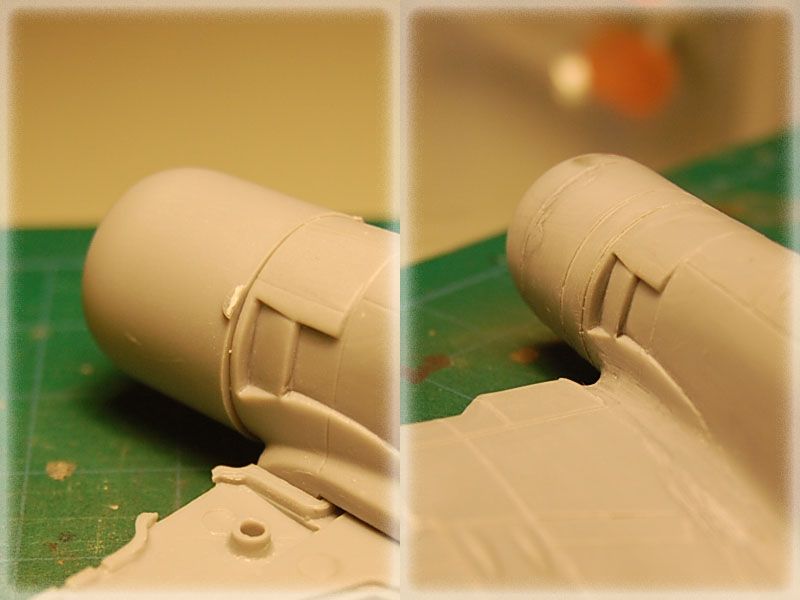
Trailing edges of wings were too thick, so these had to be sanded with a 150 grit, too.  Most of the panel lines, which were already only a few, were about to be sanded away. This was an opportunity to engrave panel lines for the first time. A cheap kit, even if I mess it up.
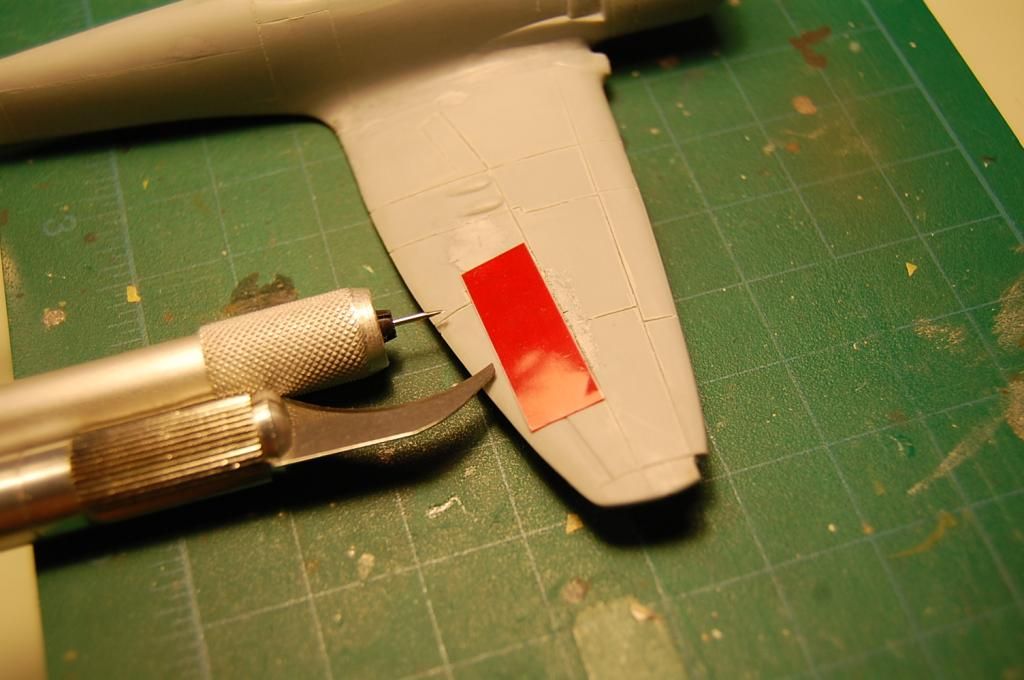
This started a repetitive procedure such as "oops it slid away-putty up-sand-oops again" but I quickly got the feel of it. When I was done, I noticed that the lines were engraved a little too deep, but there was nothing to be done.
Tags: Hawker , PM

_

JOIN OUR COMMUNITY!

Our community is FREE to join. To participate you must either login or register for an account.

SEARCH FORUMS
FREE NEWSLETTER
By signing up you may also receive reader surveys and occasional special offers. We do not sell, rent or trade our email lists. View our Privacy Policy.