SEARCH FINESCALE.COM

Enter keywords or a search phrase below:

1/48 Hasegawa F-15C Eagle WIP

22549 views
92 replies
1 rating 2 rating 3 rating 4 rating 5 rating
  • Member since
    September 2023
Posted by mealsonwheels on Saturday, September 23, 2023 2:50 AM

Hi Fly, 

would love to see this completed. I bought this kit in 1989 on holiday in England (Harrod's, London). I just started to build it - 34 years later and had no idea you could buy more detailed parts etc! So, I'm building it stock, mainly for nostalgic reasons, but I'm trying to find a good detail of the exhausts with the turkey feathers that come with the kit to maje them more realistic. Damn, all this filling and sanding too, I'm such a hack! Hope you find this thread again and do an update. Magnificent so far! 

  • Member since
    September 2023
Posted by mealsonwheels on Saturday, September 23, 2023 1:24 AM

Hi Fly, 

would love to see this completed. I bought this kit in 1989 on holiday in England (Harrod's, London). I just started to build it - 34 years later and had no idea you could buy more detailed parts etc! So, I'm building it stock, mainly for nostalgic reasons, but I'm trying to find a good detail of the exhausts with the turkey feathers that come with the kit to maje them more realistic. Damn, all this filling and sanding too, I'm such a hack! Hope you find this thread again and do an update. Magnificent so far! 

  • Member since
    December 2006
  • From: Phoenix, AZ
Posted by Fly-n-hi on Saturday, March 10, 2018 3:39 PM

Applied all of the decals.  This took about 3 hours.  There are so many little "NO STEP" and "Caution" decals!   And she's standing on her own legs now!

This was weird...the peg on one of the stabilators just snapped off as I was holding it...

  • Member since
    December 2006
  • From: Phoenix, AZ
Posted by Fly-n-hi on Saturday, March 10, 2018 3:35 PM

keavdog

Looking really nice.  


Thanks!

  • Member since
    April 2003
  • From: USA
Posted by keavdog on Wednesday, March 7, 2018 12:46 AM

Looking really nice.  

Thanks,

John

  • Member since
    December 2006
  • From: Phoenix, AZ
Posted by Fly-n-hi on Wednesday, March 7, 2018 12:40 AM

This is my first time using them.  I have been a pretty faithful Alclad II user up to this point.  I had seen the review on Flory's YouTube channel about how durable they were and it convinced me to give them a try.

I have had issues with the Alclad II high shine paints lifting up with masking tape.  The Flory review made it seem like there was no lifting at all with the AK stuff...if sprayed correctly, of course.  I sprayed it correctly and did get just a little lifting but not nearly as much as Alclad II.  I've never had any lifting issues with the normal shine paints, though.

The AK black base paint is way better than Alclad's, IMHO.

Overall I really liked this stuff.  I think after I use up my Alclad II paints I'll make the switch.

  • Member since
    November 2008
  • From: Central Florida
Posted by plasticjunkie on Tuesday, March 6, 2018 6:39 PM


Fly-n-hi

Thx Plastic!

I used AK Xtreme Metal Black Base and Polished Aluminum.  Then I weathered it using Alclad II Transparent Smoke and Xtreme Metal Pale Burnt Metal.  I'll add more weathering after I apply the decals and the semi matte coat over the rest of the plane...


The Xtreme metal paints are pretty good And have a realistic metal tone. Looks great.

 GIFMaker.org_jy_Ayj_O


Too many models to build, not enough time in a lifetime!!

  • Member since
    December 2006
  • From: Phoenix, AZ
Posted by Fly-n-hi on Tuesday, March 6, 2018 9:01 AM

Thx Plastic!

I used AK Xtreme Metal Black Base and Polished Aluminum.  Then I weathered it using Alclad II Transparent Smoke and Xtreme Metal Pale Burnt Metal.  I'll add more weathering after I apply the decals and the semi matte coat over the rest of the plane...

  • Member since
    November 2008
  • From: Central Florida
Posted by plasticjunkie on Monday, March 5, 2018 10:24 PM

Looks great Fly. Which NMF paint did you use?

 GIFMaker.org_jy_Ayj_O


Too many models to build, not enough time in a lifetime!!

  • Member since
    December 2006
  • From: Phoenix, AZ
Posted by Fly-n-hi on Monday, March 5, 2018 1:33 PM

BrandonK

Exceptional work. I love it.

BK


Thanks BK!

  • Member since
    June 2014
Posted by BrandonK on Sunday, March 4, 2018 9:05 PM

Exceptional work. I love it.

BK

On the bench:

A lot !! And I mean A LOT!!

2024 Kits on deck / in process / completed   

                         14 / 5 / 2  

                              Tongue Tied

  • Member since
    December 2006
  • From: Phoenix, AZ
Posted by Fly-n-hi on Sunday, March 4, 2018 8:51 PM

I've made alot of progress on the F-15.  I painted most of the details, given her a gloss coat, washed some of the control surface panel lines and painted the bare metal areas around the exhaust:

I've also finished painting the missiles:

I decided to go with a set of resin wheels by Northstar.  The resin wheels are closer to the camera.  You can see how much nicer they are than the kit parts:

  • Member since
    December 2006
  • From: Phoenix, AZ
Posted by Fly-n-hi on Friday, February 16, 2018 9:28 PM

Bish

Good to see you back Fly. Been there myself, took me 5 years to get back to the bench.

Some nice work there, love the detail on those pylons. Looking forward to more.


Thanks Bish, nice to see a familiar name!

I think Im done with the canopy.  I got the Eduard PE cockpit set mainly for the canopy details.  But the main part that attaches to the bottom of the canopy was just barely too wide.  So I used my new Zuron PE cutter to trim it down:

This cut through the PE like a hot knife through butter!  I took this pic just to show how little I was able to trim off.

Then I attached the base part, used Perfect Plastic Putty to fill the seam around the edge and carefully brush painted it the Citadel black mixed with a drop or two of white 9the flash didn't really bring out the color).  In order to use the PE you have to cut out the plastic details on the inside of the kit part that attaches to the canopy:

Then I did the same with the front piece:

The color shows up a bit here:

I used Micro Krystal Clear to attach the parts.

Stay tuned...

  • Member since
    December 2002
  • From: Bury St Edmunds, Suffolk, England
Posted by Bish on Friday, February 16, 2018 2:20 AM

Good to see you back Fly. Been there myself, took me 5 years to get back to the bench.

Some nice work there, love the detail on those pylons. Looking forward to more.

I am a Norfolk man and i glory in being so


On the bench: Airfix 1/72nd Harrier GR.3/Fujimi 1/72nd Ju 87D-3

  • Member since
    December 2006
  • From: Phoenix, AZ
Posted by Fly-n-hi on Thursday, February 15, 2018 11:56 PM

Here's another quickie update:

I mostly finished the pylons.  The wing pylons will have 2 AIM-9s each and the center pylon will have a 600 gal tank.  The kits anti sway braces look very plain so I added the adjustable screws that lock the object into place:

And since the wing pylons weren't going to have fuel tanks I needed to do something about the bottoms.  I looked at a ton of reference pics and saw the BRU is fitted in an opening in the pylon.  Making this from scratch is beyond my skill right now so I tried to paint it to make it look convinsing.  I think it turned out ok.  You all can tell me if you think it looks cheesy or not:

I also painted the missile launch rails:

More to come...

  • Member since
    December 2006
  • From: Phoenix, AZ
Posted by Fly-n-hi on Thursday, February 15, 2018 11:32 PM

Alirighty...I'm back baby!!  Finally got myself a new place to live and I back in business!

I have 4 models that have been in a state of suspension and I'm blowing the dust off 'em.  Obviously I've got this F-15...and Ive got a 1/48 Hasegawa F-1, a 1/48 Tamiya F-16C and a 1/144 Revell 737-800 all in various stages of progress.

But...on to the update (feels good to say that again finally!)...

About this F-15C:  So as I handled it over the last two years I spotted all kinds of little errors that I just couldn't live with like ghost seams, imperfections in the paint or things that I just wanted to add or do better.  I ended up stripping all of the Tamiya paint off and resanding the intakes...those were the two big items.

Here she is now repainted and touched up:
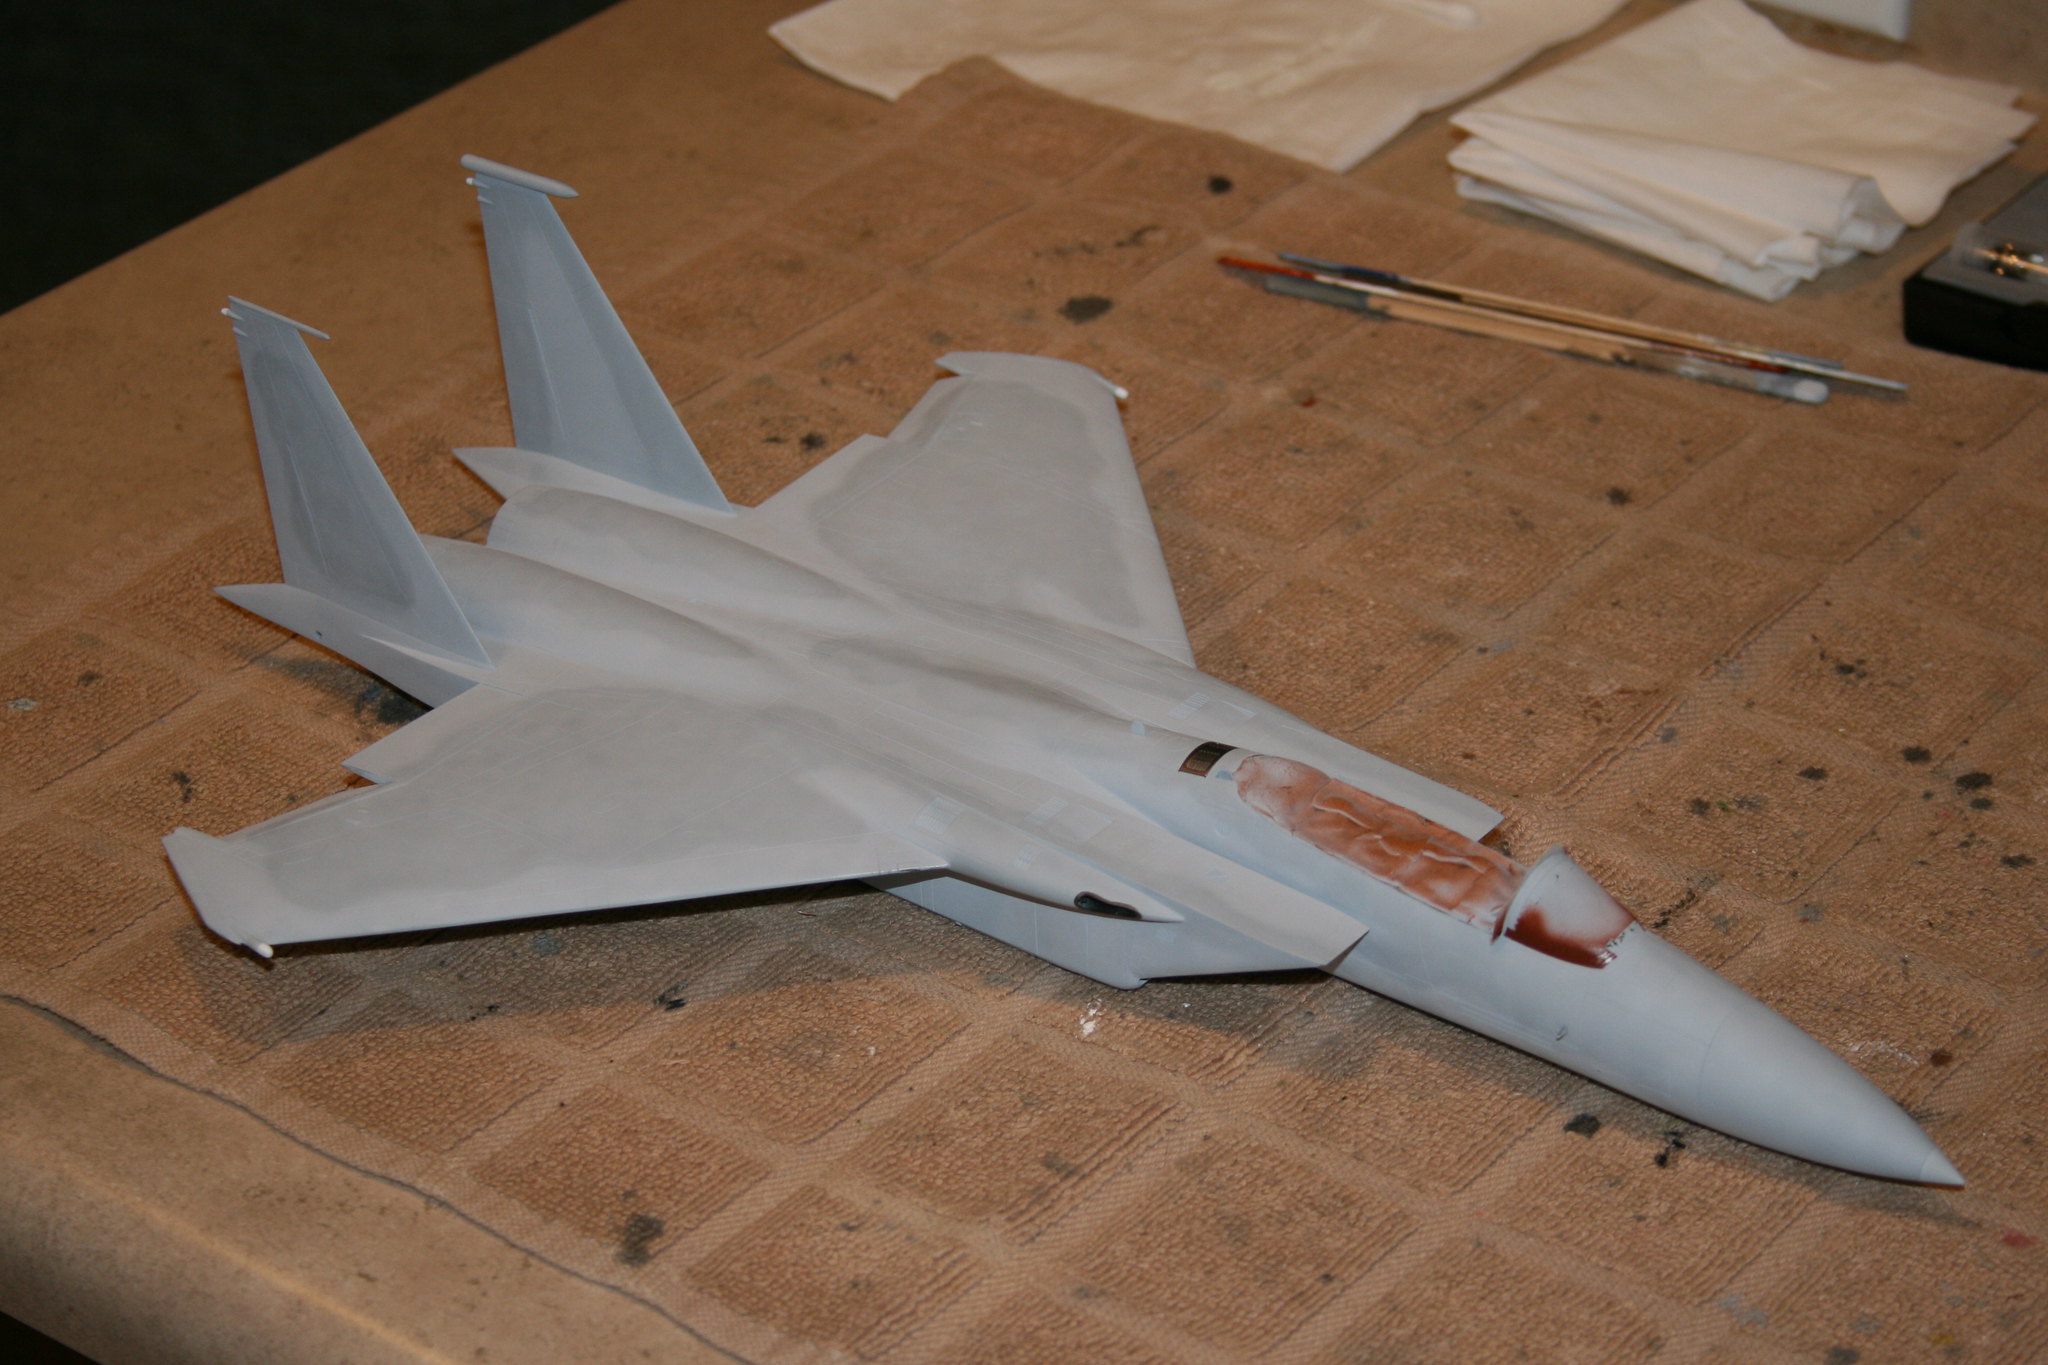
The paints are my own mixtures of Tamiya Acrylic paint.  I painted a normal base layer and then added white to paint the subsequent "mottling" to get the sun bleached look two times with each color...Light Ghost Grey and Dark Ghost Grey.  The metal areas are Alclad II Magnesium with the inner part of the gun muzzle area Jet Exaust:
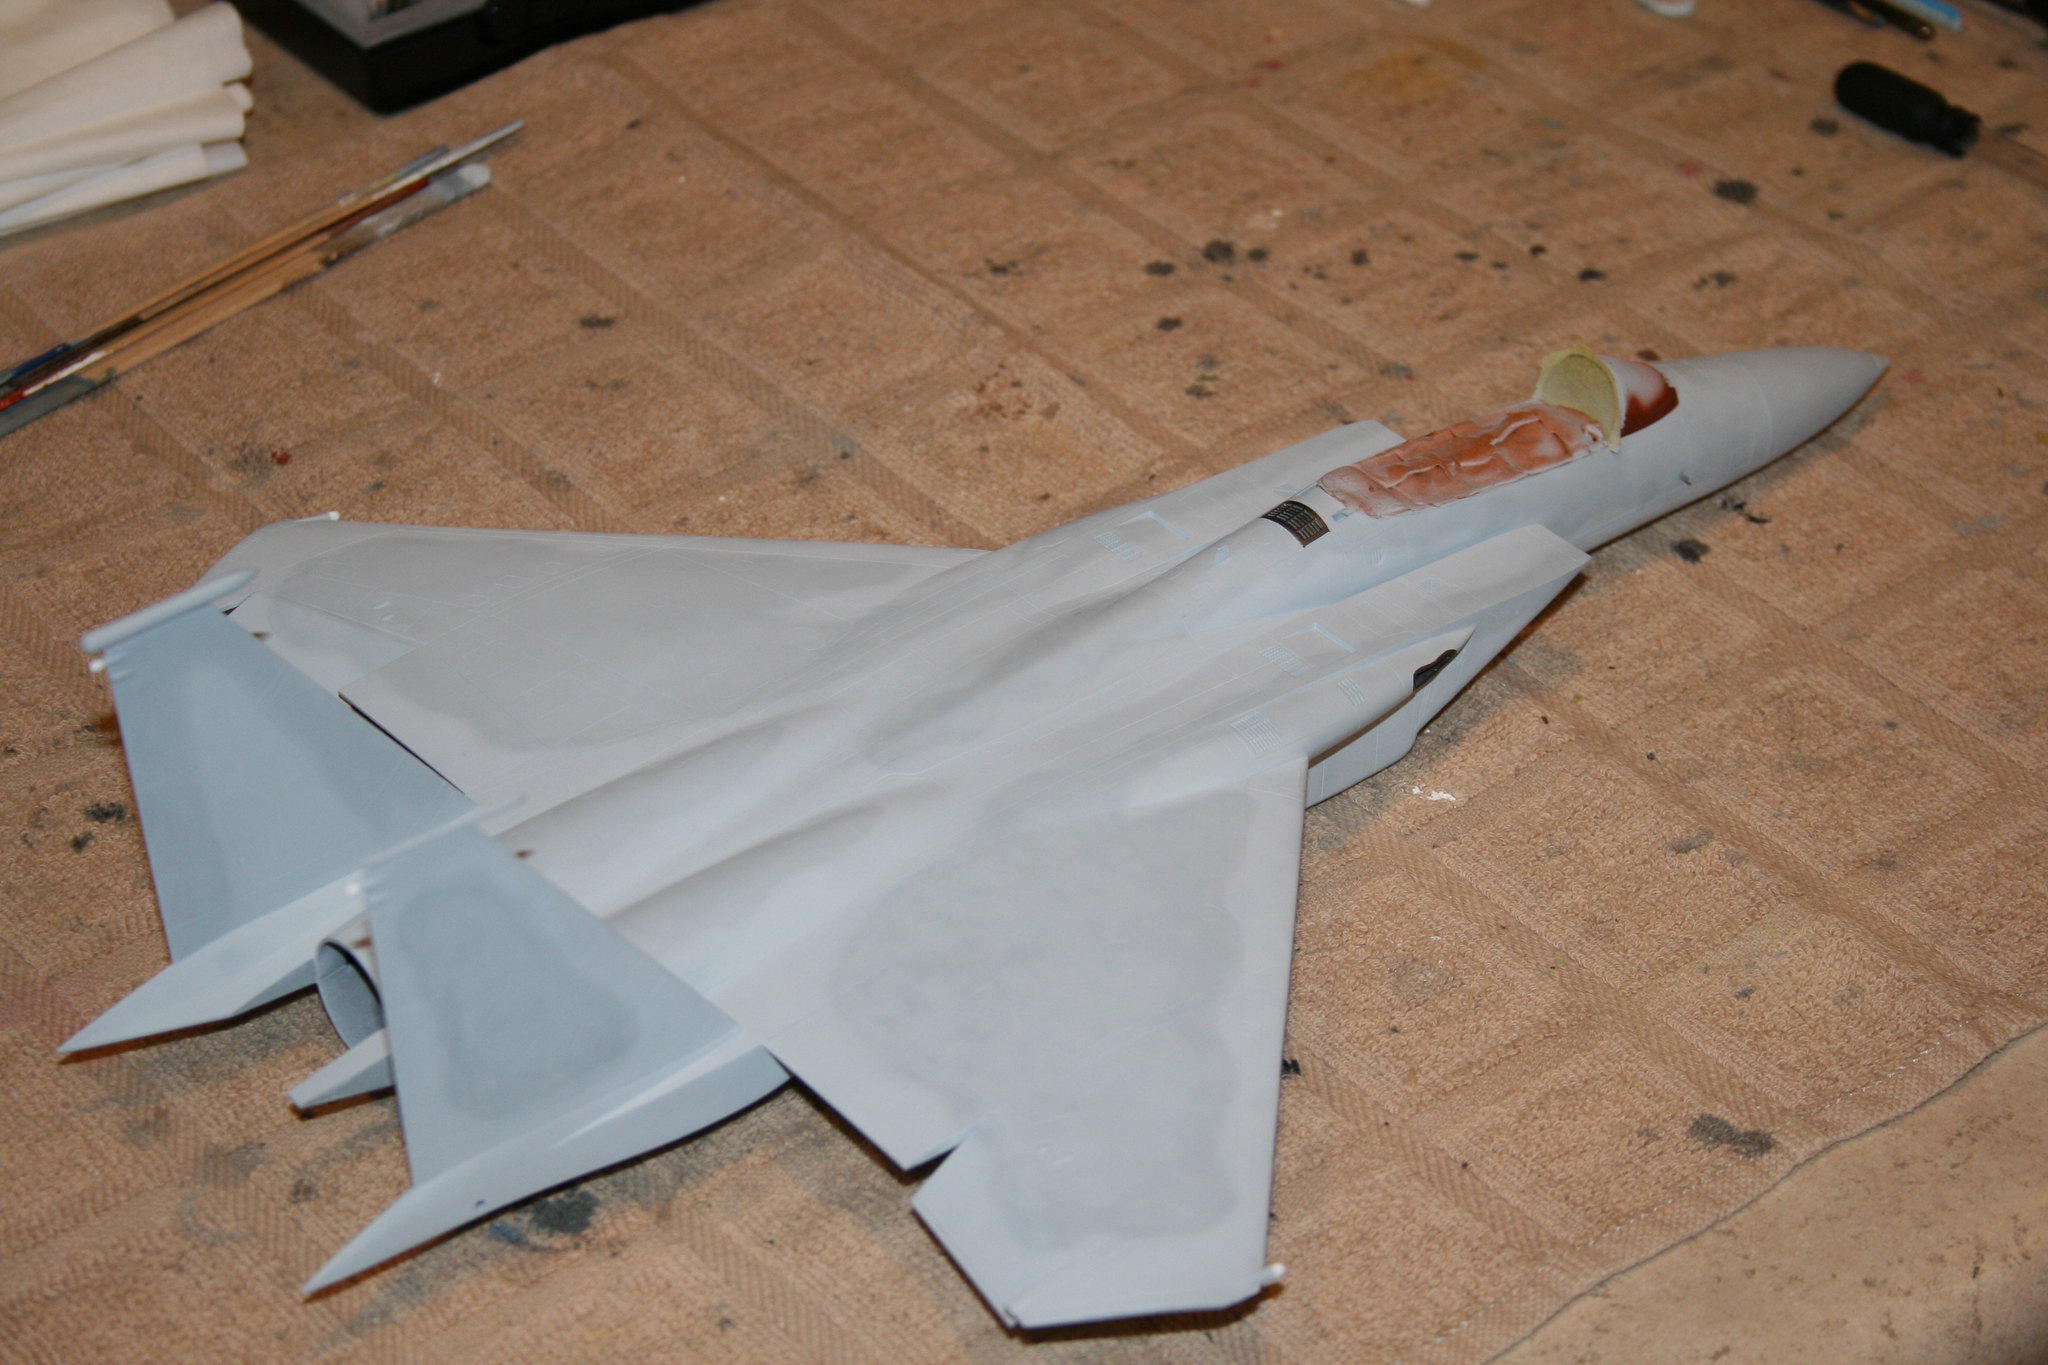
I've also painted the seals around the canopy & windscreen:
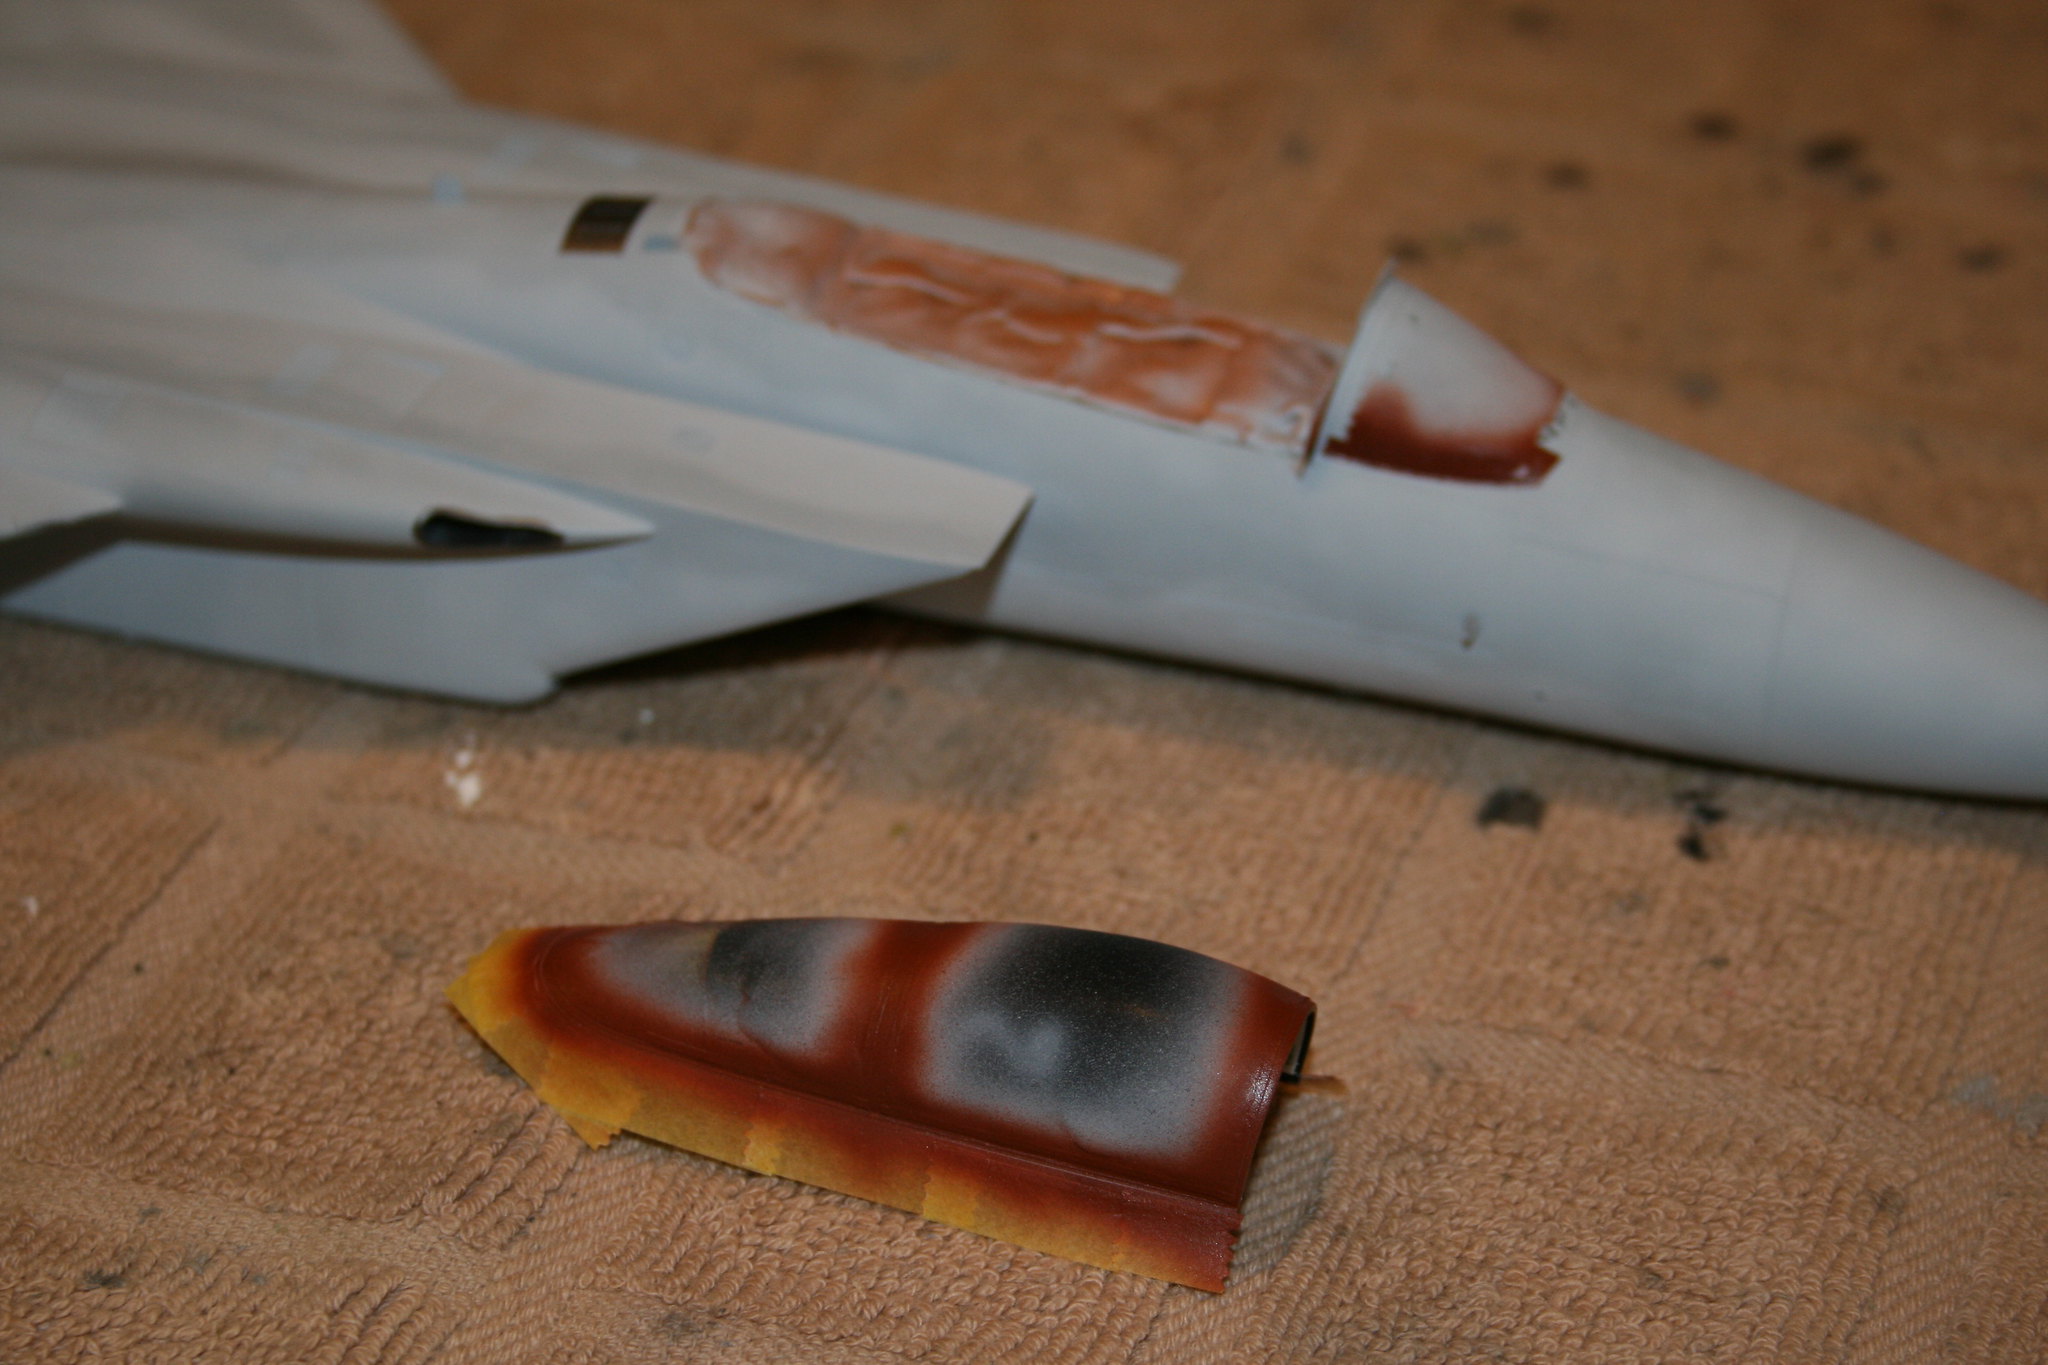
On reference pics of F-15's in the early 80's they typically had this reddish brown seal.  Some other modelers make it a copper color but in pics I've used its more like how you see it painted here.

Those of you who followed my F-15E and IAF F-16C know I like to weather my builds alot.  This one will get dirtier as time goes on.  I'll also accent some panels and access doors according to pics of the real planes.

  • Member since
    November 2008
  • From: Central Florida
Posted by plasticjunkie on Saturday, July 15, 2017 7:26 AM

Hi Fly. Sorry to hear about your ordeal but there is a light at the end of the tunnel. I went thru a divorce over 30 years ago and it was the best thing that hapenned to me! Two years after that I met my current wife and after 32 very happy years, we have two kids and now enjoy two beautiful grandkids. 

I never did the two Eagles as I had posted in thread back in 2015 since the customer decided on two Tomcats instead. Can't wait to see more of your excellent modeling skills here so welcome back.

 GIFMaker.org_jy_Ayj_O


Too many models to build, not enough time in a lifetime!!

  • Member since
    December 2006
  • From: Phoenix, AZ
Posted by Fly-n-hi on Friday, July 14, 2017 6:43 PM

For anybody interested I'm hoping to get back into modeling here really soon!  This build has been "on the shelf," along with all of my modeling stuff for about 15 months.  But I'm finally getting back into a house soon and when I do one of the first things Im going to do is get this build out and finish her up!

Went through a divorce and have been living in a temporary situation this whole time.  But that chapter is over!

And yes...I switched to Flickr and re linked all of these pics!

  • Member since
    December 2006
  • From: Phoenix, AZ
Posted by Fly-n-hi on Saturday, September 12, 2015 9:30 AM

crown r n7

Yes That's one fine build . I built one just like it many years back but it made a hard landing and it's FUBR but I have another one in my stash it is a fun kit well it's kick off time keep going again super job !!Drinks


Thanks crown!  I'm gonna try to keep this one from making any hard landingsYes

BrandonK

Coming along nicely there. Such a smooth look so far. Nice!!

I am curious how this kit measures up against the Revell -15. I've heard the Revell kit is considered one of the better kits, but how does it measure up against the Eduard? 
Thoughts?

BK


Thanks BK!  I used Tamiya paint and polished it down with a cotton cloth to get a nice satin finish.

The Revell kit is a bit nicer.  But it is also about 10+ years newer I think. It seemed like the seams were a bit tighter on the Revell kit and the details were nicer, too.  There are some rivit counter type details on the Hasegawa kit that are more acurate like the angle the wingtips bend down.

Whats funny, too, is that you can regularly find the Revell kits for $20 cheaper that the Hasegawa kits.

  • Member since
    June 2014
Posted by BrandonK on Friday, September 11, 2015 9:15 AM

Coming along nicely there. Such a smooth look so far. Nice!!

I am curious how this kit measures up against the Revell -15. I've heard the Revell kit is considered one of the better kits, but how does it measure up against the Eduard? 
Thoughts?

BK

On the bench:

A lot !! And I mean A LOT!!

2024 Kits on deck / in process / completed   

                         14 / 5 / 2  

                              Tongue Tied

  • Member since
    August 2015
  • From: the redlands Fl
Posted by crown r n7 on Thursday, September 10, 2015 6:44 PM

Yes That's one fine build . I built one just like it many years back but it made a hard landing and it's FUBR but I have another one in my stash it is a fun kit well it's kick off time keep going again super job !!Drinks


 Nick.

  • Member since
    December 2006
  • From: Phoenix, AZ
Posted by Fly-n-hi on Wednesday, September 9, 2015 8:40 PM

B-one & Plastic...thanks alot!  You guys are really encouraging!

I'm almost done with the Sparrows and the Sidewinders.  I think you guys will like themBig Smile.  Should be soon.

  • Member since
    April 2014
Posted by B_one fixer on Wednesday, September 9, 2015 2:30 PM

Looking good fly, your builds always catch my attention in a good way .Yes

  • Member since
    November 2008
  • From: Central Florida
Posted by plasticjunkie on Wednesday, September 9, 2015 2:14 PM

Looking great Fly! This will be a stunner once done.

 GIFMaker.org_jy_Ayj_O


Too many models to build, not enough time in a lifetime!!

  • Member since
    December 2006
  • From: Phoenix, AZ
Posted by Fly-n-hi on Wednesday, September 9, 2015 2:11 PM

Wow, its been a while since I've posted any updates here...

Anyway, I've gotten some work done on the F-15.  I cleaned up the seams, primed it, cleaned up some ghost seams and applied the base layer of light ghost grey:

I'm especially happy here.  On these old kits the wings are attached separately and the seam can be incedilbly difficult to get rid of.  I managed to get this about as seamless as I possibly could have.  You can't really see it but there are alot of fine panel lines that the flash drowns out:

I ended up snapping off the front end of this antenna.  Fortunately, this kit provided two of them!  So I used my razor saw to cut the broken one off and glued the spare one on.  Can't even tell:

The next step will be some post fading and then the dark ghost grey camo pattern.

  • Member since
    December 2006
  • From: Phoenix, AZ
Posted by Fly-n-hi on Friday, June 5, 2015 6:19 PM

Greg

Are the clear parts of the HUD the little clear sheets you cut to size? Those give me fits.

Sounds like you had a lot of trimming and fitting to make things fit. Surely made it look easy, though. :)

Yes, and the outline on the clear sheet was probably the correct size. But like I said you either have to cut the piece about half as big or remove some of the resin detail to make the correct size piece fit.  Whoever  was supposed to make sure that stuff lined up at Aires dropped the ball on that one.

In retrospect I wish I had removed the resin and made the "glass" the correct size.

Plus, if you don't attach the PE HUD frame parts at exactly the right spots the clear parts won't sit level in their respective slots.  So this is definitely not for beginners.

  • Member since
    May 2013
  • From: Indiana, USA
Posted by Greg on Friday, June 5, 2015 1:14 PM

Are the clear parts of the HUD the little clear sheets you cut to size? Those give me fits.

Sounds like you had a lot of trimming and fitting to make things fit. Surely made it look easy, though. :)

  • Member since
    November 2008
  • From: Central Florida
Posted by plasticjunkie on Friday, June 5, 2015 10:38 AM


Fly-n-hi


Thanks Plastic!  That F-15E was a really fun kit.

When you start your Eagles are you going to post WIP threads?  I think you should.


I will try but it gets a little hectic with 5 different builds going on..........:twitch:

 GIFMaker.org_jy_Ayj_O


Too many models to build, not enough time in a lifetime!!

  • Member since
    December 2006
  • From: Phoenix, AZ
Posted by Fly-n-hi on Friday, June 5, 2015 10:24 AM

Greg

HUD looks good from where I sit. I've yet to try a PE HUD (I have enough trouble with the glass armor plates or whatever they are in WWII aircraft!)  ........ I'm impressed.

Greg, thank you! 

This is only my third PE HUD.   I tend to avoid them because they are so easy to screw up. But I think I'm a little better at modeling now so I'm trying to take on more challenging stuff...like more PE.

I figured out what was wrong.  The bottom glass piece needs to be about twice as long as it is here.  The problem is that the resin bits on the glare shield (just behind the HUD) are too tall and interfere with the clear part.  So you either have to remove some of the resin or make the clear part shorter.  I should have removed the resin instead, I think.  On the real plane that lower clear part extends about 8 inches back from the HUD framing.  Oh well.

plasticjunkie

Excellent work going on F-N-H. I remember your Strike Eagle and it was a beauty.

I'm about to start two Eagles, one Hasegawa w/ ASAT for me and the Eduard # 1176 (Academy with resin upgrades) as a commission. I will be watching your excellent build. :spy:

Thanks Plastic!  That F-15E was a really fun kit.

When you start your Eagles are you going to post WIP threads?  I think you should.

JOIN OUR COMMUNITY!

Our community is FREE to join. To participate you must either login or register for an account.

SEARCH FORUMS
FREE NEWSLETTER
By signing up you may also receive reader surveys and occasional special offers. We do not sell, rent or trade our email lists. View our Privacy Policy.