SEARCH FINESCALE.COM

Enter keywords or a search phrase below:

Tammy's 1/48 - Whole lotta Zero going on here.

6489 views
93 replies
1 rating 2 rating 3 rating 4 rating 5 rating
  • Member since
    July 2003
  • From: Cincinnati, Ohio
Posted by ridleusmc on Tuesday, August 29, 2017 10:14 AM

Thank you Mike, Thank you bvallot,

I had no idea about red primer until I read the afformentioned book.  Sure enough, it's in the color pictures of unrestored aircraft.  

http://imgproc.airliners.net/photos/airliners/7/8/7/1803787.jpg?v=v40

This is a link to a picture which shows the primer "peaking out" at the edges of the chipped areas of the wing.  

I think this feature wasn't of great concern amongst modellers, because most of the wartime reference photos are in black and white.  It's pretty hard to see that dark red between the metal of the scuffed surface and the dark green of the aircraft paint.

I will shoot for light weathering, but I want there to be just a little bit of red peaking between the aluminum and green.  

Cheers, Beer

Chris 

  • Member since
    November 2009
  • From: SW Virginia
Posted by Gamera on Tuesday, August 29, 2017 10:17 AM

Interesting, looking forward to how the primer comes out. 

I've got that book around somewhere, I'll have to dig it out and reread that chapter as I follow you. 

"I dream in fire but work in clay." -Arthur Machen


  • Member since
    June 2013
Posted by bvallot on Tuesday, August 29, 2017 11:47 AM

Very cool! That's a great pic!!

On the bench:  

Tamiya F4U-1  Kenneth Walsh


  • Member since
    July 2003
  • From: Cincinnati, Ohio
Posted by ridleusmc on Tuesday, August 29, 2017 9:31 PM

Tuesday night update.  

The Hinomarus are painted.  I feared misalignment of the inner circle masks, and the outer circle masks.  Masking tape was applied to assure there were no gaps.  Tomorrow, I will try to lay IJN Grey/Green on the undersides of the Zero-sen.  I've decided to do the yellow stripes with paint after the main aircraft colors are applied.  

 IMG_2213 by Christopher Ridle, on Flickr

 IMG_2214 by Christopher Ridle, on Flickr

PS - I just bought a huge new work-mat from amazon for cheap.  It's 2 feet by 3 feet and it cost $30.  That's $5 per square foot!  I love it.  It's so clean and new.

  • Member since
    July 2003
  • From: Cincinnati, Ohio
Posted by ridleusmc on Wednesday, August 30, 2017 8:57 PM

Wednesday night update,

I gave the underside some IJN Gray Green (XF-76).  I had to give it a consistent coat to avoid the red from showing through.  The look is a little monotone at the moment.  

The lower wing Hinomarus have some white base showing through.  It looks a little pink to me.  I may remask and apply a little more red.  

Masking tape lifted a little red "primer."  I half expected that, because there is chipping medium beneath it.  In fact, I expected more paint pulled up by tape.  I don't think it needs touch up.  The Dark Green should cover it pretty well, or that area may get some enhanced weathering.  I think I'll leave it. 

 IMG_2215 by Christopher Ridle, on Flickr

 IMG_2218 by Christopher Ridle, on Flickr

I'll put it down for now.  

Cheers Beer

  • Member since
    July 2003
  • From: Cincinnati, Ohio
Posted by ridleusmc on Thursday, August 31, 2017 8:28 PM

Thursday update. 

Build time tonight was all about adding some life to the underside of the Zero.  In my opinion, it was too monotone.  Aaron Skinner had a great, but short article on post shading from the February 2009 issue of FSM.  It's the first thing that pops up when you search "post-shading," on this site.  Aaron's subject was a Russian tank, but the technique worked well for my Zero.  

The shadow color is the base color (IJN Gray Green XF-76) with XF-65 Field Grey added.  (Why does Tamiya use both spellings for Gray/Grey?)  

 IMG_2219 by Christopher Ridle, on Flickr

The highlight color is IJN Gray Green with XF-2 white.  

 IMG_2221 by Christopher Ridle, on Flickr

Then I blended it out with a misting of the base color.

 IMG_2222 by Christopher Ridle, on Flickr

I'm happy with it now, I wasn't digging the monotone look.  

Cheers everybody Beer,

Chris

  • Member since
    November 2009
  • From: SW Virginia
Posted by Gamera on Friday, September 1, 2017 7:51 AM

Looks really good! Yes

The 'reality' crowd is right, you don't see every panel line picked out on a real plane but I'll admit going with the 'art' crowd makes something bland like simple grey much more interesting.

"I dream in fire but work in clay." -Arthur Machen


  • Member since
    July 2003
  • From: Cincinnati, Ohio
Posted by ridleusmc on Friday, September 1, 2017 10:32 AM

Uh Oh! 

I thought I was going with the reality crowd.  Smile

Honestly, it's hard to tell how they actually looked.  I know my old grey helicopters presented a fair amount of tonal variations, especially when our ops tempo was faster than usual.  I think zero bellies likely took a beating in the Solomon Islands, and I'd bet it showed.  It may be artsy, but I shoot for realism.  I don't get close, but that's what I shoot for.  

Beer

  • Member since
    February 2012
  • From: Olmsted Township, Ohio
Posted by lawdog114 on Saturday, September 2, 2017 3:59 AM
Looking good...try adding some white to the base color, then streak it back with the airflow. That will break up the mono too. I paint my Hinos too...

 "Can you fly this plane and land it?...Surely you can't be serious....I am serious, and don't call me Shirley"


  • Member since
    July 2003
  • From: Cincinnati, Ohio
Posted by ridleusmc on Saturday, September 2, 2017 8:28 AM

lawdog114
Looking good...try adding some white to the base color, then streak it back with the airflow. That will break up the mono too. I paint my Hinos too...
 

When you say streak, do you mean like a dry-brush technique?  Do you mean a thinned mix?

Yeah, I'm going to paint national insignias whenever practicle from now on.  I'm trying a few things to make this zero look a little worn.  Fresh and uniform decal Hinomarus just wouldn't look right.  

I've started laying down some green (Dark Green 2 (IJN) - XF-70).

 IMG_2229 by Christopher Ridle, on Flickr 

  • Member since
    July 2003
  • From: Cincinnati, Ohio
Posted by ridleusmc on Saturday, September 2, 2017 8:55 PM

Saturday night update:

I got much done today, both at the bench and away from it.  First, the zero recieved a base coat of Tamiya XF-70 Dark Green 2 (IJN).  I used XF-11 JN Green for a post shade along panel lines.  

 IMG_2230 by Christopher Ridle, on Flickr

I mixed the XF-70 with yellow to make the highlight shade.

 IMG_2231 by Christopher Ridle, on Flickr

The shades got blended in with a misting of the original color.

 IMG_2232 by Christopher Ridle, on Flickr

Masking the yellow stripes forward of the tail was the next challenge.  

 IMG_2233 by Christopher Ridle, on Flickr

The stripes aren't perfect, but perfection may be inappropriate.  I may touch them up tomorrow.  I'll think about that, but now I'll have a rum and coke.  Beer

Has anyone else noticed that Coke ZERO has a big red Hinomaru on each of their cans now?   

 IMG_2239 by Christopher Ridle, on Flickr

 IMG_2236 by Christopher Ridle, on Flickr

 IMG_2237 by Christopher Ridle, on Flickr

 IMG_2238 by Christopher Ridle, on Flickr

  • Member since
    February 2012
  • From: Olmsted Township, Ohio
Posted by lawdog114 on Sunday, September 3, 2017 6:52 AM

ridleusmc


lawdog114
Looking good...try adding some white to the base color, then streak it back with the airflow. That will break up the mono too. I paint my Hinos too...


When you say streak, do you mean like a dry-brush technique?  Do you mean a thinned mix?


Just add some white to the grey paint. throw it in the airbrush, then go real fast with the airflow.  It leaves a cool streaking effect.  I call then "condensation" streaks.  It takes some practice but I've been doing it for years.  The key is to be subtle.  You can also use the lightened paint to fade the top side panels.  In this case, I recommend buff (XF-57) to lighten the green.    

Looking great Chris.     

 "Can you fly this plane and land it?...Surely you can't be serious....I am serious, and don't call me Shirley"


  • Member since
    March 2015
  • From: Streetsboro, Ohio
Posted by Toshi on Sunday, September 3, 2017 7:21 AM

That is one of the best WIP I've seen yet.  Your Zero is going to look fabulous!

Toshi

On The Bench: Revell 1/48 B-25 Mitchell


Married to the most caring, loving, understanding, and beautiful wife in the world.  Mrs. Toshi


  • Member since
    December 2002
  • From: Bury St Edmunds, Suffolk, England
Posted by Bish on Sunday, September 3, 2017 8:04 AM

Looking good there ridle.

I am a Norfolk man and i glory in being so


On the bench: Airfix 1/72nd Harrier GR.3/Fujimi 1/72nd Ju 87D-3

  • Member since
    July 2003
  • From: Cincinnati, Ohio
Posted by ridleusmc on Sunday, September 3, 2017 9:18 PM

Thank you Gentlemen,

Thank you Toshi, Thank you Bish, Thank you LawDog,

LawDog, I don't think I'll try that technique on this build.  You said yourself, "It takes some practice."  However, I am curious.  I very much appreciated your tutorial on radial engines.  Would it be possible to post your technique like that tutorial?  Have you already done that?  I'm sorry, I don't think I have the understanding to try it yet.  

Saturday night update, 

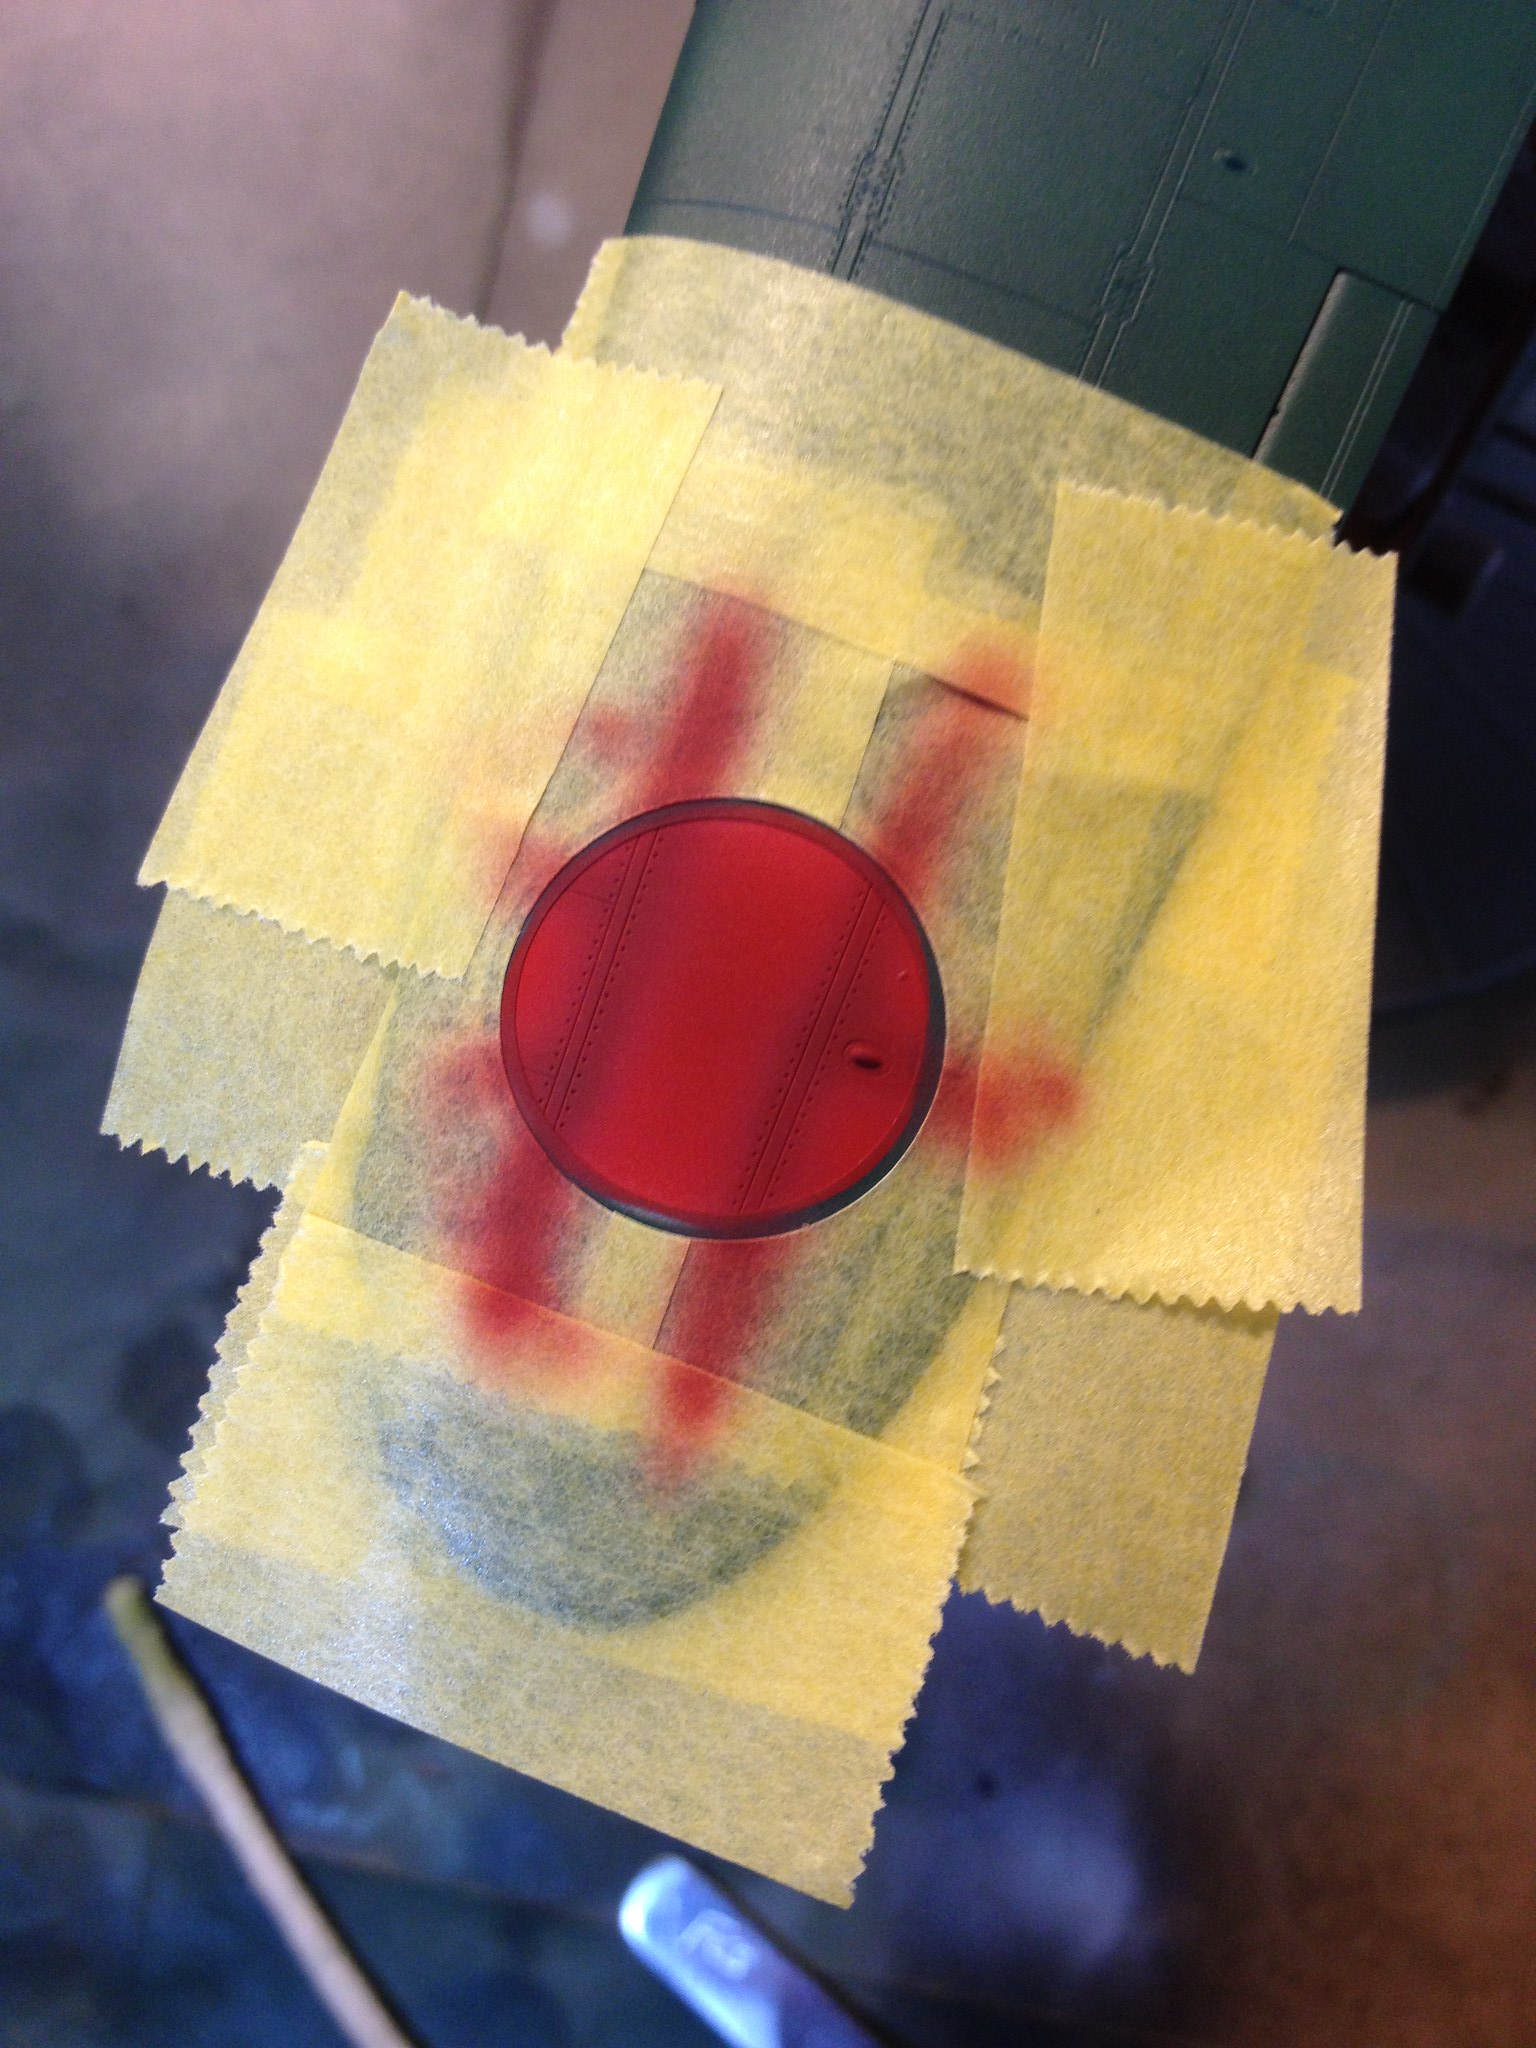
I didn't have much plastic time, but I worked to improve the Hinomarus.  I remasked them, then I used the post shading techniques to fill them in a little better.  Before, they were a little too pink for my taste.  

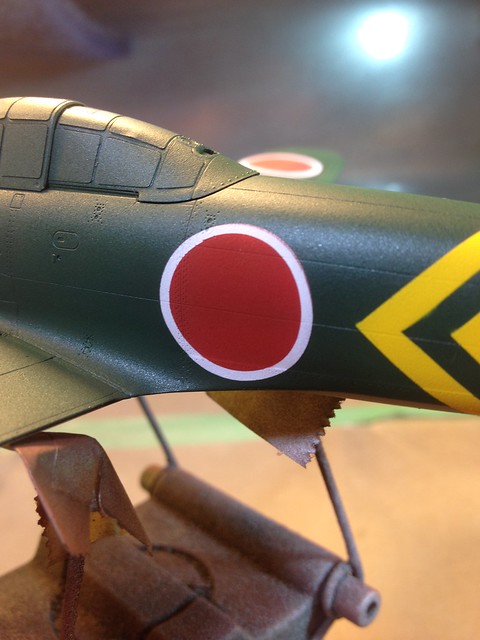
I'm happy with their look now, but the left fuselage Hinomaru is showing a little red outside of its white circle.  It'll get touched up.    

 IMG_2246 by Christopher Ridle, on Flickr

I forgot to take a picture of the highlight color, but it was similar to Pepto-Bismol (maybe a little darker, but Pepto-Like).  

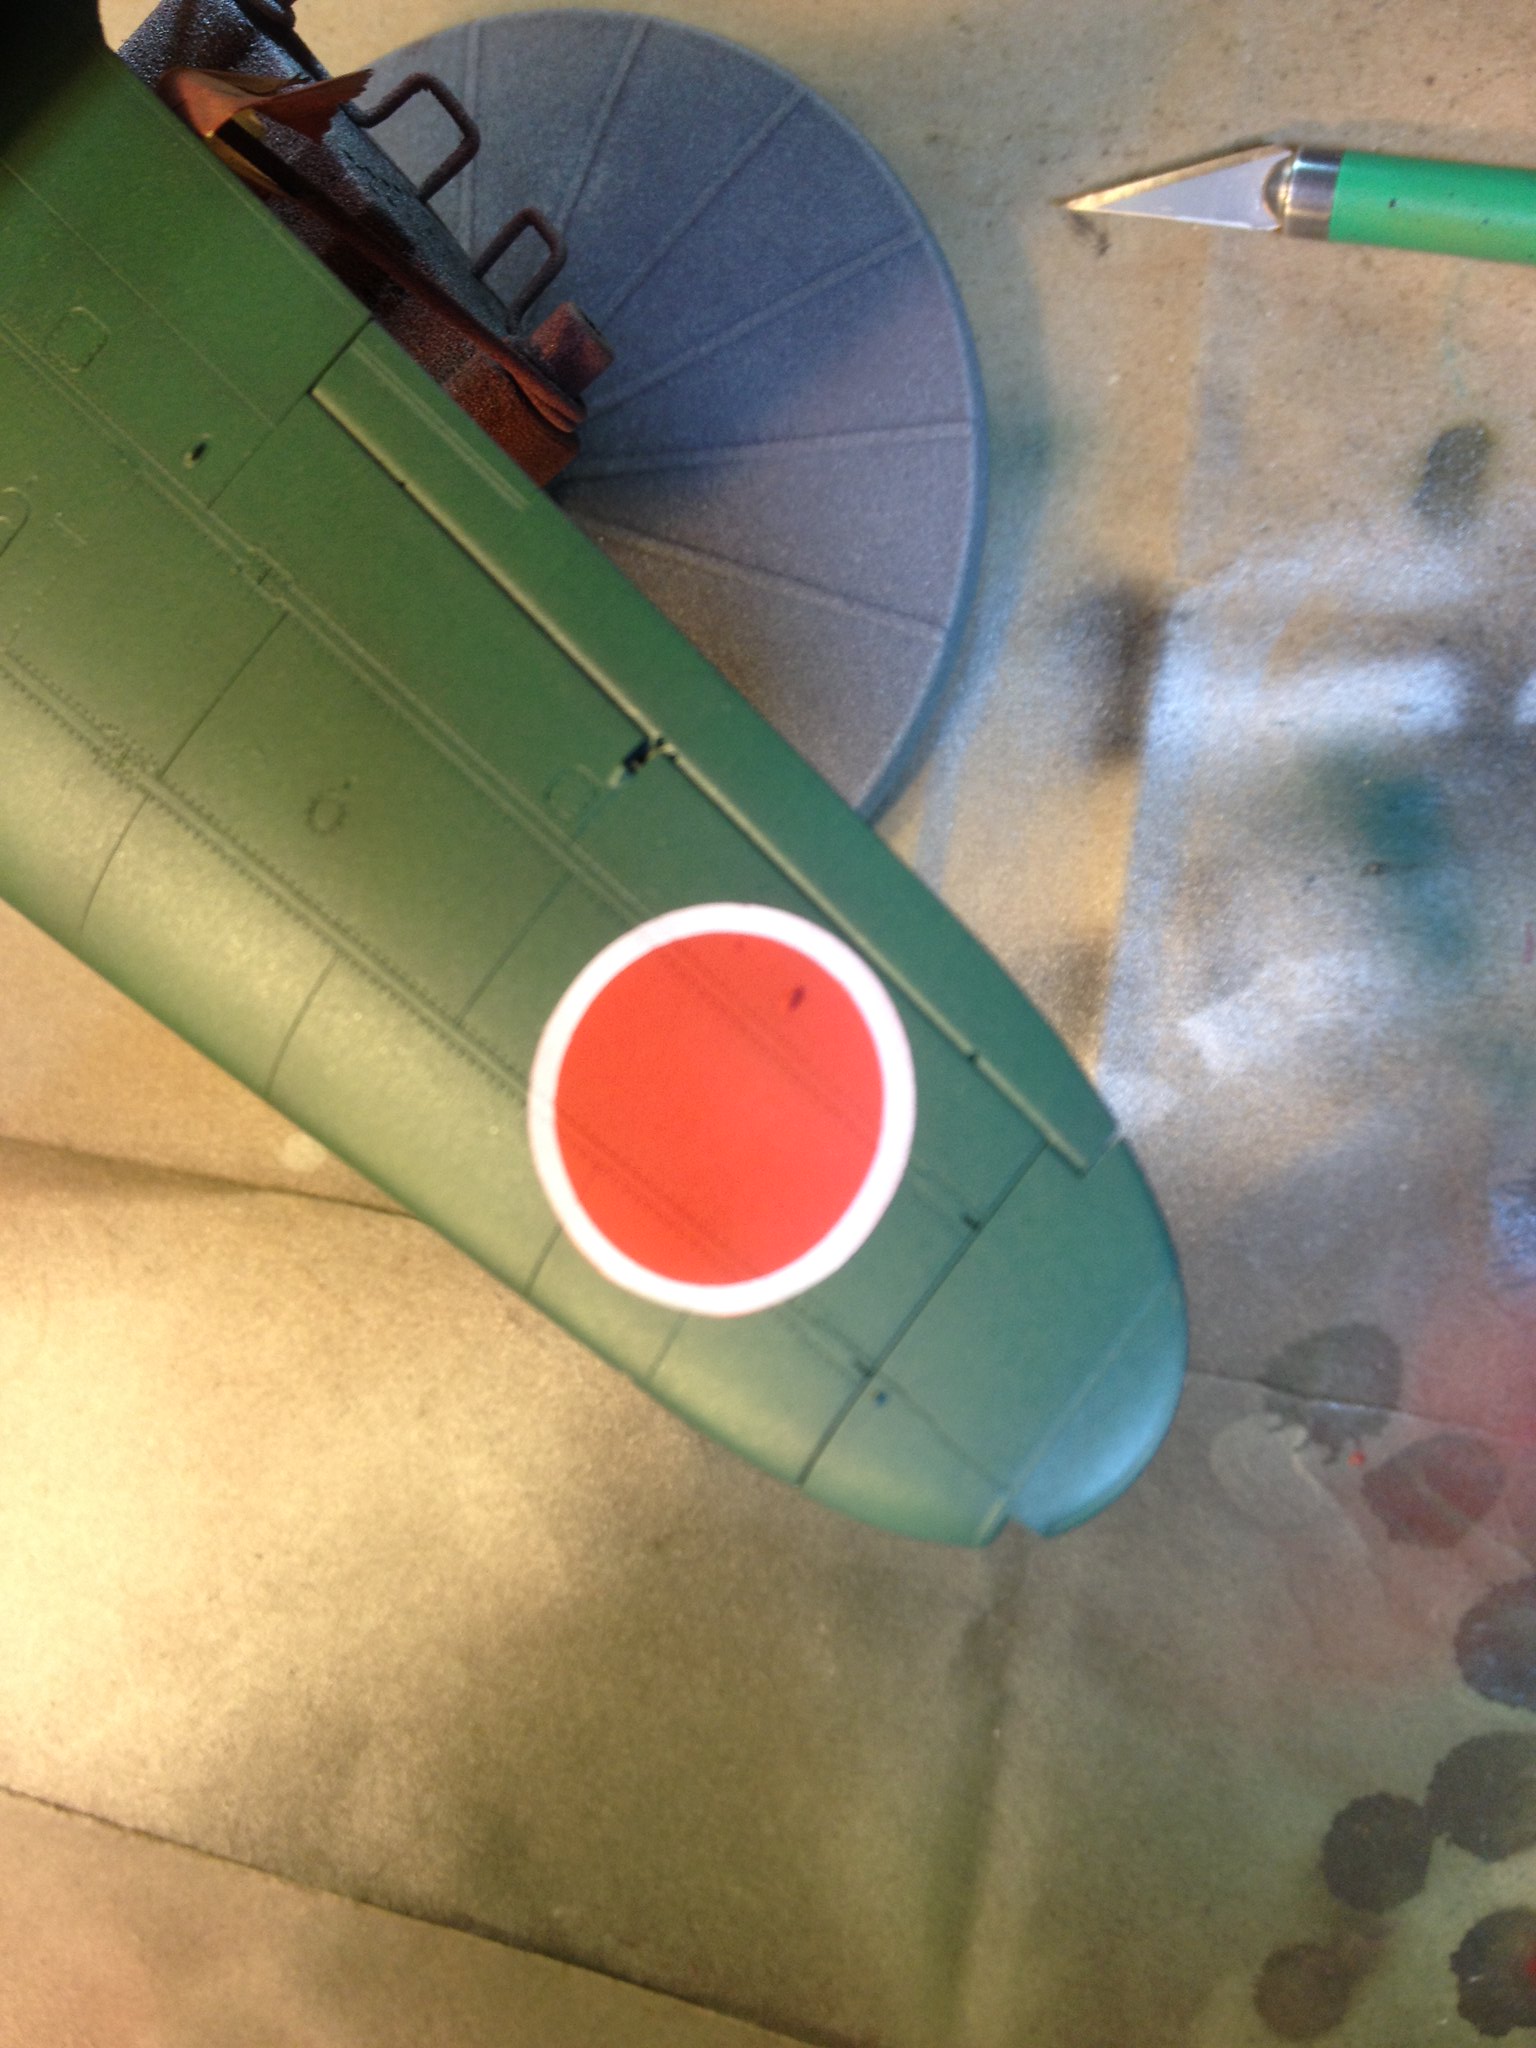
Here's how they turned out.

 IMG_2247 by Christopher Ridle, on Flickr

This is the one with the red outside of the white.  It's on the upper rear quadrant.

 IMG_2249 by Christopher Ridle, on Flickr

Cheers everyone, Beer


  • Member since
    June 2017
Posted by Chemteacher on Sunday, September 3, 2017 9:50 PM
Wow! That's looking great. Keep the updates coming.

On the bench: Revell-USS Arizona; Airfix P-51D in 1/72

  • Member since
    March 2005
  • From: Lancaster, South Carolina
Posted by Devil Dawg on Sunday, September 3, 2017 11:24 PM

Hey, Marine, that Zero is looking good! How did you get the Rising Sun masks centered on each other? Did you just eyeball it, like a good Marine rifleman? If so, heck of a job! If not, STILL heck of a job!

Devil Dawg

On The Bench: Tamiya 1/32nd Mitsubishi A6M5 Model 52 Zeke For Japanese Group Build

Build one at a time? Hah! That'll be the day!!

  • Member since
    July 2003
  • From: Cincinnati, Ohio
Posted by ridleusmc on Monday, September 4, 2017 12:22 AM

^ Honestly, it's just the design of the Maketar paint masks.  Their set has all of the appropriately sized Hinomarus with outlines and without outlines.  I also have a circle cutter which has helped me in general masking.  However, it's just the Maketar masks that line up easily with themselves.  I've never gone UNQ at the range, but I've never scored expert either.  I've always listened to the coaches to line up my sights.  The Maketar masks are my range coach.  They are a good product, I recommend them.  There's a picture of the package on the first post of this thread.  It'll make Japanese markings easier.  

  • Member since
    July 2003
  • From: Cincinnati, Ohio
Posted by ridleusmc on Monday, September 4, 2017 8:35 PM

Monday night update, 

Today I painted the identification stripe on the leading edge of the wing.  I mixed the yellow with a little red, because the stripe seems to have a slightly darker color than the yellow stripes forward of the tail.  I was mimicking the kit's decal sheet.  

I popped the cowling on to get an idea of how the machine will look.  I'm pretty happy with how things are going.  Since then, I've been working on little things.  I've touched up paint on the main assembly, and I've painted some details which are not yet attached.  

I hope to start the paint wearing and chipping tomorrow.  I hope I don't destroy my model.  I'll start by experimenting with the top side of the drop tank, inconspicuous place.   

 IMG_2252 by Christopher Ridle, on Flickr 

 IMG_2253 by Christopher Ridle, on Flickr

  • Member since
    March 2005
  • From: Lancaster, South Carolina
Posted by Devil Dawg on Monday, September 4, 2017 9:46 PM

WOW, Chris! That Zero is looking gorgeous!! Excellent job!

Devil Dawg

On The Bench: Tamiya 1/32nd Mitsubishi A6M5 Model 52 Zeke For Japanese Group Build

Build one at a time? Hah! That'll be the day!!

  • Member since
    March 2005
  • From: Lancaster, South Carolina
Posted by Devil Dawg on Monday, September 4, 2017 9:53 PM

ridleusmc

I've never gone UNQ at the range, but I've never scored expert either.  I've always listened to the coaches to line up my sights.  

I remember one year at the Cherry Point range, my glasses broke while firing 200 yard-line rapid fire. I raised my hand, told my range coach what happened, and he said to keep firing, and he would get me an alibi after that round of firing was over, So, I kept firing. Hit other targets, but not mine, as I couldn't see a thing without my glasses. The range OIC wouldn't give me an alibi for it because they weren't "military issue" glasses!! Ticked me off. The only time I had ever qualified as a marksman. I wound up rigging my glasses to a point where I could still see out of the right lens and finish the qualification day, but that wasn't easy.

Devil Dawg

On The Bench: Tamiya 1/32nd Mitsubishi A6M5 Model 52 Zeke For Japanese Group Build

Build one at a time? Hah! That'll be the day!!

  • Member since
    December 2002
  • From: Bury St Edmunds, Suffolk, England
Posted by Bish on Tuesday, September 5, 2017 1:49 AM

Lovely job on the markings there.

I am a Norfolk man and i glory in being so


On the bench: Airfix 1/72nd Harrier GR.3/Fujimi 1/72nd Ju 87D-3

  • Member since
    July 2003
  • From: Cincinnati, Ohio
Posted by ridleusmc on Tuesday, September 5, 2017 12:25 PM

Thanks Bish, Thanks Devil Dawg,

DD -  I was lucky to avoid glasses.  I remember one recruit at Parris Island had to turn his glasses upside down.  

Stone Bay Range, near Lejeune, had one guy who'd sell hot dogs from a hot-dog cart pulled by a van.  He must've had something worked out with the range officers, because he'd drive up right behind the firing line.  He made a red onion relish which was amazing.  I tried to duplicate it, but with no luck.  I read that he had earned the Silver Star in Vietnam.  Maybe I should've been thinking more about shooting than hot dogs.  I could've done better than Sharpshooter.  

  • Member since
    March 2005
  • From: Lancaster, South Carolina
Posted by Devil Dawg on Tuesday, September 5, 2017 3:52 PM

Heck, you still get paid the same, regardless of how you qualified! Big Smile

Wish our ranges would've had mobile food vendors. We either had to brown bag it, or get to the chow hall and back in less than an hour during range week. I chose to brown bag it. Less stressful.

Devil Dawg

On The Bench: Tamiya 1/32nd Mitsubishi A6M5 Model 52 Zeke For Japanese Group Build

Build one at a time? Hah! That'll be the day!!

  • Member since
    July 2003
  • From: Cincinnati, Ohio
Posted by ridleusmc on Tuesday, September 5, 2017 8:27 PM

Tuesday night update,

I haven't done much tonight, because an automobile needed attention.  The work I have done on the Zero has yielded excellent results.  The paint wearing method described by Brian Criner in Modelling the Mitsubishi A6M Zero has worked well for this model so far.  (pp 10-13)  I've just started.  I don't want to get carried away or do too much at one time.  I'll save some for tomorrow, but I'm excited about the results.  I've only worked on the left wing-root and the leading edge of the left wing.  

 IMG_2256 by Christopher Ridle, on Flickr

 IMG_2258 by Christopher Ridle, on Flickr

I ended up using this product.  I originally tried the #1, but that's more of a cleaner than a polish.  The bottle is sitting on my test plastic.  

 IMG_2254 by Christopher Ridle, on Flickr

  • Member since
    February 2014
  • From: Michigan
Posted by silentbob33 on Tuesday, September 5, 2017 8:42 PM
That chipping looks really nice, and that red primer looks good in the lightly chipped areas. I can't wait to see the rest of it

On my bench: Academy 1/35 UH-60L Black Hawk

  • Member since
    July 2003
  • From: Cincinnati, Ohio
Posted by ridleusmc on Wednesday, September 6, 2017 8:09 PM

Thank you Silent Bob, 

Tell Jay to stay away from my sister.  

Wednesday night update,

This chipping process isn't quick, and I'm determined to take my time with it.  I don't want to overdo things.  I worked the technique on the upper wings tonight.  I found a good deviation from the technique as written in the book.  Instead of rubbing the area of wear with a cut cotton swab and buffing compound, I started rubbing the area of wear with a round tooth pick with compound.  The tooth pick is smaller and allows for more area control.  Additionally, it seems to take a lighter touch to remove the unwanted paint.  The tooth pick tip can reach small details, or you can use the edge of the tooth pick to wear a larger area.  I still keep the cotton swabs on hand to wipe away excess compound.  I've done the upper wings and I'm happy with the results.  I'll work the fuselage tomorrow.  

 IMG_2259 by Christopher Ridle, on Flickr

 IMG_2260 by Christopher Ridle, on Flickr

Cheers Beer Toast

  • Member since
    September 2016
  • From: Albany, New York
Posted by ManCityFan on Wednesday, September 6, 2017 8:27 PM

That, sir, is a fine looking Zero.  Everything you have done with this kit has been outstanding!  Eager to see how it looks when you are done.

D

Dwayne or Dman or just D.  All comments are welcome on my builds. 

  • Member since
    March 2009
  • From: Yorkville, IL
Posted by wolfhammer1 on Wednesday, September 6, 2017 9:03 PM

I just read all the way through this post, and am amazed by what you are accomplishing with this Zero.  I have one on the bench in process, but will be doing a Pearl Harbor attacker, so little weathering.  Incan't wait to see the finished product.

John

  • Member since
    June 2013
Posted by bvallot on Wednesday, September 6, 2017 10:10 PM

Chris this is really coming out quite nice. =] The primer underneath is making all the difference. I'm a believer in the little things. These models we build are approximations of the real thing. No kit manufacturer can get it right. Especially at 1:48 scale, there is no amount of help or AM that is going to make it perfect. So all everything we can do to convince the eye it's seeing what it expects--the better. 

Definitely take your time with the chipping. It's easy for it too become too much too quick. You're doing a fantastic job. Happily watching along. =]

On the bench:  

Tamiya F4U-1  Kenneth Walsh


JOIN OUR COMMUNITY!

Our community is FREE to join. To participate you must either login or register for an account.

SEARCH FORUMS
FREE NEWSLETTER
By signing up you may also receive reader surveys and occasional special offers. We do not sell, rent or trade our email lists. View our Privacy Policy.