As I state in my Revell Corsair post, I had an eye on closing out this year with Tamiya's big Birdcage Corsair.

I'm going to talk a little about this kit. This kit is right up there with Tamiya's P-51, Spitfire, and Zero 1/32 warbird kit (have not built their Mosquito, but I'm assuming that one would be equivalently awesome). There is almost enough in the box to build it right out of the box. The detail is great. The kit also goes together with little difficulty. If you've built any of their other 1/32 warbirds, or their 1/48 Corsair, then you should know what to expect if you tackle this one. I will rank this one as one of their best overall (and wonder why they have not put out a 1/32 version of their wonderful 1/48 P-47 Thunderbolt). But I will say that as a nearly life-long modeler, I am rarely intimidated by any kit; this one is an exception. I probably spent half a month just looking at the many parts on the many sprues, thinking about how I was going to tackle some of the component parts. The kit's only flaws: it is completely missing a prominent detail of the actuator cable on the cowl flaps, and the rubber tires feature an unremovable (by me, at least) seam right down the middle of the tire. I recommend replacing with an aftermarket set (I bought a set from Eduard for this build).
I decided early on to use one of the kit markings, the "Daphne 'C'". This Corsair operated with VMF-213 of the United States Marine Corps, and was piloted by Lt. James N. Cupp. The only photo I found of him shows him standing in front of a Corsair with a different ID number (no idea if 13 preceded or followed 15, the aircraft my build represents).
_of_VMF-213_on_Guadalcanal_in_June_1943.jpg)
As I did last year with the Tamiya P-51D 1/32, I used a lot of .2mm, .3mm, and .4mm lead wire to augment the great detail already in this kit. Some is not visible on the completed build, and some is.
Cockpit


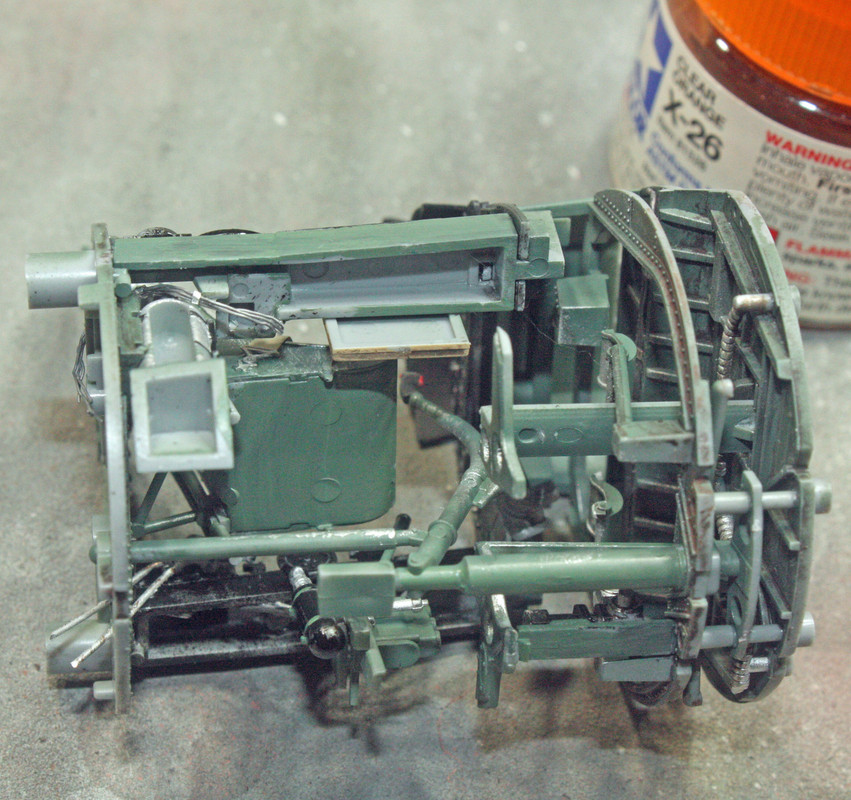


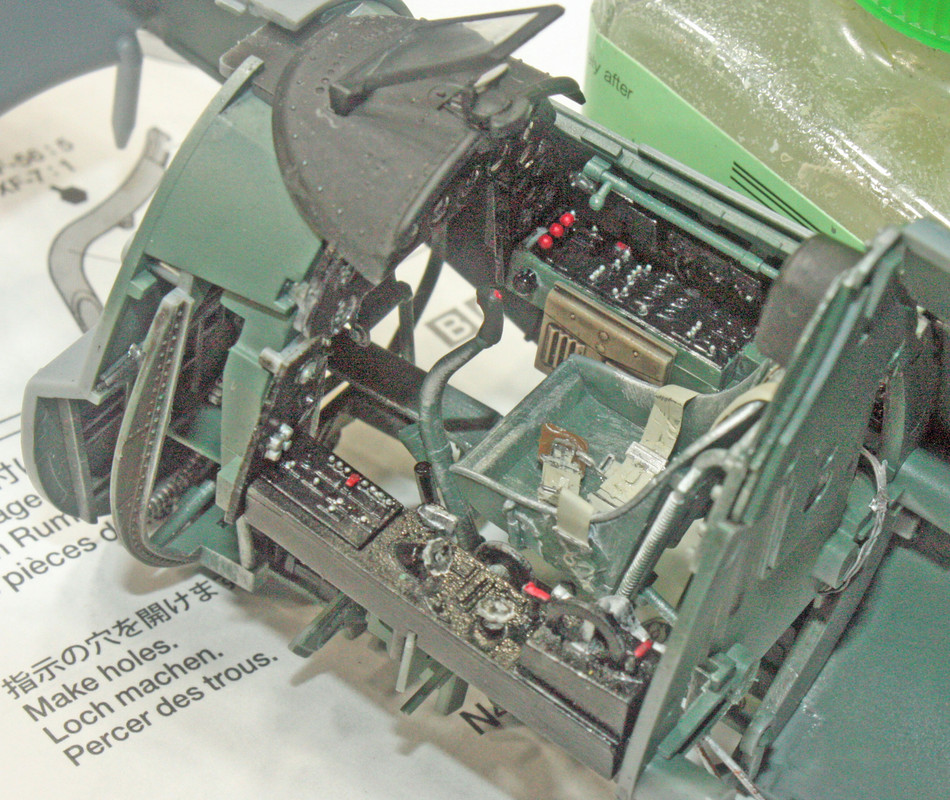
The Tamiya R-2800 engine looks pretty good but is devoid of some details (oil connectors and ignition wiring). I added both of those with lead wiring and some small diameter copper wiring.


I mentioned the lack of the cowl flap actuator. I did a crude representation of that system by cutting small pieces of thin styrene and then running .2mm lead wire around the inside of the cowl flaps.

On to the wheel wells. Unlike Revell, Tamiya gives the modeler a very fine representation of the Corsair's primary wheel wells, but in studying photos I found so much more detail that I could add with various sizes of lead wire. I added a bunch of wires to the wing spar that forms a part of the wheel well in this kit.
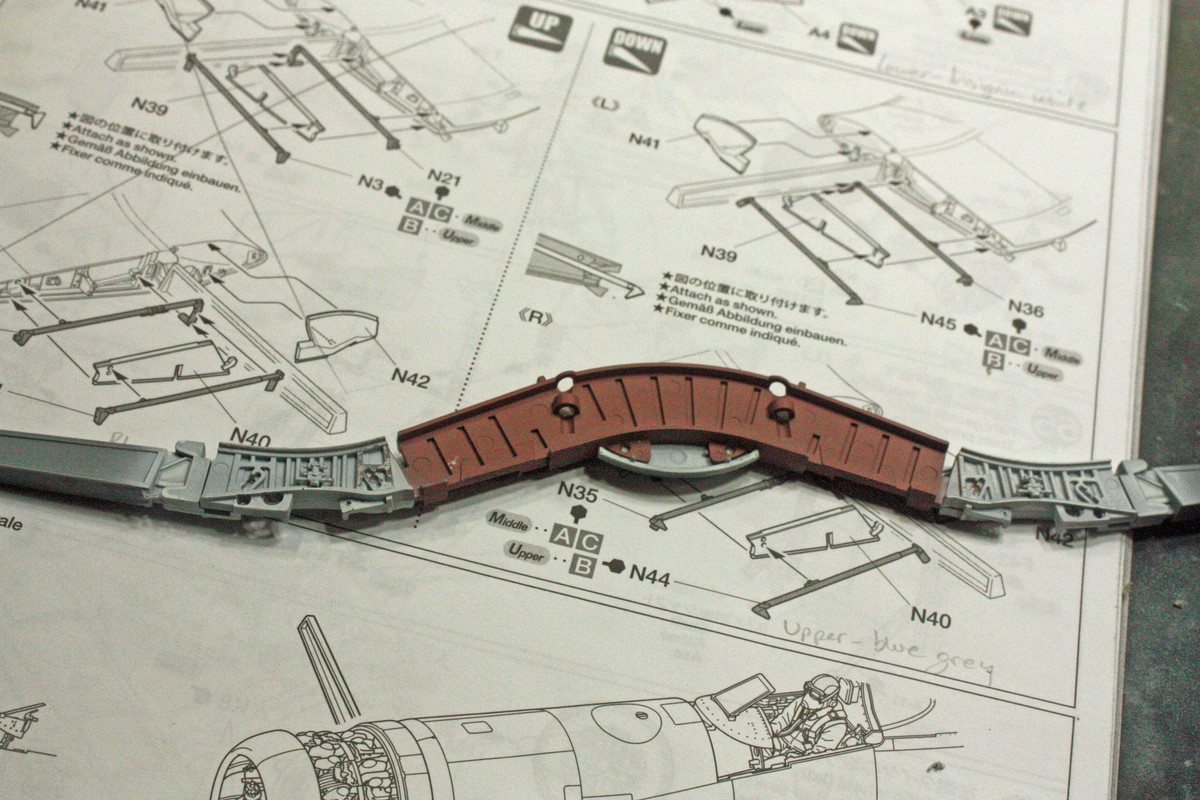


While the Revell kit gives you what is essentially a 2D representation of the prominent air intakes along the inner wing, Tamiya gives you a full 3D intake


Another thing that Tamiya does not include is anything resembling machine guns. This could be due to the engineering of the kit that includes a heavy spar going right through what would be the gun bay. In any event, that leaves six holes in the front of the wings that should at least appear to have something in them. I cut some tube to replicate machine guns.


I utilized Bert Kinzey's Detail and Scale, Squadron's Walk-Around, and Tamiya's Building the F4U-1 books for this build, as well as studying a bunch of photos to see what a war weary Corsair should look like. The Corsair was known to leak oil proficiously, to which ground maintenance guys typically put white tape over panels prone to leaks; but this was not always the case, especially early in the Corsair's active duty. As far as I could tell, Cupp's White-15 did not have the tape. This was an early F4U-1 carrying a paint scheme prior to the introduction of the tri-color scheme, so I used Vallejo's light gull gray and US blue grey to achieve this look.
To get to the chipped paint look that Corsairs were notorious for, I opted not to do the salt treatment as I did with the Revell. Instead, I dabbed some liquid masking goo in the areas where I wanted the chipped paint, and followed the same process of painting AK Interactive XTreme Metal aluminum over a grey Stynylrez primer, and Mission Models green zinc chromate over the aluminum after putting down some of that liquid mask. This worked out better than the salt, and also did not give me the chemical reaction that I saw on the Revell.
I spent a lot of time weathering this kit, using ground up pastels to replicate dirt on the tires and rear gear doors, the AK Interactive streaking grime to effect leaked oil, and Flory dark dirt wash.
So on to the completed build photos.

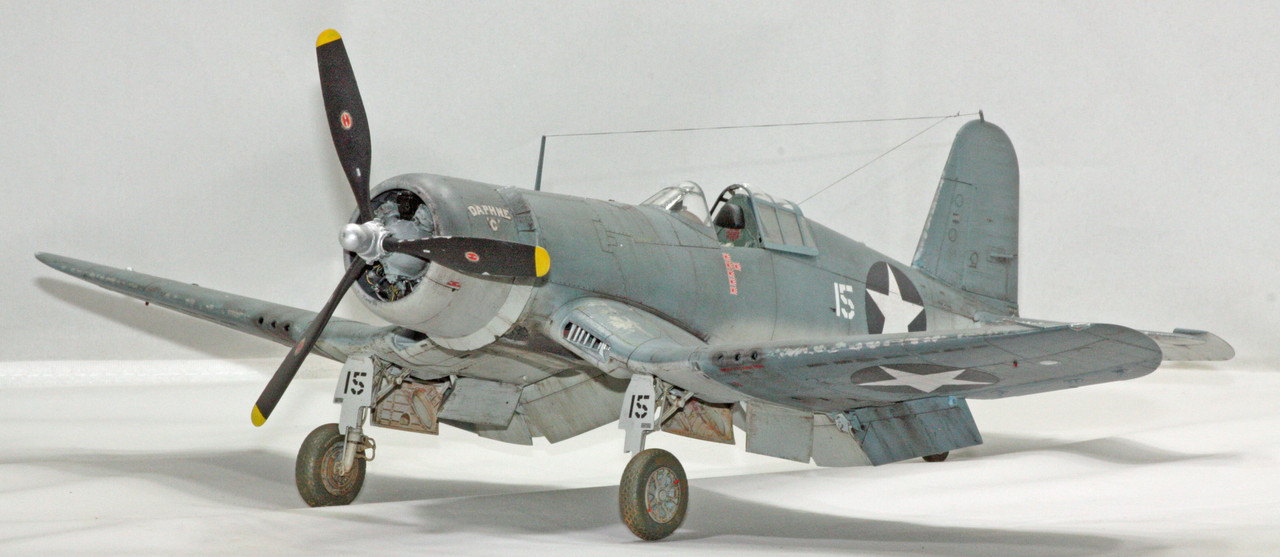
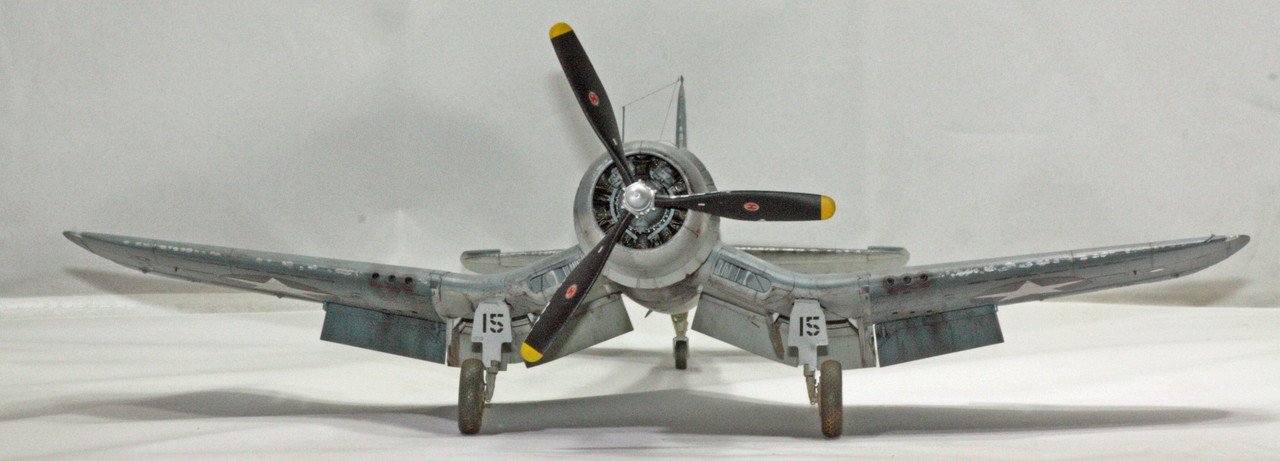


After I took all of these pictures, I saw in a few of them that I'd neglected to remove the mask from the window that was right beneath the pilot's feet. So here is a shot of the window now unmasked.

And now I'm hearing a line from a song in a Disney movie ... "For the first time in forever ..." I have no idea what I want to build next. I do know that this is the last model I'm doing this year (obviously, not even I build that fast). But given how many I did over the course of 2020, I'm pretty much done with the hobby for the time being. I'm sure I'll get back to it sooner than I'm currently thinking, though.
Happy New Year everyone!