SEARCH FINESCALE.COM

Enter keywords or a search phrase below:

PACIFIC CARRIER AVIATION GROUP BUILD

90288 views
1294 replies
1 rating 2 rating 3 rating 4 rating 5 rating
  • Member since
    September 2003
  • From: AandF in the Badger State
Posted by checkmateking02 on Thursday, October 23, 2014 10:32 AM

That does look nasty!  It will be an education watching you tackle this.


  • Member since
    March 2012
  • From: Corpus Christi, Tx
Posted by mustang1989 on Thursday, October 23, 2014 10:49 AM

Yeah for you and me both!!! LOL


 Forum | Modelers Social Club Forum (proboards.com) 

  • Member since
    August 2009
  • From: MOAB, UTAH
Posted by JOE RIX on Thursday, October 23, 2014 12:40 PM

Joe my resourceful little friend, Yes, it is ugly. And yes, it is frustrating. But, and I'm going to start sounding like a broken record here, but, yeah, yeah, yeah...whatever...You GOT THIS!!! This is coming from your biggest fan big guy.

"Not only do I not know what's going on, I wouldn't know what to do about it if I did". George Carlin

  • Member since
    January 2011
  • From: Commonwealth of Virginia
Posted by Tal Afar Dave on Thursday, October 23, 2014 5:51 PM

Holy smoke, Mustang!!  That sucks to the Nth degree!!! Looking back, I don't remember building this Corsair as a kid either!!!  LOL......

TAD

2022 New Year's Resolution:  Enter 1 group build and COMPLETE a build this year!!  Why Photobucket did you rob me of my one Group Build Badge???  Must be part of the strong anti-Monogram cartel!!!

 ]

  • Member since
    March 2012
  • From: Corpus Christi, Tx
Posted by mustang1989 on Friday, October 24, 2014 3:32 AM

Tal Afar Dave

Looking back, I don't remember building this Corsair as a kid either!!!  LOL......

TAD

Something tells me you'd remember it. lol


 Forum | Modelers Social Club Forum (proboards.com) 

  • Member since
    March 2012
  • From: Corpus Christi, Tx
Posted by mustang1989 on Friday, October 24, 2014 6:08 AM

You know it occurred to me this morning that although I haven't thrown any real AM stuff at this kit, I am spending just as much time "saving" this kit as I do with "modifying" a decent kit. It doesn't discourage me or upset me all that much but it is kind of funny the lengths that one has to take to make this kit shine (or at least TRY to make it shine.........lol). I got started this morning on fitting the wing. Boy was I in for an awakening........

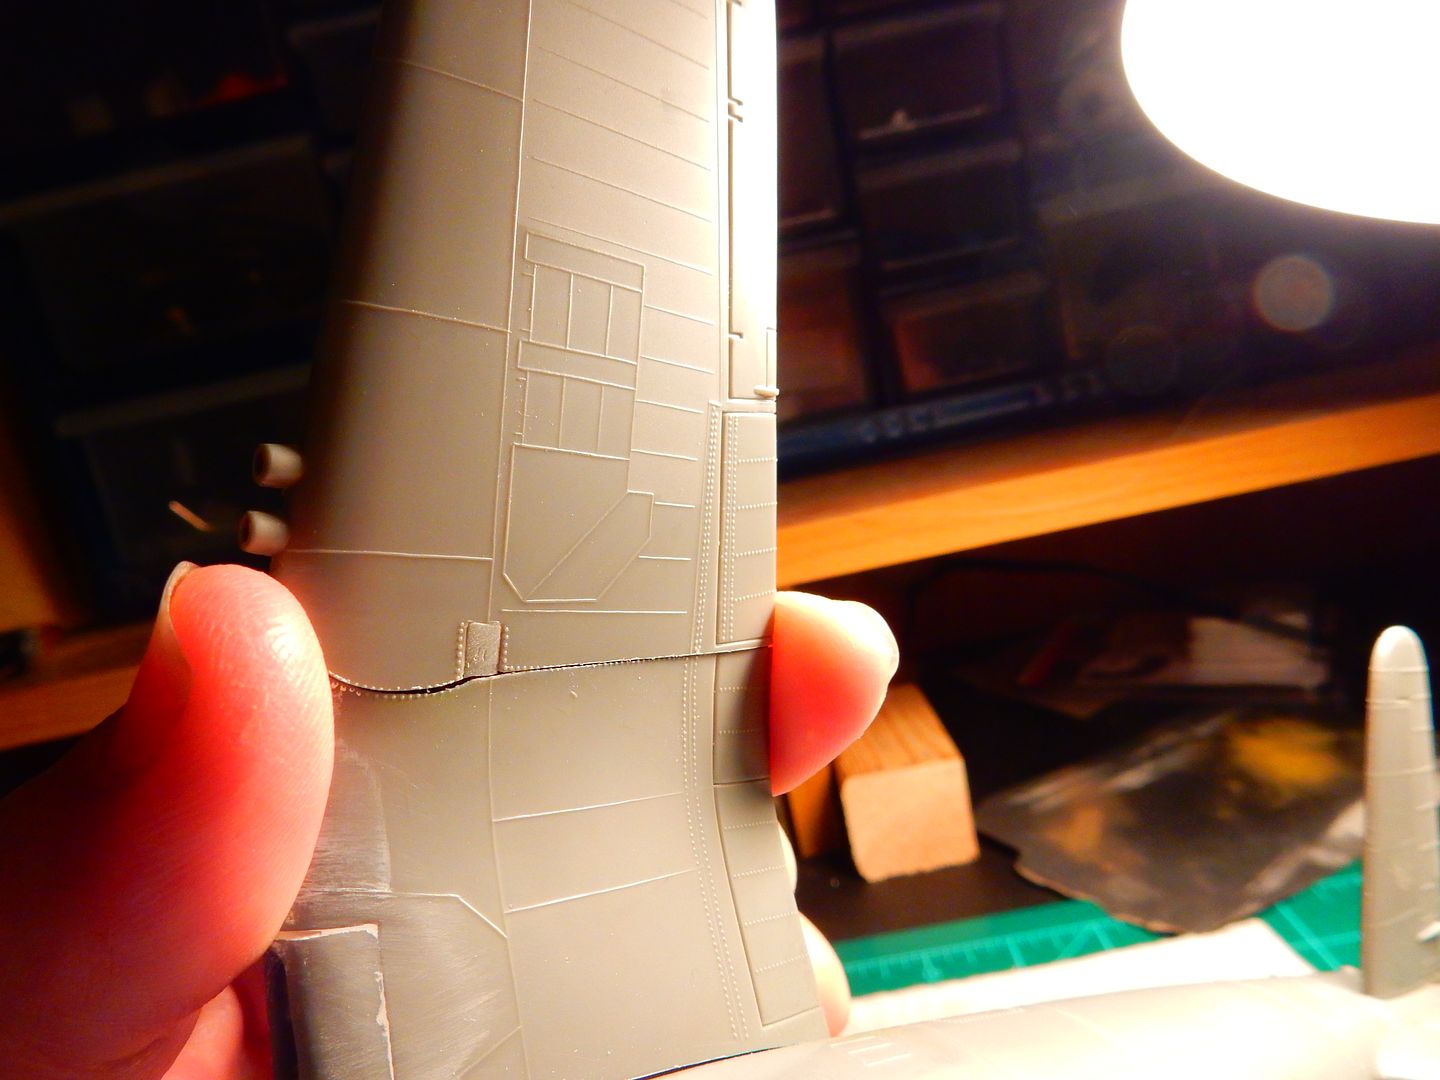
This is the upper part of the wing which needs some work:

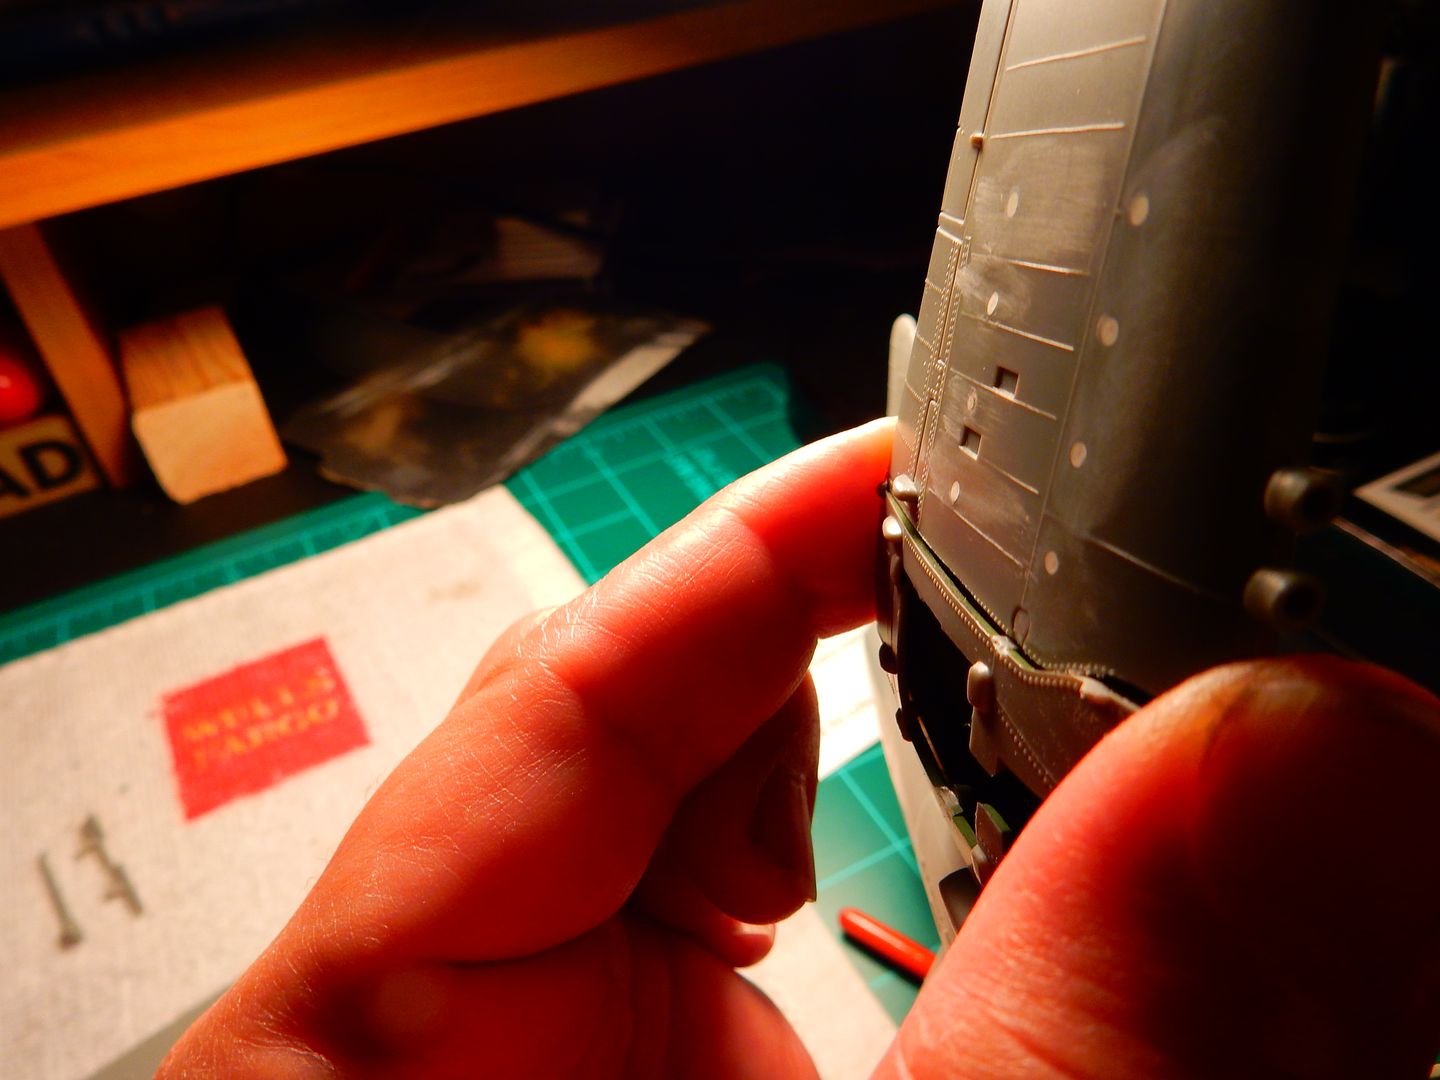
 Now for the fun part! The bottom of the wing. Jesus wept. 

Soooo.............I got a paint brush and stuck the handle in like so:

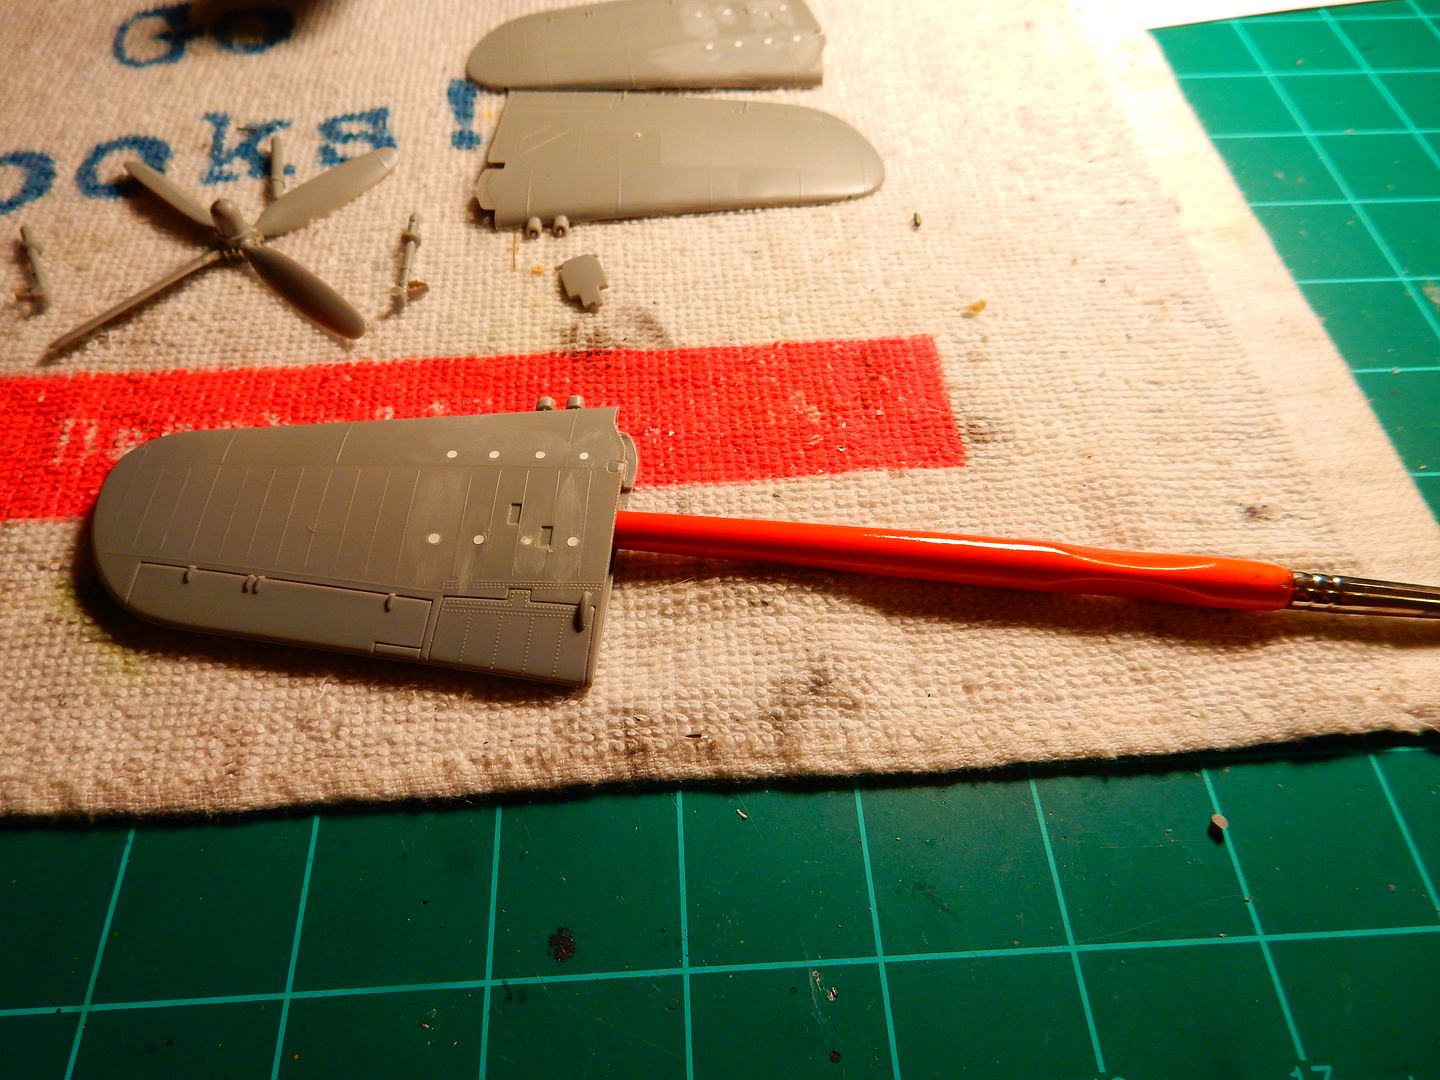
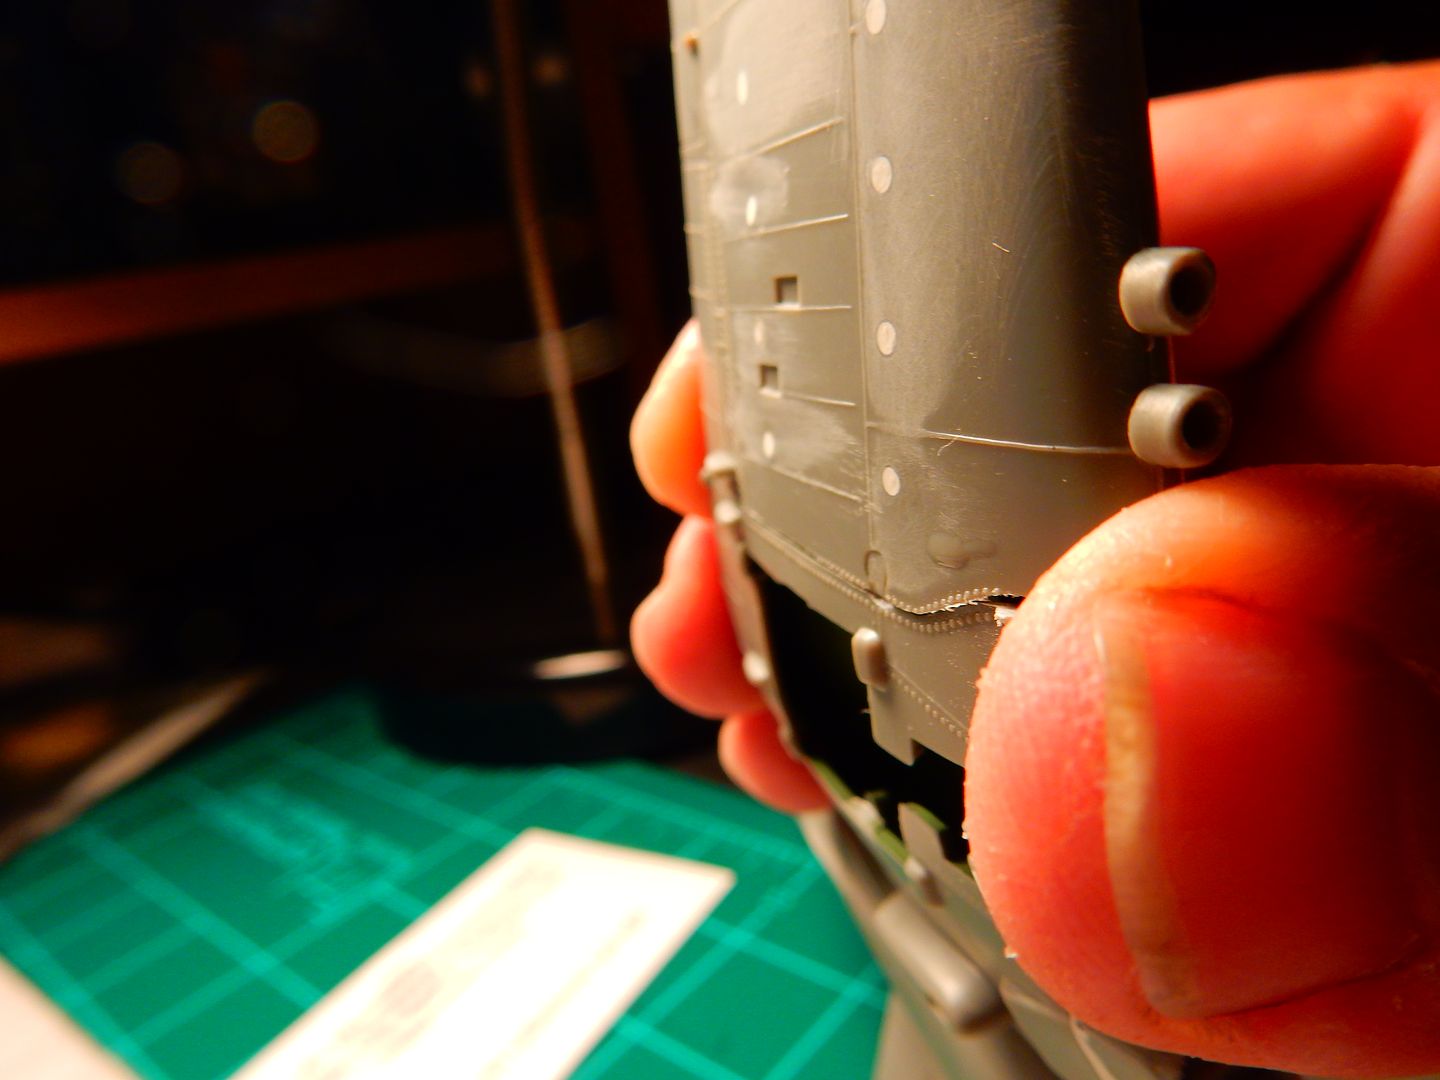
 Then I stuck the whole wing in some boiling water for about 10 seconds and pulled it back out. And it now fits like so:

 I also know that with this wing down that I'm going to have some support other than plastic. I have a sacrificial lamb (file) that I'll trim up to carry out this task.

Yes I know. Use a valuable tool? I have TONS of these things and its just flat enough and narrow enough to fullfill the need. 

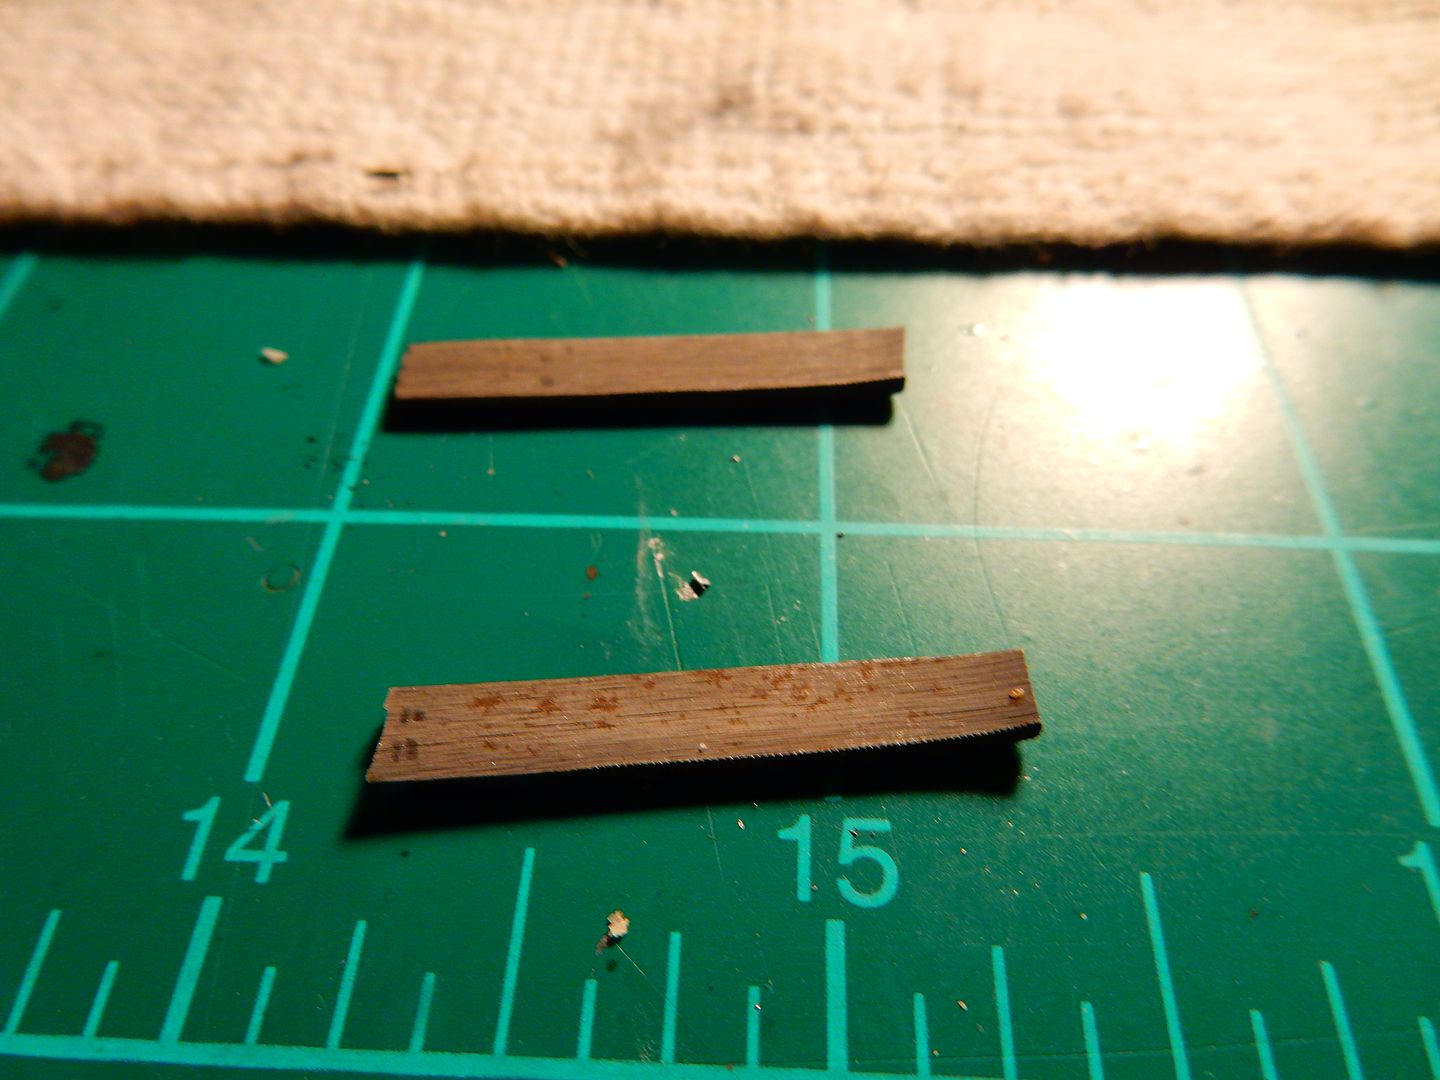
The support strips have a slight curvature to them but that's ok. They will be positioned so that the curve actually helps out here:

and now with the supports JB welded into place:

and that's a wrap after a 2-1/2 hour benchtime this morning. Looking to install the wing and have the bodywork done on it by the end of the weekend. 


 Forum | Modelers Social Club Forum (proboards.com) 

  • Member since
    August 2009
  • From: MOAB, UTAH
Posted by JOE RIX on Friday, October 24, 2014 12:29 PM

Did I not call you resourceful, Joe? Well it seems that I left out creative and brilliant. That is a marvelous approach to your issue. Yet again..You Got This!!!Wink. There is some thing that I find interesting in your fix. That is that when you dipped you wing in boiling water the glue and putty seems unaffecetd. Even if it was for only 10 seconds.

"Not only do I not know what's going on, I wouldn't know what to do about it if I did". George Carlin

  • Member since
    March 2012
  • From: Corpus Christi, Tx
Posted by mustang1989 on Friday, October 24, 2014 12:54 PM

The glue was affected but only in one area at the back of the wing where the aileron is.  I ended up re-adhering it and it was ok. It was something that was an afterthought alright. But hey, it worked!!! And I learned how to "debond" glued joints. lol


 Forum | Modelers Social Club Forum (proboards.com) 

  • Member since
    August 2014
Posted by avipond on Friday, October 24, 2014 11:11 PM

Sorry Schatten, hadn't been on the forum in a few days.  I used my exacto to taper off the end of a toothpick to a fine point, and dabbed and/or dragged a tiny bit of paint on the panel edges where I wanted the chipping.  I applied it after my final flat coat to make sure it stayed shiny.  Used Testors silver enamel - the ones that come in the very small bottles at any hobby store.  Normally I stay away from enamels, but I like that particular silver for paint chipping and brush painted metal finishes on small parts.  Seems easier to apply and has a better appearance than other silver/aluminum paints that I've tried with a brush.

Let's use the first completed picture that I posted for the front page.

Great work mustang-Joe!  I would have thrown in the towel a long time ago, but your perseverance and skills are very impressive!

-Drew

  • Member since
    March 2012
  • From: Corpus Christi, Tx
Posted by mustang1989 on Saturday, October 25, 2014 4:31 AM

avipond
.

Great work mustang-Joe!  I would have thrown in the towel a long time ago, but your perseverance and skills are very impressive!


Thanks Drew. Man I'll tell you......I installed the wing last night and I've got alot of work ahead of me. Don't count the trash can out yet. I was on ebay last night just looking at a Tamiya F4U-D with that distant "what might of been" stare.......Indifferent


 Forum | Modelers Social Club Forum (proboards.com) 

  • Member since
    April 2013
Posted by SchattenSpartan on Saturday, October 25, 2014 3:21 PM

Joe, that Corsair really looks like an godawful kit. I would've binned it a very long time ago, so I'm truly amazed by your courage, patience and amount of skill! I'm sure you're going to finish this corsair and it's going to look bad-A for sure!

  • Member since
    December 2012
Posted by flyerduke on Saturday, October 25, 2014 8:52 PM

Hey Joe, what year was the molds made for the Corsair?  I probably would have quit modeling again if I came back to the Revell Corsair kit.  I've bought the F-5, Dauntless, and F-15E.  I will probably give the Dauntless and F-5 away.  I got high hopes for the F-15.  

On a side note, I've made some progress on my plane.  I'll post pics soon.

Craig

  • Member since
    March 2012
  • From: Corpus Christi, Tx
Posted by mustang1989 on Sunday, October 26, 2014 4:14 AM

Hey Craig. The molds for the Corsair date back to 1963. I don't know about the  F-5 or the F-15 but the Dauntless is one of the better fitting kits. I bought a Hasegawa Dauntless about 15 years ago used at an air show for about 5 bucks and used ALOT of that kit to build a pretty decent Monogram kit. The only downfall of that Monogram kit was the severe lack of detail. The Hasegawa kit had it all almost all of it mostly in the form of cockpit detail and was a direct fit into the Mono kit. As far as the 15 goes, I know that Great Wall Hobby has a killer 1/48 scale beauty.


 Forum | Modelers Social Club Forum (proboards.com) 

  • Member since
    March 2012
  • From: Corpus Christi, Tx
Posted by mustang1989 on Sunday, October 26, 2014 7:40 AM

Well this isn't turning out to be the perfect build but I think I'll be able to salvage it at the very least!!!! lol . I got the wing the rest of the way dressed up at the folding point. I still have a little work to do on the leading edge at the wing tip but I puttied the affected area and moved on to pre-shading the entire model minus the port outer wing due to time restraints. Gotta get up and get breakfast ready for everybody you know.

 First off here's the wing seam at the folding point. I'm ok with this because I'll try to make the difference up in decaling and painting.

   I pre-shaded her up even though its going to be a darker shade of blue. My intent is to go really light on the blue layer to bring out the panel lines and show wear and tear and then to fade it some to give it that slight sun-bleached look. We'll get to that when we get there though. I didn't prime this one as there is only one color, I don't want to loose any of my homemade rivet detail,  and I don't have to mask any so no worries about the paint lifting when masking.

as a bonus , and still being close to my budget, I purchased some True Details resin 1000 lb. bombs for this jewel. I just couldn't build the kit bombs man. They were worse than horrible and I would have had to do the  same bodywork on those as I have the whole rest of the plane!!!  I still have to do SOME  body work on these but at least there aint no nasty seamline running right down the middle of 'em.


 Forum | Modelers Social Club Forum (proboards.com) 

  • Member since
    September 2003
  • From: AandF in the Badger State
Posted by checkmateking02 on Sunday, October 26, 2014 1:08 PM

Excellent work, mustang!


  • Member since
    March 2012
  • From: Corpus Christi, Tx
Posted by mustang1989 on Sunday, October 26, 2014 1:32 PM

Thanks checkmateking! It does a  small boo boo here and there....................but I'll never tell.Wink


 Forum | Modelers Social Club Forum (proboards.com) 

  • Member since
    August 2009
  • From: MOAB, UTAH
Posted by JOE RIX on Sunday, October 26, 2014 11:18 PM

The wing looks great Joe. You're doin' a heck of job there.

"Not only do I not know what's going on, I wouldn't know what to do about it if I did". George Carlin

  • Member since
    March 2012
  • From: Corpus Christi, Tx
Posted by mustang1989 on Monday, October 27, 2014 5:10 AM

'Preciate it Joe!Big Smile


 Forum | Modelers Social Club Forum (proboards.com) 

  • Member since
    March 2012
  • From: Corpus Christi, Tx
Posted by mustang1989 on Wednesday, October 29, 2014 5:14 AM

Got some initial paint on this morning that revealed a little more body work that has to be completed. Shouldn't be too much to do but will hopefully resume painting real soon.


 Forum | Modelers Social Club Forum (proboards.com) 

  • Member since
    August 2009
  • From: MOAB, UTAH
Posted by JOE RIX on Wednesday, October 29, 2014 8:25 AM

Getting the paint on there Joe really emphasizes what an outstanding job you have done with the filling, straightening, and sanding. Remarkable work my friend. I believe you are over the hump and it is all gravy from here. Keep that good stuff coming.

"Not only do I not know what's going on, I wouldn't know what to do about it if I did". George Carlin

  • Member since
    December 2012
Posted by flyerduke on Wednesday, October 29, 2014 8:56 AM

The Corsair is looking sharp.  What paint are you using?  I picked up some Mr. Color c14, c72, and c316 off of ebay to paint my Hellcat.  I've never used Gunze paints before.

Craig

  • Member since
    July 2014
  • From: Franklin Wi
Posted by Bakster on Wednesday, October 29, 2014 9:34 AM

Mustang--it is looking good.  You are really making lemonade out of lemons.  Way to go man.

  • Member since
    March 2012
  • From: Corpus Christi, Tx
Posted by mustang1989 on Wednesday, October 29, 2014 10:05 AM

Joe Rix:Thanks dude! Really tapping into the deepest of all the skills I've learned on here for the last couple of years, that's for sure!

flyerduke:I appreciate the comments. I'm using Vallejo Intermediate Blue. I started using Vallejo Dark Sea Blue yesterday but it came out more like a Sapphire Blue so I switched to "Intermediate Blue" which is a darker blue than Vallejo's "Sea Blue".

Bakster:Lemme tell you, I'll be seeing lemons in my head for a looooong time! Thanks for the encouragement.


 Forum | Modelers Social Club Forum (proboards.com) 

  • Member since
    September 2003
  • From: AandF in the Badger State
Posted by checkmateking02 on Wednesday, October 29, 2014 2:34 PM

Now that's looking really good!


  • Member since
    March 2012
  • From: Corpus Christi, Tx
Posted by mustang1989 on Wednesday, October 29, 2014 3:35 PM

Thanks checkmateking! Hopefully it keeps cooperating with me. lol


 Forum | Modelers Social Club Forum (proboards.com) 

  • Member since
    March 2012
  • From: Corpus Christi, Tx
Posted by mustang1989 on Friday, October 31, 2014 6:47 AM

Ok gang! I'm underway with the paint on this thing. The more I paint , the worse I think this kit is. Good grief!  I'm really trying to do my best on this and every time I make some progress I see yet another flaw, or two, or three. It's either that or something that I overlooked. Anyhow here's the latest push:


 Forum | Modelers Social Club Forum (proboards.com) 

  • Member since
    March 2012
  • From: Corpus Christi, Tx
Posted by mustang1989 on Friday, October 31, 2014 4:05 PM

I don't make a whole lot of progress throughout the week until Friday because I just flat don't have the time. Once Friday hits I make fairly good progress. Today has been a good day for modeling. A gloss coat and decals all in a day!!!!! Cool

  This has to be my favorite part besides paint these days because these babies just bring character to this thing.....

I suddenly find myself getting somewhat content with this build. Operative word being "somewhat".

And another pic:


 Forum | Modelers Social Club Forum (proboards.com) 

  • Member since
    July 2014
  • From: Franklin Wi
Posted by Bakster on Friday, October 31, 2014 5:02 PM

Mustang--it looks great!  I want to get in and fly it.  :)

  • Member since
    December 2012
Posted by flyerduke on Friday, October 31, 2014 6:25 PM

Lookin' good Joe.  I'm sure you will be proud of the Corsair due to all the work that went into it.

Question to anyone.  I'm about ready to glue the pitot tube to the underside of the wing tip.  Do I glue it perpendicular to the wing or deck?  The instructions don't say.  Thanks.

Craig

  • Member since
    September 2003
  • From: AandF in the Badger State
Posted by checkmateking02 on Friday, October 31, 2014 6:32 PM

Nice save, Joe.  That's a great looking Corsair!


JOIN OUR COMMUNITY!

Our community is FREE to join. To participate you must either login or register for an account.

SEARCH FORUMS
FREE NEWSLETTER
By signing up you may also receive reader surveys and occasional special offers. We do not sell, rent or trade our email lists. View our Privacy Policy.