SEARCH FINESCALE.COM

Enter keywords or a search phrase below:

50th Anniversary Vietnam War Group Build

78916 views
896 replies
1 rating 2 rating 3 rating 4 rating 5 rating
  • Member since
    February 2014
  • From: Michigan
Posted by silentbob33 on Saturday, December 13, 2014 7:44 AM

Thanks Rob! Your paint looks great, can't wait to see your decals on her

On my bench: Academy 1/35 UH-60L Black Hawk

  • Member since
    April 2010
Posted by Theuns on Saturday, December 13, 2014 8:57 AM

Dang that Phantom looks good!

I went to a build allong today with my thud and a frieng told me to try his water based ink as a pannel wash, I must say it work way easier than my usual pastel water mix.

Left wing washed and cleaned up, right wing needs wiping off.

I do hope the matt coat will tone everything down a bit though.....

Theuns

  • Member since
    January 2014
  • From: Toronto
Posted by Rob S. on Saturday, December 13, 2014 3:15 PM

Theuns, I bet your matt coat will definitely tone everything down. I really did on my Thud.

I got some bench time today, but, spent most of the day bringing back rivet details that I had previously sanded off. Also, I had an interesting time highlighting the panel lines. Because I had the primer, pre-shade, enamel Gull Grey and then two-coats of Future, I decided to re-scribe all the panel lines. Well, lo-and-behold, the re-scribing came out almost as though I did a pin-wash, SO, I decided to go with it. I will have to pin-wash the white underside, though. The biggest pain was pin-vice twisting hundreds of rivets. They were so shallow, no amount of pin-washing would have brought them out, so, again, the colour came out dark enough to allow them to stand out, if, however, they are a bit largish (I find the Hase rivet details are bit big in 1/72):

Decalling and oil pin-wash detailing starting tomorrow and then on to landing gear. AND, then that MASSIVE bomb-load!!

______________________________________________________________________________


On the Bench: Nothing on the go ATM

  • Member since
    May 2009
  • From: Poland
Posted by Pawel on Saturday, December 13, 2014 3:51 PM

Gentlemen, beautiful models ang great progress to be seen here lately! Congratulations!

Have a nice day

Paweł

All comments and critique welcomed. Thanks for your honest opinions!

www.vietnam.net.pl

  • Member since
    January 2014
  • From: Toronto
Posted by Rob S. on Monday, December 15, 2014 6:00 PM

Here's a quick update of just a 'few' of the hundreds (it seems) of decals. This is just the large decals...there are TONS of micro small ones to go. Also, I am in progress of sanding off the boiler plates as I missed that during assembly...oh well, thanks for the tip Nathan...I gotta pay closer attention Embarrassed. I considered saying to heck with it, but, it would bug me Angry:


______________________________________________________________________________


On the Bench: Nothing on the go ATM

  • Member since
    July 2004
  • From: Sonora Desert
Posted by stikpusher on Monday, December 15, 2014 10:24 PM

Damn that is pretty!


F is for FIRE, That burns down the whole town!

U is for URANIUM... BOMBS!

N is for NO SURVIVORS...

       - Plankton

LSM


  • Member since
    April 2010
Posted by Theuns on Monday, December 15, 2014 10:43 PM

I have always liked the bold colorfull markings of that eras ship based planes :-)

Looking very good.

I am busy with the Thud's undercart, man it is a fiddly not so nice job :-(

Theuns

  • Member since
    March 2010
  • From: MN
Posted by Nathan T on Tuesday, December 16, 2014 12:28 AM

Nice decal work Rob. Hope I didn't cause you too much trouble with the boiler plate comment!Confused. Looks like you got it fixed up nicely.

Theuns- The Trumpy gear on that kit is thin and fiddly indeed! I've read alot of folks like to rob the gear legs from the old Monogram kit. I plan on reinforcing them a bit with some flat sprue, .020" strip or so. Its got a help a bit while not looking too out of wack at the same time. 


  • Member since
    January 2014
  • From: Toronto
Posted by Rob S. on Tuesday, December 16, 2014 4:31 AM

Nope Nathan, on the contrary, it was a good kik in my butt....teaches me to slow down and pay closer attention to detail...much appreciated!! One of the biggest reasons I love to build on this site.

______________________________________________________________________________


On the Bench: Nothing on the go ATM

  • Member since
    January 2014
  • From: Toronto
Posted by Rob S. on Wednesday, December 17, 2014 5:44 AM

ALMOST done this build! Because it's xmas leave period (and I'm still at work for the week), and, there's literally nobody around, I got tons of bench time this week so far, thus, this F-4B is one step from done. Poured tons of time into the massive weapons load, weathering and the final matt coat (decanted Testors Dull Coat). For the bombs, each was painted Olive green, then I made a jig out of an old biplane wing with a hole drilled into it to mask each bomb's yellow nose ring. Anyway, it was great to have so much free time:

Each bomb (18 of 'em) got this treatment with the 'wing jig':

I couldn't resist doing this layout!!! (Note: NO canopy intalled yet, that's yet to come)

Bombs slung on left side:

Boiler plates successfully sanded off:

Here's what's to be done today: Canopies and windscreen to be finished and installed:

Cockpit close'er up..posted these pics now as it will be harder to see after canopy install:

Full weapons load:

Final pics, with neutral background will be up after I finish, thanks for lookin'!

______________________________________________________________________________


On the Bench: Nothing on the go ATM

  • Member since
    April 2010
Posted by Theuns on Wednesday, December 17, 2014 9:37 AM

Rob that is looking very cool!

I must admit that I am getting a little tired of this lengthy Thud build now.

Cool idea for the yellow rings. When I did mine I painted the bombs and then dipped the noses in the yellow paint pot, worked a treat LOL

Theuns

  • Member since
    February 2014
  • From: Michigan
Posted by silentbob33 on Wednesday, December 17, 2014 12:58 PM

Looks great Rob!

On my bench: Academy 1/35 UH-60L Black Hawk

  • Member since
    July 2004
  • From: Sonora Desert
Posted by stikpusher on Wednesday, December 17, 2014 2:30 PM

Phabulous work RS!!!! That is looking mean and gorgeous! That painting jig is also a great idea... I may have to borrow it...


F is for FIRE, That burns down the whole town!

U is for URANIUM... BOMBS!

N is for NO SURVIVORS...

       - Plankton

LSM


  • Member since
    January 2014
  • From: Toronto
Posted by Rob S. on Wednesday, December 17, 2014 3:05 PM

Thanks guys, got back at it today and finished 'er off, oh, and Stik...for the front page, she's a 1/72 Hasegawa F-4B Phantom II (Gonna grab a badge, too Big Smile):

______________________________________________________________________________


On the Bench: Nothing on the go ATM

  • Member since
    January 2011
  • From: Commonwealth of Virginia
Posted by Tal Afar Dave on Wednesday, December 17, 2014 3:40 PM

Dang Rob!  That is one sweet Phantom!  Love the way the rescribing made the panel lines pop out!  Really nice!!

TAD

2022 New Year's Resolution:  Enter 1 group build and COMPLETE a build this year!!  Why Photobucket did you rob me of my one Group Build Badge???  Must be part of the strong anti-Monogram cartel!!!

 ]

  • Member since
    July 2004
  • From: Sonora Desert
Posted by stikpusher on Wednesday, December 17, 2014 7:16 PM

RS, that is simply gorgeous! Take your GB badge and fly it with well earned pride! Thank you for participating here... I'll get it added to the front page tomorrow when I am off work and at my desktop.


F is for FIRE, That burns down the whole town!

U is for URANIUM... BOMBS!

N is for NO SURVIVORS...

       - Plankton

LSM


  • Member since
    March 2010
  • From: MN
Posted by Nathan T on Wednesday, December 17, 2014 7:31 PM

About time I entered hereWhistling

Decided on this:

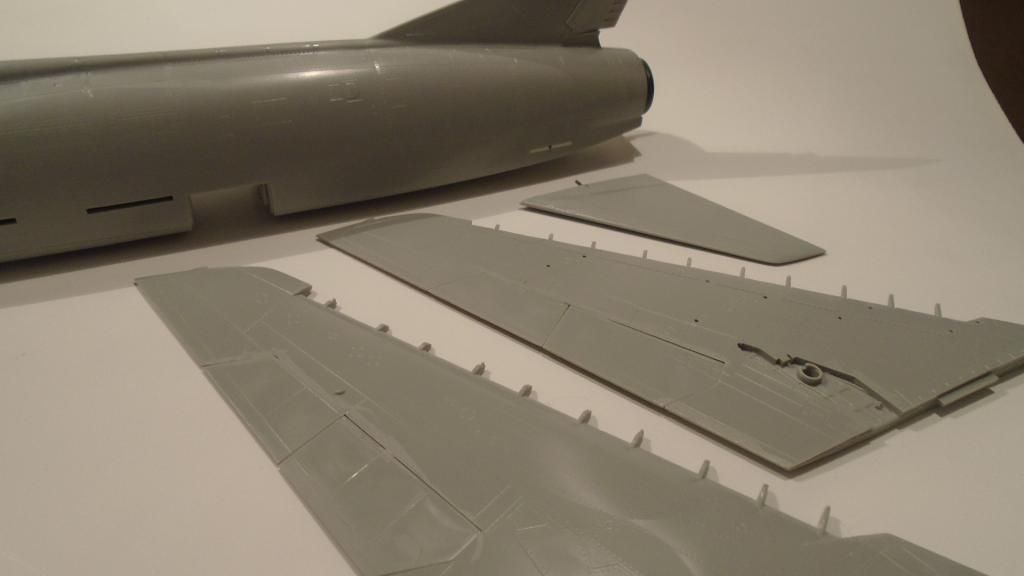
Am includes Aires wheels, cause Trumpeters are the size of Mac Truck tires, Masks, Master Model pitot tube, and not pictured are Aires cockpit and exhaust Nozzle. I gotta say this looks like one of Trumpeter's better 1/48 kits. Rivet detail is not over done and the panel lines are crisp and even. Just never mind the kit's own inaccuracies...

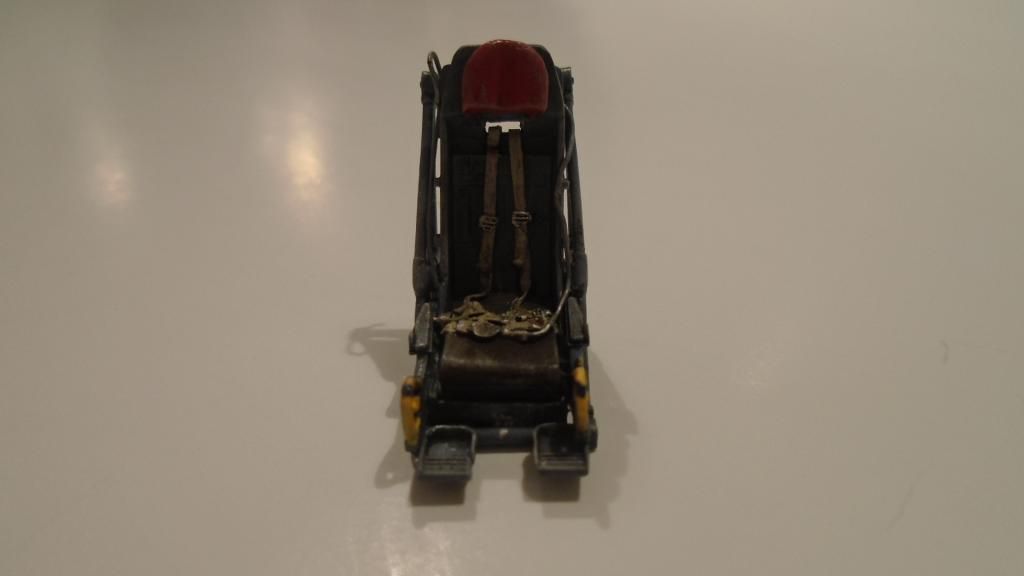
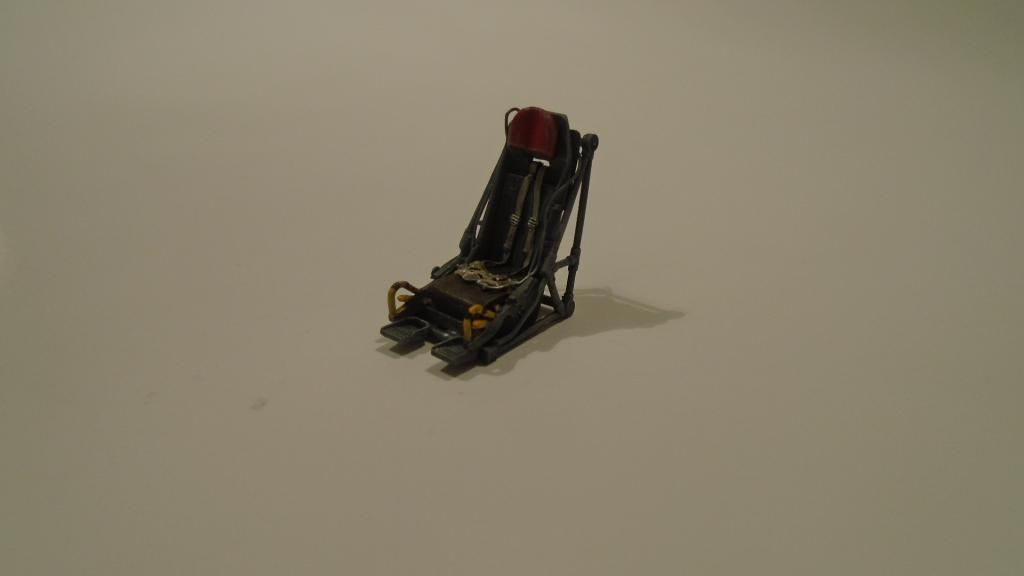
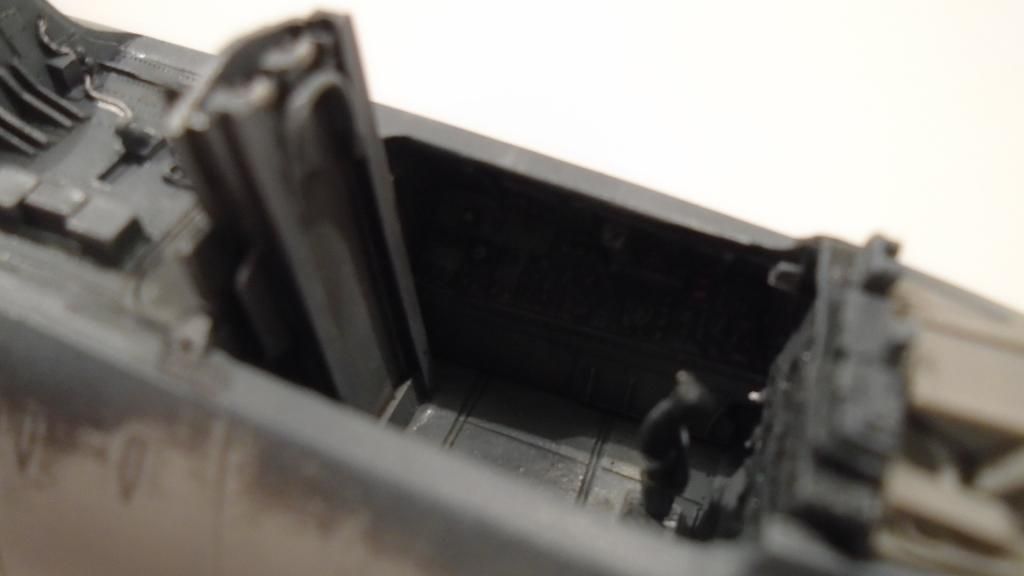
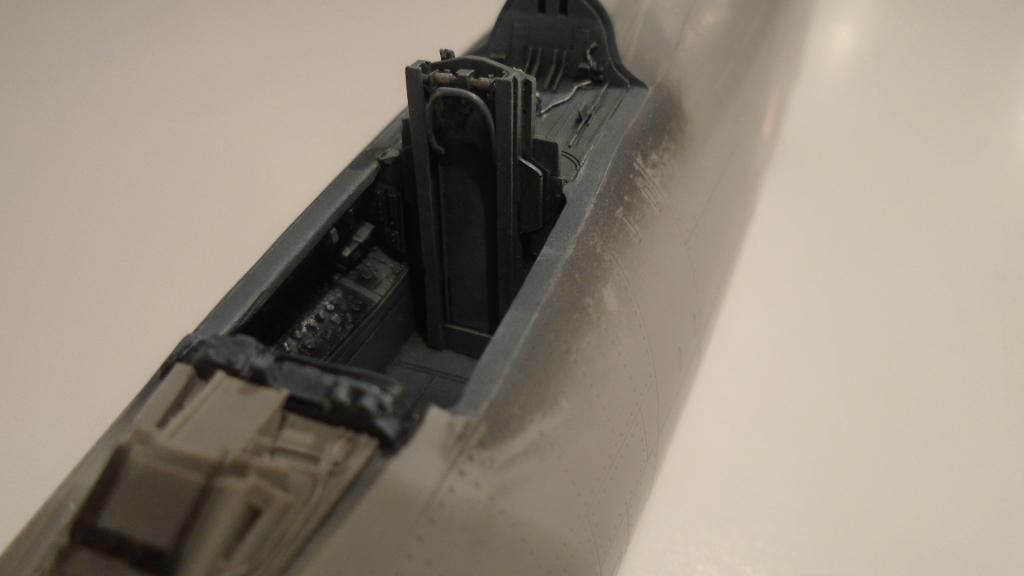
First up is the Aires cockpit. It's more accurate than the kit pit but the seat is still a bit off. It sits in the tubular frame a little weird and the ejection rails are a bit too short. I also think the back rest padding isn't supposed to be there? Anyway its all painted up and awaiting installation:

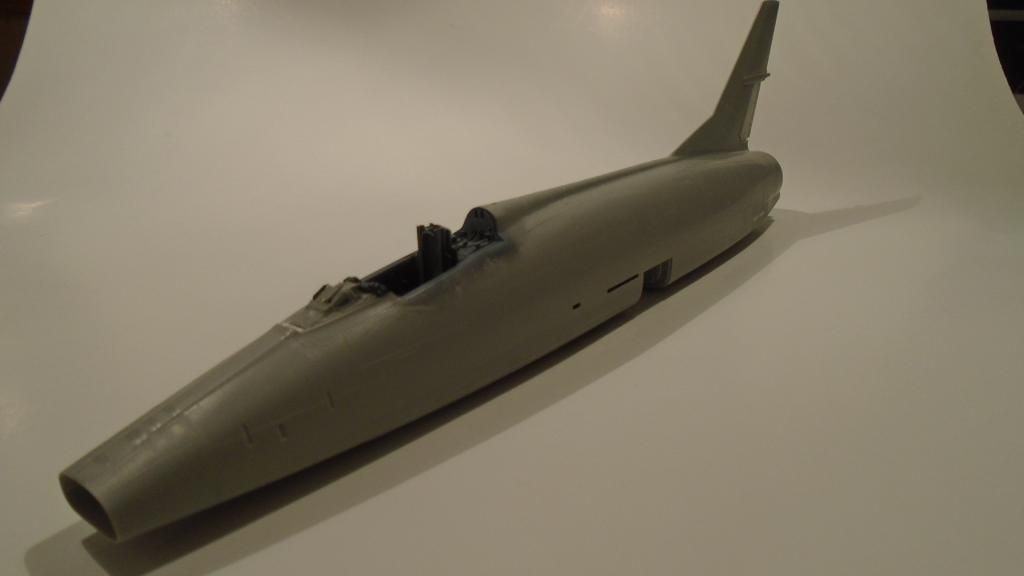
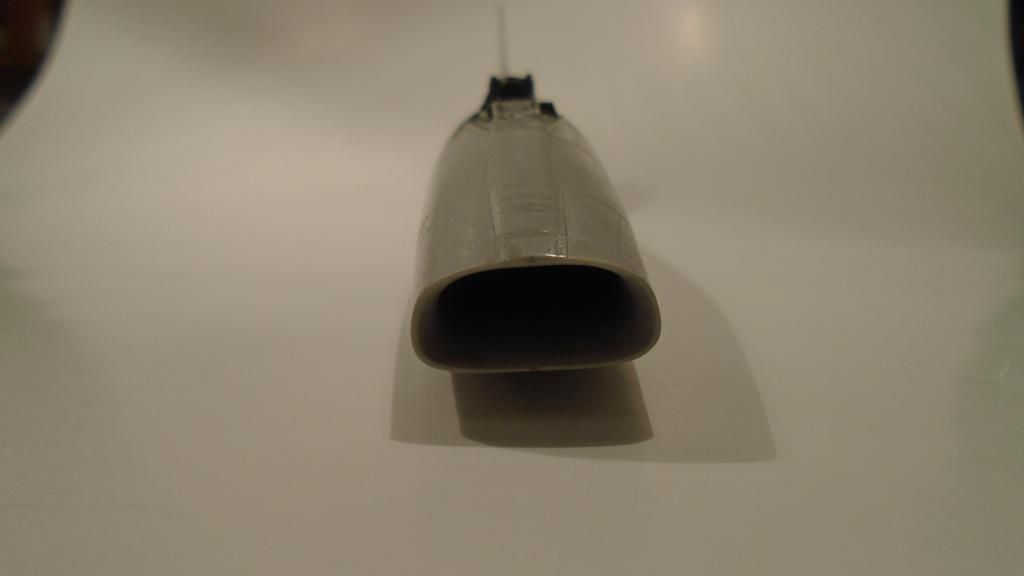
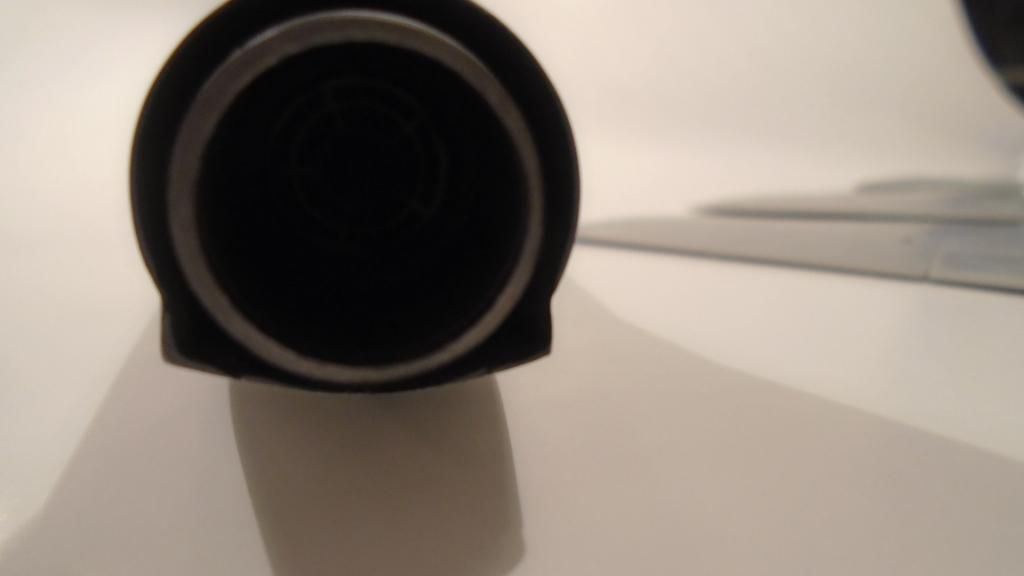
I got the cockpit fitted with lots of fuss and grinding. It has to sit on top of the intake trunking and there is no positive locating means at all. Lots of dry fitting was in order. Same goes for the exhaust pipe. The fusleage halves fit almost perfectly. The only issue with them and the rest of the kit parts is the sprue attachment points. They are thick and overlap the edge of each part, making trimming a pain. Here's the fuselage with everything stuffed inside:
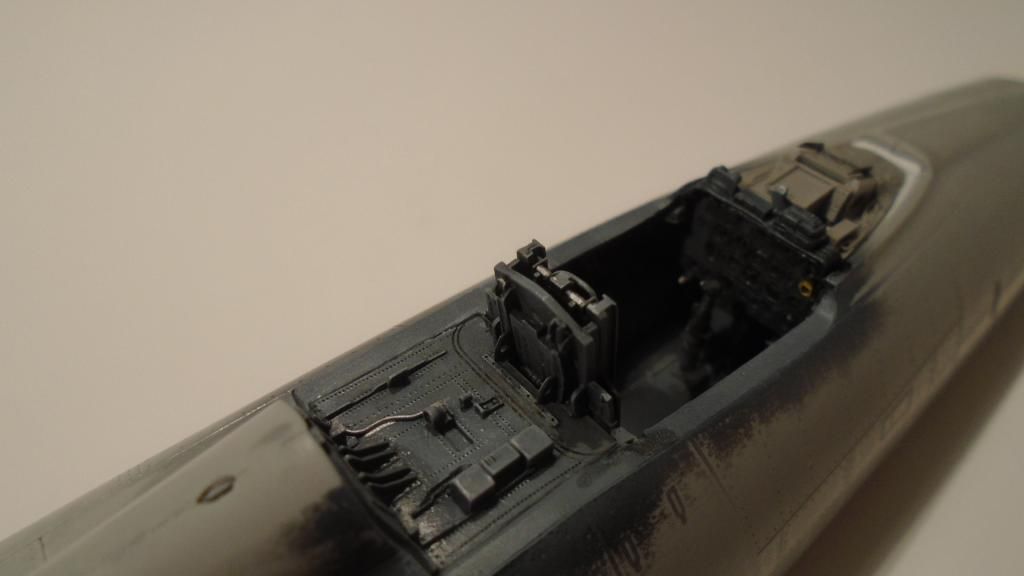
Cockpit close ups:

Intake seams sanded:

Not much putty at all needed on the top and bottom seams:

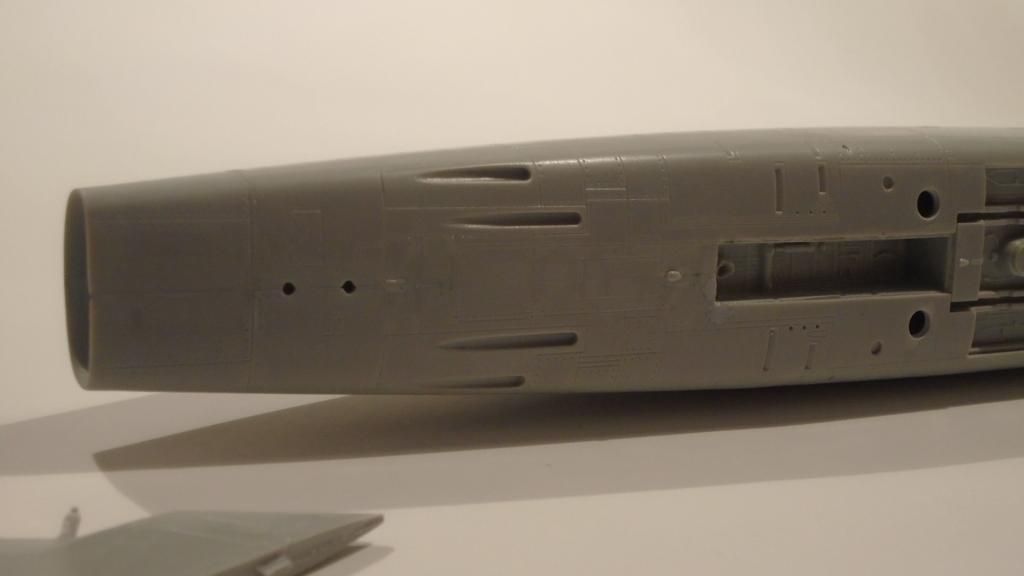
There was a long, raised mold line that needed to be sanded out along the edge of each fuselage half. I did some rescribing afterwards.

The stabilators attach solid with a slot molded in the fuselage halves. I wanted to pose mine down so I filled the slot and added a aluminum rod in the stabilator end:

A look down the backside:

Now to fit the wings to the fuselage. This jet is gonna be pretty large once the main assembly is done. More on the way!


  • Member since
    January 2014
  • From: Toronto
Posted by Rob S. on Thursday, December 18, 2014 8:51 AM

Great start Nathan...I love that plane and Trumpeter does do a good kit. I did the 1:72 version (of course, lol). Yes

______________________________________________________________________________


On the Bench: Nothing on the go ATM

  • Member since
    December 2002
  • From: Bury St Edmunds, Suffolk, England
Posted by Bish on Thursday, December 18, 2014 2:19 PM

WOW Rob, that is one really nice Phantom. Really nice weathering and iot sure looks like someone is about to cope a world of hurt with that load.

And is it me, or have you changed your screen name. I didn't know you could do that.

I am a Norfolk man and i glory in being so


On the bench: Airfix 1/72nd Harrier GR.3/Fujimi 1/72nd Ju 87D-3

  • Member since
    December 2002
  • From: Bury St Edmunds, Suffolk, England
Posted by Bish on Thursday, December 18, 2014 2:20 PM

Great star Nathan, that seat looks very nice.

I am a Norfolk man and i glory in being so


On the bench: Airfix 1/72nd Harrier GR.3/Fujimi 1/72nd Ju 87D-3

  • Member since
    March 2010
  • From: MN
Posted by Nathan T on Thursday, December 18, 2014 3:06 PM

Thanks Rob and Bish. For my first Trumpeter kit, looks like I picked one of their better ones.


  • Member since
    January 2014
  • From: Toronto
Posted by Rob S. on Thursday, December 18, 2014 5:27 PM

You can't beat the price for such good quality.

______________________________________________________________________________


On the Bench: Nothing on the go ATM

  • Member since
    July 2004
  • From: Sonora Desert
Posted by stikpusher on Thursday, December 18, 2014 9:45 PM

Nathan, that seat at cockpit looks very nice!

Rob, your Phantom has been added to the front page photos... once again, very well done sir!


F is for FIRE, That burns down the whole town!

U is for URANIUM... BOMBS!

N is for NO SURVIVORS...

       - Plankton

LSM


  • Member since
    January 2014
  • From: Toronto
Posted by Rob S. on Friday, December 19, 2014 5:12 AM

Thanks Stik...it was a fun build.

______________________________________________________________________________


On the Bench: Nothing on the go ATM

  • Member since
    May 2009
  • From: Poland
Posted by Pawel on Saturday, December 20, 2014 5:50 PM

Nice! At last some more vehicles here - that M113 won't be so lonesome now! Good luck with your build!

Paweł

All comments and critique welcomed. Thanks for your honest opinions!

www.vietnam.net.pl

  • Member since
    January 2013
Posted by jibber on Saturday, December 20, 2014 6:47 PM

Thanks Pawel

  • Member since
    July 2004
  • From: Sonora Desert
Posted by stikpusher on Sunday, December 21, 2014 2:14 PM

Yes, my 113 gets some long needed company... 

I forgot to post this update here on Friday evening. I resumed work to get some interior paint colors started...

OD on the bench seat cushions, flat black on the TC's stand, seat, drivers's seat and squad leader's seat, aluminum on the removable floor plates, some other colors on the instrument panel, IR drivers periscope head, and radio...

the colors were still drying when I took the photos, so that is why there is some shine on the bench seat cushions... As usual the Humbrol colors dried to their standard dead flat finish later on...


F is for FIRE, That burns down the whole town!

U is for URANIUM... BOMBS!

N is for NO SURVIVORS...

       - Plankton

LSM


  • Member since
    February 2014
  • From: Michigan
Posted by silentbob33 on Sunday, December 21, 2014 3:44 PM

Looks good Stik.  I finished my Phantom, hopefully I'll be able to get some pics posted later this evening.

On my bench: Academy 1/35 UH-60L Black Hawk

  • Member since
    January 2014
  • From: Toronto
Posted by Rob S. on Sunday, December 21, 2014 3:46 PM

Right on thus far Stik!! Love the 113. Worked in one for a time (and the M577), so, they are near and dear. Looking forward to more.

______________________________________________________________________________


On the Bench: Nothing on the go ATM

JOIN OUR COMMUNITY!

Our community is FREE to join. To participate you must either login or register for an account.

SEARCH FORUMS
FREE NEWSLETTER
By signing up you may also receive reader surveys and occasional special offers. We do not sell, rent or trade our email lists. View our Privacy Policy.