SEARCH FINESCALE.COM

Enter keywords or a search phrase below:

Mustang Build

80038 views
1582 replies
1 rating 2 rating 3 rating 4 rating 5 rating
  • Member since
    June 2010
Posted by 5-high on Wednesday, February 3, 2016 5:30 PM

got it home and opened it and ,,,,,,,,,,looked at ,,,,,,WOW.Surprise. there more rivetes then the revell spitfire!!!..but then i remember doing this in the late 70's . i think i,ll put this one away till i buy a few AM stuff. packed in poland ..canopy blows ..and i think i,ve cut my finger running it across the rivet detail!!.  ha ha lolWink

5-high

  • Member since
    July 2014
Posted by modelcrazy on Wednesday, February 3, 2016 5:38 PM
I was looking at this kit at HL and curious about it. So the rivet detail is raised, how about the panel lines? Is it a repop of their old mold or a new mold if you can tell?

Steve

Building a kit from your stash is like cutting a head off a Hydra, two more take it's place.


http://www.spamodeler.com/forum/

  • Member since
    December 2015
Posted by Kyuzo on Wednesday, February 3, 2016 5:46 PM

10 BUCKS!?!? I'm jealous 

  • Member since
    June 2010
Posted by 5-high on Wednesday, February 3, 2016 7:46 PM

sorry for the late repley ....cookin dinner 

well model crazy it looks like the old molding ..same agly canopy with that hinge for the movable glazing .just down loading pic,s to photobucket

stay tuned ..5

  • Member since
    June 2010
Posted by 5-high on Wednesday, February 3, 2016 8:24 PM

while im waiting . were im liveing ,, here in prince george bc . we only have one true hobby store ,,,if i can call it that ,,,,thay rarely have 1/32 scale planes and if thay do it,s the mega priced one,s (ie tamiyas corsair at $170.00 or the airfix tempest ..at ....wait for it.............$300 Indifferent . when i saw this on the shelve the guy next to me only saw a blerr .Smile Burger

  • Member since
    June 2010
Posted by 5-high on Wednesday, February 3, 2016 8:43 PM

modelcrazy its all raised .. remember the old hawker hurricane ?  its just like that but more ..its a pincushion. the decals are rather thick , typical revell  1970,s  decal for the IP . the color is great and in registerSurprise. the prop is so skinny at first i thought its for a P-47 thunder bolt ..( garbage). dont get me wrong guys .with some elbow greese and a bunch of AM peicess it,ll make a nice mustang . 

  • Member since
    June 2010
Posted by 5-high on Wednesday, February 3, 2016 9:39 PM

ok here,s the pic,s starting with the decals. 

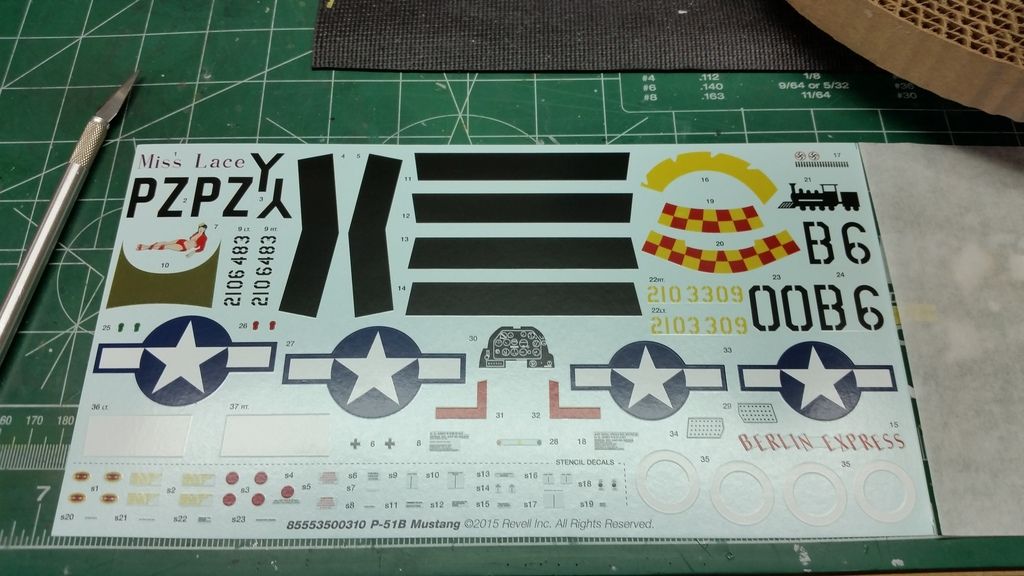
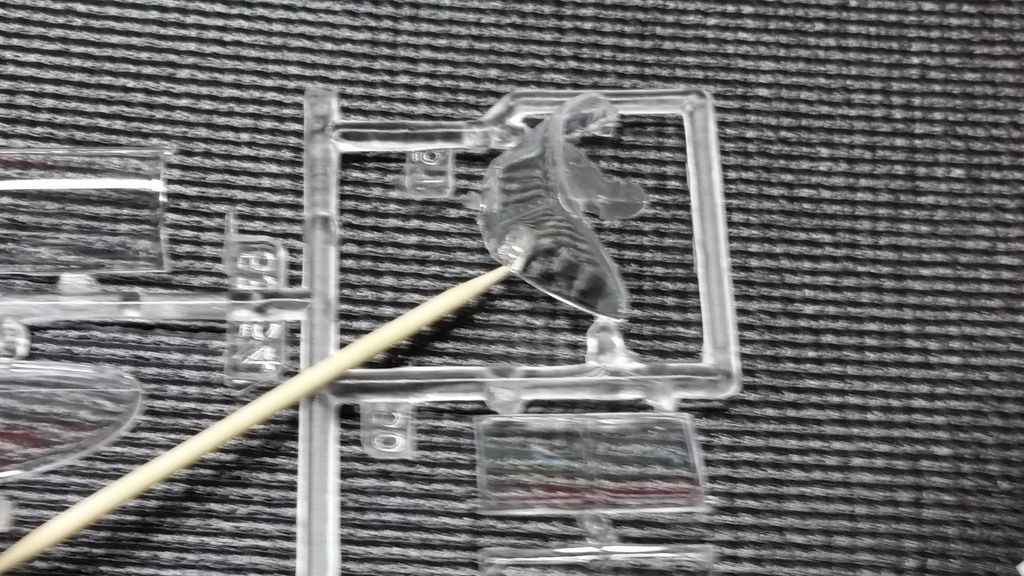
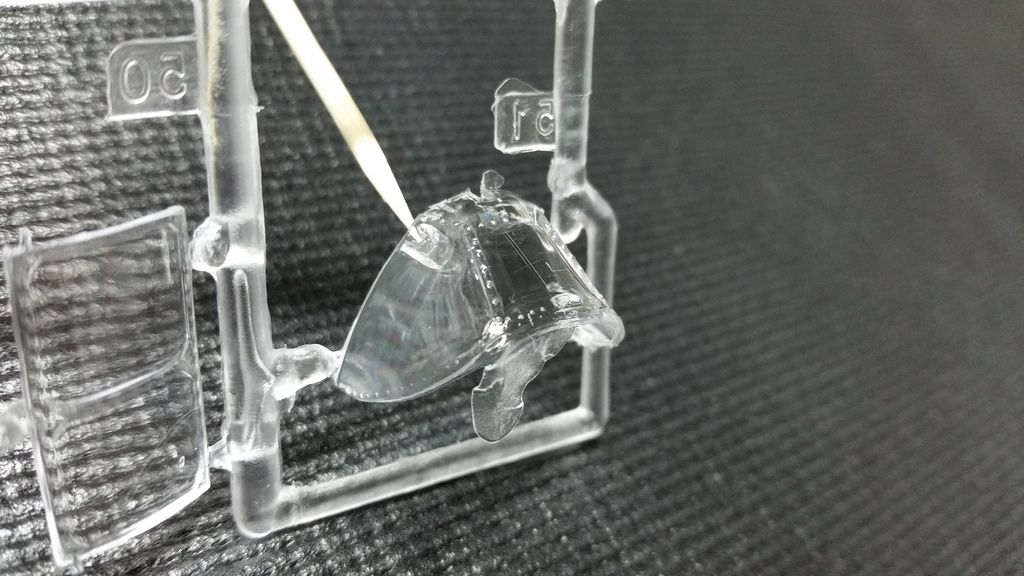
the glass is rather poor , the toothpick shows that gimicky hinge and theres alot of flash.

oops sorry Embarrassed

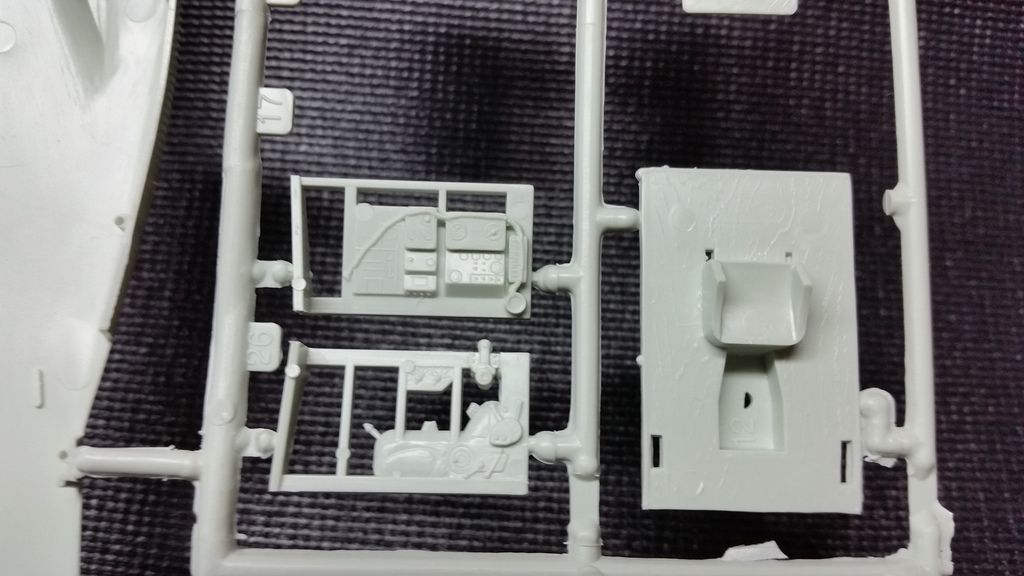
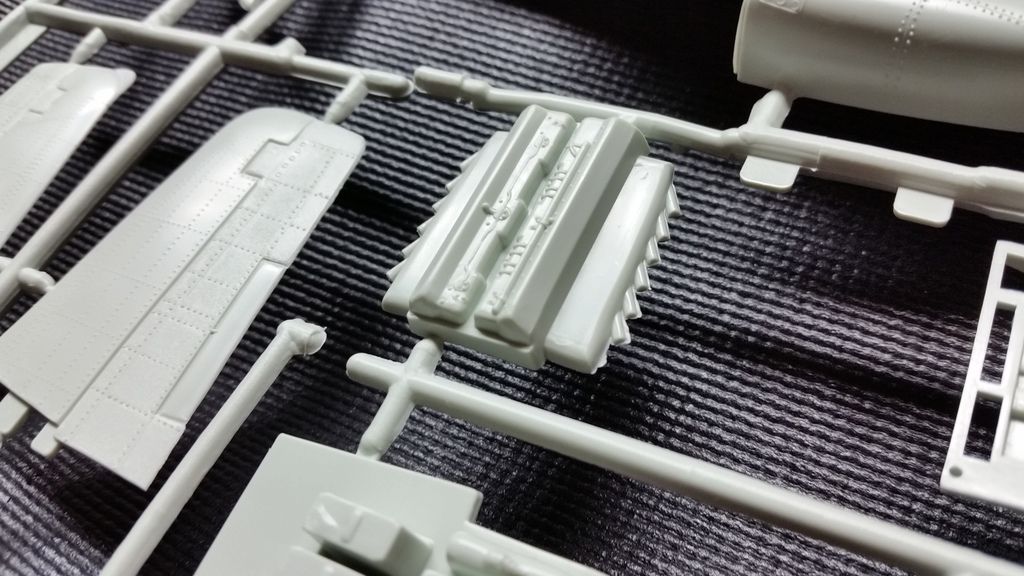
ok moveing along ,,,he he he ..theres no guns 

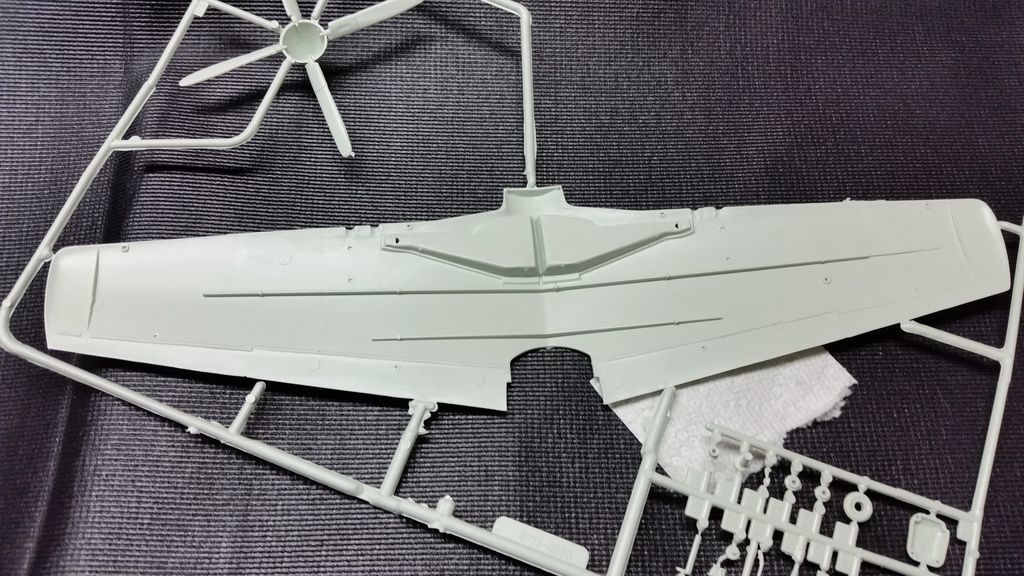
i,ll have to buy resin cockpit 

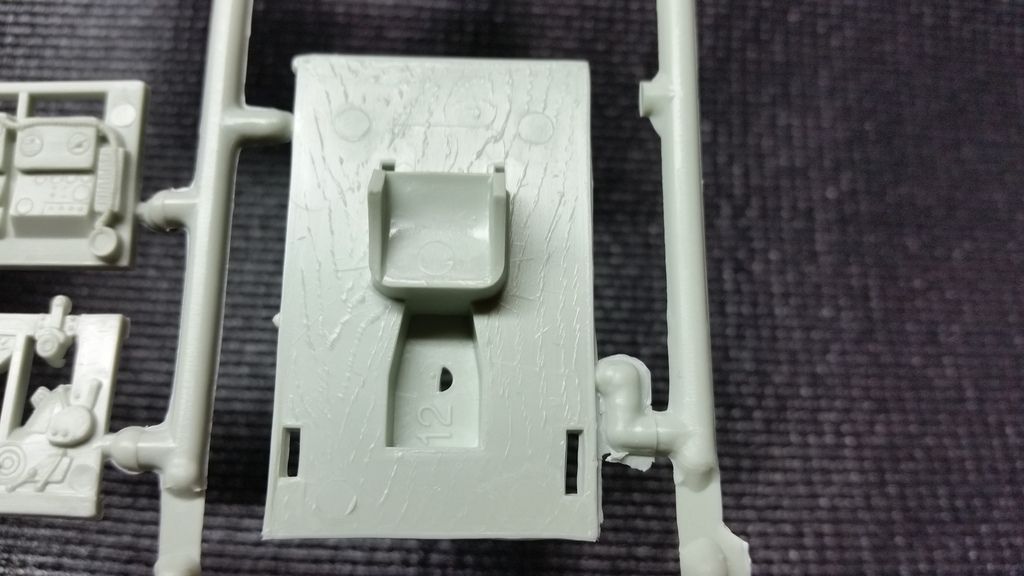
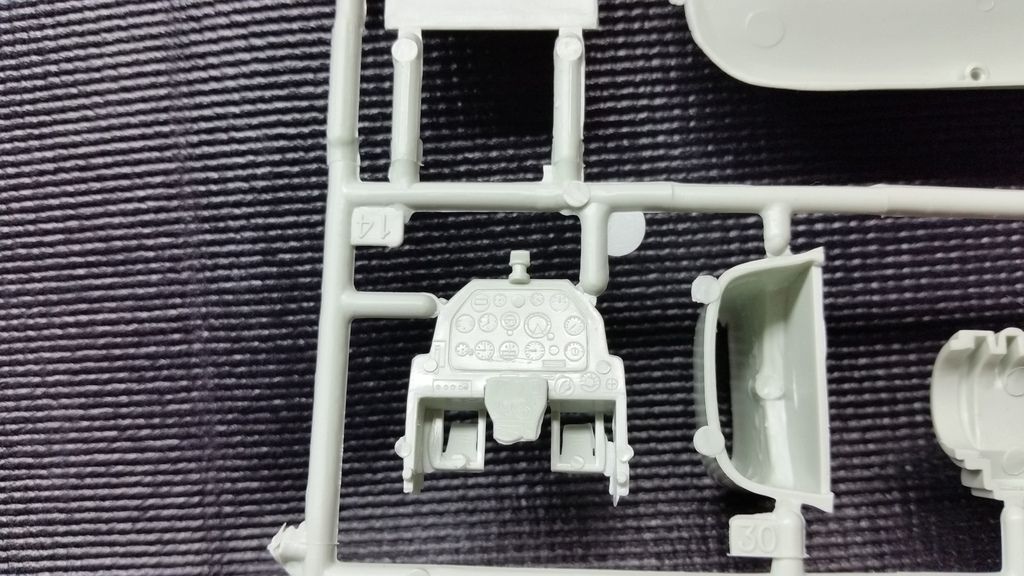
it looks like a ummmm

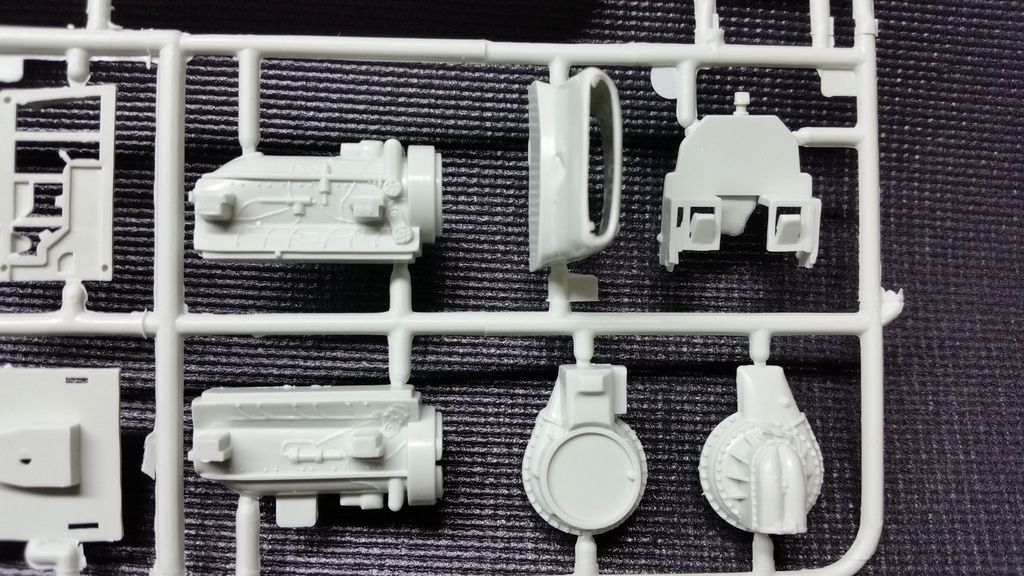
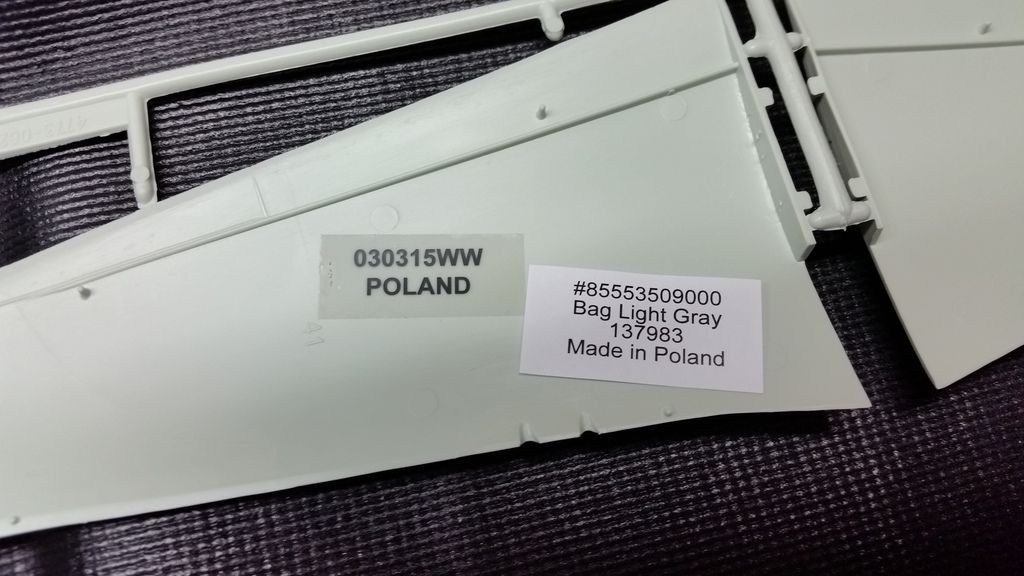
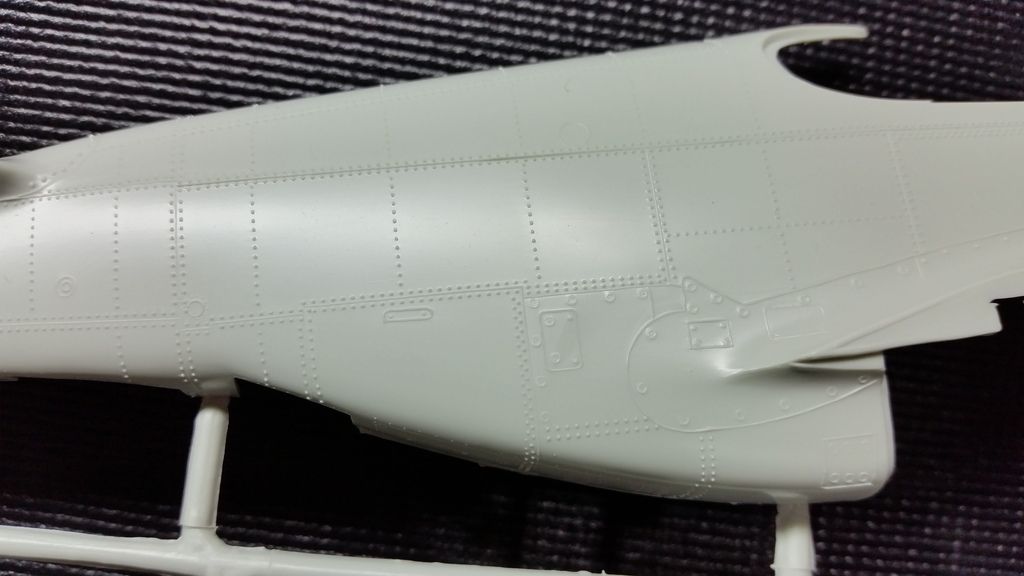
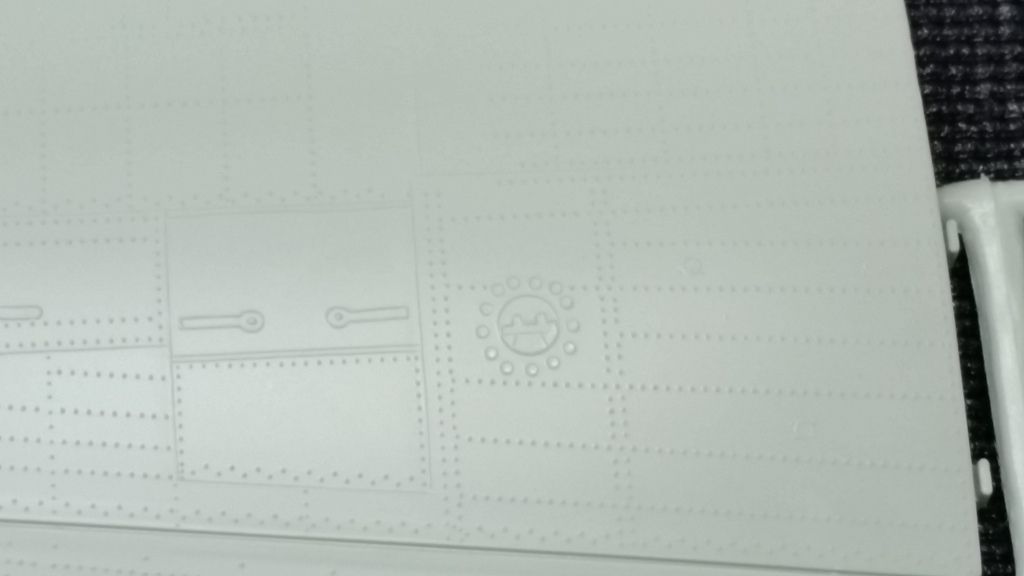
raised rivets and panel lines 

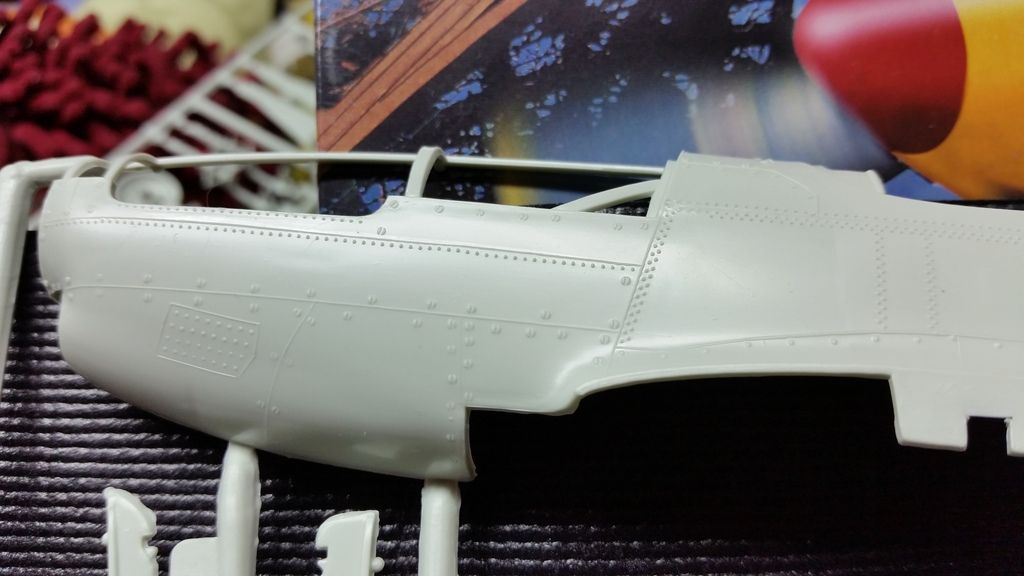
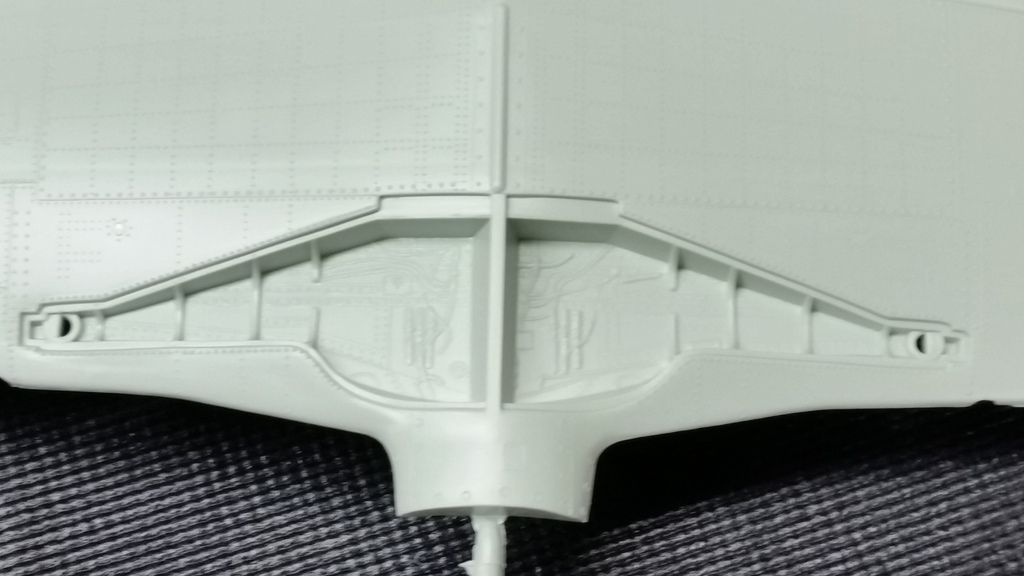
definite resin wheels and wheel bay
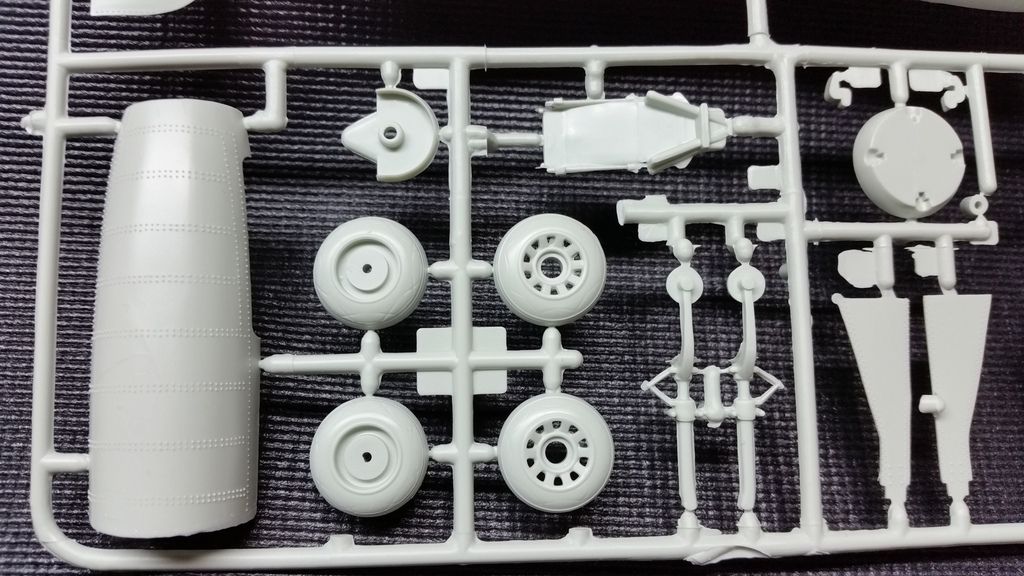
and prop --spinner 

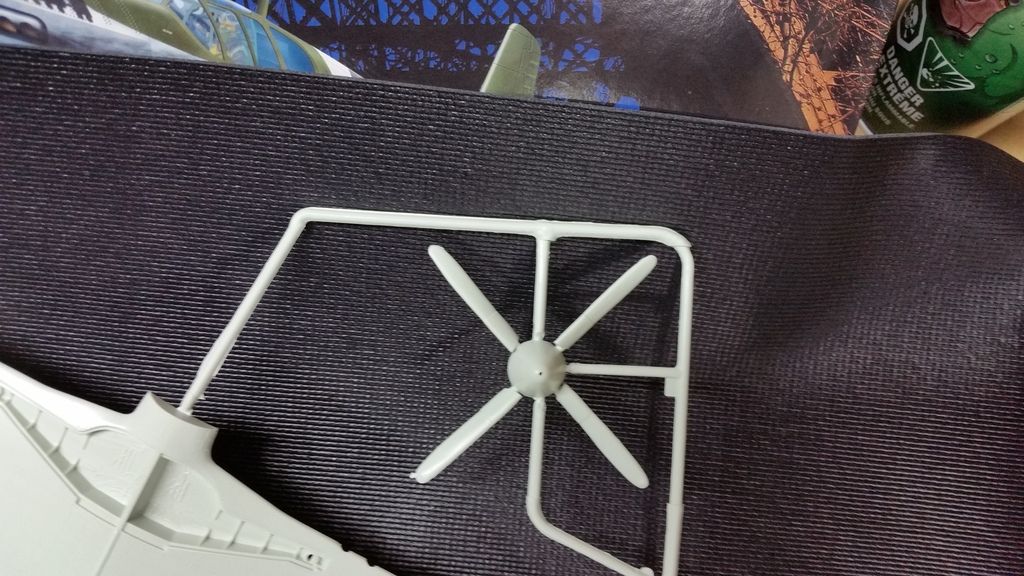
so there you have it ,, was it worth the 10 bucks ??....i think so ..with some sanding ..and rescribing of the key panel lines . throw in some after market , oh and  lot of time im sure i,ll make it work ....but for now i,ll put her back in the stash. Wink

sure glad i save those trumpeter engines ,ie allisons (ala p-38 --p-51 merlin--bf,s 605s )

5-high

  • Member since
    June 2010
Posted by 5-high on Wednesday, February 3, 2016 9:48 PM

oh i almost forgot ,,its was 1980 ..made in USA ,,,packed in polandHuh?

  • Member since
    July 2014
Posted by modelcrazy on Wednesday, February 3, 2016 10:50 PM
Thanks for the peek 5, I think I'll pass for now. I have tons to do this year and I don't feel like putting MORE PE and AM to make a build look good. I have full confidence that you will make a great looking build out of it when you get to it.
To answer your question about the Merlin, here it is. Speaking of AM, I have to come up with it. The instructions are sketchy at best. I need to refer to pictures of Merlins to try to find the answers. And as many pictures there are, there are just some areas that aren’t pictured.
Anyway, here it is at the moment. A few more fuel lines and wires and I’ll paint it up. The tough part will be constructing the hose clamps for the radiator hoses.


Steve
 

Steve

Building a kit from your stash is like cutting a head off a Hydra, two more take it's place.


http://www.spamodeler.com/forum/

  • Member since
    June 2010
Posted by 5-high on Thursday, February 4, 2016 1:00 AM

Modelcrazy your very welcome. 

And I must say that's one hunk of resin. Surprise...it's looking very good. Your doing great there .I know what you mean by that , I too have trouble finding what I need on subjects. 

5-high 

  • Member since
    June 2010
Posted by 5-high on Thursday, February 4, 2016 1:08 AM

Modelcrazy your very welcome. 

And I must say that's one hunk of resin. Surprise...it's looking very good. Your doing great there .I know what you mean by that , I too have trouble finding what I need on subjects. Clamps. .yea that's going to be tough. 

5-high 

  • Member since
    June 2010
Posted by 5-high on Thursday, February 4, 2016 1:12 AM

Oops .sorry for the bubble post Embarrassed

5-high 

  • Member since
    July 2013
Posted by lzdaily@comcast.net on Thursday, February 4, 2016 5:23 AM

Steve,

The Merlin is looking good.

Larry

  • Member since
    June 2010
Posted by 5-high on Friday, February 5, 2016 8:25 PM

Awww ..GREAT !! ..RIGHT IN THE MIDDLE OF PAINTING. ..THE POWER WENT OUT !!!Bang Head...EMERGENCY CLEAN OUT OF THE PAINT CUP . ..

HOPEFULLY THE POWER COMES BACK ON .....TIME TO BREAK OUT AND FIRE UP THE T-REX'ESBang Head

  • Member since
    January 2003
  • From: Chantilly, Virginia
Posted by CNicoll on Friday, February 5, 2016 9:28 PM

My first post for my build.  Building the 1/48 Tamiya Mustang III, using the Techmod sheet 48033 for the Polish squadron.  Building Wing Commander Jan Zumbach's JZ HB868aircraft from August 1944.

Starting with preshading the panel lines, hitting the tires, and then onto the cockpit.

Here is the start to the cockpit.  The fuel tank is hand painted to give it some texture - which in this scale is still pretty hard to see. 

The instrument panel center section has a coat of gloss to get ready for the instrument decal. The instrument decal is black, so for contrast the rest of the panel is painted a dark grey.

Before adding the instrument panel, I used the Flory black wash to bring out some of the details of the aluminum base behind the seat and the cockpit interior.  The base of the fuel tank won't be seen once the fuselage is closed up.  The interior colors are Model Master acrylics - RAF Interior Green, with some highlights in Dark Green.

The control column was painted Interior Green to add yet another shade to the cockpit.  The instrument panel decal is not fantastic, but since this is an Out of the Box build, it will do and I'll be using the Malcom Hood, which in this kit is only available closed so lots of this detail will not be seen anyway.  May also use the pilot figure.  Prismacolor pencils added detail and simulated chipping.

Up next is closing up the fuselage.  Comments are welcomed!

On the bench:  Academy 1/72 B-17G 'Blue Hen Chick';  1/48 Tamiya Mustang III; Kitty Hawk 1/32 P-39. 

Completed:  1/48 Tamiya P-51D Mustang - 'Show Bird', 1/32 Dragon P-51D  Flying Tigers 'What if'; 1/32 Tamiya P-51D Big Beautiful Doll

Group build:1/48 Tamiya Mustang III; 1/48 Tamiya P-51D Show Bird

  • Member since
    June 2010
Posted by 5-high on Friday, February 5, 2016 9:59 PM

CN

NICE START ON OFFICE  .I.LL BE WATCHING THIS ONE .Yes.

5-high. ..still sitting in the dark .Indifferent

  • Member since
    January 2003
  • From: Chantilly, Virginia
Posted by CNicoll on Friday, February 5, 2016 9:59 PM

Thanks!  Wish I could send some electricity your way!

On the bench:  Academy 1/72 B-17G 'Blue Hen Chick';  1/48 Tamiya Mustang III; Kitty Hawk 1/32 P-39. 

Completed:  1/48 Tamiya P-51D Mustang - 'Show Bird', 1/32 Dragon P-51D  Flying Tigers 'What if'; 1/32 Tamiya P-51D Big Beautiful Doll

Group build:1/48 Tamiya Mustang III; 1/48 Tamiya P-51D Show Bird

  • Member since
    July 2014
Posted by modelcrazy on Friday, February 5, 2016 10:05 PM

5,
I hope you were able to get your airbrush cleaned out.

CNicoll,
I need to try some Flory wash one of these days. I like the Malcom Hood Mustangs and will be enjoying your build.

Steve

Steve

Building a kit from your stash is like cutting a head off a Hydra, two more take it's place.


http://www.spamodeler.com/forum/

  • Member since
    January 2003
  • From: Chantilly, Virginia
Posted by CNicoll on Friday, February 5, 2016 11:05 PM

Steve,  the Flory wash is good stuff - easy to use and since it is water based, very easy to clean up if you don't like it.  I like the range of colors, too.  I used to make my own, but I never made a lot of it and ran into problems with color consistency if I ran out in the middle of a build. 

Chris

On the bench:  Academy 1/72 B-17G 'Blue Hen Chick';  1/48 Tamiya Mustang III; Kitty Hawk 1/32 P-39. 

Completed:  1/48 Tamiya P-51D Mustang - 'Show Bird', 1/32 Dragon P-51D  Flying Tigers 'What if'; 1/32 Tamiya P-51D Big Beautiful Doll

Group build:1/48 Tamiya Mustang III; 1/48 Tamiya P-51D Show Bird

  • Member since
    June 2010
Posted by 5-high on Friday, February 5, 2016 11:19 PM

CN ....thanks ,, as soon as I looked at yours and models posts ..the electricity came back on Big Smile.

Luckily I dunked  the airbrush front end in a cup of thinner . Thank goodness I keep the old tamiya jars .just in case of these situations. 

5-high 


  • Member since
    June 2013
Posted by bvallot on Saturday, February 6, 2016 9:08 AM

BD, nicely done. =]  Happy to see it.

5, I've been looking forward to doing Overstreet's mustang for a while now.  Always happy to see her again.

Steve, hurry up and slap some paint on that Merlin!! What are you waiting for?! lol =D

Kyuzo, I think you did the right thing with the Metallic Blue.  It's not always apples to apples.  Some things look right for one thing but just can't fit in another world.  Good judgement call there! =]  I think you're on to something.

On the bench:  

Tamiya F4U-1  Kenneth Walsh


  • Member since
    January 2003
  • From: Chantilly, Virginia
Posted by CNicoll on Saturday, February 6, 2016 9:21 PM

Making some progress and by accident ended up with some weathered landing gear doors.  I had painted them flat aluminium (along with a bunch of other things) and was moving on to interior green for the wheel well, when I caught a bit of a wild hair and thought I'd paint the inside of the doors the same green.  I grabbed a post-it note to use as the mask.

Having moved it to do the other side it took up some of the green paint.  I liked the effect and so kept working it.

Starting work on the wheel well.  No wash yet.  Prismacolor silver highlights.

As expected, closing up the fuselage really hides a lot of detail.

More to come!

On the bench:  Academy 1/72 B-17G 'Blue Hen Chick';  1/48 Tamiya Mustang III; Kitty Hawk 1/32 P-39. 

Completed:  1/48 Tamiya P-51D Mustang - 'Show Bird', 1/32 Dragon P-51D  Flying Tigers 'What if'; 1/32 Tamiya P-51D Big Beautiful Doll

Group build:1/48 Tamiya Mustang III; 1/48 Tamiya P-51D Show Bird

  • Member since
    July 2014
Posted by modelcrazy on Saturday, February 6, 2016 9:49 PM

Looking good C, that's a different way of constructing the nose. I've never seen a manufacturer design it in horizontal half's,  but I haven't built a ton of Mustang kits either, so there you go.

Steve

Building a kit from your stash is like cutting a head off a Hydra, two more take it's place.


http://www.spamodeler.com/forum/

  • Member since
    June 2010
Posted by 5-high on Sunday, February 7, 2016 12:37 AM

CN ..looks great. Yes

5-high 

  • Member since
    July 2013
Posted by lzdaily@comcast.net on Sunday, February 7, 2016 8:22 AM

CN,

Looks great so far.

Larry

  • Member since
    June 2010
Posted by 5-high on Sunday, February 7, 2016 12:03 PM

Well ..update on my mustang lll 

Finnished the chipping I think I've over done it .especially the prop blades . So I washed off the chipping on them . Use prismacolor on the wings fuselage and tail ..it's the first time I've done this .

5-high 

Pictures to come this afternoon. 

  • Member since
    June 2010
Posted by 5-high on Monday, February 8, 2016 12:03 AM

well as promised.

as i posted before in the day ..i finnished the chipping on my mustang ..i thought ive over done it being the first for me ..in the past ive never used the pencil (prismacolor silver) before so i thought why not Big Smile i did though over chipped the prop blades , i save,d them by washing them off with the moist Q tip . it would have been outa place (ETO).

so here is some wip pic,s. before the gloss coat (TAMIYA X-22 )thined with x-20a .

little blurry Oops


to my amazement of what i thought i over did . the clear fixed it nicely.here,s the first coat


the flaps

the chipping of the spinner

secound and final coat.

im very happy how the chipping turned out . now i wait ,,Whistling ..till its dry ,,then on to decal,en ,,then weathering ..i may postshade some panels for that england weather,d look .

comments and criticisms are welcome .

5-high ...cheersToast


  • Member since
    November 2003
  • From: Naples, FL
Posted by tempestjohnny on Monday, February 8, 2016 10:00 AM

CN nice start. Nice weathering Pete. 

Got some color on the nose of the B. The D too but I don't have pic of that just the spinner


  • Member since
    July 2014
Posted by modelcrazy on Monday, February 8, 2016 11:23 AM
Pete,
Very nice, I have never use pencils either, but after seeing yours, I need to try.
TJ,
I tried a blue nose on a 1/72 once….I won’t try that again. It was tough enough on a 1/32 for me. You’re able to pull it off, nice job.


Steve

Steve

Building a kit from your stash is like cutting a head off a Hydra, two more take it's place.


http://www.spamodeler.com/forum/

  • Member since
    June 2013
Posted by bvallot on Monday, February 8, 2016 12:27 PM

Hey there 5, I think you may have gone a bit over board with the prismacolor pencil a bit.  Unless you have a photo you're referencing, I doubt you'll see too many ETO Mustangs late in the war that were real beaten up or at least in this fashion.  I've seen some with some chipping around the panels on the wings and certainly you can always expect it around the cowling and moving parts, but not really as much around the rest of the fuselage.  If you happen to like it as it is, then by all means leave it be.  Nice thing about this is it's yours! =]  You can make her the way you want. If you're looking to change it, you could probably get away with either some oil/dry pastel...MiG/AK pigment, or highly diluted paint to tone it down some.  I would do all of that over a flat coat as well.  Do a little at a time and vary your spots you focus on to keep it non-uniform.  You're really just looking to break up how even it is.  Mask things off as needed...it wouldn't be too hard.

She's looking good.  Those stripes really look sharp.  Or rather...not sharp! ;) 


On the bench:  

Tamiya F4U-1  Kenneth Walsh


JOIN OUR COMMUNITY!

Our community is FREE to join. To participate you must either login or register for an account.

SEARCH FORUMS
FREE NEWSLETTER
By signing up you may also receive reader surveys and occasional special offers. We do not sell, rent or trade our email lists. View our Privacy Policy.