SEARCH FINESCALE.COM

Enter keywords or a search phrase below:

Star Trek Group build

21188 views
317 replies
1 rating 2 rating 3 rating 4 rating 5 rating
  • Member since
    November 2009
  • From: SW Virginia
Posted by Gamera on Friday, March 27, 2015 8:44 AM

Lol, the first one would be pretty funny. Personally I think I'd just go with the planet though, seems odd they don't just have a plain starfield or did I miss it?  

"I dream in fire but work in clay." -Arthur Machen


  • Member since
    March 2010
  • From: Boston
Posted by mach71 on Friday, March 27, 2015 9:51 PM

What would be really cool is to mount a small LCD display with a moving star field or rotating planet to the viewscreen!

Lots of work, but it would look cool.

  • Member since
    March 2010
  • From: Boston
Posted by mach71 on Saturday, March 28, 2015 5:40 PM

Between work and traveling I have not been able to get much work done on Spock. I got a few minutes today to work on a troublesome seam. It is in front of his shirt. A bad design on the kit. I put a bit more putty on it. I'll see if that works.

His head is just dry fitted in this photo.

  • Member since
    January 2010
Posted by Klik on Wednesday, April 1, 2015 11:36 AM

Ok, it seems its been a long time, and I hadn't thought to post 'in-progress' pics, so here we go.

I assembled all the major sub-assemblies: main saucer, nacelles, and 'rollbar'. I decided to use a variation of the pre-weathering technique that I used on my 1/2500th Ambassador:

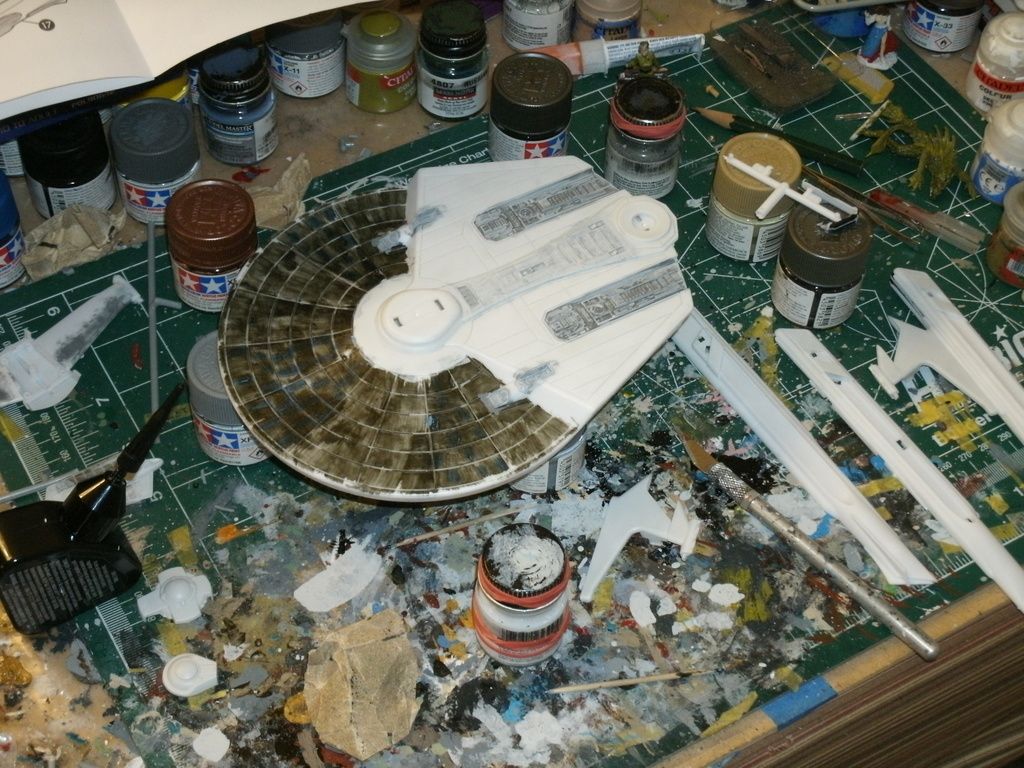
So, form that to this:

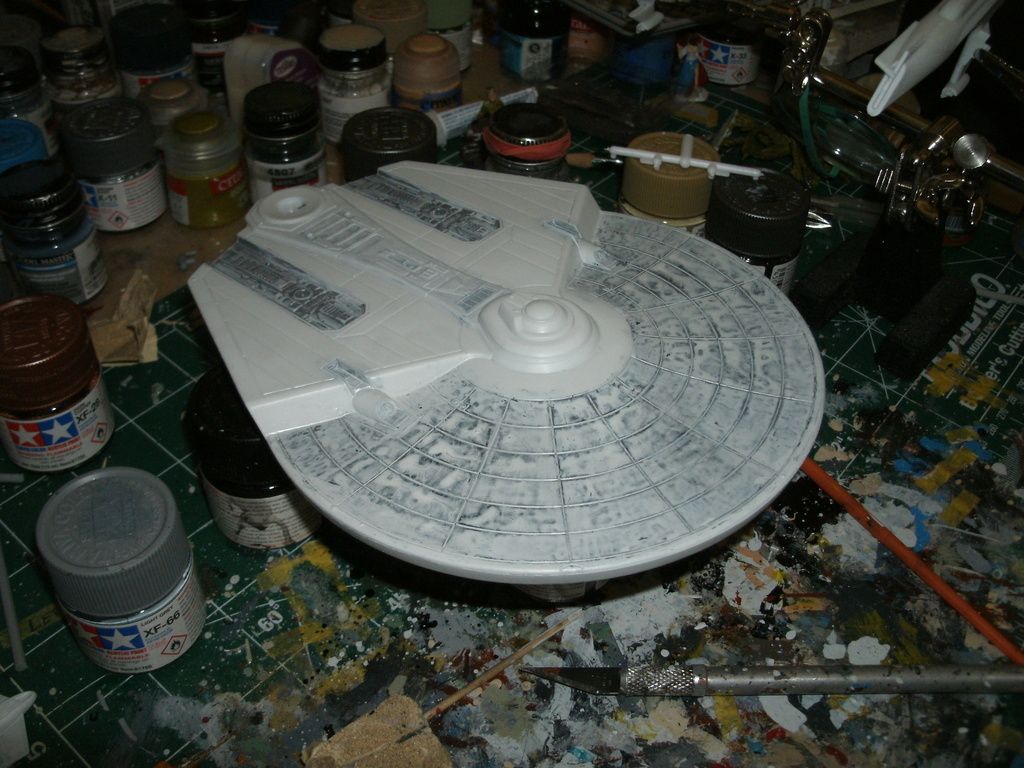
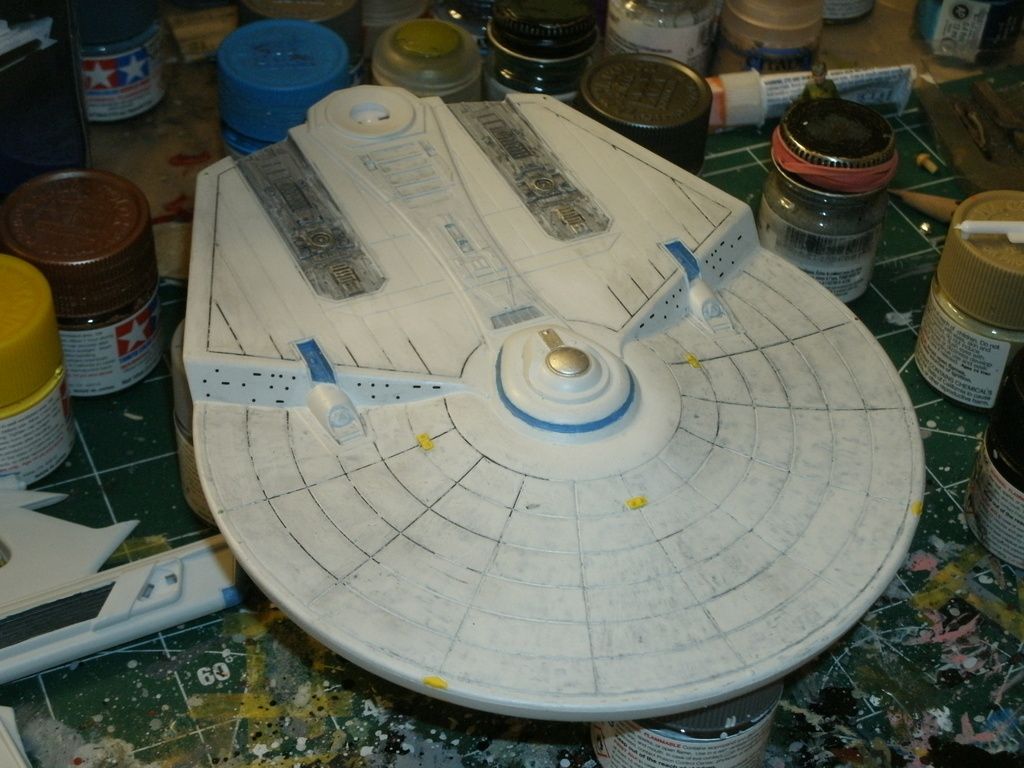
Then, with a quick coat of grey paint, and some black wash (with blue paint and the addition of the bridge and sensor array) to bring out the details turned it into this:

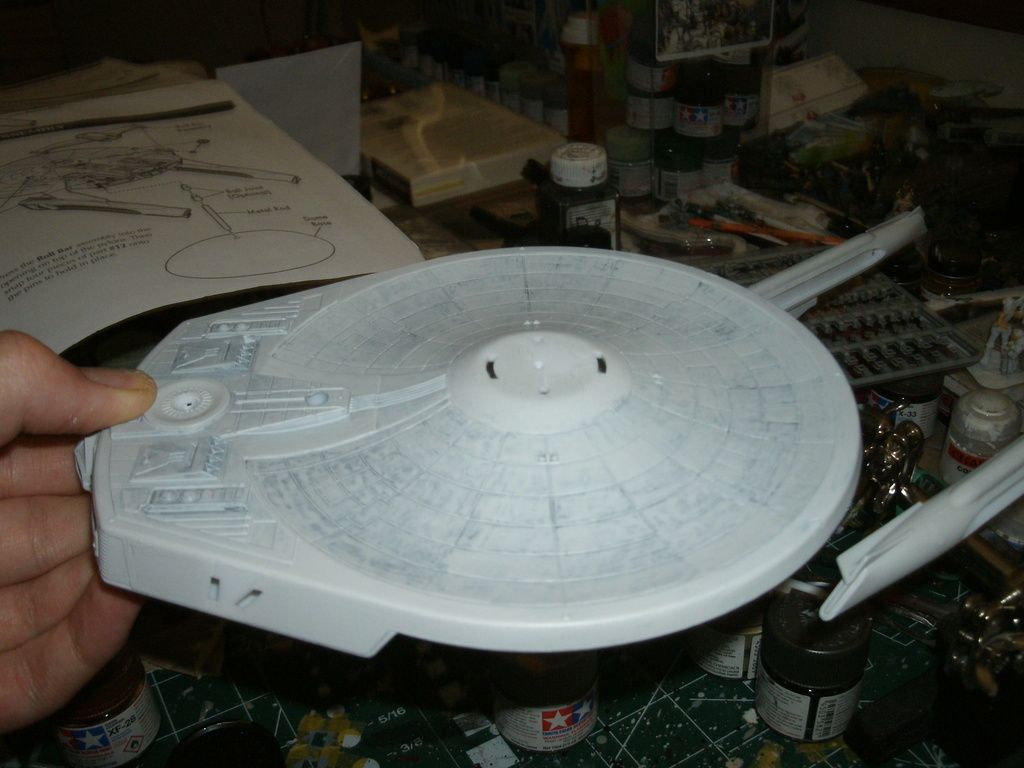
Then, I began to apply decals, starting with the Windows:

And the Rollbar:

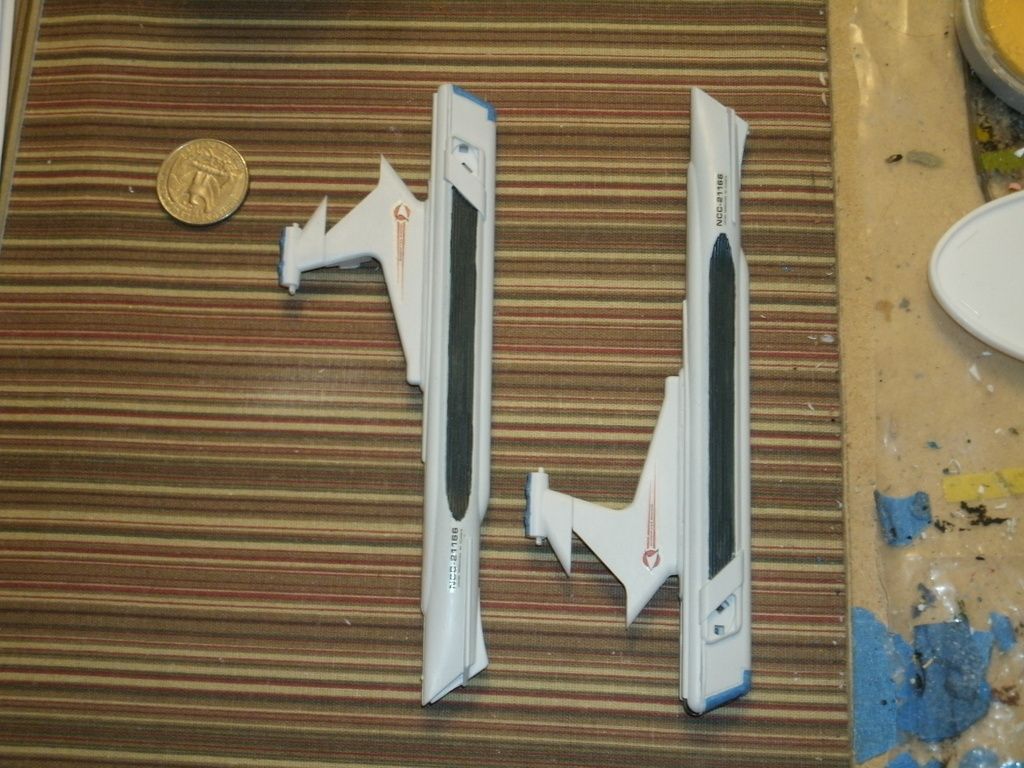
The nacelles went from this:
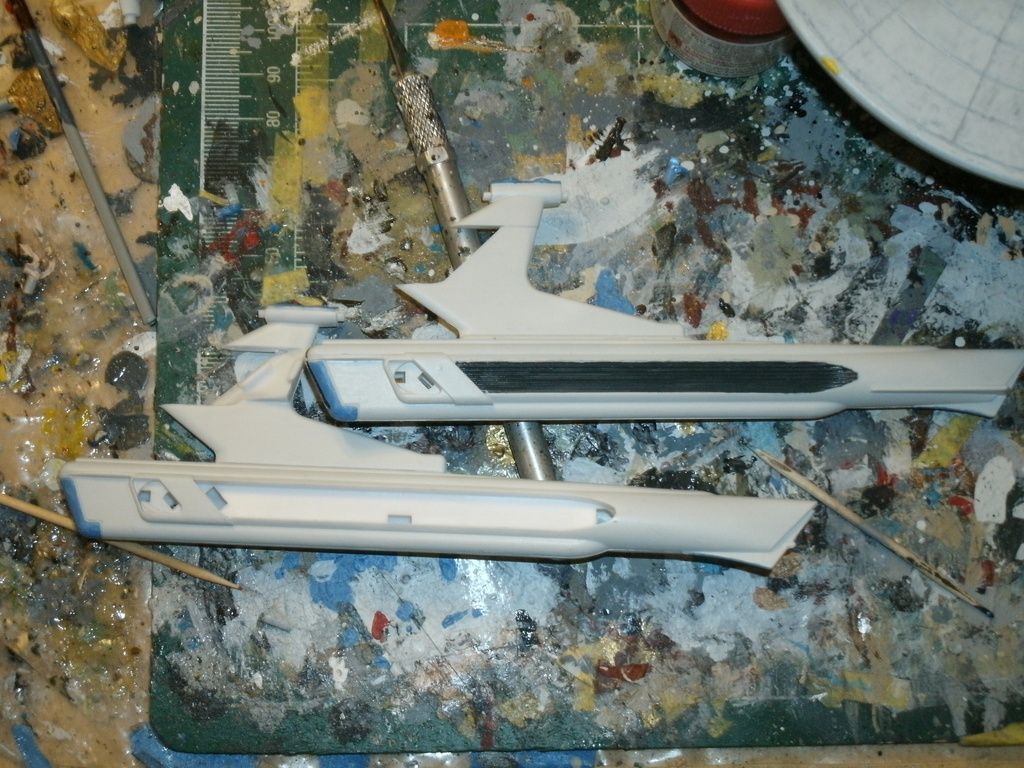
to this:

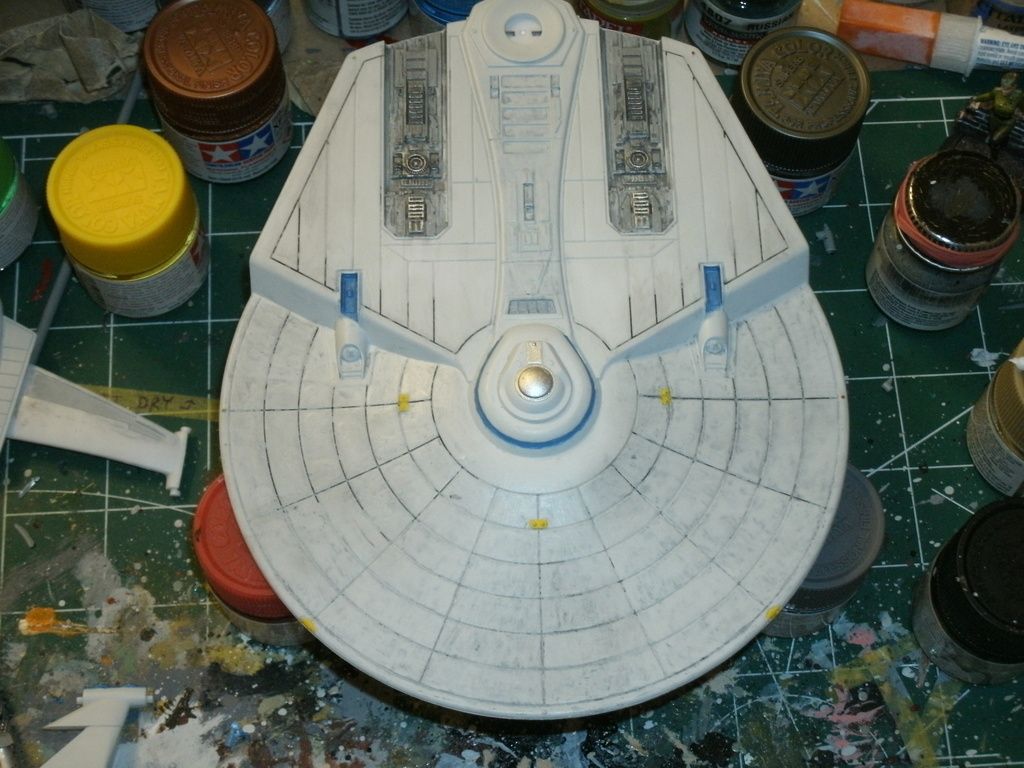
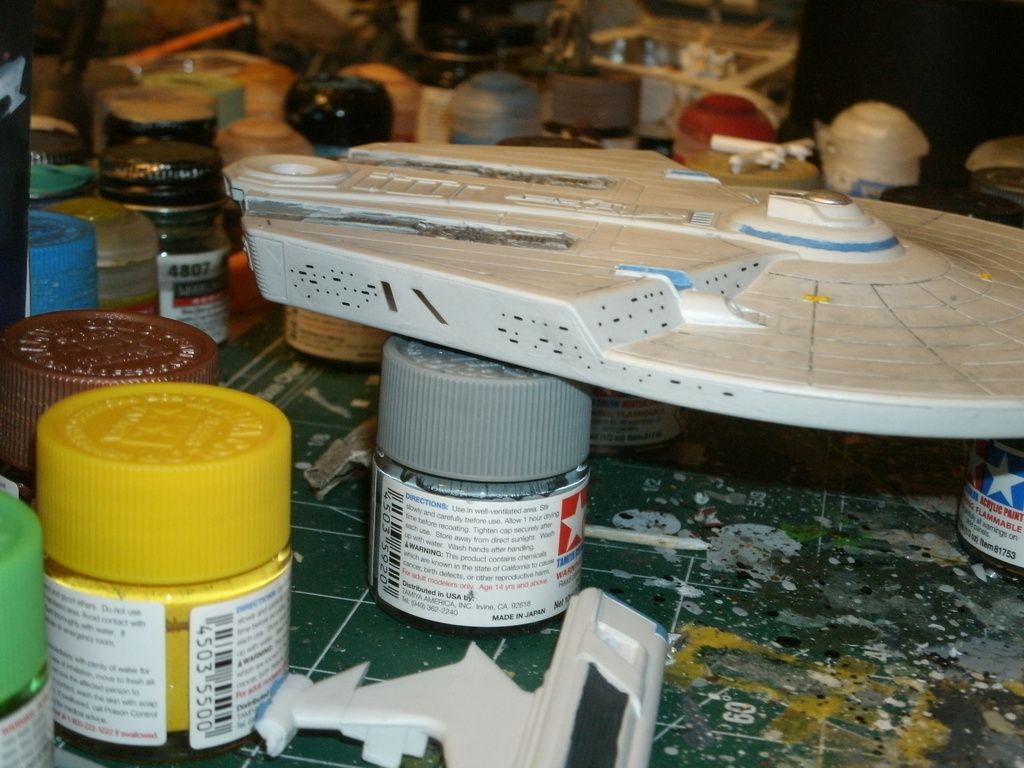
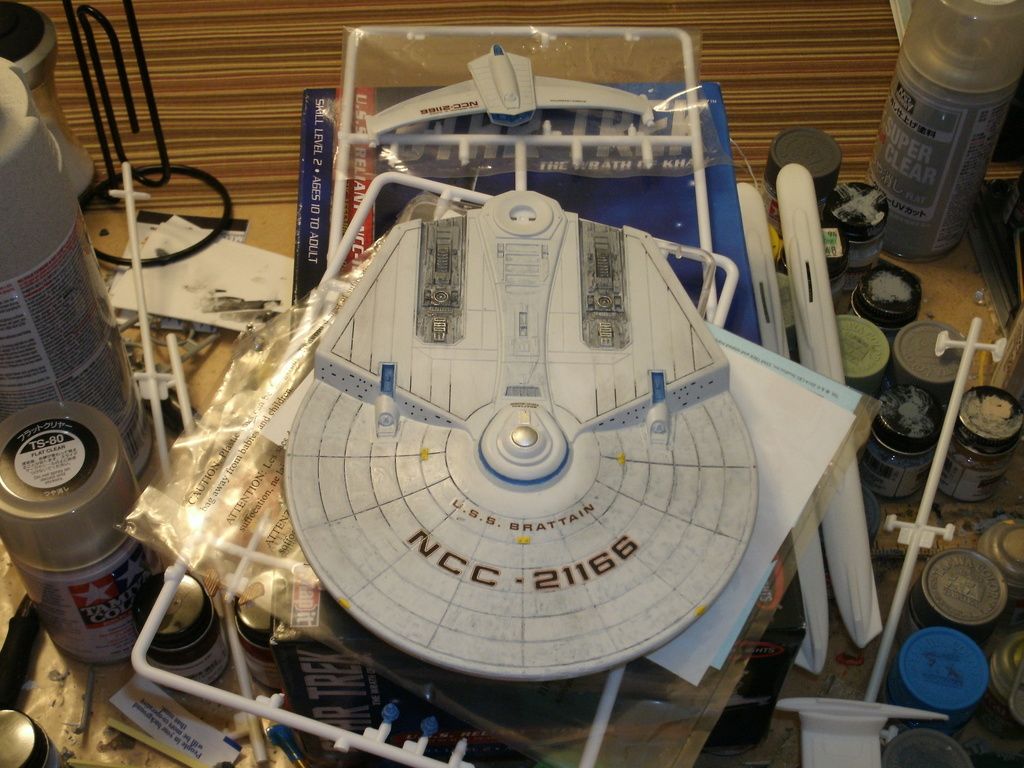
Then, the markings on the hull were applied:

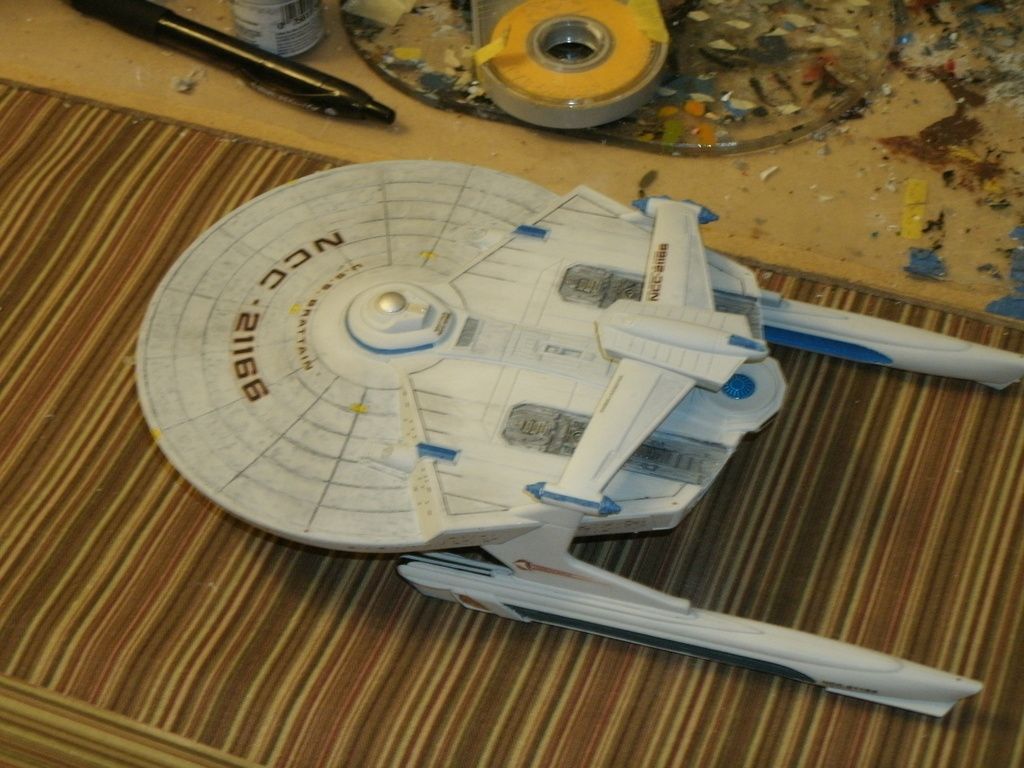
Then, the ship underwent 'final assembly', and here is how it sits right now (just needs a few touch-ups):

I'll get the touch-ups finished, and post final pictures by the end of the week.

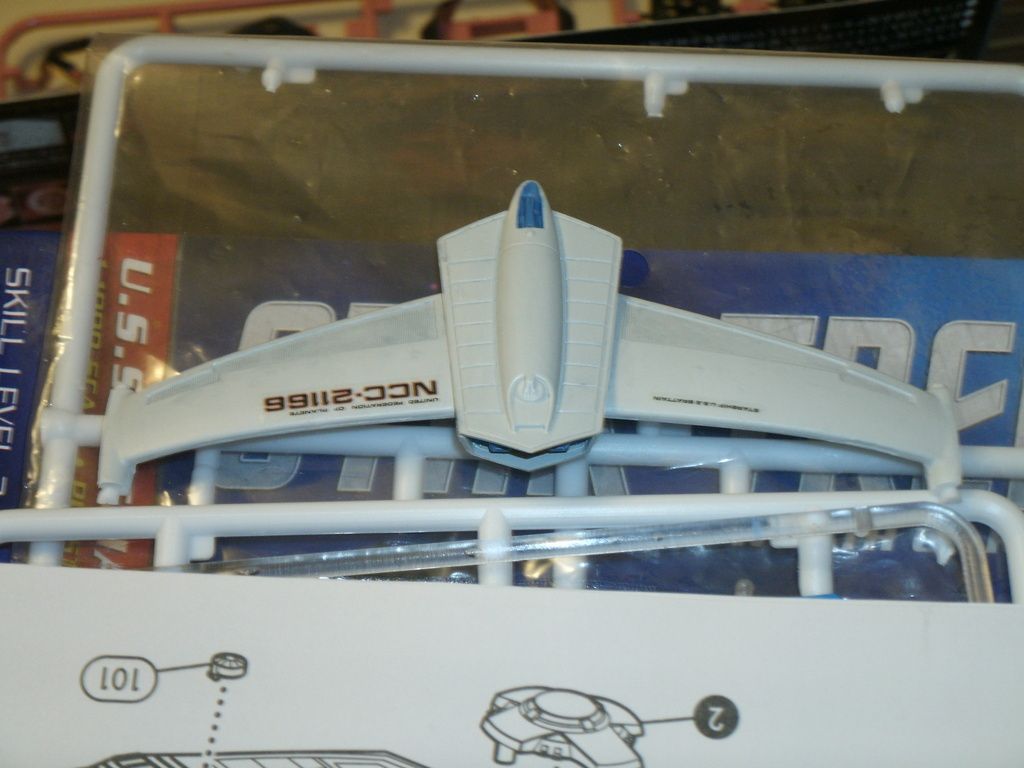
Also, if you're interested, here is the partially-assembled Enterprise-B, for which I've got a few 'special modifications' in mind.

Thanks for looking, comments, criticisms, and critiques humbly requested.

Klik

oneyearwar1

The hardest part of flying isn't flying...it's landing.

  • Member since
    November 2009
  • From: SW Virginia
Posted by Gamera on Wednesday, April 1, 2015 2:14 PM

Mach71: Sorry, saw your post a week ago and then forgot to comment. Looks good so far, did you make any more progress on the seam?

Klik: Very cool technique there. Does painting and assembling the kit in sub-sections work better for you? I generally would just assemble everything and hose the whole darn thing down with white paint and then decal.

Sorry not much progress on 'Bones'- I've been feeling like rewarmed krap lately and haven't gotten much of anything done.

"I dream in fire but work in clay." -Arthur Machen


  • Member since
    March 2010
  • From: Boston
Posted by mach71 on Friday, April 3, 2015 12:58 PM

Nice work o the Reliant Klik.

How did it go together? It looks like R2 did a good job on the kit.

Gamera, I'm still working on the front seam. It's not cooperating at all.

I've been very busy at work so not much progress. I hope to make some

headway this weekend.

Hope you are feeling better.

  • Member since
    January 2010
Posted by Klik on Friday, April 3, 2015 3:59 PM

Thanks for the comments, guys!

Yes, Gamera, building this one in sub-assemblies made painting a little easier (but not by much), though it did make decals a snap (no bending wrists or fingers in weird angles to get the little ones in the right places or worrying about snapping off a part while decaling). For this kit, it was definitely better to do it in chunks, particularly for the decals on the nacelles and the pylons.

And, Mach71, R2 did an excellent job on this Reliant kit, with better engineering and fit than the older, bigger 1/537th (if I remember correctly) Reliant kit. Everything is snap-together (though I didn't snap it--I shaved off the snappy bits and glued), with very minor seams (so minor that I didn't bother to fill them with anything other than just a spurt of glue). Surface details are just right, and they even separated the engine parts out to make painting more manageable. I'm just sorry I didn't take any more in-progress pictures to share.

Anyhow, it is now completely finished and I should get final pics up as soon as I can (today is very busy--took a short break to sneak this update in...)

Klik

oneyearwar1

The hardest part of flying isn't flying...it's landing.

  • Member since
    January 2014
  • From: Toronto
Posted by Rob S. on Friday, April 3, 2015 8:32 PM

I've decided to either simplify or complicate my 1/1000 NX Refit with this decal set from Acreation (cost way more than the original kit too!!!):

This will be my first attempt at a massive decaling job of this scale.

______________________________________________________________________________


On the Bench: Nothing on the go ATM

  • Member since
    November 2009
  • From: SW Virginia
Posted by Gamera on Friday, April 3, 2015 9:59 PM

Wow, good luck with those Rob, looks easier than painting but seems like they'll bring their own issues though.

"I dream in fire but work in clay." -Arthur Machen


  • Member since
    January 2014
  • From: Toronto
Posted by Rob S. on Saturday, April 4, 2015 7:27 AM

Yup..methinks I may regret this...lol

______________________________________________________________________________


On the Bench: Nothing on the go ATM

  • Member since
    July 2014
Posted by modelcrazy on Saturday, April 4, 2015 9:55 AM

I dont know. They may go on real sweet. Like Gamera said, they will be a whole lot easier that painting all those little boxes.

Steve

Building a kit from your stash is like cutting a head off a Hydra, two more take it's place.


http://www.spamodeler.com/forum/

  • Member since
    March 2010
  • From: Boston
Posted by mach71 on Saturday, April 4, 2015 2:40 PM

Wow Rob, Those are some amazing decals. Good luck.

I've made a little more progress on Spock, but nothing to show. Just trying to clean up the shirt

seams.

  • Member since
    January 2010
Posted by Klik on Saturday, April 4, 2015 8:39 PM

Ok, back as promised, with finalized pictures:

And a few 'glamour shots'....feel free to pick your favorite for the cover page:

And that's all I've got for now...

If you want me to, I can post pics of what I'm doing (and what I intend to do) with the Enterprise-B, it's up to you. Either way, I hope you like the Brattain. I sure do. 

Thanks for looking, Comments and Criticisms welcomed.

Klik

oneyearwar1

The hardest part of flying isn't flying...it's landing.

  • Member since
    January 2014
  • From: Toronto
Posted by Rob S. on Sunday, April 5, 2015 9:23 AM

Awesome Klik!! Very cool and great name...Brattain! Well done YesCoolYes

______________________________________________________________________________


On the Bench: Nothing on the go ATM

  • Member since
    July 2014
Posted by modelcrazy on Sunday, April 5, 2015 11:11 AM

Klik,

Nice jobYes.

I'll get your pic posted on page 2 as soon as I get a computer. 

Busy morning. 

Steve

Building a kit from your stash is like cutting a head off a Hydra, two more take it's place.


http://www.spamodeler.com/forum/

  • Member since
    July 2014
Posted by modelcrazy on Sunday, April 5, 2015 11:12 AM

Klik,

Nice jobYes.

I'll get your pic posted on page 3 as soon as I get to a complete. 

Busy morning. 

Steve

Building a kit from your stash is like cutting a head off a Hydra, two more take it's place.


http://www.spamodeler.com/forum/

  • Member since
    July 2014
Posted by modelcrazy on Sunday, April 5, 2015 11:14 AM

Klik,

Nice jobYes.

I'll get your pic posted on page 3 as soon as I get to a computer.

Busy morning. 

Steve

Building a kit from your stash is like cutting a head off a Hydra, two more take it's place.


http://www.spamodeler.com/forum/

  • Member since
    July 2014
Posted by modelcrazy on Sunday, April 5, 2015 7:40 PM

Klik,

I got you updated. Sweet build man, Yes

Impressive, most impressive... sorry, wrong galaxy.

Steve

Steve

Building a kit from your stash is like cutting a head off a Hydra, two more take it's place.


http://www.spamodeler.com/forum/

  • Member since
    November 2009
  • From: SW Virginia
Posted by Gamera on Monday, April 6, 2015 7:40 AM

Superb work there Klik!

"I dream in fire but work in clay." -Arthur Machen


  • Member since
    January 2013
Posted by jibber on Monday, April 6, 2015 7:34 PM

Mach71, can you put me down for an AMT Galileo II Shuttlecraft. Looking forward to this.  

Thanks, Terry

  • Member since
    March 2010
  • From: Boston
Posted by mach71 on Tuesday, April 7, 2015 7:36 AM

Got it Terry. And I'm looking forward to your build!

It's great to see Kilk's finished USS Brattain as the first across the line!

  • Member since
    March 2010
  • From: Boston
Posted by mach71 on Tuesday, April 7, 2015 7:47 AM

I got a coat of Luftwaffe blue on Spock. Something interesting happened. His knee bubbled badly.

I had a few other very small bubbles on his back but they were very small. I washed all the parts, primed with Tamiya fine primer and Tamiya paint.

A little sanding and another coat of paint fixed it.

This is where I'm at now.

  • Member since
    November 2009
  • From: SW Virginia
Posted by Gamera on Tuesday, April 7, 2015 11:30 AM

Interesting, (should I say fascinating?) I've never seen Tamiya primer bubble like that but glad it was just a small boo-boo and you were able to fix it.

I finished the flesh tones on Bones this weekend and sprayed a few light mists of flesh on him to tone down the contrast. I'll look at him tonight and see how the results turned out- hopefully I've have something to photo and post here then.

"I dream in fire but work in clay." -Arthur Machen


  • Member since
    November 2009
  • From: SW Virginia
Posted by Gamera on Tuesday, April 7, 2015 7:27 PM

Sorry, not the best lighting guys. Not sure if I should just go ahead and paint his eyes and hair and move on or go back and add more highlighting....

"I dream in fire but work in clay." -Arthur Machen


  • Member since
    March 2010
  • From: Boston
Posted by mach71 on Tuesday, April 7, 2015 7:59 PM

Bones looks good!

  • Member since
    November 2009
  • From: SW Virginia
Posted by Gamera on Tuesday, April 7, 2015 8:25 PM

Thanks Mach71, hopefully I'll get some more work done and some decent photos up this weekend.

"I dream in fire but work in clay." -Arthur Machen


  • Member since
    January 2014
  • From: Toronto
Posted by Rob S. on Wednesday, April 8, 2015 6:12 AM

My NX-01 decal set arrived, but, I'm a bit worried....they are quite faint and I'm worried they'll not be seen against a gunmetal surface???

______________________________________________________________________________


On the Bench: Nothing on the go ATM

  • Member since
    November 2009
  • From: SW Virginia
Posted by Gamera on Wednesday, April 8, 2015 7:43 AM

Are there any spare decals on the sheet you're not using that you can do a test run with on a piece of scrap? Only thing I can think of here.

"I dream in fire but work in clay." -Arthur Machen


  • Member since
    January 2014
  • From: Toronto
Posted by Rob S. on Wednesday, April 8, 2015 12:01 PM

Yeah, Gam, that's what I'm gonna have to do. Lightening gunmetal grey will be difficult. I think I'm being paranoid!! lol

______________________________________________________________________________


On the Bench: Nothing on the go ATM

  • Member since
    January 2014
  • From: Toronto
Posted by Rob S. on Sunday, April 12, 2015 3:48 PM

I got a start on my NX-01 Refit today. I have to say, thus far, this is a well detailed kit for 1/1000 scale. The plastic is very hard too, I"m not used to that. The snap-together engineering is well done and is finished off nicely with normal Tamiya liquid cement. Anyway, not much to show as there's not much to build: only 4 steps and here's the first two:

Engineering section

Main hull:

As for my colour concern from my earlier post, I now longer am worried. This version will not be gunmetal grey. It's actually Light Grey (or Tamiya XF-12 IJN grey) according to the instructions. This is good news as my massive decalling set will be well shown against that colour. It will be a marathon job getting it done though!! Anyway, to introduce some colour variation, I will use several hues of the grey to increase visual interest and even some very very light hints of blue in some areas, just for variety. Will it all be seen under all those decals? Dunno...we'll see soon...

______________________________________________________________________________


On the Bench: Nothing on the go ATM

JOIN OUR COMMUNITY!

Our community is FREE to join. To participate you must either login or register for an account.

SEARCH FORUMS
FREE NEWSLETTER
By signing up you may also receive reader surveys and occasional special offers. We do not sell, rent or trade our email lists. View our Privacy Policy.