SEARCH FINESCALE.COM

Enter keywords or a search phrase below:

Battle of Britain 75th Anniversary GB

21460 views
279 replies
1 rating 2 rating 3 rating 4 rating 5 rating
  • Member since
    December 2003
  • From: 37deg 40.13' N 95deg 29.10'W
Posted by scottrc on Saturday, November 28, 2015 8:28 AM

It makes a nice compliment to my Spitfire.  Thanks Lew for hosting this GB.  The BoB is a very interesting subject to model after.

  • Member since
    January 2015
Posted by BrandonD on Saturday, November 28, 2015 3:32 PM

Scott,

Those came out great! Nice pair of RAF birds to put up against the Luftwaffe. They really do look nice next to each other.

-BD-

  • Member since
    July 2014
Posted by modelcrazy on Monday, November 30, 2015 10:34 PM
 

I finally received the paint this weekend and painted the 111. I just installed the front and upper canopies with some Elmer’s and will hand paint the frame tomorrow and install the decals.

Steve

Steve

Building a kit from your stash is like cutting a head off a Hydra, two more take it's place.


http://www.spamodeler.com/forum/

  • Member since
    December 2003
  • From: 37deg 40.13' N 95deg 29.10'W
Posted by scottrc on Tuesday, December 1, 2015 10:41 AM

Looks great Steve.

  • Member since
    June 2008
Posted by lewbud on Friday, December 4, 2015 12:14 PM
Kim and Steve, your builds are looking great! Keep at it! I've kind of neglected my 110. I found out I was out of 65 for the undersides and that's where she sits for the moment. After seeing the new Do-217Z, I was underwhelmed by the lack of cockpit detail in the 110. However, it looks like a 110, and will look good on the shelf when she's done.

Buddy- Those who say there are no stupid questions have never worked in customer service.

  • Member since
    July 2014
Posted by modelcrazy on Saturday, December 5, 2015 12:08 AM

I'm done. The 1/144 He 111 KG55 is in night markings and shown in flight mode.
Thank you for hosting this GB Lewbud, it was fun.

Steve

Steve

Building a kit from your stash is like cutting a head off a Hydra, two more take it's place.


http://www.spamodeler.com/forum/

  • Member since
    December 2003
  • From: 37deg 40.13' N 95deg 29.10'W
Posted by scottrc on Monday, December 7, 2015 10:44 AM

The 111 looks great Steve.  

  • Member since
    September 2014
Posted by rooster513 on Monday, December 7, 2015 11:01 AM

Very nice Steve! Great build!

-Andy

  • Member since
    June 2008
Posted by lewbud on Monday, December 7, 2015 8:34 PM
Looks great Steve! Painting the framing for the nose would have driven me nuts! Let me know which pic you would like for the front page. Keep at it peeps!

Buddy- Those who say there are no stupid questions have never worked in customer service.

  • Member since
    September 2003
  • From: AandF in the Badger State
Posted by checkmateking02 on Monday, December 7, 2015 8:54 PM

It's time to catch up here!

Great looking Stuka, BrandonD.

Glad to see your Defiant, RobS; I have one too, and am looking forward to starting it now.

Very sharp Hurricane, rooster.  Nice work with the pastels.

Neat little 109, OWL; colors are eye-catching.

Dan, very effective treatment of the Sptifire camouflage;very good.

Really did well with the Hurricane, Scott.

Steve, that is one petite Heinkel.  Nice touch to have it in flight. 

Good work on the cockpit, moose.  Coming along great.


  • Member since
    July 2014
Posted by modelcrazy on Monday, December 7, 2015 9:03 PM

Thanks guys. Lewbud picture 1 would be fine.

Steve

Building a kit from your stash is like cutting a head off a Hydra, two more take it's place.


http://www.spamodeler.com/forum/

  • Member since
    September 2003
  • From: AandF in the Badger State
Posted by checkmateking02 on Monday, December 7, 2015 9:10 PM

Now to resume my long-delayed entry into the build.

I lost the wing light lens, and couldn't get another from Airfix.  They only accept UK pounds sterling for postage, and my phone wouldn't connect for an international call to give them my cc number; so I just started a new kit.

I went back to my original plan to build a Hurricane from 145 Squadron, and I had enough time to order a deHavilland propeller from Hannants.

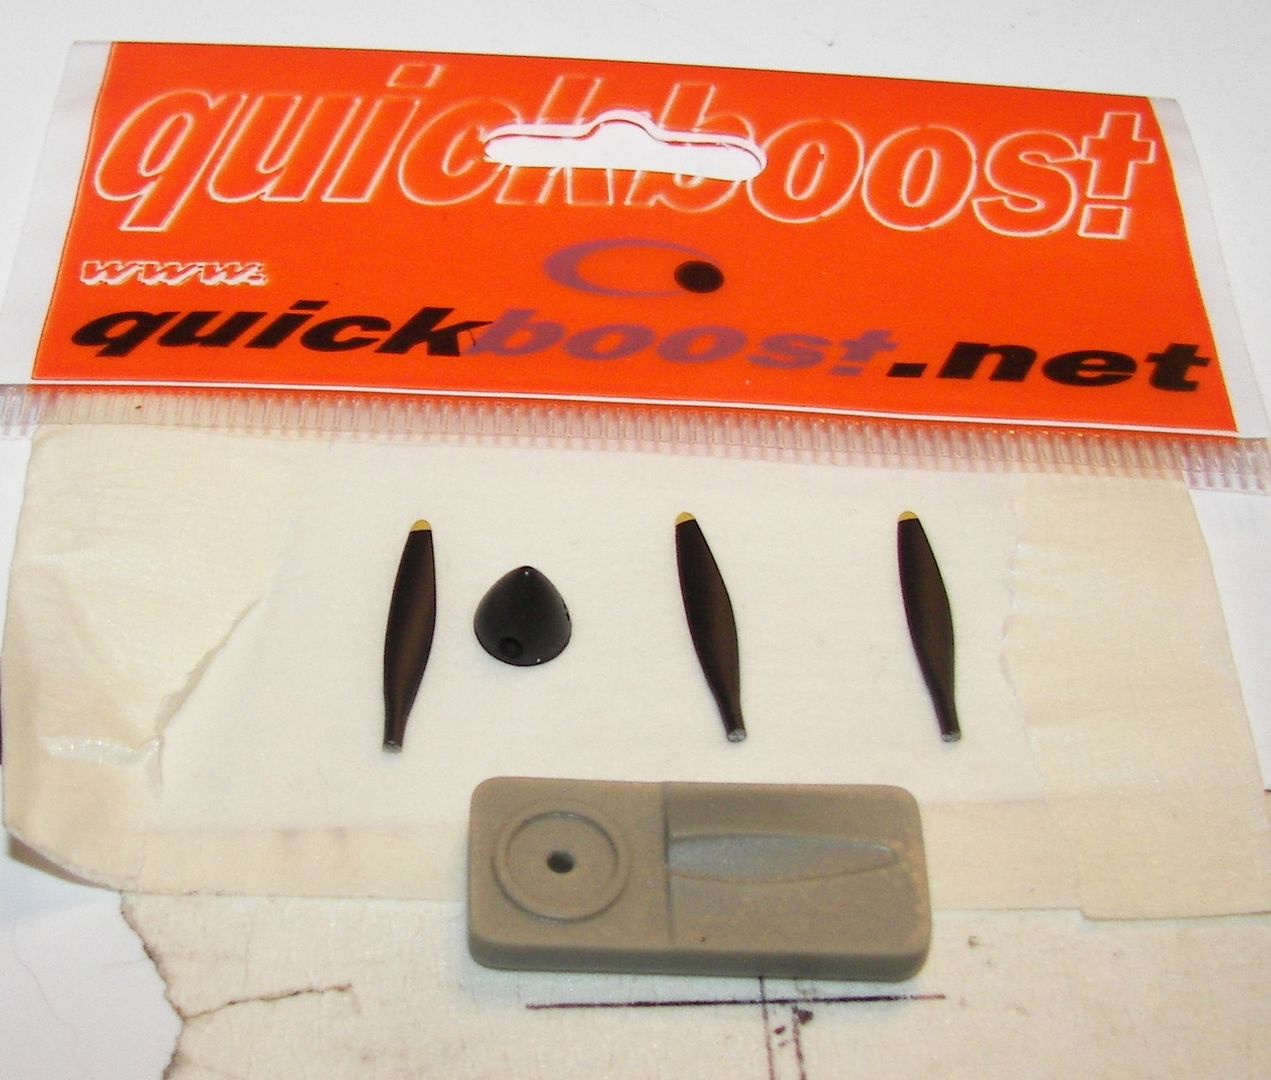
The handy little device included allows you accurately to drill the hole into the spinner for the prop shaft.  There's a little "tray" to lay the blades in, so you get them aligned right.  But I knew I'd knock them off during masking if I put them on early, so they'll have to wait till the end.

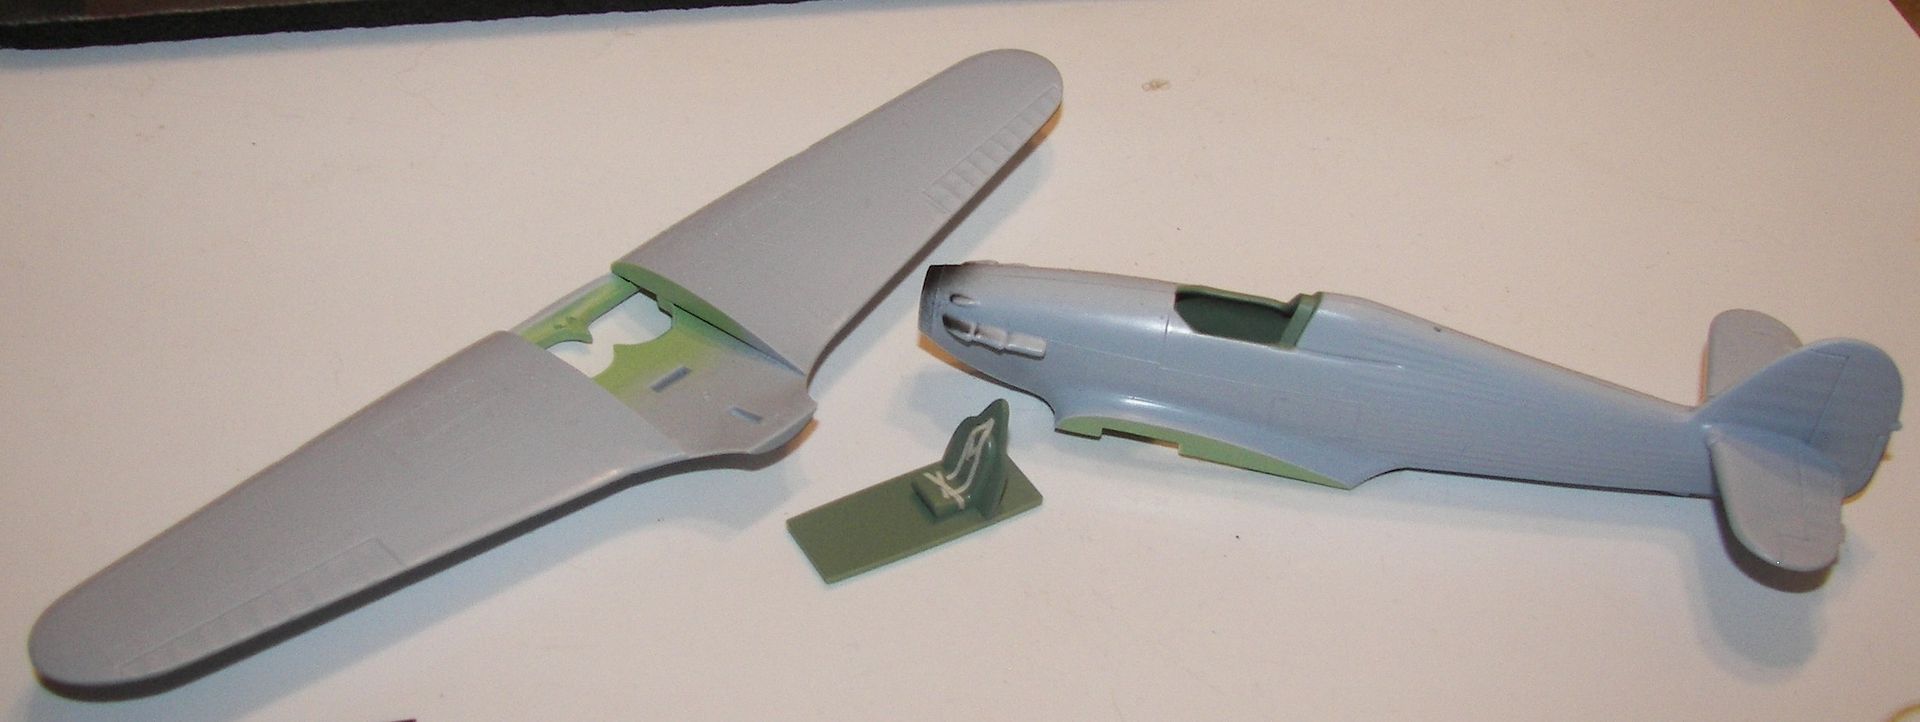
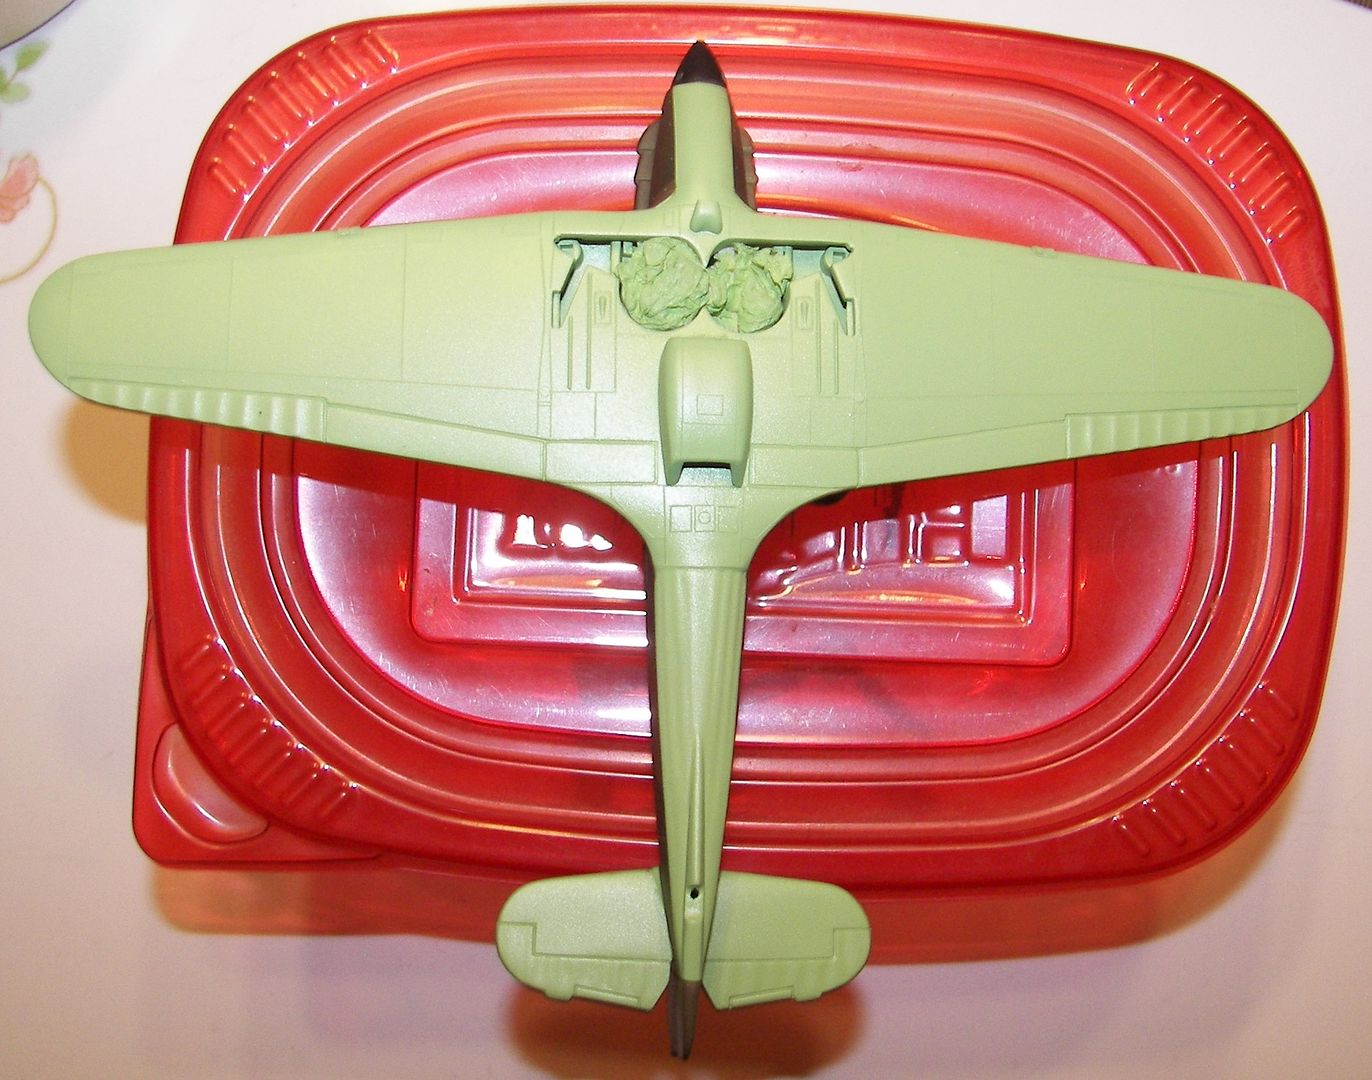
Here are the fuselage, wings and cockpit assemblies.

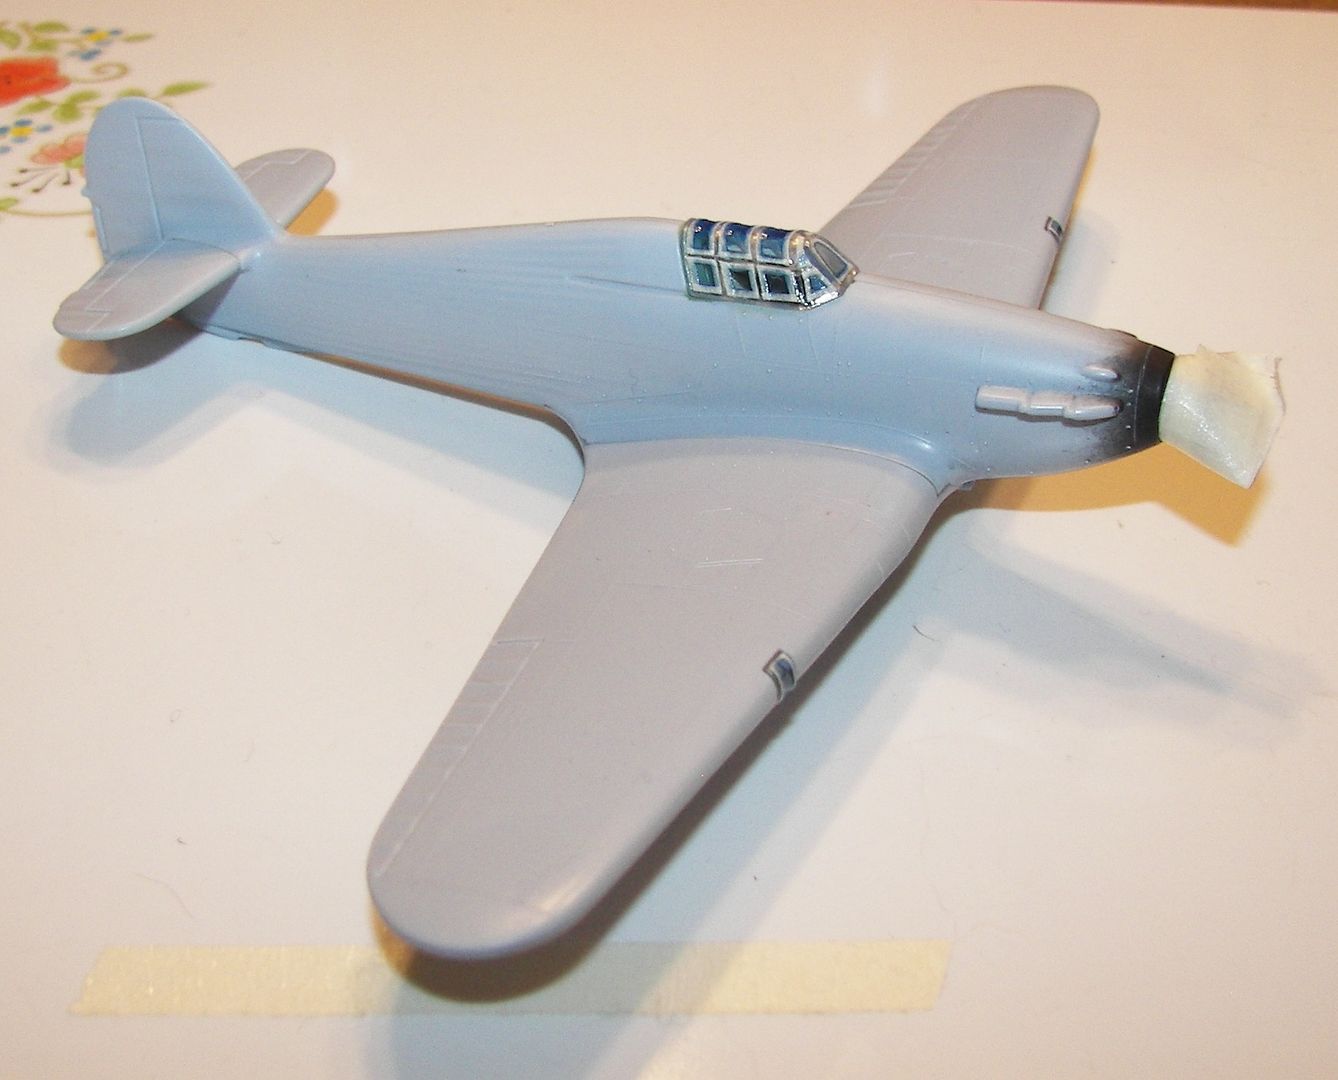
Here's the thing put together and the canopy masked.

Here's how the paint turned out.  I used Sovereign's Colourcoat line:  dark earth and dark green.  The underside is Eau d' Nil--sometimes denoted "duck egg green."

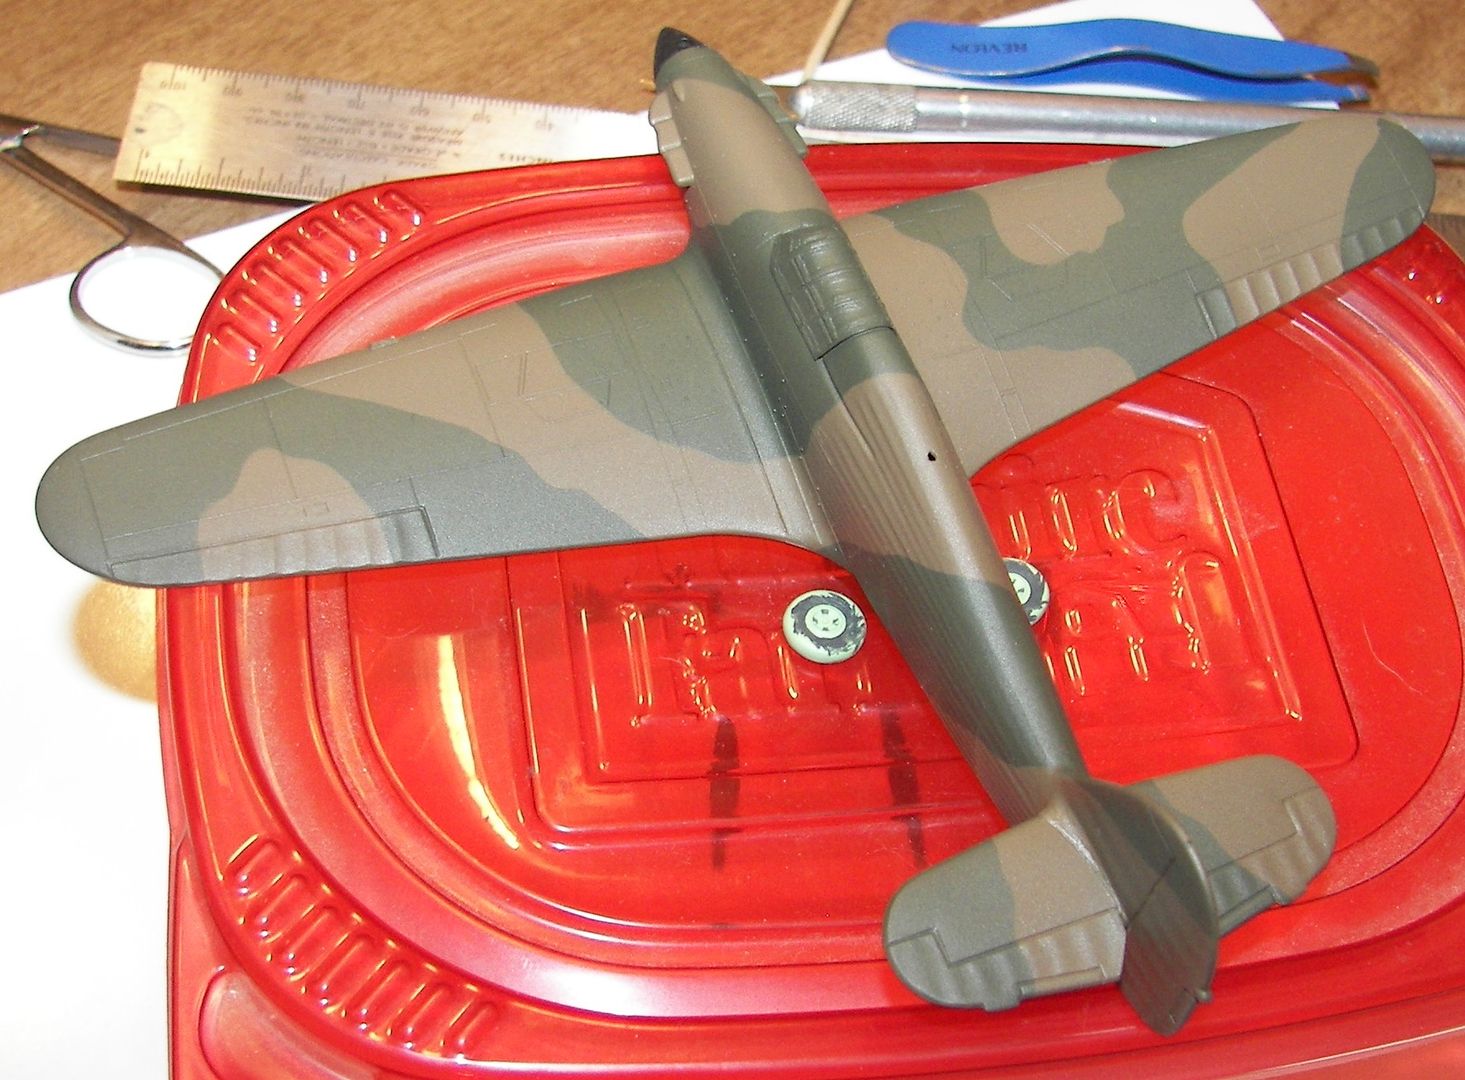
Also picked up some after market wheels from S.B.S. out of Hungary.  The kit wheels in this old kit are not up to snuff.

After painting, I ran a pin wash along the raised panel lines and into the gaps between the moving flight surfaces.  I also put some of Doc O'Brien's weathering powder into the ailerons and elevators.  Started applying decals tonight, so I should be finished soon--before the build runs out.


  • Member since
    January 2015
Posted by BrandonD on Tuesday, December 8, 2015 12:05 AM

Great work. Love the He-111.

Kim - on that kit, I built it with the cowl off. I'm sure you know, but just in case you didn't see the part, you can't fit the cowl on, so painting 100 percent exact line matchup shouldn't matter too much, as it can't ever be put in place (unless you hollow it out to the point it's almost translucent.

I used Tamiya tape to mask my engine and guns on the E-7 variant. Also, I added the exhaust pipes after painting. It took a bit of shaving on the front pipes, but nothing that will ever be noticeable as it's hidden deep inside.

Anyway, I can't wait to see it come together. That 109 and their Spitfire VIII kit sold me on Eduard, and it and Tamiya are tied for my favorite kitmakers.

-BD-

  • Member since
    November 2007
  • From: Wisconsin Rapids, WI
Posted by moose421 on Friday, December 11, 2015 10:07 AM

Ok, I finally got some good bench time.  I have my Bf 109 E-4 built.  The fit of this kit is great.  Very little filler needed.  And most of the filler that I used was due to my errors.  The only real bad spot and it wasn't that bad was around the radiators.

Next up I have her primed, pre-shaded and the yellow tips painted.

I used a white primer before I layed the yellow down.  Afterwards I sealed the yellow with a flat coat.  I didn't want any problem with lifting when I masked the yellow.

Thanks for looking

Kim

  • Member since
    September 2003
  • From: AandF in the Badger State
Posted by checkmateking02 on Friday, December 11, 2015 12:30 PM
Coming along very nicely, Kim!


  • Member since
    November 2003
  • From: Nashville, TN area
Posted by bobbaily on Saturday, December 12, 2015 7:24 PM

Great looking builds all-very impressive.  Been checking in on a daily basis but failed to comment along the way-sorry.

Got started on the bf109E-3 this weekend-it's the 1/48 Tamiya kit-no surprises-interior detail is ok-building this one for Lewbud's Weekend Madness GB......not going to get it done by the end of the weekend but I hope to have it finished by the 18th.

Since it is a 'quick' build, I ended up using the kit decal for the harnesses-not happy with them but the canopy will be closed so it won't be noticed.  Also building with flaps up due to time constraints.  Hope to get the canopy masked tomorrow and the camo on-we'll see.....

Bob


  • Member since
    November 2007
  • From: Wisconsin Rapids, WI
Posted by moose421 on Saturday, December 12, 2015 8:31 PM
Looking good Bob.
  • Member since
    June 2008
Posted by lewbud on Sunday, December 13, 2015 5:42 PM

I apologize for not keeping up with this.  Scott and Dan, congratulations on your completions! Which pics would you like for the group build?


Buddy- Those who say there are no stupid questions have never worked in customer service.

  • Member since
    September 2003
  • From: AandF in the Badger State
Posted by checkmateking02 on Sunday, December 13, 2015 7:58 PM

Finished with the Hurricane from 145 Squadron, which took part in the defense of Convoy "Peewit" on 7/8 August, 1940.  The profile in Camouflage and Markings:  Battle for Britain, RAF (Paul Lucas) dates this particular aircraft to early June.

The undersides:  I used black-painted decal stock to simulate the missing ejector ports.  From this angle, one of the prop blades looks off kilter.  After viewing the photo, I checked the model, and in real life, it does line up fine.  Must be an optical anomaly from the angle of the shot.

The rest of the topsides:

Thanks, lewbud, for hosting the GB.  I always appreciate a chance to build something from the BoB.


  • Member since
    June 2008
Posted by lewbud on Sunday, December 13, 2015 9:42 PM
Looks great CMK! Which pic would you like for the front page?

Buddy- Those who say there are no stupid questions have never worked in customer service.

  • Member since
    September 2014
Posted by rooster513 on Monday, December 14, 2015 11:41 AM

Beautiful build Checkmate! Really clean, great paint job!

-Andy

  • Member since
    September 2003
  • From: AandF in the Badger State
Posted by checkmateking02 on Monday, December 14, 2015 11:45 AM
Thanks, lewbud and rooster! For the photo, I think I like the one from the rear, left side. It shows the codes nicely. Thanks again for the GB!


  • Member since
    February 2006
  • From: Cincinnati Ohio
Posted by DantheMan85 on Tuesday, December 15, 2015 9:29 AM

Thanks Scottrc: As it turns out some were a little thick, yeah Airfix put some pretty good detail on the spitfires. Great job on finishing your Huricane.

Thanks Lewbud.

Your He 111 looks great Steve, nice job on the finishing touches.

Thanks Checkmateking: I think my first try at free hand camouflage turned out great. Nice camouflage on your Hurricane.

BrandonD: Your Bf109 looks great, like the camouflage blotches.

Moose421: Great work on your Bf109.

Bobbaily: Another fine Bf109 coming together.

Think I'm calling my Spitfires down, these are the smallest 1/72 scale aircraft I've built. The Mk. 11A is the first freehand camouflage I've done, by turning the air pressure down two in between 5 and 10, and just baring opening up the needle, you get better control and can airbrush any shape you want. It also help to thin the paint down a little more. The Airfix decals are a bit thick, some laded down in the panels line well, while others did not. I applied a wash consisting of 10 drops of water, three drops of model master acryl gloss black, and three drops of liquid dish detergent into a paint pallet. Then brush it on where ever you want it, let it dry over night. Then use a Q tip with model master acrylic cleaner #50496A and gently rub away the excess. If the color gloss black doesn't work, you can use any color in the model master acryl range. Yesterday I added sewing string for the antenna to the Mk. 11A.


On my Work Bench: Tamiya Ford GT 1/24

Up Coming: ?


  • Member since
    September 2003
  • From: AandF in the Badger State
Posted by checkmateking02 on Tuesday, December 15, 2015 11:44 AM

Great-looking Spitfires, Dan.  The camouflage and weathering on both of them is excellent.


  • Member since
    September 2003
  • From: AandF in the Badger State
Posted by checkmateking02 on Tuesday, December 15, 2015 6:47 PM
Nice work on the Emil, bob. Very smooth and silky paint job you accomplished.


  • Member since
    January 2015
Posted by BrandonD on Wednesday, December 16, 2015 12:54 AM

Chekmateking - Nice job on that Hurry. I like how it came out, and I am filing away the tip to use decal stock for missing ejection ports. I would have tried to paint them and gotten frustrated, I'm sure.

DantheMan - Love the Spitfires. I really like the paintwork. Looks like in this group buld the RAF definitely has air superiority!

-BD-

  • Member since
    September 2003
  • From: AandF in the Badger State
Posted by checkmateking02 on Wednesday, December 16, 2015 12:05 PM
Thanks, Brandon. I think it's the easiest solution. Painting them or actually cutting holes would be a major opportunity for disaster. Since they're on the wing bottoms, they don't show much anyhow.


  • Member since
    June 2008
Posted by lewbud on Thursday, December 24, 2015 10:31 PM

I want to apologize to all of you for letting this build drift towards the end.  I got caught up in my other GB and neglected this one, for that I apologize. For those of you who still have stuff on the table for this build, please keep at them and post pics as you go along.  Finally, I'd like to thank each of you for participating, without you, this build would be nothing.  Thanks for your time and effort.

Buddy- Those who say there are no stupid questions have never worked in customer service.

  • Member since
    November 2007
  • From: Wisconsin Rapids, WI
Posted by moose421 on Friday, December 25, 2015 12:10 PM

No need to apoligize.  We are all adults and get the prior commitments.  Heck I am running behind as well.  My new job that I started at the end of August put me way behind on builds.

This is where I got as of last weekend.

First up the majority of build is done.  Just the landing gear and small stuff needs to be added.  I got the camo with mottling done.  As she sits she is wearing the gloss coat.

Next up I have all the decals and stencils on.  Also the flat coat is on as well.  I am very happy with the way she is looking. 

Thanks for looking.  I will finish this up and get the final pictures up next week.


Thanks lewbud for hosting this.


Kim

JOIN OUR COMMUNITY!

Our community is FREE to join. To participate you must either login or register for an account.

SEARCH FORUMS
FREE NEWSLETTER
By signing up you may also receive reader surveys and occasional special offers. We do not sell, rent or trade our email lists. View our Privacy Policy.