SEARCH FINESCALE.COM

Enter keywords or a search phrase below:

Halftrack GB 2016/17

18387 views
468 replies
1 rating 2 rating 3 rating 4 rating 5 rating
  • Member since
    November 2009
  • From: SW Virginia
Posted by Gamera on Thursday, June 30, 2016 7:51 AM

Looks good Bish! I built that kit a few years ago and had no issues with it. Only problem is I think I said somewhere on the forum one of the 'rubber' tires cracked in half on me a year or so later, there's a millimeter split in it now. Of course if you're replacing it with the resin part in the Royal Models aftermarket kit that's no problem for you. 

"I dream in fire but work in clay." -Arthur Machen


  • Member since
    December 2002
  • From: Bury St Edmunds, Suffolk, England
Posted by Bish on Thursday, June 30, 2016 12:56 PM

Thanks guys.

Steve, theres a lot to learn about German armour, even after all these years, there are still surprises.

G, i am not a fan of those rubber tires, so the resin wheels were a big plus from this set. The road wheels also seem to better match the one si have seen in pics than the kit ones.

I am a Norfolk man and i glory in being so


On the bench: Airfix 1/72nd Harrier GR.3/Fujimi 1/72nd Ju 87D-3

  • Member since
    May 2013
  • From: From the Mit, but live in Mason, O high ho
Posted by hogfanfs on Thursday, June 30, 2016 1:06 PM

Bish,


Nice start on the Panzerwerfer! This will be very fun to watch, with all the AM goodies!

 Bruce


 On the bench:  1/48 Eduard MiG-21MF

                        1/35 Takom Merkava Mk.I


  • Member since
    December 2002
  • From: Bury St Edmunds, Suffolk, England
Posted by Bish on Thursday, June 30, 2016 1:27 PM

Thanks Bruce.

I am a Norfolk man and i glory in being so


On the bench: Airfix 1/72nd Harrier GR.3/Fujimi 1/72nd Ju 87D-3

  • Member since
    December 2002
  • From: Bury St Edmunds, Suffolk, England
Posted by Bish on Sunday, July 3, 2016 2:23 PM

After finishing of the lower portion of the inside, it was time to work on the top half. I started off with the vision slits. The AM set has you block these off with plastic card and then re-open them with provided templates to correct the shape.

Once all these were open again, the outer resin pieces were added.

And then onto the inside with plenty of PE.

So there is not much left to add to the inside, i can finish that and hopefully the missing parts will be here from RM soon.

So last night i made a start on the launcher. My hope was that i could finish that and the tracks today. I have had the whole day to myself with the Mrs at work and all the kids away. So i have had about 7 hours at the bench today. But, things did not go quite to plan.

The 10 resin launch tubes are each in 2 parts.Each part of hollow at its open end, but 2/3's of each once is soid resin. So, they all had to be drilled and filed out, and of course being resin they are rather brittle and i had to get them very thin. So after a few hours and with a large pile of resin dust on the bench, they were ready to go together. I put all 10 of the lower sections and 2 of the top sections into the PE frames.

These were then fited together and the other 8 tubes fitted.

A couple of the tubes are a little kinked so will need to be straightened up. And then there is a lot more PE detail and wiring to add.

And i did manage to get one track finished. This were not as fiddly as i was expecting given the size, certainly not as bad as their 251 tracks.

Just got the other one to do. But no rush as the tracks won't go on until at the end.


I am a Norfolk man and i glory in being so


On the bench: Airfix 1/72nd Harrier GR.3/Fujimi 1/72nd Ju 87D-3

  • Member since
    November 2009
  • From: SW Virginia
Posted by Gamera on Sunday, July 3, 2016 5:43 PM

Looks neat Bish! I really love those resin and PE rocket tubes. Lots of work but they look about a zillion times better than the plastic ones that come with the kit.


BTW: I went ahead and ordered the Dragon 1/35th M3 75mm GMC (Gun Motor Carriage) and a set of US Marine Corps figures. Can't let you guys have all the fun!!!

"I dream in fire but work in clay." -Arthur Machen


  • Member since
    December 2002
  • From: Bury St Edmunds, Suffolk, England
Posted by Bish on Monday, July 4, 2016 12:24 PM

Thnaks G, ye, they are a hell of a lot better. There a lot of detail both on the outsid of the tubes and the insid. The tricky bit was sanding out the inside witout damaging the detail at the ends.

O, nice, so is that an offical entry.

I am a Norfolk man and i glory in being so


On the bench: Airfix 1/72nd Harrier GR.3/Fujimi 1/72nd Ju 87D-3

  • Member since
    November 2009
  • From: SW Virginia
Posted by Gamera on Monday, July 4, 2016 1:26 PM

Yes sir, I might be making some slow progress at first but I'm in. I'm still fussing around with the base and waiting for one figure for more progress on your 1946 GB so I can get a little work done here in the meantime.

"I dream in fire but work in clay." -Arthur Machen


  • Member since
    December 2002
  • From: Bury St Edmunds, Suffolk, England
Posted by Bish on Monday, July 4, 2016 1:37 PM

No worries, theres plenty of time and the GB has only just got going.

I am a Norfolk man and i glory in being so


On the bench: Airfix 1/72nd Harrier GR.3/Fujimi 1/72nd Ju 87D-3

  • Member since
    November 2009
  • From: SW Virginia
Posted by Gamera on Monday, July 11, 2016 10:35 AM

My kit came in Saturday: 

And though I have two boxes of Marine figures these were so cool I had to buy them, I'm going with a small and I mean small dio here. I'm still working on the big one for your 1946 GB: 

I promised myself I won't start on this till I'd knocked out some other stuff but ended up doing a little work on the engine and running gear last night anyway... Embarrassed

I thought they'd left out the tracks at first since I didn't see any rubber band ones or a packet of 'Magic Tracks'. Weirdly the treads are cast solid plastic pieces, at least they give you two choices of which to use.


"I dream in fire but work in clay." -Arthur Machen


  • Member since
    December 2002
  • From: Bury St Edmunds, Suffolk, England
Posted by Bish on Monday, July 11, 2016 12:55 PM

I see you have the breaking strain of a kit-kat G Big Smile. Looks nice and a nice set of figures. Not seen tracks like those before, will be interesting to see how they work.

And will be nice to se anotehr Dio, we could do with a few more of those.

I am a Norfolk man and i glory in being so


On the bench: Airfix 1/72nd Harrier GR.3/Fujimi 1/72nd Ju 87D-3

  • Member since
    December 2002
  • From: Bury St Edmunds, Suffolk, England
Posted by Bish on Thursday, July 14, 2016 3:33 PM

Just a short update as its been over a week now. Firtsly, i still have not recieved those mssing parts from RM. I did e-mail them at the weekend but have had no reply. So i have turned to plan B. The Eduard set has the metal parts but does not include the wooden blocks that hold the rockets in place. So i used so resin to make the blocks and have used those. So i have now been able to get the inside primed and can start paiting, so some pic sof that at the weekend. But my main focus has been the launcher which was a long slow and tedious process.

But now its all done.

The two tubes on the types right as you look here, which will be bottom left once fitted, have had the locking clamps left off. These will have rockets loade so the clamps will be added later.

I gave this a coat of primer tonighg as i want to see how much clean up was neded, and its not looking as bad as i thought.

I also got the turret built and that was primed tonight as well. The white rod replaces the kit parts. Its the elevating rod but it was the wrong shape and set in the lowered position. I can trim this to correct length once i determne the angle.

And thats it. But hopfeully now i can get some good progress. No doubt the RM parts will turn up as soon as i close up the hull, sod's law.

I am a Norfolk man and i glory in being so


On the bench: Airfix 1/72nd Harrier GR.3/Fujimi 1/72nd Ju 87D-3

  • Member since
    July 2014
Posted by modelcrazy on Thursday, July 14, 2016 4:09 PM

Oh wow Bish, nice PE work!!

Steve

Building a kit from your stash is like cutting a head off a Hydra, two more take it's place.


http://www.spamodeler.com/forum/

  • Member since
    May 2013
  • From: From the Mit, but live in Mason, O high ho
Posted by hogfanfs on Friday, July 15, 2016 9:43 AM

Bish,

The launcher looks outstanding! Is this going to completely replace the launcher from the kit? That is some amazing PE work!

 Bruce


 On the bench:  1/48 Eduard MiG-21MF

                        1/35 Takom Merkava Mk.I


  • Member since
    December 2002
  • From: Bury St Edmunds, Suffolk, England
Posted by Bish on Friday, July 15, 2016 12:33 PM

Thanks guys.

Bruce, the rockets tubes and all fittings are completly replaced, either from the RM set or wire i had myself. The turet is mainly the kit with some improvments.

And just a word on Royal Model, they came through with the missing parts, they arrived today, so just in time. And to their credit, it was posted on the 2nd, and its not there fault it took 13 days.

So anotehr example of good customer service fom Europe.

I am a Norfolk man and i glory in being so


On the bench: Airfix 1/72nd Harrier GR.3/Fujimi 1/72nd Ju 87D-3

  • Member since
    November 2009
  • From: SW Virginia
Posted by Gamera on Friday, July 15, 2016 1:22 PM

That is some nice work there Bish- kudos! 

And good to hear you've got your replacement parts. 

"I dream in fire but work in clay." -Arthur Machen


  • Member since
    October 2015
Posted by Modelrob on Saturday, July 16, 2016 5:14 AM

Gamera that looks like it will be a great kit to build though the tracks are different. Your right that is one cool figurer set.


Rob

  • Member since
    November 2009
  • From: SW Virginia
Posted by Gamera on Saturday, July 16, 2016 12:30 PM

Thanks Rob, I've got a little done and typical good Dragon fit and detail. And when I saw that figure set I just loved the dobermans, a nice change of pace from just human figures.

I've given them nicknames: Satan, Killer, and Fluffy...

"I dream in fire but work in clay." -Arthur Machen


  • Member since
    December 2002
  • From: Bury St Edmunds, Suffolk, England
Posted by Bish on Sunday, July 17, 2016 2:01 AM

Thanks G, more soon.

I am a Norfolk man and i glory in being so


On the bench: Airfix 1/72nd Harrier GR.3/Fujimi 1/72nd Ju 87D-3

  • Member since
    November 2009
  • From: SW Virginia
Posted by Gamera on Thursday, July 21, 2016 8:57 AM

I've been making some slow progress. The running gear is close to being done. Gee whiz, I built the good 'ol Tamiya M3 years ago and this kit is about a dozen times more complex, the suspension bogies are about twenty parts in and of themselvies! Not that I'm complaining or anything, I love this type of stuff. On the other hand the parts here are smaller than those of a typical tank and my eyes aren't what they used to be... Blind Fold

One little point I am confused on here though, the instructions tell you to paint the underside steel, but as I understand US factories at the time just hosed everything down with multiple thick coats of olive drab. Well, plenty of time to do research before I paint the thing... 


"I dream in fire but work in clay." -Arthur Machen


  • Member since
    December 2002
  • From: Bury St Edmunds, Suffolk, England
Posted by Bish on Thursday, July 21, 2016 2:16 PM

Glad to see you off to a good start G. It would not make sense to me to leave the underside bear steel, it would not do good for rust prevention.

I am a Norfolk man and i glory in being so


On the bench: Airfix 1/72nd Harrier GR.3/Fujimi 1/72nd Ju 87D-3

  • Member since
    November 2009
  • From: SW Virginia
Posted by Gamera on Thursday, July 21, 2016 3:20 PM

Thanks Bish. Yeah, didn't make much sense to me either where you'd leave anything bare steel. As I'd heard they just hosed the olive drab on as a preservative. 

"I dream in fire but work in clay." -Arthur Machen


  • Member since
    December 2002
  • From: Bury St Edmunds, Suffolk, England
Posted by Bish on Thursday, July 21, 2016 3:27 PM

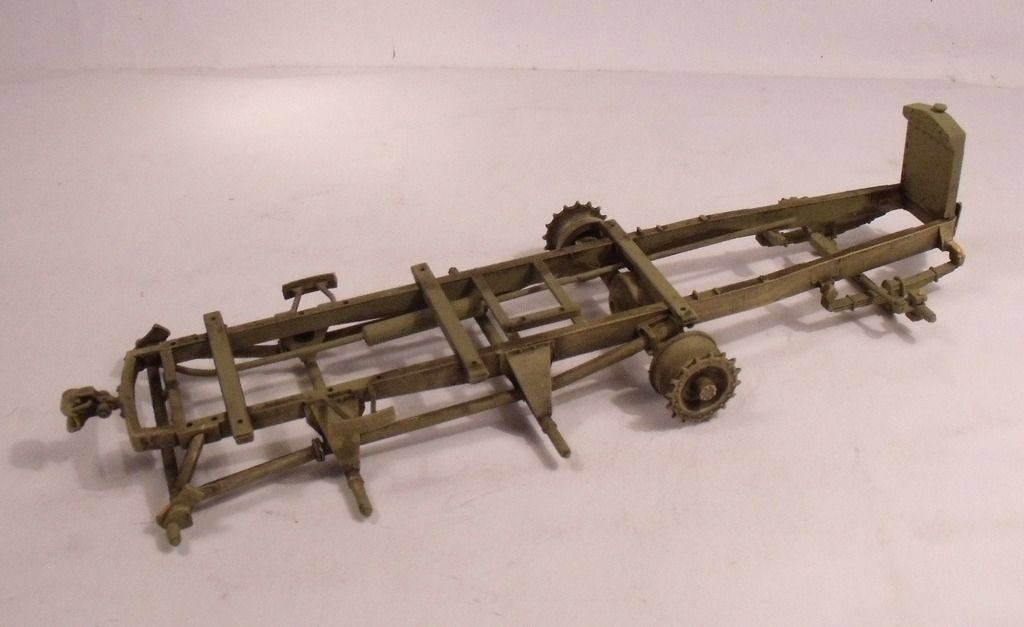
Rigt, time for a more hefty update. And time to hit the spray booth. Starting with the chassis and running gear, it got a primer coat and the DY.

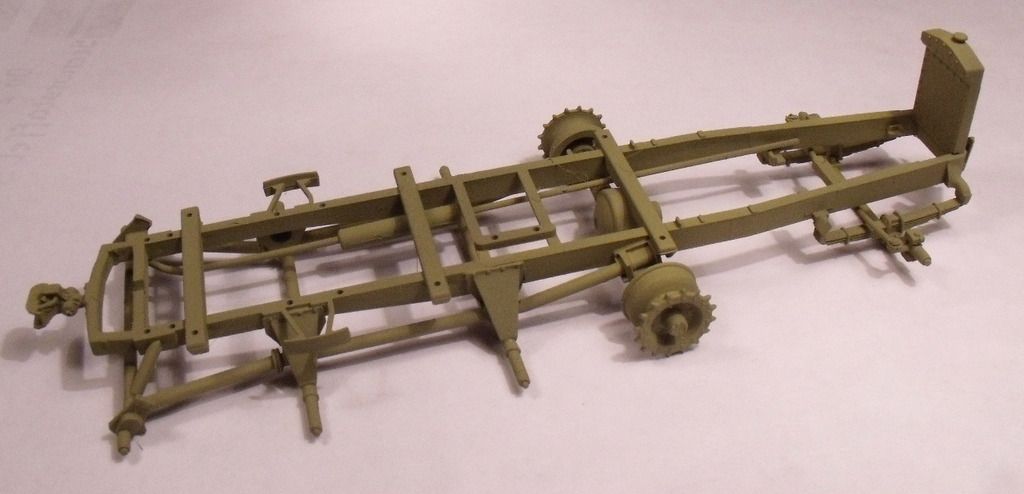
And then an overall wash of AK wash for DAK vehicles.

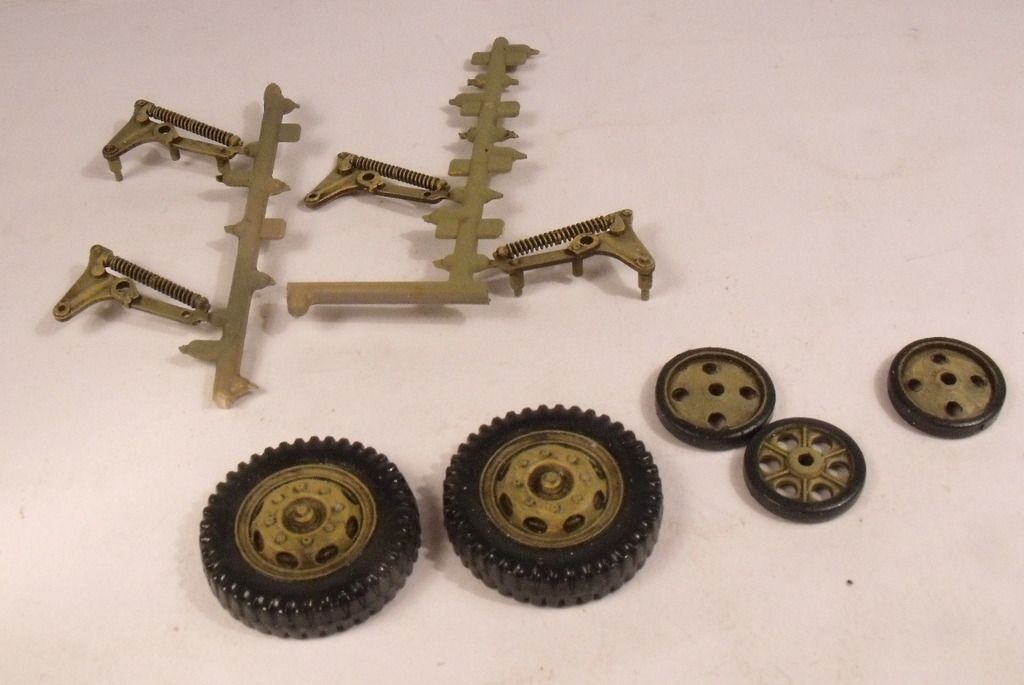
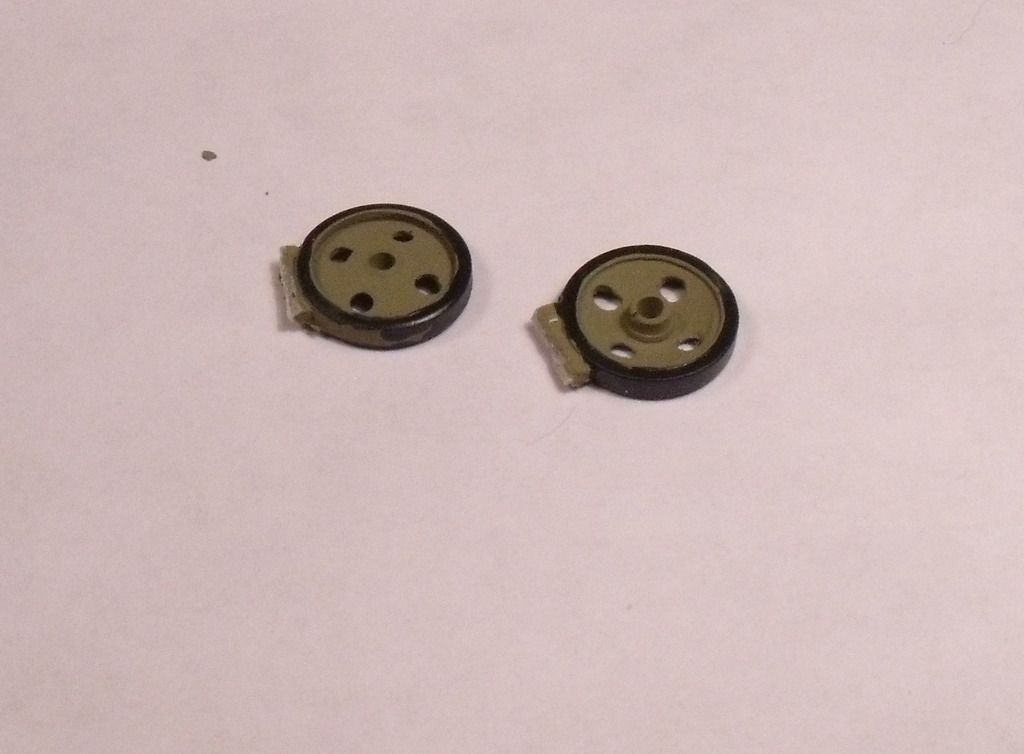
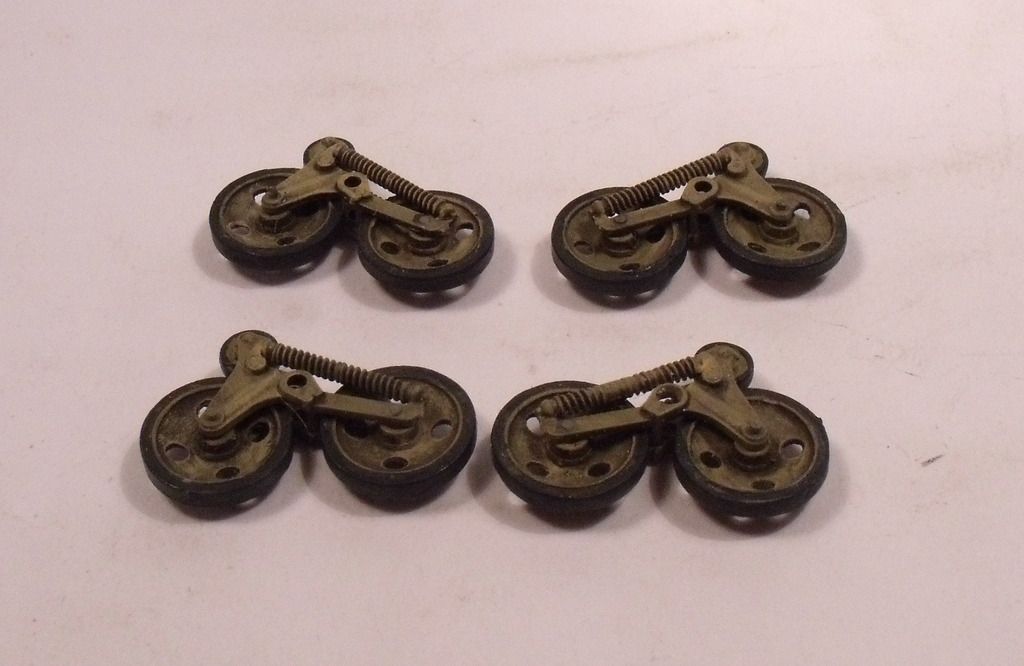
And then i was able to get the bogies together.

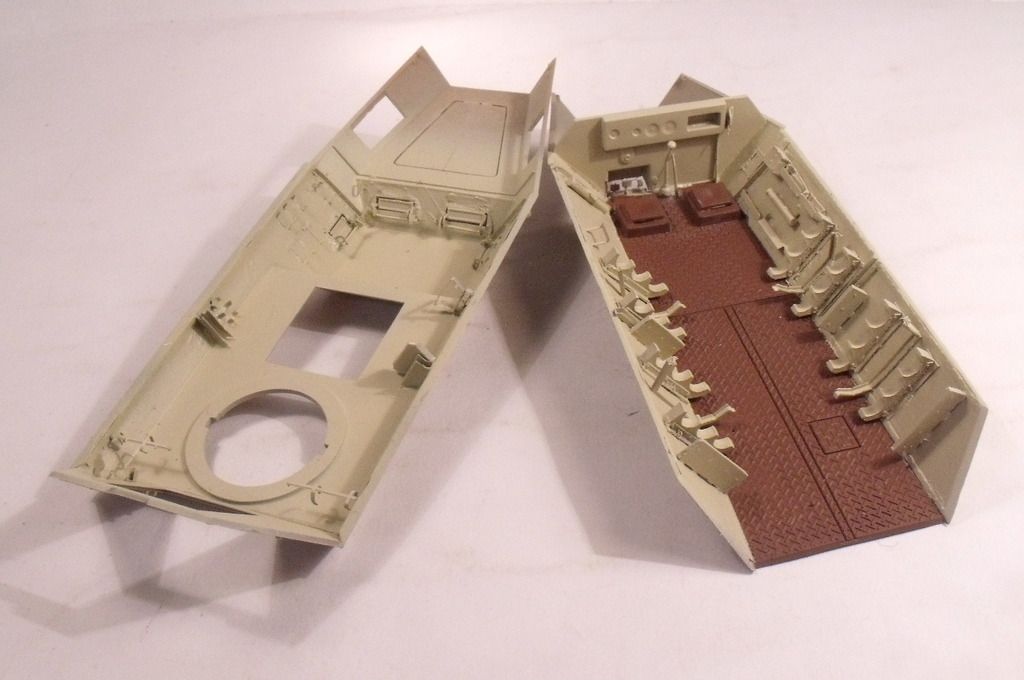
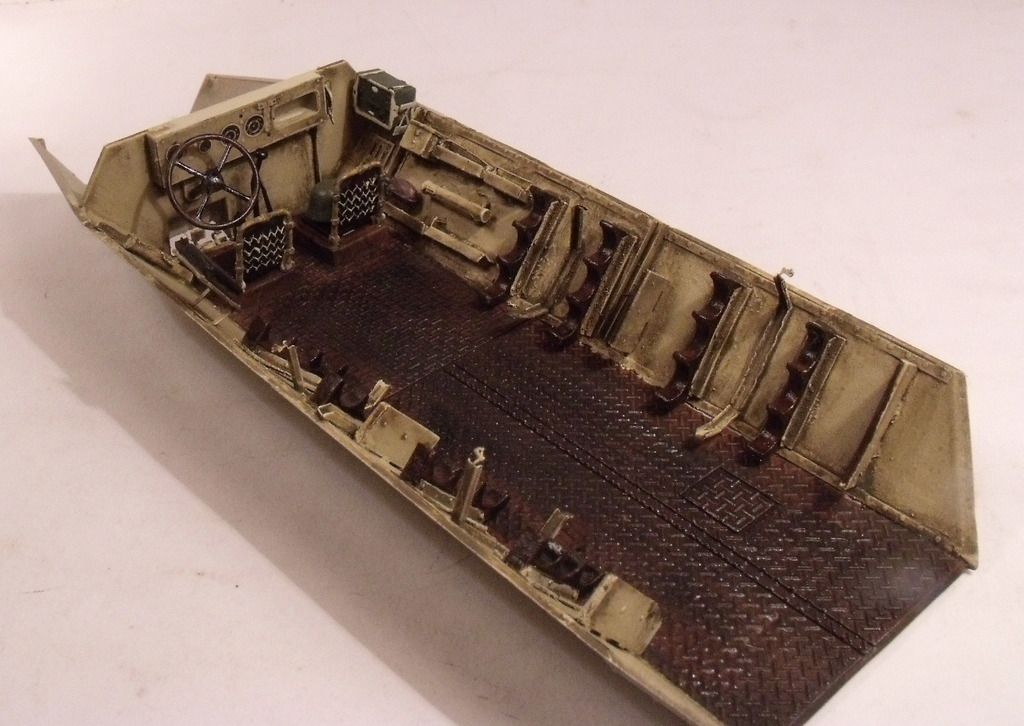
Then it was the turn of the inside of the hull. For the floor i mixed up a German red primer with Tamiya and the rest got a coat of Xtracolor interior cream

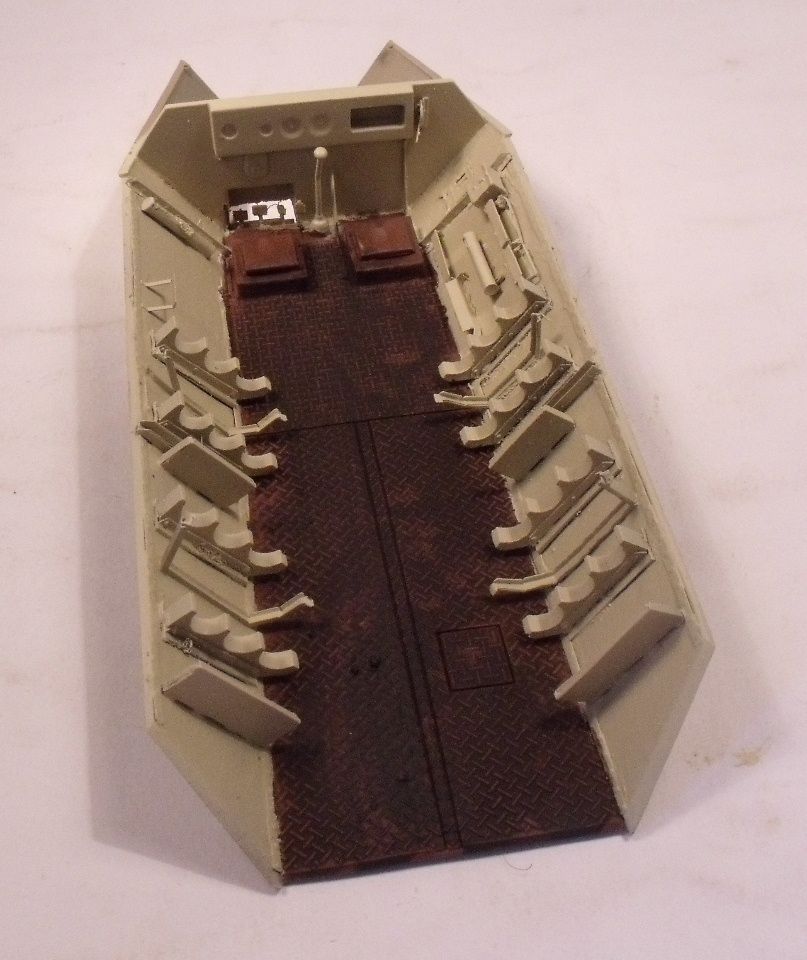
Then the floor got an raw umber oil wash. I had to be careful i didn't damage the Enamel paint on the side, which i would used flory washes on.

Now i know what you thinking, why not use flory on the whole thing. The answer is simple.

Because i am stupid. It just never occured to me to use flory on the floor, i usually leave that wash for aircraft but just wanted to avoid a future coat.

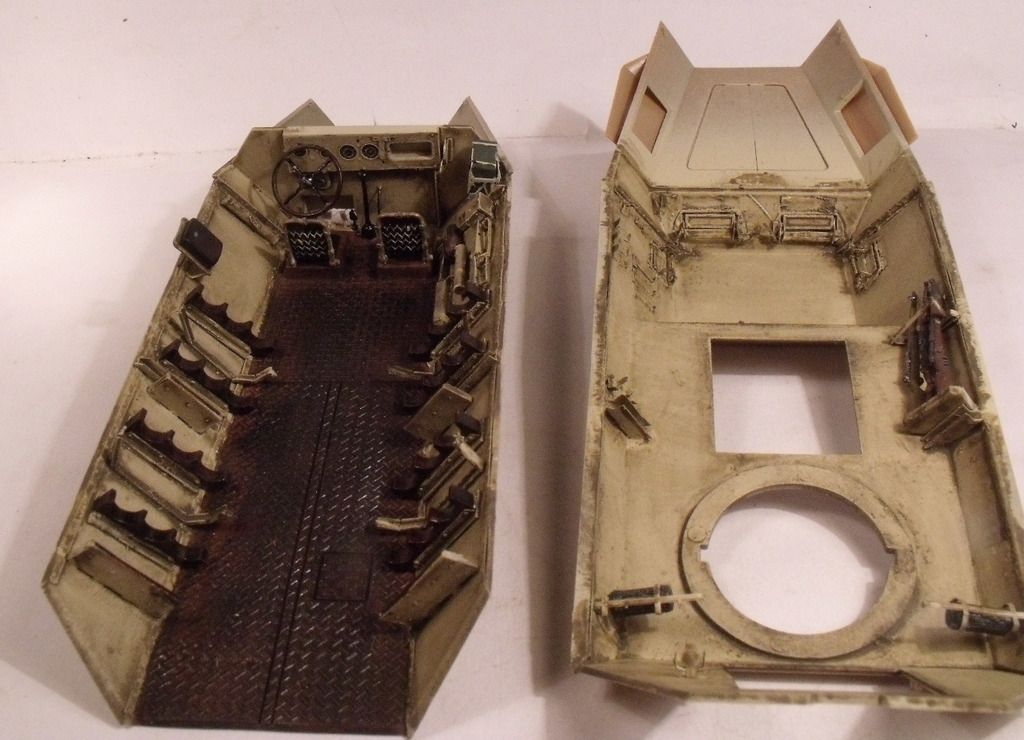
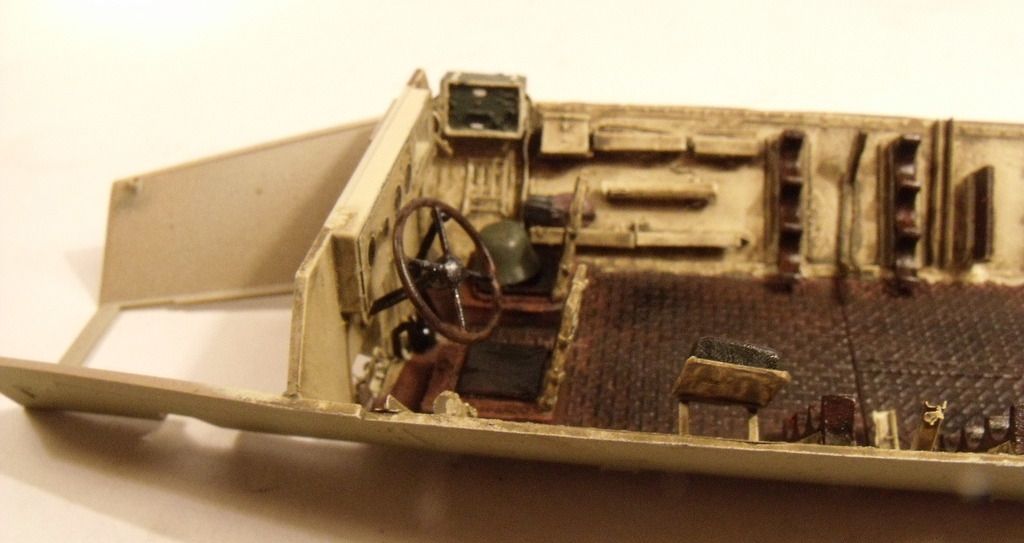
So the rest got a wash, the floor, after removing excess wash, got a dry brush for chipping and the wood parts were painted. For the wood, i painted tamiya red brown and went over it with a sepia ink wash. This matches nicley the wood parts in the photo's and is a tip i found out by accident when i tried to paint my 251/6 leather seats a red leather. That was a bad idea that turned good. I also added the final parts includeing a few bit of crew equipment.

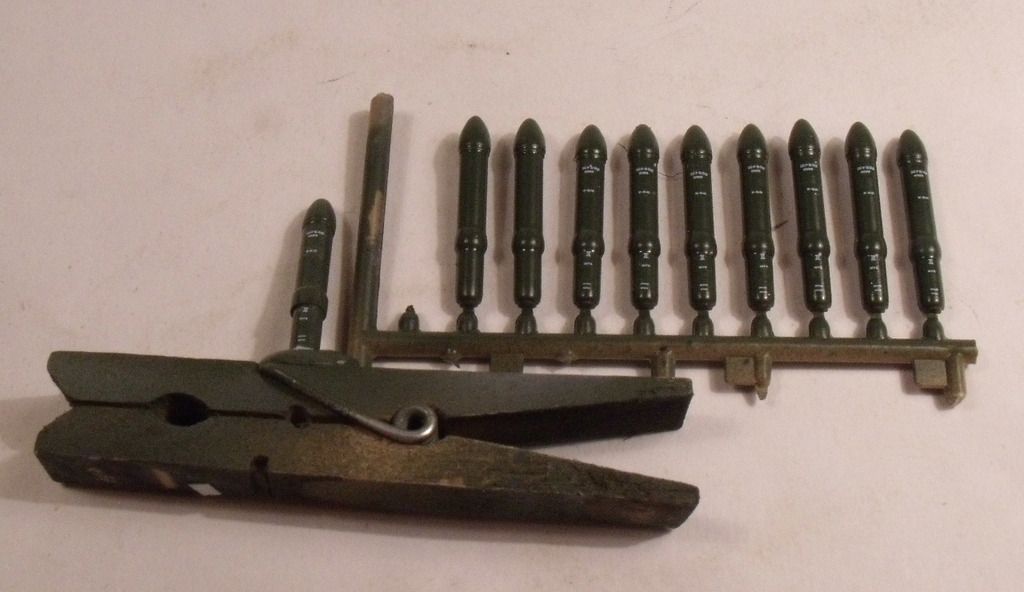
The final bit to add before i can close up is the rockets. These have been painted and decal added useing a set from Peddinghaus which has a nice selection of German rocket markings.

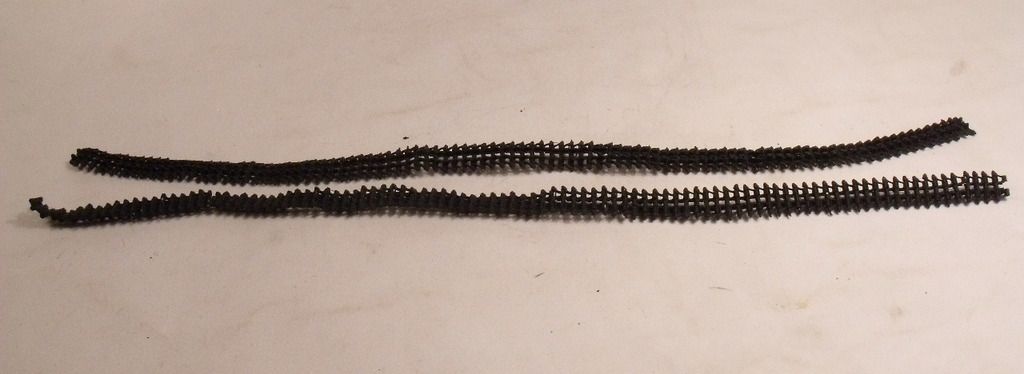
Also got the tracks together.

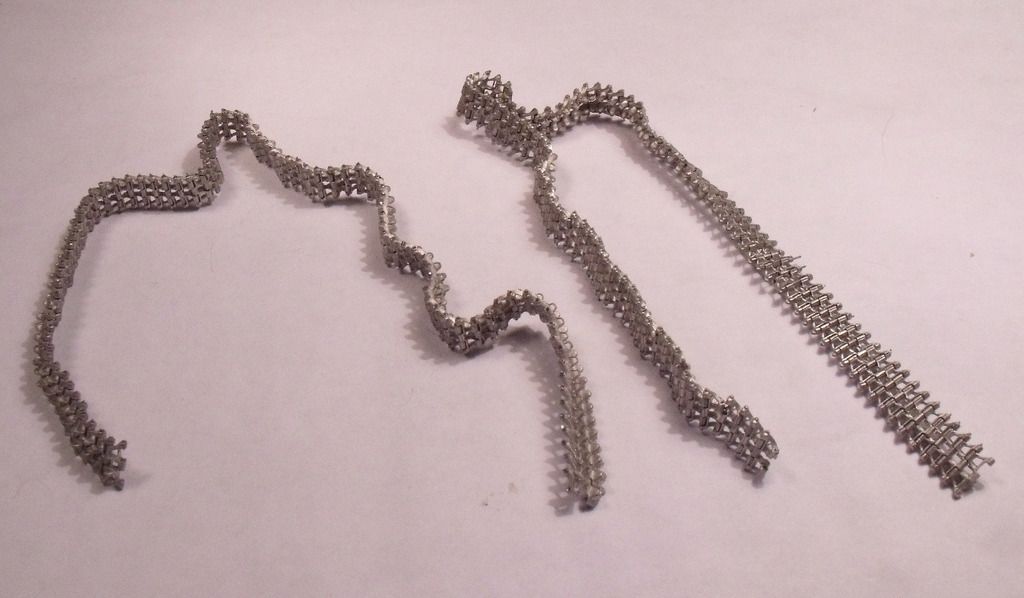
And painted tamiya NATO black.

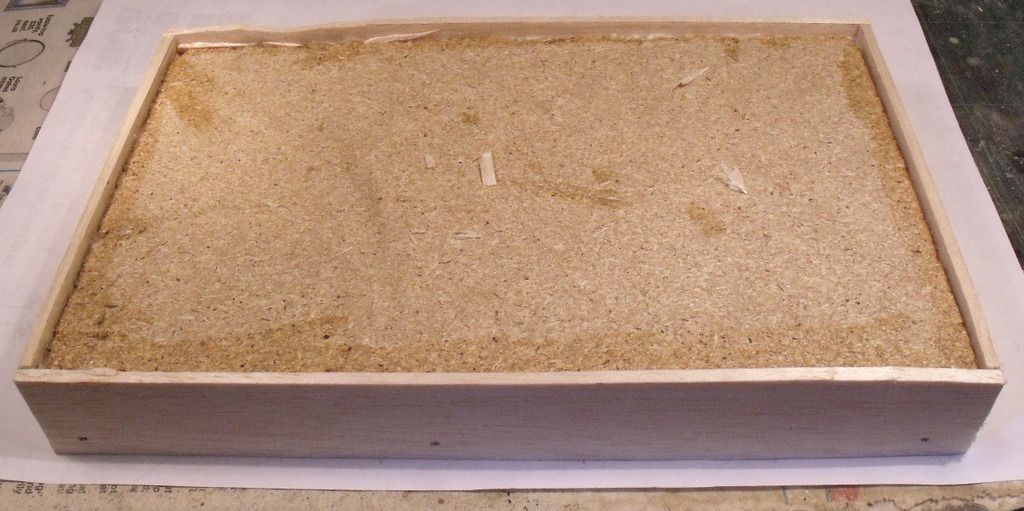
And finally the base. A piece of chipboard glued to a bit of MDF to get the thickness i wanted surrounded by my usual balsa wood.

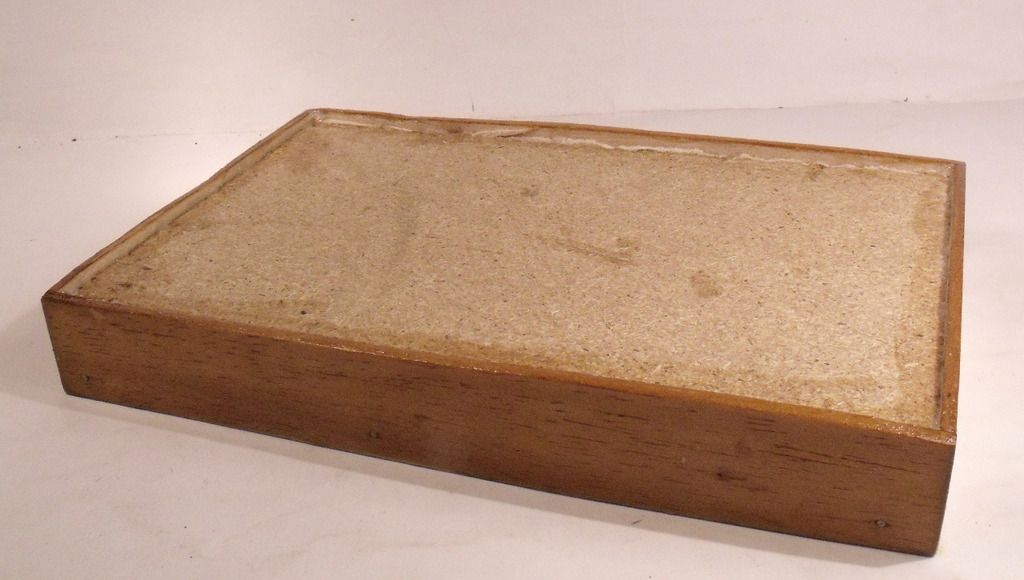
Then stained and varnished. This can now be put to one side until i am ready to add the celluclay.

And that all for now. I am hopeing by the end of the weekenbd, i can start on painting the outside of the hull.

I am a Norfolk man and i glory in being so


On the bench: Airfix 1/72nd Harrier GR.3/Fujimi 1/72nd Ju 87D-3

  • Member since
    November 2009
  • From: SW Virginia
Posted by Gamera on Friday, July 22, 2016 8:06 AM

She's looking sharp Bish, love the interior! Yes

"I dream in fire but work in clay." -Arthur Machen


  • Member since
    December 2002
  • From: Bury St Edmunds, Suffolk, England
Posted by Bish on Friday, July 22, 2016 10:04 AM

Thanks G.

I am a Norfolk man and i glory in being so


On the bench: Airfix 1/72nd Harrier GR.3/Fujimi 1/72nd Ju 87D-3

  • Member since
    December 2002
  • From: Bury St Edmunds, Suffolk, England
Posted by Bish on Sunday, July 24, 2016 3:19 PM

Had quite a busy wekend so thought i would share it with you. having got the rockets finihsed, i fitted some inside, along with the long awaited missing parts from RM.

I was then able to get the top on which went on pretty well. I then laid a couple more rockets on the floor once i worked out where the loader would stand.

It seems as thoguh this kit is based on the vehicle at the Samur tank museum. It includes moulded on hooks for holding the hatch open. These are fitted to the samur vehicle but according to Nuts and Bolts, these are probably a post war addition as there is not sign of these in war time photo's, and i have looked and think they are right.

It was then just down to the last bits of PE on the outside. I used Aber tool clamps as the RM set did not include these. The insid was also filled with tissue to mask off the openings. You can see those hooks have been removed.

Then off to the paint booth. Yesterday i gave it a primer coat, then this morning i got up early before we went out for the day and sprayed the Dark Yellow useing Xtracolor enamels. When we came home, i then sprayed the random squiggles of green and red brown which i could do in one sitting as i didn't have to worry about masking.

And the launcher was done as well.

And after leaving it a couple of hours, i gave the whole thing a dry brush useing MiG oils.

And yes, i was useing enamels, yes i did say a couple of hours and yes it was touch dry. A complete paiunt job and dry brush in 12 hours, who says useing enamels is slow.

And finally, my first pic of the figures. I put the two standing figures toigetehr a couyple of weeks ago. But i waited until the two hull halves were together before doing the kneeling figure to get his arm position right.

So now i will let the oil dry brush dry for a couple of days before a coat of future and the weathering. In the menatime i can work on the figures and finish and fit the tracks.


I am a Norfolk man and i glory in being so


On the bench: Airfix 1/72nd Harrier GR.3/Fujimi 1/72nd Ju 87D-3

  • Member since
    May 2013
  • From: From the Mit, but live in Mason, O high ho
Posted by hogfanfs on Sunday, July 24, 2016 5:41 PM

Bish,

That looks awesome! Wow! You got a lot accomplished! 

 Bruce


 On the bench:  1/48 Eduard MiG-21MF

                        1/35 Takom Merkava Mk.I


  • Member since
    November 2009
  • From: SW Virginia
Posted by Gamera on Monday, July 25, 2016 7:51 AM

Yeah wow Bish you went from about 1/3rd done to about 2/3rds right there! Nice work, good thing for the big hatches so you see all that work you put into the interior. 

"I dream in fire but work in clay." -Arthur Machen


  • Member since
    May 2013
  • From: From the Mit, but live in Mason, O high ho
Posted by hogfanfs on Monday, July 25, 2016 8:30 AM

Gamera

I've been making some slow progress. The running gear is close to being done. Gee whiz, I built the good 'ol Tamiya M3 years ago and this kit is about a dozen times more complex, the suspension bogies are about twenty parts in and of themselvies! Not that I'm complaining or anything, I love this type of stuff. On the other hand the parts here are smaller than those of a typical tank and my eyes aren't what they used to be... Blind Fold

One little point I am confused on here though, the instructions tell you to paint the underside steel, but as I understand US factories at the time just hosed everything down with multiple thick coats of olive drab. Well, plenty of time to do research before I paint the thing... 


Cliff,

Sorry I missed this! Great start on the M3. I'm amazed at how many parts it took to build those bogies!

 Bruce


 On the bench:  1/48 Eduard MiG-21MF

                        1/35 Takom Merkava Mk.I


  • Member since
    November 2009
  • From: SW Virginia
Posted by Gamera on Monday, July 25, 2016 9:02 AM

No worries Bruce, I can understand why since I'm just limping along behind Bish's sprint to the finish! 

As I said over on the '46 GB I'm almost done there so I concentrate more effort here when done there. On the other hand I still have the 1/32nd Zero I really need to move faster on with my own GB though. I must be getting old, I cannot believe we're already over halfway though 2016 already and I have only 5 months left to finish by the end of the year! 

"I dream in fire but work in clay." -Arthur Machen


JOIN OUR COMMUNITY!

Our community is FREE to join. To participate you must either login or register for an account.

SEARCH FORUMS
FREE NEWSLETTER
By signing up you may also receive reader surveys and occasional special offers. We do not sell, rent or trade our email lists. View our Privacy Policy.