SEARCH FINESCALE.COM

Enter keywords or a search phrase below:

Export Model Group Build 2020

64257 views
184 replies
1 rating 2 rating 3 rating 4 rating 5 rating
  • Member since
    May 2015
Posted by Griffin25 on Friday, January 17, 2020 7:31 PM

I think That pit looks real nice bk. Don't forget the PE footpedals. Lol


Griffin

  • Member since
    November 2003
  • From: Naples, FL
Posted by tempestjohnny on Friday, January 17, 2020 8:50 PM

BrandonK

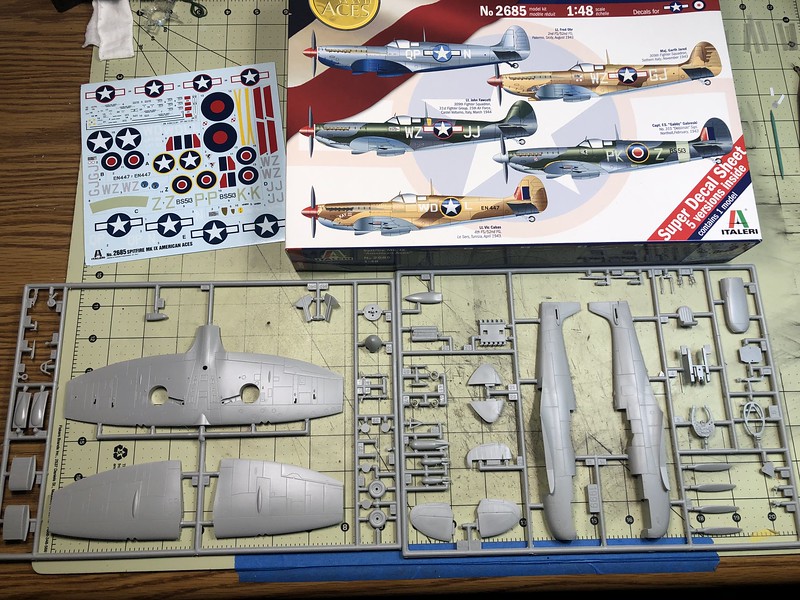
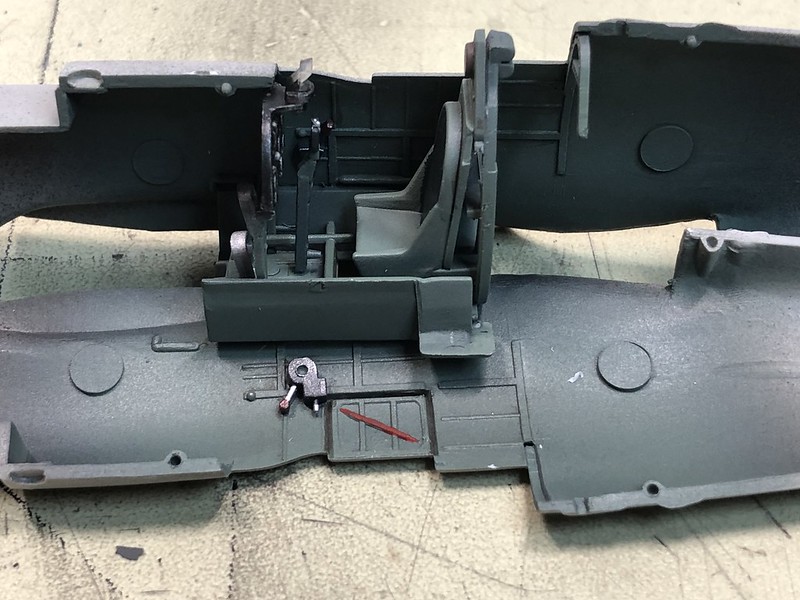
I managed to get started on the Spitfire. Even though it's a Spitfire with US markings, the callouts are calling for all RAF colors. Not sure if this is correct, but I'm gonna go that route anyway. It will look cool when done. I have the pit completed, it's a tad low detail, but that's okay, 99% will never see it anyway.

BK


most American Spits were in British colors. They literally just put stars on them


  • Member since
    May 2015
Posted by Griffin25 on Sunday, January 19, 2020 1:01 PM

So I got the base coat and some shading done. At some point I will attempt the home spun camouflage they did in the field after the 10 Chaffee tanks were flown in disassembled and assembled at the Dien Bien Phu airfield. Each tank was camouflaged by their crews in individual patterns as they felt was best to break up their outlines on the valley floor. My model will represent the tank "Conti" which was the comand tank. With the cargo planes the French had at their disposal in 1954 Indochina it was a remarkable feat. The clandestine CIA air force assisted as well. The American tax payer paid for about 70% of the French effort in Indochina from 49' to 54'. 


Griffin

  • Member since
    June 2019
Posted by Mach1 on Sunday, January 19, 2020 8:25 PM

Griffin25: Chaffee is looking good! I really like how you did the shading, and I'm looking forward to seeing it in camo.


BrandonK: Nice job on the pit. Looking forward to seeing the Spitfire come together.


Some progress on the Heinkel - assembled the pit, and finishing glue up of the bomb bays.

  • Member since
    June 2014
Posted by BrandonK on Monday, January 20, 2020 3:18 PM

Just a quick update on the Spit. I have it all built up now and I will mask the canopy and start priming probably tomorrow. This is an Italeri kit that is apparently a rebox of an old Ocindental kit. It's not too bad, but won't get it again, there are far better Spits available now than this kit. It will look good enough for the shelf when done, it won't be a show winner, but at least it will be done.

BK

On the bench:

A lot !! And I mean A LOT!!

2024 Kits on deck / in process / completed   

                         14 / 5 / 2  

                              Tongue Tied

  • Member since
    May 2015
Posted by Griffin25 on Monday, January 20, 2020 7:04 PM

Looking good BK 


Griffin

  • Member since
    May 2015
Posted by Griffin25 on Wednesday, January 22, 2020 11:57 AM

I added a green filter to bring the green back and painted the wheels. I'm going to handpaint the axle caps. I forgot that part and said screw it. Duh. Then I will do some camo. The tank crews did the camo themselves with whatever paint was available so I have some leeway. 


Griffin

  • Member since
    June 2019
Posted by Mach1 on Thursday, January 23, 2020 6:53 PM

BrandonK

Just a quick update on the Spit. I have it all built up now and I will mask the canopy and start priming probably tomorrow. This is an Italeri kit that is apparently a rebox of an old Ocindental kit. It's not too bad, but won't get it again, there are far better Spits available now than this kit. It will look good enough for the shelf when done, it won't be a show winner, but at least it will be done.

BK


She may be a rebox of an oldie, but it looks like she went together really well.

  • Member since
    June 2019
Posted by Mach1 on Thursday, January 23, 2020 7:08 PM

Griffin25

I added a green filter to bring the green back and painted the wheels. I'm going to handpaint the axle caps. I forgot that part and said screw it. Duh. Then I will do some camo. The tank crews did the camo themselves with whatever paint was available so I have some leeway. 


Nice progress on the Chaffee.

Looking back and forth between the shots of before and after the filter has convinced me to finally learn shading. I've admired the finished product of the process plenty of times at shows, but this is just the first time I've seen the progression of base coat through filter where the shading process has "clicked" for me. Thank you for the inspiration to take the dive and expand my modeling skills.

  • Member since
    August 2015
  • From: the redlands Fl
Posted by crown r n7 on Friday, January 24, 2020 9:41 AM

awesome stuff guys..

Im in with a tamiya P-47 1/48 RAF SEA theater.


 Nick.

  • Member since
    May 2015
Posted by Griffin25 on Friday, January 24, 2020 7:54 PM

Mach I use mostly Vallejo products and this book has helped me a lot. Trial and error too. I takr all the pics with my phone and sometimes depending on how its feeling the pics very a bit. It wasn't as stark to start with and its not as green as it looks after the green filter but the filter teqniuqe works very well at blending the shading together so the contrast isn't so abrupt. I just follow the directions and toy around with it. Basically I start with a darker base color then airbrush a lighter shade in the towards the center of the larger flat areas so the edges are darker than the centers. 


Griffin

  • Member since
    June 2019
Posted by Mach1 on Friday, January 24, 2020 8:03 PM

crown r n7

awesome stuff guys..

Im in with a tamiya P-47 1/48 RAF SEA theater.


Glad to have you, Nick!

  • Member since
    June 2019
Posted by Mach1 on Friday, January 24, 2020 8:16 PM

Griffin25

Mach I use mostly Vallejo products and this book has helped me a lot. Trial and error too. I takr all the pics with my phone and sometimes depending on how its feeling the pics very a bit. It wasn't as stark to start with and its not as green as it looks after the green filter but the filter teqniuqe works very well at blending the shading together so the contrast isn't so abrupt. I just follow the directions and toy around with it. Basically I start with a darker base color then airbrush a lighter shade in the towards the center of the larger flat areas so the edges are darker than the centers. 


Thanks for the info Griffin, I'll have to get that book.

  • Member since
    May 2015
Posted by Griffin25 on Sunday, January 26, 2020 10:55 AM

This is the camo I went with. The crews did it however they wanted in the field and reference materials differ widely so I followed suit and did it how I wanted. Lol. This picture is is how it really looks color wise. I think taking pics on a white background makes it hard on my phone camera to use the right auto settings. Its more accurate this way.


Griffin

  • Member since
    June 2014
Posted by BrandonK on Sunday, January 26, 2020 10:57 AM

Griffin25

This is the camo I went with. The crews did it however they wanted in the field and reference materials differ widely so I followed suit and did it how I wanted. Lol. This picture is is how it really looks color wise. I think taking pics on a white background makes it hard on my phone camera to use the right auto settings. Its more accurate this way.


Now I like that. This is one really nice looking scheme you came up with on this tank. What a transformation. And, good idea on the background affecting the colors. I'll give that a try on my next shots.

BK

On the bench:

A lot !! And I mean A LOT!!

2024 Kits on deck / in process / completed   

                         14 / 5 / 2  

                              Tongue Tied

  • Member since
    May 2015
Posted by Griffin25 on Sunday, January 26, 2020 3:12 PM

Thanks BK. I'm going to do a dot filter next. Hopefully it will tone it down a bit. 


Griffin

  • Member since
    June 2019
Posted by Mach1 on Monday, January 27, 2020 4:56 PM

Griffin25

This is the camo I went with. The crews did it however they wanted in the field and reference materials differ widely so I followed suit and did it how I wanted. Lol. This picture is is how it really looks color wise. I think taking pics on a white background makes it hard on my phone camera to use the right auto settings. Its more accurate this way.


Nice camo scheme!

  • Member since
    June 2014
Posted by BrandonK on Monday, January 27, 2020 6:09 PM

Just another quick update. At this point the bird is painted. I'll be clearing it tomorrow and then decals and pin wash. Things will slow down now that the detail work starts.

BK

On the bench:

A lot !! And I mean A LOT!!

2024 Kits on deck / in process / completed   

                         14 / 5 / 2  

                              Tongue Tied

  • Member since
    May 2015
Posted by Griffin25 on Monday, January 27, 2020 7:06 PM

That looks great BK. How did you mask it? 


Griffin

  • Member since
    April 2014
  • From: Australia
Posted by lostagain on Tuesday, January 28, 2020 2:30 AM

BK, that is a really nice paint job on the Spit there.  And that's on top of great work in the'pit.

Griffin, really good painting on the Chaffee. That is an unique colour scheme too I like it a lot.

Yes photos on a white background do change the colour a lot, still struggle to get colours coming out the way I see them. 

  • Member since
    June 2014
Posted by BrandonK on Tuesday, January 28, 2020 11:40 AM

Griffin25

That looks great BK. How did you mask it? 


For the camo edges I use Silly Putty, and for sharp edges I mask with Tamiya tape. 

Thanks for the kind words, gents.

BK

On the bench:

A lot !! And I mean A LOT!!

2024 Kits on deck / in process / completed   

                         14 / 5 / 2  

                              Tongue Tied

  • Member since
    May 2015
Posted by Griffin25 on Tuesday, January 28, 2020 1:22 PM

 I'm about as far as I want to get with the main body of the Chaffee. I'll add the ancillary pieces and gear for later. I will add a little more weathering after that. I used a dot filter of blue yellow and redish artist oil paints and a pin wash of black Vallejo wash around most of the raised parts. It toned it down a bit. I'm pleased with how it looks at the moment. Now I'll switch to the Friulmodel tracks. It's a bit monotonous, those tracks, but they add a lot to the overall look I feel. My cat is helping me. Lol


Griffin

  • Member since
    June 2019
Posted by Mach1 on Wednesday, January 29, 2020 7:57 PM

BK: Superb paint job on the Spit.

Griffin: Really like how the camo came out.

  • Member since
    May 2015
Posted by Griffin25 on Thursday, January 30, 2020 5:54 PM

The GD friulmodel tracks are not going to work. I guess it's vinyl track time! $36 down the drain. At least I checked before spend 6 hours putting the effin things together. Ugh. 


Griffin

  • Member since
    June 2019
Posted by Mach1 on Thursday, January 30, 2020 8:43 PM

Griffin25

The GD friulmodel tracks are not going to work. I guess it's vinyl track time! $36 down the drain. At least I checked before spend 6 hours putting the effin things together. Ugh. 


That really sucks, since I've only heard good things about their tracks (fiddly assembly aside). At least you caught it right away and have the vinyl tracks as a plan B.

  • Member since
    June 2019
Posted by Mach1 on Thursday, January 30, 2020 8:53 PM

I've made a little progress on the Heinkel, but not enough to post a photo of yet.

Basically, I've had to go a few subassemblies ahead to figure out which clear part needs to be modified so as not to fix one fit problem while creating others. It makes for an interesting engineering challenge, mildly annoying, but a big step up from the Azur kits I built when I got back into the hobby a couple years ago. I'll have a step by step posted when I get the necessary part(s) modified so I can finish assembling the interior.

  • Member since
    May 2015
Posted by Griffin25 on Saturday, February 1, 2020 5:22 PM

The joy of vinyl tracks. Crying Wheels can't handle the torque when I tried to join them toget. 4 different wheels broke off. At least I started on the side that will be on the far side of the direction of view when the vignette is displayed. After I fix this I am going to use fine wire to attach the track ends. It'll work. Maybe....


Griffin

  • Member since
    June 2008
Posted by lewbud on Wednesday, February 5, 2020 12:34 AM

BK,

That Spit is looking nice!

Griffin,

That's a good looking Chaffee you got there. Bummer about the Fruil tracks not working.

Mach, 

Here's my entry for the build. I built it for the Weekend GB. It's Tamiya's P-51D in Ethiopian markings from 1955-1960.  Decals are by Carpena. Paint is Tamiya AS-12 Bare Metal over their gloss black. I didn't take a lot of pictures for this build, mainly a pic of nonstartedness, a pic of her ready for primer and the finished product. I was successful in my quest to finish her in 48 hours. If I were like John Wick, a man of great focus and committment, I would have been done in about 10-12 hours. On to the pics.

Proof of nonstartedness.

Ready for primer.

Done.

There are a few minor details I need to add such as the formation lights under the wing, and the red fuel caps. Other than that, she's done.  I'll most likely do another entry, but it probably won't be a Mustang. Keep at it guys!

Buddy- Those who say there are no stupid questions have never worked in customer service.

  • Member since
    July 2004
  • From: Sonora Desert
Posted by stikpusher on Wednesday, February 5, 2020 11:09 AM

Griffin25

The GD friulmodel tracks are not going to work. I guess it's vinyl track time! $36 down the drain. At least I checked before spend 6 hours putting the effin things together. Ugh. 


Check to see if Fruil makes sprocket wheels for that vehicle before you can them. They do make some for their tracks to fit on kits.


F is for FIRE, That burns down the whole town!

U is for URANIUM... BOMBS!

N is for NO SURVIVORS...

       - Plankton

LSM


  • Member since
    July 2004
  • From: Sonora Desert
Posted by stikpusher on Wednesday, February 5, 2020 11:13 AM

And yes, Fruil does make the sprocket and idler wheels for a 1/35 M24

http://www.friulmodel.hu/en/aw-21-m24-chaffee-i188/


F is for FIRE, That burns down the whole town!

U is for URANIUM... BOMBS!

N is for NO SURVIVORS...

       - Plankton

LSM


JOIN OUR COMMUNITY!

Our community is FREE to join. To participate you must either login or register for an account.

SEARCH FORUMS
FREE NEWSLETTER
By signing up you may also receive reader surveys and occasional special offers. We do not sell, rent or trade our email lists. View our Privacy Policy.