SEARCH FINESCALE.COM

Enter keywords or a search phrase below:

Second Strike: Viper GBII June 2012-Dec 2012

18509 views
153 replies
1 rating 2 rating 3 rating 4 rating 5 rating
  • Member since
    December 2006
  • From: Phoenix, AZ
Posted by Fly-n-hi on Monday, September 24, 2012 11:50 AM

Well the paint arrived and I was finally able to get the base coat on.  I applied it lightly so that I wouldn't cover up too much pre shading but I ended up doing my usual post shading as well.  Here she is with the first layer of dark post shading:

Then I went with some lighter post shading (fading) followed by some blending.  There is a little detail painting as well:

The flash really brings out the contrast in the shading.  In normal light its more subtle.

I also hand brushed some Future into the intake to give it a semi gloss appearance.

  • Member since
    June 2009
  • From: Florida
Posted by STFD637 on Tuesday, September 25, 2012 8:50 AM

Fly-n-hi: Looks great!!

All: sorry I have been away. Thanks to medicman for helping keep up the encouragment! Too many things keeping me away lately!

Anyone else I may have forgotten to mention sorry. I tried to get on and play catch up this weekend but the site was down. I have been plugging away on the Hobbyboss kit and now have come to a major hurdle! Has anyone built this kit? If you haven't I would stay away! The only redeaming feature is that it gives you 2 options of verticle stabilizer for the"C" models. I got the kit body together and that is where the problem comes in! The way the halves go together you end up having a "Cliff" at the joint. Forget seam line! I will have pics tomorrow for all to enjoy!Angry Oh how I miss the easier Hasegawa F-16 kit (of which I have several in the stash). i may have to start a new, but at least I know the kit will "fall" together compaired to this!

Keep up the work. I will go back and review anything i may have missed. Any finished builds will be placed on the front page. As far as the time line goes....no worries and your host won't even make that!

Travis

"If a lie is told often, and long enough, it becomes reality!"

Travis/STFD637

make an avatar

  • Member since
    October 2009
  • From: Texas
Posted by Gregbbear on Thursday, September 27, 2012 9:40 PM

I started back on my "Night Falcon" today.   Nothing big.  It really isn't what I originally wanted to build, so other than the True Details seats, box stock.  Since the canopy is a one piece affair, more would be kind of wasted anyways.

Very plain jane compared to the others, but I think it will come out all right in the end.

Cheers,

Greg

- yat yas!


  • Member since
    September 2003
  • From: Northern hemisphere - most of the time-
Posted by blkhwkmatt on Saturday, September 29, 2012 1:24 AM

Now that my Su-37 is complete (for the flankers GB), I have been able to focus more on my viper.  The 1/48th tamiya kit is very nice, almost falls together, i think that the only gaps/seams that I have are completely my fault.  I will be using a Legends productcion ejection seat, and a steel beach intake cover.

my first coat of paint, not quite the right color but close:

my second attempt, much better along with some post shading to add some depth:


Im glad to share my progress, although it is not looking as clean as some of the othe builds I have seen here.


Matt


Quidquid latine dictum sit, altum videtur!!! - Anything said in Latin sounds profound!


  • Member since
    December 2006
  • From: Phoenix, AZ
Posted by Fly-n-hi on Monday, October 1, 2012 2:22 PM

Good lookin' Viper so far Matt.  Colors look good to me.  

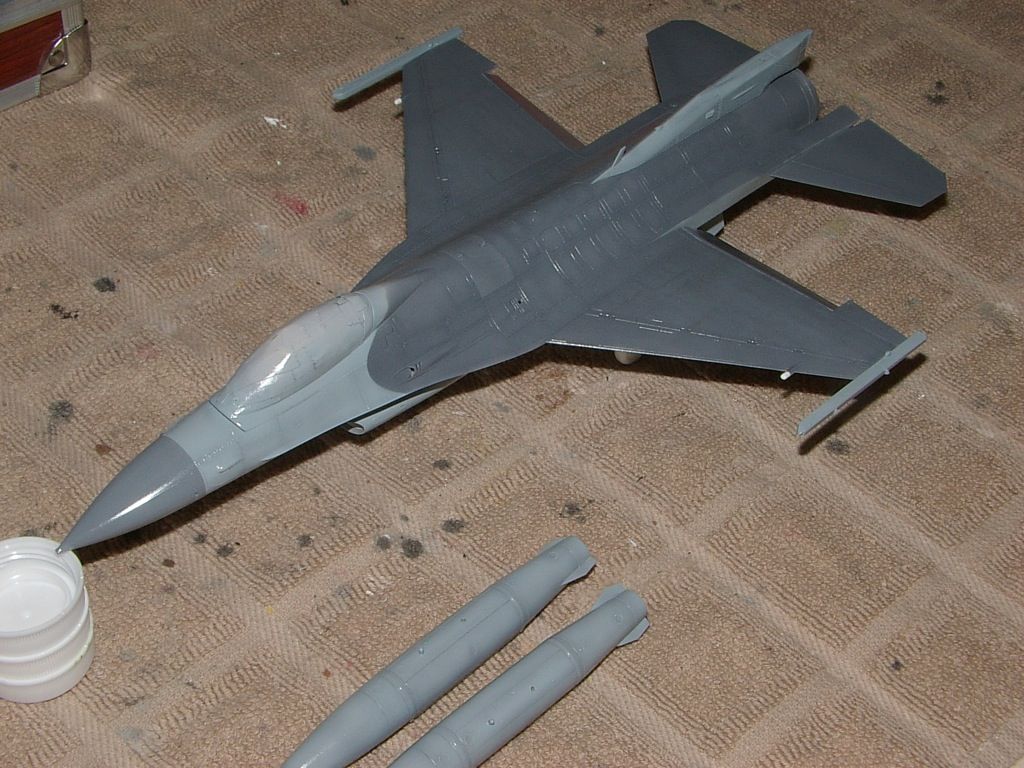
Got some work done on my F-16.  I did some weathering out of order to see how it would turn out.  I like to do oil dot filters and streaks but its difficult to do over a glossy surface.  So before gloss coating it I applied the oil directly to the flat paint.  It turned out really good.  

First I brush over the area with some odorless turpenoid.  Then I apply a dot (or several) of oil where I want the stain.  Then I take a brush dampened with the turpenoid and streak the oil stain bak in the direction of airflow.  Doing this over the flat base coat of paint allows the oil to stain the paint better.  I only did a little bit since the USAF F-16s tend to be pretty clean.

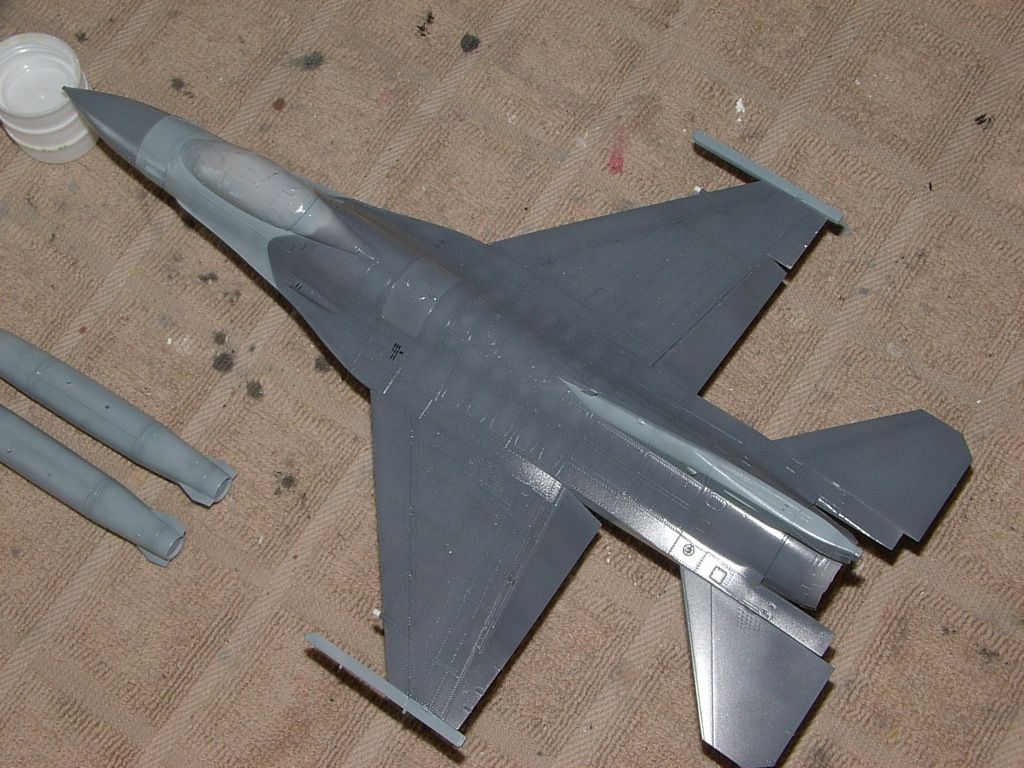
You can see the effect behind some of the hinges of the leading edge flaps and behind the wheel wells.

Then I gloss coated it with Mr. Super Clear.  Love this stuff:

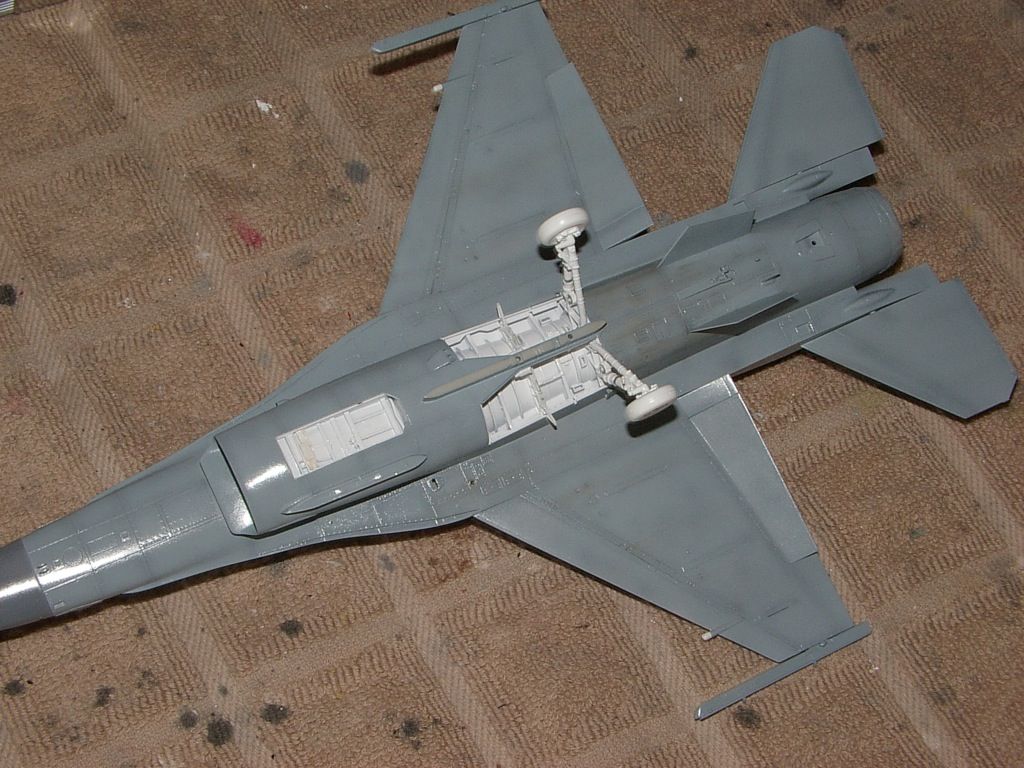
The white wheels are the spare kit wheels that I didn't need.  I placed them there to protect the little nubs from getting any gloss coat or paint on them.  Its a pretty tight fit for the wheels already.

On to the decaling!

  • Member since
    December 2006
  • From: Phoenix, AZ
Posted by Fly-n-hi on Tuesday, October 2, 2012 11:42 PM

Alrighty, here she is with some decals.  Gotta say that Tamiya's decals leave alot to be desired.  They are thick and have a matte texture to them.  I should have gone with AM decals:

Up next will be a wash in the wheel wells, landing gear and gear doors...then a flat coat....then attach all the stuff...then finish up the bang seat.  I can see the finish line!

  • Member since
    December 2006
  • From: Phoenix, AZ
Posted by Fly-n-hi on Tuesday, October 2, 2012 11:55 PM

Thanks!

Yeah, these decals weren't that good.  The detail was fine but man are they thick!  You can see it in the pic of the red tail.  Look right above the "188."  And that's after two more coats of Mr. Super Clear on top of the decals!  The hog is even worse.  Its a two part decal so it ended up being really think.

  • Member since
    December 2006
  • From: Phoenix, AZ
Posted by Fly-n-hi on Tuesday, October 16, 2012 12:15 AM

Ok, here are the latest pics.  I finished the landing gear, applied Mr. Super Clear flat (first time using it) and attached the pylons.  The Super Clear really helped to tone down the hideous Tamiya decals.  I also attached the burner can:

As I post this the Viper is 99.9% done.  Everything is attached and pretty much finalized...just need to attach the static wicks.  Should be done and and posting pics tomorrow!

  • Member since
    December 2006
  • From: Phoenix, AZ
Posted by Fly-n-hi on Tuesday, October 16, 2012 12:46 AM

Thanks prof.  

I ended up spraying the entire model with Mr. Super Clear Gloss to cover the decals and seal them in.  Then, when I sprayed the flat they all blended really well.  The decals on the tail still show up a little bit but you have to shine the light on it at a certain angle.  I'm pretty happy with the results.

Yeah, $30 for on of these is a good deal.  I had a chance to get one at Hobby Lobby for $18 and I didn't do it!Bang Head

  • Member since
    December 2006
  • From: Phoenix, AZ
Posted by Fly-n-hi on Tuesday, October 16, 2012 12:49 AM

I should mention that I completely stripped the wheels and repainted them.  I just wasn't happy with how they turned and I just couldn't let 'em be.  Also, there's a small antennae just ahead of the refueling receptacle.  I accidentally fed the part to the carpet monster and had to scratch build a replacement.

  • Member since
    December 2006
  • From: Phoenix, AZ
Posted by Fly-n-hi on Tuesday, October 16, 2012 3:18 PM

Alrighty, I'm calling this one DONE!  Hope you enjoy it!:

The plane sat somewhat higher on the left side.  So I filed down the wheel to get the wings level.  This was a mystery considering how well engineered this kit was.  That plus the fact that this is my second Tamiya F-16 and the other one didn't do this.  Oh well:

  • Member since
    January 2012
  • From: Hatfield
Posted by Misty on Tuesday, October 16, 2012 4:03 PM

Lovely job, love the shading, come out really nice.

  • Member since
    September 2003
  • From: Northern hemisphere - most of the time-
Posted by blkhwkmatt on Wednesday, February 13, 2013 1:06 PM

Well - in the spirit of not giving up, I have finally glossed and decaled my viper.  Next step is another gloss coat followed by a good wash.  Pics to follow soon.

Quidquid latine dictum sit, altum videtur!!! - Anything said in Latin sounds profound!


  • Member since
    April 2005
Posted by Thunderbolt379 on Thursday, February 14, 2013 12:28 AM

blkhwkmatt -- funny you should post about Keeping at it, after a rediculous hiatus involving an overseas trip and a housemove from hell, I have recently got my -CJ/50 together and would be painting by now if not for the discovery that the AM resin seats I got are in fact so full of bubbles they look like they were carved from a scotchbrite pad... What to do? Use the kit seat which is structurally fine but looks nothing like an ACES II, or  use the AM because it's a scotchbrite pad shaped like an ACES II? :-)

Cheers, Mike/TB379

http://worldinminiature.blogspot.com/

  • Member since
    April 2005
Posted by Thunderbolt379 on Sunday, August 18, 2013 11:03 PM

Hi all,

Well, looong after this GB was officially over, I managed to finish my Hasegawa -CJ/50. It has just left the bench and entered the display case, but better late than never. I thought you'd appreciate a look! It was not a comfortable build, the scale is small for my dexterity, and both the kit and its decals could have been friendlier. Here the centreline station is left empty, I was concerned about ground clearance, the way the gear settled into place, and I wanted to photograph the wash relief in the bay as well.

http://worldinminiature.blogspot.com/

  • Member since
    December 2006
  • From: Phoenix, AZ
Posted by Fly-n-hi on Sunday, August 18, 2013 11:52 PM

Looks good!  I like it!

  • Member since
    April 2005
  • From: Australia
Posted by taxtp on Monday, August 19, 2013 1:56 AM

Looks good T-Bolt.  At least you got it done, and I'm glad to see it.

Cheers

Tony

I'm just taking it one GB at a time.

  • Member since
    April 2005
Posted by Thunderbolt379 on Monday, August 19, 2013 2:27 AM

Many thanks, guys, it's good to have it done at last. I'll be putting up a blogpost about it in a few days, too.

Cheers, Mike/TB379

http://worldinminiature.blogspot.com/

  • Member since
    September 2013
Posted by afish8shipp on Tuesday, September 3, 2013 10:42 PM

Howdy,

Passing through the internet and saw your viper models... From someone who has always appreciated models but never had much of a knack for building them without destroying them... You all are incredible. These models... amazing. I had to make an account just to tell y'all--I hope that you realize how insanely beautiful these models are--real talent.

Really looking forward to see how the 149th bird comes out--in about a month I'll be lucky enough to fly with the Gunfighters, but I'm telling ya, your models look prettier than some of the vipers on the flight line. Really great, when I get some spare time I'll have to grab a few issues of that magazine and sift through here picking up tips. I'd love to be able to a tenth of the talent you guys have. Take it easy!

JOIN OUR COMMUNITY!

Our community is FREE to join. To participate you must either login or register for an account.

SEARCH FORUMS
FREE NEWSLETTER
By signing up you may also receive reader surveys and occasional special offers. We do not sell, rent or trade our email lists. View our Privacy Policy.