SEARCH FINESCALE.COM

Enter keywords or a search phrase below:

Twin Boom Group Build 2013

46039 views
314 replies
1 rating 2 rating 3 rating 4 rating 5 rating
  • Member since
    December 2009
Posted by ww2psycho on Thursday, January 3, 2013 3:51 PM

Bish - Yes, all the instruments have seperate decals, All of them except like 1 or 2 have a double.

  • Member since
    December 2002
  • From: Bury St Edmunds, Suffolk, England
Posted by Bish on Thursday, January 3, 2013 3:57 PM

Not seen that before. My main concern would be once i have a decal on and dry, when i try to add another one, i assume they are quite close together, the ones before it may get wet and move. Sounds like its going to be awkward.


The only thing i can think of is to do a couple, preferable not ones next to each other, let them dry then seal and then move on to the next. But maybe someone has a better idea.

I am a Norfolk man and i glory in being so


On the bench: Airfix 1/72nd Harrier GR.3/Fujimi 1/72nd Ju 87D-3

  • Member since
    September 2012
Posted by GMorrison on Thursday, January 3, 2013 4:01 PM

OK I am in with the good ole "Dollar Nineteen", in this case "Earthquake McGoon" from the battle at Dien Bien Phu.

Italeri in 1/72.

 Modeling is an excuse to buy books.


  • Member since
    December 2009
Posted by ww2psycho on Thursday, January 3, 2013 5:02 PM

At least it has raised detail to separate most of them, some are just on a flat surface. Its going to take me a week just to do the IP!

  • Member since
    April 2003
Posted by shivinigh on Thursday, January 3, 2013 11:04 PM
Trying to find some good referances for the interior of my Gotha. Anyone have any ideas? Seen lots of outside pics but nothing for the inside.


  • Member since
    April 2003
Posted by shivinigh on Friday, January 4, 2013 2:52 PM

and so begins my very first GB. Used Tamiya RLM Grey for the base coat. A friend of mine is teaching me how to do fine line drawing with a calligraphy pen so I can do the panel lines.


  • Member since
    April 2003
Posted by shivinigh on Friday, January 4, 2013 2:56 PM

Bish when you did your Gotha didyou run across alot of fit problems? Trying to fit the cargo floor and it doesn't seem to have a sure way of sitting and the directions are kinda vague on how it goes.


  • Member since
    December 2002
  • From: Bury St Edmunds, Suffolk, England
Posted by Bish on Friday, January 4, 2013 2:57 PM

Afraid i don't have any images of the inside of the 242. But i did find a couple of pics via google. Being the glider version, it looks to be rather sparse, just some basic controls.

 I can't remember whats in the kit. If you can get some PE foot pedals, that would be more than enough.

I am a Norfolk man and i glory in being so


On the bench: Airfix 1/72nd Harrier GR.3/Fujimi 1/72nd Ju 87D-3

  • Member since
    September 2003
  • From: Australia
Posted by Helo H-34 on Friday, January 4, 2013 3:56 PM

GMorrison

OK I am in with the good ole "Dollar Nineteen", in this case "Earthquake McGoon" from the battle at Dien Bien Phu.

Italeri in 1/72.

In regards to the C-119 build , there are two small issues with the cockpit interior .

Firstly , you will need to file down the raised detail on the rear cockpit bulkhead wall wher the table fits ;

The table sits to high and edge can be seen through the side cockpit window ;

On my second C-119 build , I lowered the table so it sits flush with the bottom of the window edge ;

Secondly , I needed to file the sides of the main cockpit console as it was too wide and caused issue's with the fuselage nose join  when glueing the fuselage halves together .

The rest of the build went okay , I don't remember any other major issue's .

John .

  • Member since
    December 2009
Posted by ww2psycho on Friday, January 4, 2013 10:34 PM

Im hoping to start cutting plastic tonight, seat belts should get here tomorrow so I'm aiming for getting the cockpit together.

  • Member since
    August 2009
  • From: Borlando Fla home of the rat
Posted by TREYZX10R on Saturday, January 5, 2013 12:25 PM

Looking great in here Fellas !

shivinigh welcome aboard the roster has been updated.

I've won the battle with the warped wing. I broke the lower wing in 2 spots while tweaking it,the plastic is very brittle. I hit the wing halves with a hair dryer and weighted them ,while hot. At this point the warps are %90 gone . Next after joining the halves I taped them down and weighted them again,this got the slight warp that was left out. The fit to the booms is decent ,some filler will be needed to fix up a gap on the starboard boom . Still waiting on the seats before I can finish scratching the office bits.


  • Member since
    April 2005
  • From: Australia
Posted by taxtp on Saturday, January 5, 2013 3:10 PM

Good progress Trey, but it sounds like that thing is fighting all the way.

Cheers

Tony

I'm just taking it one GB at a time.

  • Member since
    April 2003
Posted by shivinigh on Saturday, January 5, 2013 6:14 PM

letting the glue dry, put some dull coat to get rid of the shiny areas and I think I am ready to put the halves together. They test fitted really well so hope there isn't much problems.


  • Member since
    December 2009
Posted by ww2psycho on Saturday, January 5, 2013 10:08 PM

Whats the name of the tool used to bend PE? I got my seat belts in and need one. I went to like 4 different places today and none had them.

  • Member since
    April 2003
Posted by shivinigh on Saturday, January 5, 2013 11:47 PM

etch mate 3c,8737.html

Check this site. The store is called micro mark.


  • Member since
    September 2003
  • From: Australia
Posted by Helo H-34 on Saturday, January 5, 2013 11:51 PM

Excellent work fixing the wings Trey , no easy feat I'm sure .

And Shivinigh has made an awesome start on his build .

I'm sorry I can't help with the name of the PE bending tool . The few times I've bent PE seatbelts , I just used the edge of a razor blade .

My progress has been slow on the HH-43 ; Instructions mention adding plenty of weight under the cockpit and cabin floor but there is not a lot of free space under there ;

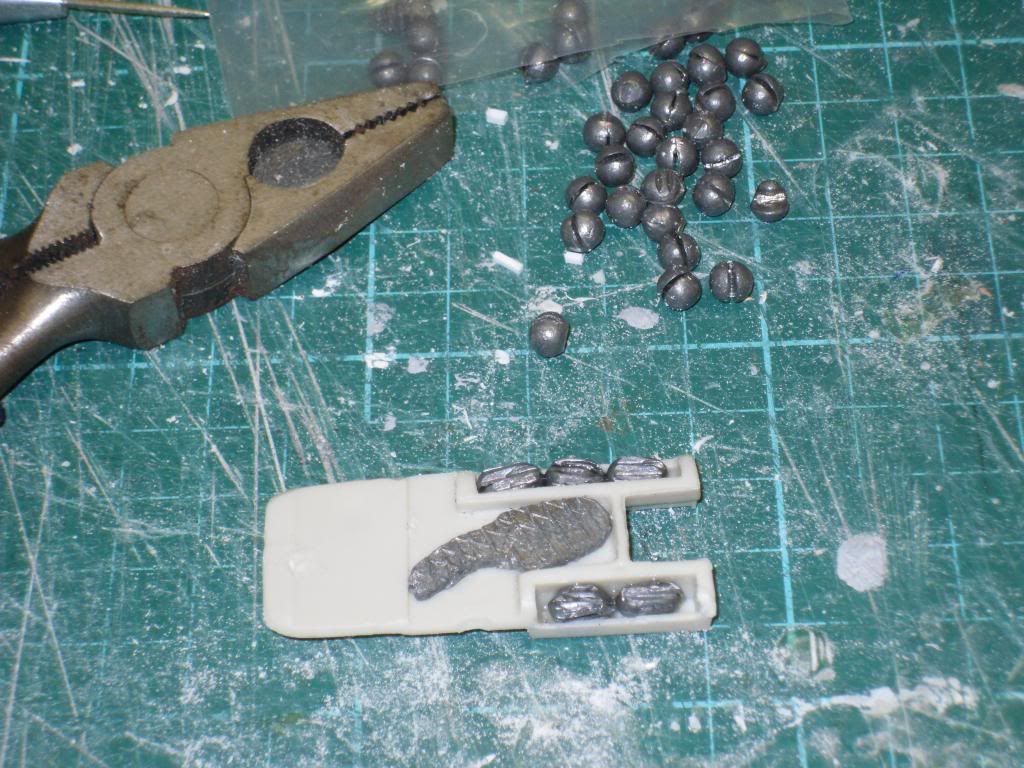
I squashed up some fishing sinkers and fitted them where I could .

I copied this pic from the primeportal walkaround site of the cockpit interior ;

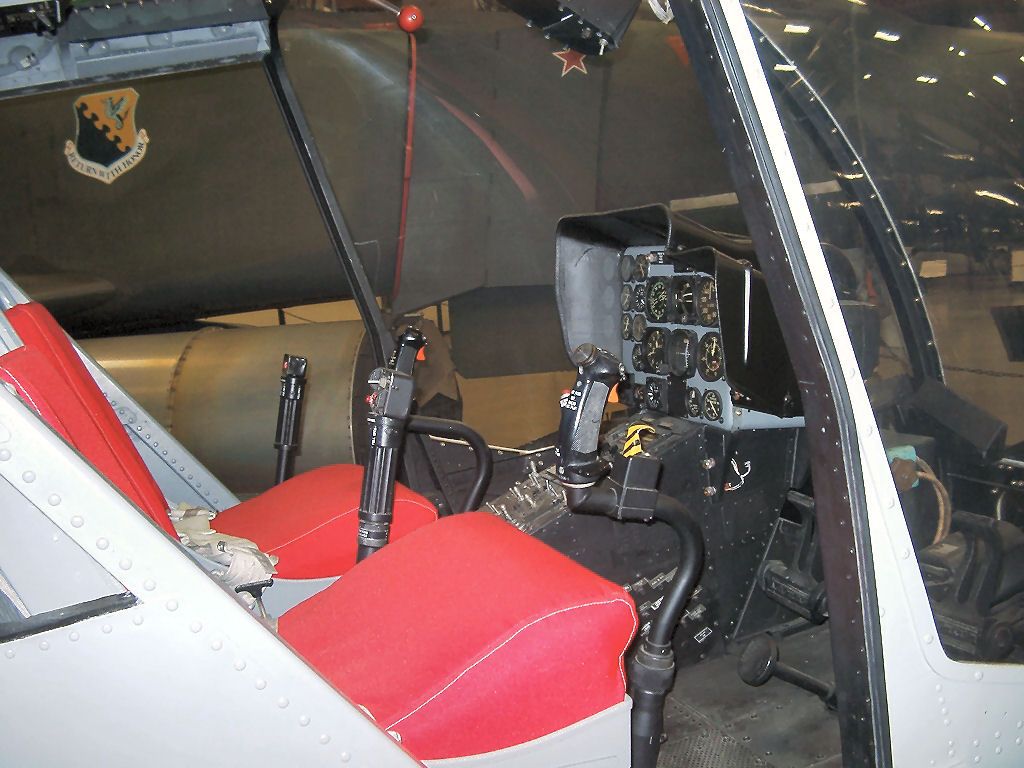
There's a shroud that fits over the main instrument console and it steps down on the right side , so I tried to make mine look the same ;

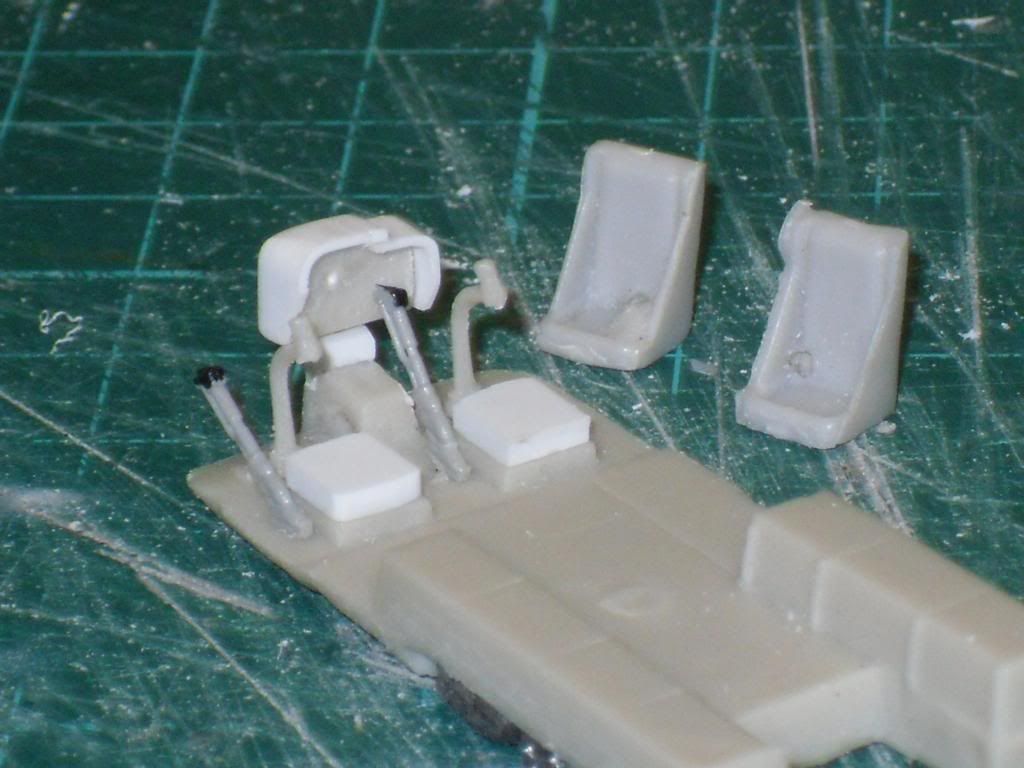
I found some collective sticks in the spares box to use and I added some plastic strip to raise up the front seats a little as they sat too low .

Another pic from primeportal shows and overhead console and lever ;

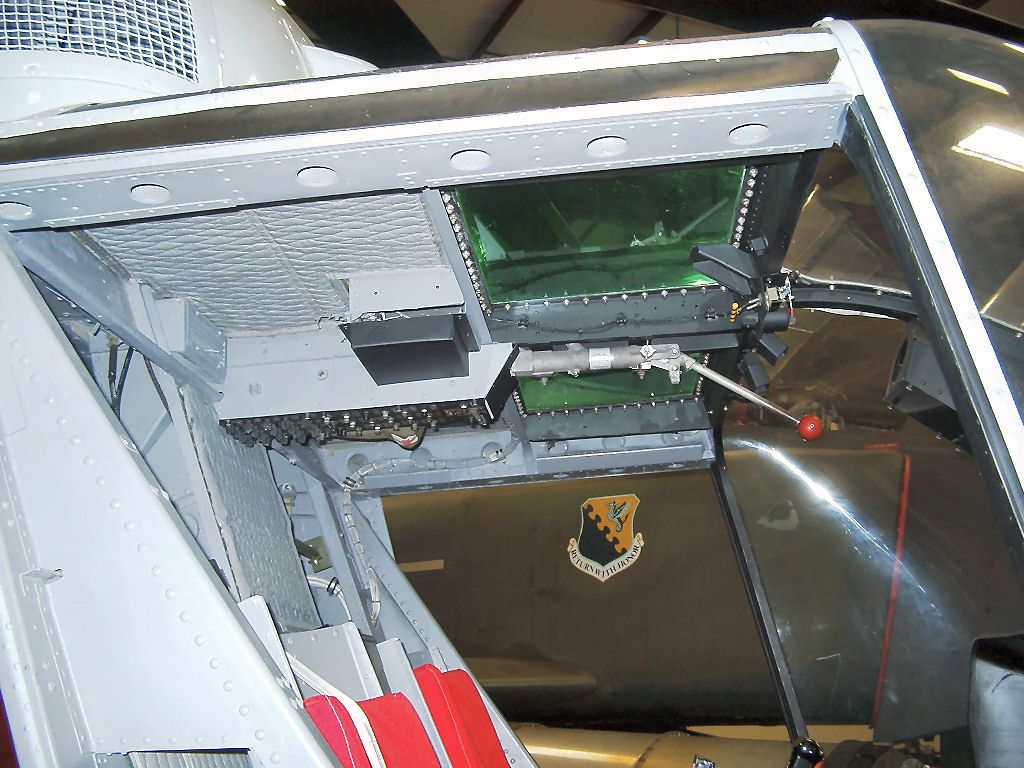
I decided to do the same and I also made a cabin roof section from some plastic sheet with lines scribed in at 45 degrees to represent padded quilting ;

That's all so far , not a lot done but progress none the less .

John .

  • Member since
    August 2009
  • From: Borlando Fla home of the rat
Posted by TREYZX10R on Sunday, January 6, 2013 4:56 PM

John great work detailing the office! The IP shroud looks just right too. Fyi the lever on the overhead console is the rotor brake .


Spent most of the weekend sanding off those hideous rivets and incorrect panel lines. I stole Chuks liquid paper trick to fill in some of the more stubborn deep lines. I also used it to fill the repaired cracks in the wing

I cleaned up the booms and sealed the doors in the up position,suprisingly they fit good. I still have the intakes to tackle,they are far from correct and not sure what I'll do to fix them yet


  • Member since
    September 2003
  • From: Australia
Posted by Helo H-34 on Sunday, January 6, 2013 6:52 PM

Excellent WIP pic's Trey and I didn't know about the liquid paper trick . A lot of times after wet sanding tamiya's putty I get a few very tiny pin holes in the putty surface , I suppose liquid paper would fill those little annoying holes nicely .

I wanted to ask what color scheme you were considing for your OV-10A  build ?

I've built some in 1/72 scale in a variety of color schemes and I have a few more in the stash with some aftermarket decals including some NASA markings ;

The USMC Tri-Color is my favourite

What are you contemplating Trey !!!

  • Member since
    December 2009
Posted by ww2psycho on Sunday, January 6, 2013 7:31 PM

So I'm going to have to contact great wall hobby for some replacement parts. Working on one of the seats some parts broke and went flying who knows where, found part of it cant find the other part. On the other hand I've been making progress. Almost ready to start painting the inside then I will take pictures and share. Looking at the instructions and seeing where some of the decals go on the sides of the cockpits, I have no idea how they think they fit there. I'm not going to put them all on since there isnt even room where they say there should be. Pretty sure no one will notice.

  • Member since
    April 2005
  • From: Australia
Posted by taxtp on Sunday, January 6, 2013 11:12 PM

I am very impressed with your OV-10 collection John. I have ambitions to have one like it one day.

Regards

Tony

I'm just taking it one GB at a time.

  • Member since
    August 2009
  • From: Borlando Fla home of the rat
Posted by TREYZX10R on Monday, January 7, 2013 4:16 PM

John thats quite a stable of ponies you've corraled up! I'm with Tony ,would like that stable for myself as well(just not the testors kits!) I too like the Marine tri color but I think that was a D only scheme? I found some a/m decals with a shark mouth so maybe going a solid green or grey with that,I've got pics of both aircraft just need to make a choice.

ww2psycho I think you'll be okay without the interior decals I left them off mine and do'nt miss them. The office is busy enough without them anyway imho. Looking forward to seeing some pics!

  • Member since
    April 2003
Posted by shivinigh on Monday, January 7, 2013 4:25 PM

Well my glider is finally starting to look like something that might actually fly. Going to be spending the next 2-3 days getting rid of all the seam lines though.


  • Member since
    December 2009
Posted by ww2psycho on Monday, January 7, 2013 10:29 PM

Still no reply about the parts yet, might have to find some small rod and try making the new part, too bad its the pilots seat but depending on how close the walls are to it no one will notice once together.

  • Member since
    December 2009
Posted by ww2psycho on Monday, January 7, 2013 11:52 PM

Hey  shivinigh, is that the cheapest tool for PE? I'll spend the money If I have to, its not a problem, I'm just wondering.

  • Member since
    April 2003
Posted by shivinigh on Tuesday, January 8, 2013 12:11 AM
No I have seen them go for a bit less but $50 or so is actually a good price. I have seen them run up over $100 for some. Just search for photo etch bender. I just showed that one cause I have ordered from that place a few times for stuff and like dealing with the company.


  • Member since
    February 2003
  • From: Rothesay, NB Canada
Posted by VanceCrozier on Tuesday, January 8, 2013 7:16 AM

shivinigh

Well my glider is finally starting to look like something that might actually fly. Going to be spending the next 2-3 days getting rid of all the seam lines though.

Looking good so far - I haven't seen many gliders completed.

On the bench: Airfix 1/72 Wildcat; Airfix 1/72 Vampire T11; Airfix 1/72 Fouga Magister

  • Member since
    December 2009
Posted by ww2psycho on Tuesday, January 8, 2013 11:21 AM

This is what I got from lion roar:

Dear sir.

Thank you buying our kit

For the part replacement, because we have not single spare parts, the only way is that you should buy the whole square, but we shoudl calcilate the price and it will not be very cheap. Meanwhile, for the high freight charge, we suggest you contact with the seller or region agent first and let them to contact with us. We can add the square in their order.

We'd like to know your opinion about it.

Thank you very much.

B.rgds.

Yu Lin

Now lets face it the English isn't that great but he is trying to help. From what I understand I should try putting an order though with the hobby store that I bought it from. Problem is I didn't buy from from a store, I got it from squadron. Anyone know if I would still be able to work something out with a store?

  • Member since
    August 2009
  • From: Borlando Fla home of the rat
Posted by TREYZX10R on Tuesday, January 8, 2013 6:25 PM

Shivinigh the glider is shaping up fast! Looking great too!

ww2psycho I would forward that to Squadron and get their input on it,sounds like Lion Roar is willing to step up to the plate for you and thats good.Seems to me if you can get  Yu Lin in touch with the person that orders for Squadron you'll be good to go.

I've gotten %90 of the booms rescribed,I'll have to add more once I sort out the intake shape issue. I also sanded off the small intakes and will replace one on each lower front starboard side boom,the second one up on the port side is'nt present on the ref aircraft I've photos of.

seats arrived today ,so at last I can start scratching an office

The Horizontal stab needs a few details,ie vortex generators and counter balancers but I'll add those just before paint.

The basic sub components so far

  • Member since
    December 2009
Posted by ww2psycho on Wednesday, January 9, 2013 10:42 AM

I forwarded that email to squadron, just need to wait and see now. I've been working on the gun bay since I need the chair to finish painting the cockpit area. I note to anyone who builds this kit, the gun barrels are too thick to go through the front part that they mount to. Not the part that needs to be glued in but the vertical triangle parts that are molded to the gun bay already. sanding will be needed but from my test fitting anything that needs sanding wont be seen installed if you plan on leaving the doors open.

  • Member since
    August 2009
  • From: Borlando Fla home of the rat
Posted by TREYZX10R on Wednesday, January 9, 2013 7:21 PM

Hope they come thru for you ww2psyco

I've got some minor work done on the Pod. Canopy parts just required a little sanding on the edges to get the fit snug. Filed the seats down so they cleared the canopy and some plastic card covered the ugly seam on the IP. Next up will be scratching all the missing office details,not going to be 'rivet counter' perfect but enough so its not the barren waste land it is now.


JOIN OUR COMMUNITY!

Our community is FREE to join. To participate you must either login or register for an account.

SEARCH FORUMS
FREE NEWSLETTER
By signing up you may also receive reader surveys and occasional special offers. We do not sell, rent or trade our email lists. View our Privacy Policy.