SEARCH FINESCALE.COM

Enter keywords or a search phrase below:

Reich Defenders IV Group Build: Strike From Above

54307 views
513 replies
1 rating 2 rating 3 rating 4 rating 5 rating
  • Member since
    December 2003
  • From: Charleston, SC
Posted by sanderson_91 on Tuesday, March 26, 2013 8:02 PM

Mike,

I'd like to join this group build.  I have the 1/48 Dragon Ju88P-1 w/75mm Pak 40.  Here's a photo of the box. 

Steve


  • Member since
    April 2005
Posted by Thunderbolt379 on Tuesday, March 26, 2013 8:06 PM

Steve, you are SO in with that! Glad to have you join the outfit!

Mike/TB379

http://worldinminiature.blogspot.com/

  • Member since
    December 2003
  • From: Charleston, SC
Posted by sanderson_91 on Tuesday, March 26, 2013 8:17 PM

Mike,

Cool!  I have to finish up my Macchi MC.200 and a B-26 Invader that I have for the 60th Anniversary Korean War GB.  Not sure about any afermarket yet. Hopefully will get started in a few weeks.

Steve  


  • Member since
    October 2008
  • From: Georgia
Posted by Rigidrider on Thursday, March 28, 2013 4:43 AM

Thanks Nathan... Couple of thoughts, Maybe a Bf110, or a Ju189(ugly as sin but still used as ground attack craft) or a Fw190-F? Any thoughts???

When Life Hands You A Bucket Of Lemons...

Make Lemonade!

Then Sell It Back At $2 Bucks A Glass...

  • Member since
    November 2003
  • From: Naples, FL
Posted by tempestjohnny on Saturday, March 30, 2013 6:24 AM

Mike. I'd like to join again. Have a bunch of kits to choose from. 72nd Ju87G-1. 48th Ju87G-2. 4xHs129B and Ju88P-1. John

I am finally able to build again.  Bench was apart because of flooding in the basement. Its been almost 2 years. John


  • Member since
    April 2005
Posted by Thunderbolt379 on Saturday, March 30, 2013 6:41 AM

Glad to see you with us, John. I'll list your project as TBA until you select a starter.

Cheers, MIke/Tb379

http://worldinminiature.blogspot.com/

  • Member since
    October 2008
  • From: Georgia
Posted by Rigidrider on Saturday, March 30, 2013 7:00 PM

Thunderbolt... I think I'm going to do the Monogram Revelle Pro kit of the Bf110 "C" variation, 1/48 scale with some true detail Resin and PE, The decals will be Owl (likely) The "C" was used in both ground attack, as well as the "C-G (I think) as a night attack aircraft for hunting bombers. If that fits the requirements. Thanks

Doug

When Life Hands You A Bucket Of Lemons...

Make Lemonade!

Then Sell It Back At $2 Bucks A Glass...

  • Member since
    April 2005
Posted by Thunderbolt379 on Saturday, March 30, 2013 7:28 PM

Hi Rigidrider -- that sounds excellent. I wasn't sure about a strike role for the 110 so I did some research and there it is: "The Bf 110 enjoyed a successful period following the Battle of Britain as an air superiority fighter and strike aircraft in other theatres. During the Balkans Campaign, North African Campaign and on the Eastern Front, it rendered valuable ground support to the German Army as a potent fighter-bomber (Jagdbomber-Jabo)." I got that from Wikipedea. Well, I had no idea, but there it is! I believe a 110 was proposed by one of the squadron earlier but was declined -- a thousand appologies to the pilot concerned, and if any other Jabo 110s are fancied, have at 'em! My only stipulation would be to look for an example as late as possible so it falls within the period of Germany on the defensive, falling back to the Reich, say mid-43 onward.

Will update p1.

Cheers, M/TB379

http://worldinminiature.blogspot.com/

  • Member since
    October 2008
  • From: Georgia
Posted by Rigidrider on Saturday, March 30, 2013 8:27 PM

Absolutely! My thoughts exactly, When I heard "Reich Defenders" That was what I was thinking of, The withdrawl from the occupied lands and the time of the retreat back to and trying to defend the Mother Land. I'll be looking for something mid to late 1944, early 1945. The unit I'm trying to research used a couple different types ,one carried rocket pods under each wing(not very successfully) and one not only carried 2- 500 lb bombs side by side under the fuselage it also had an upward firing 30mm cannon for downing marauding bombers at night. I'm still looking up info, so I think were on the same page. Thanks...

Doug(RR)

When Life Hands You A Bucket Of Lemons...

Make Lemonade!

Then Sell It Back At $2 Bucks A Glass...

  • Member since
    August 2012
Posted by AndrewW on Sunday, March 31, 2013 9:42 AM

    Well, over the last four days, I've started breaking open the kit (Tamiya's 1:48 F8), washing styrene and resin, cutting up some resin, sticking things (and for once, not my fingers) together and even got a layer of primer over a few pieces this morning.  I'm glad to get this kit moving, and I'm delayed on my Tiffy anyhow while I wait for masks that may (or may not, as it turns out, been waiting since december) be in the mail.

I'm hoping this time I can get this right, it's my third go (the previous two disasters that sit in the basement) at detailing an FW 190.  So far, I've got CMK's F8 detailing kit (bad luck with the Aires set last time), Scale Model Conversions landing gear, a bit of Eduard etch and a set of Aeromaster decals.  I'm planning to mostly use decals, but I may use a few paint masks I have laying around for the balkencruz.  I'm going to wait for the arrival (hopefully quicker than Maketar's paint masks) of the new Eduard Luftwaffe fabric seatbelts, and use those.  I was disappointed to find that though CMK gives you the engine and firewall, absent are the MG131 cannons, so I've ordered a set of Eduard brassin guns as well as they will show.  Otherwise, I've found CMK's resin very nice, free of pores and pretty crisp.  In a day or two, I'm hoping to start on paint for the cockpit tub.  With this kit, I'm hoping to go with Vallejo primer, paint and clearcoats exclusively.  I've picked up and experimented with a bit of their chipping medium, which I may use, and a few of their washes which I think I won't use.  Probably just go to the fallback of Flory or Windsor and Newton oils, as they behave better.

Well, slow and steady and hopefully she turns out as nicely as things are going so far. 

Life is hard, it's even harder when you're stupid - John Wayne.


  • Member since
    December 2002
  • From: Bury St Edmunds, Suffolk, England
Posted by Bish on Sunday, March 31, 2013 1:26 PM

Thought it was time we got a badge sorted. Been looking for a few images and found these 3.


If you guys like any of these i can add the details.


I am a Norfolk man and i glory in being so


On the bench: Airfix 1/72nd Harrier GR.3/Fujimi 1/72nd Ju 87D-3

  • Member since
    December 2002
  • From: Bury St Edmunds, Suffolk, England
Posted by Bish on Sunday, March 31, 2013 2:34 PM

Been playing around with one of the badges and got this.

I am a Norfolk man and i glory in being so


On the bench: Airfix 1/72nd Harrier GR.3/Fujimi 1/72nd Ju 87D-3

  • Member since
    April 2005
Posted by Thunderbolt379 on Sunday, March 31, 2013 7:25 PM

AndrewW -- great start! Good luck on this 190, you certainly have a battery of techniques to bring to bear!

Bish -- good pics! The Mistel is certainly imposing. The 129 is Airfix box art from the 70s, isn't it? Nice layout, looking good! Maybe we need a variety, I usually line up several badges, but then Phantoms are much easier to find pictures of!

Cheers, Mike/TB379

http://worldinminiature.blogspot.com/

  • Member since
    December 2003
  • From: Charleston, SC
Posted by sanderson_91 on Sunday, March 31, 2013 8:45 PM

Those are cool pics for badges.  I reall like the one Bish marked up.


  • Member since
    December 2002
  • From: Bury St Edmunds, Suffolk, England
Posted by Bish on Monday, April 1, 2013 2:54 AM

Mike, it could well be from the Aifix kit. I just found the image, but it didn't mentiuon its back ground. I will add the details to the other two, trhen we have a choice of 3. I am torn between the 129 and the Stuka myself,first one because its a nice image and the second  just because its a Stuka.

I am planning a Ju 87 GB for next year and was thinking of that for the badge, but went with a couple of other options.

I am a Norfolk man and i glory in being so


On the bench: Airfix 1/72nd Harrier GR.3/Fujimi 1/72nd Ju 87D-3

  • Member since
    December 2002
  • From: Bury St Edmunds, Suffolk, England
Posted by Bish on Thursday, April 4, 2013 2:15 PM

Sorry for the delay. I just got the other two pics done. I hope these are ok, i am not really that good with coming up with decent badges.


I am a Norfolk man and i glory in being so


On the bench: Airfix 1/72nd Harrier GR.3/Fujimi 1/72nd Ju 87D-3

  • Member since
    April 2005
Posted by Thunderbolt379 on Thursday, April 4, 2013 7:03 PM

Thanks Bish! These are really excellent, a great set and I'm happy to run with them! Now, GB badges are 150 pixels high (certainly in all my builds), can you produce versions scaled to that size? You may need to recreate the overtype at that size as reducing the current files will cause the lettering to fuzz up.

I usually have my sister, a graphic artist, create the badges, but she's been unwell lately...

This is a great contribution to the build, thank you so much!

Cheers, Mike/TB379

http://worldinminiature.blogspot.com/

  • Member since
    December 2002
  • From: Bury St Edmunds, Suffolk, England
Posted by Bish on Friday, April 5, 2013 12:43 AM

Glad you like them Mike.I only have a few mins, off to work in a bit. I have quickly shrunk them, the text seems ok. But if it looks fuzzy, i will do them again tonight.


I am a Norfolk man and i glory in being so


On the bench: Airfix 1/72nd Harrier GR.3/Fujimi 1/72nd Ju 87D-3

  • Member since
    April 2005
Posted by Thunderbolt379 on Friday, April 5, 2013 1:05 AM

They do look good! Many thanks, will get them onto p1!

Cheers, have fun at work, M

http://worldinminiature.blogspot.com/

  • Member since
    August 2012
Posted by AndrewW on Sunday, April 7, 2013 11:54 AM

Those are indeed some very nice looking badges.  Beautiful work.

After a week, I've got CMK's resin pit mostly done, just waiting on the arrival of the Eduard fabric seatbelts (which I'm hoping to have within two weeks)

And my sidewalls painted up

And lastly, about half of the CMK version of the BMW 801 engine built and painted.

I do apologize for some of the fuzzyness in the photos.  With all parts, I'm shading as I go.  The engine was primered, then painted with a dark shade of grey, mid toned in spots with a mid grey and highlighted with white.  Then a very thin layer of steel, some wash and white dry brush and I was happy.  Next will be attaching spark plug wires (which I will have to thread through some of the braces) and the last little pieces before masking and painting the shaft end of the engine.  Finally a few tiddly bits and exhaust pipes.  I realized I've made a few minor mistakes in assembly (mostly in the location of the braces) but I think they are very minor, and in the long run I hope won't particularly show.  That, and they were attached with epoxy, so they're there to stay.  Overall I'm reasonably pleased with everything so far. 

Life is hard, it's even harder when you're stupid - John Wayne.


  • Member since
    December 2002
  • From: Bury St Edmunds, Suffolk, England
Posted by Bish on Sunday, April 7, 2013 1:00 PM

Thanks Andrew. Thast some nice work there.

Eduard Fabric seatbelt, i've not heard of those. I know they do PE belts.

I am a Norfolk man and i glory in being so


On the bench: Airfix 1/72nd Harrier GR.3/Fujimi 1/72nd Ju 87D-3

  • Member since
    August 2012
Posted by AndrewW on Sunday, April 7, 2013 4:35 PM

Bish,

I'd noticed that Eduard has teemed with HGW and recently released a set of fabric (HGW contribution) with etched buckles and jewelry (Eduard's contribution).  There's a 1:48 set for Luftwaffe aircraft and a USAAF set as well.  I'm hoping they'll release a Sutton harness suitable for a Spit before long.

www.eduard.com/.../Seatbelts-Luftwaffe-WWII-Fighters-FABRIC-1-48.html

www.eduard.com/.../Seatbelts-USAAF-FABRIC-1-48.html

I'm not sure how easy they'll be to use yet, but I'm looking forward to finding out.  Luckily, I already shave my head, so no hair to rip out in trying.  

Life is hard, it's even harder when you're stupid - John Wayne.


  • Member since
    December 2002
  • From: Bury St Edmunds, Suffolk, England
Posted by Bish on Sunday, April 7, 2013 4:46 PM

Yes, now i remember hearing about this a while back. Odd how they have teamed up as i thought HGW did there own PE bits anyway. I wouldn't mind trying a set of tehse in 72nd, as i think they might be easier to position than the PE ones.

I am a Norfolk man and i glory in being so


On the bench: Airfix 1/72nd Harrier GR.3/Fujimi 1/72nd Ju 87D-3

  • Member since
    April 2005
Posted by Thunderbolt379 on Sunday, April 7, 2013 7:22 PM

Nice start, Andrew! I assume you're doing an open cowling for all that detail? Will there be a diorama base? Can't wait to see more!

M/TB379

http://worldinminiature.blogspot.com/

  • Member since
    August 2012
Posted by AndrewW on Monday, April 8, 2013 11:09 AM

Bish,  I'm not certain they make the fabric in 72nd scale, worth looking into though.  I think they will be much easier to position and make look realistic as compared to etch.  Just having a quick peek at the Eduard site, I don't see anything in 1:72, but that doesn't mean the don't (or won't) exist.

Mike, thank you.  I'm planning an open cowl, but now trying to decide if I'll use the supplied Tamiya clear parts or take a chance and learn to work with vaccuform pieces (supplied by CMK) that I've not worked with before.  I'm a bit scared, as anything new is daunting, but without taking chances we don't grow.  At worst, I'll attempt with the vaccuform and if it goes sideways, fall back on the Tamiya clear parts.  And naturally, the cowl will be splayed open.  Any day now I should see the arrival of my order of EZ line which will make up the antenna and the wires for the cowl.  

As for a base, yes, I think so.  I've got another BMW engine (from an aforementioned failed build) that may place nicely as though there were an engine swap out taking place, a few Verlinden figures (mechanics, a workbench, two maintenance crew cleaning guns) an ICM (I think? or the Revell reboxing of) set of ground crew with a dog (and I do love placing dogs in my scenery, just a shame it's not a shepherd), an Eduard styrene hard stand and a set of Woodland Scenics fall trees (beautiful reds, oranges, yellows) that would probably look the part as well as several bags of turf and long grass from Woodland.  I'm thinking fall in Germany, but all of that is a ways off yet.  I still have to get my fuselage halves joined!

Well, back to the airbrush, as I want to get that engine finished off.  Happy building everyone.

Life is hard, it's even harder when you're stupid - John Wayne.


  • Member since
    August 2012
Posted by AndrewW on Sunday, April 14, 2013 9:46 AM

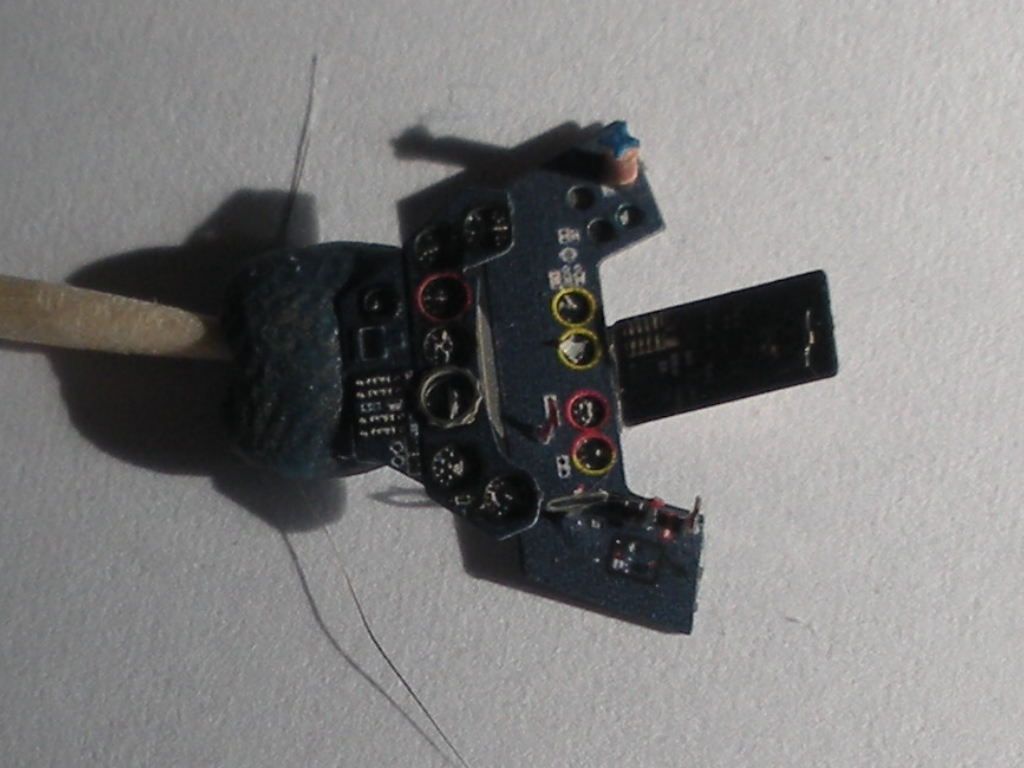
Well, another week gone by, and progress is slow, but it's progress.  I've built up Eduard's etched instrument panel (complete with a dog hair in the background, as they're constantly trying to help, though I'll make sure it doesn't get incorporated in the assembly)

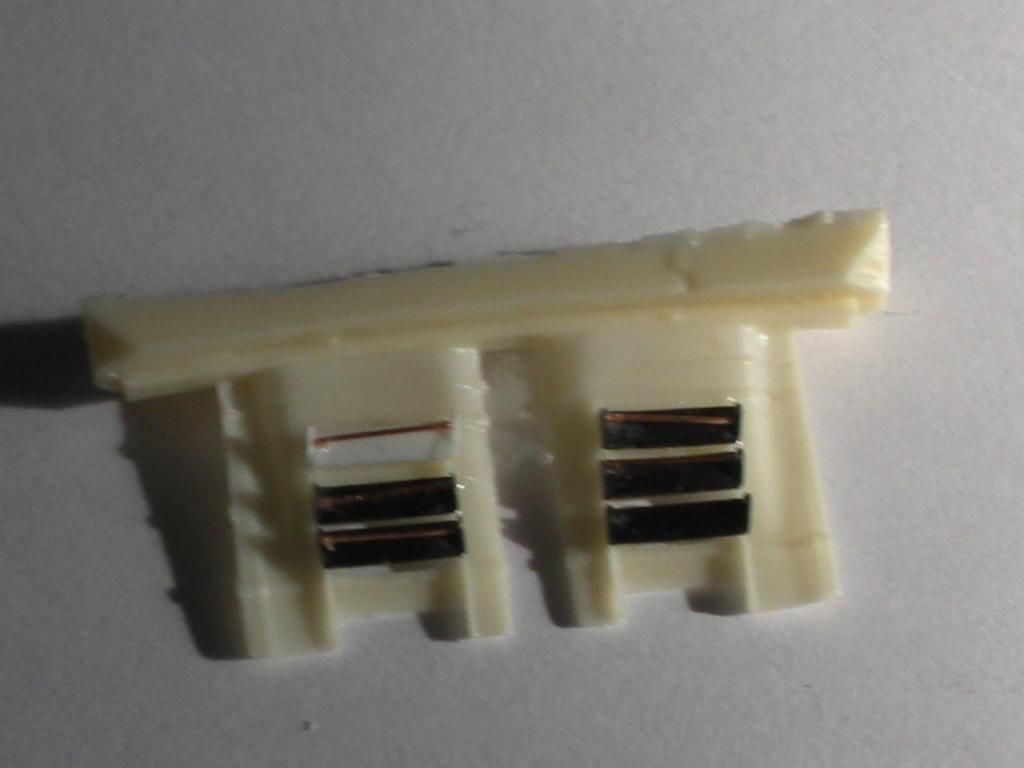
Exhaust shutters (I managed to lose one of the shutters from the etch tree, so I had to fabricate one from styrene strip)

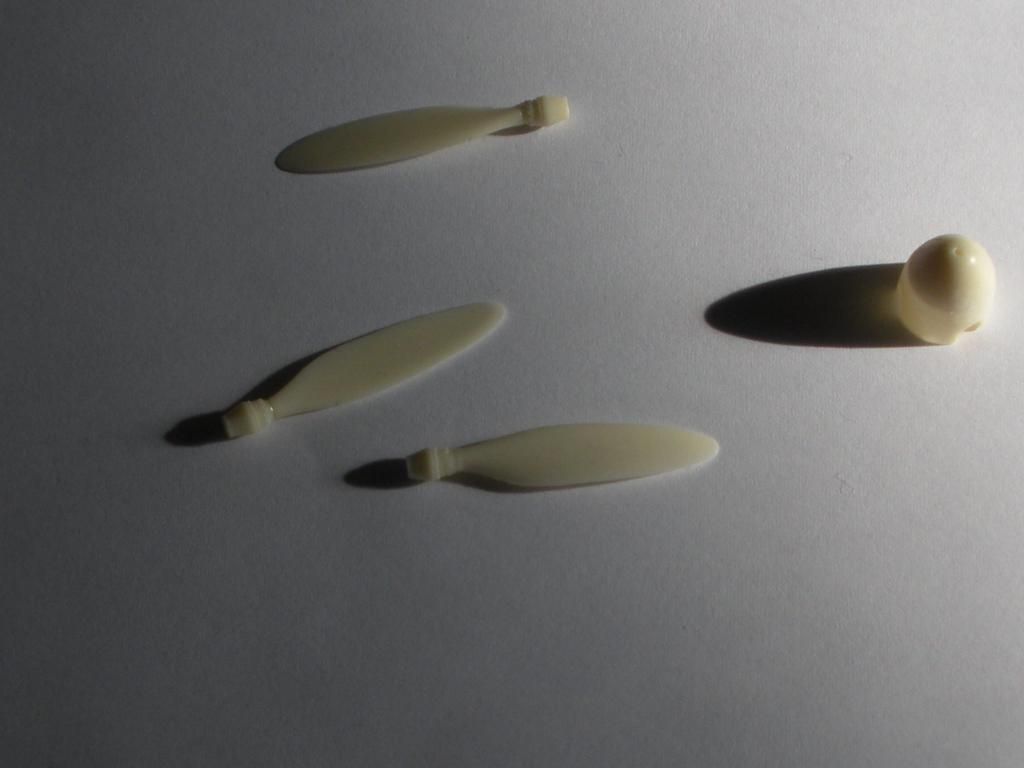
Prop spinner and blades built up

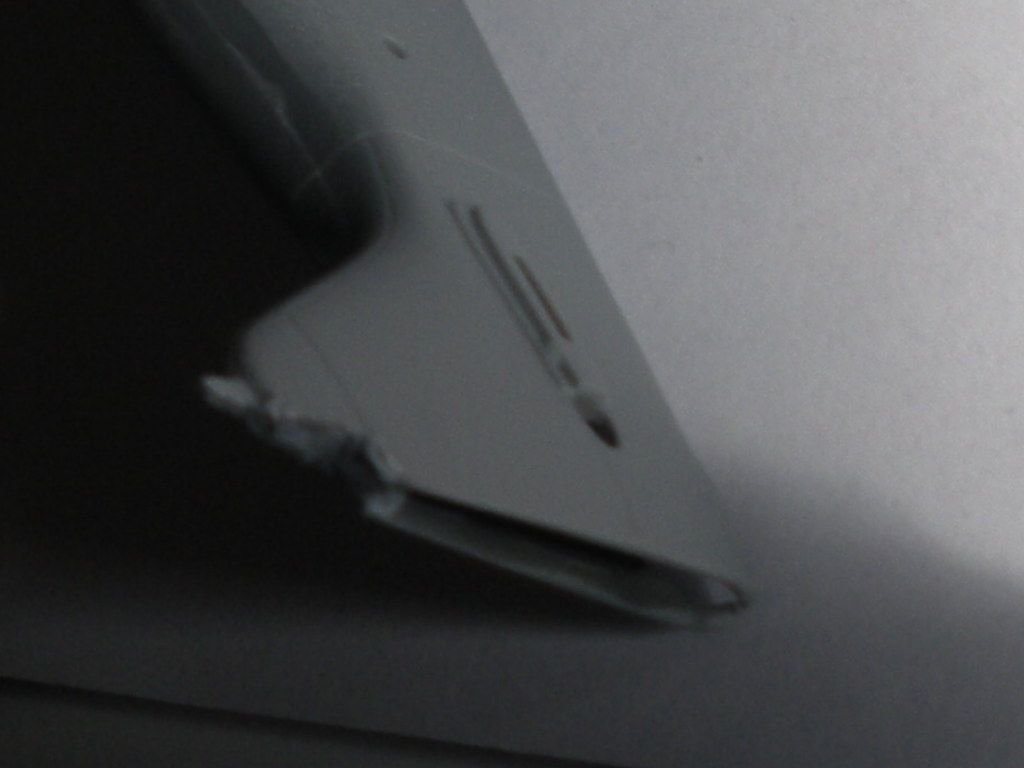
Elevators and stabilizers separated (though the picture doesn't show it, I've beveled the trailing edge of the stabilizer to accept the resin elevator)

Fuselage halves joined up

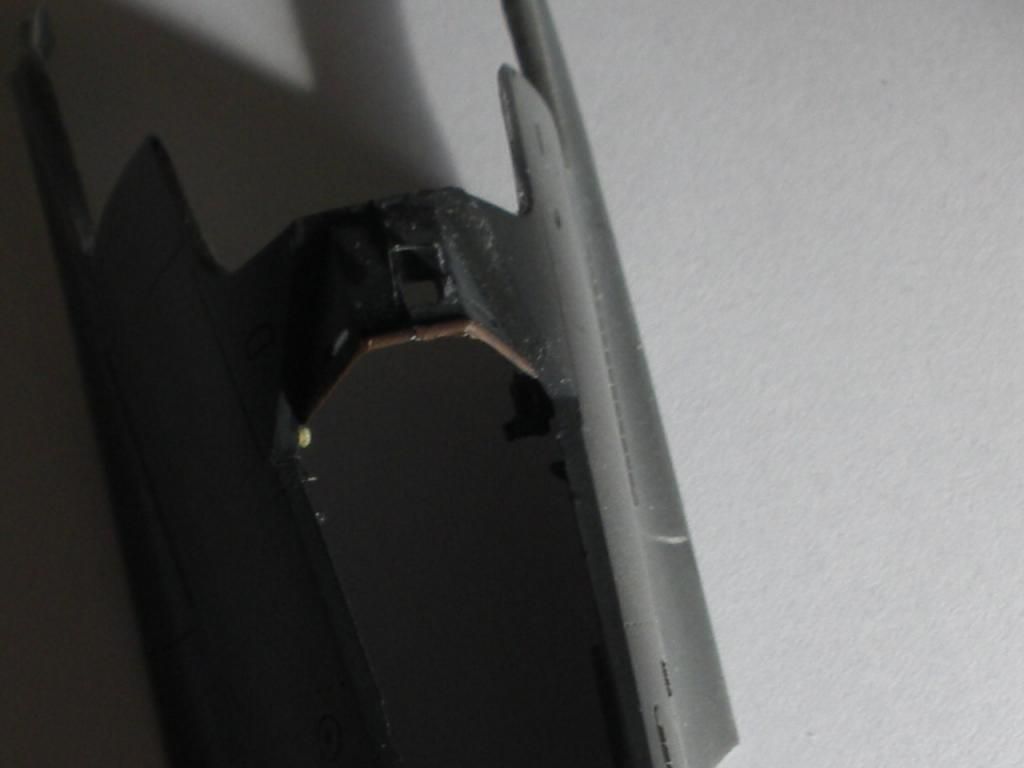
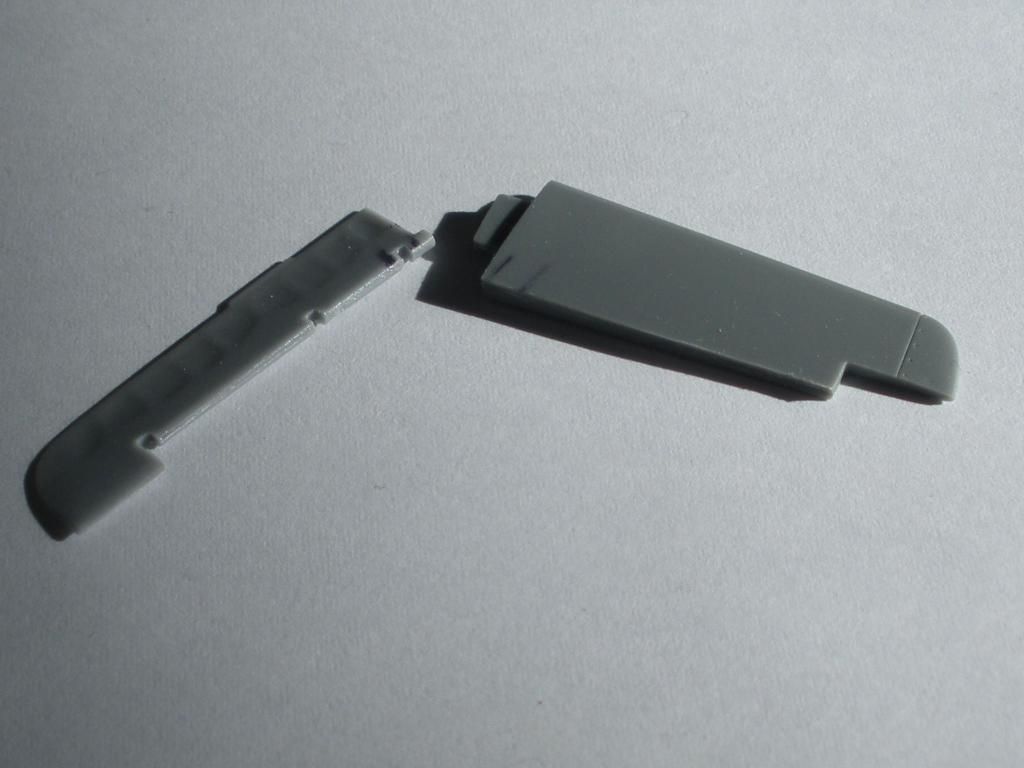
And the rudder separated in preparation for the resin rudder (though I've had to do quite a bit of putty work to counter my overzealous cuts and the fact that the antenna horn on the starboard side was messed up out of the box)

And finally, a few of the exhaust pipes leading from the BMW's cylinder heads and most of the engine paint finished.

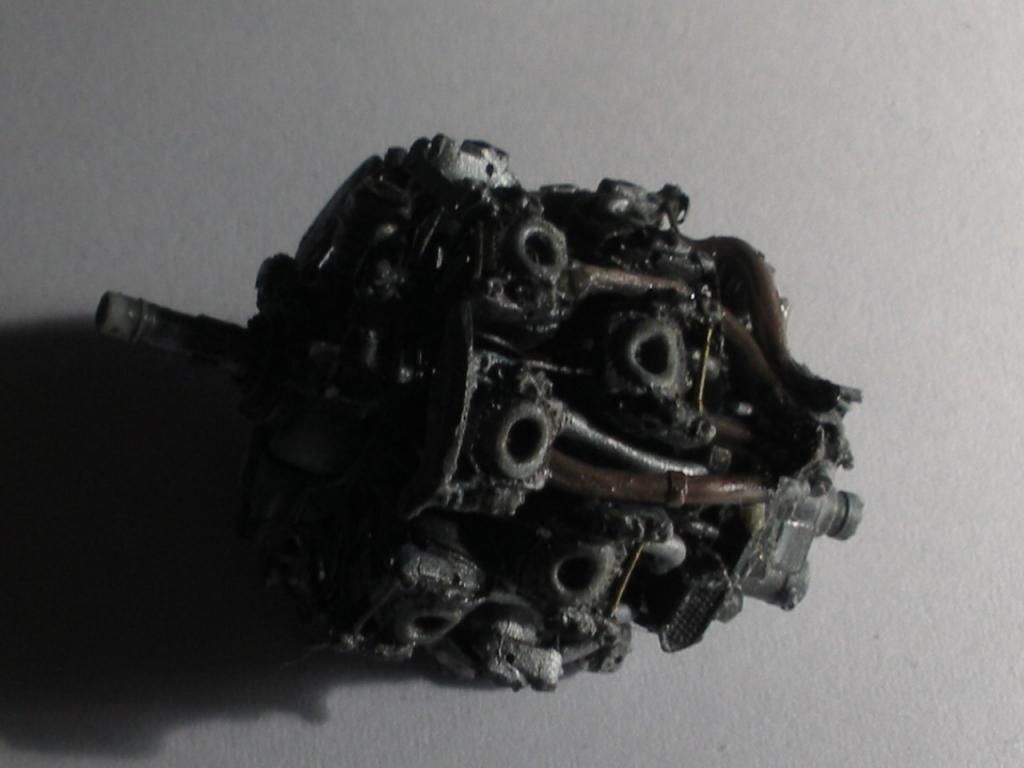
I spent a bit of time hollowing the prop hub centre so I could mount it properly on the engine shaft when I come to that point, and hopefully even have it capable of spinning.

I've started assembling an aftermarket wheel bay, and prepainting the surrounding area on the lower wing which should make masking easier.  I'll have to wait for the mail again as I've ordered up some mg 151's that were not included in the resin wheel bay.  I know it's going to be tricky fitting the last 6 exhaust pipes and having them line up with the outlet under the cowl, so I'm planning to white glue some parts in place over the next few weeks and trial fit once I come to that point.  I've also begun at separating the vacuform canopy, and it looks quite workable.  I'll have to do a little prepainting and masking, as my cuts don't allow it to close perfectly, but with an open canopy it should be passable.  I've gone back to the well for masking the canopy, and used bare metal foil, as it is aftermarket and the Eduard masks didn't fit perfectly.  Now I'll just have to figure out how I will remove the goo left behind by the foil.Huh?

Slow but steady.  Happy building everyone.

Life is hard, it's even harder when you're stupid - John Wayne.


  • Member since
    December 2002
  • From: Bury St Edmunds, Suffolk, England
Posted by Bish on Sunday, April 14, 2013 10:55 AM

Andrew, no, there doesn't sem to be any in 72nd. I might see it could be to small for the fabric belts, but i have seen fabric RBF tags in that scale. I am guessing that the PE HGW use in there sets is probably made by Eduard anyway and Eduard have just released them as well but with there name on the PE. I found this on Hannants and though it has a different number, i think its the same set. And the PE layout is pretty much the same as well.

www.hannants.co.uk/.../HGW148014

The build is coming along nicely.

Mike, i have made a small start on the 262, but nothing worthy of any pics yet.

I am a Norfolk man and i glory in being so


On the bench: Airfix 1/72nd Harrier GR.3/Fujimi 1/72nd Ju 87D-3

  • Member since
    August 2012
Posted by AndrewW on Sunday, April 14, 2013 12:07 PM

Bish,

they certainly do look like the same components.  Just roughly working out the exchange, seems the Eduard offering is a few dollars cheaper, but of course that does not incorporate taxes or shipping, and it's a matter of about 2 or 3 dollars.  

Thanks for the compliments on the build, I just hope it keeps going in this vein as I hit the more frustrating fitting stages (not my strong point).  I figure if need be, I'll just sand and force and push and squish til everything fits in there.  I'm already realizing I may have to omit the oil cooler from the engine cowling to get everything to close up right (I think the omission will be invisible by the time I have the prop on and the engine cooling fan in place) and will probably have to twist the cowls a little bit to get it to seal up, but I expected that.

Looking forward to seeing some photos of the 262, one of my favorite luftwaffe aircraft and I have yet to attempt building one.  I'll have to put it on the short list, though I do have quite a line up on that list.  

Presently, I'm finishing a typhoon in desert markings (hoping to drop that with the aircraft museum in Victoria BC for display), the 190 above, and then I have three spits (a mk v, a mk v trop and mk i) that I'm hoping to add a fair bit of resin and etch (already purchased and stowed in the kit boxes) on to and get to working on one of these years (get them off the shelf in the basement).   Then I'd like to get at a 262 and a 109 and maybe some rotary wing for a change and a challenge.

Life is hard, it's even harder when you're stupid - John Wayne.


  • Member since
    December 2002
  • From: Bury St Edmunds, Suffolk, England
Posted by Bish on Sunday, April 14, 2013 12:46 PM

Ye, the price difference isn't that great. I have a few 262's in the stash and i built one for an earlier RD GB, and that was a variant that didn't see service as well, the C-1a. I plan on doing this build as if it was operational and so i am planning an unusal paint scheme for it.

Can't say i have ever seen a Typhoon in desert markings.

Sounds like you still have some work to do on the 190.

I am a Norfolk man and i glory in being so


On the bench: Airfix 1/72nd Harrier GR.3/Fujimi 1/72nd Ju 87D-3

  • Member since
    August 2012
Posted by AndrewW on Monday, April 15, 2013 3:57 PM

Bish,

I cannot wait to see the paint on the 262.  

The Typhoon really didn't see much tropical service, but there were three aircraft loaned to the RAAF by the RAF for tropical trials, though the experiment was short lived as the tide turned in Africa / Italy and the Typhoons were required more in Europe.  No modifications were made to the aircraft, they were just sent and repainted by the Aussies.  I just figured it was a different scheme, something not seen too often and a little fun to do.  I'm just about done with it, so I'll be posting photos shortly in the aircraft section as I was running a WIP post for it.  

I still do have quite a bit to do for the Wulf, and am pretty much stood still while I wait for the seatbelts (if I were more impatient, I'd use the etched set, but I want to do this right and I do want to see how the fabric build up and sit) and some machine guns that I didn't realize the resin kit lacked.  I wasn't certain if there was a reason why they were lacking from the resin kit, but all my reading (vol 1 and 2 of the FW 190 from Classic Publications) seems to indicate that they were present on the Frederich's.  I don't want to fit the wheel bay without the 151 mg's, and then I can't glue the lower wing to the fuselage without that or the cockpit tub in place.  Hopefully later this week I'll have a few boxes in the mail.

Life is hard, it's even harder when you're stupid - John Wayne.


JOIN OUR COMMUNITY!

Our community is FREE to join. To participate you must either login or register for an account.

SEARCH FORUMS
FREE NEWSLETTER
By signing up you may also receive reader surveys and occasional special offers. We do not sell, rent or trade our email lists. View our Privacy Policy.