SEARCH FINESCALE.COM

Enter keywords or a search phrase below:

Rommel vs Monty (North African GB 1941-43) Jan. 1 - Aug. 31 2014

137099 views
1455 replies
1 rating 2 rating 3 rating 4 rating 5 rating
  • Member since
    April 2005
Posted by Thunderbolt379 on Saturday, December 27, 2014 4:04 PM

Thanks Eric and Bish -- I'm making a push to get as much done as possible and I should be able to take a pic with everything on that's going to be, minus the flag, pretty soon. The flag is a total experiment so I'm not going to count it as part of the build proper. I'll have the stowage in decent shape shortly -- the oil drybrushing should be dry by now so I can get to the next stage on that.

M/TB379

http://worldinminiature.blogspot.com/

  • Member since
    December 2002
  • From: Bury St Edmunds, Suffolk, England
Posted by Bish on Saturday, December 27, 2014 4:06 PM

What are you using for the flag Mike.

I am a Norfolk man and i glory in being so


On the bench: Airfix 1/72nd Harrier GR.3/Fujimi 1/72nd Ju 87D-3

  • Member since
    April 2005
Posted by Thunderbolt379 on Saturday, December 27, 2014 4:52 PM

Bish -- the plan is to use TG's method. The base is textureless kitchen paper of some sort, thick and absorbent, it gets painted with dilute whiteglue to plasticize it, then the design is sprayed through stencils. The paper is wetted from the back to restore some flexibility and pressed gently into the final shape of drape and wrinkles, and when dry is shadowed with pigments.

M/TB379

http://worldinminiature.blogspot.com/

  • Member since
    December 2002
  • From: Bury St Edmunds, Suffolk, England
Posted by Bish on Saturday, December 27, 2014 5:23 PM

Going old school. be interested to see how it comes out.

I am a Norfolk man and i glory in being so


On the bench: Airfix 1/72nd Harrier GR.3/Fujimi 1/72nd Ju 87D-3

  • Member since
    April 2005
Posted by Thunderbolt379 on Sunday, December 28, 2014 6:28 AM

Today I worked on stowage, still trying to get the crates right, and drybrushed the mines and other items. Canteens and grenades in progress now. I finished the helmets, including the Archer decals, using the "wet method," and sealed them with Micro Flat. The lights are all done now. If I could get a decent run at the remaining stowage items, she'd be finished but for those items I've not yet identified/obtained, and of course that flag...

M/TB379

http://worldinminiature.blogspot.com/

  • Member since
    November 2009
  • From: SW Virginia
Posted by Gamera on Sunday, December 28, 2014 5:56 PM

Mike: Looking forward to photos!

"I dream in fire but work in clay." -Arthur Machen


  • Member since
    July 2004
  • From: Sonora Desert
Posted by stikpusher on Thursday, January 1, 2015 12:02 PM

Well I finally got this one completed. It is a conversion of the original issue Tamiya M13/40 Carro Armato into the Carro Comando command tank. I did lots of scratch work including a partial interior.

now to finish up the Miniart crew figures for a display


F is for FIRE, That burns down the whole town!

U is for URANIUM... BOMBS!

N is for NO SURVIVORS...

       - Plankton

LSM


  • Member since
    April 2006
  • From: ON, Canada
Posted by jgeratic on Thursday, January 1, 2015 1:12 PM

Looks fantastic, Stick!  The vehicle colour is a lot easier on the eyes now too - lighting change or was it the weathering that reined in the strong mimetico colour?

regards,

Jack

  • Member since
    July 2004
  • From: Sonora Desert
Posted by stikpusher on Thursday, January 1, 2015 4:30 PM

Thanks! It was a combination of all... Wash, flat top coat, pigments, etc.. It all toned down great... Than you can see how the natural light and flash give different looks to the color.


F is for FIRE, That burns down the whole town!

U is for URANIUM... BOMBS!

N is for NO SURVIVORS...

       - Plankton

LSM


  • Member since
    April 2005
Posted by Thunderbolt379 on Sunday, January 4, 2015 11:00 PM

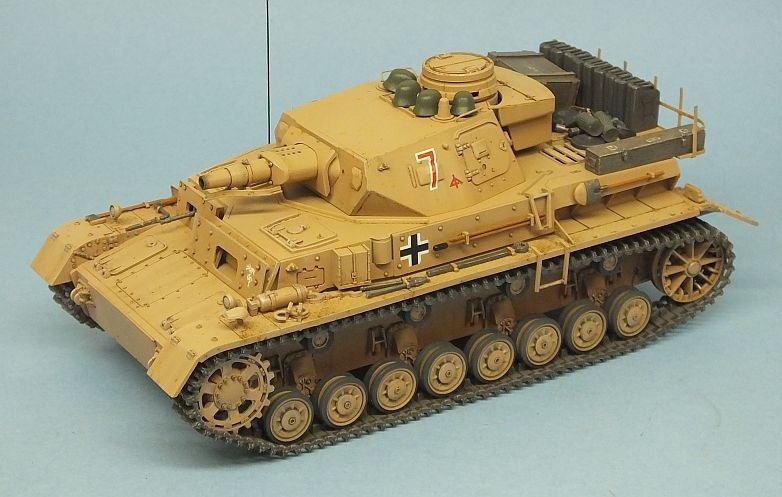
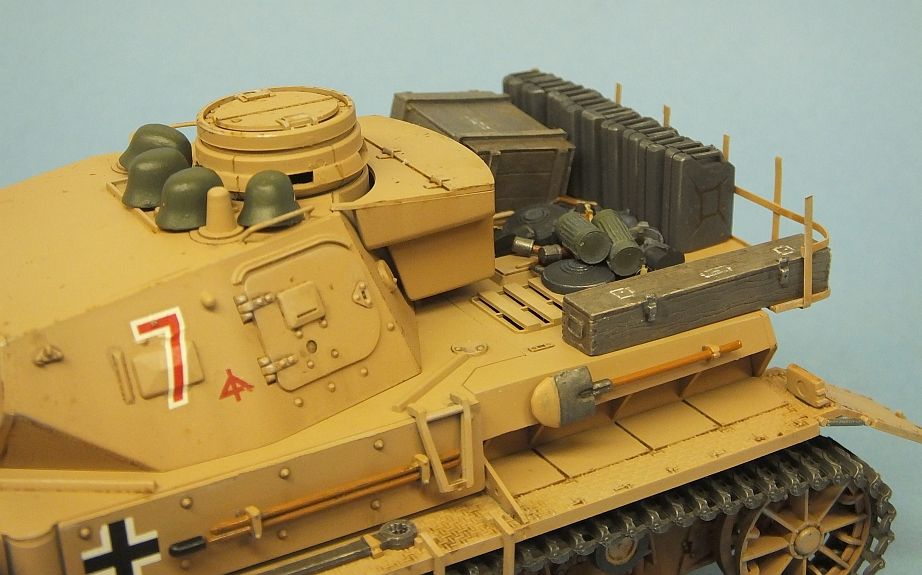
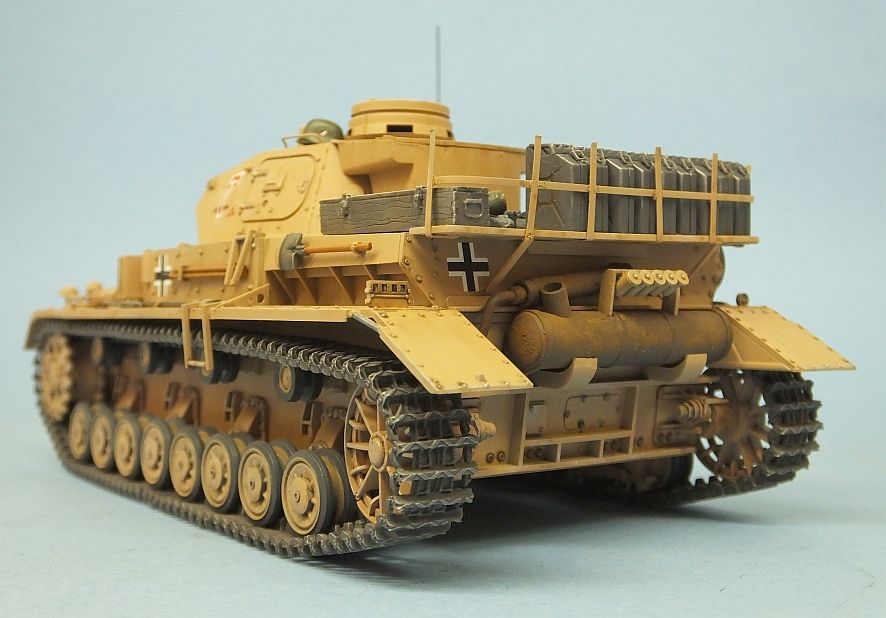
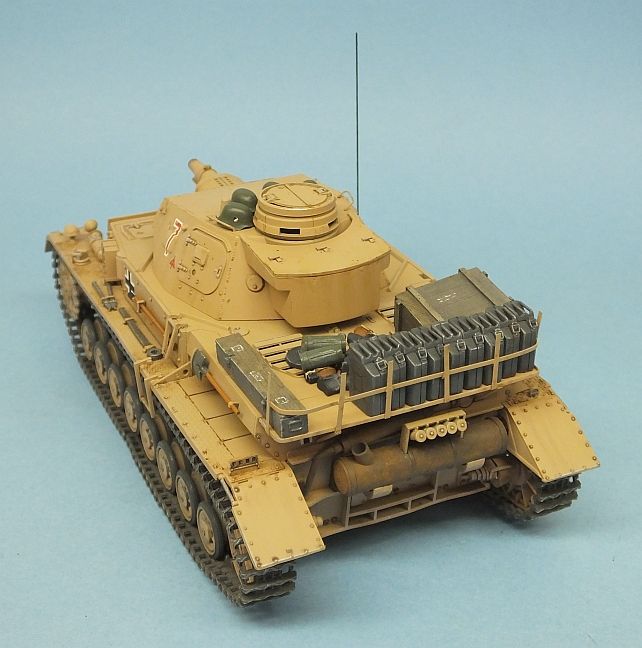
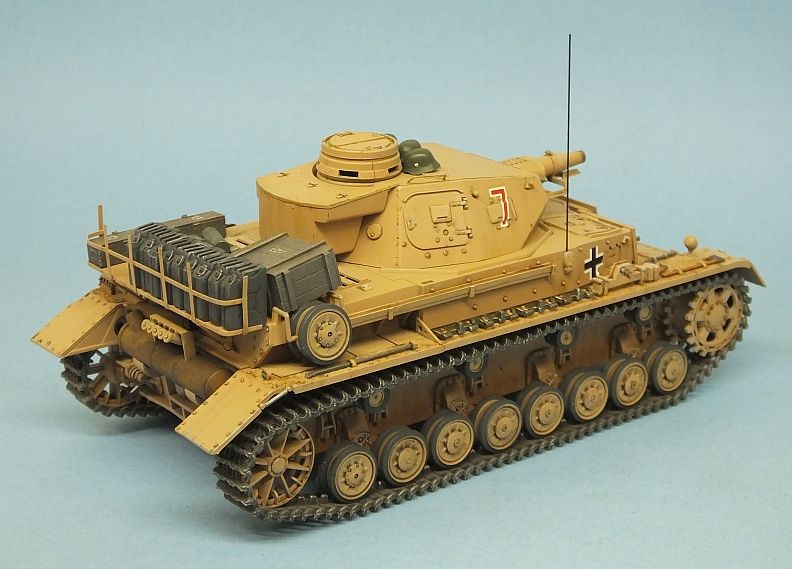
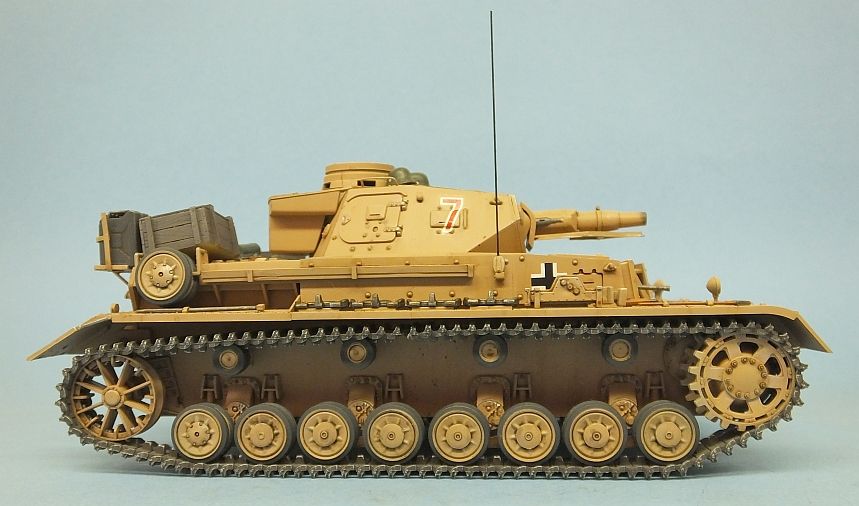
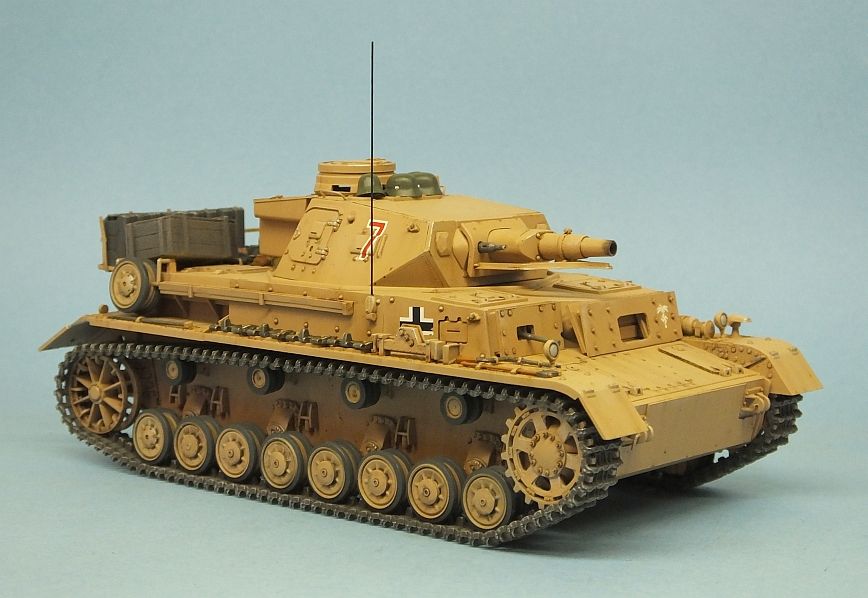
Hi guys -- well, I'm calling her done! The last few items of stowage were a fiddle but I'm delighted with the way the crates came out, they actually look rather like wood!

There are a few differences from the TG original -- he battle-damaged the fenders, which I'm not up to yet, added some hinges/pins to the front fenders which I missed, and of course he got a wider variety of stowage, added the flag and pinned the tracks to create a looping effect. And a bucket hanging on the rack, which I'll add... I'll keep an eye open for stowage items, and take a shot at the flag, just not quite yet.

My sister did the photos using the new HS-50 digital camera she got for Christmas, and a lovely job it does too! I colour-balanced, cropped and sized the shots through Irfanview.

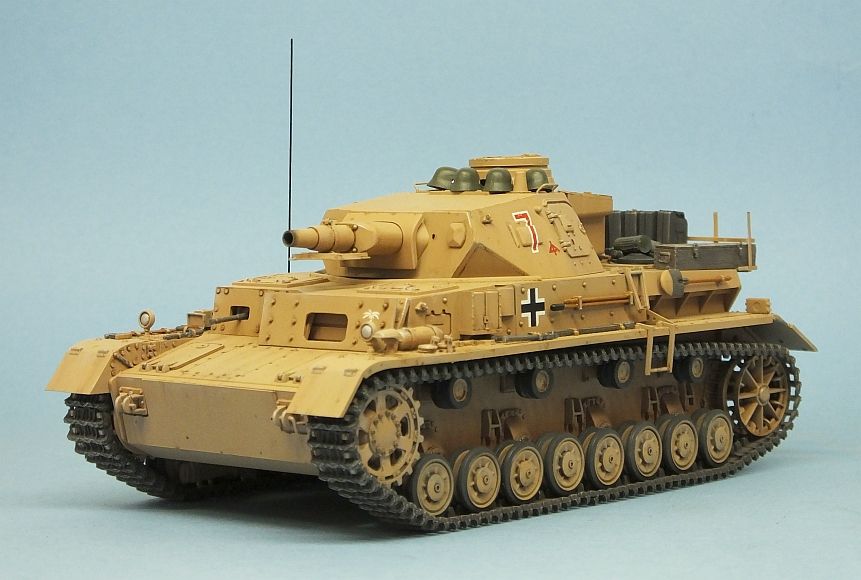
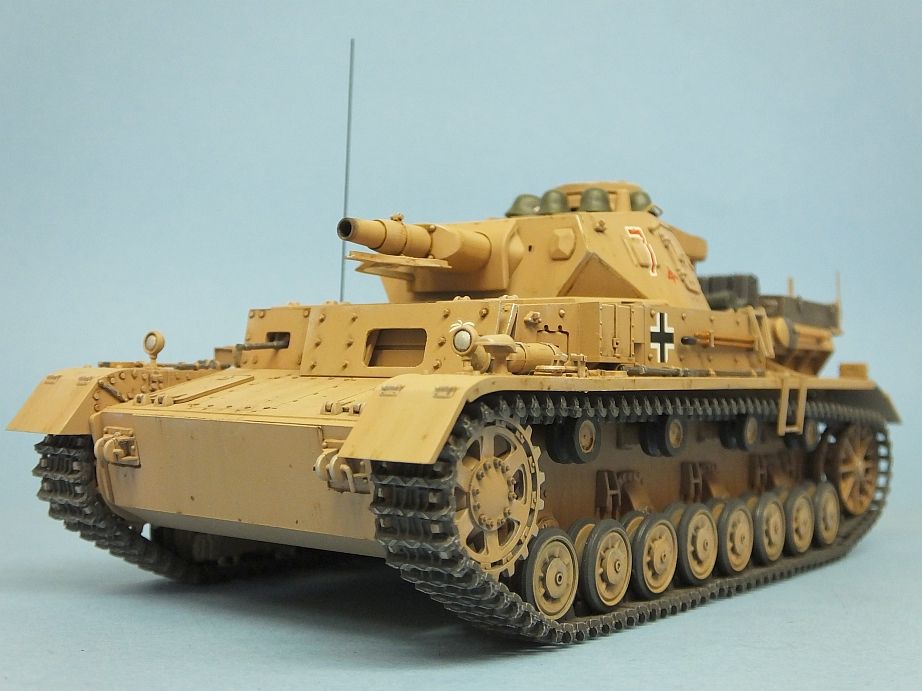
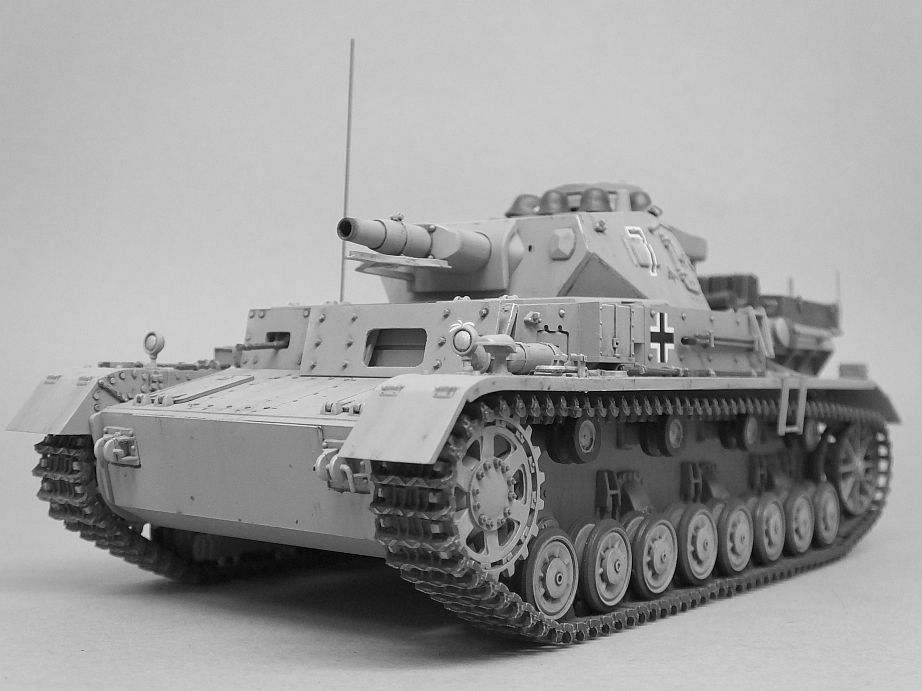
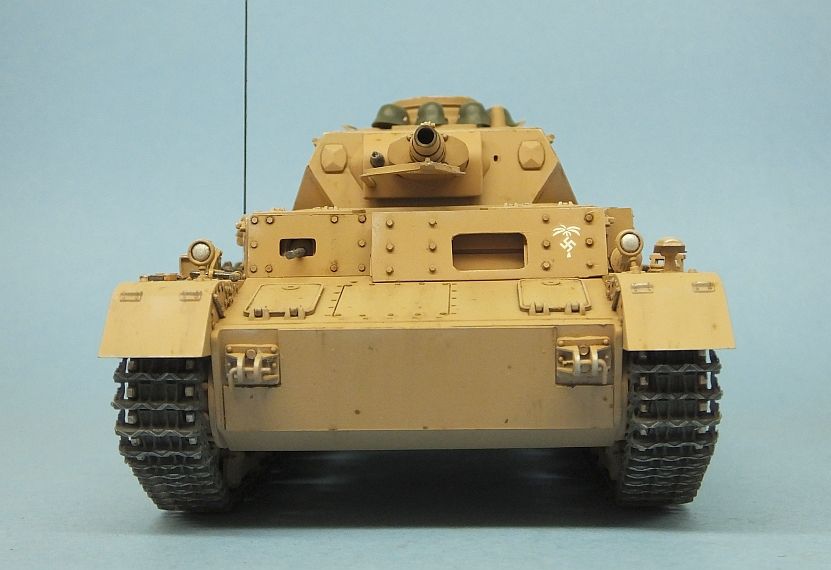
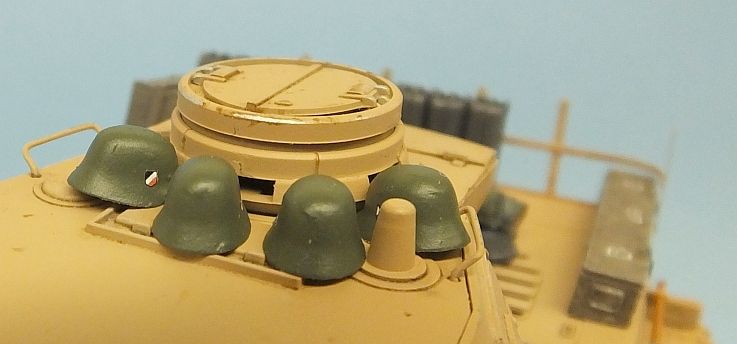
So, without further ado, here's the evidence. Tamiya Pz. IVD, classic kit, with Tamiya acrylics, homebrewed, decals by Archer and Armour Decals, stowage by Italeri, Tamiya and Verlinden, rack scratchbuilt along with the laminate armour, grab handles and extra boltheads.


There we are, then -- the GB has been a lot of fun, I'm glad to have completed three projects for it (my badge is for those, not this one!)

Many thanks for looking, and I hope this project has been worth the wait. It's my twelfth completion for 2014.

Cheers, Mike/Thunderbolt379

http://worldinminiature.blogspot.com/

  • Member since
    April 2006
  • From: ON, Canada
Posted by jgeratic on Monday, January 5, 2015 11:10 AM

Mike - outstanding work, great colour! Yes

regards,

Jack

  • Member since
    November 2009
  • From: SW Virginia
Posted by Gamera on Monday, January 5, 2015 11:19 AM

Mike: Great job, she looks all dusty and weathered without being overdone.

"I dream in fire but work in clay." -Arthur Machen


  • Member since
    April 2005
Posted by Thunderbolt379 on Monday, January 5, 2015 4:17 PM

Thanks, Jack and Gamera, it's a kit I've wanted to do for many years and a project that's been on my agenda for years since I got TG's book. I must do another of these in earlier trim for the blitzkrieg period, I've not done a Panzer Grey project yet...

Cheers, M/TB379

http://worldinminiature.blogspot.com/

  • Member since
    July 2004
  • From: Sonora Desert
Posted by stikpusher on Monday, January 5, 2015 5:32 PM

Beautiful work! I am the opposite of you with this kit, I built a gray one many years ago, but now after seeing your work here I want to build a DAK one...


F is for FIRE, That burns down the whole town!

U is for URANIUM... BOMBS!

N is for NO SURVIVORS...

       - Plankton

LSM


  • Member since
    April 2013
Posted by SchattenSpartan on Saturday, January 10, 2015 5:50 PM

Mike & Stik: Both your tanks look magnificent! I think the weathering on each of them is spot on, including the dust (something I always have problems with)

  • Member since
    April 2005
Posted by Thunderbolt379 on Saturday, January 10, 2015 10:25 PM

Thanks, Clemens! The dust is suggested by the paint rather than being an application of pigment, and its kinda neat it worked that way!

M/TB379

http://worldinminiature.blogspot.com/

JOIN OUR COMMUNITY!

Our community is FREE to join. To participate you must either login or register for an account.

SEARCH FORUMS
FREE NEWSLETTER
By signing up you may also receive reader surveys and occasional special offers. We do not sell, rent or trade our email lists. View our Privacy Policy.