SEARCH FINESCALE.COM

Enter keywords or a search phrase below:

100th Anniversary of WWI GB

75497 views
879 replies
1 rating 2 rating 3 rating 4 rating 5 rating
  • Member since
    December 2002
  • From: Bury St Edmunds, Suffolk, England
Posted by Bish on Sunday, November 2, 2014 3:04 AM

Blue, that is absolutely stunning. The look of the metal, the wood, paint scheme, weathering, everything is just beautiful. I am defiantly getting that kit next year, I just hope I can come close to the results you, Mike, marc and others are able to achieve. I will certainly be taking some notes from your build.

You mentioned fighting up the lines. How exactly do you do that.

And thanks for the compliment, but unfortunately the running of this GB is not down to me. But don't worry, even I struggle to keep up with my GB's.

I am a Norfolk man and i glory in being so


On the bench: Airfix 1/72nd Harrier GR.3/Fujimi 1/72nd Ju 87D-3

  • Member since
    April 2006
  • From: ON, Canada
Posted by jgeratic on Sunday, November 2, 2014 1:02 AM

Blue - cracking job on the Eindecker! Yes

I'll have to remember your method for painting the turned aluminum surfaces, that really turned out quite successful, as is the whole build.

regards,

Jack

  • Member since
    October 2013
Posted by Big Blue on Saturday, November 1, 2014 11:33 PM

Thanks Marcus!  Smile

  • Member since
    September 2013
  • From: San Antonio, Texas
Posted by Marcus McBean on Saturday, November 1, 2014 10:53 PM

Blue,

That is one fantastic build.  It looks like it is ready to take off and do battle or just came back from the battlefield.

Marcus

  • Member since
    October 2013
Posted by Big Blue on Saturday, November 1, 2014 10:48 PM

And here are the final pictures:

That's probably more than enough!

I'm looking forward to seeing the updates on this group build.  Thanks again to all.

Blue

  • Member since
    October 2013
Posted by Big Blue on Saturday, November 1, 2014 10:35 PM

Looks great Dale!  I am looking forward to seeing your progress.

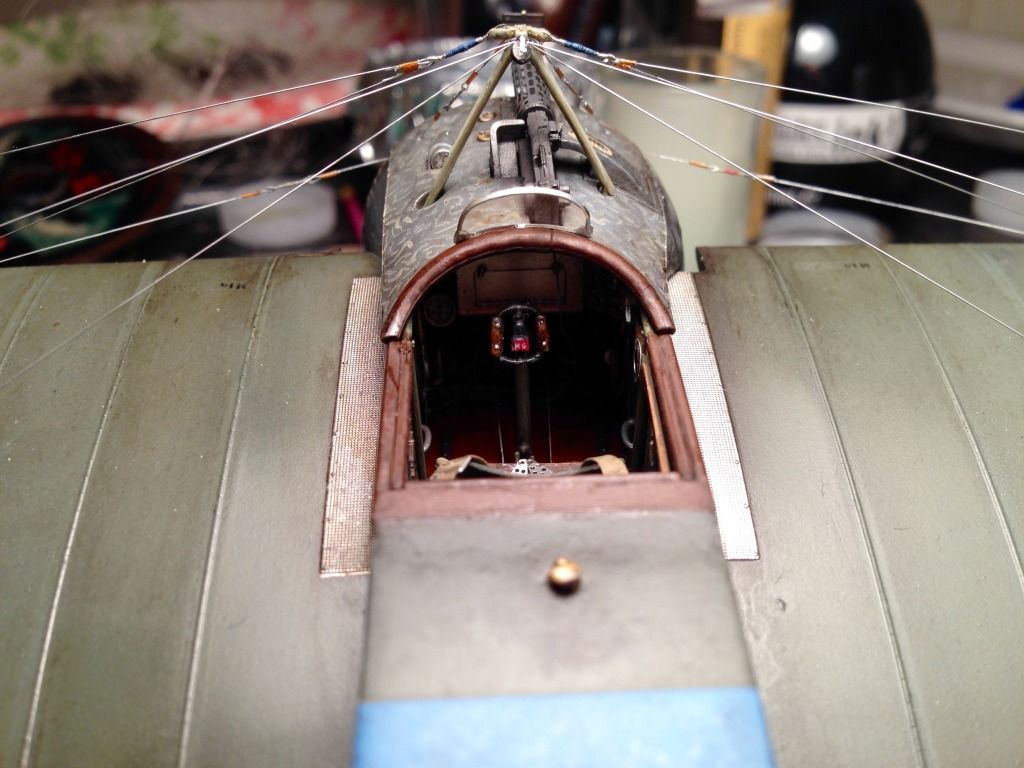
Well, my Eindecker is complete.  Picking up from my last update, I next undertook the upper rigging.  First some setup, the wing warping pylon:

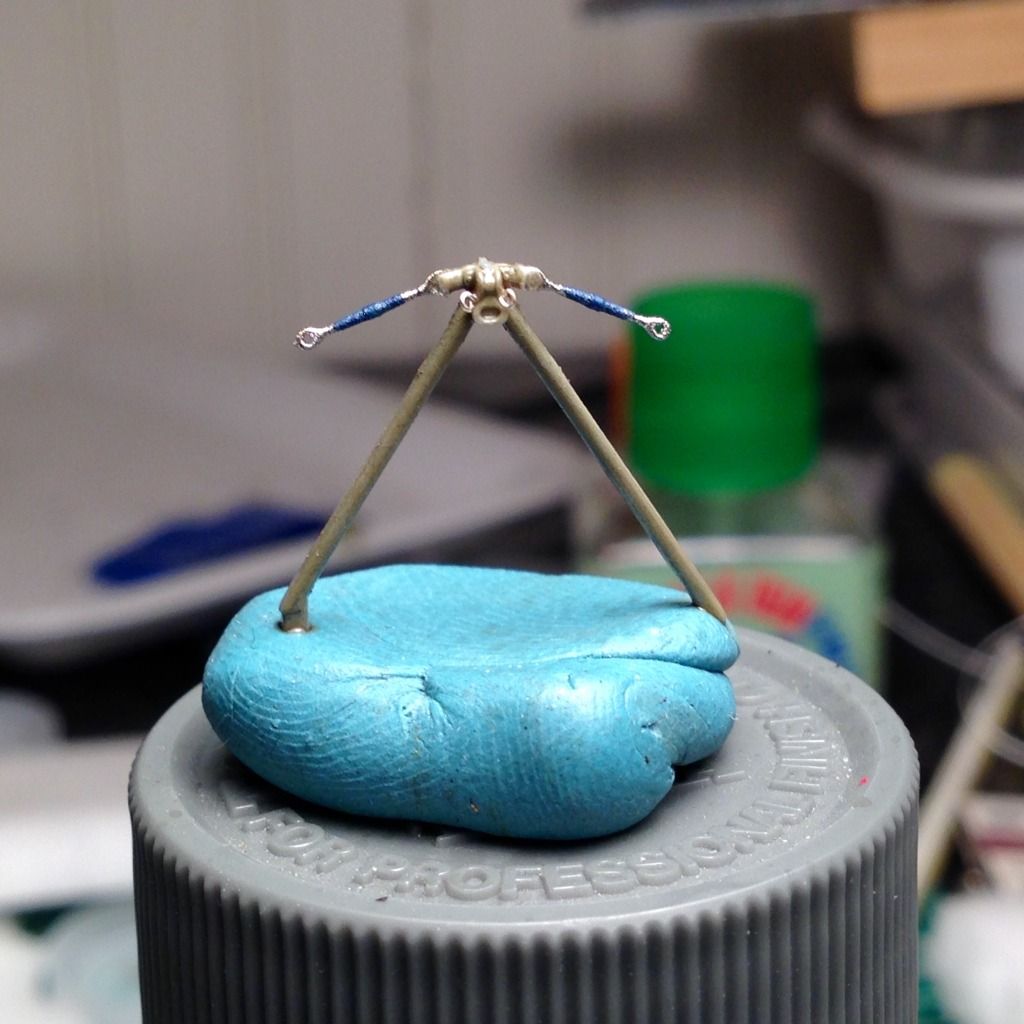
I removed the molded plastic arms and replaced them with 1/32 Gasptach turnbuckles.  I also drilled a pair of holes in the back and mounted eyelets for the rigging lines that run to the cowling.  The Eindecker's turnbuckles were color coded, with blue for the center rigging.

The upper rigging is not as complicated as the lower rigging was, so I did not take as many set up pictures.  Here is one I took while in progress:

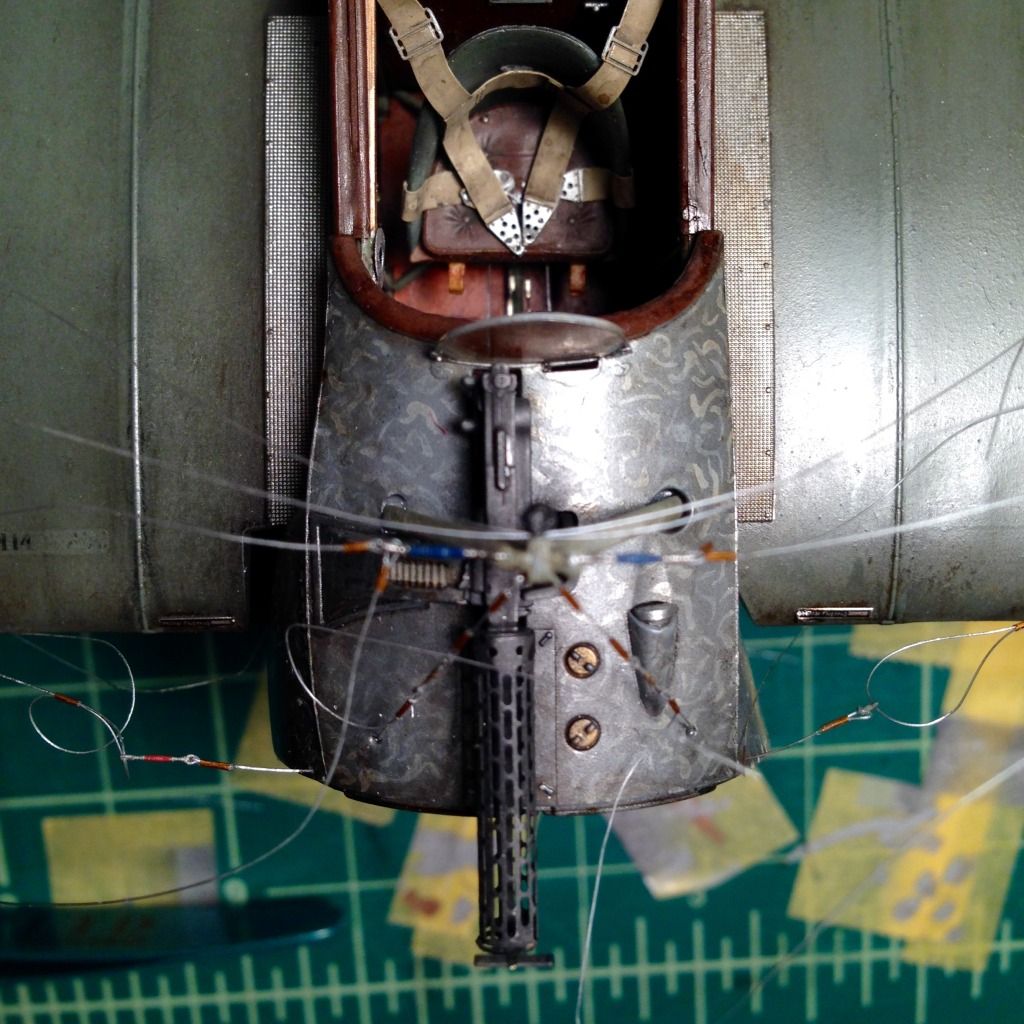
You can see the basic process: mono run through the turnbuckles, and clinched with Polyimide tubing.  I left everything loose until the rigging was complete, and then tightened it all together.  

Resulting in:

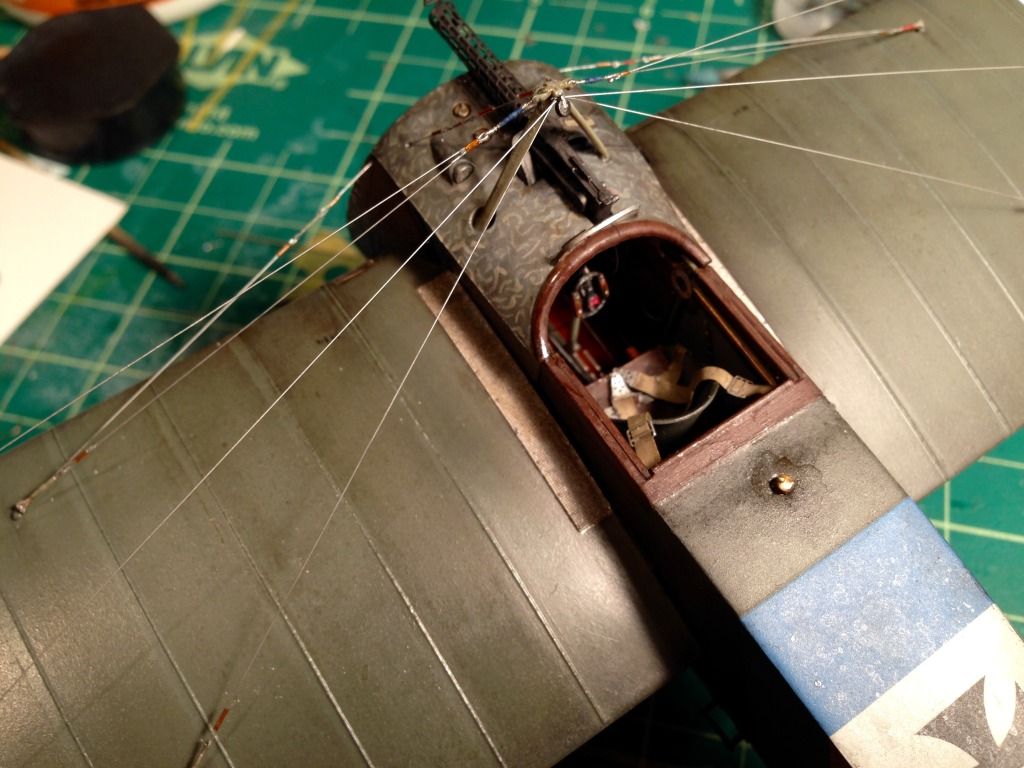
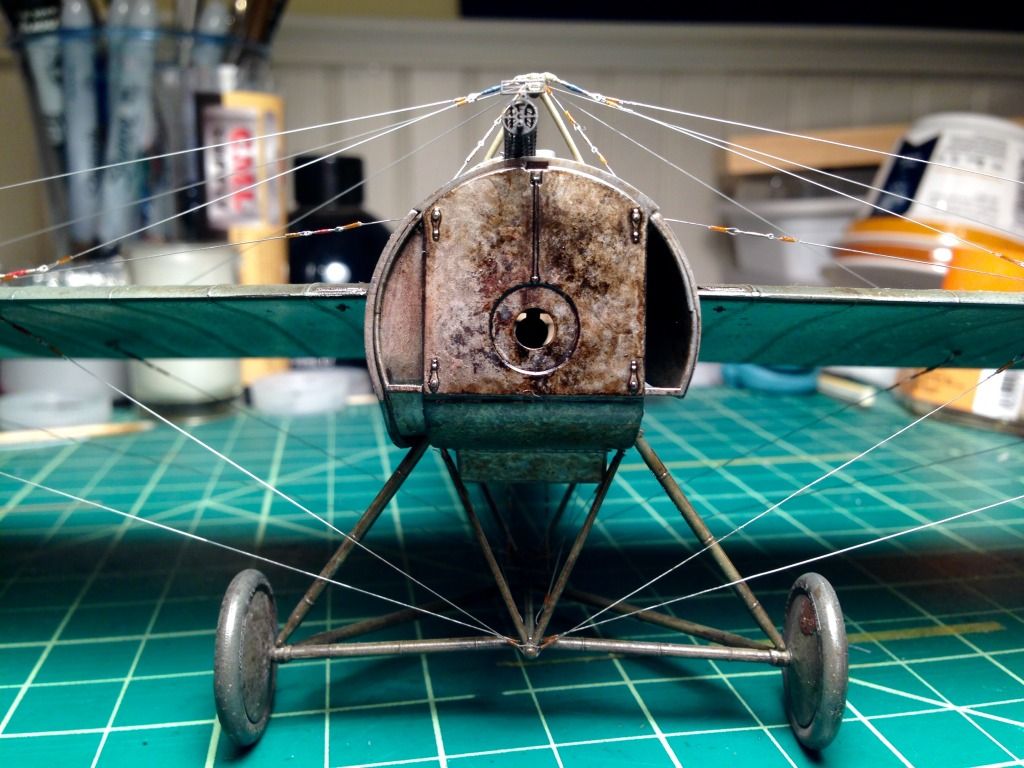
When I was ready to tighten everything up, I supported the aircraft by placing a pair of empty yogurt containers under the wing tips, lifting the wheels off the ground and ensuring the wings would be (if anything) flexed upwards a bit.  I then tightened the upper lines one by one, trying to work symmetrically by wing, and making sure not to introduce slack in the already finished "wires".  Once the upper lines were set and trimmed, I removed the cups and tightened the bottom rigging.

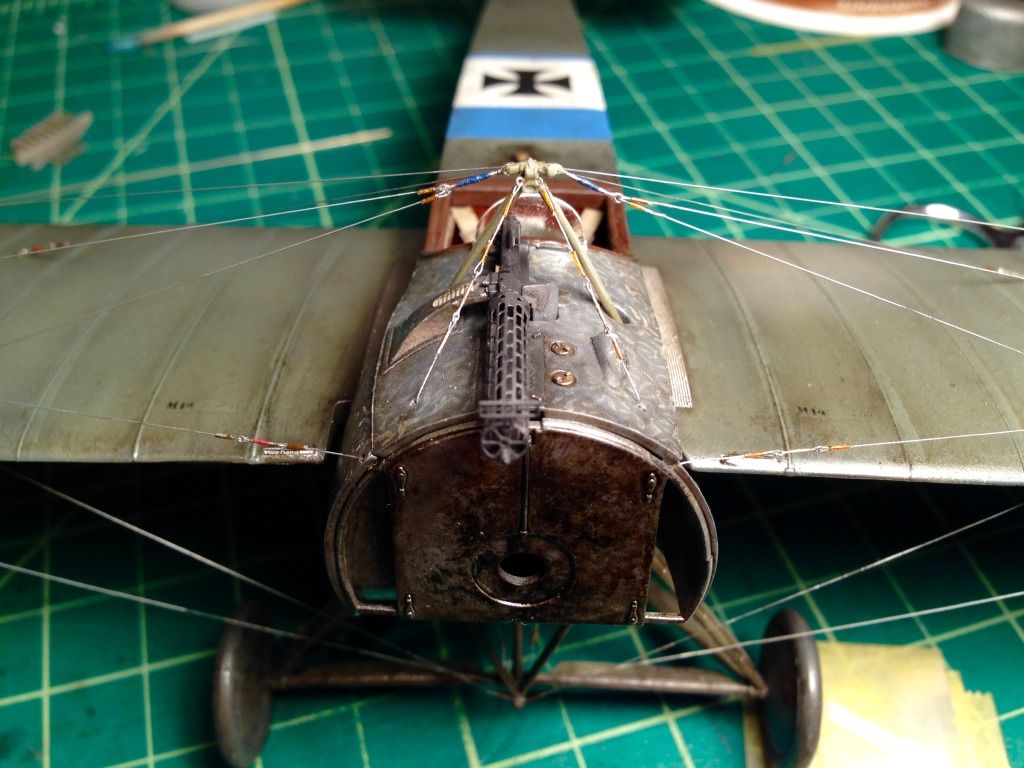
All that was left at that point was mounting the motor, cowling and prop... or so I thought.  Within an hour of my taking those pictures, the back fuselage seam which had mysteriously appeared half way through my build decided to pay me another visit!  Same deal as last time, a divot appeared right behind the fuel filler cap and a straight line ran straight back through the blue and white markings.  All said, it delayed my finish by two or three days while I waited for various fillers, clear coats and paints to dry.  

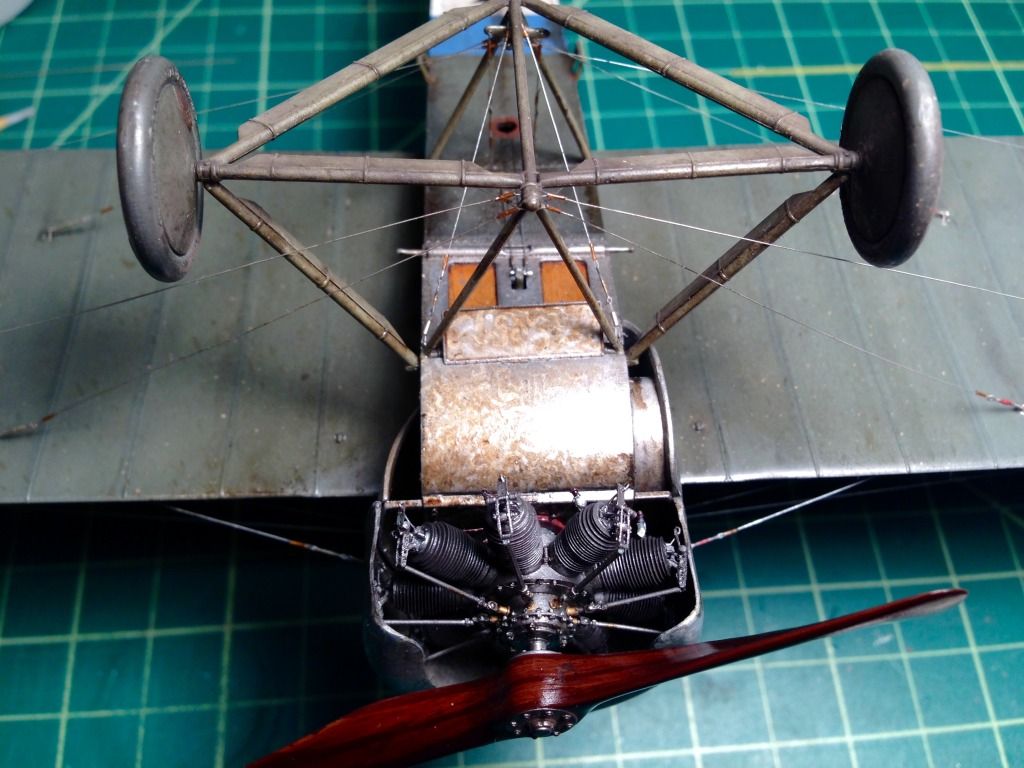
Once I had that issue sorted out to my satisfaction, I attached the engine and cowling with CA (since they are both resin).  Due to my lack of quality control in building the engine, it was a tight fit to get the cowling over the cylinder heads, but it wasn't too difficult.  A few drops of CA on the shaft, and the propeller was attached, bringing the build to a close.

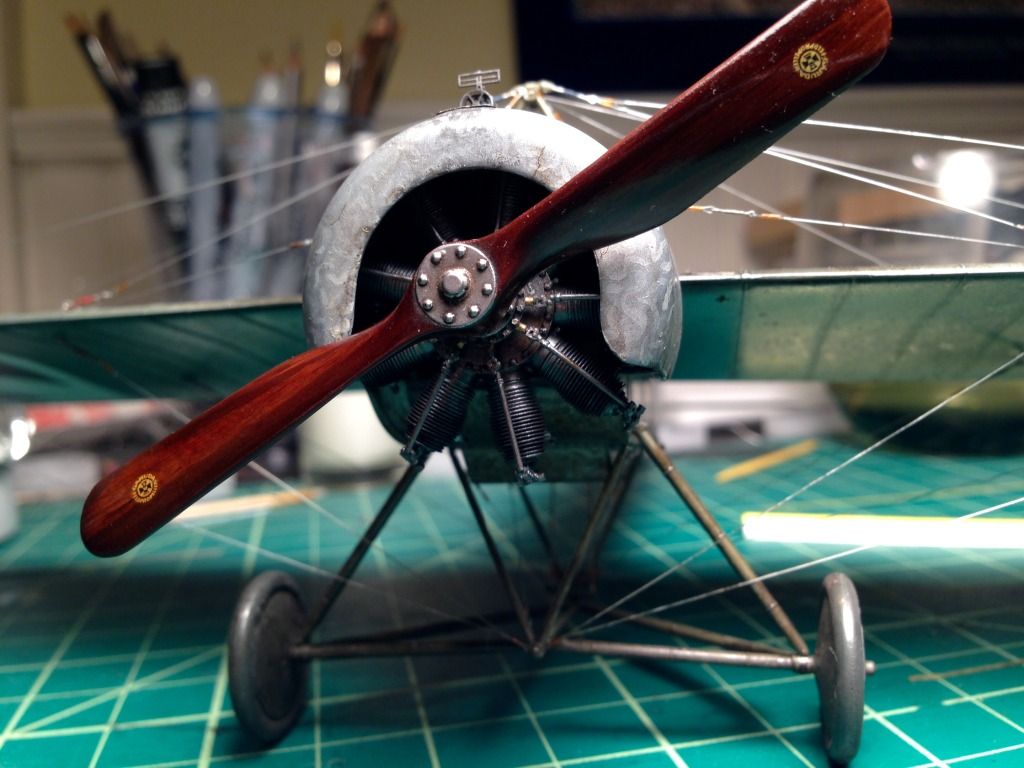
And that is a wrap for this build.  Aside from the troublesome seam, it was a very enjoyable build, and I'd recommend it to anyone interested.  

As this post is quite long and picture heavy, I'll put the final pictures up separately.  Thanks to Mike, Bish and Snake (and whomever else I missed!) for organizing this, it was very fun.  Thanks also to everyone for the supportive comments along the way.  There is some very lovely work being shown here, and it has been a treat to be part of it.

Blue

  • Member since
    February 2005
  • From: Proctor. MN
Posted by 65ss on Saturday, November 1, 2014 8:45 PM

I have a little more progress. I sprayed the bogies, drive sprocket, large idler wheel, and the inside of the suspension pieces, before putting them together. The arm that the idler wheel snaps into has kind of a sloppy fit where it glues into the suspension. So after everything else dries, I'm going to wrap a length of track I have made around the suspension and use that to line up the idler wheel while I glue the wheel, and arm into place.

I also have the sides sort of glued onto the body, but there is a lot to line up so thats going in stages.

Dale

  • Member since
    April 2005
  • From: Piscataway, NJ!
Posted by wing_nut on Thursday, October 30, 2014 11:08 AM

Thanks Rob.

Marc  

  • Member since
    January 2014
  • From: Toronto
Posted by Rob S. on Wednesday, October 29, 2014 4:16 AM

Marc, fantastic and very inspirational!

______________________________________________________________________________


On the Bench: Nothing on the go ATM

  • Member since
    April 2005
  • From: Piscataway, NJ!
Posted by wing_nut on Tuesday, October 28, 2014 7:14 PM

Thanks a lot fellas

Marc  

  • Member since
    February 2005
  • From: Proctor. MN
Posted by 65ss on Tuesday, October 28, 2014 7:01 PM

Marc, that looks awesome!

Dale

  • Member since
    December 2002
  • From: Bury St Edmunds, Suffolk, England
Posted by Bish on Tuesday, October 28, 2014 12:41 PM

That's some bomb load on there.

I am a Norfolk man and i glory in being so


On the bench: Airfix 1/72nd Harrier GR.3/Fujimi 1/72nd Ju 87D-3

  • Member since
    October 2013
Posted by Big Blue on Tuesday, October 28, 2014 8:11 AM

That looks great, Marc.   The fins came out very nicely, and I like how the wrapping on the landing gear looks.  Great to see her with her top on!

  • Member since
    April 2005
  • From: Piscataway, NJ!
Posted by wing_nut on Tuesday, October 28, 2014 7:07 AM
As I slowly get the new PC up and running I managed to fit in so bench time. The fins on th the 112 lb bomp scaled up to about 3/4" so I made new once from plastic card.  The struts were a little tedious since they are thin with small attachment pint... compared to their newer kits...and it real wobbly until all the struts were in place and secured. On of the cabanes broke at one end while I was fitting the interplane struts. But now she's nice and firm.   And she has a nice rack too

Marc  

  • Member since
    April 2005
  • From: Piscataway, NJ!
Posted by wing_nut on Monday, October 27, 2014 2:27 PM

Disregard my comment about the wood fuselage.  I just noticed the disappointing news.Sad

Marc  

  • Member since
    January 2014
  • From: Toronto
Posted by Rob S. on Monday, October 27, 2014 2:12 PM

Mike...that B&W version is going to be epic for sure. As for mine and yours...your engine has already trumped mine, so, keep kickin' butt on it!! I learned some stuff from you that I want to apply on my next one!!

______________________________________________________________________________


On the Bench: Nothing on the go ATM

  • Member since
    December 2002
  • From: Bury St Edmunds, Suffolk, England
Posted by Bish on Monday, October 27, 2014 1:13 PM

Those decals look really nice marc.

Dale, nice start on the tank.

Mike, well, I don't think I need to say anything do I.

I am a Norfolk man and i glory in being so


On the bench: Airfix 1/72nd Harrier GR.3/Fujimi 1/72nd Ju 87D-3

  • Member since
    April 2005
  • From: Piscataway, NJ!
Posted by wing_nut on Monday, October 27, 2014 11:28 AM

Mike, those words worked just fine.  Thanks my friend.

Pretty good? What do you mean pretty good?  That's awesome.  consider that idea officially stolen.  Please tell me your doing a wood fuselage.  I'd love to see what you do with that.

Marc  

  • Member since
    February 2006
  • From: Smithers, BC, Canada
Posted by ruddratt on Sunday, October 26, 2014 7:39 PM

Glad you fellas are likin' it so far.  Rob, no wood on this one.  I'm going for Emil Koch's mount, the one with all that B&W horizontal striping on the fuselage.  If it turns out half as nice as yours, I'll be a very happy guy!

Mike

 "We have our own ammunition. It's filled with paint. When we fire it, it makes pretty pictures....scares the hell outta people."


  • Member since
    February 2005
  • From: Proctor. MN
Posted by 65ss on Sunday, October 26, 2014 6:52 PM

Thanks Mike - That engine looks like it's about ready to start up!

Dale

  • Member since
    January 2014
  • From: Toronto
Posted by Rob S. on Sunday, October 26, 2014 6:31 PM

Lovin' it Mike...looks great. I can't remember which version you were doing? Going wood?

______________________________________________________________________________


On the Bench: Nothing on the go ATM

  • Member since
    October 2013
Posted by Big Blue on Sunday, October 26, 2014 6:11 PM

Your engine looks superb, Mike.  I think the wiring came out quite nicely.  Well done.

Blue

  • Member since
    February 2006
  • From: Smithers, BC, Canada
Posted by ruddratt on Sunday, October 26, 2014 4:21 PM

Marc - wish I could come up with something that hasn't already been said about your 'Tate.  Man, that is just flippin' amazing! You are indeed the master!

Dale - now I know why I don't do much armor. No way could I do 'em justice the way you guys do.  That interior is mindblowing! Great stuff!

Blue - it's been a treat watching the Eindecker come together.  That rigging- man, I wish I'd done mine that way.  Sure does look the part!

....and speaking of rigging, I'm with Rob.  Love WnW, but the rigging diagrams should be broken up into subassemblies.  Probably why I've yet to start the Fe2B.  Makes me dizzy just looking at all that cabling.


I've managed to squeeze in some work on the Roland in spite of a bathroom reno I'm undertaking.  The engine is done and installed into the fuselage, which has been buttoned up. The engine was painted with Alclad II, Reaper, and Tamiya paints and weathered with Tamiya powders and Citadel washes. For the wiring, I tightly twisted very fine speaker wire around the shaft of a #67 bit. The resulting loops fit perfectly over the nubs on the mag. The wiring was painted black and given a yellow wash to replicate the spiral jacketing - think it turned out pretty good. Next will be getting some primer on 'er and start painting those stripes.


Mike

 "We have our own ammunition. It's filled with paint. When we fire it, it makes pretty pictures....scares the hell outta people."


  • Member since
    October 2013
Posted by Big Blue on Sunday, October 26, 2014 12:25 PM

Glad it will be documented there then.

  • Member since
    February 2005
  • From: Proctor. MN
Posted by 65ss on Sunday, October 26, 2014 10:25 AM

Thanks guys. I will leave all the hatches I can open, but from the reviews I read a lot of it will disappear.

Dale

  • Member since
    October 2013
Posted by Big Blue on Sunday, October 26, 2014 10:13 AM

That is a great looking interior, Dale.  It will be a shame if it gets entirely covered up.

Thanks Marc!

Totally agree with you Rob.  Can't imagine how difficult the DH2's wiring guide would be to interpret!

  • Member since
    January 2014
  • From: Toronto
Posted by Rob S. on Saturday, October 25, 2014 8:32 PM

Wow, Dale, that tank is going to be amazing. Does the kit make allowances to see the interior??

______________________________________________________________________________


On the Bench: Nothing on the go ATM

  • Member since
    January 2014
  • From: Toronto
Posted by Rob S. on Saturday, October 25, 2014 8:30 PM

Big Blue

Many thanks, Rob.  Like you have said, without that second wing getting in the way, it is really not that bad to rig.  Again, figuring out the plan is the hardest part.  I hope the pictures help to simplify someone's future Eindecker build.  This one has been fun.

Yup, I agree Blue. I am a total worshiper of the glory that is WnW, BUT, I will admit, their 'wiring' guides in the normally magnificent instruction 'manuals' is typically VERY hard to see. I'd rather see them break down the wiring into multiple stages for ease. When I did the AMC DH.2...some of the wiring locations were guesses. 

______________________________________________________________________________


On the Bench: Nothing on the go ATM

  • Member since
    February 2005
  • From: Proctor. MN
Posted by 65ss on Saturday, October 25, 2014 8:09 PM

Blue that rigging looks good!

I finely have some updates to post.

I wanted the weathering to be pretty heavy on the interior, I figured there would be lots of water, dust, and mud  getting in. Also the drivers seat and back rest were smooth so I used diluted white glue to glue some tissue paper to the areas that would be leather, to give them some texture for weathering. Also it looks like I forgot a picture.

Dale

  • Member since
    April 2005
  • From: Piscataway, NJ!
Posted by wing_nut on Saturday, October 25, 2014 5:25 PM

Can't think of a better word than wicked for that rigging blue.

Bish... yup 1 decal for the tires.

Marc  

JOIN OUR COMMUNITY!

Our community is FREE to join. To participate you must either login or register for an account.

SEARCH FORUMS
FREE NEWSLETTER
By signing up you may also receive reader surveys and occasional special offers. We do not sell, rent or trade our email lists. View our Privacy Policy.