SEARCH FINESCALE.COM

Enter keywords or a search phrase below:

75th Anniversary of 1941 Group Build (World at War)

36908 views
712 replies
1 rating 2 rating 3 rating 4 rating 5 rating
  • Member since
    December 2002
  • From: Bury St Edmunds, Suffolk, England
Posted by Bish on Friday, February 5, 2016 2:14 PM

DantheMan85


Those are some sharp looking decals for your P-40 Checkmate.


Made some good progress on the Panzer IV, got the turret put together, upper and lower hulls glued. There's quite a lot of parts that go inside that are not visible, so I'll be leaving those off.


Some nice work there Dan, though i have to say there is somthign odd about your turret i just can't put my fingur on.Wink

I am a Norfolk man and i glory in being so


On the bench: Airfix 1/72nd Harrier GR.3/Fujimi 1/72nd Ju 87D-3

GAF
  • Member since
    June 2012
  • From: Anniston, AL
Posted by GAF on Saturday, February 6, 2016 5:30 AM

Bish


DantheMan85


Those are some sharp looking decals for your P-40 Checkmate.


Made some good progress on the Panzer IV, got the turret put together, upper and lower hulls glued. There's quite a lot of parts that go inside that are not visible, so I'll be leaving those off.


Some nice work there Dan, though i have to say there is somthign odd about your turret i just can't put my fingur on.Wink


Isn't that the infamous Flak Panzer variant where they tried to put a Flak Tower on top in place of the turret?  It ran into some serious problems, as it was too tall to pass under most bridges... and too heavy to cross them.  I think it's top speed was something like 1 kph... downhill.  Big Smile


  • Member since
    December 2002
  • From: Bury St Edmunds, Suffolk, England
Posted by Bish on Sunday, February 21, 2016 8:14 AM

Well, whilewaiting for those figures to finish off the Arado, it was time to get started on the Whirlwind. Its been a lng time, about 15 years, since i built a WW2 British aircraft, so well overdue. And this is my 4th build in my long term project to build aircrfat from all the military airfields in Norfolk. I started on Thurs night and its gone pretty good so far.

This is the kit. I am growing to like Special Hobby kits. Some nice subjects and despite the lack of location tabs they go together well and have some nice detail.

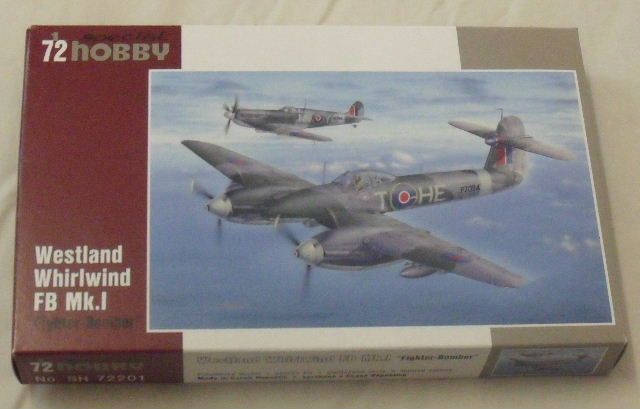
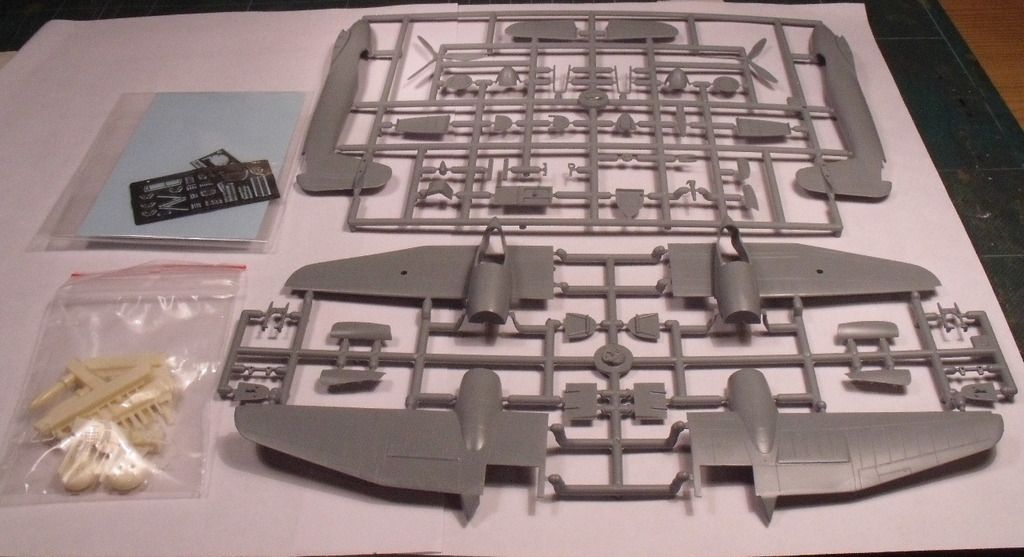
The kit includes resin and PE.

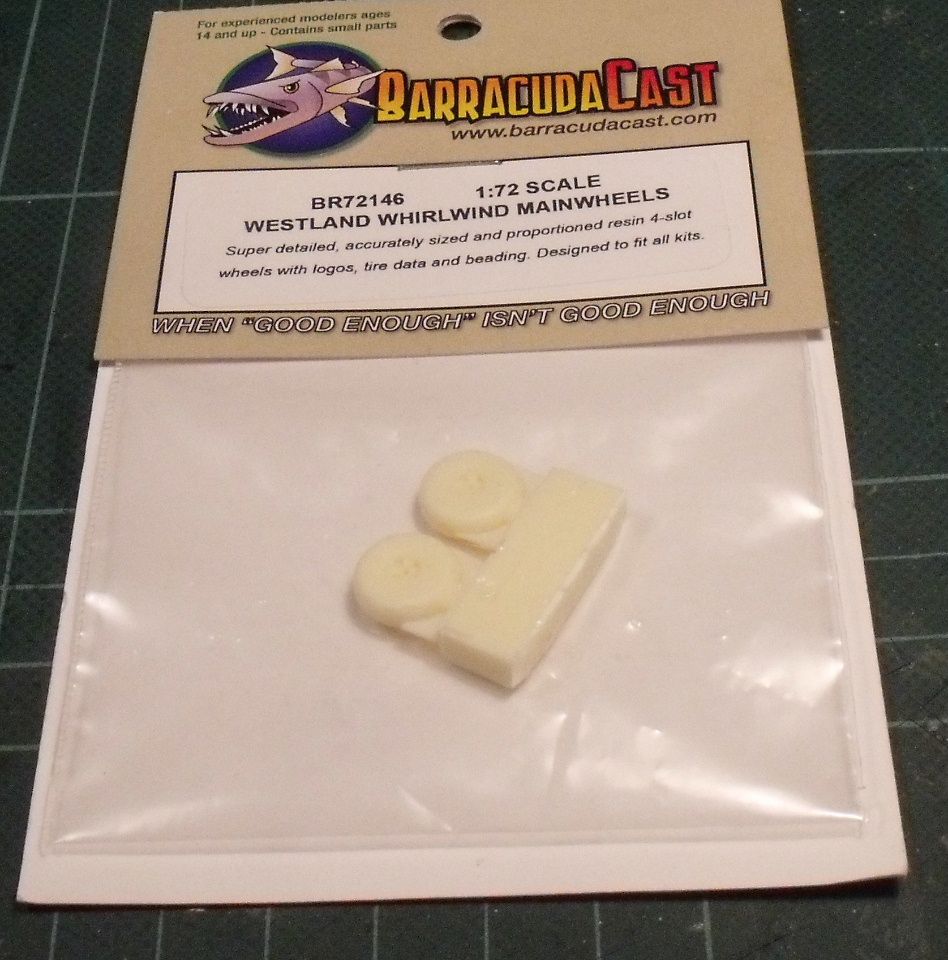
I also have a set of resin wheels. This are flattened out and do have some raised detail. But at this scale you can't really see it and the kit has a nice pair of resin wheels anyway. So this were not really needed, but seeing as i have them, might as well use them.

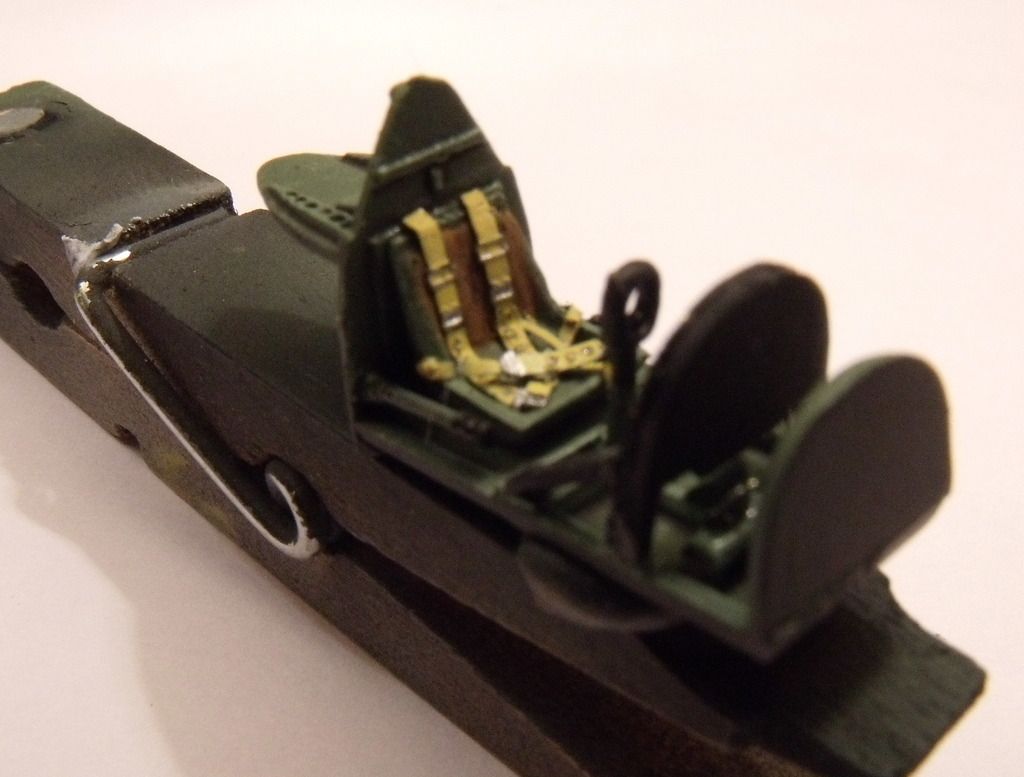
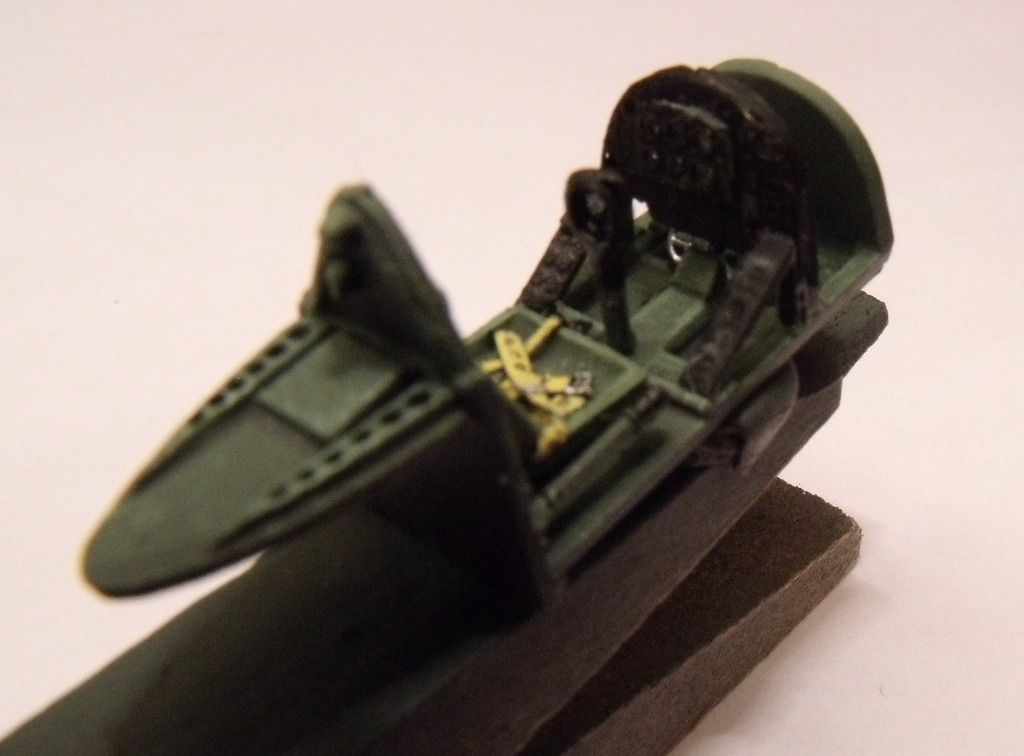
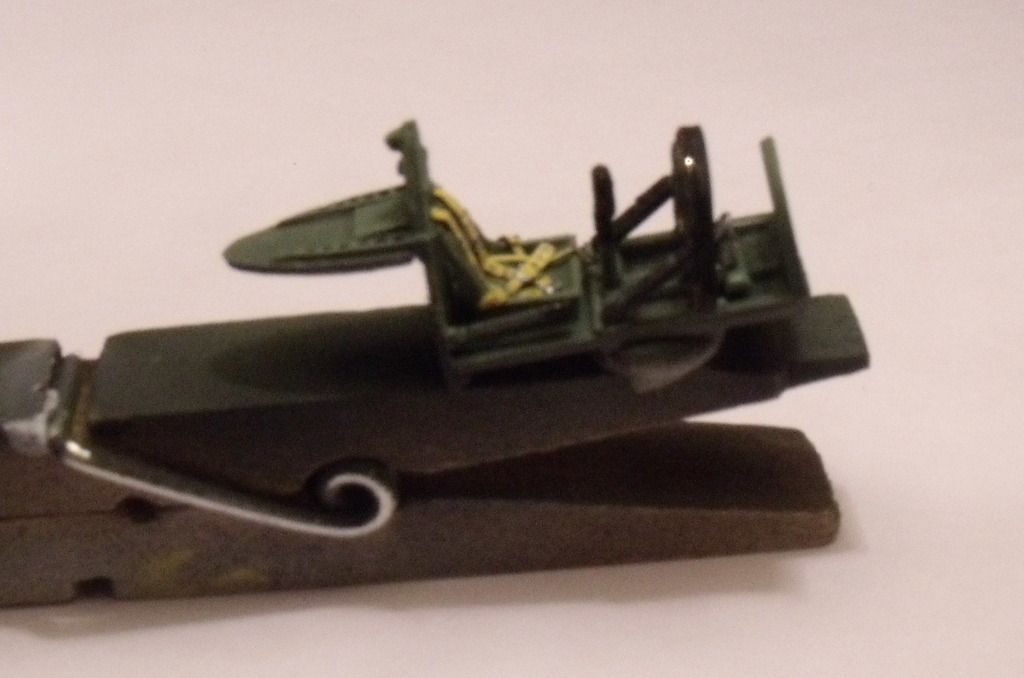
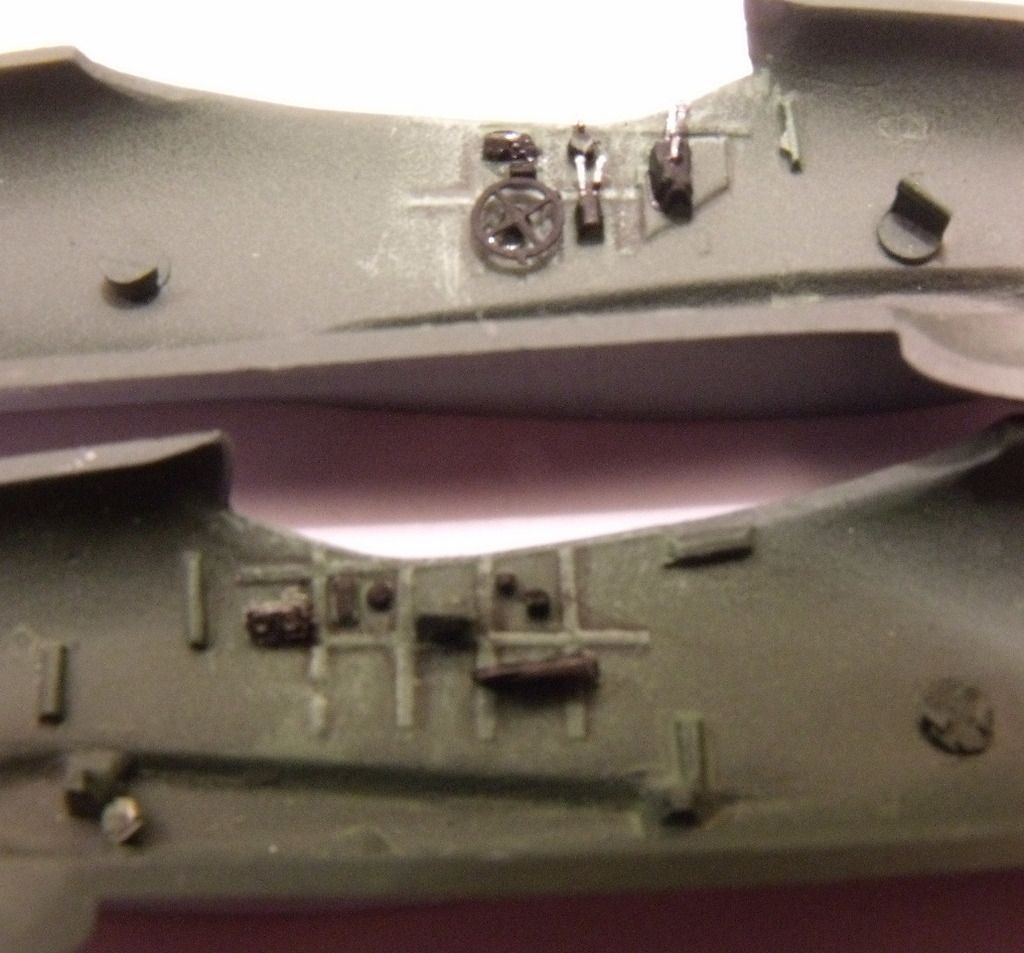
So first, the pit. There was not much to put together before i set some paint down, the rest, mostly PE and resin, was painted on its frets.

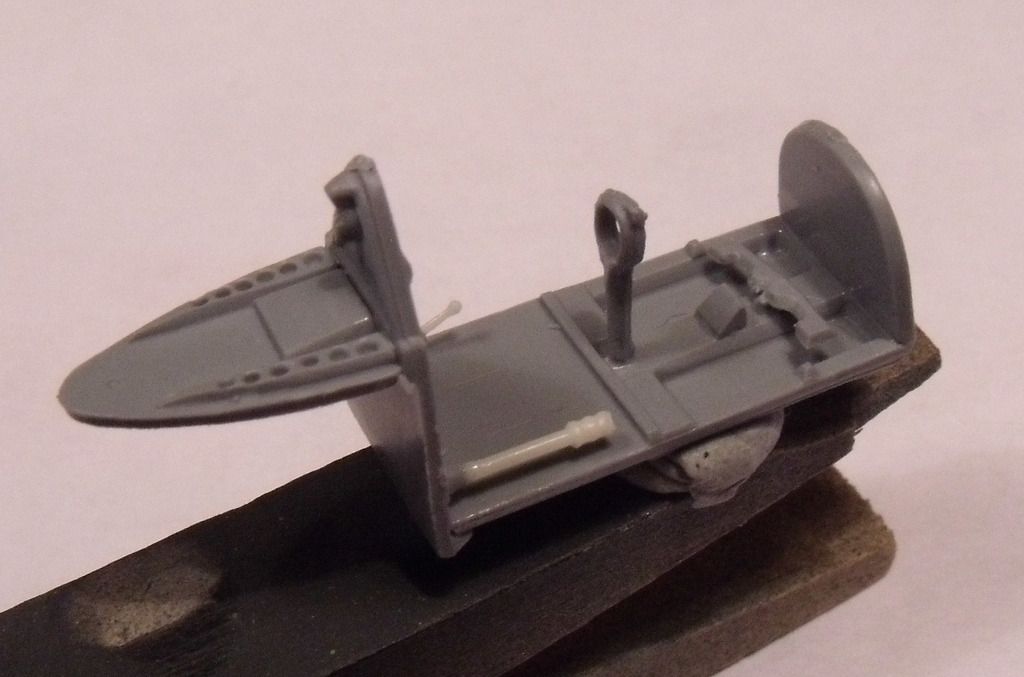
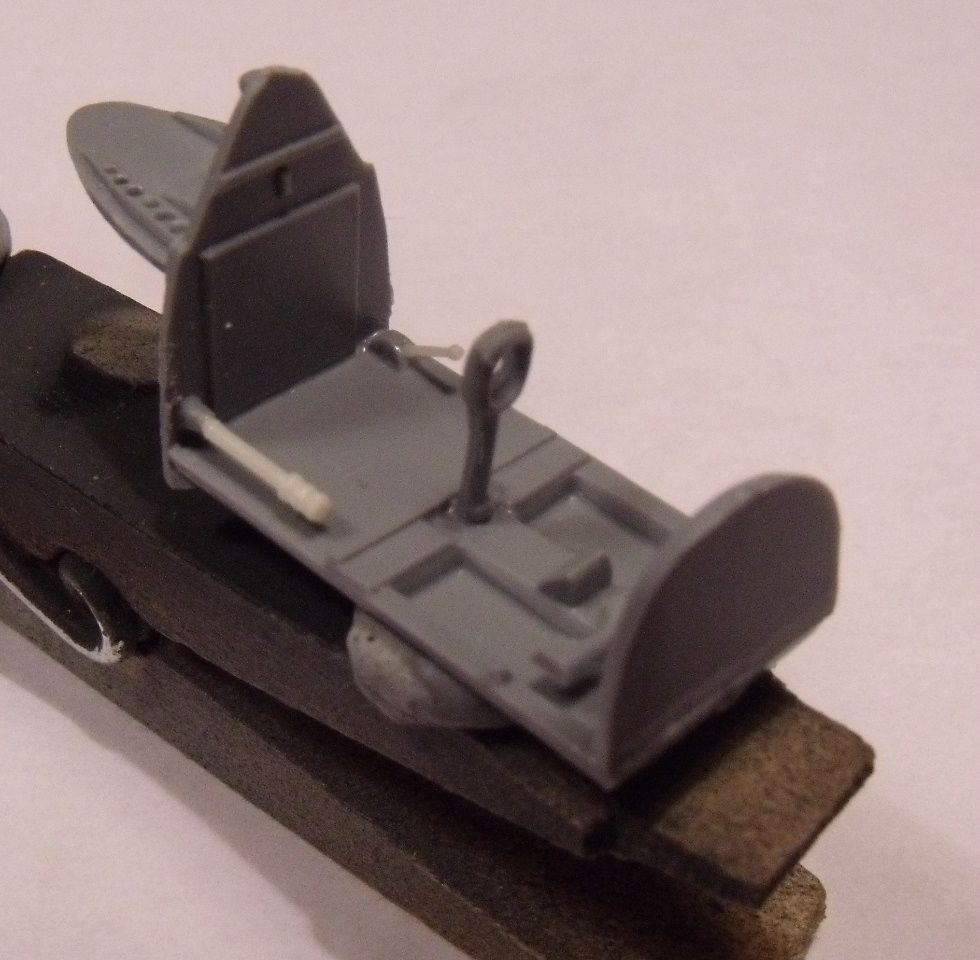
After that a coat of black primer and painting useing Humbrols interiour green. The Xtracolur for this, my normal choice, has been out of stock for a while, somthing thats getting prety common with that brand, so i went for the Humbrol paint. The instruments were done with Humbrol flat black.

Also got the wings together, just a bit of cleaning up left to do.

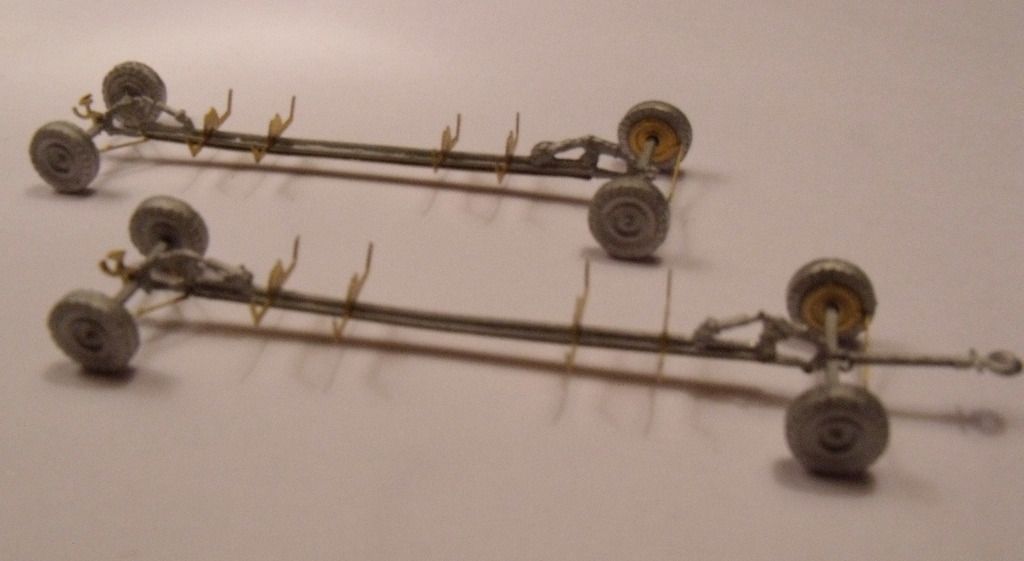
And after painting last night, i was able to get a couple of bits of ground equipment together. These are Type B bomb trolleys from the Flightpath bomb train set. I'll also be ading a Flightpath tractor.

And in case your thinking didn't he just do a bomb loading dio on the Arado, you are correct. Pure coincidance.

And thats it for now. I am planning to get the pit in and fuselage together tonight. Once i have the wings on i can start sizing up for the base.


I am a Norfolk man and i glory in being so


On the bench: Airfix 1/72nd Harrier GR.3/Fujimi 1/72nd Ju 87D-3

  • Member since
    January 2014
  • From: Toronto
Posted by Rob S. on Sunday, February 21, 2016 10:02 AM

I really like where you are going with this Bish. Questions, i've never seen a Special Hobby kit, what other mainstream company would you rate the quality against? The Whirlwind has been a underappreciated plane that I'd love to build as part of my growing RAF collection. I'd like this kit, but, I'd like your review.

______________________________________________________________________________


On the Bench: Nothing on the go ATM

  • Member since
    December 2002
  • From: Bury St Edmunds, Suffolk, England
Posted by Bish on Sunday, February 21, 2016 10:13 AM

Thanks Rob.

Well, this is only the second SH kit i have built, and thats a good question. After some thought, i would say Dragon and the slighlty older Revell kits. The one Plus of SH over these other two is the addition of resin and PE. But it does have more of a Limted run feel than the other two. The only location tabs were small ones for the wings and horizontal tails. But i have just fitted those and they go geotehr nice with a litle clean up and a touch of filler.

Airfix do one, but i think that dates from the 70's. SH also do a fighter version and one kit with civilian and prototype markings.

I am a Norfolk man and i glory in being so


On the bench: Airfix 1/72nd Harrier GR.3/Fujimi 1/72nd Ju 87D-3

  • Member since
    September 2003
  • From: AandF in the Badger State
Posted by checkmateking02 on Sunday, February 21, 2016 7:10 PM
Off to a good start, Bish. Lovely work on the cockpit especially!


  • Member since
    December 2002
  • From: Bury St Edmunds, Suffolk, England
Posted by Bish on Monday, February 22, 2016 2:05 PM

Thanks check.

I am a Norfolk man and i glory in being so


On the bench: Airfix 1/72nd Harrier GR.3/Fujimi 1/72nd Ju 87D-3

  • Member since
    February 2006
  • From: Cincinnati Ohio
Posted by DantheMan85 on Wednesday, February 24, 2016 12:46 PM

Thanks Checkmate: the bottle of thinner did help but there was a small gap all the way around.

Thanks Bish: I think there is about five parts per suspension, on the Dragon kit. Looks like a great start to your Whirlwind, always think that add-on seat belts add to the aircraft. Some kits just have them molded on. Those bomb trolleys are looking sharp.

Finished assembly on my Panzer IV yesterday, this Dragon kit has a lot of parts but the detail is excellent. The instructions were not clear on the placement of the rear exhaust, but I was able to get it on. I had silly putty holding on the road wheels for the pictures, the return wheels would not stick so that is why they were not on. The idler wheel is placed in the forward position, and getting the DS tracks on is a tight fit. I plan to wash the Panzer IV down with soap and water, then get her primed up.


On my Work Bench: Tamiya Ford GT 1/24

Up Coming: ?


  • Member since
    July 2014
Posted by modelcrazy on Wednesday, February 24, 2016 1:13 PM

Stick,
I’d like to change my entry to the 1/72 Airfix Curtiss hawk 81-A-2. It looks like a quick build and will be OOB.
Steve

Steve

Building a kit from your stash is like cutting a head off a Hydra, two more take it's place.


http://www.spamodeler.com/forum/

  • Member since
    July 2014
Posted by modelcrazy on Wednesday, February 24, 2016 9:39 PM
I started the P-40. I looks like a pretty quick build. The panel lines look a little deep but the reviews I’ve read say it is a fairly accurate kit.

Steve

Building a kit from your stash is like cutting a head off a Hydra, two more take it's place.


http://www.spamodeler.com/forum/

  • Member since
    September 2003
  • From: AandF in the Badger State
Posted by checkmateking02 on Wednesday, February 24, 2016 10:22 PM

Sharp build, Dan. Looking forward to see it dressed up in paint.

Modelcrazy: I've updated the front page. I'm planning on doing this up, too.

Am presently cleaning up parts. There's a lot of mold seam on the landing gear that's not very easy to get at. And the pitot tube is very fragile. I've broken one already and will have to replace it with some styrene rod. But the kit does look nice and accurate.

Check references for the markings in 1941, though. The leaping tiger and blue "V for Victory" he's jumping out of didn't appear till March 1942. It was actually a self-adhesive decal (not water-slide), based on Disney-designed art and sent over to the AVG.  Osprey published a good book on the subject.


  • Member since
    July 2014
Posted by modelcrazy on Thursday, February 25, 2016 2:47 PM

checkmateking02
Check references for the markings in 1941, though. The leaping tiger and blue "V for Victory" he's jumping out of didn't appear till March 1942. It was actually a self-adhesive decal (not water-slide), based on Disney-designed art and sent over to the AVG.  Osprey published a good book on the subject.

Hmm, Ok that's no problem. The question I have is the decal sheet's tiger is missing the V. Did they have a tiger without a V in 41 or were all tiger decals only supplied in 42?

Steve

Steve

Building a kit from your stash is like cutting a head off a Hydra, two more take it's place.


http://www.spamodeler.com/forum/

  • Member since
    September 2003
  • From: AandF in the Badger State
Posted by checkmateking02 on Thursday, February 25, 2016 7:16 PM

Steve:

The blue "V" and the tiger were two distinct pieces of the decal and were applied separately.  The "V" was "seldom used," according to the author of Osprey's American Volunteer Group:  Colours and Markings (Terrill J. Clements), p. 78.

The color photos of "68" on pp. 62 and 64 show no "V."  That plane was assigned to Third Squadron Flight Leader Charles Older.

Plane "47," also assigned to Third Squadron (Robert T. Smith), carries both the "V" and the tiger.

The book makes the point that markings were inconsistent due to lack of time and in some cases material.  Even the shark's mouths show a lot of variation in design and execution between the squadrons and individual planes.

For the "Hell's Angels" figure, the book says that no two angels were alike, even the ones painted on both sides of the same aircraft. 

Airfix's painting and decaling instructions on the box back match up with the photos and color profile in Osprey's book--at least on the port side, so I think you're OK building it with the markings provided.

I'm looking forward to watching your progress.  It'll be a while before I can get around to mine.

By the way, have you run into any information about the color of the cockpit interior? There's a lot of information and speculation about what Dupont paints were used by Curtiss for the exterior, but I haven't found anything on the cockpit.  I don't know if Curtiss used their version of U.S. "interior green," or tried to match the RAF interior grey-green color.  If you find anything, I'd be very interested.

Thanks!


  • Member since
    July 2014
Posted by modelcrazy on Thursday, February 25, 2016 8:29 PM

Check, 

Thanks for that informative reply. I'Lloyd go ahead and apply the decals as shown. 

As far as the interior, the instructions show a Humbrol color of flat yellow or something like that.  Airfix just showed the Humbrol color code and had to look it up (I don't have the instructions near me right now). I am using Testers interior yellow. 

Steve

Building a kit from your stash is like cutting a head off a Hydra, two more take it's place.


http://www.spamodeler.com/forum/

  • Member since
    September 2003
  • From: AandF in the Badger State
Posted by checkmateking02 on Friday, February 26, 2016 12:26 AM

Steve:

I haven't looked at the instruction sheet closely enough to figure out the Airfix-recommended paint, but this site:

http://www.ipmsstockholm.org/magazine/2004/02/stuff_eng_interior_colours_us_part2.htm

says:

"The cockpit of the P-40 was Curtiss Cockpit Green, which was the Berry Brothers' (a local paint vendor) approximation of Interior Green. Reportedly it was a little browner than Interior Green."

What I've wondered about is whether this was close to RAF interior green, since the planes were pulled from a line originally slated for Britain.  Since exterior colors were supposed to be equivalents of RAF's Dark Earth, Dark Green and Sky, I've been questioning whether they specified the interior color be close to the RAF's version, too.

The Osprey book reports that interior panels and landing gear doors were zinc chromate yellow.

Research sometimes makes ya Propeller--maybe I'll just take a best guess and go ahead with it.


  • Member since
    July 2014
Posted by modelcrazy on Friday, February 26, 2016 7:30 AM


Check
There was a time when I just slapped a kit together and assumed the manufactures had all the research figured out, not anymore. Now my research time = the times it take me to build the kit X2. After more searching, I found that the tiger was, as you stated, designed by Disney and sent to the squadrons in March 42. There are a few pictures I found of "Tex" Hill's mount 48 of the Panda Bears from Dec 41, which doesn’t show any tiger. That is the only reference I found of any AVG plane from 41, that I can tell.
As far as the interior color, your idea of RAF interior green certainly makes sense. The exterior colors do match the RAF. I'm just going to go for broke, leave the interior yellow and do a black oil wash which will make it look yellow or green depending on lighting.
Steve

Steve

Building a kit from your stash is like cutting a head off a Hydra, two more take it's place.


http://www.spamodeler.com/forum/

  • Member since
    September 2003
  • From: AandF in the Badger State
Posted by checkmateking02 on Friday, February 26, 2016 9:14 AM

Sounds good, Steve.  Sometimes you just have to call a halt to the research, and to with what you've got.


  • Member since
    July 2014
Posted by modelcrazy on Friday, February 26, 2016 9:56 AM
Calling a halt to the research, here is an update.
The kit is going together well so far despite the need to trim some thick flashing on the leading edge of the wing roots at the wheel well faring’s to allow the lower half of the wig to fit better. This was a small inconvenience though and have certainly had worse. There is a pretty nice gap at the wing and horizontal stabilizer roots. This shouldn't pose too much of a problem though.
Even though this is an OOB build, I did add some masking tape belts to the interior. The interior detail is sufficient but begs for more, but since the canopy is molded in the closed position, one wouldn't see too much anyway.
So far I'm not completely impressed with the kit, but not put off by it either. It is going together nicely with the usual seam joints. The fuselage fit together very well with very little seam and any loss of detail can easily be re-scribed. There will be some needed work to the cowling seams though, again nothing that can’t be handled by a competent modeler.
I will be able to make a nice little vignette out of it I think. Besides, I’ve been wanting to build an AVG display for a while.
Thank you Check for allowing me to toss this in. It’s giving me a break from the work intensive Prinz Eugen and Fletcher destroyer.


Steve
 

Steve

Building a kit from your stash is like cutting a head off a Hydra, two more take it's place.


http://www.spamodeler.com/forum/

  • Member since
    December 2002
  • From: Bury St Edmunds, Suffolk, England
Posted by Bish on Friday, February 26, 2016 2:15 PM

That looks nice Steve. I belive this is one of the new Airfix kits, seems to be the odd one out from al the otehr new kits.

I am a Norfolk man and i glory in being so


On the bench: Airfix 1/72nd Harrier GR.3/Fujimi 1/72nd Ju 87D-3

  • Member since
    September 2003
  • From: AandF in the Badger State
Posted by checkmateking02 on Friday, February 26, 2016 7:16 PM
Looks good, Steve. Thanks for the information on the problem areas. I'll watch for them.


  • Member since
    February 2006
  • From: Cincinnati Ohio
Posted by DantheMan85 on Saturday, February 27, 2016 9:12 AM

Modelcrazy: Your off to a great start on your P-40.

On Thursday I airbrushed model master enamel Panzer Schwarzgrau #2094 on the Panzer IV, this is really the first time I've used this color and it looks to be a bit darker than Tamiya's German Grey XF-63. Model master enamel paints tend to be thicker than other brands, so for airbrushing I mix the paint in a pallet with about four to five drops of enamel thinner. I've found that if you mix it in the airbrush, the paint that is nearest the front in the head area will not get thinned, so when you add thinner the first five to ten seconds of paint that comes out is thick.

Today I plan to airbrush Model Master Afrika Dunkelgrau '42 #2103, this is there DAK color. I'll be going for a 80 to 20 ratio of Afrika Dunkelgrau '42 over Panzer Schwarzgrau #2094.


On my Work Bench: Tamiya Ford GT 1/24

Up Coming: ?


  • Member since
    September 2003
  • From: AandF in the Badger State
Posted by checkmateking02 on Saturday, February 27, 2016 11:24 AM

That's very nice paintwork, Dan.  Very smooth finish.  

I've taken to thinning MM paint 50-50 with lacquer thinner for airbrushing.  Seems to be working better for me.


  • Member since
    July 2014
Posted by modelcrazy on Tuesday, March 1, 2016 7:17 AM

OK guys, here is an update on the P-40. I sprayed the light gray on the underbelly and the brown on the upper surfaces. Once this is dry I will use some Silly Putty to mask off for the green. The kit has gone together well.

Steve

Building a kit from your stash is like cutting a head off a Hydra, two more take it's place.


http://www.spamodeler.com/forum/

  • Member since
    April 2007
  • From: Schroon Lake, NY
Posted by SMJmodeler on Tuesday, March 1, 2016 10:32 AM

DantheMan85: Nice to see some paint!  I'm surprised it's darker than Tamiya XF-63,  I've struggled with that color in the past.  

I forgot to mention it earlier in your finished build pic's:  Your tracks seem very tight, I don't see any sag at all, can you still add a link or two? 

  • Member since
    January 2016
Posted by suomi39 on Tuesday, March 1, 2016 11:43 AM

Hey all, too late to join the party? Really interesting subjects here. I'll be watching those armor builds especially as that's an area I've yet to dip into. 

I've just started a Hurricane build that'll be done up as Finnish Hurricane MkI HC456 in August 1941, just after the start of Barbarossa, but early enough that it still had Hawker factory paint on it. 

I'm using Airfix's A01010 MkI 1:72 kit, and adding details from the Eduard 73501 set (will not be using landing flaps as they were not parked with flaps down). This is my first time using photo etch.

There is a known issue with this kit -- there should be metal panels in front of and behind the wing MG bays for crew access. Pic below shows the fabric texture in those areas. A pretty big flaw in an otherwise really nicely-tooled kit. So some filling and sanding and scribing is in order right off the bat. 

There is lots of fun detail on this kit, and cool 3D shaded instructions. Here are the gear bays, before PE parts or paint. 

More pics soon, as I've made a little more progress. 

  • Member since
    September 2003
  • From: AandF in the Badger State
Posted by checkmateking02 on Tuesday, March 1, 2016 7:38 PM

Welcome to the GB, suomi!  Glad to have you with us.  Nice to see a Hurricane here.  I've got a couple in the stash, but haven't started any yet.  

Thanks for the detailed photos of your progress!


  • Member since
    September 2003
  • From: AandF in the Badger State
Posted by checkmateking02 on Tuesday, March 1, 2016 7:41 PM

Good looking paintwork on the Flying Tiger, Steve.  Looks like you achieved a close match to the color on the box back.


  • Member since
    July 2014
Posted by modelcrazy on Tuesday, March 1, 2016 8:26 PM
Thanks Check
I Silly Putty’ed the camo and sprayed the green. Tomorrow I'll touch up the underside grey and install the gear.


Steve

Steve

Building a kit from your stash is like cutting a head off a Hydra, two more take it's place.


http://www.spamodeler.com/forum/

  • Member since
    December 2002
  • From: Bury St Edmunds, Suffolk, England
Posted by Bish on Wednesday, March 2, 2016 1:08 PM

A bit overdue, but here is my next update. Got the bulk of the construction done, only needed a little filling and sanding.

And then time to get some paint on. Underside was done in Med Sea Grey. On top, dark green and then mixed grey. I did some reading up and found this last colour was an interim colour which later became Ocean Grey. So i mixed 7 parts Med Sea Grey with 1 part night black.

Also got started on the base. I sandwiche a piece of chip board between some 5mm plywood and 6.. MDF.

The balsa surround was added, then staine and varnished.

And i have just added the Celluclay. This has now been brought in to dry.

And next up, my favorite part, adding the decals.

I am a Norfolk man and i glory in being so


On the bench: Airfix 1/72nd Harrier GR.3/Fujimi 1/72nd Ju 87D-3

  • Member since
    September 2003
  • From: AandF in the Badger State
Posted by checkmateking02 on Thursday, March 3, 2016 8:23 AM

That's a slick, streamlined aircraft, Bish.  Nice work on the camouflage, too.  Very eye-catching!


JOIN OUR COMMUNITY!

Our community is FREE to join. To participate you must either login or register for an account.

SEARCH FORUMS
FREE NEWSLETTER
By signing up you may also receive reader surveys and occasional special offers. We do not sell, rent or trade our email lists. View our Privacy Policy.