SEARCH FINESCALE.COM

Enter keywords or a search phrase below:

Floats and Boats: Amphibious Aircraft Group Build

28653 views
865 replies
1 rating 2 rating 3 rating 4 rating 5 rating
  • Member since
    June 2014
Posted by BrandonK on Saturday, June 18, 2016 8:52 AM

It just hit me that my figures are all 1/48 and not 1/72 so you would have a bit of a time getting them to fit. LOL

BK

On the bench:

A lot !! And I mean A LOT!!

2024 Kits on deck / in process / completed   

                         14 / 5 / 2  

                              Tongue Tied

  • Member since
    July 2014
Posted by modelcrazy on Saturday, June 18, 2016 9:33 AM

Thanks BK,

I need to look through my pilots...what's left.

Steve

Building a kit from your stash is like cutting a head off a Hydra, two more take it's place.


http://www.spamodeler.com/forum/

  • Member since
    May 2011
  • From: Honolulu, Hawaii
Posted by Real G on Monday, June 20, 2016 5:38 PM

Time at the work bench has been limited lately, but some progress on the Mach-Poo Seamonster has been made.  Reworking the tail group continues:

https://flic.kr/p/JcYAEE] [/url]Seamaster-39 by N.T. Izumi, on Flickr

https://flic.kr/p/JcYzym] [/url]Seamaster-40 by N.T. Izumi, on Flickr

I discovered a little discrepancy at the fin base.  There is a rectangular fairing with some sort of antenna right above the upper tail dome, but Mach-2 just faked it and represented it as a section of fuselage.  The fuselage of the real plane is straight, with the dome right at the top.  This will need correction.

https://flic.kr/p/HqPkpQ] [/url]Seamaster-42 by N.T. Izumi, on Flickr

https://flic.kr/p/JmTX6P] [/url]Seamaster-43 by N.T. Izumi, on Flickr

The photo of the real plane was taken from a book I have, is used to illustrate a point, and represents fair use, etc, etc.

I have decided the resin seats I got are close but no cigar, so I will try to scratch build new ones that are closer to the real deal.  I will be concentrating on the cockpit for now, as I need to finish it to close up the fuselage and get on with the fin correction.


“Ya ya ya, unicorn papoi!”

  • Member since
    July 2014
Posted by modelcrazy on Monday, June 20, 2016 6:40 PM

G,

It amazes me how much we learn while doing research, not that any of the stuff we learn will win a round of Jeopardy. Huh?

Good catch.

Steve

Building a kit from your stash is like cutting a head off a Hydra, two more take it's place.


http://www.spamodeler.com/forum/

  • Member since
    May 2011
  • From: Honolulu, Hawaii
Posted by Real G on Monday, June 20, 2016 7:26 PM

Yep Steve, and this is a relatively "light" research project!  I'm just fixing what I find while poring over the one refernce book I have on the subject.  Imagine if Trumpeter did the Seamaster and commited this error - oh the howling and gnashing of teeth that would follow!  "Unbuildable!"  "Egg Plane!!!"  Stick out tongue 

I once built a DML Me-262 with exposed engines, and so I wanted to add all the wiring/piping.  It was just a confusing jumble at first, but I isolated the fuel, oil, and electric systems by studying photos of real Jumo engines.  By starting at the entry points under the wing, it was fairly straightforward to figure out where everything went.  I think I got 90% of it in the end.  However, I didn't identify or add the instrumentation wiring for the engine revs, oil pressure, turbine temperature probe, etc.  It was the most intense research project I have undertaken, but it did give me a better understanding of how a turbojet functions.

And yes, it won't matter in "Jeopardy", unless there is a plastic modeler's special episode!  It's just fun mind candy for us modelers.

“Ya ya ya, unicorn papoi!”

  • Member since
    December 2002
  • From: Bury St Edmunds, Suffolk, England
Posted by Bish on Tuesday, June 21, 2016 1:06 AM

Thats looks like it will be a tricky one to fix G. Be interested to see how you get round it.

I am a Norfolk man and i glory in being so


On the bench: Airfix 1/72nd Harrier GR.3/Fujimi 1/72nd Ju 87D-3

  • Member since
    May 2011
  • From: Honolulu, Hawaii
Posted by Real G on Tuesday, June 21, 2016 1:52 AM

Bish,

Nah, the fix will be to just rebuild the upper profile of the aft fuselage and reposition the two domes up.  The fin base cross section is probably also too wide, but I will leave that one alone.  

I also had an idea on how to easily build ejection seats while feeding my cats this afternoon.  And no, the seats will have nothing to do with cats or cat food; I was just daydreaming while waiting for them to finish!  That's just how I solve problems.  Stick out tongue

“Ya ya ya, unicorn papoi!”

  • Member since
    June 2014
Posted by BrandonK on Tuesday, June 21, 2016 9:19 AM

RG,  I have to agree with Bish, that looks like a challenge to correct. I think the hardest part is deciding where to begin. But, looking at what you've done thus far, I have no doubt you will make this look easy as well. I'm really loving the work you've done so far.

BK

On the bench:

A lot !! And I mean A LOT!!

2024 Kits on deck / in process / completed   

                         14 / 5 / 2  

                              Tongue Tied

  • Member since
    June 2014
Posted by BrandonK on Tuesday, June 21, 2016 5:34 PM

Slowly but surely, I'm getting it done. I have the bulk of the paint work finished. Now I need to add decals and then the PE rigging. Once that's on I can do some pastel weathering to fade things a bit and add some grime. Then clear parts and some major assembly. Should be nearing the end by that point. This kit is kinda wierd in how I have to reverse build it and paint it, them assemble. It's actually kind of confusing in that regard.

BK

On the bench:

A lot !! And I mean A LOT!!

2024 Kits on deck / in process / completed   

                         14 / 5 / 2  

                              Tongue Tied

  • Member since
    December 2002
  • From: Bury St Edmunds, Suffolk, England
Posted by Bish on Wednesday, June 22, 2016 12:50 AM

Seems like you have it in hand G. And maybe i will have to watch the cats eater, we just put the food down and leav ethem to it. I didn't realise it could be such a good source of inspiration.

I am a Norfolk man and i glory in being so


On the bench: Airfix 1/72nd Harrier GR.3/Fujimi 1/72nd Ju 87D-3

  • Member since
    March 2006
Posted by simpilot34 on Wednesday, June 22, 2016 4:48 AM

40mm-The quacker is looking good mate! Like the new harnesses!

G- Steller work! Really improving that kit immensely!Toast

MC- Looking forward to watching the Seiran take shape!

BK- Pete is looking good! Biplanes can be like that, some seem to be more subassemblies then a straight build.Beer

Cheers, Lt. Cmdr. Richie "To be prepared for war, is one of the most effectual means of preserving the peace."-George Washington
  • Member since
    August 2015
  • From: the redlands Fl
Posted by crown r n7 on Wednesday, June 22, 2016 9:18 PM

here are my lastest pics from my PBM-5 with open bomb bay in the engine nacelles . I couldnt pass it up 


 Nick.

  • Member since
    June 2014
Posted by BrandonK on Wednesday, June 22, 2016 11:01 PM

crown, that is a nice amount of detail in those bays and the color looks great. This is gonna be one sweet PBM.

BK

On the bench:

A lot !! And I mean A LOT!!

2024 Kits on deck / in process / completed   

                         14 / 5 / 2  

                              Tongue Tied

  • Member since
    May 2011
  • From: Honolulu, Hawaii
Posted by Real G on Thursday, June 23, 2016 1:57 PM

All the great work being done here is certainly providing me with motivation!

https://flic.kr/p/JoZSm5] [/url]Seamaster-44 by N.T. Izumi, on Flickr

After much consideration, I decided that the very nice True Details resin seats were not quite right, so I am attempting to make new ones to more closely resemble the Stanley seats of the Seamaster.  The big difference is that the Stanley seats have a heavy looking rear extension that appears to house the guide rollers for the ejection rails.  So using the True Detail seats for dimensional reference, new ones are being fabricated from sheet plastic.

https://flic.kr/p/JoZPxu] [/url]Seamaster-45 by N.T. Izumi, on Flickr

Here the new seats are being test fitted, along with the Monogram B-52 test pilot along for the ride.  The head boxes have not yet been fabricated.  I pulled out a new set of magnifying looken-peepers which allow me a much better view of what I am doing. The only thing is that I'm kind of cross-eyed when staring at the parts!  Stick out tongue

Lots of real-world responsibilities demand my attention and time at the moment, but the more I watch the action on this GB, the more I want to work on the Seamonster!  Thanks for helping guys!  Big Smile

“Ya ya ya, unicorn papoi!”

  • Member since
    July 2014
Posted by modelcrazy on Thursday, June 23, 2016 2:00 PM

Can't wait to see this come together G.

Steve

Building a kit from your stash is like cutting a head off a Hydra, two more take it's place.


http://www.spamodeler.com/forum/

  • Member since
    May 2011
  • From: Honolulu, Hawaii
Posted by Real G on Friday, June 24, 2016 2:17 PM

Please allow me to post a little entertainig distraction.

https://flic.kr/p/HxH6GQ] [/url]Seamaster-46 by N.T. Izumi, on Flickr

I was looking for the second pilot figure when I found this guy.  Way back in the 1980s I wanted to have a movie version pilot for a Macross VF-1 Super Valkyrie, so I modded a Monogram F-15 pilot with a reshaped helmet, chest pack, and big shoulder pads (remember this was from the 1980s).  Looking at it now it is very rough and pales in comparison to Hasegawa's rendition.  And I took too long to build the Imai Super Valkyrie, so it got superseded by Hasegawa's excellent kit.

Anyway, the Stanley seats now have head boxes, which still need to be sanded to shape.  I didn't get far last night, as my allergies were in full force after mowing the lawn.  At least the yard looks nice this morning.  Smile

“Ya ya ya, unicorn papoi!”

  • Member since
    December 2003
  • From: 37deg 40.13' N 95deg 29.10'W
Posted by scottrc on Sunday, June 26, 2016 10:34 AM

Greetings GB members,

I have taken a break from life and spent the day on my Goose.  Took a while to mask it all off and have now painted all the black surfaces.  I also put a coat of stain on the dock.  Hope to provide another update soon.  Scott

  • Member since
    December 2003
  • From: 37deg 40.13' N 95deg 29.10'W
Posted by scottrc on Sunday, June 26, 2016 11:05 AM

An interesting side step into this project was finding out the Goose in the TV show had 3 blade and the kit 2 blade props.  All I had was a set of 1/48 props from a B-24 which were going to be too long, so, using the kit's prop as a guide, I cut them down and then re-glued them to the hub, showing them in a semi-feathered position as they would be if docked. 

  • Member since
    March 2006
Posted by simpilot34 on Monday, June 27, 2016 1:52 AM

Crown those bays look like they mean business!! Looking to be another great Mariner!!

G love those seats! Getting better and better!

Scott your honker is looking great!! Love the prop work!

Cheers, Lt. Cmdr. Richie "To be prepared for war, is one of the most effectual means of preserving the peace."-George Washington
  • Member since
    June 2014
Posted by BrandonK on Monday, June 27, 2016 9:08 AM

RG, the seats appear to be taking shape and that pilot kills me. LOL

Scott, the work on the goose is looking great and the prop work is a great idea, not sure I would have noticed that till it was too late. Are you going to re-profile the blades once you have then scaled down?

BK

On the bench:

A lot !! And I mean A LOT!!

2024 Kits on deck / in process / completed   

                         14 / 5 / 2  

                              Tongue Tied

  • Member since
    November 2008
  • From: Central Florida
Posted by plasticjunkie on Wednesday, June 29, 2016 9:48 PM

There are some really cool builds going on here. Beer

I finally was able to get back to work on the Seiran. It's ready for the Eduard canopy mask and paint. I also got the dolly assembled and is also ready for paint.

 GIFMaker.org_jy_Ayj_O


Too many models to build, not enough time in a lifetime!!

  • Member since
    June 2014
Posted by BrandonK on Thursday, June 30, 2016 9:07 AM

PJ, looking good. We should see some color on that pretty soon I'd say. I still need to build my dolly for mine but I've been busy and not a lot of progress lately. 

BK

On the bench:

A lot !! And I mean A LOT!!

2024 Kits on deck / in process / completed   

                         14 / 5 / 2  

                              Tongue Tied

  • Member since
    November 2008
  • From: Central Florida
Posted by plasticjunkie on Thursday, June 30, 2016 9:57 AM

Thanks BK. Yep color is next and speaking of color it will sport a rather unusual scheme of IJN Green over orange with some red primer showing thru. This particular scheme was found on a Seiran found on Nagoya by GIs.

The dolly looks to be part wood and part metal as I suspect it to be as such for strength. I will be doing both the hair spray and salt technique for the distressing on both the aircraft and dolly.

Here's a link to my scheme:

http://www.ipmsstockholm.org/magazine/1998/05/stuff_eng_ww2incolor_airaxis.htm

 GIFMaker.org_jy_Ayj_O


Too many models to build, not enough time in a lifetime!!

  • Member since
    July 2014
Posted by modelcrazy on Thursday, June 30, 2016 11:06 AM

PJ,

Is the tail going to be missing and a hole in the float on yours? Nice picture, they are hard to find except for the one in the Smithsonian.

Steve

Building a kit from your stash is like cutting a head off a Hydra, two more take it's place.


http://www.spamodeler.com/forum/

  • Member since
    November 2008
  • From: Central Florida
Posted by plasticjunkie on Thursday, June 30, 2016 11:16 AM

No it will not be a derelict but in operational condition. This particular airframe was apparently used for testing due to the orange color.

 GIFMaker.org_jy_Ayj_O


Too many models to build, not enough time in a lifetime!!

  • Member since
    May 2011
  • From: Honolulu, Hawaii
Posted by Real G on Thursday, June 30, 2016 7:28 PM

PJ, I wasn't aware that a Seiran prototype had an all-green fuselage.  You learn something new every day!  Big Smile

I haven't had time to mess with the Seamonster lately, but before bedtime I drilled out the missing portholes for the back seaters.  Mach-2 only provide a scribed circle on the left fuselage, but not on the right side (!).  The first filled in circle is the kit location, which is too far forward.  The second filled circle was my first attempt to make new holes, but I decided they needed to be a little further back and a wee bit lower.  Like I said, I measure once and cut twice!  Stick out tongue

https://flic.kr/p/JvWSs7] 
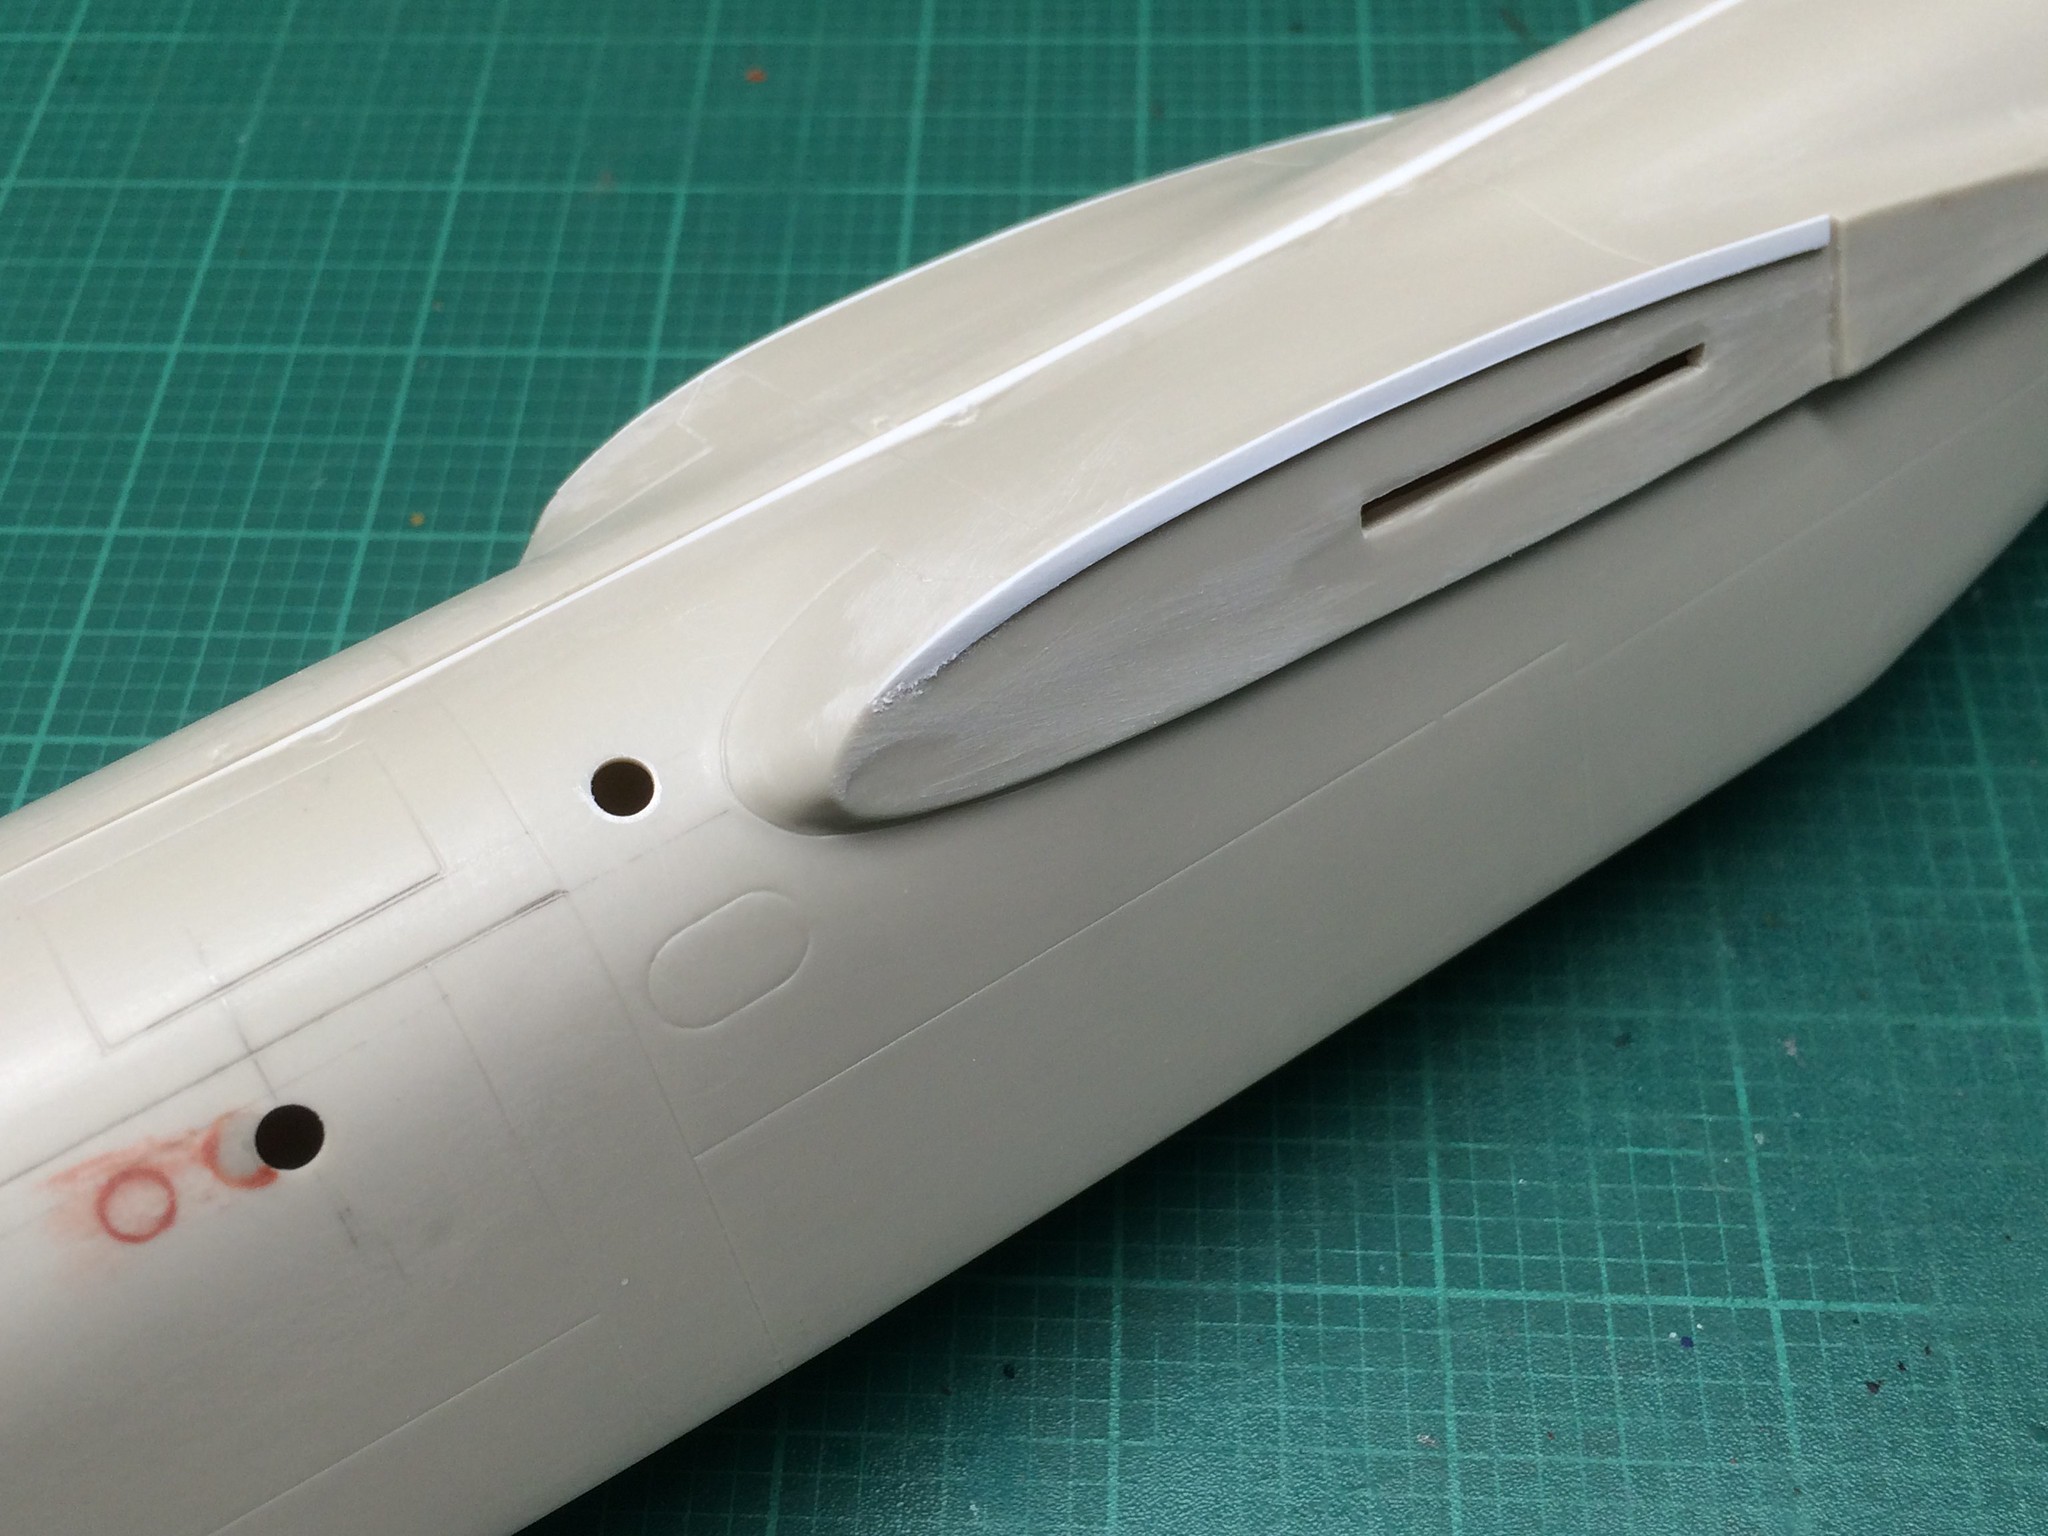
[/url]Seamaster-47 by N.T. Izumi, on Flickr

The two "deadlight" portholes on the roof were entirely absent on the kit, and the placement of said holes were a compromise between what I could see and measure off photos, and the realities of the kit.  I think the panels lines are way off, and the back seaters' roof hatches are too far back.  I'll take care of that later on.  I plan on filling the porthole openings with CA glue, polishing them, then painting the backsides with Tamiya smoke.

https://flic.kr/p/Jy7Dge] 
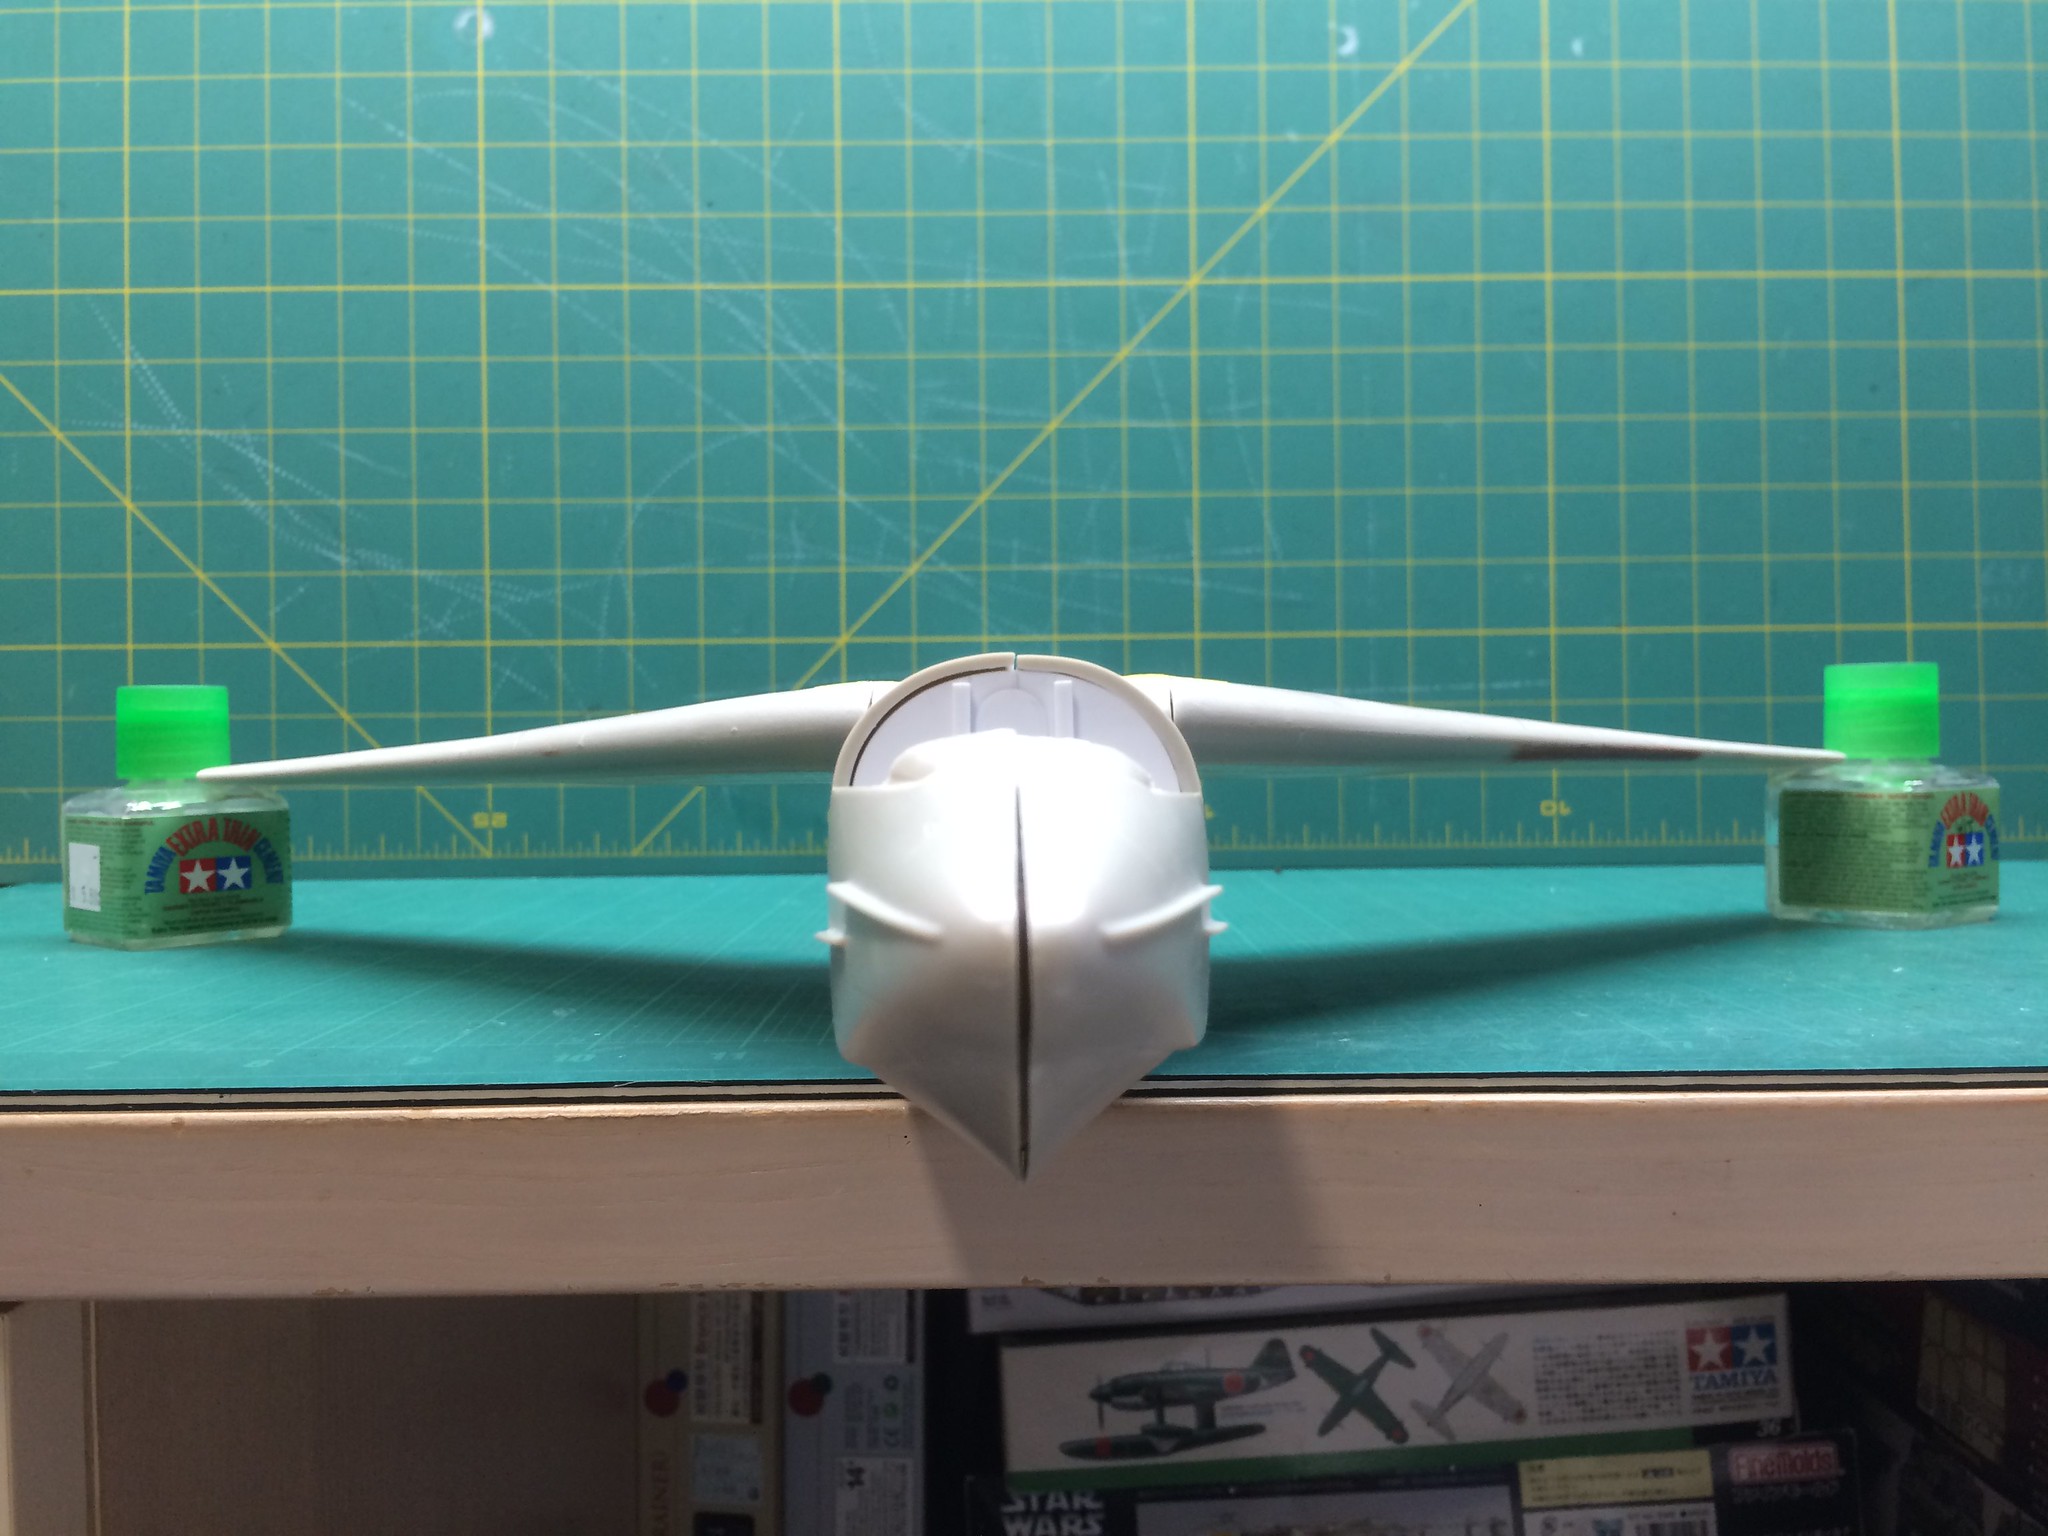
[/url]Seamaster-49 by N.T. Izumi, on Flickr

I also took the time to shim the wings to get them to approximate the real thing.  The P6M2 had less anherdal than the XP6M and P6M-1, with the underside of the wings appearing to be almost horizontal from head-on.  The kit wings have almost no anhedral, so the undersides of the wings angle up going towards the wingtips.  0.030" strip plastic was glued to the upper edges of the wing roots to correct the problem.  A bigger problem is that Mach-2 molded the wing section such that the top and bottom surfaces curve in when seen head on rather than having straight lines.  Since it would take essentially new wings to correct, plus the nacelles would then need to be adjusted to fit, I am going to leave this one alone.  Pay no attention to the Kyofu under the desk!


“Ya ya ya, unicorn papoi!”

  • Member since
    November 2008
  • From: Central Florida
Posted by plasticjunkie on Thursday, June 30, 2016 9:13 PM

G, yep this particular Seiran scheme is different for sure.

That Seamaster is giving you some concerns but you are handling things out very well. That is a very unique looking aircraft indeed.

I may have seen one near Priceton, NJ back in 1986 while on an extradition trip up there. I recall seeing some type of aviation museum with several aircrafts out on display and I think one of them may have been a Seamaster. I recall it being very odd looking. I think I took a picture of it but I have to locate it.

 GIFMaker.org_jy_Ayj_O


Too many models to build, not enough time in a lifetime!!

  • Member since
    June 2014
Posted by BrandonK on Thursday, June 30, 2016 10:57 PM

That test plane only has a scratch and it will "buff" out. Lol. I am really looking forward to seeing that with color.

That seamaster is really a peach but you are handling it with a masters skill and patience. Nice work all the way along.

BK

On the bench:

A lot !! And I mean A LOT!!

2024 Kits on deck / in process / completed   

                         14 / 5 / 2  

                              Tongue Tied

  • Member since
    May 2011
  • From: Honolulu, Hawaii
Posted by Real G on Friday, July 1, 2016 3:42 PM

Fitting out the Seamonster's cockpit has begun.  First off are the side consoles.  I noticed that they angle up towards the IP and also out to the fuselage sides in photos of the real thing.  To avoid having to calculate anything and getting involved in real hard math(!), the inner walls of the consoles were cut from 0.030" sheet plastic and set in place with a square section strip to keep them vertical.  The consoles were then cut oversize and added to the inner walls (I beveled their mating edges to minimize unsighlty joints), then were followed by front and back panels cut to fit.  All joints were reinforced from the inside with bits of sheet plastic.

https://flic.kr/p/HL66V9] [/url]Seamaster-50 by N.T. Izumi, on Flickr

https://flic.kr/p/JgyGPq] [/url]Seamaster-51 by N.T. Izumi, on Flickr

The console sides were then savagely sanded back until the cockpit drop fit back into the fuselage halves.  The IP shroud had to be removed as its thickness interfered with the consoles.  At this point I noticed the canopy sills were not even.  But that's OK as the left side (which is low) has a small chunk of plastic missing courtesy of Mach-2's stellar manufacturing prowess.  The sill will be shimmed with strip pastic, which will correct the height as well as take care of the missing chunk.  All happy smiles.  No, really.  Big Smile  The center console will follow, then detailing!

“Ya ya ya, unicorn papoi!”

  • Member since
    March 2006
Posted by simpilot34 on Saturday, July 2, 2016 6:40 AM

PJ that's some great progress on th Serien!!! Looking forward to the color!!Toast

G the Seamonster is looking better and better! The office work is stellar!! You're doing some helicopter moves on that!! Beating it(air) into submission!Toast

Finished my Camel so the E7K might get moved onto the hangar floor and progressed.

Cheers, Lt. Cmdr. Richie "To be prepared for war, is one of the most effectual means of preserving the peace."-George Washington
JOIN OUR COMMUNITY!

Our community is FREE to join. To participate you must either login or register for an account.

SEARCH FORUMS
FREE NEWSLETTER
By signing up you may also receive reader surveys and occasional special offers. We do not sell, rent or trade our email lists. View our Privacy Policy.