SEARCH FINESCALE.COM

Enter keywords or a search phrase below:

Metal masters GB 2016 (1Feb to 31 July)

12639 views
250 replies
1 rating 2 rating 3 rating 4 rating 5 rating
  • Member since
    April 2010
Posted by Theuns on Monday, July 11, 2016 9:57 AM

Lary, that looks really good, well done for a first try.

I hope you will do another NMF soon.


I will post a pic on the front page, thanx for taking part :-)


Theuns

  • Member since
    July 2013
Posted by lzdaily@comcast.net on Monday, July 11, 2016 2:40 PM

Theuns,

Thanks for allowing me to participate. I've already started the next model - a replacement for this one. One thing I need to investigate is weathering. This bird looks far too clean.

I kinda partial to the first photo, if you wouldn't mind using that one.

Best,
Larry

  • Member since
    July 2013
Posted by lzdaily@comcast.net on Monday, July 11, 2016 2:41 PM

Whoops, just saw that you posted a different pic. Like that one too - it maybe shows the NMF a bit better.

LZD

  • Member since
    April 2010
Posted by Theuns on Monday, July 11, 2016 11:45 PM

What I have found is that NMF planes do not really weather like painted craft. The metal is to smooth to really hold onto any dirt od soot.

The metal does however fade a little more "dull" than when new and the different pannels have a different "colour" to it due to the different alloys.

You might want to play arround with that to simulate some weathering and maybe have a "new" shiny replacement pannel somewhere.


Theuns

  • Member since
    June 2013
Posted by bvallot on Tuesday, July 12, 2016 12:48 PM

Theuns is right. The NMFs are changing due to oxidation and UV conditions and other corrosive elements as I'm sure you know, but something I see commonly with modelers is a brief disconnect between what they see being done by many and what actually is. They adopt certain practices of weathering an aircraft that may simulate what's being seen, but it may not accurately reflect what's happening or why and where it should be happening. For instance, you see a lot of preshading for panel lines in an effort to reveal the joins along the borders of panels. I personally don't think there's anything wrong with this practice...how it works can largely vary on your coverage of whatever paint goes on top, but seeing each and every border uniformly on a plane is not normally accurate. There are other ways to accomplish it with better success. So to relate this to NMFs, I would suggest you consider how pretty you want your shine to be and start there. And by that I'm speaking of a primer coat underneath your NMF surface. I can't speak for the new MiG acrylics that just came out, but for Alclads using either the Gloss Black or Grey primer will have a significant difference in shine. Then consider a sealing coat of either flat or light sheen. Both change the final appearance of your efforts. Alclad itself doesn't need to be sealed with anything. It's durable enough on it's own, but adding a flat coat on top can dull the shine and give a more warbeaten look. Of course you still have oil leaks and fuel leaks to display and the big rooster tail of oil spray on the right side of mustangs in particular, but griming up a NMF starts with what goes on underneath.

I'm sorry I'm not as caught up as I'd like to be with my two mustangs. I'd have probably run through some of this already to some degree with my WIP part. What do you plan on doing for the next one Larry?

On the bench:  

Tamiya F4U-1  Kenneth Walsh


  • Member since
    April 2010
Posted by Theuns on Wednesday, July 13, 2016 11:32 PM

Just over 2 weeks left guys  ;-)


Theuns

  • Member since
    June 2013
Posted by bvallot on Thursday, July 14, 2016 10:02 AM

I know! I'm sweating bullets!! =]

I should be starting my paint real soon. Hopefully this weekend.

On the bench:  

Tamiya F4U-1  Kenneth Walsh


  • Member since
    April 2010
Posted by Theuns on Thursday, July 14, 2016 11:15 AM

nothing like a deadline to get motivated LOL


Theuns

  • Member since
    June 2013
Posted by bvallot on Thursday, July 28, 2016 12:14 PM

I'm starting to have doubts about finishing my build now. Not enough time in the day especially with a 2 month old. I'm starting to get fussed at by the wife for spending all day in the garage... =[ I haven't quite managed to be where I wanted. I missed a whole day basically having to be daddy and hubby, but it's not such a bad gig to have =]. Here's what I managed so far.

I got everything primed and before I could finish my poor little compressor crapped out on me. He needed to take a break! Eventually wrapped it up. What I like about it is even though it's a bit time consuming, once I'm done with a section...it's done for the most part. Any addtional weathering will be based on the theatre of operations. One thing that's worth mentioning is I preshaded certain panel lines and riveted sections with Alclad's Magnesium. This allows me a bit of depth with the Aluminums that go on top and gives the surface a bit more character with more control. The double action airbrush is the key to that though. 

I do apologize about the pics. They are very rushed and I honestly searched for the best light to show what your eyes are really seeing as best as I could.

 Untitled by Britt Vallot, on Flickr

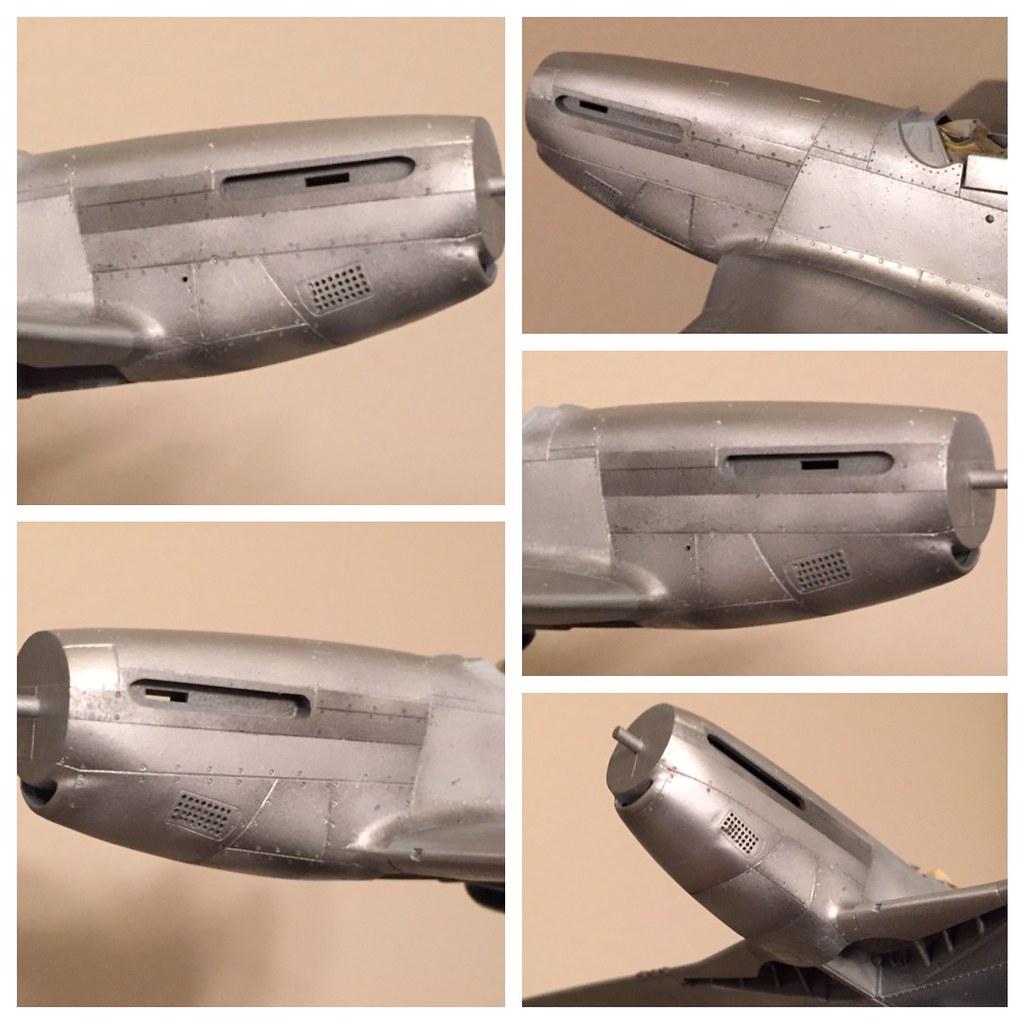
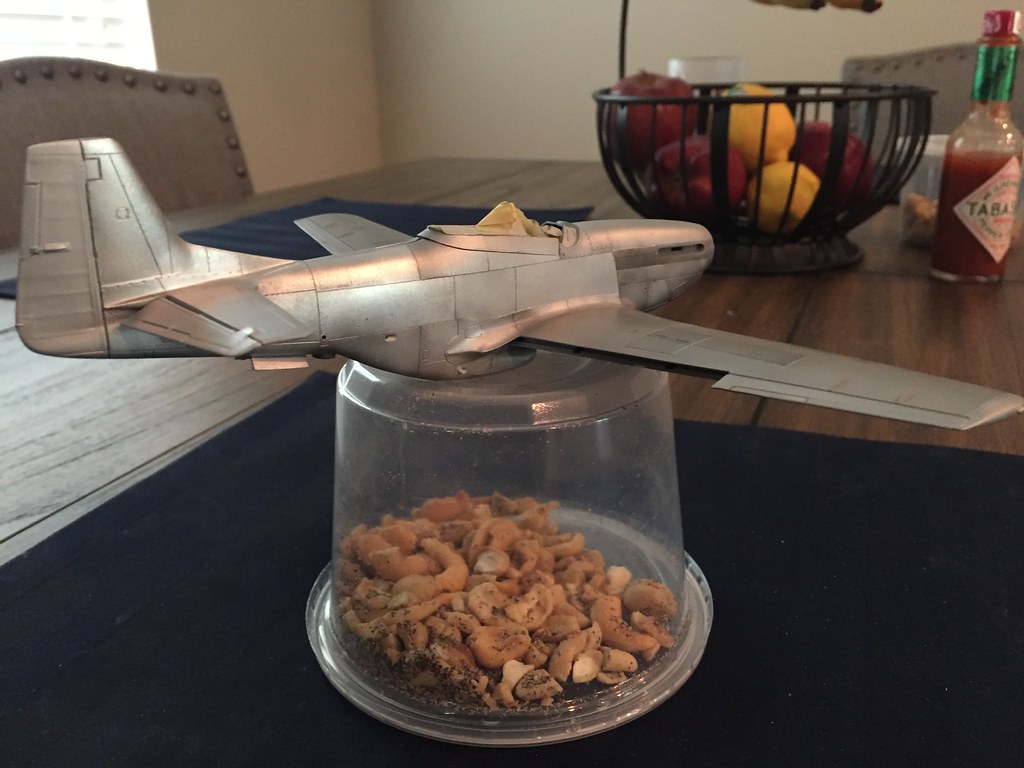
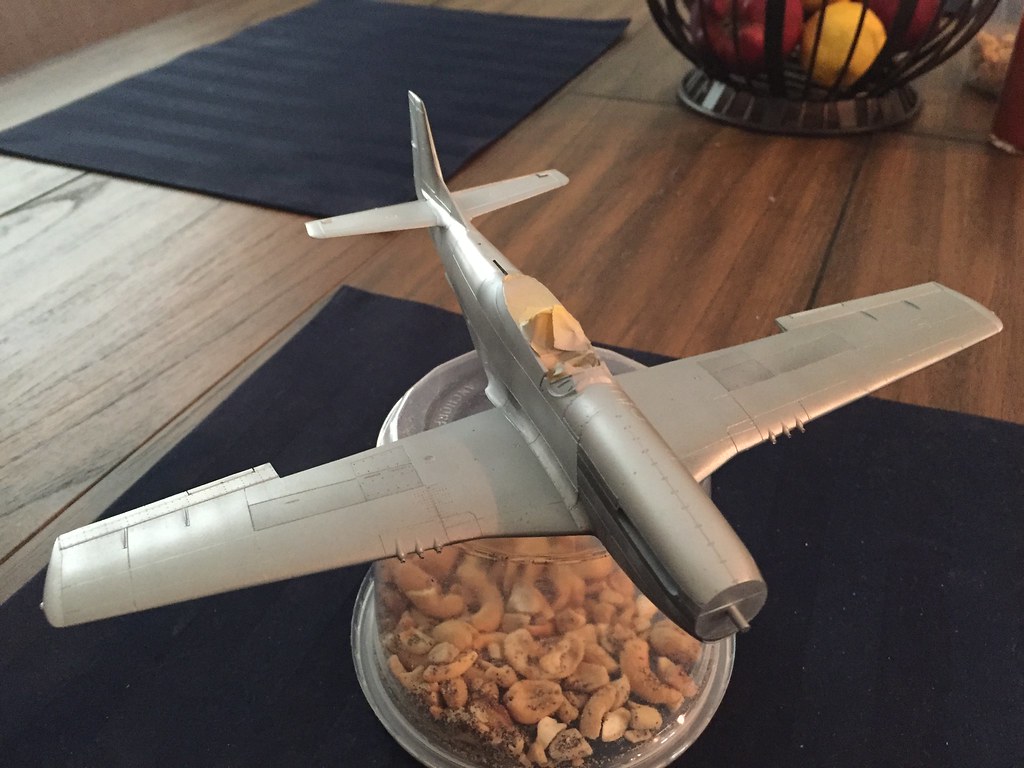
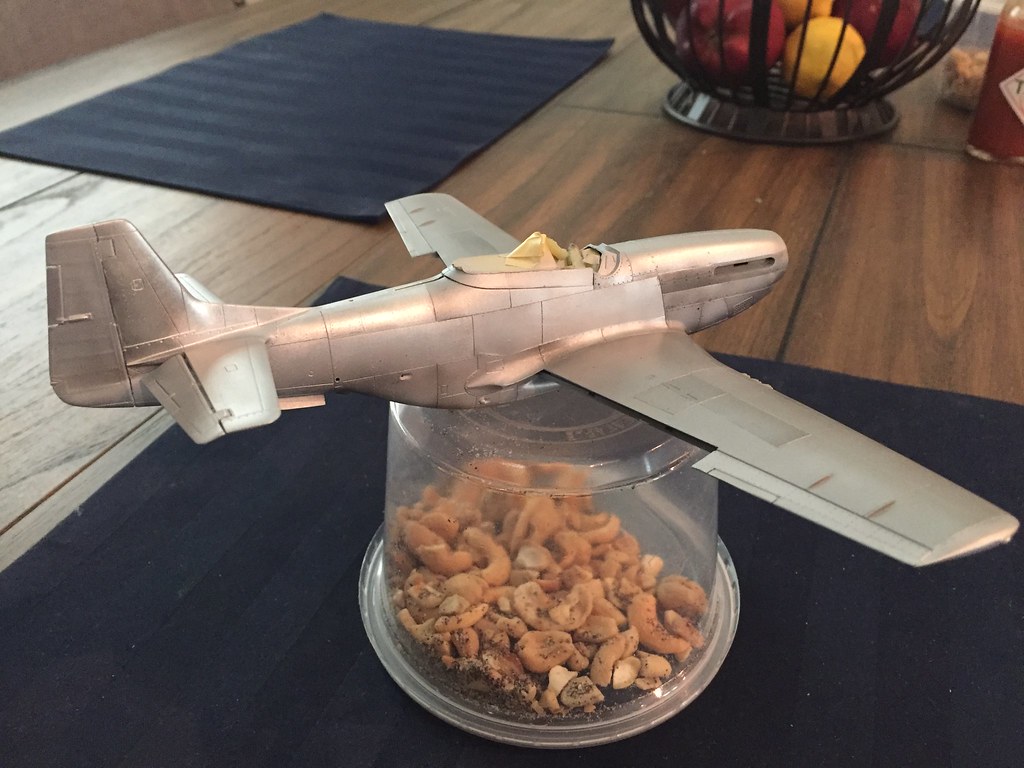
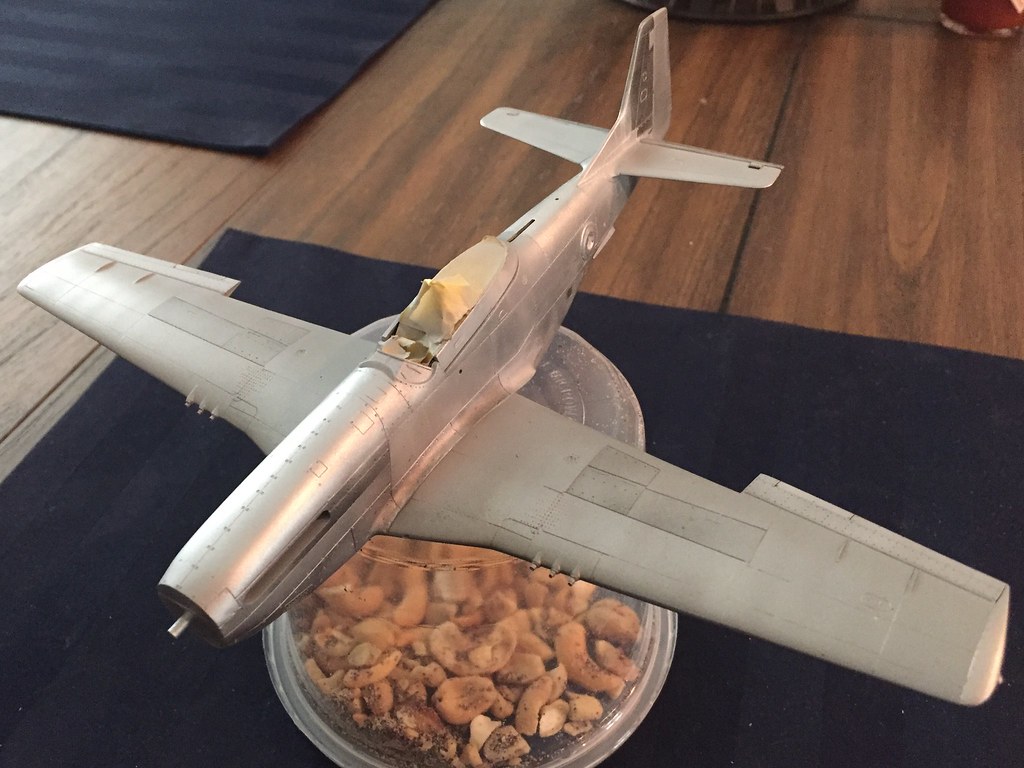
The cowling was preshaded some as described above and painted with White Aluminum. The panel along the exhaust stack was done almost entirely with the Magnesium. I find it does a great job of representing this part.

The rest sort of speaks for itself. I paint the panels individually by taping them off with Tamiya tape. I hear of others having a lot of trouble with this and I can never understand why. My tape does get low tack very quickly as I tear off many strands and put then on the mat or cardboard, etc and reuse them. That may have something to do with it. I will say that my paint goes down in thin coats and is dry immediately after. No kidding...immediately. Just tossing that out there for folks. I hope it helps solve the Alclad mystery. 

The rest of the plane is painted in Aluminum along the cockpit and Polished Aluminum as we move aft. The wings are Duraluminum with Magnesium within the ammo/gun bays. I always come back and clean up whatever overdoing it happens while using the Magnesium with whatever color is dominant. When the panels are taped off, you won't notice how much is going down. Tip...it never takes much for a subtle difference. =] I did  not have the luck I thought I'd have with the Airframe Aluminum over the grey primer. It didn't bond with the plastic at all hardly. So for the tail part that shines bright in all the pics I referenced I went back with the Gloss Black and put down the Polished Aluminum instead as I didn't want something that shined too much. The Airframe Aluminum is way to bright and pretty for what was seen in the PTO.

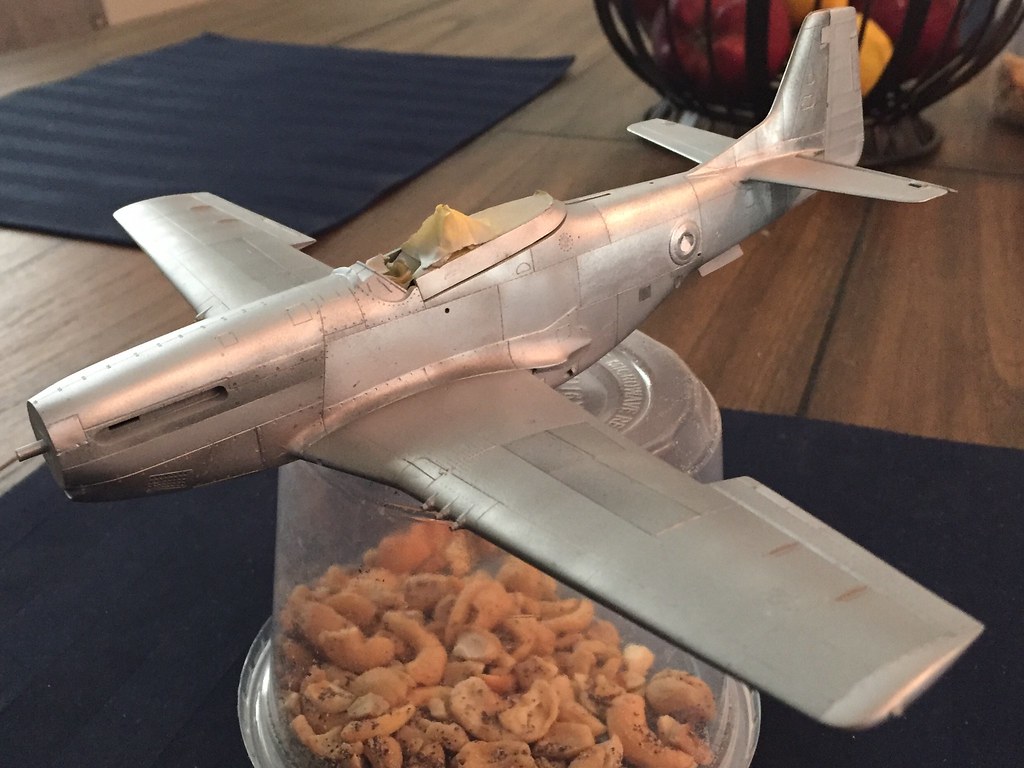
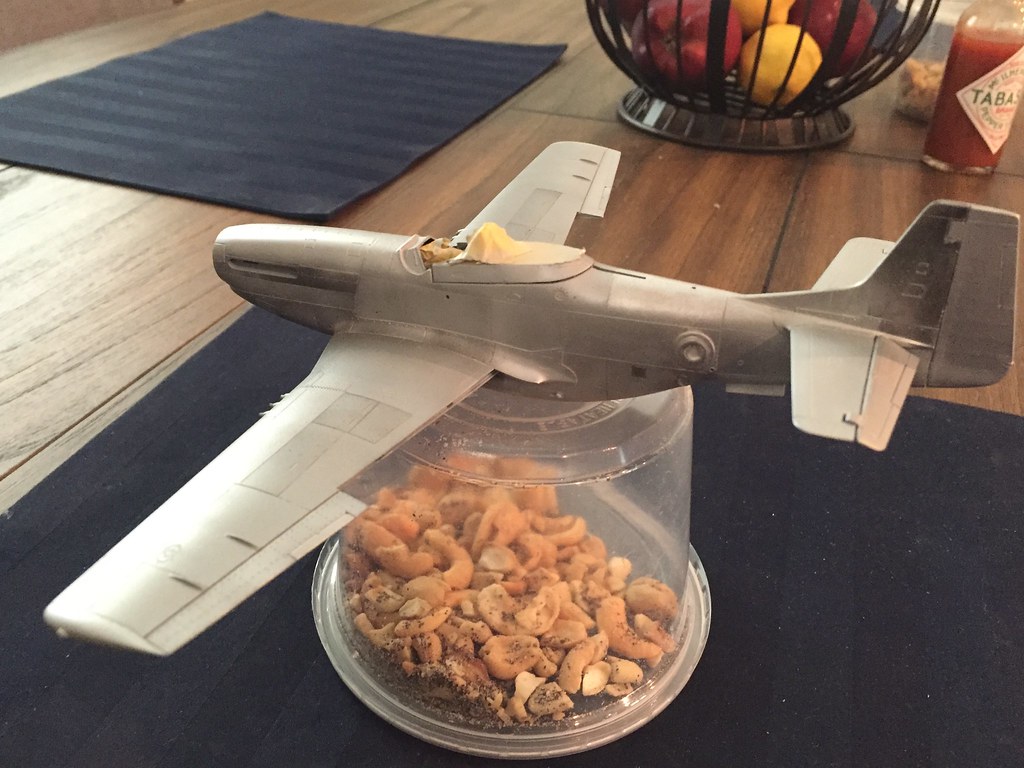
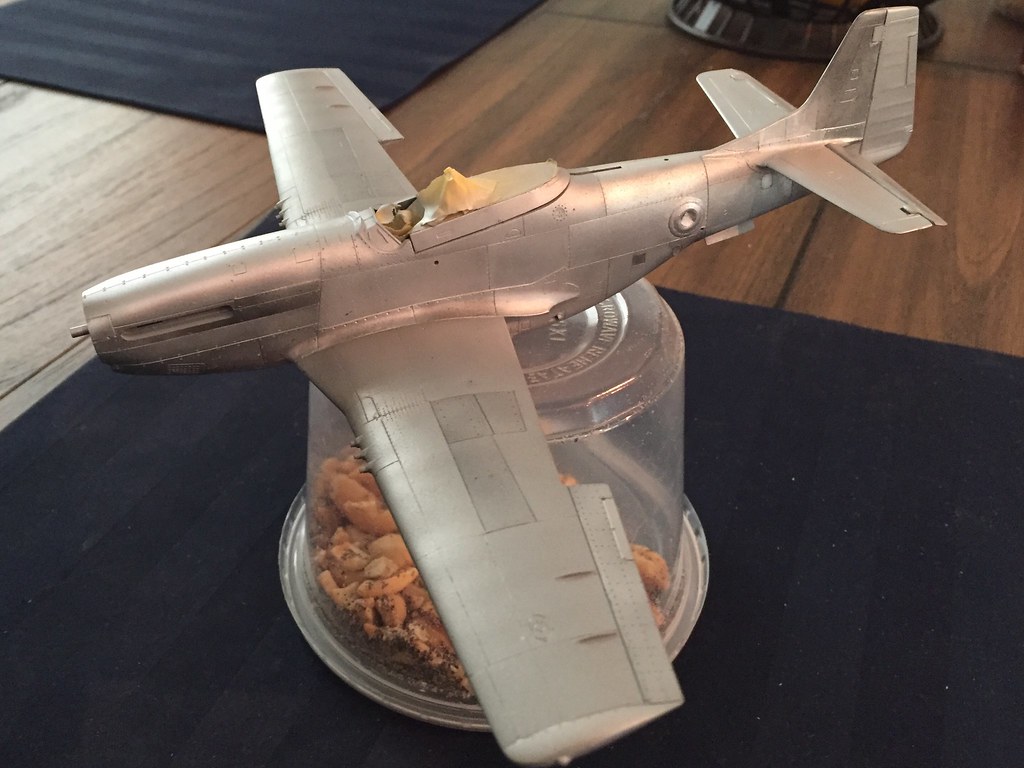
A little walkaround.

 Untitled by Britt Vallot, on Flickr

 Untitled by Britt Vallot, on Flickr

 Untitled by Britt Vallot, on Flickr

 Untitled by Britt Vallot, on Flickr

 Untitled by Britt Vallot, on Flickr

 Untitled by Britt Vallot, on Flickr

 Untitled by Britt Vallot, on Flickr

 Untitled by Britt Vallot, on Flickr

That's where I'm at for now. I need to tidy up the gear bay, assemble the prop, and paint the insignia and anti-glare strip.  I'm skeptical about the finish.

On the bench:  

Tamiya F4U-1  Kenneth Walsh


  • Member since
    June 2014
Posted by BrandonK on Thursday, July 28, 2016 12:20 PM

Britt, that is one of the most convincing NMF's I have ever seen. The sun beaten and weathered treatment is very good. I really like what you've pulled off here. Great job.

BK

On the bench:

A lot !! And I mean A LOT!!

2024 Kits on deck / in process / completed   

                         14 / 5 / 2  

                              Tongue Tied

  • Member since
    April 2010
Posted by Theuns on Thursday, July 28, 2016 11:33 PM

It seems the build is driving you "nuts" ;-)

I have to agree, you have nailed the weathered NMF look perfectly, well done.

I might have to try the preshading with alclad myself some time.


Theuns

JOIN OUR COMMUNITY!

Our community is FREE to join. To participate you must either login or register for an account.

SEARCH FORUMS
FREE NEWSLETTER
By signing up you may also receive reader surveys and occasional special offers. We do not sell, rent or trade our email lists. View our Privacy Policy.