SEARCH FINESCALE.COM

Enter keywords or a search phrase below:

Halftrack GB 2016/17

18391 views
468 replies
1 rating 2 rating 3 rating 4 rating 5 rating
  • Member since
    December 2002
  • From: Bury St Edmunds, Suffolk, England
Posted by Bish on Monday, July 25, 2016 2:11 PM

hogfanfs
 
Gamera

I've been making some slow progress. The running gear is close to being done. Gee whiz, I built the good 'ol Tamiya M3 years ago and this kit is about a dozen times more complex, the suspension bogies are about twenty parts in and of themselvies! Not that I'm complaining or anything, I love this type of stuff. On the other hand the parts here are smaller than those of a typical tank and my eyes aren't what they used to be... Blind Fold

One little point I am confused on here though, the instructions tell you to paint the underside steel, but as I understand US factories at the time just hosed everything down with multiple thick coats of olive drab. Well, plenty of time to do research before I paint the thing... 


Cliff,

Sorry I missed this! Great start on the M3. I'm amazed at how many parts it took to build those bogies!


Bruce, i had not noticed that until i saw your post. If i am looking at that right, each bogie has 20 parts. Thats impressive even for Dragon.

I am a Norfolk man and i glory in being so


On the bench: Airfix 1/72nd Harrier GR.3/Fujimi 1/72nd Ju 87D-3

  • Member since
    December 2002
  • From: Bury St Edmunds, Suffolk, England
Posted by Bish on Monday, July 25, 2016 2:13 PM

Bruce, Cliff, thanks. Once the two halfs were together, there was not a lot left to add to the outside. But i was surprised at how much i got gone this weekend especially with everthing else i had on.

I am a Norfolk man and i glory in being so


On the bench: Airfix 1/72nd Harrier GR.3/Fujimi 1/72nd Ju 87D-3

  • Member since
    July 2016
  • From: Kentucky , USA
Posted by MailDude on Wednesday, July 27, 2016 12:31 PM

Bish, please add me with this Tamiya 1/35th M21 kit:

I just joined the Sub Warfare GB, but with this kit laying around, I can't pass up trying to get this badge! I should have enough time to complete both (I hopeTongue Tied).

MailDude a.k.a. mailwalker

  • Member since
    December 2002
  • From: Bury St Edmunds, Suffolk, England
Posted by Bish on Wednesday, July 27, 2016 12:48 PM

Glad to have you on board Dude, and nice to have somthing else not German.

I am a Norfolk man and i glory in being so


On the bench: Airfix 1/72nd Harrier GR.3/Fujimi 1/72nd Ju 87D-3

  • Member since
    May 2013
  • From: From the Mit, but live in Mason, O high ho
Posted by hogfanfs on Wednesday, July 27, 2016 12:57 PM

Bish

Glad to have you on board Dude, and nice to have somthing else not German.


I know you rolled your eyes when you typed that! LOL!

MailDude, glad to have you on-board!

 Bruce


 On the bench:  1/48 Eduard MiG-21MF

                        1/35 Takom Merkava Mk.I


  • Member since
    November 2009
  • From: SW Virginia
Posted by Gamera on Wednesday, July 27, 2016 1:59 PM

Maildude: Cool! I built the Tamiya M3 years ago but not this one- looking forward to following along with you. 

"I dream in fire but work in clay." -Arthur Machen


  • Member since
    July 2016
  • From: Kentucky , USA
Posted by MailDude on Wednesday, July 27, 2016 2:23 PM

Bish- Thanks for the add. 

Hog-Thanks for the welcome. 

Gamera-Thanks for the welcome. I'll be getting started soon, gotta put final touches on a T-33A to get my work space cleared!

MailDude a.k.a. mailwalker

  • Member since
    November 2009
  • From: SW Virginia
Posted by Gamera on Saturday, July 30, 2016 8:26 AM

I'm slowly getting there. Few more things to add to the chassis, cab, and bed and then onto the 75mm gun. Lots of small parts there, gonna be fun... 

"I dream in fire but work in clay." -Arthur Machen


  • Member since
    December 2002
  • From: Bury St Edmunds, Suffolk, England
Posted by Bish on Saturday, July 30, 2016 9:28 AM

hogfanfs
 
Bish

Glad to have you on board Dude, and nice to have somthing else not German.


I know you rolled your eyes when you typed that! LOL!

MailDude, glad to have you on-board!


I don't know what your implying, really i don't Whistling

I am a Norfolk man and i glory in being so


On the bench: Airfix 1/72nd Harrier GR.3/Fujimi 1/72nd Ju 87D-3

  • Member since
    December 2002
  • From: Bury St Edmunds, Suffolk, England
Posted by Bish on Saturday, July 30, 2016 9:31 AM

Coming on nicley there G. Are those PE parts from the kit or you using an AM set.

I am a Norfolk man and i glory in being so


On the bench: Airfix 1/72nd Harrier GR.3/Fujimi 1/72nd Ju 87D-3

  • Member since
    November 2009
  • From: SW Virginia
Posted by Gamera on Saturday, July 30, 2016 10:10 AM

Thanks Bish! The kit comes with two small frets of PE, one a little smaller and the other a little larger than a matchbook. 

"I dream in fire but work in clay." -Arthur Machen


  • Member since
    December 2002
  • From: Bury St Edmunds, Suffolk, England
Posted by Bish on Sunday, July 31, 2016 6:04 AM

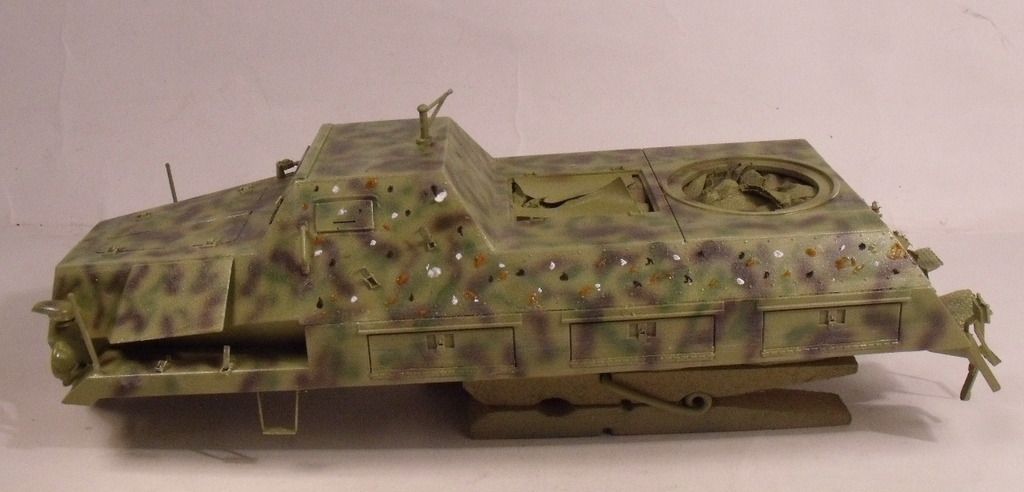
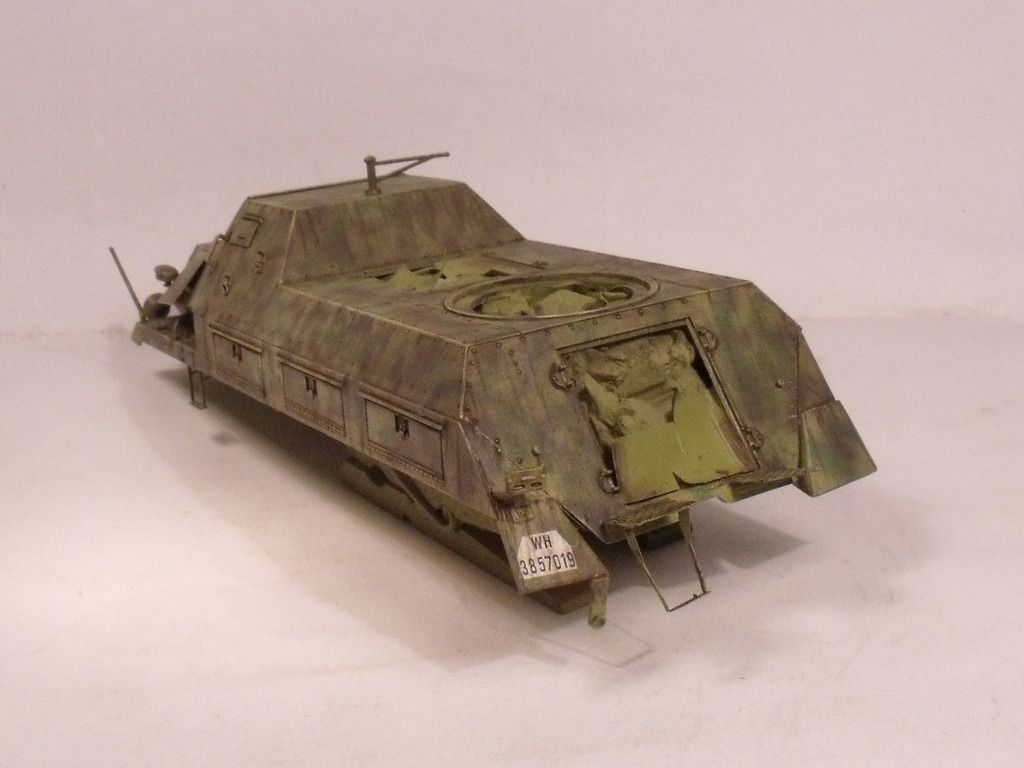
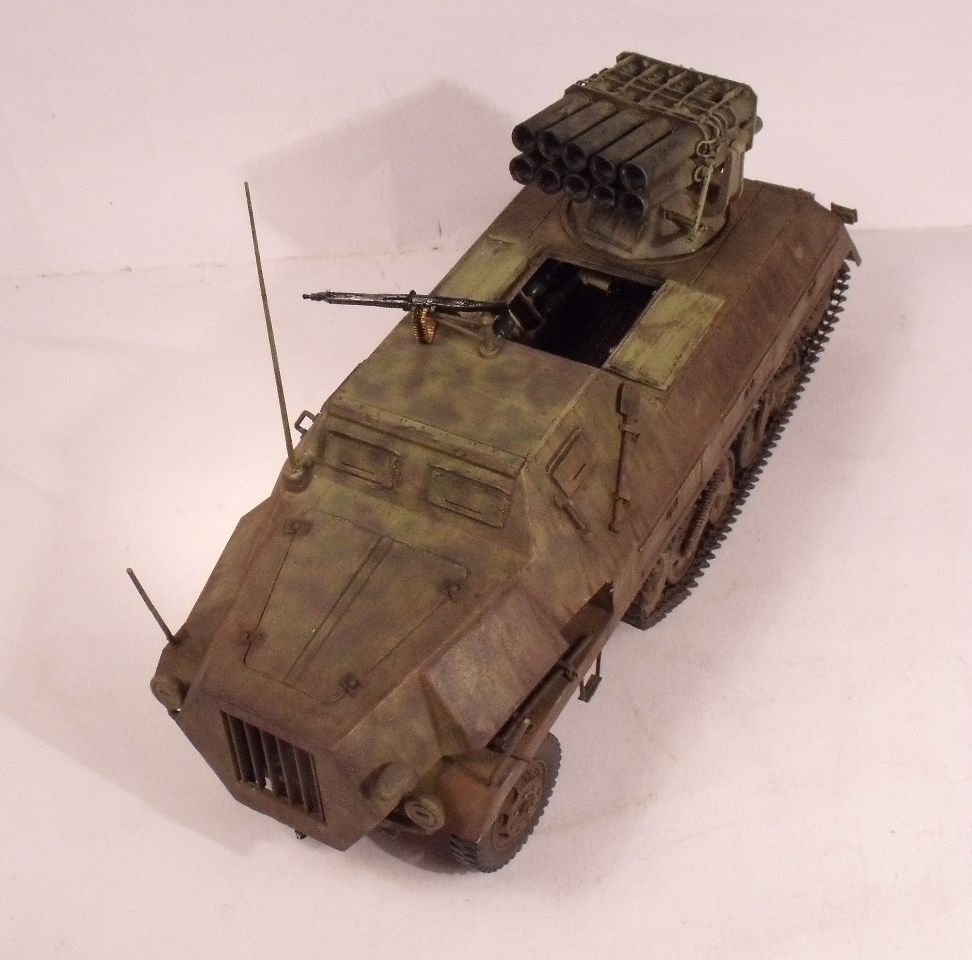
Time to get to the weathering and get the vehicle finished. First thing to do was the dot filtering. I am going for a heavy weathered finish and how the dot filtering is done has a large effect on this. I have pretty much got the hevay look just how i want it. I still have to work on the lighter weathered finish, but i have a couple of builds coming up to work on that.

For the filtering i am using oils which allows me a lot of time to work on it. Doing one section at a time, i added dots of white, raw umber and raw sienna.

Then, using a wide flat brush with a little white spirits these are streaked downwards.

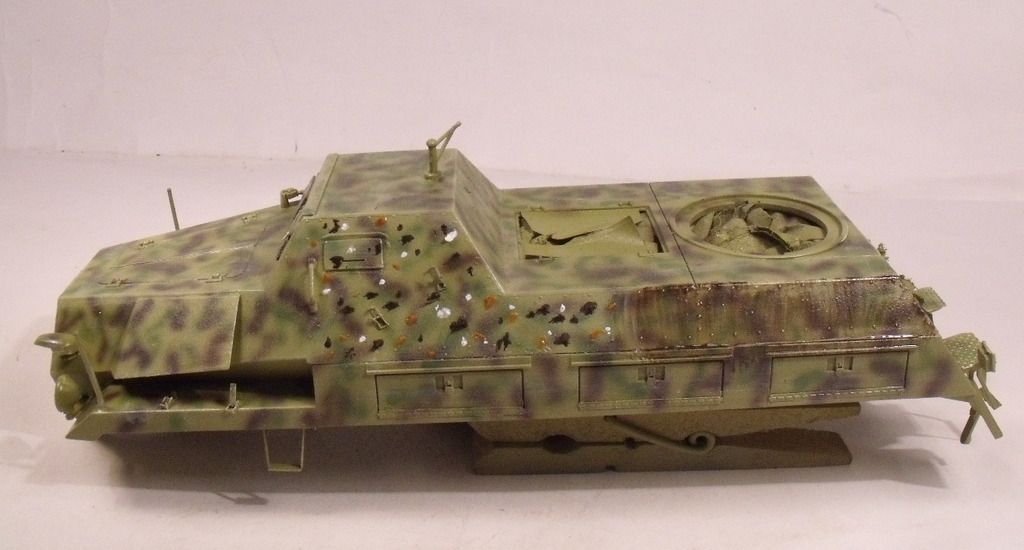
Once the whole vehcile is donw, i add some streaking with AK streak effects.

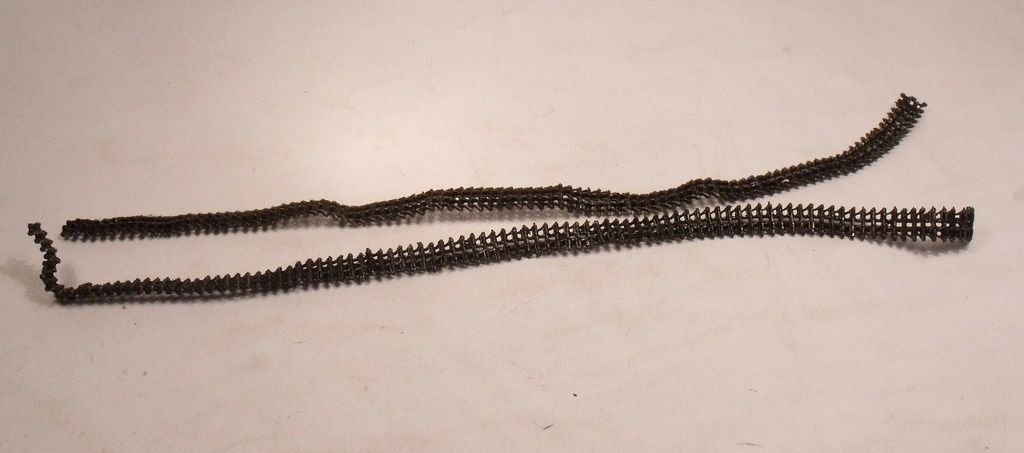
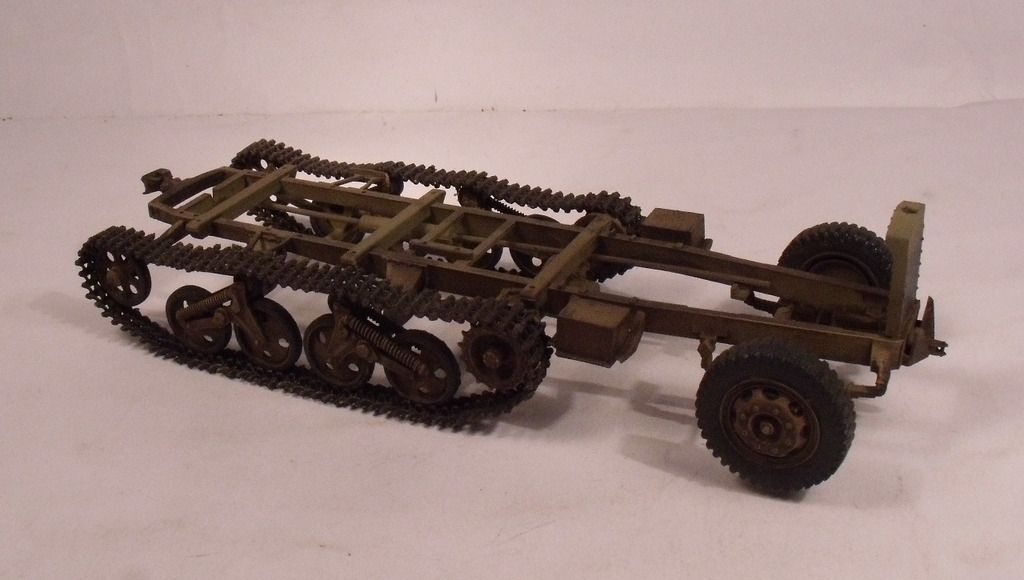
I had also done some work on the trcaks. A steel dry brush was followed by a raw unmber wash.

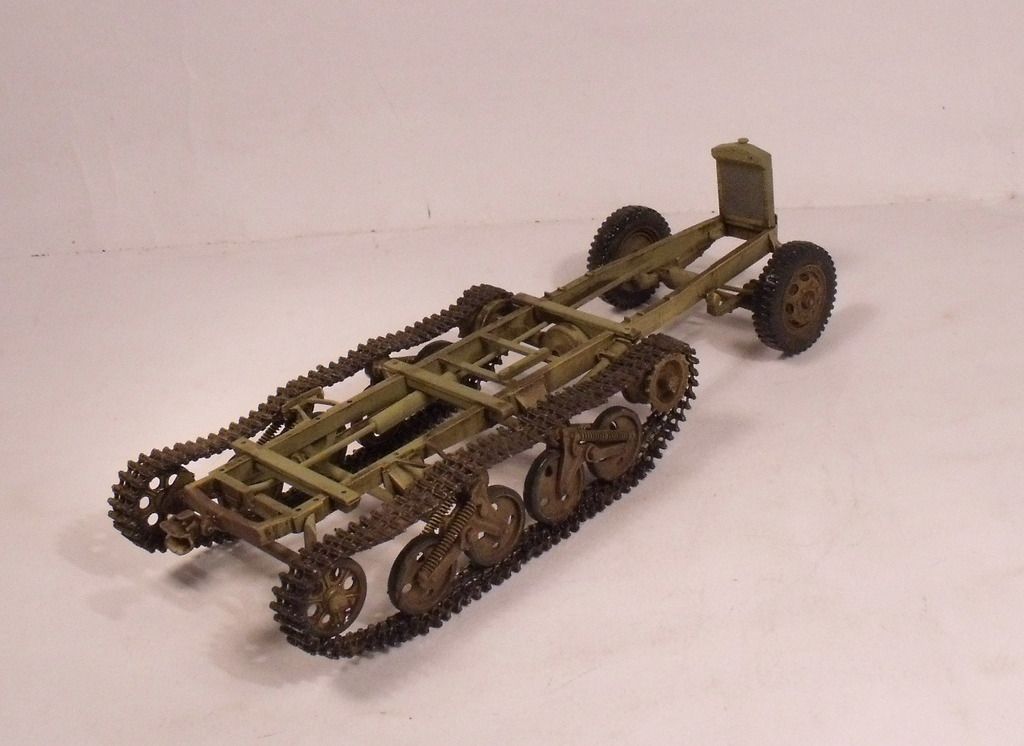
And the chassis could now be put together.

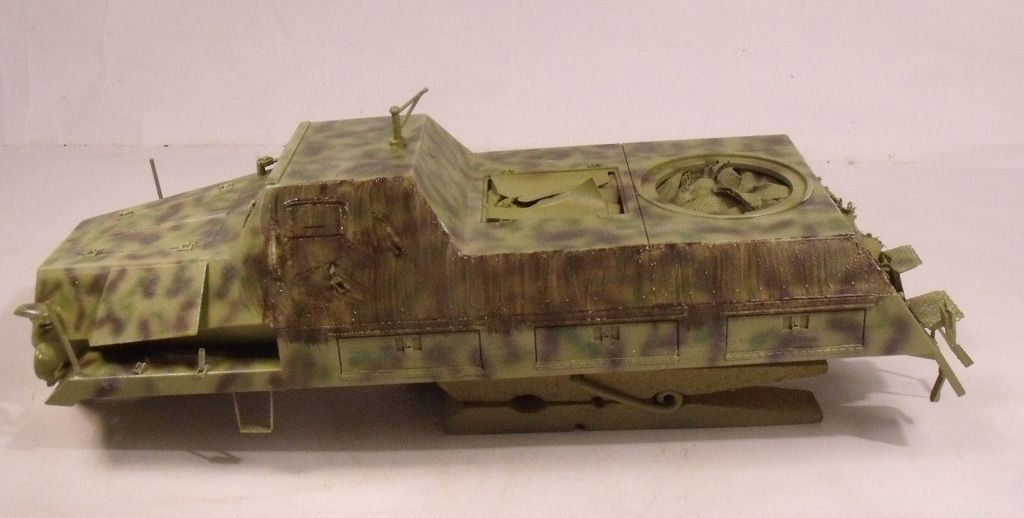
And back on the upper hull, the final touches were some chipping and dusting with AK Dark mud, earth and dust effects.

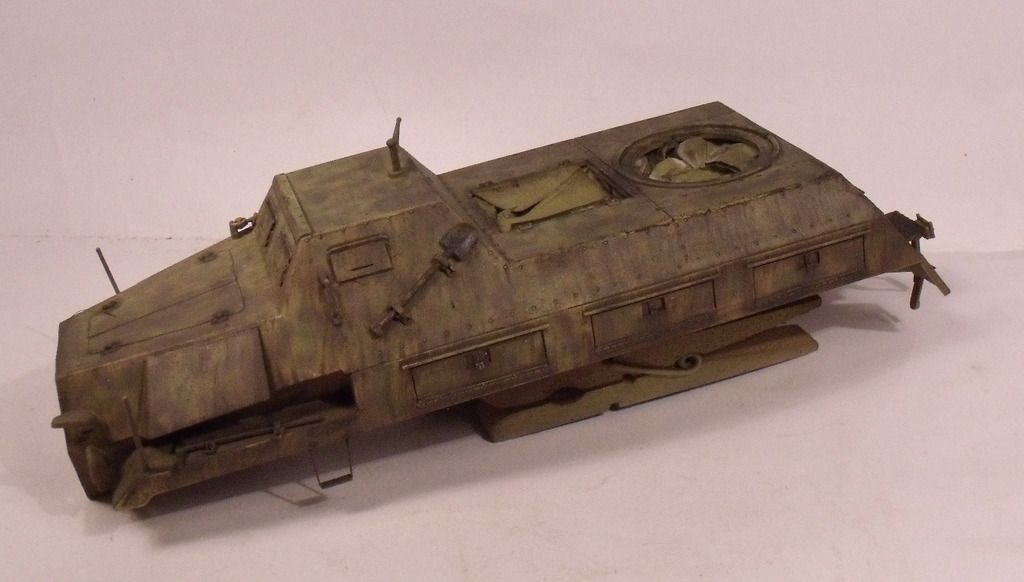
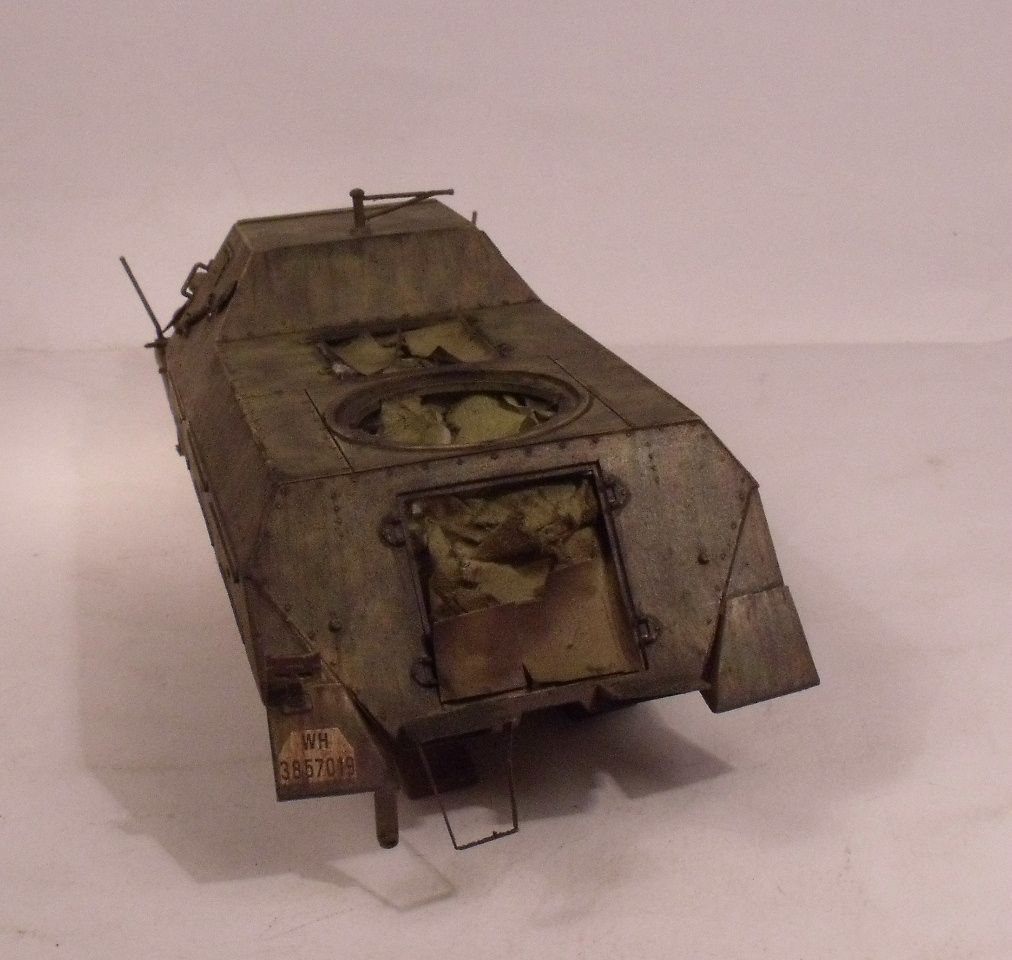
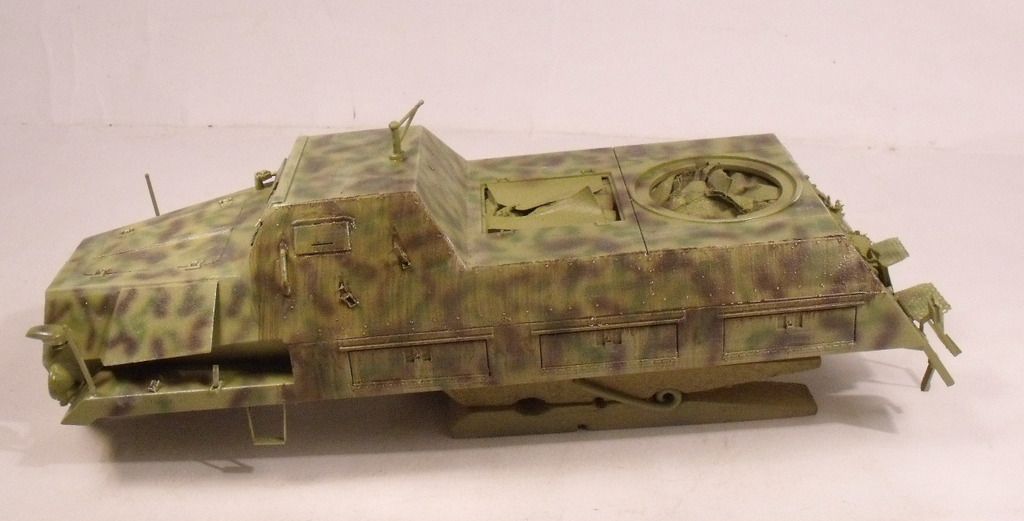
Then the two halves were brought together and all the last parts fitted. And once that was done some pigments added around the lower edge and the running gear.

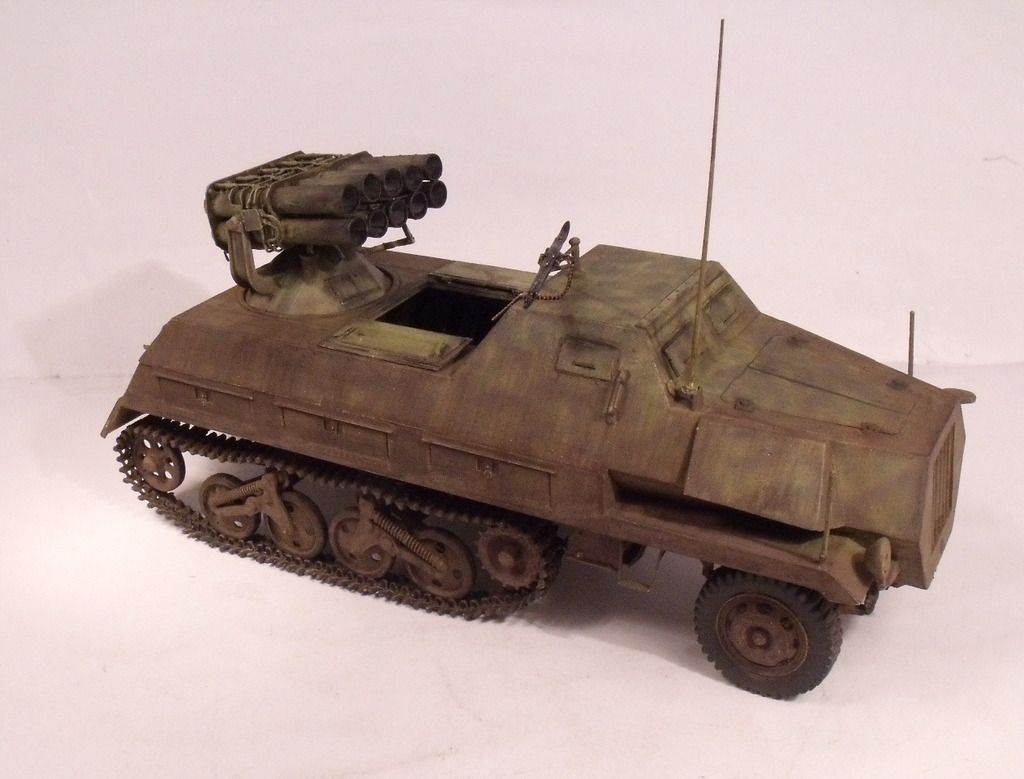
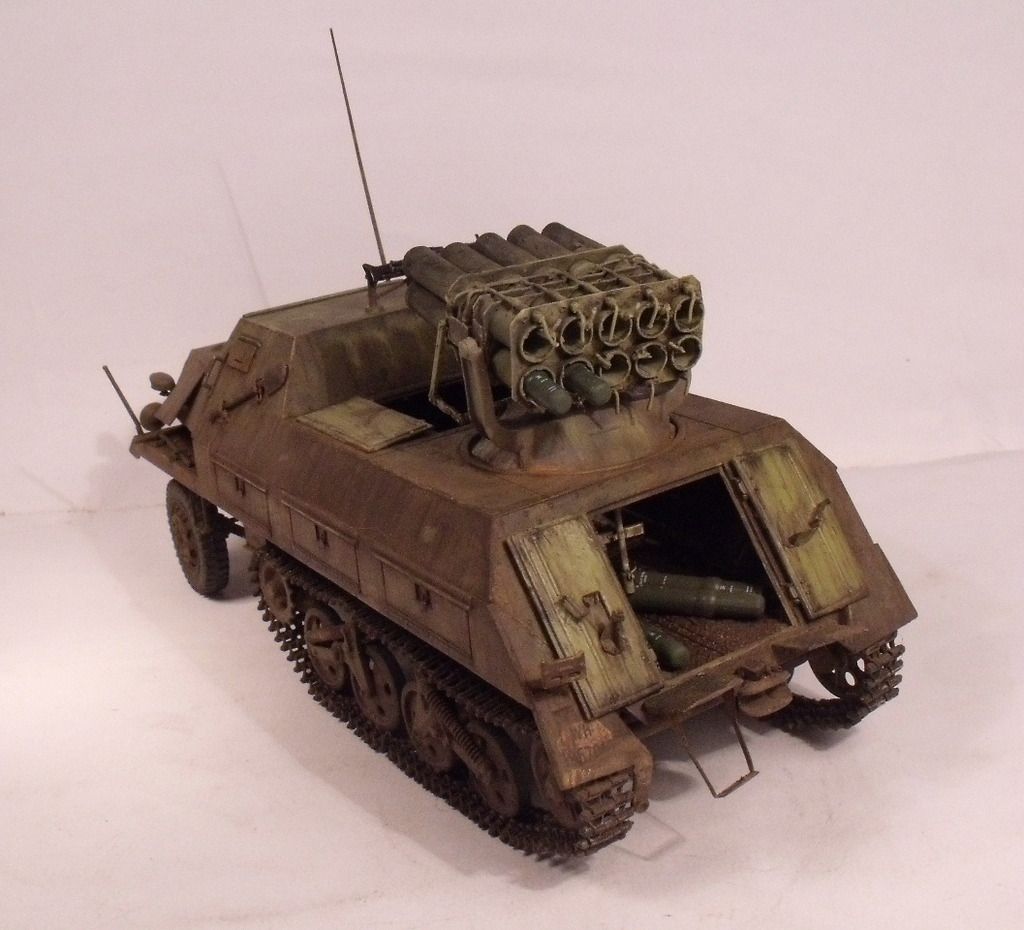
And thats just about it. I think i will add some exhaust stain down the rocket tubes as they look a bit shiny.

I do think this finish looks over done for a stand alone model, but hopefully onc eon the base it will make sense. And speaking of which, i now have to out this on hold for a week or so. The materials i wanted to give me the base i wanted i could only find at the Scenic factory in the US. So i ordered some bt on Fri and hopefully they won't take more thna a couple of weeks. So for now i'll just get the figures finished off and get onto my next build.

I am a Norfolk man and i glory in being so


On the bench: Airfix 1/72nd Harrier GR.3/Fujimi 1/72nd Ju 87D-3

  • Member since
    November 2009
  • From: SW Virginia
Posted by Gamera on Sunday, July 31, 2016 7:47 AM

Looks sharp Bish! I've been having some issues with the dot filters, I think I've been adding too much thinner and taking too much off. 

Looking forward to the figures, base, and seeing it all come together. Yes

"I dream in fire but work in clay." -Arthur Machen


  • Member since
    December 2002
  • From: Bury St Edmunds, Suffolk, England
Posted by Bish on Sunday, July 31, 2016 8:14 AM

Thanks G. My problem is always adding to much. I really need to try and reign it in, its easier to add than to take away. Same goes for the AK weathering effects. The 251 i will do later in the GB, i really want that much lighter weathered than this.

For the thinner, i run my brush over some tissue to remove the excess from the brush.

I am a Norfolk man and i glory in being so


On the bench: Airfix 1/72nd Harrier GR.3/Fujimi 1/72nd Ju 87D-3

  • Member since
    July 2016
  • From: Kentucky , USA
Posted by MailDude on Monday, August 1, 2016 5:48 PM

I have gotten started on the M21. It's taking me a while, because I'm trying to make sure to get rid of all mold seams. After all, if I'm spending the money on the kits and supplies, I'm gonna take this hobby seriousStick out tongue.  Here is what two nights of messin' with it has gotten me. A few sub-assemblies are glued up and ready for some paint. Which brings me to a question. This is the first piece of armor I have ever built and I was wondering when you guys decide to paint what parts? I mean do you add all the frame assemblies then primer and then paint individual brakes, drive shafts, mufflers..........?

I also drilled out the exhaust pipe. A first for me, so I thought it looks pretty neat.

More to come. 

MailDude a.k.a. mailwalker

  • Member since
    May 2013
  • From: From the Mit, but live in Mason, O high ho
Posted by hogfanfs on Monday, August 1, 2016 8:31 PM

@Bish,

Wow! My heart skipped a beat! The weathering is spectacular! I can't wait to see this in your diorama! 


@Cliff,

The M3 is really coming along nicely! I'm looking forward to seeing some paint on this vehicle!


@MD,

Great start on the M21, and even better job on opening the exhaust! It's the little details like this that will make this build fantastic! Great job!

 Bruce


 On the bench:  1/48 Eduard MiG-21MF

                        1/35 Takom Merkava Mk.I


  • Member since
    January 2011
  • From: Commonwealth of Virginia
Posted by Tal Afar Dave on Monday, August 1, 2016 9:17 PM

MailDude

I have gotten started on the M21. It's taking me a while, because I'm trying to make sure to get rid of all mold seams. After all, if I'm spending the money on the kits and supplies, I'm gonna take this hobby seriousStick out tongue.  Here is what two nights of messin' with it has gotten me. A few sub-assemblies are glued up and ready for some paint. Which brings me to a question. This is the first piece of armor I have ever built and I was wondering when you guys decide to paint what parts? I mean do you add all the frame assemblies then primer and then paint individual brakes, drive shafts, mufflers..........?

I also drilled out the exhaust pipe. A first for me, so I thought it looks pretty neat.

More to come. 


MailDude,

When you paint things is a personal choice.  If you have an airbrush, you could pretty much build the whole model and spray it with an overall OD color.  You can then go back and pick out the details with a paint brush.  Working this process you can build with strong glue bonds as well.  If you paint as you go, you may have to go back and scrape paint off of joining surfaces before gluing parts together.  It's all a matter of personal choice; after a few armor builds, you'll figure out what works best for you.

Good job on the exhaust, the little things add great detail.


TAD

2022 New Year's Resolution:  Enter 1 group build and COMPLETE a build this year!!  Why Photobucket did you rob me of my one Group Build Badge???  Must be part of the strong anti-Monogram cartel!!!

 ]

  • Member since
    July 2014
Posted by modelcrazy on Monday, August 1, 2016 9:39 PM

Looks really great Bish, I need to try some filters. I agree, the tubes could use some more exhaust staining. I imagine they got pretty bad during a firefight.

Steve

Building a kit from your stash is like cutting a head off a Hydra, two more take it's place.


http://www.spamodeler.com/forum/

  • Member since
    July 2016
  • From: Kentucky , USA
Posted by MailDude on Tuesday, August 2, 2016 7:56 AM

hog- Thanks for the compliment.

TAD- Thanks for that. That is what I was thinking until I started seeing all the nooks and crannies. I'm just gonna have to dive in and see how it works out.

Bish- Your build is outstanding. The weathering is YesYes.

Gamera-Looks like your coming right along with your M3. Do you know off hand the major difference between the M3 and M21?

MailDude a.k.a. mailwalker

  • Member since
    November 2009
  • From: SW Virginia
Posted by Gamera on Tuesday, August 2, 2016 11:02 AM

Thanks guys!

Maildude, she's coming right along! As to your questions looks like the M21 simply denotes an M3 with modifications for the mortar carrier. The chassis and cab seem to be the same.

As to paint if it's all olive drab I'd just assemble as much as possible and then spray it all at the same time. Then use a small brush to pick out the details that need to be painted differently. You might want to paint the undercarriage and the body as separate parts and then attach them and give it an overall spray. And probably leave the tools off and paint them and attach them when you're done.

"I dream in fire but work in clay." -Arthur Machen


  • Member since
    July 2016
  • From: Kentucky , USA
Posted by MailDude on Tuesday, August 2, 2016 11:11 AM

Gamera

Thanks guys!

Maildude, she's coming right along! As to your questions looks like the M21 simply denotes an M3 with modifications for the mortar carrier. The chassis and cab seem to be the same.


That's what I was thinking. I actually have the Squadron Signal "M3A1 Scout Car" walk around book, and was noticing a lot of similarities in the undercarriage and such. Thanks for the advice on the paint, that's the route I'm going I suppose.

MailDude a.k.a. mailwalker

  • Member since
    December 2002
  • From: Bury St Edmunds, Suffolk, England
Posted by Bish on Tuesday, August 2, 2016 1:01 PM

hogfanfs

@Bish,

Wow! My heart skipped a beat! The weathering is spectacular! I can't wait to see this in your diorama! 


@Cliff,

The M3 is really coming along nicely! I'm looking forward to seeing some paint on this vehicle!


@MD,

Great start on the M21, and even better job on opening the exhaust! It's the little details like this that will make this build fantastic! Great job!


Thanks Bruce, i am hoping the stuff will be here end of next week at latest, thats the usual shipping time from the US.

I am a Norfolk man and i glory in being so


On the bench: Airfix 1/72nd Harrier GR.3/Fujimi 1/72nd Ju 87D-3

  • Member since
    December 2002
  • From: Bury St Edmunds, Suffolk, England
Posted by Bish on Tuesday, August 2, 2016 1:02 PM

Thanks steve. ye, from what i have seen, they can get pretty dirty.

I am a Norfolk man and i glory in being so


On the bench: Airfix 1/72nd Harrier GR.3/Fujimi 1/72nd Ju 87D-3

  • Member since
    December 2002
  • From: Bury St Edmunds, Suffolk, England
Posted by Bish on Tuesday, August 2, 2016 1:03 PM

Thanks MD. A nice start there on the M21. You did a good job on that exhaust. I did build the old tamiya M3 many years ago, same base kit as yours i am guessing, not bad from what i recall. Good old tamiya.

I am a Norfolk man and i glory in being so


On the bench: Airfix 1/72nd Harrier GR.3/Fujimi 1/72nd Ju 87D-3

  • Member since
    July 2016
  • From: Kentucky , USA
Posted by MailDude on Tuesday, August 2, 2016 7:48 PM

Making steady progress on the M21. Although everything is not glued together, just some dry fitting, this is what I have accomplished so far today. 

I found a pic online of the rear spring, and the bracket had a hole in the rear. so, I thought what the heck, drill 'em out while they are still accesible. Better to look at than a flat surface.

MailDude a.k.a. mailwalker

  • Member since
    November 2009
  • From: SW Virginia
Posted by Gamera on Thursday, August 4, 2016 7:50 AM

MD: She's looking good, you're making solid progress there. 

"I dream in fire but work in clay." -Arthur Machen


  • Member since
    July 2016
  • From: Kentucky , USA
Posted by MailDude on Thursday, August 4, 2016 3:13 PM

Gamera
MD: She's looking good, you're making solid progress there.

Thanks for the compliment. I'm a little slower than most, I guess, just feeling my way along. I do have a question though. I was sanding some seams off the middle of the road wheels when I looked at some photos online.

Seams are clearly visible on some of these wheels, and some are gone obviously by wear. Question is, do you guys leave these seams or sand them off?

MailDude a.k.a. mailwalker

  • Member since
    December 2002
  • From: Bury St Edmunds, Suffolk, England
Posted by Bish on Thursday, August 4, 2016 3:52 PM

Those look like new wheels, i would have thougt that wear would remove that.

But one thing i notice is the track, its not metal links but looks like a continuous rubber track.

I am a Norfolk man and i glory in being so


On the bench: Airfix 1/72nd Harrier GR.3/Fujimi 1/72nd Ju 87D-3

  • Member since
    July 2016
  • From: Kentucky , USA
Posted by MailDude on Thursday, August 4, 2016 4:23 PM


I figured wear would remove the moulding seam. I didn't notice the tracks, but they do resemble the illustration on the Tamiya box art, and the rubber track supplied with the kit. I wonder if that track was common for these vehicles?


MailDude a.k.a. mailwalker

  • Member since
    December 2002
  • From: Bury St Edmunds, Suffolk, England
Posted by Bish on Thursday, August 4, 2016 4:38 PM

MailDude


I figured wear would remove the moulding seam. I didn't notice the tracks, but they do resemble the illustration on the Tamiya box art, and the rubber track supplied with the kit. I wonder if that track was common for these vehicles?


I can't say i have noticed but then i don't pay much attention to US vehicles. they remind me of the track on the BV 206. I just did a quick search and could not find any info, but the pics all seem to have the same track. It will make painting a bit easier.

I am a Norfolk man and i glory in being so


On the bench: Airfix 1/72nd Harrier GR.3/Fujimi 1/72nd Ju 87D-3

JOIN OUR COMMUNITY!

Our community is FREE to join. To participate you must either login or register for an account.

SEARCH FORUMS
FREE NEWSLETTER
By signing up you may also receive reader surveys and occasional special offers. We do not sell, rent or trade our email lists. View our Privacy Policy.