SEARCH FINESCALE.COM

Enter keywords or a search phrase below:

Japanese Group Build VI

27079 views
536 replies
1 rating 2 rating 3 rating 4 rating 5 rating
  • Member since
    January 2016
  • From: A Galaxy Far, Far Away
Posted by Hunter on Monday, September 4, 2017 1:28 PM

Gamera


Hunter


Gamera

Hunter: Looks good! I assume you've seen Lawdog's tutorial on wiring radial engines? I used it myself a few years ago on a P-47D and was pleasantly surprised by the results.

 http://cs.finescale.com/fsm/modeling_subjects/f/2/t/149327.aspx


Yes I have Gam.


I mentioned it my post yesterday. LawDog did an awesome job highlighting how to do it. And thank you for attaching the link


Ack, I'm sorry. I'm old and can't remember anything.... Sad


LOL....it's okay Gam. Absolutely no worries. I appreciate you communicating the information to us.

Hunter 


  • Member since
    November 2009
  • From: SW Virginia
Posted by Gamera on Monday, September 4, 2017 1:24 PM

Hunter


Gamera

Hunter: Looks good! I assume you've seen Lawdog's tutorial on wiring radial engines? I used it myself a few years ago on a P-47D and was pleasantly surprised by the results.

 http://cs.finescale.com/fsm/modeling_subjects/f/2/t/149327.aspx


Yes I have Gam.


I mentioned it my post yesterday. LawDog did an awesome job highlighting how to do it. And thank you for attaching the link


Ack, I'm sorry. I'm old and can't remember anything.... Sad

"I dream in fire but work in clay." -Arthur Machen


  • Member since
    January 2016
  • From: A Galaxy Far, Far Away
Posted by Hunter on Monday, September 4, 2017 1:15 PM

simpilot34

Thanks Gam!Toast

Bys and Hunter great starts!! Look forward to seeing them progress and finished!

Those figures are looking good too!


Simpilot,

Thank you sir....appreciate the kind words

Hunter 


  • Member since
    January 2016
  • From: A Galaxy Far, Far Away
Posted by Hunter on Monday, September 4, 2017 1:13 PM

bsyamato,

Very nice sir...both are coming along nicely.

Hunter 


  • Member since
    January 2016
  • From: A Galaxy Far, Far Away
Posted by Hunter on Monday, September 4, 2017 1:03 PM


Gamera

Hunter: Looks good! I assume you've seen Lawdog's tutorial on wiring radial engines? I used it myself a few years ago on a P-47D and was pleasantly surprised by the results.

 http://cs.finescale.com/fsm/modeling_subjects/f/2/t/149327.aspx


Yes I have Gam.

I mentioned it my post yesterday. LawDog did an awesome job highlighting how to do it. And thank you for attaching the link

Hunter 


  • Member since
    November 2009
  • From: SW Virginia
Posted by Gamera on Monday, September 4, 2017 11:07 AM

Hunter: Looks good! I assume you've seen Lawdog's tutorial on wiring radial engines? I used it myself a few years ago on a P-47D and was pleasantly surprised by the results.

 http://cs.finescale.com/fsm/modeling_subjects/f/2/t/149327.aspx

"I dream in fire but work in clay." -Arthur Machen


  • Member since
    January 2016
  • From: A Galaxy Far, Far Away
Posted by Hunter on Monday, September 4, 2017 10:11 AM

Hello all,

Just a quick update....I got the fuselage and wings put together and painted the engine parts. I am waiting for the parts to dry so I can wash and install the plug wires. Wish me luck with that LOL Huh?

This a photo of a 1943 14 Cylinder Twin Row NK1F Sakae 21 that is depicted in this kit.

Be back on soon....

Hunter 


  • Member since
    November 2009
  • From: SW Virginia
Posted by Gamera on Monday, September 4, 2017 10:07 AM

bsyamato


Gamera


Simpilot: Thanks, I really need to get better photos though.... Sad


Light seems too low :(


Yes, that was also a problem. I'll try to get my next ones outside or something like that with better lighting. 

"I dream in fire but work in clay." -Arthur Machen


  • Member since
    October 2008
  • From: italy
Posted by bsyamato on Monday, September 4, 2017 9:51 AM

Gamera


Simpilot: Thanks, I really need to get better photos though.... Sad


Light seems too low :(

  • Member since
    November 2009
  • From: SW Virginia
Posted by Gamera on Monday, September 4, 2017 8:00 AM

Bsyamato: Great job on both of those! 

Simpilot: Thanks, I really need to get better photos though.... Sad

"I dream in fire but work in clay." -Arthur Machen


  • Member since
    March 2006
Posted by simpilot34 on Monday, September 4, 2017 6:06 AM

Thanks Gam!Toast

Bys and Hunter great starts!! Look forward to seeing them progress and finished!

Those figures are looking good too!

Cheers, Lt. Cmdr. Richie "To be prepared for war, is one of the most effectual means of preserving the peace."-George Washington
  • Member since
    November 2009
  • From: SW Virginia
Posted by Gamera on Sunday, September 3, 2017 4:06 PM

The end of the year, but if you're done by Thursday great! Yes

"I dream in fire but work in clay." -Arthur Machen


  • Member since
    January 2016
  • From: A Galaxy Far, Far Away
Posted by Hunter on Sunday, September 3, 2017 2:15 PM

Gamera
Hunter and Simpilot: Of course no issues if you don't get finished to rolling over your builds to JGB VII.

Gam,

I will be done by Thursday. I thought the cutoff date is 12/2017...Am I incorrect with that?

Hunter 


  • Member since
    November 2009
  • From: SW Virginia
Posted by Gamera on Sunday, September 3, 2017 2:02 PM

Bsyamato and Simpilot: Just put down both of your subjects.

Hunter: She looks great so far. And don't sweat it, at the rate I'm moving any progress is good progress!


Hunter and Simpilot: Of course no issues if you don't get finished to rolling over your builds to JGB VII.


I have almost finished the Japanese figures for my little dio- working on the Chinese ones  now. Sorry about the horrible image quality, the lens in my cell phone broke and I'm taking them with my tablet- which for some reason is awful at close-ups.


"I dream in fire but work in clay." -Arthur Machen


  • Member since
    January 2016
  • From: A Galaxy Far, Far Away
Posted by Hunter on Sunday, September 3, 2017 12:16 PM

Hello Gam and fellow GB friends,

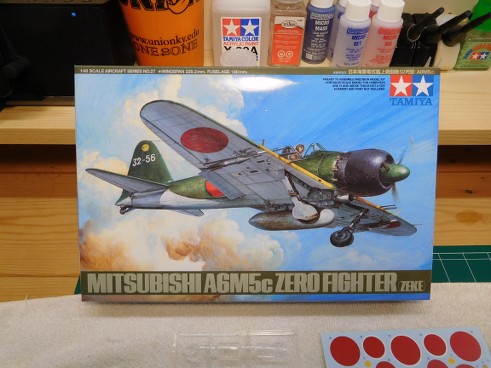
I want to apologize for being soooo late to the GB....kinda had a life event that put the brakes on everything. I must say everyone so far has built some wonderful  looking builds. I deceided to build the Tamiya 1/48th Mitsubishi A6M5c Zero (zeke)

My first build was simular to this kit and it went together rather nicely.

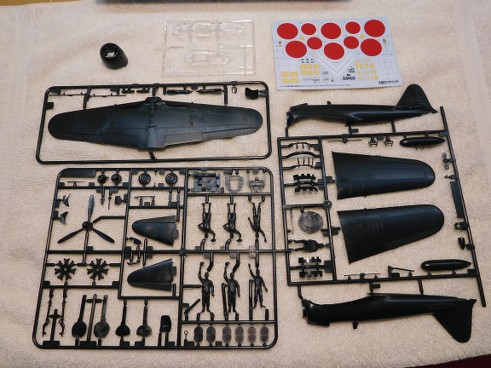
Not too much to the kit

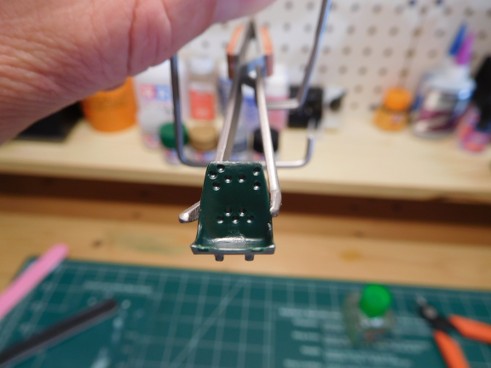
The first thing I noticed was the seat holes were not comletely punched through.

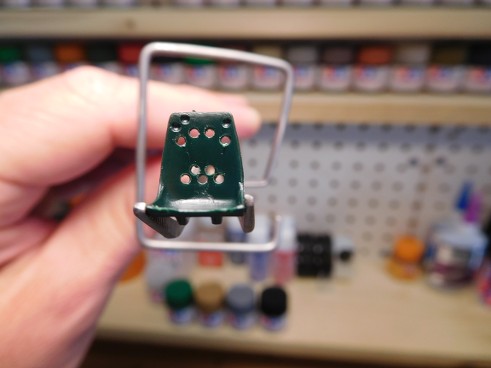
Simple work with a 0.9mm drill bit

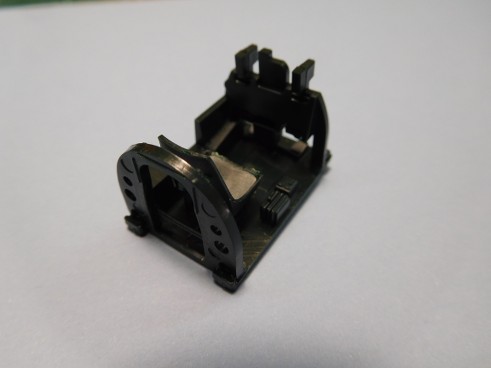
Straight forward pit...not too much to it

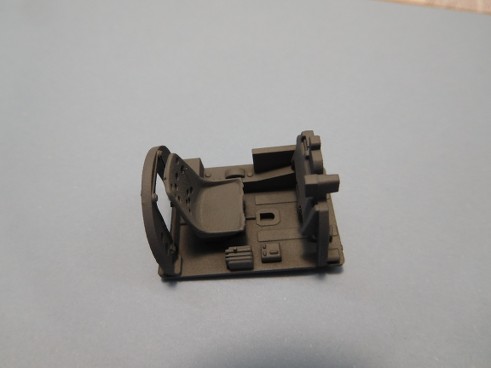
Added a light coat of primer to highlight small details.

I was kinda surprised that this kit didn't have any type of controll knobs to attach to either side of the interior fuselage. But there is some nice details to work with. After I assemble the pit, engine and before attaching the fuselage I am going to attempt my very first wash on these areas. I will be using "The Detailer" that LawDog114 recommended.

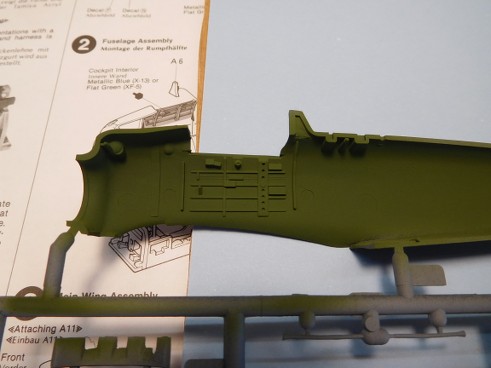
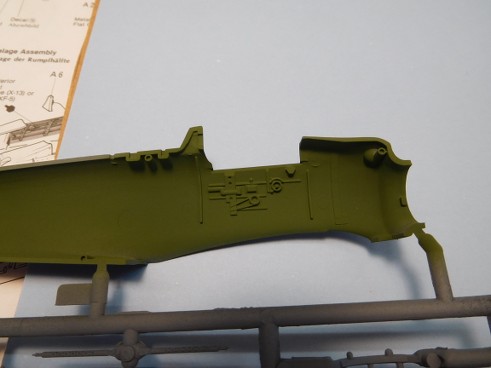
The other half of the fuselage. The interior color for the pit and instrument panel is Tamiya flat green (XF-5)

I am also going to detail the engine this time appling plug wires and a two stage wash that I picked up reading the latest tutorial that LawDog114 posted about a week ago. If you haven't seen or read it...I recommend taking a moment and take a look at it. Very well done and very imformative.

I should be posting the above mentioned by Tuesday afternoon. Again, I apologize for missing out, and my hat is off to you gentlemen for some top notch builds.

Hunter 


  • Member since
    January 2014
  • From: Nampa, Idaho
Posted by jelliott523 on Sunday, September 3, 2017 11:29 AM

bsyamato

I use also another way with hard decals: use hot water instead of warm water Coffee


Actually, I was using fairly warm water...not hot, hard to keep it hot without a hot plate. I prefer this method over straight room temp water, as yes, it does help to soften the decal and helps it to conform; however, these didnt seem to get the "memo".

On the Bench:  Lots of unfinished projects!  Smile

  • Member since
    March 2006
Posted by simpilot34 on Sunday, September 3, 2017 1:30 AM

WOW there are some great builds going on here!!! Hey guys, lol. I am going to try and get back here real soon with my E7K1 from last years build. I'm going to finish my FW-190 first then will get back to my floater. Gam if I may? I'm close enough to completing the FW I should be able to get back to the E7K1 and get it done (hopefully) before the end of the year.

Cheers, Lt. Cmdr. Richie "To be prepared for war, is one of the most effectual means of preserving the peace."-George Washington
  • Member since
    October 2008
  • From: italy
Posted by bsyamato on Friday, September 1, 2017 6:23 PM

Thanks Cliff.

I have another subject to put down

Aichi E16A zuiun from fujimi, 1/72 :)

  • Member since
    November 2009
  • From: SW Virginia
Posted by Gamera on Friday, September 1, 2017 7:42 AM

That make sense on the decals. 


Great job there on the cockpit, it never ceases to amaze me you're doing all this detail in 1/72nd! 

"I dream in fire but work in clay." -Arthur Machen


  • Member since
    October 2008
  • From: italy
Posted by bsyamato on Friday, September 1, 2017 4:19 AM

The effect is that decals become really soft and can extend , then use great attention .


Finished cockpit after washing, added last pieces and closed fuselage. Some problem with radiator that needed some cut front and rear


At the next

  • Member since
    November 2009
  • From: SW Virginia
Posted by Gamera on Thursday, August 31, 2017 9:14 AM

She's looking great! 

Hmmm, I haven't tried hot water yet, I'll give it a go next time I have issues with decals- thanks! 

"I dream in fire but work in clay." -Arthur Machen


  • Member since
    October 2008
  • From: italy
Posted by bsyamato on Thursday, August 31, 2017 4:50 AM

I use also another way with hard decals: use hot water instead of warm water Coffee


More works on hien last night

Sealed inner yellow with semigloss coat, clean  primered and painted last main pieces (not all in pictures) . Main clean work on the landing gears that have some excess plastic between compass.


At the next

  • Member since
    November 2009
  • From: SW Virginia
Posted by Gamera on Wednesday, August 30, 2017 3:08 PM

Oh wow I forgot you said it was a Hasegawa kit. I'd had awful luck with setting solutions and their decals. Micro/Super Set (I think that's right- the red label stuff) always caused their decals to crinkle up for me and stay crinkled when they dried. So I've only been using Micro/Super Sol (the blue label in any case) on them. I'd have figured Solvaset would have melted them for sure! 

"I dream in fire but work in clay." -Arthur Machen


  • Member since
    January 2014
  • From: Nampa, Idaho
Posted by jelliott523 on Wednesday, August 30, 2017 2:06 PM

Gamera

Those are looking great guys! 

Jelliott: If Solvaset doesn't work I'm not sure what else to use, it's the most powerful solution I've heard of.


I was amazed, being a new tool kit from Hasegawa, I figured that the decals couldnt be as bad as other Hasegawa kits. These things were like impervious to solvents. I'd never used Solvaset prior to this experience and had been told that the stuff had the potential to melt decals into puddles of quivering glue...not the experience I had. They did settle down some, not as much as I would have liked, but I'm just going to keep it where it is and hopefully some weathering will help improve the looks of them.

On the Bench:  Lots of unfinished projects!  Smile

  • Member since
    November 2009
  • From: SW Virginia
Posted by Gamera on Wednesday, August 30, 2017 11:54 AM

Those are looking great guys! 

Jelliott: If Solvaset doesn't work I'm not sure what else to use, it's the most powerful solution I've heard of.

"I dream in fire but work in clay." -Arthur Machen


  • Member since
    October 2008
  • From: italy
Posted by bsyamato on Wednesday, August 30, 2017 4:25 AM

Nicely done on the zero. When decals don't go good on recessed panels i use to cut them alond the panel line, then more and mare super sol .. old hasegawa decals are not a good client :)


Last night start with inner paint on tony : some dark yellow obtained with mixed colors (about yellow , black, red..), the black.. is just black Propeller


At the next


  • Member since
    January 2014
  • From: Nampa, Idaho
Posted by jelliott523 on Tuesday, August 29, 2017 4:38 PM

reetings all, sorry its been so long since I've been on, or added any progress pics. Summertime is usually very busy for me with family trips, work, etc. Anyway, here is where I'm at currently on the 1/32 Hase A6M5c build. I hope to have everything finshed up and weathered in the next week or so. In this picture I was in the process of applying decals and working to get them to settle into the recessed areas. This turned out to be a bigger task than I had expected. I had first tried using Micro-Set and Micro-Sol to settle them with no luck, even after several coats of the sol. I eventually picked up a bottle of Solvaset and it worked a little better...still not 100%.

On the Bench:  Lots of unfinished projects!  Smile

  • Member since
    November 2009
  • From: SW Virginia
Posted by Gamera on Tuesday, August 29, 2017 7:37 AM

Looks good! 

I pulled mine out of the box and looked at it but didn't open the plastic bag since I'm always loosing parts. I like what I'm seeing with yours.  

"I dream in fire but work in clay." -Arthur Machen


JOIN OUR COMMUNITY!

Our community is FREE to join. To participate you must either login or register for an account.

SEARCH FORUMS
FREE NEWSLETTER
By signing up you may also receive reader surveys and occasional special offers. We do not sell, rent or trade our email lists. View our Privacy Policy.