castel, that Walrus is coming along quite well I'd say, nice colours too.
----------------------
Update on the Camel ... well thought I'd be done with the scratchbuilding, but keep finding things to be improved upon.
Belts are put together, but I did apply an umber wash to dirty them up a bit and help some of the detail stand out. HGW provides two different styles of attachment points, either metal or a loop of fabric leather. Think will go with the latter in hopes it makes it easier to attach to the airframe.
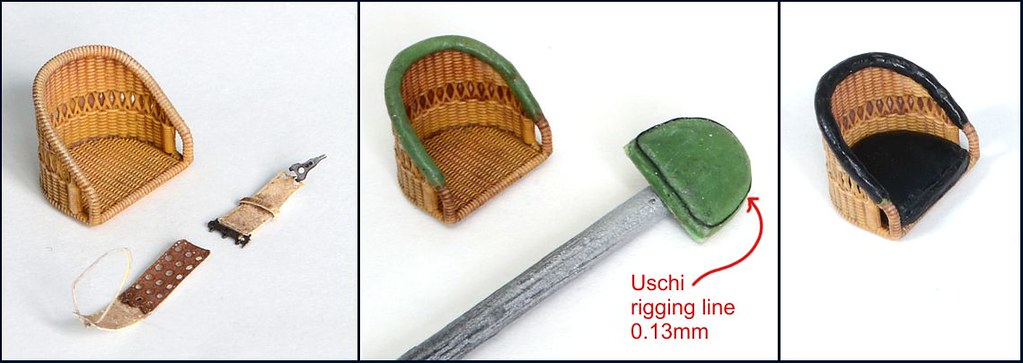
The resin whicker chair paints up nicely, but still needs a cushion, and usually the top frame also has some padding - so out came the green putty. Also added some Uschi rigging line as the raised seam around the cushion. Painted flat black afterwards, and oil from the ole forehead adds some sheen.
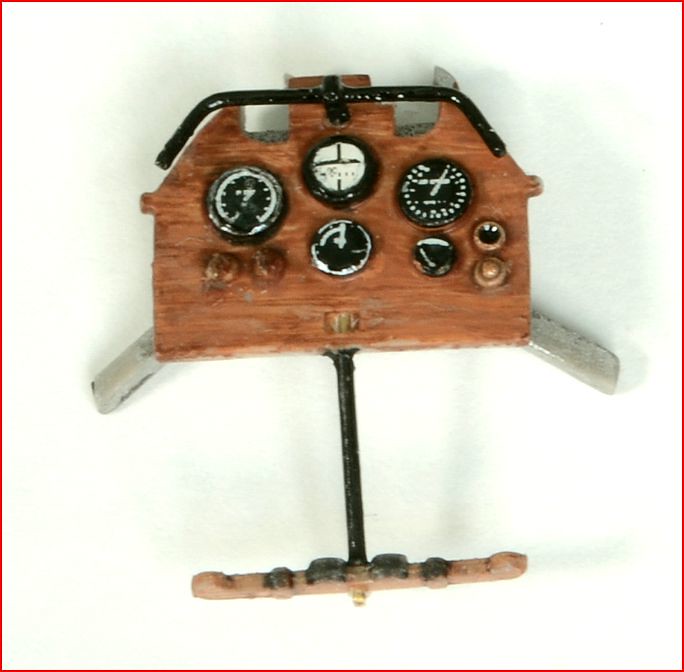
Ip done, but was surprised no PE on this (nor does Eduard make any separate IP for the 1/48 Camel - shocked!). Dials are just decals, but they are oversized so had to fill in the bezels in order to accomodate the decals. The black bars (verticle and the one on top that looks like a bicycle handle) were replaced with brass rod.
regards,
Jack