SEARCH FINESCALE.COM

Enter keywords or a search phrase below:

Monogram Mafia IV Group Build

51920 views
1009 replies
1 rating 2 rating 3 rating 4 rating 5 rating
  • Member since
    July 2004
  • From: Sonora Desert
Posted by stikpusher on Thursday, August 17, 2017 6:42 PM

Nice to know the RoG recently had this one out there. Even better that they had the decals on hand for you! 

I believe that the bomber crews wore the flight coveralls over their blue service uniforms. Although you do see some crews in those in photos as well. I suppose it depends upon the climate and mission profile. 

Youre doing an in flight display? Cool!


F is for FIRE, That burns down the whole town!

U is for URANIUM... BOMBS!

N is for NO SURVIVORS...

       - Plankton

LSM


  • Member since
    November 2008
  • From: Central Florida
Posted by plasticjunkie on Thursday, August 17, 2017 9:55 PM

Ok the lads got into their correct attire now but are still lazy and hanging out in the tree. I just put on a dark oil wash that need to dry so I can do some dry brushing to pop some molded details. They will be hard to see once the greenhouse goes on so I'm not concerned with super detailing them.

Darnet I forgot to glue the small belly window before closing up the fuselage.

The window is glued from the inside soo i had to do some surgery in a hidden area to make an access location.

I slid the window in place and used the Touch N Flow applicator to glue it in place.

The window is glued in place now.

This 1969 kit has a fantastic fit. No putty needed up to now.

This one will be in-flight so gear doors are up and closed.

 GIFMaker.org_jy_Ayj_O


Too many models to build, not enough time in a lifetime!!

  • Member since
    July 2004
  • From: Sonora Desert
Posted by stikpusher on Thursday, August 17, 2017 10:02 PM

PJ, nice fixes on the crew and the window oops! Looks like those guys are still doing their mic checks...

You're making very rapid progress here!  


F is for FIRE, That burns down the whole town!

U is for URANIUM... BOMBS!

N is for NO SURVIVORS...

       - Plankton

LSM


  • Member since
    May 2004
  • From: Land of Lakes
Posted by cbaltrin on Tuesday, August 22, 2017 6:33 AM

Still working on the P-47. Sorry for not having any progress shots. My camera has been performing other duties and currently has a 200mm lens on it which is not suitable for my small workshop :-). I need to get a dedicated shop camera I guess.  Anyway, I've been stuck in AMS mode--rescribing the intricate network of panel lines on the bottom of the fuselage. Been stalled a bit contemplating markings as well. Been thinking NMF but since this is a mix match of raised and scribed detail, I think it's not the best choice for bare metal. Probably going to be another 78th FG check nose (Top Hat nose are most likely). Hope to get the scribing finished up this week. Also go the windscreen resanded/polished this week.

On the Bench: Too Much

  • Member since
    July 2004
  • From: Sonora Desert
Posted by stikpusher on Tuesday, August 22, 2017 3:56 PM

No worries CB... were barely 6 weeks or in...


F is for FIRE, That burns down the whole town!

U is for URANIUM... BOMBS!

N is for NO SURVIVORS...

       - Plankton

LSM


  • Member since
    November 2008
  • From: Central Florida
Posted by plasticjunkie on Friday, August 25, 2017 8:56 PM

Have been sidelined by house chores but was able to get some bench time. Thank God for the Eduard masks. They saved me a couple of hours of masking work on all those tiny windows.

I received my Prop Blurs today. I've been wanting to use these things since they give the illusion of rotation. Proper airbrush work will bring them to life.

Hopefully tomorrow I can spray some colors on the flying pencil.

 GIFMaker.org_jy_Ayj_O


Too many models to build, not enough time in a lifetime!!

  • Member since
    July 2004
  • From: Sonora Desert
Posted by stikpusher on Friday, August 25, 2017 9:46 PM

Excellent progress! I can't wait to see some paint on her! Those prop blurs should really look cool!  


F is for FIRE, That burns down the whole town!

U is for URANIUM... BOMBS!

N is for NO SURVIVORS...

       - Plankton

LSM


  • Member since
    June 2008
Posted by lewbud on Saturday, August 26, 2017 4:39 AM

Don Stik,

I humbly submit to you my first kit, Monogram's most recent re-pop of the Willy Ley Passenger Rocket.  I do not like the kit decals, so I've been looking for replacements.  I thought about doing a classic Pan Am scheme, but I didn't find one I liked (or would fit on the model).  I did find a classic TWA scheme that I like, so I'll be going with that.  Pics soon.

Buddy- Those who say there are no stupid questions have never worked in customer service.

  • Member since
    March 2005
  • From: Lancaster, South Carolina
Posted by Devil Dawg on Saturday, August 26, 2017 9:24 PM

Well, I finally made a small bit of progress on my Devastator today. Got the main color airbrushed in (zinc chromate green), using a bottle of Model Master enamel paint that I bought back in February of 2004 (who knows how long it was on the shelf before I bought it). And it's still good, after a good amount of shaking, with a couple of BBs in the bottle to help things during said shaking (same prinicple as a rattle can of spray paint......). The instructions called for zinc chromate, but it didn't really specify the shade. The few color pictures that I could find (on a site dedicated to Bf-109s, no less!!) looked like a green shade of zinc chromate in the cockpit, so that's what I went with. I have the yellow-tinted zinc chromate, too, but that just didn't look right to me. The below picture shows all of the pieces that needed some paint. I'll be letting all of that cure overnight so that I can do the detail painting in a couple of days:


I remember building this kit waaaayyyyy back in my early teens, and I thought I remembered this kit's contents pretty well, until I came across a clear piece that I couldn't figure out. The instructions show it attaching to the forward part of the wing, just in front of the bottom of the pilot's rudder pedals. I had to do some research on it, and found that it is a bomb-aiming window. This really confused me, as I thought the Devastator was torpedo only. Seems it has some small bomb bay doors just beihnd the engine cowling, and, when these open, the bombardier (who sits just behind the pilot) uses this window to help his aim. The window is at the very rear of the bomb bay, and sits at about a 30 degree angle. Once I get it glued in place, I'll point it out in the pictures. Below is my attempt at masking it off on both sides with Tamiya tape. First time that I can remember ever taping a clear piece on both sides. The large section that isn't masked is shown that way in my reference photos. It should be painted zinc chromate, and not clear. 


Gimme some feedback, folks. More importantly, light a fire under my butt to get this project moving!! I've taken too long to get only this far with this build. I still got a B-26 to build after this one! Tongue Tied Confused Big Smile

Gary Mason


Devil Dawg

On The Bench: Tamiya 1/32nd Mitsubishi A6M5 Model 52 Zeke For Japanese Group Build

Build one at a time? Hah! That'll be the day!!

  • Member since
    February 2010
  • From: New Jersey
Posted by 68GT on Sunday, August 27, 2017 3:57 PM

I got back late last night from vacation but early this morning I jumped on decaling the tigercat.

On Ed's bench, ???


  • Member since
    November 2008
  • From: Central Florida
Posted by plasticjunkie on Sunday, August 27, 2017 5:17 PM

Looks good GT. Hey your dog looks like my Holly.

 GIFMaker.org_jy_Ayj_O


Too many models to build, not enough time in a lifetime!!

  • Member since
    June 2008
Posted by lewbud on Sunday, August 27, 2017 5:25 PM

Looking good 68GT!Yes

Buddy- Those who say there are no stupid questions have never worked in customer service.

  • Member since
    July 2014
Posted by modelcrazy on Monday, August 28, 2017 8:26 AM
Hey Stick, I hate to do this to you but I wanted to change one of my entries (probably the Packard) to the Revell P-40B. I kinda got the bug for it now. It will be OOB, nothing fancy in 1940 prewar scheme.

I started on the pit last night but nothing to show now.


Steve

Building a kit from your stash is like cutting a head off a Hydra, two more take it's place.


http://www.spamodeler.com/forum/

  • Member since
    March 2017
  • From: Mid Michigan
Posted by shamoo on Monday, August 28, 2017 8:43 PM

Things are looking busy around here.  Nice work, people.

I actually got a small amount done this afternoon...

 2017-08-28_09-15-32 by David Brownlee, on Flickr

 2017-08-28_09-29-24 by David Brownlee, on Flickr

Given the age of the kit, I'm pretty pleased with the fit so far.  There's no a lot of detail, but the fuselage closed up fairly well.  Not really a lot of flash either.  Ejector pin marks galore, though they seem mostly hidden.

Dave

  • Member since
    November 2008
  • From: Central Florida
Posted by plasticjunkie on Monday, August 28, 2017 8:53 PM

Great job Dave. These old kits actually have some great fitting parts.

A  bit more progress with my second build. Shot the old Monogram stand flat black and polished it with Rub n' Buff for a metallic sheen. The plastic stand was super glued to a finished wood base for added stability and better look.

The RLM 70 and 71 were sprayed on over some marbling to break up the solid colors.

I ran out of MM RLM 65 enamel but had some Acryl RLM 65 at hand. It was simply a PITA to spray this paint on at low PSI and tight mottling to get the marbling effect going but I kept having stoppages and tip dry even when using retarder and flow improver. This is why I hate spraying acrylics. I still have to shoot the RLM 04 yellow on the bottom wing tips. White will be sprayed first then the yellow.

The Eduard pre cut masks are worth every penny. They cut hours of masking.


 GIFMaker.org_jy_Ayj_O


Too many models to build, not enough time in a lifetime!!

  • Member since
    July 2014
Posted by modelcrazy on Monday, August 28, 2017 9:54 PM

The progress of the P-40 is coming along. The fit of the fuse is OK but not great. Nothing some filler can't fix though.

Steve

Building a kit from your stash is like cutting a head off a Hydra, two more take it's place.


http://www.spamodeler.com/forum/

  • Member since
    May 2004
  • From: Land of Lakes
Posted by cbaltrin on Tuesday, August 29, 2017 7:43 AM

Wow lots of great work going on here. TBD and P-40 are bringing back memories! Will post some updates as soon as I can pry my laptop away from my wife!

On the Bench: Too Much

  • Member since
    May 2004
  • From: Land of Lakes
Posted by cbaltrin on Tuesday, August 29, 2017 9:31 PM

Ok, I got the replacement engine painted up for my P-47 and I started working on the 190.


On the Bench: Too Much

  • Member since
    July 2004
  • From: Sonora Desert
Posted by stikpusher on Tuesday, August 29, 2017 10:23 PM

Nice progress all around guys! Lots of great stuff!


F is for FIRE, That burns down the whole town!

U is for URANIUM... BOMBS!

N is for NO SURVIVORS...

       - Plankton

LSM


  • Member since
    September 2012
Posted by GMorrison on Wednesday, August 30, 2017 9:27 AM

Put down a color coat on the Stude. There's a pretty nasty sink mark right across the roof over a rib molded on the underside. It'll have to do.

This car has really pretty lines that are beginning to show through.

 Modeling is an excuse to buy books.


  • Member since
    May 2004
  • From: Land of Lakes
Posted by cbaltrin on Wednesday, August 30, 2017 11:14 AM

GMorrison

Put down a color coat on the Stude. There's a pretty nasty sink mark right across the roof over a rib molded on the underside. It'll have to do.

This car has really pretty lines that are beginning to show through.


Looks great GM! gona color sand and clear coat it? Is that the final color or you gona candy coat it? Stick out tongue

On the Bench: Too Much

  • Member since
    December 2002
  • From: Coldwater, Mich
Posted by MKelley on Saturday, September 2, 2017 2:40 PM

Please include me in the build. I have a B-24D and the Paddy Wagon that I would like to build for this. Thank you.

  • Member since
    July 2014
Posted by modelcrazy on Saturday, September 2, 2017 10:00 PM

I have the P-40 fuse and wings attached. There are some major gaps at the wing roots and nose. I haven't had to deal with seams like this in a while. Nothing I can't handle though, it will just remove some of the raised detail. A few coats of Mr. Surfacer 500 should do the trick.

Steve

Building a kit from your stash is like cutting a head off a Hydra, two more take it's place.


http://www.spamodeler.com/forum/

  • Member since
    February 2010
  • From: New Jersey
Posted by 68GT on Sunday, September 3, 2017 12:07 PM

While I'm waiting for the clear coat to dry on the Tigercat I was wondering if this F-4B by Revell would qualify.

On Ed's bench, ???


  • Member since
    March 2005
  • From: Lancaster, South Carolina
Posted by Devil Dawg on Sunday, September 3, 2017 3:19 PM

plasticjunkie

Have been sidelined by house chores but was able to get some bench time. Thank God for the Eduard masks. They saved me a couple of hours of masking work on all those tiny windows.

Wow, plasticjunkie!! Those masks look great! I think I'm gonna hafta find some for my Devastator, with all the glasswork that it has. Your photos of the painted canopy are outstanding, too! Looks great!


Gary


Devil Dawg

On The Bench: Tamiya 1/32nd Mitsubishi A6M5 Model 52 Zeke For Japanese Group Build

Build one at a time? Hah! That'll be the day!!

  • Member since
    November 2008
  • From: Central Florida
Posted by plasticjunkie on Sunday, September 3, 2017 3:23 PM

Thanks Gary. Yes those Eduard masks are a lifesaver.

 GIFMaker.org_jy_Ayj_O


Too many models to build, not enough time in a lifetime!!

  • Member since
    March 2005
  • From: Lancaster, South Carolina
Posted by Devil Dawg on Sunday, September 3, 2017 3:56 PM

Got some more work completed on the Devastator today (Sunday 03 Sept). So far, no major problems. The interior detail is pretty darned good, even for a 40-year-old kit. I decided to not go all-out on the painting for the cockpit, as most of my reference photos show that it's mostly zinc chromate green, with black instrument panels, switch panels, etc. So, not a lot of detail painting needed. Plus, it ain't gonna be a competition build anyways, and it'll be sitting in my display case with only me looking at it, so............


 Port-side cockpit interior. As mentioned before, not a lot of detail to paint, so I only used some interior black for the few details. Interestingly, this is pretty darned accurate based on the reference photos. Not a lot of switch panels or instruments on the cockpit sidewalls.

 Starboard side........... I forgot to mask the small windows in the lower side of each fuselage half, so they got lots of paint when I sprayed the interior. I waited a day for the paint to dry, then took a Q-Tip soaked with denatured alcohol (100% alcohol - no rubbing oils in it), and scrubbed off the paint from the windows. Worked like a charm. Not sure if that would've worked if the paint had cured for more than a couple of days, though.


 The cockpit floor was pretty easy to paint, too. The details that you see are molded-in, and are accurate. As I said before, not bad for a 40-year-old kit. Please disregard the ejector pin marks on the pilot's seatback. I got lazy.


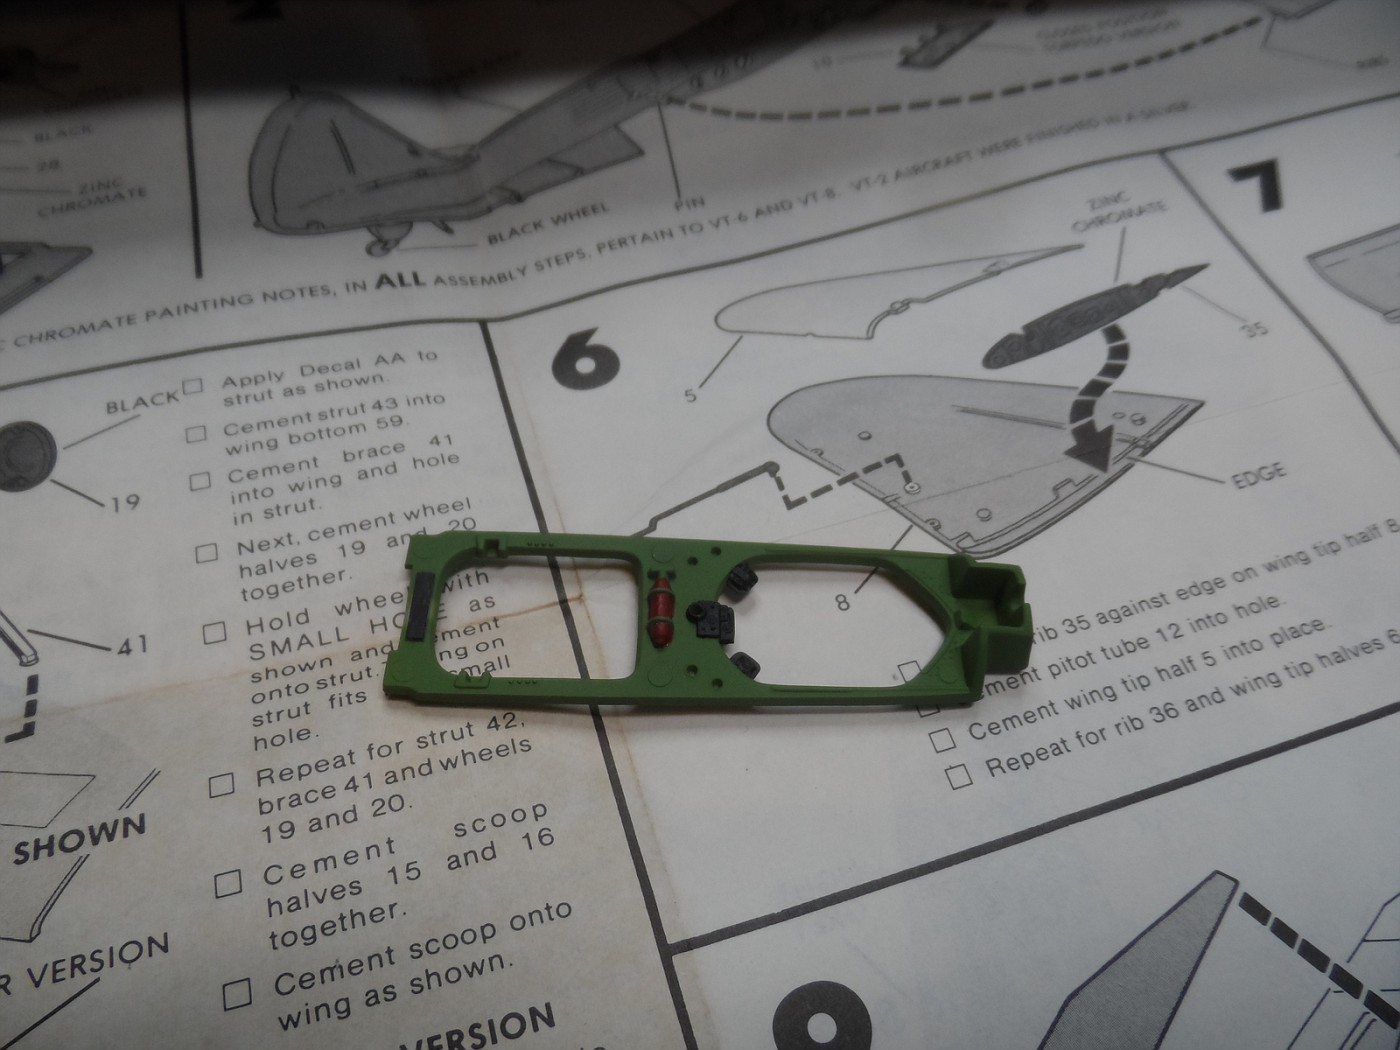
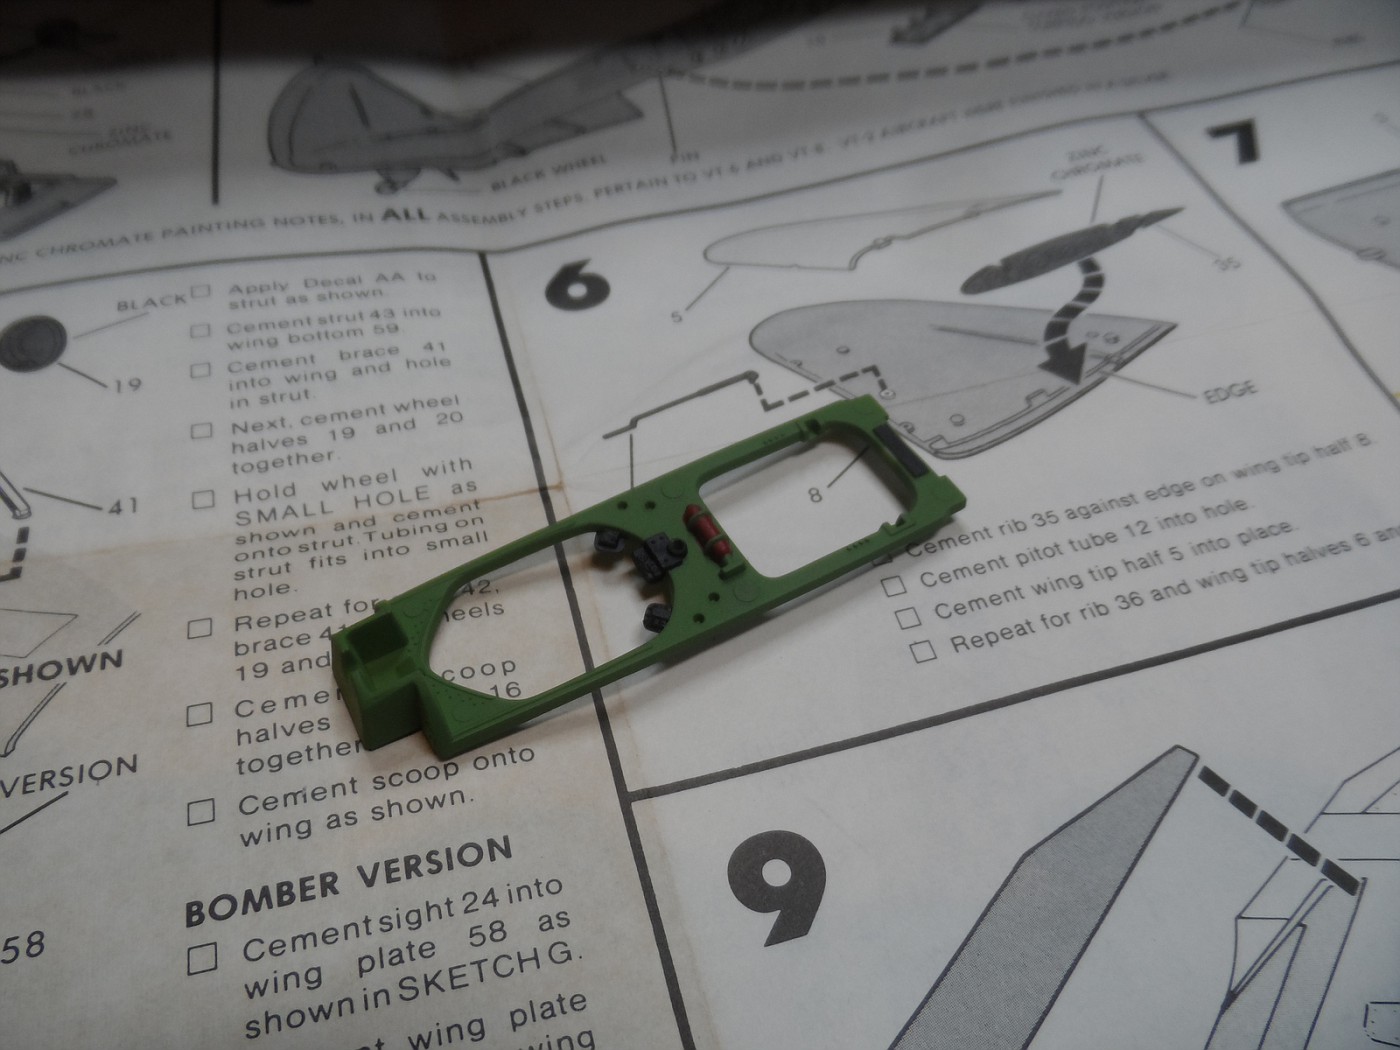
 This is the upper portion of the cockpit. I guess it would be called the upper cockpit railing, as it is right at the upper rim/ledge of the cockpit; the rear-firing .30Cal sits on the rear of this. The small oxygen tank is supposed to be red, but, with the underlying color being green, it didn't come out the shade of red that I had hoped. Oh well... better luck nect time. More views of it below......


Got the fuselage closed up. The gaps along the seam were very minimal. When I did my test fitting, the rudder showed to be gapless, but, once I got it all glued together, it now shows a slight gap . No biggie; easy to fix, but didn't expect it. The area around the nose at the bottom didn't want to go together well, either, but rubber bands coaxed it into cooperating.

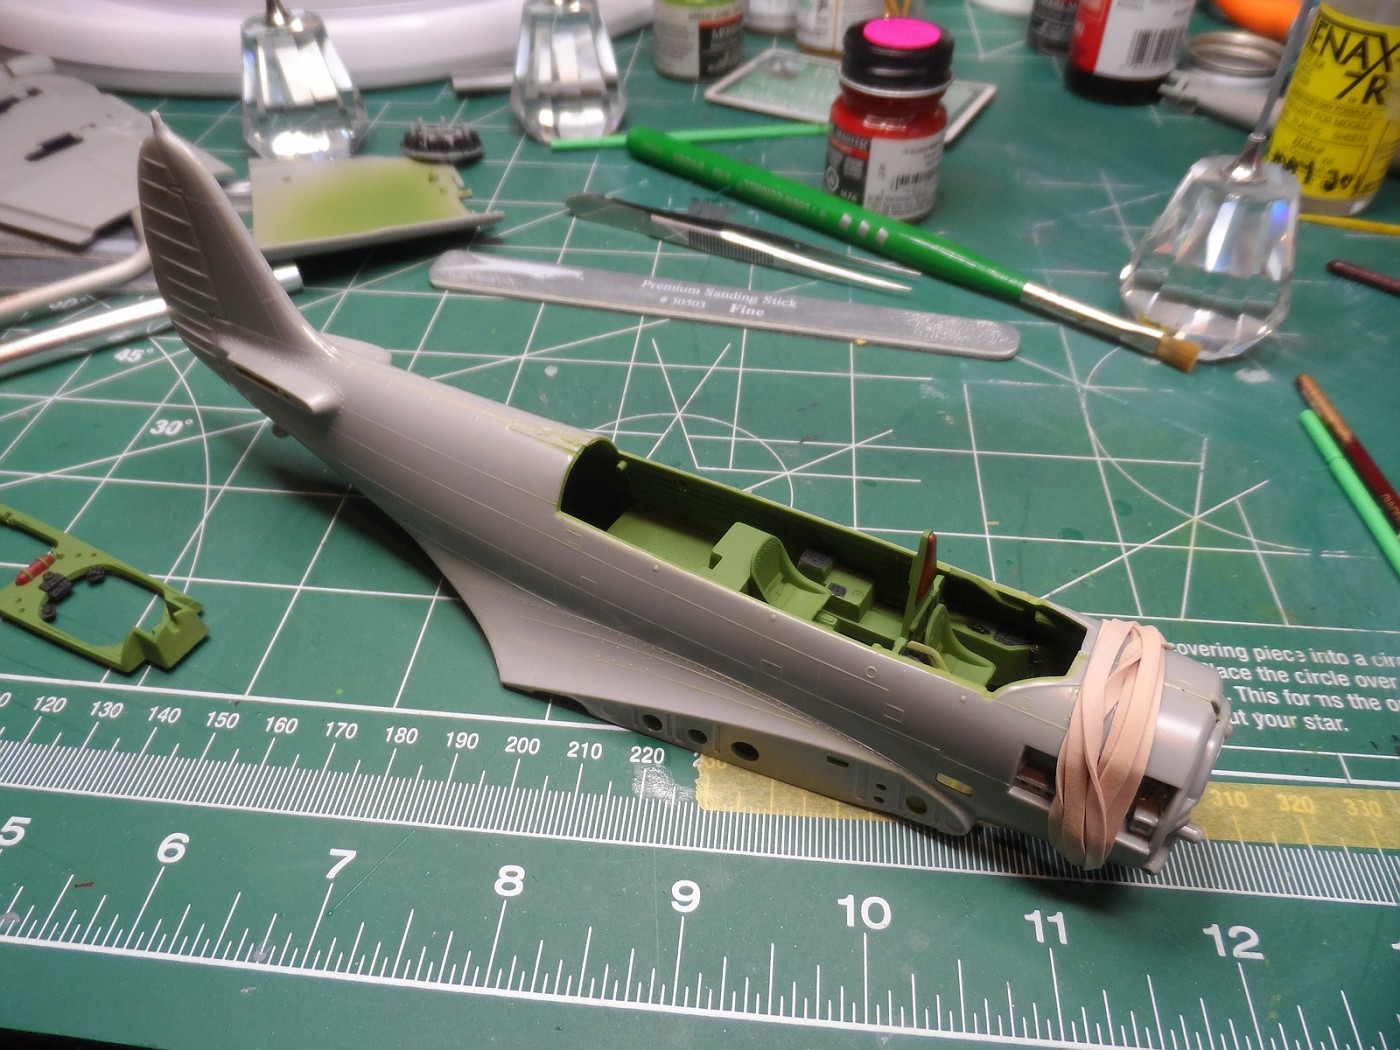
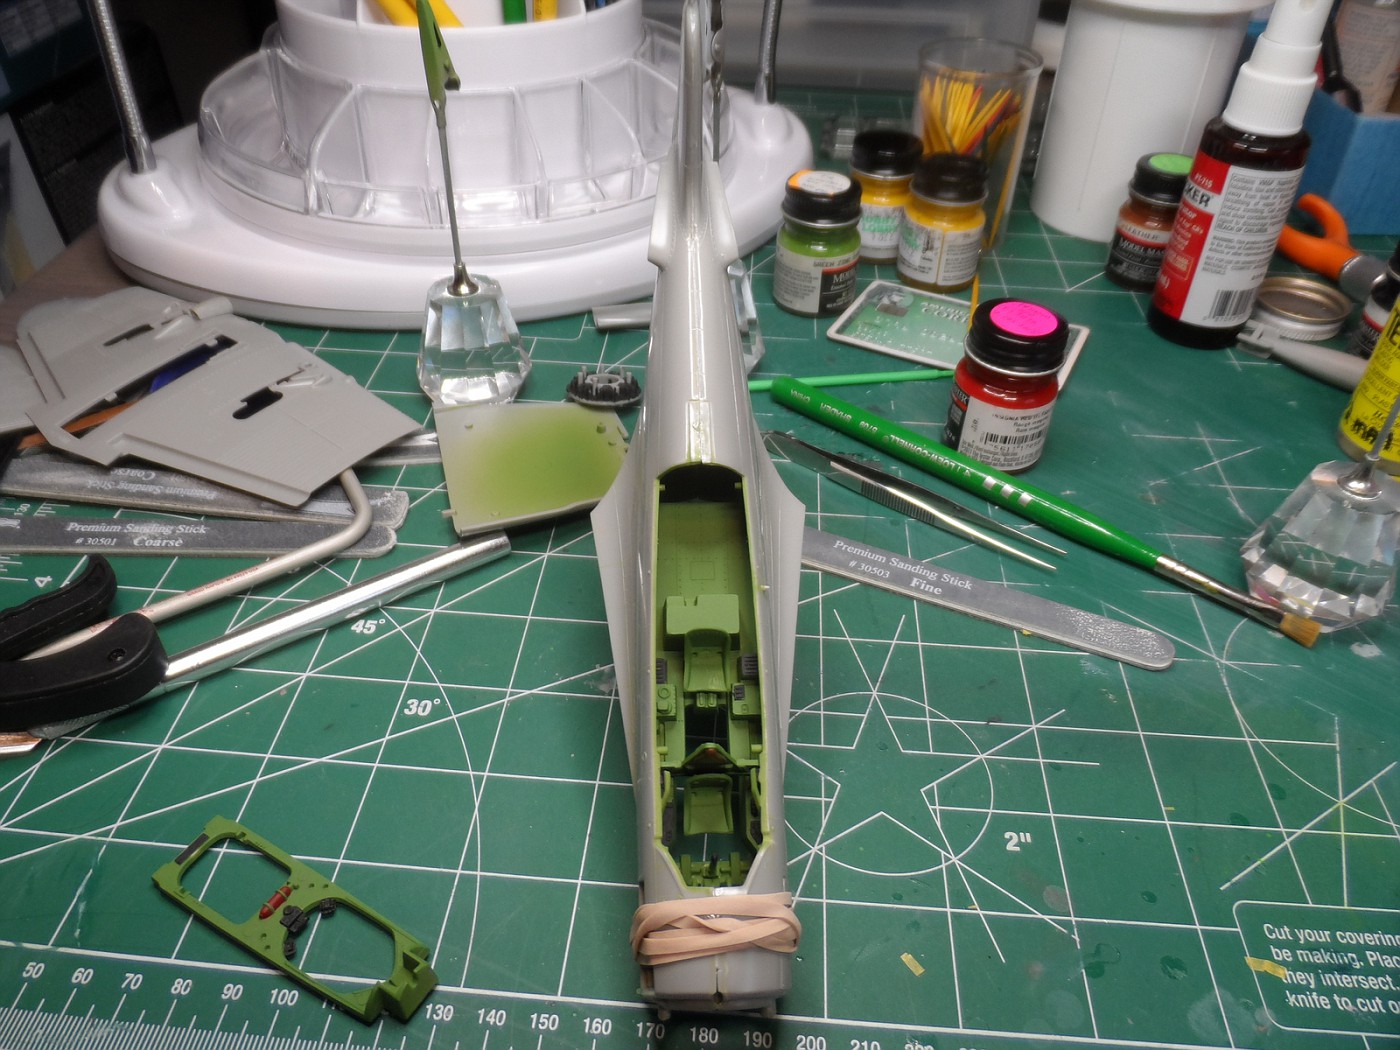
I'm hoping that I don't sand away too much of the raised panel lines. But, if I do, I guess I'll be honing my sprue-stretching skills, not that I had any in the first place.

Another aspect of this build is that I had gotten WAY out of touch with using Monogram instruction sheets. I have gotten so used to following Tamiya, Hasegawa, and Academy instructions that these Monogram instructions are hard for me to follow. But, you know, it is good to be reading them again. Brings back a lot of the good memories of my childhood when I was building these on a regular basis (with no paint!!), and helps suppress a lot of the bad ones. But, that's not for this forum........


That's it for now, folks. Hoping to get some more done later this evening while I'm watching my pre-recorded viewing of the NASCAR Southern 500 from Darlington, SC (that way, I can forward through the commercials, do my own slo-mo stuff during the wrecks, etc.). Let me know whatcha think!!


Gary


Devil Dawg

On The Bench: Tamiya 1/32nd Mitsubishi A6M5 Model 52 Zeke For Japanese Group Build

Build one at a time? Hah! That'll be the day!!

  • Member since
    November 2008
  • From: Central Florida
Posted by plasticjunkie on Sunday, September 3, 2017 9:34 PM

Looks like you are moving right along Gary. The pit looks great. 

Next time if you want to get a true red color then spray or brush white and when dry use the red. The same for yellow.

 GIFMaker.org_jy_Ayj_O


Too many models to build, not enough time in a lifetime!!

  • Member since
    April 2014
Posted by B_one fixer on Monday, September 4, 2017 3:00 AM

Squeezed in some time for the big tomcat. Worked on laying more paint down and pressing forward on the cockpit.

  • Member since
    March 2005
  • From: Lancaster, South Carolina
Posted by Devil Dawg on Tuesday, September 5, 2017 3:46 PM

From plasticjunkie:

"Next time if you want to get a true red color then spray or brush white and when dry use the red. The same for yellow."


Well, shoot! I didn't think of that. Great idea. Hopefully, this old brain will remember that the next time I need it! 

Devil Dawg

On The Bench: Tamiya 1/32nd Mitsubishi A6M5 Model 52 Zeke For Japanese Group Build

Build one at a time? Hah! That'll be the day!!

JOIN OUR COMMUNITY!

Our community is FREE to join. To participate you must either login or register for an account.

SEARCH FORUMS
FREE NEWSLETTER
By signing up you may also receive reader surveys and occasional special offers. We do not sell, rent or trade our email lists. View our Privacy Policy.