SEARCH FINESCALE.COM

Enter keywords or a search phrase below:

Viet Nam War Aircraft Group Build

34646 views
709 replies
1 rating 2 rating 3 rating 4 rating 5 rating
  • Member since
    May 2004
  • From: Land of Lakes
Posted by cbaltrin on Wednesday, December 11, 2019 5:26 AM

EA6A looking good lewbud!

On the Bench: Too Much

  • Member since
    June 2008
Posted by lewbud on Wednesday, December 11, 2019 3:14 AM

John,

The 123 is looking good. I almost asked if the main gear was built retracted because I forgot how low the aircraft is to the ground. Maybe someone out there will do a dio with a wrecked 123 on an abandoned Japanese airfield with a wrecked Pilatus PC-7 parked inside it with couple of figures that look like Mel Gibson and Robert Downey Jr.

Like G, I planned to crossbuild and build the Fujimi EA-6A for the Weekend GB. Unfortunately, my time management skills went AWOL and I didn't finish her in time. Here's some pics.

Per the rules, all builds must be unstarted.

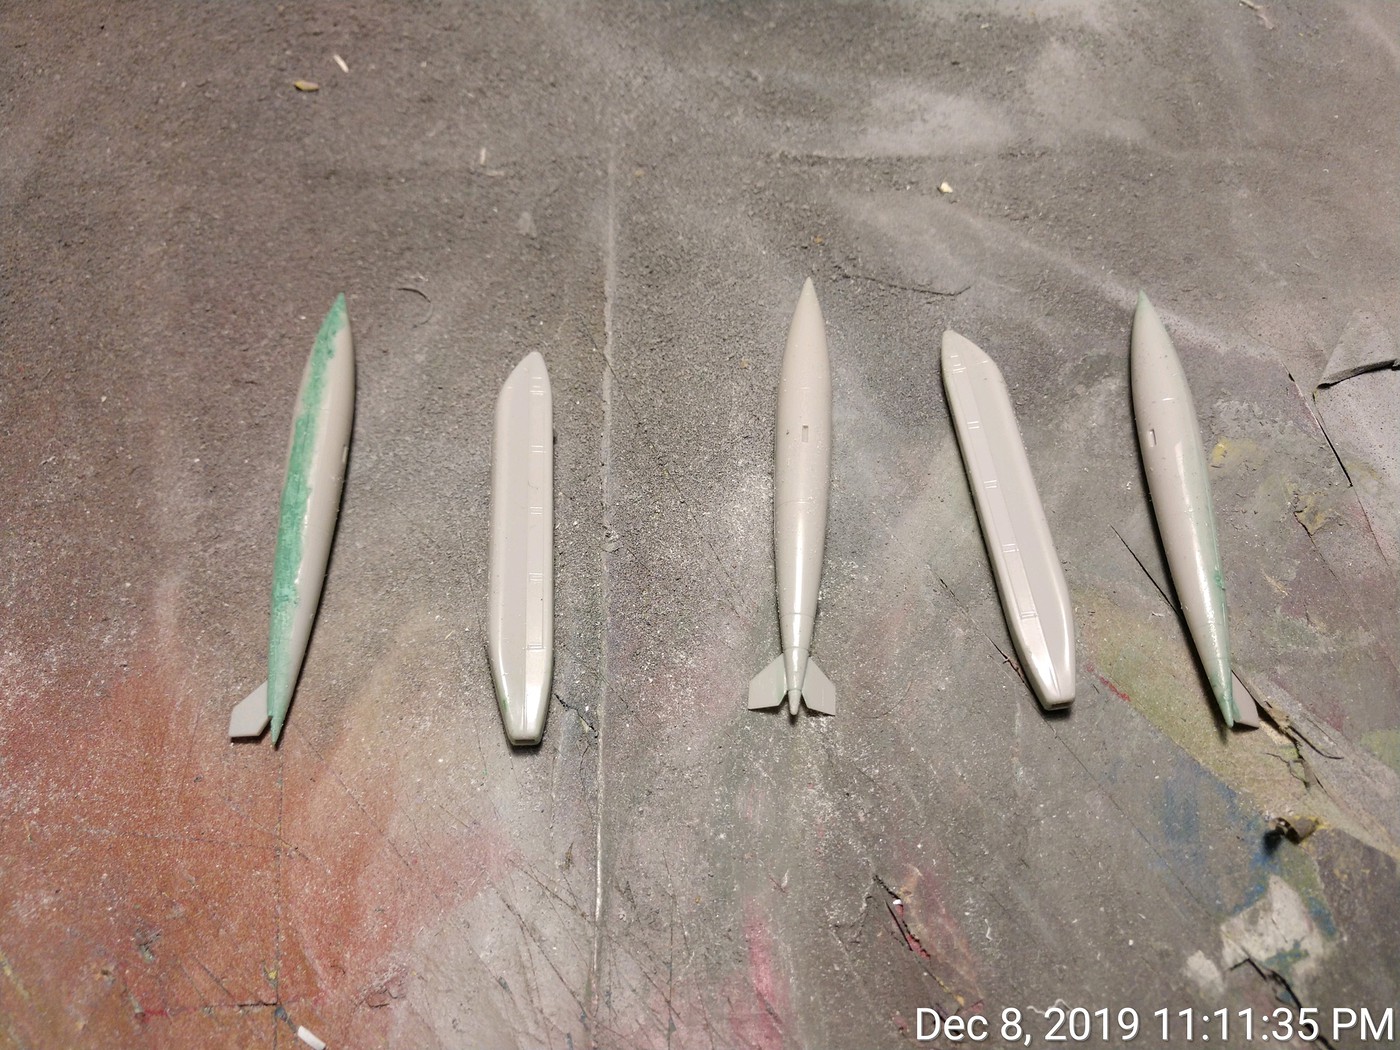
First subassemblies done.

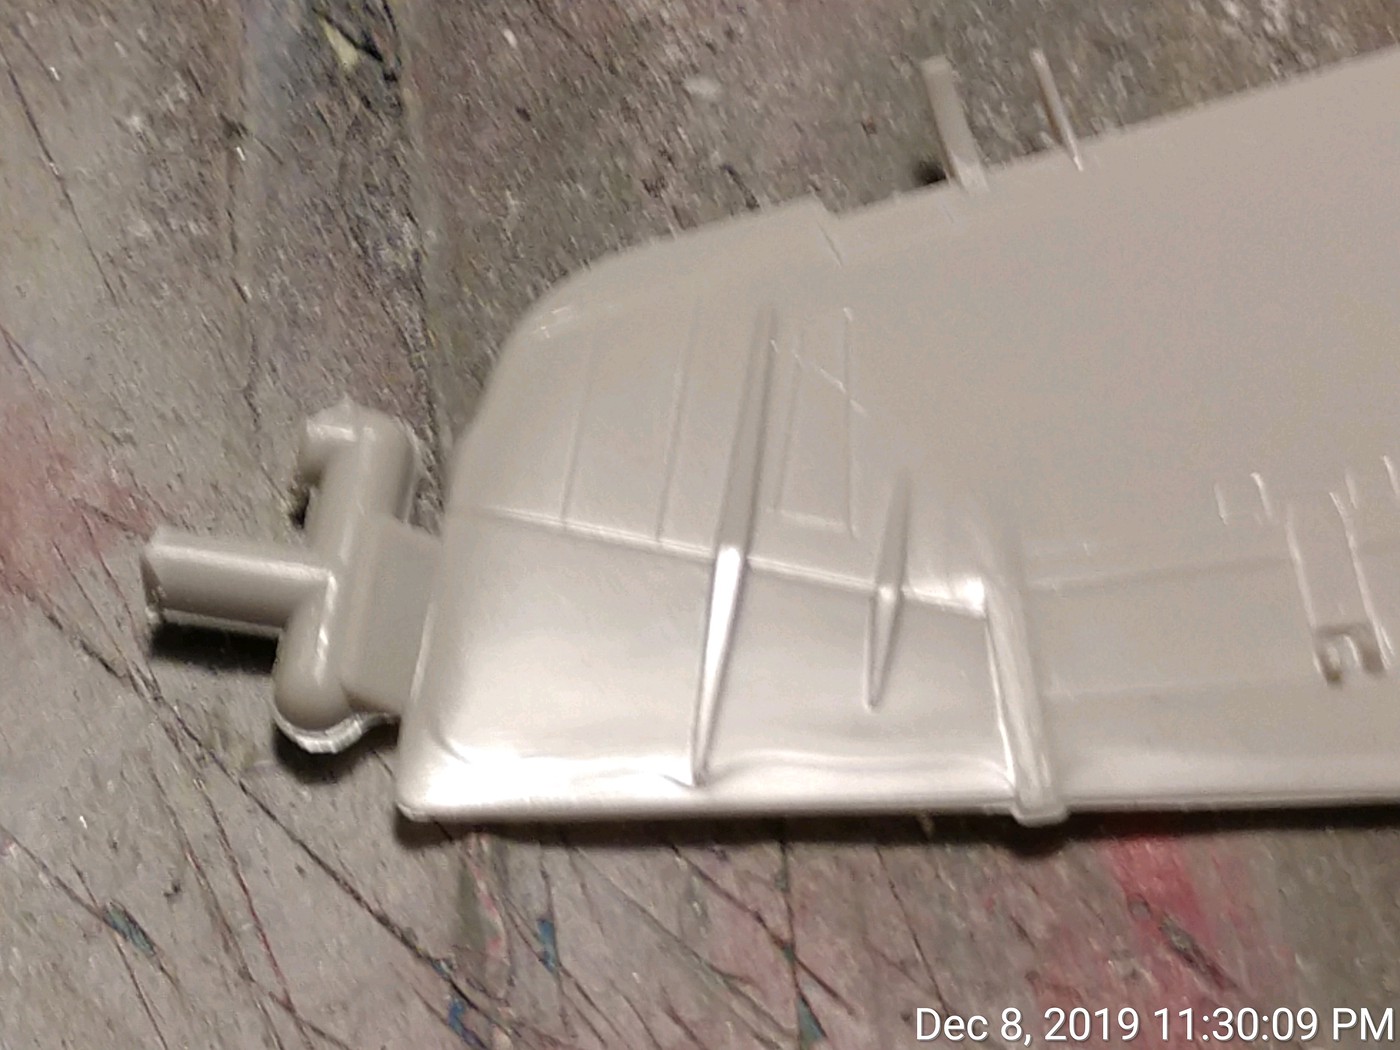
Had to deal with these on each wing half and on each of the flaps.

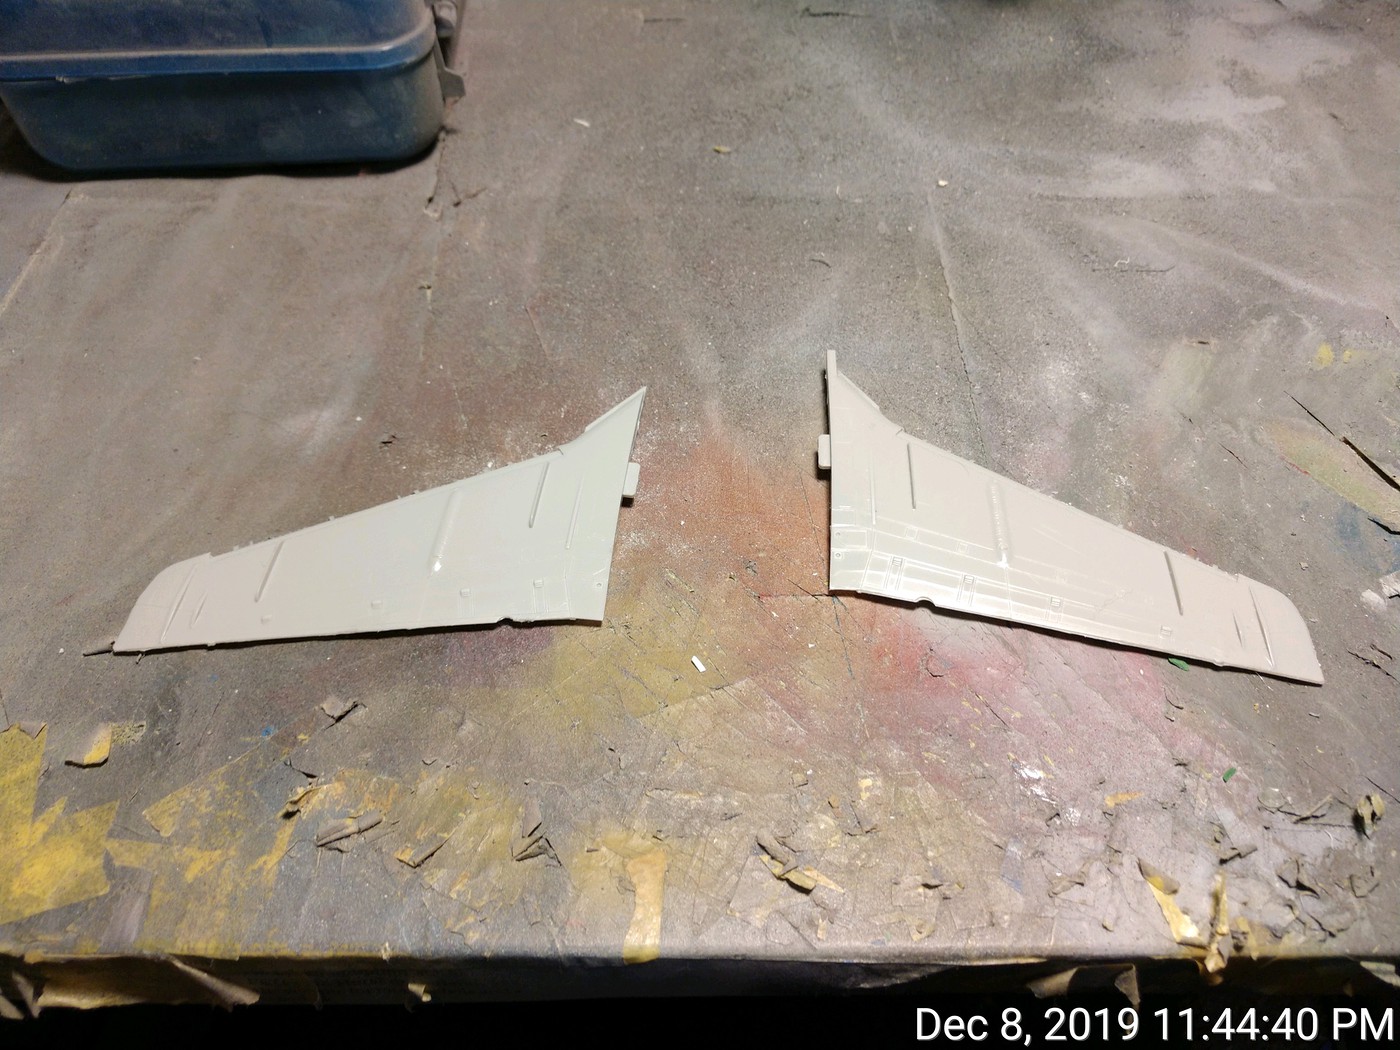
The wings.  There is a wing fence missing that you have to add in construction. Don't know why they didn't include it in the mold.

The beginning of the second day. This is when things started to go off the rails time managementwise as I had the day off, I figured I had plenty of time. I was wrong.


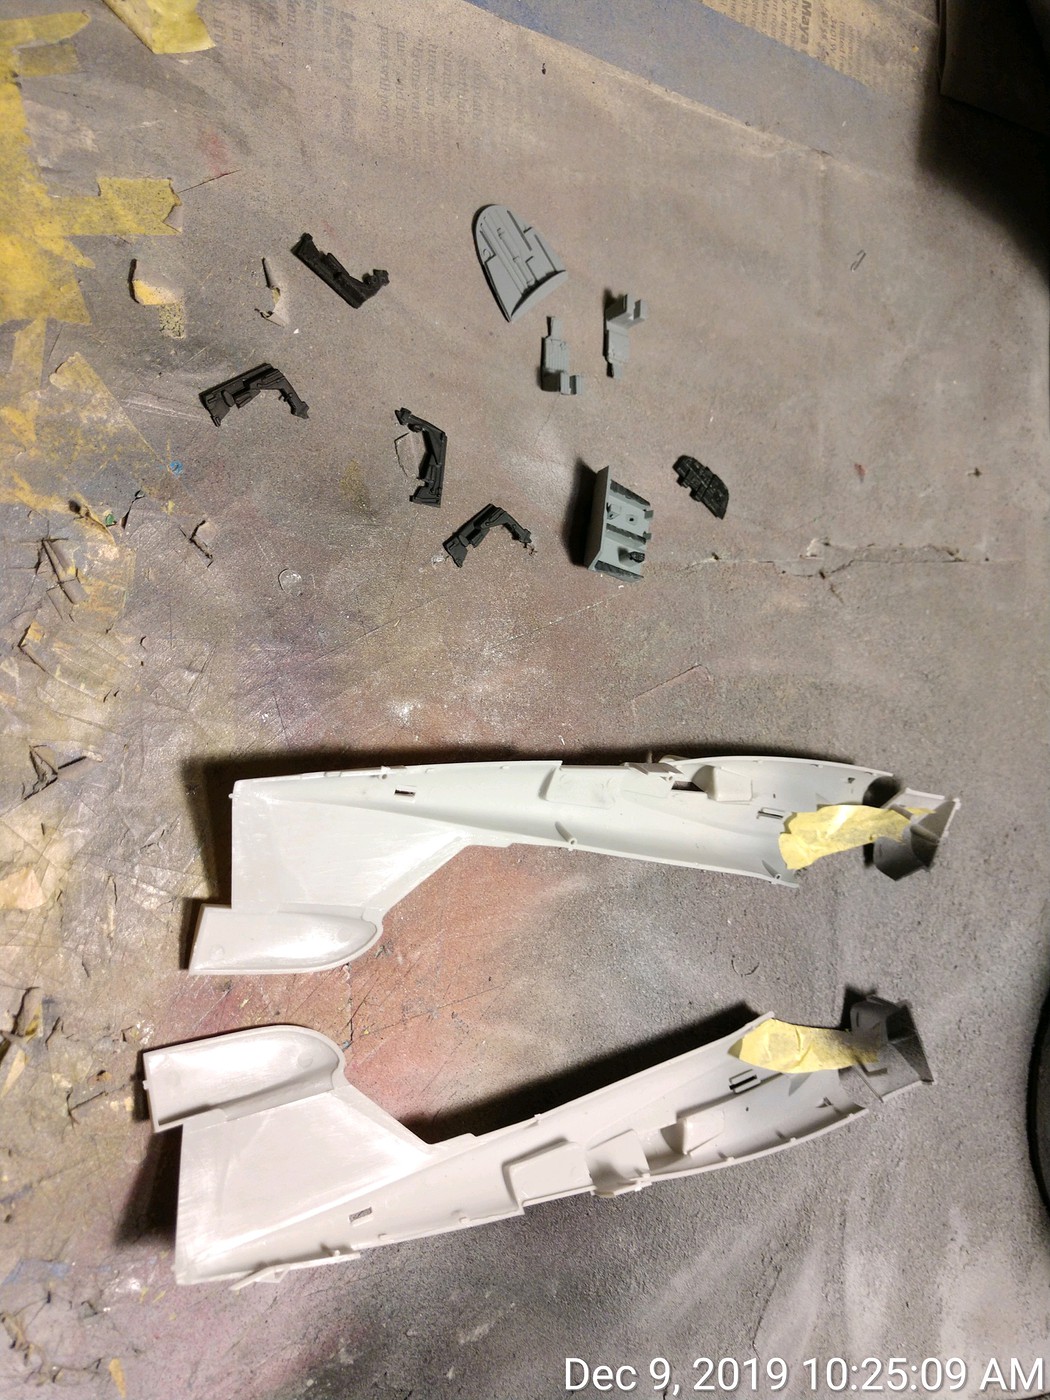
I forgot how complex a shape the A-6 airframe is. The fuselage consists of five pieces for the basic airframe, two halves, and three pieces to complete the underside. Fortunately the fit was very good and ran along existing panel lines. The top of the fuselage, not so good.


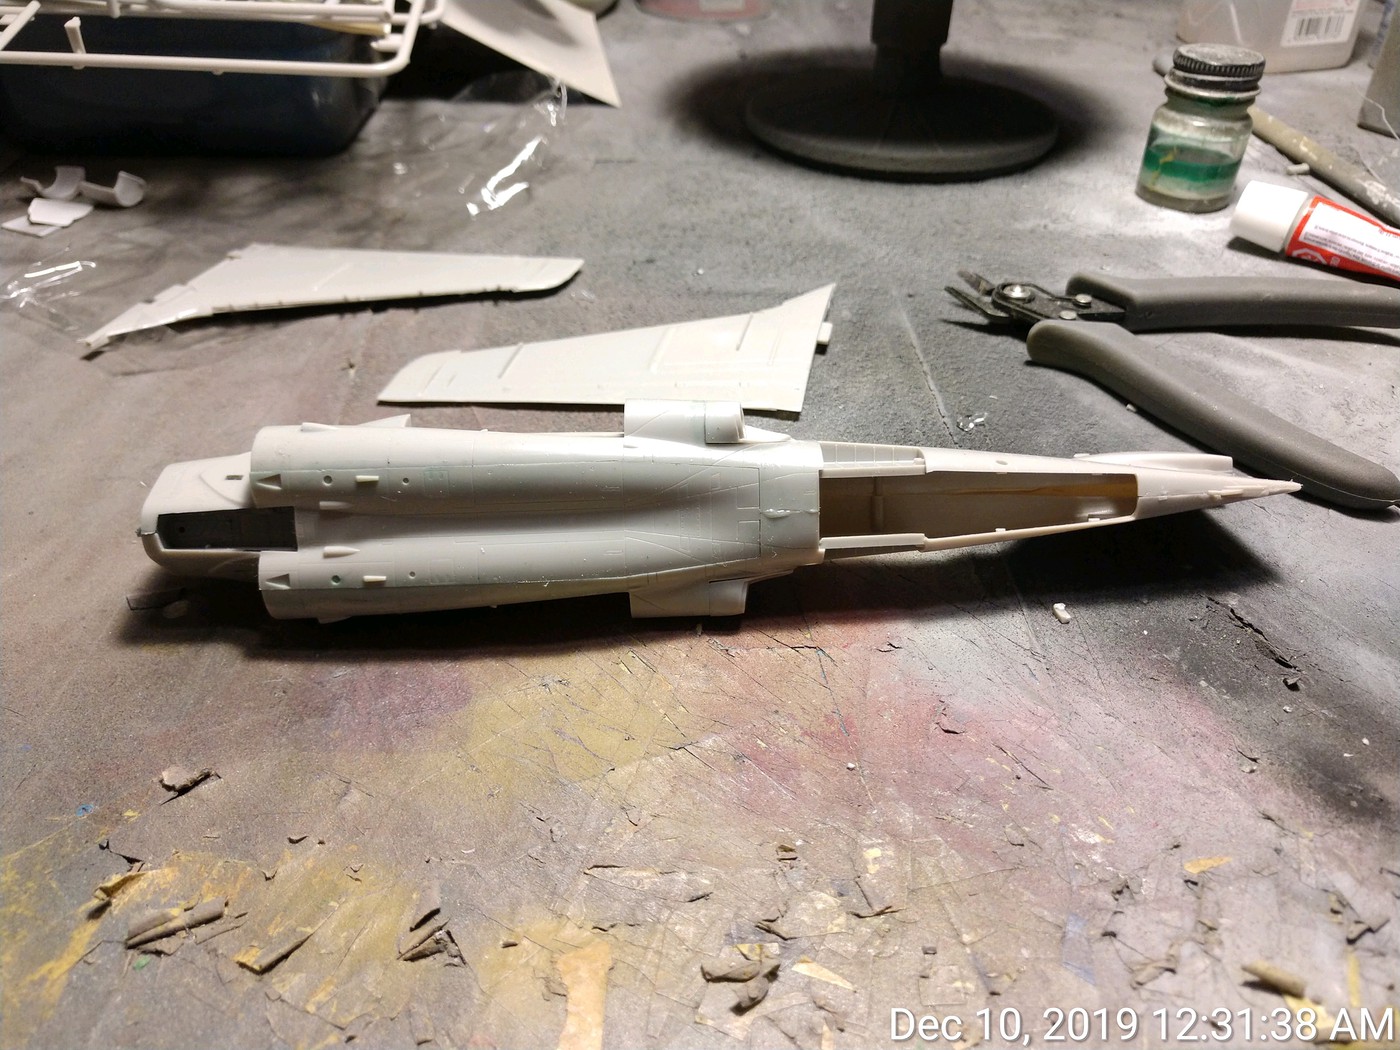
Here's where I called it a day, roughly 27 hours into the build. I forgot to take pictures of the completed cockpit and the intake and exhaust trunks that are hidden by the closed fuselage. I had to take the seats and control stick out so I could get the instrument panel in. At least it was looking like an airplane.

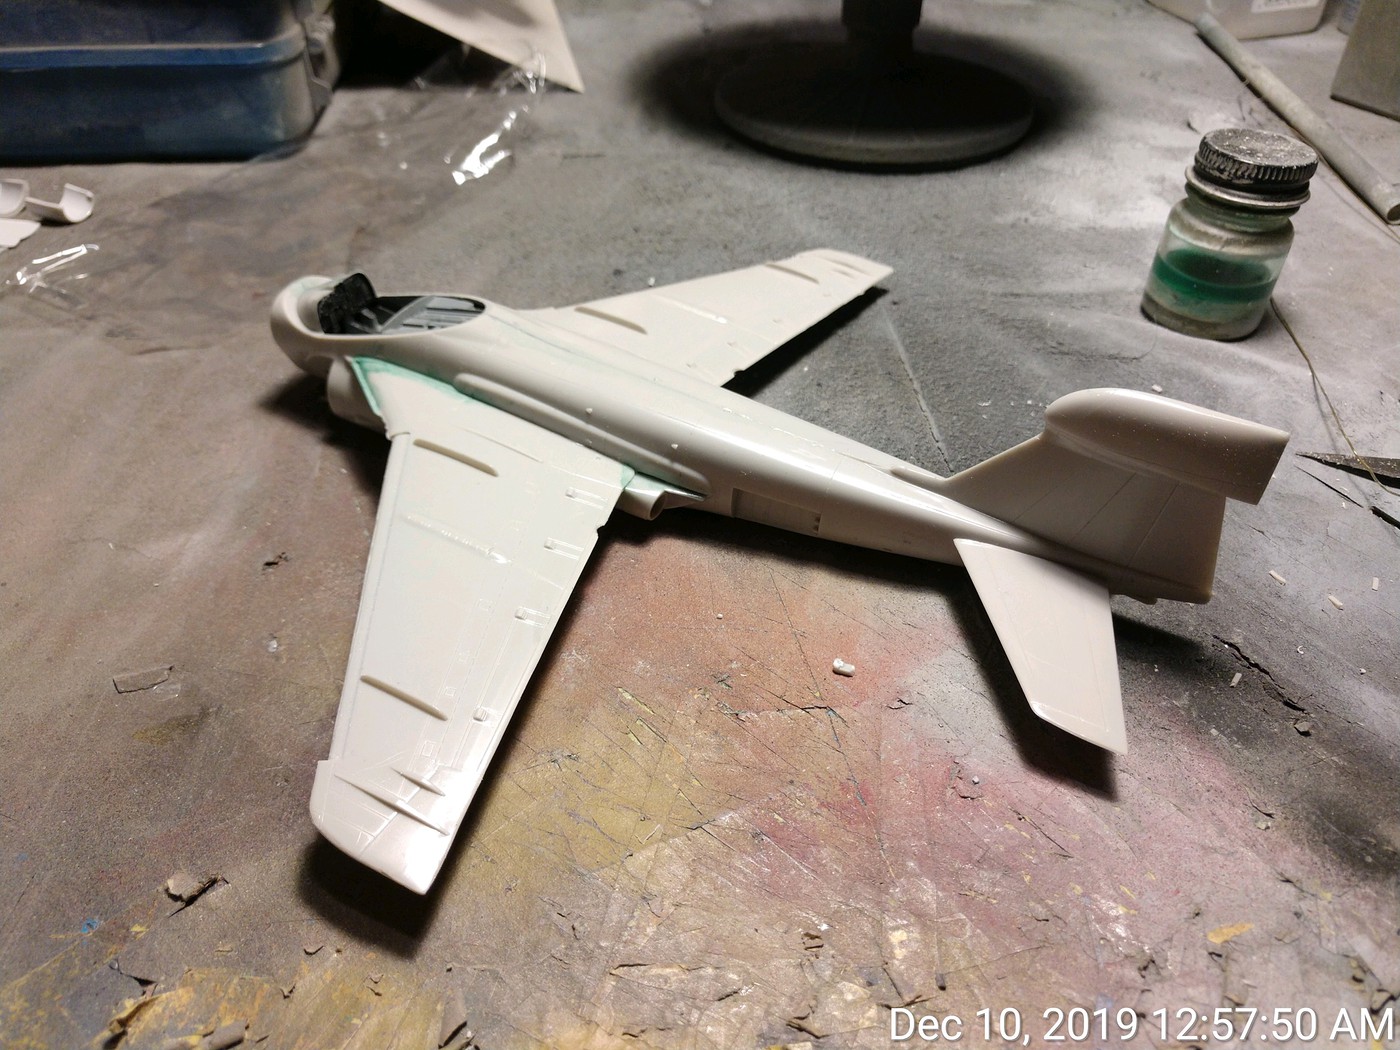
And this where I called quits after getting ready to come into work. I reinstalled the seats (I think I forgot the control stick) masked and installed the canopy and primered it. To be honest, I was quite apathetic towards this build at this point and was planning on writing it off, but I thought I would at least try to get the underside white painted before going to work. Unfortunately, I rushed the job and ended up with some paint runs, which means having to wait a couple of days until they dry and I can sand them off.  Here is where she sits now.

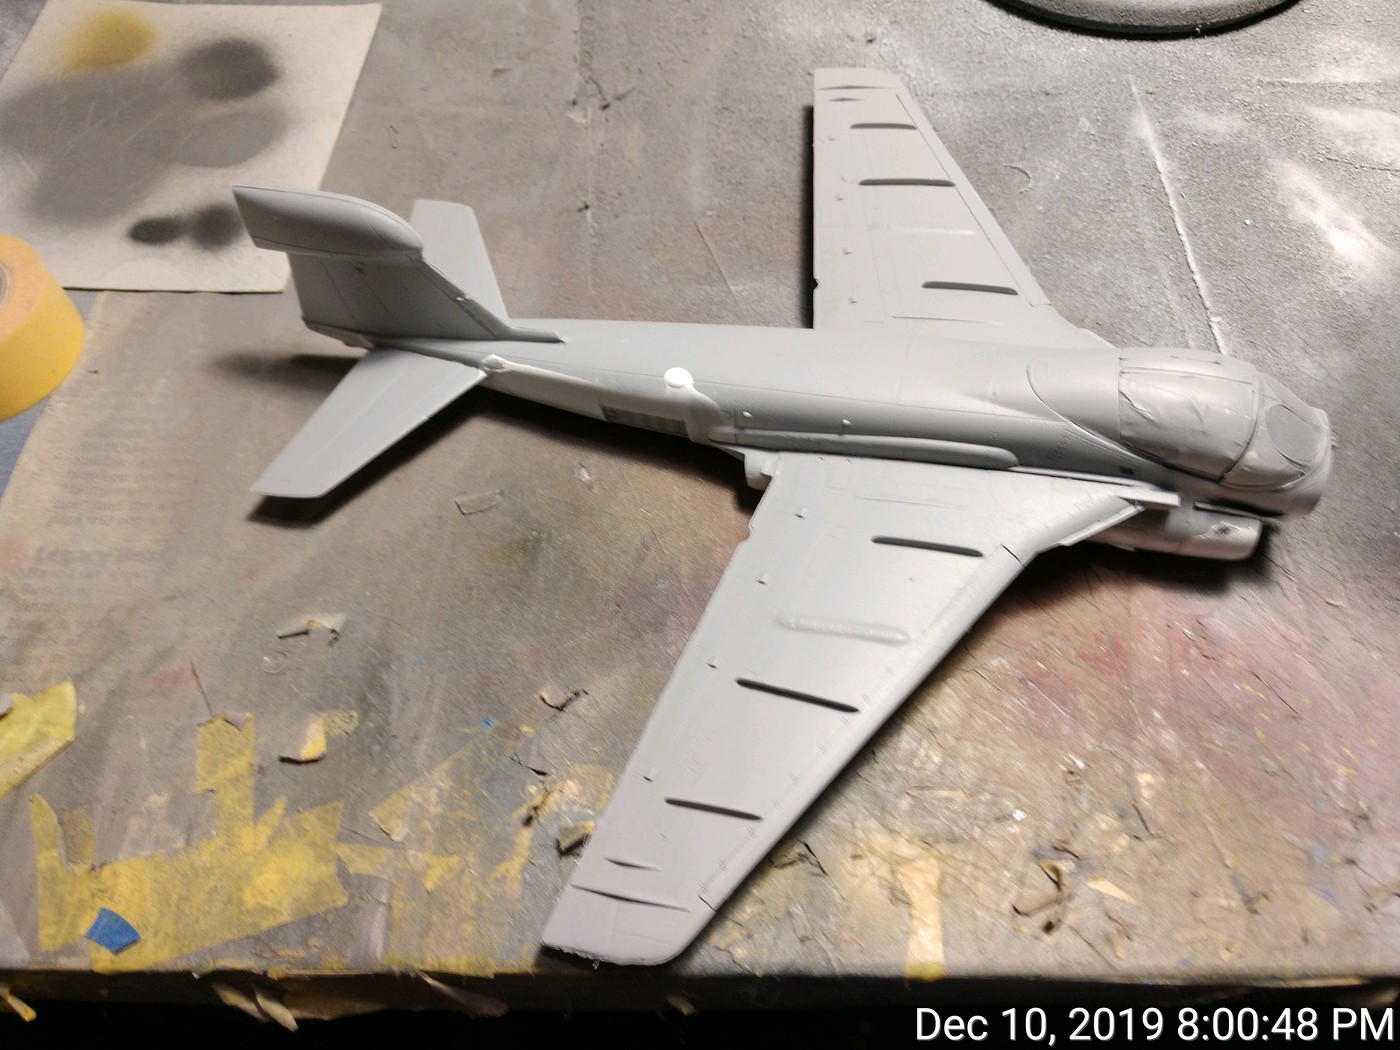
More eventually. The upside is that the A-6A is very similar, so it should go much easier.


Buddy- Those who say there are no stupid questions have never worked in customer service.

  • Member since
    October 2009
  • From: Texas
Posted by Gregbbear on Monday, December 9, 2019 3:03 PM

John, I am enjoying your build.  I always learn a lot from watching builds such as yours.  Shake and bake kits just aren't as interesting to watch in a build sequence unless it is a conversation or ams overload.  No offense to the Tamiya builders out there, I love them too.  They make me feel like I'm actually good at modeling.  Especially their cars.  

I haven't made any photographable progress myself.  I took the wife to Waco for the weekend.  It's a nice little city, and I'd go more often if I didn't have to drive through Austin.  I'm hoping to find a little man cave time today.   

Greg

- yat yas!


  • Member since
    December 2002
  • From: Northern California
Posted by jeaton01 on Monday, December 9, 2019 11:39 AM

Barely, John, just barely!

John

To see build logs for my models:  http://goldeneramodel.com/mymodels/mymodels.html


  • Member since
    November 2003
  • From: Naples, FL
Posted by tempestjohnny on Monday, December 9, 2019 7:15 AM
John its looks like you've got this beast under control


  • Member since
    December 2002
  • From: Northern California
Posted by jeaton01 on Sunday, December 8, 2019 11:54 PM

More on the C-123:


This little triangle fills in the wing root area aft of the wheel well housings.  It needs to be thinned down until it is a near wafer, and has to be trimmed back on the side facing the wheel housing to get it to fit flush with the skin and in line with the rib detail.  The style of instructions is not helpful as there is no suggested order of assembly within each section of the instructions.   The wheel well housings should be installed first, using the floor as a guide to alignment.  Get them to fit as flush to the wall as you can because any gaps here will prevent the proper fit of the floor and overhead bulkhead.  Then the triangle above should be installed, followed by fitting the floor and the the overhead bulkhead that fits above and between the wheel housings.  Dry fitting is needed at each step as the fuselage would not come together freely until the floor was trimmed a little along the sides an in the cutouts where the wheel housings fit.  A little filing was done on the top of the overhead bulkhead, and at the cutouts that fit against the wheel housings. Not much is needed but if you don't it will result in a difficult fuselage seam.  Next the fuselage frames can be installed, and then the heater ducting.  Everything was glued to one fuselage half during the fitting process.  It was necessary to remove a little material from the front of the floor before the cockpit and nose wheel assembly would fit properly.  Just for insurance about 1/32 was removed from the front of the cockpit assembly to be sure the nose weight would fit without interference.  The cockpit glareshield had to be trimmed on the front and sides, and the area of the fuselage under the front of the windscreen was thinned down considerably before the fuselage would come together at the top of the nose.


Parts are glued to the right side.  Windows are masked on the inside and outside at this point.  The masks were developed from photographs of the model, drawn in Autocad, and cut with a Silhouette Cameo from sheets of Tamiya masking material.
Another test fit.  The cargo door and ramp have been cut apart and the rear door is trial fitted.  The floor sections on both sides of the ramp area are installed, resting against the main cabin floor.  For ease of assembly some thin plastic tabs were added at the aft end of the door.  The front end will rest on the aft fuselage frame.   
 
Almost anticlimactically, the fuselage is glued together.  The interior was painted grey inside using Tamiya Light Grey, except for the floor and loading ramp which was sprayed Floquil Nato Black.  Inside window masks were removed and the fuselage seam was joined using Touch and Flow which reacted well with the plastic.  The 29 grams of weight will make it a solid nose sitter even with the wings and tail added, and the cargo door and ramp.


The engine assembly sequence, like the fuselage interior, is poorly set forth in the instructions.    It was necessary to remove the locating ridge for the firewall from the cowls and thin down the inside of the depression for the exhaust pipe before the engines could slide into the cowl.  The firewall was too far forward and not perpendicular to the thrust line.  In the end the engines ended up in the right place but the firewalls are too far forward.  This would matter only if the cowl flaps were opened.  I would suggest a better way.  When assembling the engines, do not attach the firewall to the engine during engine assembly.   Do not install the exhaust stubs.  Replace the accessory section that fits into the back of the engine with plastic or brass tubing that fits in the hole in the firewall. The accessory section is not molded well enough for the accuracy of fit needed.  When the engines are complete and painted, assemble the cowl, nose bowl, and oil cooler duct.  Next put the engines in the cowl as far forward as they will go and slip the firewall into the back of the cowl and over the tube that replaced the accessory section and glue it up against the locating ridge in the cowl.  Installing the propeller will help in positioning the engines in the center of the cowl and at the proper distance from the front of the cowl.  Tack glue the tube to the firewall and check the engine alignment as the glue sets.


Engines installed to the wings.  When assembling the nacelles a fair bit of material was scraped and filed off of the nacelle top to get the the nacelle to fit the wing properly  On one side more material should have been removed from the top side of the nacelle and some remedial work will be needed where the wing meets the nacelle.  The other side is a good fit.  The landing lights fit well after filing the openings for them in the wing.

John

To see build logs for my models:  http://goldeneramodel.com/mymodels/mymodels.html


  • Member since
    May 2004
  • From: Land of Lakes
Posted by cbaltrin on Saturday, December 7, 2019 8:28 AM

cbaltrin

Glued things that come in halves together. Boy the fins on the drop tanks are paper thin. Gona have to be real carefule! Unfortunately, wont be able to model for about a week.. See you soon.


A wee bit of progress this week. Not sure if I'm done with the cockpit or not. If I was smart, I would be. However, If AMS gets the better of me, I will add straps and seat cushion to the seat. ...Not that any of it will be visible in the end.... Let's keep this simple shall we?Confused

On the Bench: Too Much

  • Member since
    November 2003
  • From: Naples, FL
Posted by tempestjohnny on Friday, December 6, 2019 6:13 AM
I like how you did the nose weight John


  • Member since
    December 2002
  • From: Northern California
Posted by jeaton01 on Thursday, December 5, 2019 7:29 PM

Proud or not, it'll be a result, Bill!

crown, you are added to the roster.

John

To see build logs for my models:  http://goldeneramodel.com/mymodels/mymodels.html


  • Member since
    April 2005
  • From: Australia
Posted by taxtp on Wednesday, December 4, 2019 10:47 PM
Thanks John, yes it should keep me busy for a while :)

I'm just taking it one GB at a time.

  • Member since
    October 2009
  • From: Texas
Posted by Gregbbear on Wednesday, December 4, 2019 11:36 AM

John, I really like the details.  The only roden kit I've attempted was a little Fokker biplane.  I need to try and finish it someday.... 

I like the Ford.  I assume it is the Tamiya kit?  I have one in the stash to someday build as a VMF-513 bird, as I want to build everything they flew.  So far, I have two corsairs, f-4b, and an AV-8A done.  I will probably get the Tigercat and Skyknight done during the upcoming Korean War GB.  Good luck on the F-8.  I love me some Crusaders!

Cheers, 

Greg

- yat yas!


  • Member since
    August 2015
  • From: the redlands Fl
Posted by crown r n7 on Wednesday, December 4, 2019 9:53 AM

Hi john. Im in with something too many to choose from.


 Nick.

  • Member since
    July 2014
Posted by modelcrazy on Wednesday, December 4, 2019 9:26 AM

GMorrison
There's a good Jimmy Stewart movie with a C-82 but it makes me sad because my hero Mantz died making it.

Flight of the Phoenix.

Steve

Building a kit from your stash is like cutting a head off a Hydra, two more take it's place.


http://www.spamodeler.com/forum/

  • Member since
    September 2012
Posted by GMorrison on Wednesday, December 4, 2019 1:36 AM

John, it's looking swell. Roden falls into the space where one chooses kits for the subject, not the buildability. I've built a few, and the results are unique.

Fairchild, before that Chase is a good story in aviation. I don't think I ever had a ride in one, but they had some unique designs.

EDIT: May have flew in an F-27 once or twice in Air West livery.

I spent a lot of time researching the story of McGovern's last flight in the C-119.

Gave the kit to keyda because I kind of didn't want to build it. Pity as it would have fit here. Oh well.

There's a good Jimmy Stewart movie with a C-82 but it makes me sad because my hero Mantz died making it.


 Modeling is an excuse to buy books.


  • Member since
    September 2012
Posted by GMorrison on Wednesday, December 4, 2019 1:20 AM

So this isn't an official entry because I will not be proud of the results, but here's a cross build of my model for Buddy's Weekend GB. For that I add to my collection of Gull Gray over White every year. One reason for that is when I have the paints out in the goat rope that is a 48 hour GB, I rehab old models during the drying times for the latest ones. Hell of a way to run a Navy.

We are getting pummelled with rain and hail. As soon as it clears up I'll start with primer app.


Started at 10.00 a.m. Friday morning. Wrapped it up around 3.00.

BS...that's a Weekend GB from a couple of years ago that I rehabilitated today in between coats of paint on this year's model.

Speaking of... it's been raining all weekend like a cow over a flat rock.

Makes painting nearly impossible. I'm not going to finish tomorrow by 10.00 a.m. But I'll do what I can.

Afterburner:

Bang seat:

Intake and cockpit work:

Flight surfaces:


 Modeling is an excuse to buy books.


  • Member since
    December 2002
  • From: Northern California
Posted by jeaton01 on Tuesday, December 3, 2019 11:27 PM

Bang Head

John

To see build logs for my models:  http://goldeneramodel.com/mymodels/mymodels.html


  • Member since
    October 2009
  • From: Texas
Posted by Gregbbear on Tuesday, December 3, 2019 2:59 PM

Hello, I started to paint some of the undersides blue, and unfortunately I had a mishap.  The lower wing assembly fell off where I had it suspended upside down.  I don't think the paint was damaged too much, but the flaps broke off on both sides. The flaps are connected by 6 little quarter moon pieces each side.  It's a very delicate connection, and unfortunately one is missing.  Thankfully it is the bottom wing. It's all in the dehydrator now.  Now, to sand and fill the fuselage!  

Cheers,

Greg 

- yat yas!


  • Member since
    June 2017
Posted by jmoran426 on Tuesday, December 3, 2019 11:45 AM
I'm paying close attention to your processes. I have the same model on the shelf.

jmoran426

  • Member since
    October 2009
  • From: Texas
Posted by Gregbbear on Monday, December 2, 2019 9:04 PM

John, your C-123 does not look like a kit for the faint of heart!   The details are very good, however.  

I got my fuselage put together.  After the glue dries, I will be pretty busy with sanding, filling and rescribing.  Being a biplane and the method of construction, I think I am going to have to paint some of it in assemblies.  Should be interesting... 

Cheers, 

Greg


- yat yas!


  • Member since
    December 2002
  • From: Northern California
Posted by jeaton01 on Monday, December 2, 2019 8:38 PM

I've made a start on the Roden C-123.  It's a very detailed kit, however, I don't think their mold making abilities are quite up to handling the kind of fine details designed into the parts  That makes building more difficult.  Also, the plastic doesn't seem to like Tamiya thin cement, or CA for that matter.  I am using the Testors glue in the triangular bottle right now and it seems to be working, and will try the Touch and Flow Tenax like stuff also.  The engines have a lot of detail, most of which will be hidden.  I found on assembling the first one that the alignment of the cylinder banks is off, with the rear bank lined up directly behind the front bank, where the rear bank in the real world is offset so the rear cylinders are lined up with the air gap between the front cylinders.  It really doesn't matter in this case but being an old engine guy I just couldn't stand it.  I didn't fix the first one because I had already glued the front housing on and didn't want to mess it up trying to move it.  The pictures show how I modified the second engine. 


I didn't like their method of attaching the props, I'll do my usual brass tube and music wire method to attach them. 


The nose gear will ultimately rest on a spider web of struts so a lot of time was spent figuring how that was to be done. 


The main gear has an odd way of attaching the wheels, they have you put the inner wheel half on the strut, then there is a plastic keeper washer that is glued on to hold the inner wheel half.  Then you are to put the outer wheel half on.  Clumsy to sand and paint!  I assembled all of the main gear parts because I wasn't confident of how the parts fit without doing it all at once.  A little misalignment on that narrow gear and the wings will surely not be level.  The instructions are not clear enough for me on these assemblies. 

Some of the cockpit parts were assembled and two ejector pin marks on the back wall of the cockpit were fixed using melted sprue. 

I made masks for the wheels and windows this afternoon using a Silhouette Cameo vinyl cutter.  There will be paint soon!


John

To see build logs for my models:  http://goldeneramodel.com/mymodels/mymodels.html


  • Member since
    June 2019
Posted by Mach1 on Sunday, December 1, 2019 5:14 PM

Thanks jeaton01. Now that things are slowing down a little at work, I'll be able to get in quite a bit more bench time to do some serious building.

  • Member since
    December 2002
  • From: Northern California
Posted by jeaton01 on Sunday, December 1, 2019 11:52 AM

Good to see you starting the build, Mach1.  I may start on my C-123 today.  Raining here.  GMorrison should be seeing the same weather.

John

To see build logs for my models:  http://goldeneramodel.com/mymodels/mymodels.html


  • Member since
    June 2019
Posted by Mach1 on Sunday, December 1, 2019 10:38 AM

Kicking off on the F-14 now that the decals have arrived. Aside from the AM decals this will be built from the box.

Proof of unstartedness pic.

Pit nearing completion, just a small bit or two left to add.

Gluing up the wings.

  • Member since
    May 2011
  • From: Honolulu, Hawaii
Posted by Real G on Friday, November 29, 2019 9:39 PM

Hey, if anyone is planning on doing a 1/48 F-111A, Caracal just released a dedicated decal sheet for it, including options for Combat Lancer.

http://caracalmodels.com/cd48139.html

One comment I have is that the Combat Lancer birds’ undersides might have been painted medium green, not OD.  Hopefully others who know will chime in, since it is unusual and unique to the mission.

“Ya ya ya, unicorn papoi!”

  • Member since
    December 2002
  • From: Northern California
Posted by jeaton01 on Thursday, November 28, 2019 10:51 AM

Steve, nice work on the cockpit.  You'll give the SLUF a good name yet.

Tony, the list is updated.  That's a serious upgrade!

John

To see build logs for my models:  http://goldeneramodel.com/mymodels/mymodels.html


  • Member since
    November 2003
  • From: Naples, FL
Posted by tempestjohnny on Thursday, November 28, 2019 5:23 AM
Steve. Pit looks sooo much better


  • Member since
    April 2005
  • From: Australia
Posted by taxtp on Thursday, November 28, 2019 12:22 AM
That all looks really good Greg. At this stage I'm changing my subject for this GB to the 1/32 F-105D Thud from Trumpeter. I'm looking forward to it. Cheers Tony

I'm just taking it one GB at a time.

  • Member since
    July 2014
Posted by modelcrazy on Wednesday, November 27, 2019 11:10 PM

Nice start guys,

Glued the fuse halfs together. Here is a couple pics of the pit. The IP is going to get the decal.

Moving on.

Steve

Building a kit from your stash is like cutting a head off a Hydra, two more take it's place.


http://www.spamodeler.com/forum/

JOIN OUR COMMUNITY!

Our community is FREE to join. To participate you must either login or register for an account.

SEARCH FORUMS
FREE NEWSLETTER
By signing up you may also receive reader surveys and occasional special offers. We do not sell, rent or trade our email lists. View our Privacy Policy.