SEARCH FINESCALE.COM

Enter keywords or a search phrase below:

75th Anniversary of 1945 Group Build (World at War)

23236 views
354 replies
1 rating 2 rating 3 rating 4 rating 5 rating
  • Member since
    December 2002
  • From: Bury St Edmunds, Suffolk, England
Posted by Bish on Sunday, August 9, 2020 3:51 AM

Thanks check. I already have next years line up pretty much sorted, but i'll see how the U-Boat goes.

I am a Norfolk man and i glory in being so


On the bench: Airfix 1/72nd Harrier GR.3/Fujimi 1/72nd Ju 87D-3

  • Member since
    September 2003
  • From: AandF in the Badger State
Posted by checkmateking02 on Sunday, August 9, 2020 1:31 PM

You do plan ahead, Bish!  Usually I don't know what I'm going to do next week, let alone next year!

Back to my project for '45:  CMK's US Navy pilots.  I got them all put together.  Had a little set-back when I broke the foot off of one and had to perform orthopedic surgery.

I used superglue to put the parts together; thought I'd have trouble getting rid of join seams, but they didn't take too much effort to eliminate.

I primed them with Testor MM white.  Used poster ticky-tak to stick them to bottle caps for painting.

Went through my Vallejo paint, and picked out some bottles that seem likely for the khaki uniforms--numbers 837, 917, 916 and 72.034.


  • Member since
    December 2002
  • From: Bury St Edmunds, Suffolk, England
Posted by Bish on Sunday, August 9, 2020 1:48 PM

O yes, i like to be prepared.

Nice work on those figures, i do find them delicate but they come up nicely.

I am a Norfolk man and i glory in being so


On the bench: Airfix 1/72nd Harrier GR.3/Fujimi 1/72nd Ju 87D-3

  • Member since
    September 2003
  • From: AandF in the Badger State
Posted by checkmateking02 on Monday, August 10, 2020 2:55 PM

The current crop of CMK figures seem to be better than years ago.  The faces used to be ghastly!  I had an older set of a Navy pilot and two deck crew.  I thought I'd paint them up, too, but the faces were hideous and the detail (like parachute harness) was so soft, it was hard to see that it was even there.


  • Member since
    January 2013
  • From: Athens, Greece
Posted by Zvezda1980 on Monday, August 17, 2020 9:00 AM

Bish: I was about to say excellent builds, then I realized these are 1/72 Surprise. So these are amazing builds! The camo work on the Dora is perfect.

  • Member since
    December 2002
  • From: Bury St Edmunds, Suffolk, England
Posted by Bish on Monday, August 17, 2020 9:04 AM

Thank you Zvezda, much appreciated.

I am a Norfolk man and i glory in being so


On the bench: Airfix 1/72nd Harrier GR.3/Fujimi 1/72nd Ju 87D-3

  • Member since
    January 2013
  • From: Athens, Greece
Posted by Zvezda1980 on Monday, August 17, 2020 9:10 AM

I started some work on the HB kit.

Cockpit was assembled and painted RLM66.

I did not want to grind-off the relief detail of the IP, so I applied the kit decal on top of it. With some MicroSol they settled just fine.

Some small bits of kit decals were applied on the side panels, for the same reason. Rest details were painted with a thin brush.

After a last gloss coat, they were left to dry.

The camera compartment was then assembled and some cabling and junction boxes were added to make it look less empty. HB forgot to add the 2 x tubular struts. These were added from brass tubing.

  • Member since
    September 2003
  • From: AandF in the Badger State
Posted by checkmateking02 on Monday, August 17, 2020 5:38 PM

Nicely detailed work, Zvezda.  Looking fine!


  • Member since
    December 2002
  • From: Bury St Edmunds, Suffolk, England
Posted by Bish on Tuesday, August 18, 2020 2:27 AM

Off to a good start there Zvezda.

I am a Norfolk man and i glory in being so


On the bench: Airfix 1/72nd Harrier GR.3/Fujimi 1/72nd Ju 87D-3

  • Member since
    February 2005
  • From: Nashotah, WI
Posted by Glamdring on Sunday, August 23, 2020 9:28 PM

I made great progress on the base this weekend, picked up static grass from the LHS adusted it on over some ballast I had laying around.  Still looks too spartan, i think I will order some light greeen premade bushes to match the grass.  Or maybe a stone fence in front of the vehicle.  I was going for a late winter, early spring look, though it really needs more mud for that!


Robert 

"I can't get ahead no matter how hard I try, I'm gettin' really good at barely gettin' by"

  • Member since
    September 2003
  • From: AandF in the Badger State
Posted by checkmateking02 on Monday, August 24, 2020 5:51 PM

Very nice, Robert.   The first photo shows how well the camo blends in with the terrain.


  • Member since
    January 2013
  • From: Athens, Greece
Posted by Zvezda1980 on Sunday, August 30, 2020 1:25 PM

Robert, very nice camo painting. Now I also want to build one of these babies.

  • Member since
    January 2013
  • From: Athens, Greece
Posted by Zvezda1980 on Sunday, August 30, 2020 1:28 PM

I try to break a record in slow model building. All these days I managed to add/paint seat belts from a PE set and attach the control column and rudder pedals. Embarrassed

  • Member since
    September 2003
  • From: AandF in the Badger State
Posted by checkmateking02 on Tuesday, September 1, 2020 5:00 PM

It might be slow, Zvezda, but you certainly achieved a fantastically detailed cockpit.  What great work!


  • Member since
    December 2002
  • From: Bury St Edmunds, Suffolk, England
Posted by Bish on Tuesday, September 1, 2020 5:01 PM

Robert, Zvezda, some nice looking work there.

I am a Norfolk man and i glory in being so


On the bench: Airfix 1/72nd Harrier GR.3/Fujimi 1/72nd Ju 87D-3

  • Member since
    September 2003
  • From: AandF in the Badger State
Posted by checkmateking02 on Wednesday, September 2, 2020 4:50 PM

2 September 1945


  • Member since
    September 2003
  • From: AandF in the Badger State
Posted by checkmateking02 on Wednesday, September 2, 2020 4:59 PM

CMK's US Navy pilots in 1/72.  I used various Vallejo khaki-like shades for the uniforms; bases are painted with Colorcoats 20-B deck blue.


  • Member since
    December 2003
  • From: 37deg 40.13' N 95deg 29.10'W
Posted by scottrc on Thursday, September 3, 2020 8:39 AM

I wanted to have my Missouri done by this date, but it didn't happen.  Almost done though, just needing to add all the PE railings.

  • Member since
    September 2003
  • From: AandF in the Badger State
Posted by checkmateking02 on Thursday, September 3, 2020 4:53 PM

That will probably keep you busy for a while, Scott.  Lots of railings there!


  • Member since
    December 2003
  • From: 37deg 40.13' N 95deg 29.10'W
Posted by scottrc on Thursday, September 10, 2020 7:54 AM

I missed VJ day be a few days, but 75 years ago today the USS Missouri did pull up anchor from Tokyo Bay.  I am going to call this build finished.  Check please use the last picture for the cover page.

Thanks, Scott


  • Member since
    September 2003
  • From: AandF in the Badger State
Posted by checkmateking02 on Thursday, September 10, 2020 5:51 PM

Very nice, Scott!  Great looking ship.  Measure 22 camouflage looks really good on her.  I've never built an Academy ship.  Looks like they are pretty good.  

I've added the finished photo to the front page; I did re-orient it so it's horizontal.

Thanks for being part of the GB.  It's always rewarding to see the ships coming out of your naval yard.  


  • Member since
    January 2013
  • From: Athens, Greece
Posted by Zvezda1980 on Monday, September 14, 2020 2:14 AM

Scott, very nice model of a very iconic ship.

  • Member since
    January 2013
  • From: Athens, Greece
Posted by Zvezda1980 on Monday, September 14, 2020 2:28 AM

I managed to do some work on the Schwalbe, before I left for holidays (at last).

Radio compartment was assembled & painted. Almost nothing will be visible from the open panel.

IP was installed and the cockpit 'tub' was completed.

The 2 x Jet engines were assembled and their interior painted. Then , after some dry fitting, cockpit and gun compartment were placed in position and fuselage halves were glued together

I did not achieve the best seams, even though the fit was very good. Some sanding will hopefully correct things.

When dry-fitting the bottom fuselage-wings piece, I noticed steps , especially at the front joint.

I will grind off some of the internal details , so that the bottom part can 'sit' a bit deeper into the upper fuselage, and see how it goes.

If anyone has some advice, it is more than welcomed.


  • Member since
    September 2003
  • From: AandF in the Badger State
Posted by checkmateking02 on Monday, September 14, 2020 5:58 PM

Lots of good looking detail there.  Nicely done!


  • Member since
    July 2020
Posted by EricB on Sunday, October 11, 2020 2:01 AM


Hi gents


I've done a few kits for every year on this GB. However, in January Finescale lost track of my account. For some reason known only to Zeus, this GB and British Army reappeared. Hope this will remain the case.


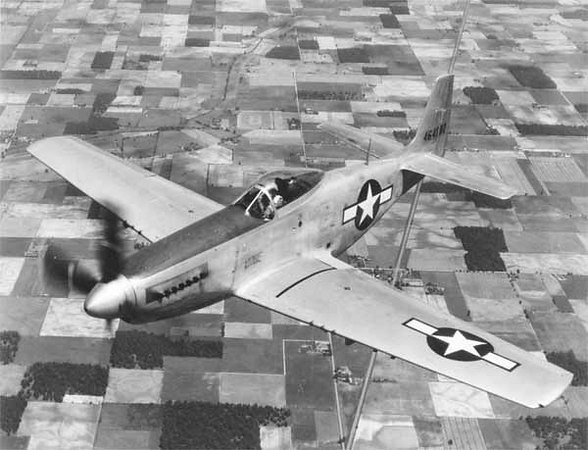
Originally I had plans for a Russian, British and American kit for the year - but considering the schedule change, I'm going to try to finish the Meng 1/48 P-51D Mustang. It'll have 8th AF colors so you can certainly figure 1945.


 kit by Eric Bergerud, on Flickr


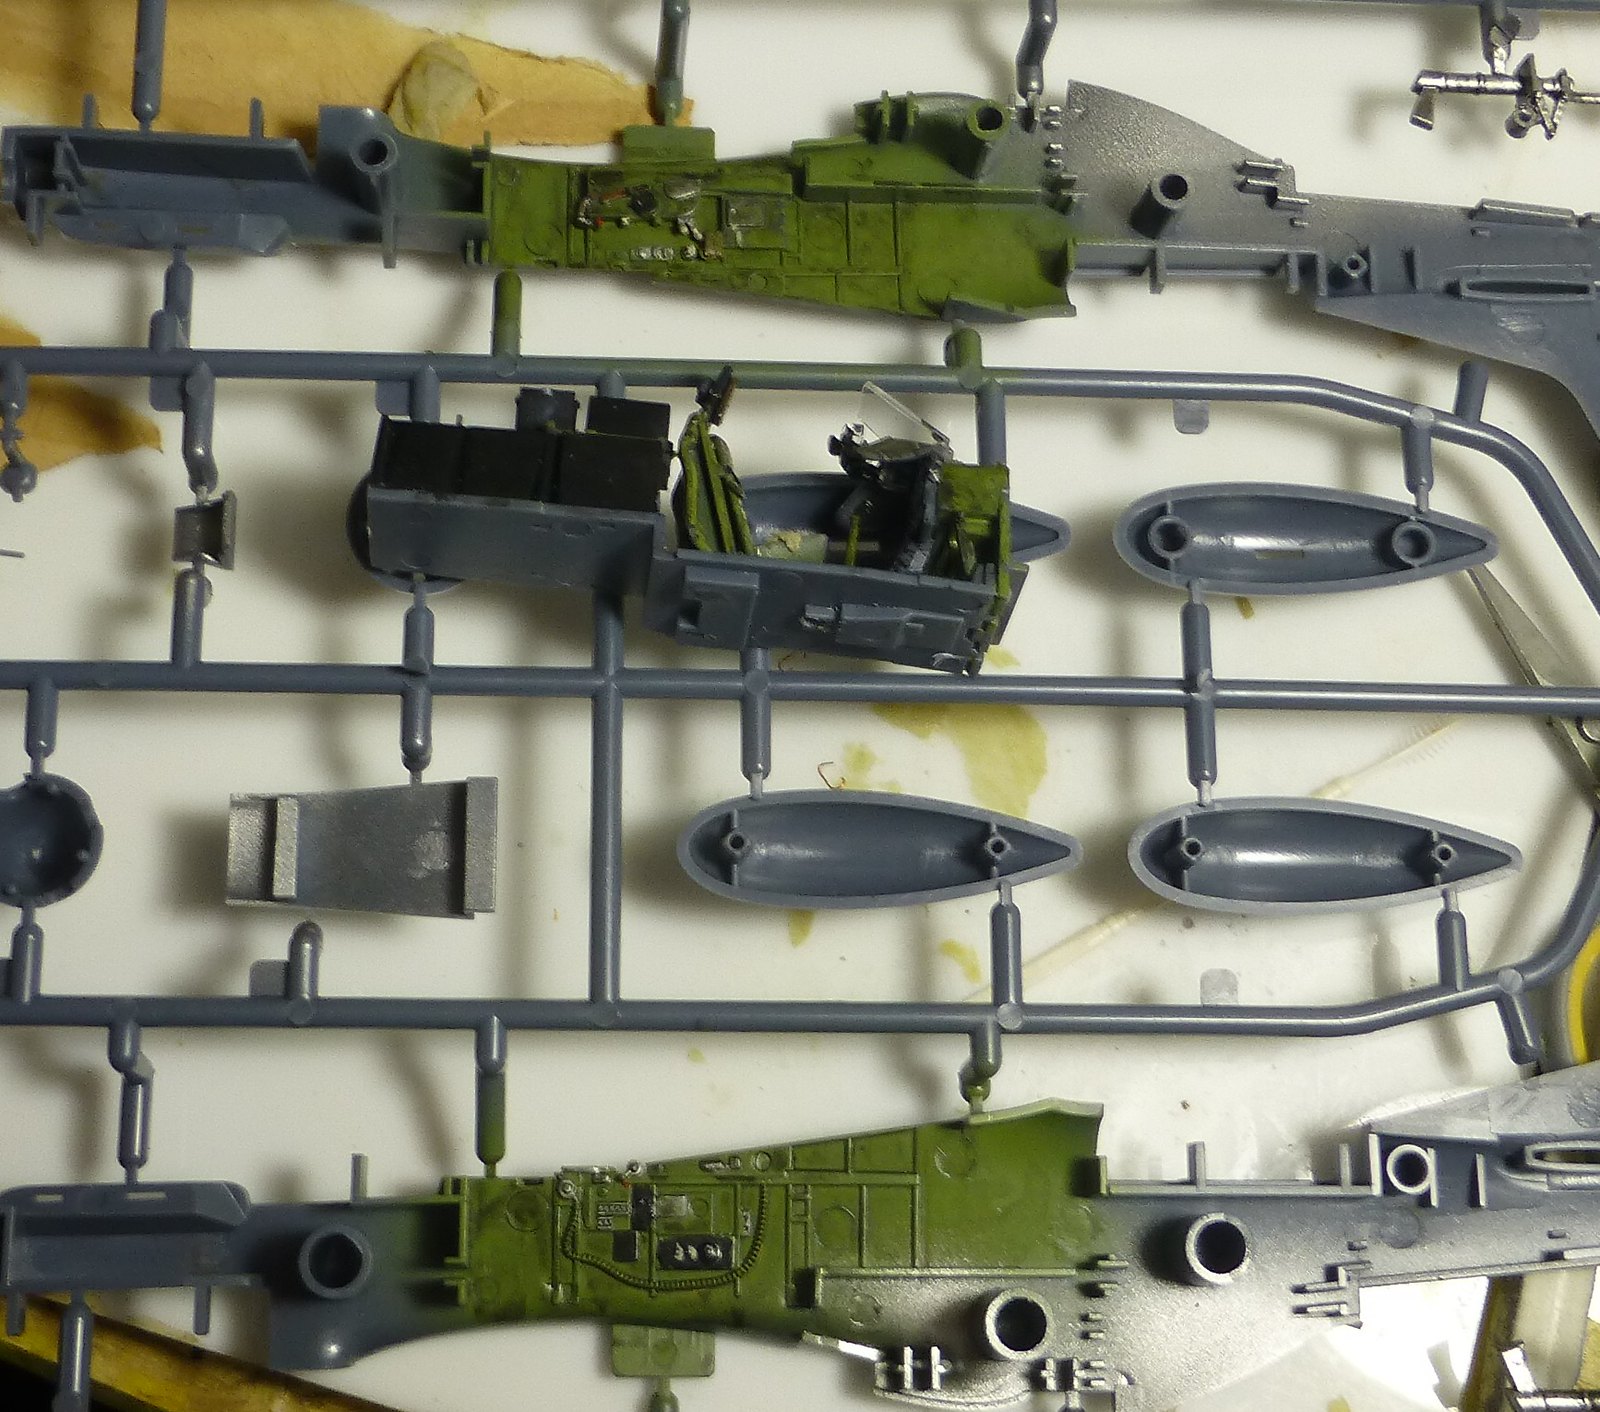
This is an odd kit and it has its own drummer. In theory it's made to be assembled without glue - hence tight fight and big attachment points. Think Bandai here - this is not a simple kit at all - it has a part count over 100 - twice what the classic Tamiya P-51D has. So far the fit on the kit has been very impressive - it's tight and you have to get used to wiggling major pieces into place - but they get there. (You can see the completed fuselage in the kit pic above.)


Naturally I did the cockpit first. I have to fess up - I've never sweated cockpits. I know you're supposed to, but I don't build for the camera and I've never built an airplane that had much cockpit easily visible. But as you can see I've got one done - there's a lot of detail on the inside. (BTW - my Interior Green is almost a perfect match for AK Real Colors interior green. Figure yellow oxide, a bit of carbon black, some permanent green and a tad of white. All done in Golden High Flow - my standard paint.) The wash is done with Iwata Com.Art transparent smoke. I like Com.Art for interiors - the colors amplify detail adequately (most of which you can't see) and it leaves a nice grime that would be inside any well used fighter.


 parts by Eric Bergerud, on Flickr


 cockpit by Eric Bergerud, on Flickr


One thing that's attractive is that the modular construction is going to leave me with no major seams - just the thing for natural metal finish. As I'm pretty much confined to using non-solvent paints I'll be using Vallejo's newish Metal Color acrylics. It won't match K-Color or the best of the lacquers, but the Vallejo line is very good. Aside from that I don't want a super shine - we've got a lot of color footage of WWII P-51s & P47s in NMF and it's it's shinny but very soiled. (I've seen some museum planes that shine like glass, but that's not wartime.) So I'm hoping that the Vallejo will do just fine.


This kit - unfortunately like every P-51 kit I know of - has a sting in the tail. The P-51 was famous for it's "laminar flow" wing. (Engineers argue still about how much "laminar effect" was gained by the Mustang wing.) The idea was to have a very even wing surface. This means that all of the top wing (minus control surfaces) and most of the bottom was sprayed with a putty over a primer and then spray painted silver. This means that the panel lines are very indistinct and rivets shouldn't be there at all. The problem is that the Meng kit is new and it's got rivets galore which complicates the process greatly. I was messing around with putty but because it appears that the panel lines don't have to be eliminated, I've decided to carefully sand the rivets off - hope we can get things smooth. Eventually I will be putting on Duplicolor black lacquer primer which is "sandable" and "fillable" so I think things will work. The big question is why hasn't anyone made their P-51 kit to fit reality. Meng, Airfix and Eduard all have new P-51 kits and every one comes with fine surface detail on the wings - just what you don't want. There were no doubt some 51s that didn't get the treatment, but in WWII the number would have been very small - the putty was put on at the factory. One of the makers could have at least put in two sets of wings - one with, one without rivets. It's not like Eduard or Meng are budget brands.


 p-51wings by Eric Bergerud, on Flickr


More later.


Eric


  • Member since
    April 2019
  • From: South west, PA
Posted by Tomcat on Tuesday, October 13, 2020 12:51 PM

Made quite a bit of progress on the 262. Here's the cockpit together...

This kit had a lot of fit issues. It took a lot of sanding, filling and filing...

After all that, here it is primed ready for paint...

Next will be the paint. I will be using AK real color RLM 76/81/82.

Here I applied the RLM 76. This is supposed to be a "late War" version that is quite a bit more green than blue...

Next the RLM 82 is applied and masked for the splinter pattern on the wings and upper fuselage...

Now applying the RLM 81 green...

now to add the (gulp), mottled camo...

A few more details to paint then it gets glossed and onto decals.

Mark aka Tomcat

On the workbench: Monogram 1/24 '69 Pontiac GTO and a Monogram 1/67 (box scale) B-26 Invader

  • Member since
    September 2003
  • From: AandF in the Badger State
Posted by checkmateking02 on Tuesday, October 13, 2020 7:23 PM

Good work on the cockpit, Eric.  Looks great!

Thanks for the lesson on the Mustang's wings.  Information there I hadn't heard of before.


  • Member since
    September 2003
  • From: AandF in the Badger State
Posted by checkmateking02 on Tuesday, October 13, 2020 7:28 PM

Looking good, Mark!  Great colors; something you don't see much of.  Nice work with the mottling.


  • Member since
    March 2017
Posted by Armor_Aficionado on Thursday, October 15, 2020 3:27 PM

Well, I FINALLY got under way with my M-36 Jackson.  A late start, but I'll definitely finish it before the end of the year:


  • Member since
    September 2003
  • From: AandF in the Badger State
Posted by checkmateking02 on Thursday, October 15, 2020 10:48 PM

Very good, AA.  And don't worry about finishing; take as long as you need to complete it.


JOIN OUR COMMUNITY!

Our community is FREE to join. To participate you must either login or register for an account.

SEARCH FORUMS
FREE NEWSLETTER
By signing up you may also receive reader surveys and occasional special offers. We do not sell, rent or trade our email lists. View our Privacy Policy.