SEARCH FINESCALE.COM

Enter keywords or a search phrase below:

Ships of the German Flag GB 2020

27736 views
502 replies
1 rating 2 rating 3 rating 4 rating 5 rating
  • Member since
    August 2020
  • From: Lakes Entrance, Victoria, Australia.
Posted by Dodgy on Sunday, March 28, 2021 6:55 PM

Lot of work there Bish. Looking great. What type of paints are you planning to use? I recently purchased the Das Werk 1/72 WWI U-Boat. Looks like a much simpler build than what you have undertaken.

I long to live in a world where chickens can cross the road without having their motives questioned

  • Member since
    August 2020
  • From: Lakes Entrance, Victoria, Australia.
Posted by Dodgy on Sunday, March 28, 2021 6:51 PM

Good work on the fiddly bits Steve. What's the issue with your hands? I have a problem with whats called 'essential tremor', or 'familial tremor'. Its a fair bugger. Incidentally, I notice you are in Tempe Arizona. I used to have a female pen friend there in the late 60's. Really nice girl and I still think of her ocassionally.

I long to live in a world where chickens can cross the road without having their motives questioned

  • Member since
    December 2002
  • From: Bury St Edmunds, Suffolk, England
Posted by Bish on Sunday, March 28, 2021 3:17 PM

So, about 11 days ago i said i would be starting on the oil canning that weekend. Didn't quite work out like that. I spent the best part of a week, starting at the front and going along one side and then repeating on the other, blending in the edges of the PE and cleaning up where i had filled flood holes and other bits. Going the check pieces was tricky as it mean filling PE and trying not to lose rivet detail. But it feels and loks like it has paid off and i think its created an oil canning effect at the same time.

Still need to fix the 2 drain holes at the front.

The PE sections above the saddle tanks were removed and re-fitted. These stuck out to much so i cleaned and filed down the plastic creating a shelfe for the PE to sit into making it flush. I also removed all of the rib detail and replaced it with thicker sheet styrene. I had used the thinnest one i had, but this was just not strong enough and kept coming away. So i recut and replaced all of the ribs and its holding fine now.

And then on Wed i finally got to the oil canning. Its taking longer then i thought, the pic below is after 3 nights. I am doing one section atb a time, running the curved blade down it and then useing small round sanding sticks to clean it up and get a nice curve. At first i could not see the effect, and you can't really see it in the pic, but when i turne my bench light off, the shadow create by the room light showed off the curves and i think its working out well.

I have managed to get these done with 1 blade but its starting to dull now so will ahve to replace it.

As well as the drain holes at the front, i also need to fix these at the bow underneath. These are both on the starboard side, the port side is fine.

And i also have the inside of the tower painted. My referance said the inside of the 552's tower was either black or dark grey. There is one pic were you can see the inside of the tower as well as the railing around the rear and the wave deflector part way up the tower. We know the deflector is black on top, and to my eye this looke to be the same as the tower and railings, so i opted for black. I have also given it a gloss coat prior to some light weathering.

My main focus with this now is to finish the oil canning. But i do need to get on with my 262 as well as a Stuka for the CAS GB. So i plan on working on those 2 and spend about 30mins per evening doing the oil canning. Hopefully by the time the aircraft are down, the hull should be ready for the final touches.


I am a Norfolk man and i glory in being so


On the bench: Airfix 1/72nd Harrier GR.3/Fujimi 1/72nd Ju 87D-3

  • Member since
    July 2014
Posted by modelcrazy on Thursday, March 25, 2021 6:00 PM

That's looking nice Steve 

Steve

Building a kit from your stash is like cutting a head off a Hydra, two more take it's place.


http://www.spamodeler.com/forum/

  • Member since
    July 2010
  • From: Tempe AZ
Posted by docidle on Thursday, March 25, 2021 5:29 PM

Thanks for checking in one and all!

Just a really small update. Haven't been at the bench lately, my hands are giving me fits again.

This just shows the clean up, putting and repriming on the center prop housing.

Enjoy,

Steve

Sorry, this one is a bit out of focus


  • Member since
    August 2020
  • From: Lakes Entrance, Victoria, Australia.
Posted by Dodgy on Tuesday, March 23, 2021 12:41 AM

Ta fellas

I long to live in a world where chickens can cross the road without having their motives questioned

  • Member since
    December 2002
  • From: Bury St Edmunds, Suffolk, England
Posted by Bish on Monday, March 22, 2021 3:14 PM

Looking good there Dodgy.

I am a Norfolk man and i glory in being so


On the bench: Airfix 1/72nd Harrier GR.3/Fujimi 1/72nd Ju 87D-3

  • Member since
    July 2014
Posted by modelcrazy on Monday, March 22, 2021 8:01 AM

Looking great Dodgy!

Steve

Building a kit from your stash is like cutting a head off a Hydra, two more take it's place.


http://www.spamodeler.com/forum/

  • Member since
    August 2020
  • From: Lakes Entrance, Victoria, Australia.
Posted by Dodgy on Sunday, March 21, 2021 7:58 PM

I long to live in a world where chickens can cross the road without having their motives questioned

  • Member since
    August 2020
  • From: Lakes Entrance, Victoria, Australia.
Posted by Dodgy on Sunday, March 21, 2021 7:56 PM

I long to live in a world where chickens can cross the road without having their motives questioned

  • Member since
    August 2020
  • From: Lakes Entrance, Victoria, Australia.
Posted by Dodgy on Sunday, March 21, 2021 7:54 PM

I long to live in a world where chickens can cross the road without having their motives questioned

  • Member since
    August 2020
  • From: Lakes Entrance, Victoria, Australia.
Posted by Dodgy on Sunday, March 21, 2021 7:53 PM

Some updates on my progress. Finally in primer, but still have some cleaning up to do.

I long to live in a world where chickens can cross the road without having their motives questioned

  • Member since
    July 2014
Posted by modelcrazy on Wednesday, March 17, 2021 9:39 AM

Bish

Good news, my number 12's arrived yesterday and they are the real deal. Don't know how this guy got hold of them or how he does them for that price, but i am not going to complain. So this weeked i intend to mask off the rivets and try my hand at oil canning.

Thats for the offers guys.


Good on ya mate. If you ever need anything and can't get it, just drop yer ole mate accross the pond an SOS. I'll drop what I'm doing and get fer ya.

Steve

Building a kit from your stash is like cutting a head off a Hydra, two more take it's place.


http://www.spamodeler.com/forum/

  • Member since
    December 2002
  • From: Bury St Edmunds, Suffolk, England
Posted by Bish on Wednesday, March 17, 2021 3:50 AM

Good news, my number 12's arrived yesterday and they are the real deal. Don't know how this guy got hold of them or how he does them for that price, but i am not going to complain. So this weeked i intend to mask off the rivets and try my hand at oil canning.

Thats for the offers guys.

I am a Norfolk man and i glory in being so


On the bench: Airfix 1/72nd Harrier GR.3/Fujimi 1/72nd Ju 87D-3

  • Member since
    August 2020
  • From: Lakes Entrance, Victoria, Australia.
Posted by Dodgy on Wednesday, March 17, 2021 3:19 AM

modelcrazy


Dodgy

Let me know if you need some number 12's and I will post some airmail.


Ye no problem mate, just let us know and they'll be in the post toot sweet. No charge from me or any of us I would presume.

Nice work on that PE! That's a tough area to do. All that grinding on the inside and filling and matching. But once it's done it looks superb. Nice idea with the black interior. I don't remember exactly what I did for the type IX but if memory serves I made a box out of cardboard to act as the pressure hull. 


Yeah mate. Definately no charge from me. Incidentally, I have just purchased the Das Werk 1/72 WWI U-Boat. One of the subjects is U-9 skippered by Otto Weddingen and the German Govt. struck a small medallion for him and his boat. As I have one of those medallions in my militaria collection I really wanted to build this kit.

Great work as always Bish. I learn so much from you blokes.

I long to live in a world where chickens can cross the road without having their motives questioned

  • Member since
    December 2002
  • From: Bury St Edmunds, Suffolk, England
Posted by Bish on Monday, March 15, 2021 2:17 PM

Thanks guys, and thank you for the offer guys. Thats why i love this place.

Still a bit to do cleaning up the seams. I am going to add some carboard tubing to simulate the top of the pressure hull, and build a small box on top for the bottom of the conning tower. Just taking my time with it.

I am a Norfolk man and i glory in being so


On the bench: Airfix 1/72nd Harrier GR.3/Fujimi 1/72nd Ju 87D-3

  • Member since
    July 2014
Posted by modelcrazy on Monday, March 15, 2021 12:05 PM

Dodgy

Let me know if you need some number 12's and I will post some airmail.

Ye no problem mate, just let us know and they'll be in the post toot sweet. No charge from me or any of us I would presume.

Nice work on that PE! That's a tough area to do. All that grinding on the inside and filling and matching. But once it's done it looks superb. Nice idea with the black interior. I don't remember exactly what I did for the type IX but if memory serves I made a box out of cardboard to act as the pressure hull. 

Steve

Building a kit from your stash is like cutting a head off a Hydra, two more take it's place.


http://www.spamodeler.com/forum/

  • Member since
    August 2020
  • From: Lakes Entrance, Victoria, Australia.
Posted by Dodgy on Sunday, March 14, 2021 8:10 PM

Lots of work Bish, but looking good. Let me know if you need some number 12's and I will post some airmail.

I long to live in a world where chickens can cross the road without having their motives questioned

  • Member since
    December 2002
  • From: Bury St Edmunds, Suffolk, England
Posted by Bish on Sunday, March 14, 2021 4:43 PM

Thanks Chad. No ide, i have been searching since about Nov. I ordered a couple of packs back in Jan as they said they would ship once they come in, but i am still waiting. There are issues for items coming in and out of Europe, but that only starting at new year and these should not be affected coming from the US.

I am a Norfolk man and i glory in being so


On the bench: Airfix 1/72nd Harrier GR.3/Fujimi 1/72nd Ju 87D-3

  • Member since
    April 2015
Posted by Mopar Madness on Sunday, March 14, 2021 3:33 PM

There's a lot of work done right there Bish.  Why the lack of #12 blades over there?

Chad

God, Family, Models...

At the plate: 1/48 Airfix Bf109 & 1/35 Tamiya Famo

On deck: Who knows!

  • Member since
    December 2002
  • From: Bury St Edmunds, Suffolk, England
Posted by Bish on Sunday, March 14, 2021 1:53 PM

Been working on the hull the last couple of weeks and got the starboard side cheek piece in place. Theres a lot of work to get these fitted. Also added the torpedo doors.

The doors are actually a fraction smaller than the opening, so they need somthing to old them in place. I use some styrene strip. Also aded the front of the torpeo tubes. These won't be seen byt they do with with strengtheing the hull.

I also added styrene inside the hull to replicate the saddle tanks. I removethe one i did on the port side and re-did it as it was to wide.

I then spraye black primer on the inside where it migt be seen through the many openings.

And primed over the PE areas so i can see what more work needs to be done to blend them in.

There is still some work to do there, but i will do that after finally getting the hull together. This should make it easier to handle without damaging the rib's i added. And putting the hull together is what i did next. 3 months work, but finally got to this stage.

So thats where i am at. Goung to finish of those PE areas and tidy up the other areas. Also going to mask the rivets prior to oil canning. I have been trying to get some X-Acto No 12 blades for a couple of months but no one seems to have them. Finally found a UK based e-bay seller with them, though i am dubious as he h=is sellign 2 packs of 5 for the same price that one pack usually sells for. They are meant to be here Thurs, so will see what i get. But hopefully i can finish off all that and get to ad the rest of the hull parts.


I am a Norfolk man and i glory in being so


On the bench: Airfix 1/72nd Harrier GR.3/Fujimi 1/72nd Ju 87D-3

  • Member since
    September 2013
  • From: San Antonio, Texas
Posted by Marcus McBean on Sunday, February 28, 2021 3:30 PM

Steve,

Thank you for the kind remark.  She did come out fairly nicely and looks mighty fine sitting in the den.  After seven years at this I think I maybe getting the hang of things..Na.

Thanks for looking in.

Marcus Beer

  • Member since
    April 2015
Posted by Mopar Madness on Friday, February 26, 2021 10:02 AM

Steve - Really nice job on those props!

Chad

God, Family, Models...

At the plate: 1/48 Airfix Bf109 & 1/35 Tamiya Famo

On deck: Who knows!

  • Member since
    December 2002
  • From: Bury St Edmunds, Suffolk, England
Posted by Bish on Friday, February 26, 2021 9:00 AM

Looks good Steve. It did worry me sliceing up that centre prop, as you say they are not cheap. But it was easier than i expected.

I am a Norfolk man and i glory in being so


On the bench: Airfix 1/72nd Harrier GR.3/Fujimi 1/72nd Ju 87D-3

  • Member since
    July 2014
Posted by modelcrazy on Friday, February 26, 2021 8:39 AM

Nice job on the props Steve. Those kit props have a ridiculous pitch on them.

Steve

Building a kit from your stash is like cutting a head off a Hydra, two more take it's place.


http://www.spamodeler.com/forum/

  • Member since
    August 2020
  • From: Lakes Entrance, Victoria, Australia.
Posted by Dodgy on Friday, February 26, 2021 3:25 AM

Do, you're doing fine mate. Those prop differences are amazing, and the centre one is looking sweet!

I long to live in a world where chickens can cross the road without having their motives questioned

  • Member since
    July 2010
  • From: Tempe AZ
Posted by docidle on Thursday, February 25, 2021 8:22 PM

Dodgy,

Very nice work on the U-Boat! I'm going to have to catch up here.

Steve


  • Member since
    July 2010
  • From: Tempe AZ
Posted by docidle on Thursday, February 25, 2021 8:20 PM

Marcus McBean

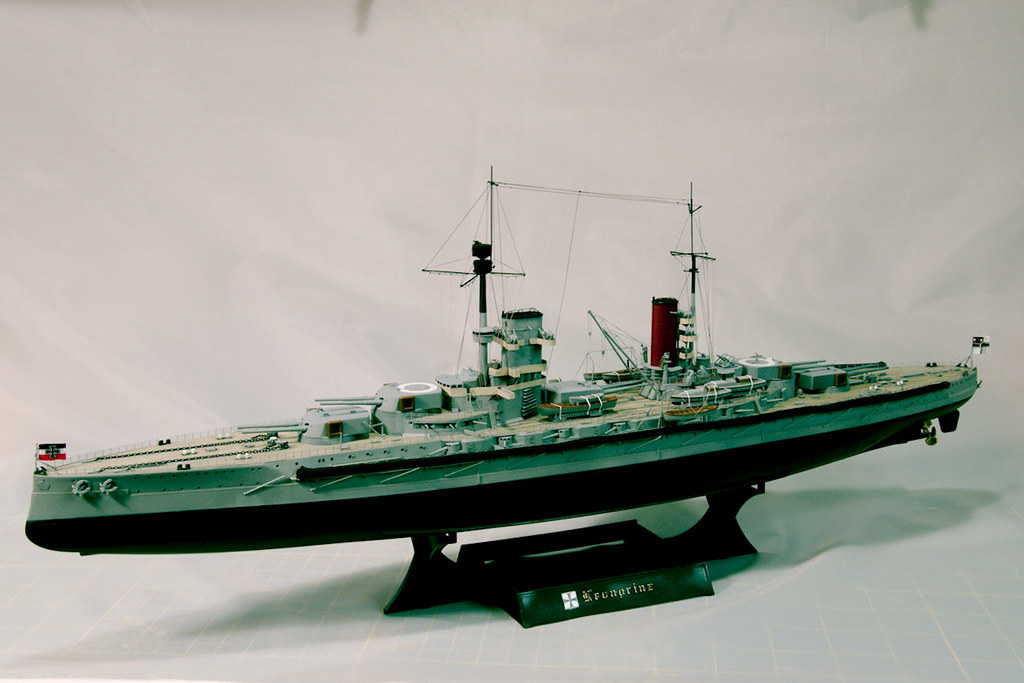
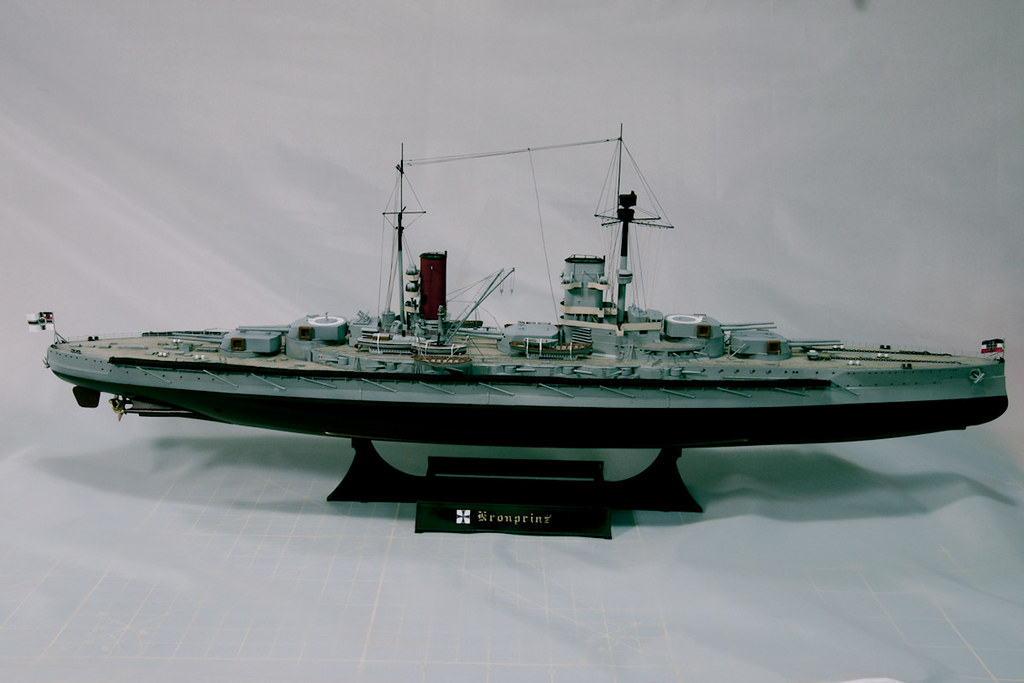
Well everyone I am calling my SMS Kronprinz build completed.  She has her errors but I am satisfied with her looks.  This was a fun build, not to many weird issues to correct.  Didn't do any weathering as she will be on a display stand I would like her to look new, as built.

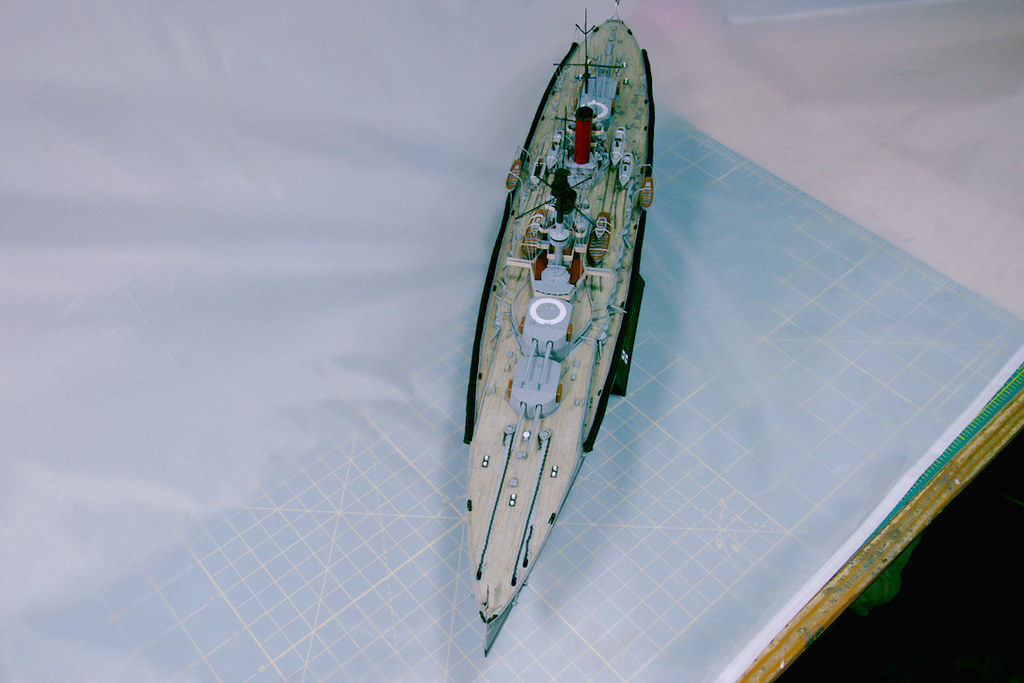
The torpedo nets are really parachute cord.  The child's round shoe laces I order were still to wide and tall.  The cord has a seperate center that unravel when cut so I had to use a lighter to melt the cords so they stay together.  I wish I had a better method to fuse them together so there wouldn't be those lumps at the ends.  They did look a lot worst but I trimmed them back as much as possible.  I can live with it.

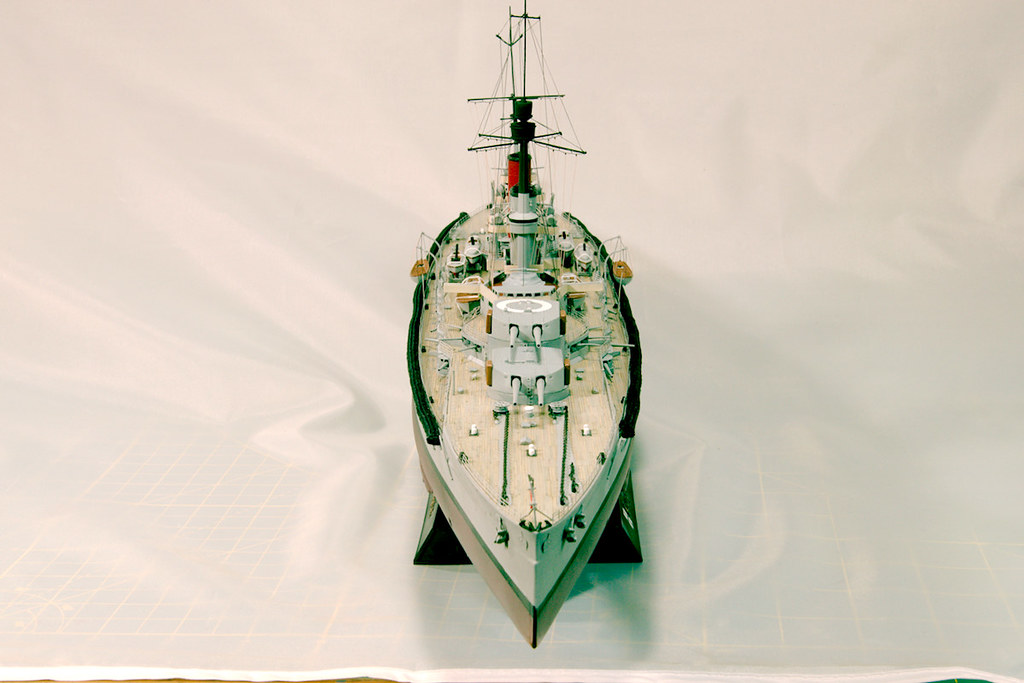
Kronprinz has two rudders but I misplaced one of them and couldn't find it anywhere so I had to go with the one. Of course as soon as I get the single rudder installed I found the lost rudder in the bottom of a box for another build I started on.  By that time I had to much of the upper works installed to be turning her upside down to change it back.  So one rudder will have to do.

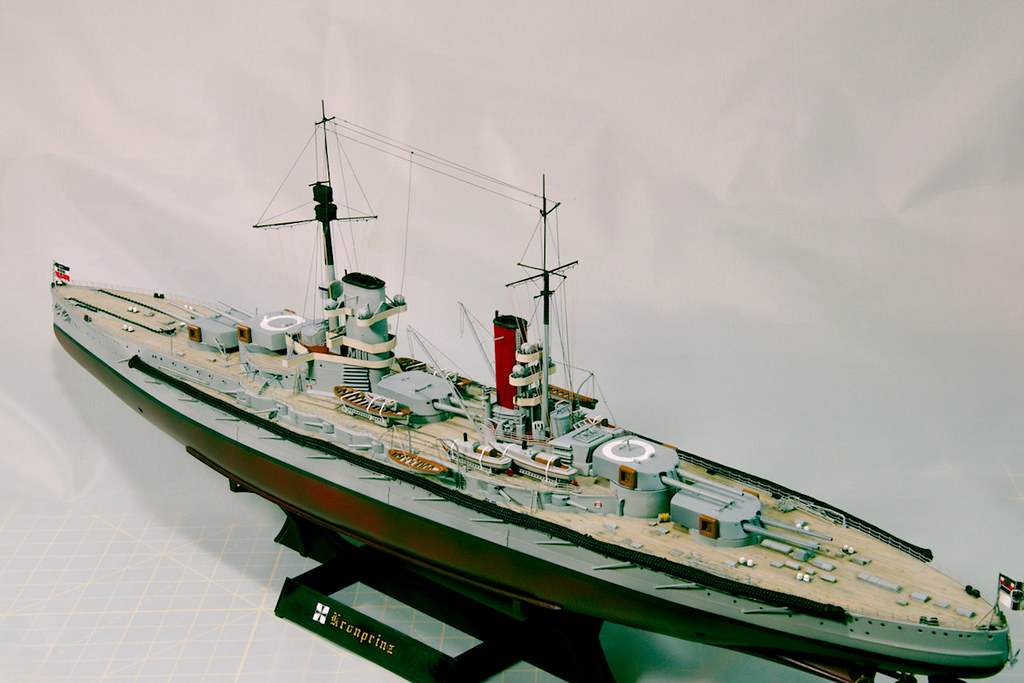
I bend the main mast during filming, didn't notice it until posting the photos.  Moved it back before putting her on the shelf.

Thats all folks.  Like I said this was one of my more enjoyable builds, but I am ready to move on to another.

MarcusBeer


Marcus,

Dad gum that is one fine model sir! It is absolutely beautiful. One of these days I'll have to pull mine out and hopefully it will look as nice.

Steve


  • Member since
    July 2010
  • From: Tempe AZ
Posted by docidle on Thursday, February 25, 2021 8:17 PM

Alright, here's a small update as usual.

I finally got up the nerve to get the center prop installed. The replacement props are 3D printed and they look great. But know that for the center prop you're going to have to do some surgery and brother, they ain't cheap! The main thing to remember is measure, measure and then measure again before surgery. The old addage about measuring twice, cut once is great advice. I only ended up cussing about 40 times or so, so not bad.

The first picture shows the difference between the kit supplied props and the 3D props. The kit props on the top, are of the wrong shape big time.

And here's a side by side view with the kit props on the left.

The center prop needs to connect to the center rudder as shone here.


So it's time to break out the calipers. This is the measure twice and cuss multiple times. Because the 3D printed props are all have the tail. Also, it's important to note that one of the props is the reverse of the other two. This is the way it supposed to be, you just have to remember that the center and port prop are the same while the starboard prop is the different one. This picture also shows the suregery on the tail.

I cut the tail off a bit short so that I could file the difference as needed. It's always easier to remove than to add. In this case impossible except to buy a new set.

After numerous dry fittings and filing I got to here. As you can see, there is still clean up to do, but I think that it came out successfully.

After cleaning up the mess, I'll install the two outer rudders and maybe get some paint on the hull. Now it's back to the fore and aft decks and bridge.

Steve


  • Member since
    August 2020
  • From: Lakes Entrance, Victoria, Australia.
Posted by Dodgy on Wednesday, February 24, 2021 4:57 PM

Bish

Thanks Dodgy. The U-99 was really a trial run for this,  especially as far as the painting goes. But i had no idea how much of a step up this would be compared to that. 9 weeks of work on this and i don't even have the hull together. I can see why it takes some people a year or more to build one.


Crikey Bish. That is a real step up. Gives me an indication of what I can expect for the Das Werk U-9.

I long to live in a world where chickens can cross the road without having their motives questioned

JOIN OUR COMMUNITY!

Our community is FREE to join. To participate you must either login or register for an account.

SEARCH FORUMS
FREE NEWSLETTER
By signing up you may also receive reader surveys and occasional special offers. We do not sell, rent or trade our email lists. View our Privacy Policy.