SEARCH FINESCALE.COM

Enter keywords or a search phrase below:

1/48 Bandai BMW R75 w side car Finished!!

10164 views
98 replies
1 rating 2 rating 3 rating 4 rating 5 rating
  • Member since
    December 2002
  • From: Bury St Edmunds, Suffolk, England
Posted by Bish on Saturday, August 23, 2014 8:11 AM

Nice work there Joe. I have a couple of the more recent 35th Tamiya bike kits, not built any yet but they do look nice.

I am a Norfolk man and i glory in being so


On the bench: Airfix 1/72nd Harrier GR.3/Fujimi 1/72nd Ju 87D-3

  • Member since
    March 2012
  • From: Corpus Christi, Tx
Posted by mustang1989 on Saturday, August 23, 2014 5:29 PM

Hell break em out!!! I shot a coat of gloss coat on this morning and just got through with the wash. A drying overnight and I'll move on to masking the wheels off so I can paint the tires.


 Forum | Modelers Social Club Forum (proboards.com) 

  • Member since
    March 2012
  • From: Corpus Christi, Tx
Posted by mustang1989 on Tuesday, August 26, 2014 5:05 AM

Masked off the wheels and painted the tires this morning. Slow progress but getting there. Pics later.


 Forum | Modelers Social Club Forum (proboards.com) 

  • Member since
    March 2012
  • From: Corpus Christi, Tx
Posted by mustang1989 on Thursday, August 28, 2014 5:16 AM

Finished painting the two wheel/ tire assys for the solo part of the bike, painted some of the detail on the bike frame and started on the side car. The side car is gonna be a LOAD of fun with that seam running right down the middle. Another opportunity to bone up on my seam filling skills......

Bish I'll use any pics you or anyone else can round up. Museum pics of this thing would be welcome also as I have nothing but B&W stuff. Thanks for any help you guys can be.


 Forum | Modelers Social Club Forum (proboards.com) 

  • Member since
    August 2009
  • From: MOAB, UTAH
Posted by JOE RIX on Thursday, August 28, 2014 7:43 AM

Looks terrific Joe. Definitely some sweet action going on there. As far as the sidecar seam goes do not fret as you will nail it. I know that you will. I'll keep my eyes peeled for any reference photos.

"Not only do I not know what's going on, I wouldn't know what to do about it if I did". George Carlin

  • Member since
    December 2002
  • From: Bury St Edmunds, Suffolk, England
Posted by Bish on Thursday, August 28, 2014 7:49 AM

Joe, you did mention that before and I completely forgot, sorry. I don't have any myself, but I did a google search and found a mix of pics.

I hope this works. There is a few restored bikes on here, many with the side car.

www.google.co.uk/search

I am a Norfolk man and i glory in being so


On the bench: Airfix 1/72nd Harrier GR.3/Fujimi 1/72nd Ju 87D-3

  • Member since
    March 2012
  • From: Corpus Christi, Tx
Posted by mustang1989 on Thursday, August 28, 2014 8:48 PM

Thanks Mr. Joe for the good word and thank you Bish for the same plus the photos. Awesome! Thanks for the color detail reference!


 Forum | Modelers Social Club Forum (proboards.com) 

  • Member since
    March 2012
  • From: Corpus Christi, Tx
Posted by mustang1989 on Friday, August 29, 2014 5:23 AM

Now I just had to ask myself: Why do these wheel/ tire assys look so friggin bland/ incomplete? Then it hit me like a ton of bricks! It's because they WERE bland!!! Forgot to paint the centers and rims!!!

I hit the centers and the wheels with a thinned down aluminum paint and then dry brushed on a super light coat of black powder for a dulled effect.

 Now that's more like it!  Big Smile


 Forum | Modelers Social Club Forum (proboards.com) 

  • Member since
    March 2012
  • From: Corpus Christi, Tx
Posted by mustang1989 on Saturday, August 30, 2014 10:04 PM

Well I finally got the frame halves together with the engine installed. This is somewhat an awkward build for me in the fact that the wheels and engine have to be installed when the frame halves are assembled. This will make the seam filling difficult for the frame halves and is why I did things unconventionally with painting first. I'll take care of the seams as there are some parts that go on that cover alot of them up and I'll have to get creative with the rest. So far I'm enjoying this build though as its something different than I normally do.

 Not to worry about the new look as though it just came out of the factory. I'll be weathering this one but am waiting a little bit longer until I make it further along in the build. Being as this is my first time building an "armor" subject , I'm still weighing my options on the correct amount of fading and dirt.


 Forum | Modelers Social Club Forum (proboards.com) 

  • Member since
    April 2013
Posted by SchattenSpartan on Sunday, August 31, 2014 9:29 AM

Nice looking progress, Joe! I'm sure you can get that seam on the sidecar sorted out!

  • Member since
    March 2012
  • From: Corpus Christi, Tx
Posted by mustang1989 on Monday, September 1, 2014 3:57 AM

Thanks Clemens! Yeah that seam on the side car is gonna be tough, do-able, but tough.


 Forum | Modelers Social Club Forum (proboards.com) 

  • Member since
    August 2009
  • From: MOAB, UTAH
Posted by JOE RIX on Monday, September 1, 2014 10:41 AM

You are nailing it Joe. Great looking work. I'm looking forward to the weathering you are going to do on it.

"Not only do I not know what's going on, I wouldn't know what to do about it if I did". George Carlin

  • Member since
    March 2012
  • From: Corpus Christi, Tx
Posted by mustang1989 on Tuesday, September 2, 2014 9:48 AM

I appreciate the vote of confidence Joe!


 Forum | Modelers Social Club Forum (proboards.com) 

  • Member since
    March 2012
  • From: Corpus Christi, Tx
Posted by mustang1989 on Thursday, September 4, 2014 8:11 AM

Well I'm well underway with the solo unit and have applied washes and decals. The seats have some sanding dust from the fingertips but just a little clean up and that'll be gone. I had the exhaust painted the wrong color (rust) and then referred to my references and found that the exhaust has a dark iron look to it so I corrected that. Will be fading the paint and hiding some of the seams to clean that mess up as well as dirtying things up a bit on the engine and saddle box.

The latest:


 Forum | Modelers Social Club Forum (proboards.com) 

  • Member since
    April 2013
Posted by SchattenSpartan on Thursday, September 4, 2014 1:05 PM

She's really starting to take shape now! Looking great, buddy!

  • Member since
    March 2012
  • From: Corpus Christi, Tx
Posted by mustang1989 on Thursday, September 4, 2014 3:26 PM

Thanks Clemens. I've got a couple of things in mind on how to weather this puppy up to keep it from looking like a plastic toy. I was going to do it today but had a doctors appt. Maybe tomorrow morning.


 Forum | Modelers Social Club Forum (proboards.com) 

  • Member since
    August 2009
  • From: MOAB, UTAH
Posted by JOE RIX on Thursday, September 4, 2014 8:05 PM

OOOOOHH, Me liking. She be coming along splendidly Joe.

"Not only do I not know what's going on, I wouldn't know what to do about it if I did". George Carlin

  • Member since
    December 2002
  • From: Bury St Edmunds, Suffolk, England
Posted by Bish on Friday, September 5, 2014 5:09 AM

That's looking really nice.

I am a Norfolk man and i glory in being so


On the bench: Airfix 1/72nd Harrier GR.3/Fujimi 1/72nd Ju 87D-3

  • Member since
    March 2012
  • From: Corpus Christi, Tx
Posted by mustang1989 on Friday, September 5, 2014 5:23 AM

Thanks Joe and Bish. I applied a flat coat to what I have so far and spotted that scale 4 or 5 inch thick up-armored rear license plate frame. Will be taking that back off and thinning that down..........crap! There aint nuthin' like backwards building. lol


 Forum | Modelers Social Club Forum (proboards.com) 

  • Member since
    March 2012
  • From: Corpus Christi, Tx
Posted by mustang1989 on Friday, September 5, 2014 11:26 AM

This pic was taken with my new Nikon S9700 Camera. I applied the faded flat effect and will start shining the contact points of the seats up and touching up other areas that need it.


 Forum | Modelers Social Club Forum (proboards.com) 

  • Member since
    August 2009
  • From: MOAB, UTAH
Posted by JOE RIX on Friday, September 5, 2014 9:39 PM

The bike, well yeah, it looks pretty dad gum good. But, with that flashy fancy new camera it is fabulous.

"Not only do I not know what's going on, I wouldn't know what to do about it if I did". George Carlin

  • Member since
    March 2012
  • From: Corpus Christi, Tx
Posted by mustang1989 on Saturday, September 6, 2014 4:49 AM

Thanks Joe! I'm really looking forward to building a Tamiya version of this motorcycle. I'm still having alot of fun with this thing but am noticing that the Tamiya kit I have is ten times more accurate in terms of scale and accuracy( the up-armored license plate and saddle bags are the main two items thus far).


 Forum | Modelers Social Club Forum (proboards.com) 

  • Member since
    March 2012
  • From: Corpus Christi, Tx
Posted by mustang1989 on Saturday, September 6, 2014 6:52 AM

Ok folks it's time for a small update. I installed the exhaust system this morning after painting it with a cocktail of darkened gray to the point that it was just almost black but not quite too dark. I drilled out the exhuast tail pipe and dry brushed some ground up charcoal and applied to the inside of the outlet for a true flat sooty appearance. I still have to do some work at the muffler/ lead pipe areas in the matter of a clean fit from pipe to muffler.

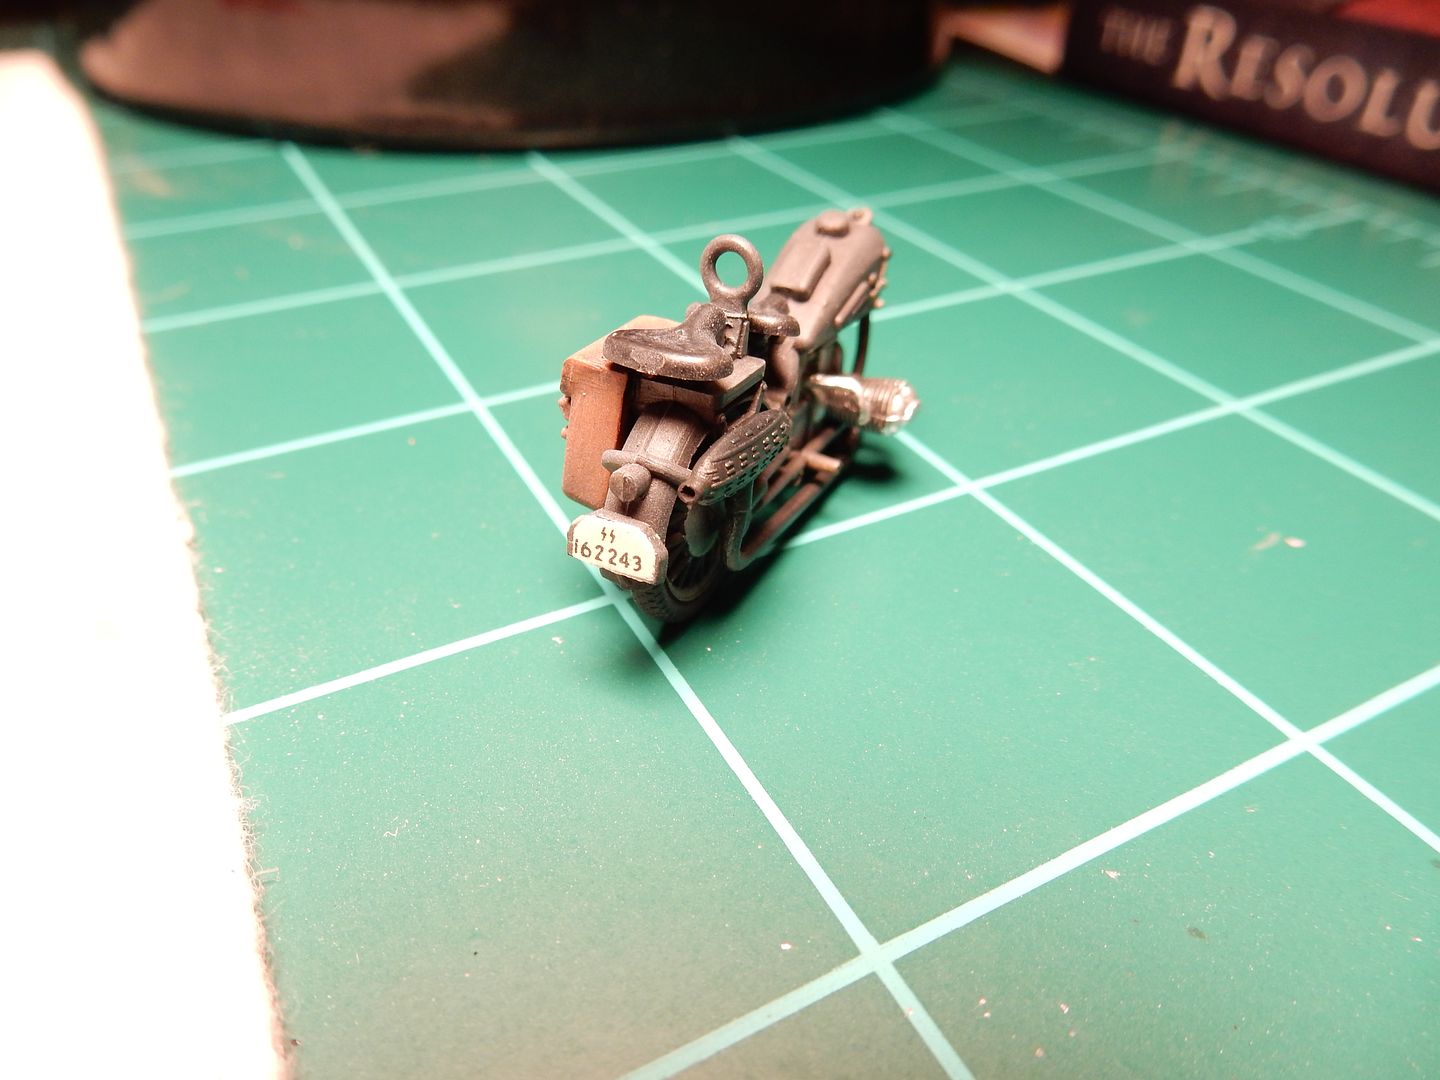
 I do have a quick question here because I don't have enough or clear enough reference to tell if that's a brake light on the rear fender or not. Was there a brake light there? If so I'll get that going as well. I'm going to find a way to hide that nasty seam line that's irritating the bejesus out of me!!!  I attempted to remove the " up-armored license plate backing" to re-work it but that thing is on there for good! Good grief! If that aint an oversight I don't know what is. Will have to distract as much as possible in other areas.

 Here's the pic of the rear of the bike:

One of the distractions I'll be working on is the engine. Here's the spark plug wires I robbed from the winding of a fuel pump relay I robbed from a warranty fuse block at the GM dealer I used to work at. (Uh oh! I don't guess posting that  I tampered with warranty turn-in parts is a good idea.........lol ) . This stuff works perfectly. Anyhow they are shaped and painted. Will trim and install later. Still learning this new camera so that the future shots won't come out so "yellow".....

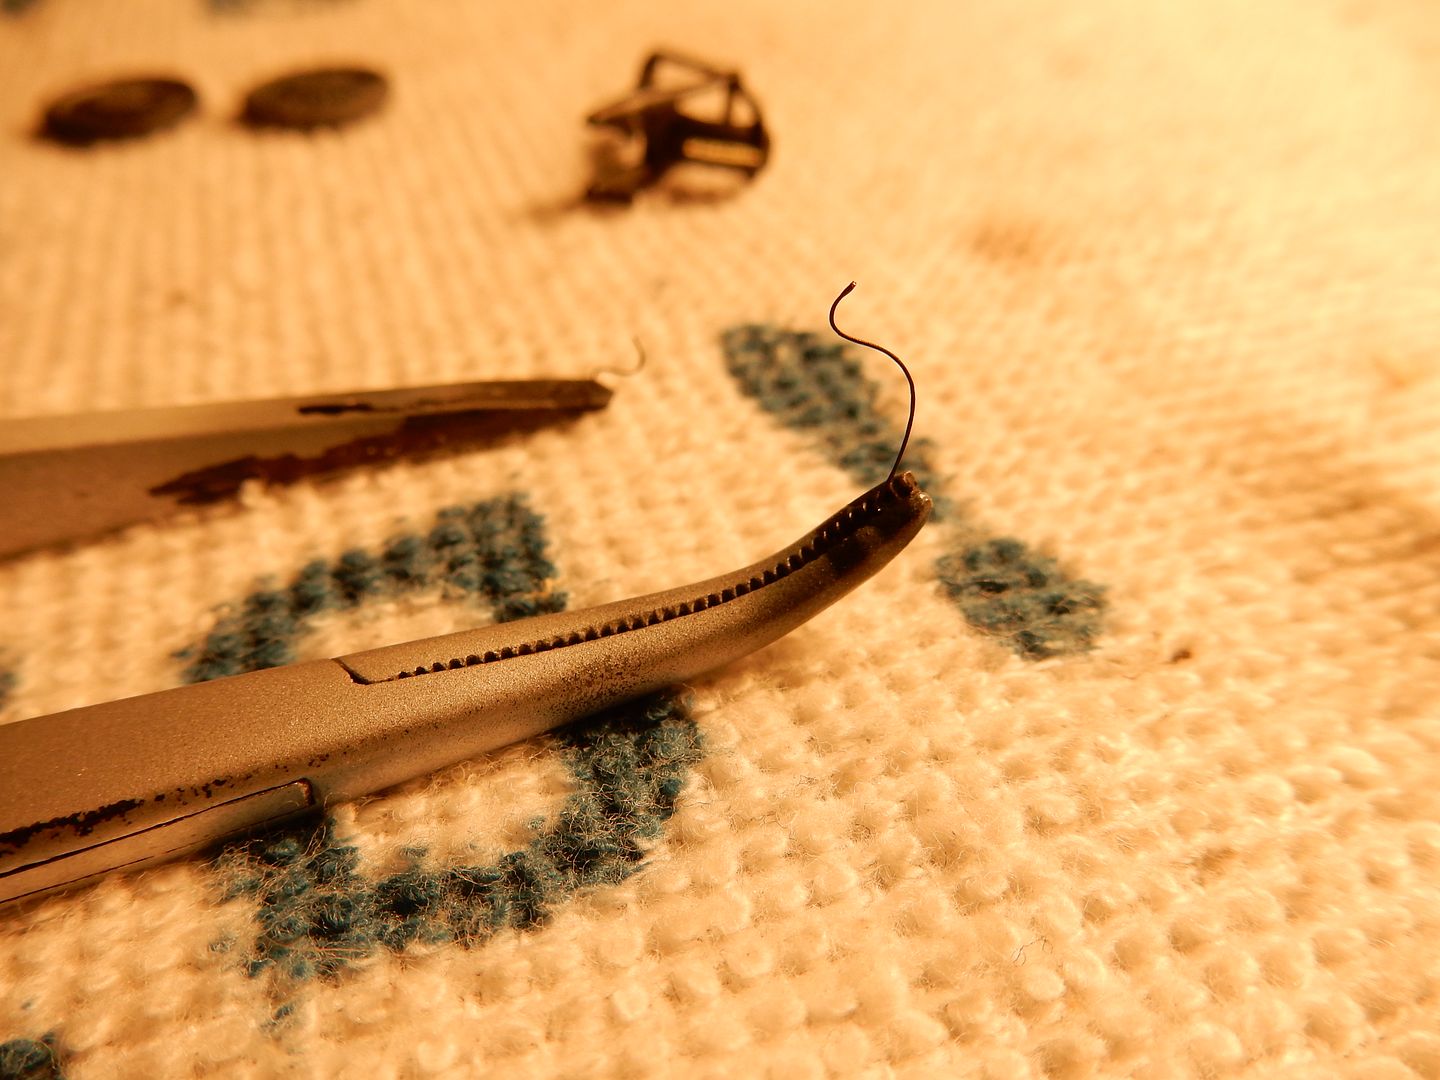
I am , however, able to take detail shots like I never could before! Big Smile

P.S. That's a two edged sword now because ALL flaws show up too! Surprise  lol  


 Forum | Modelers Social Club Forum (proboards.com) 

  • Member since
    April 2013
Posted by SchattenSpartan on Saturday, September 6, 2014 7:12 AM

Holy damn, Joe, that looks sweeet!

I hear ya about every flaw showing up. My old camera was really crap at taking detail pics but my new one excels at that, making every mess-up visible... Surprise

  • Member since
    March 2012
  • From: Corpus Christi, Tx
Posted by mustang1989 on Saturday, September 6, 2014 8:25 AM

Appreciate it Clemens! Just trying to correct some of the foul ups that I've caused along the way at this point.


 Forum | Modelers Social Club Forum (proboards.com) 

  • Member since
    December 2002
  • From: Bury St Edmunds, Suffolk, England
Posted by Bish on Saturday, September 6, 2014 8:29 AM

Some great detailing there. I know what you mean about close up pics. Every time I have taken pics of a 72nd pit I thought was perfect I then see flecks of dust that look like mountain ranges in the photo's. Very annoying.

I am a Norfolk man and i glory in being so


On the bench: Airfix 1/72nd Harrier GR.3/Fujimi 1/72nd Ju 87D-3

  • Member since
    March 2012
  • From: Corpus Christi, Tx
Posted by mustang1989 on Saturday, September 6, 2014 8:30 AM

Ha ha!!!!! I know exaclty what you mean Bish!!!! lol


 Forum | Modelers Social Club Forum (proboards.com) 

  • Member since
    March 2012
  • From: Corpus Christi, Tx
Posted by mustang1989 on Saturday, September 6, 2014 10:11 AM

 Ok folks. I've got the L/H cylinder spark plug wire installed. The relay coil wire I used is from a GM micro fuel pump relay. The idea came to me Idea this morning when I was running out of ideas for spark plug wire replication. Anyways here is a pic of the installed wire on the bike and the relay next to it.


 Forum | Modelers Social Club Forum (proboards.com) 

  • Member since
    August 2009
  • From: MOAB, UTAH
Posted by JOE RIX on Saturday, September 6, 2014 12:33 PM

Hey, that looks really good Joe. I find that one of the funner things about this hobby is finding all those odd items or things laying around the house that can become useful in model building. I spend time walking around second hand stores looking at items in that regard rather than what they were intentionally designed for.

"Not only do I not know what's going on, I wouldn't know what to do about it if I did". George Carlin

  • Member since
    March 2012
  • From: Corpus Christi, Tx
Posted by mustang1989 on Saturday, September 6, 2014 5:03 PM

Thanks Joe. In the automotive field there's alot of stuff to choose from. I get the look everytime I'm holding something of potential use and I've got that, "You know............this just might work!!!" thought going.


 Forum | Modelers Social Club Forum (proboards.com) 

JOIN OUR COMMUNITY!

Our community is FREE to join. To participate you must either login or register for an account.

SEARCH FORUMS
FREE NEWSLETTER
By signing up you may also receive reader surveys and occasional special offers. We do not sell, rent or trade our email lists. View our Privacy Policy.