Hello!
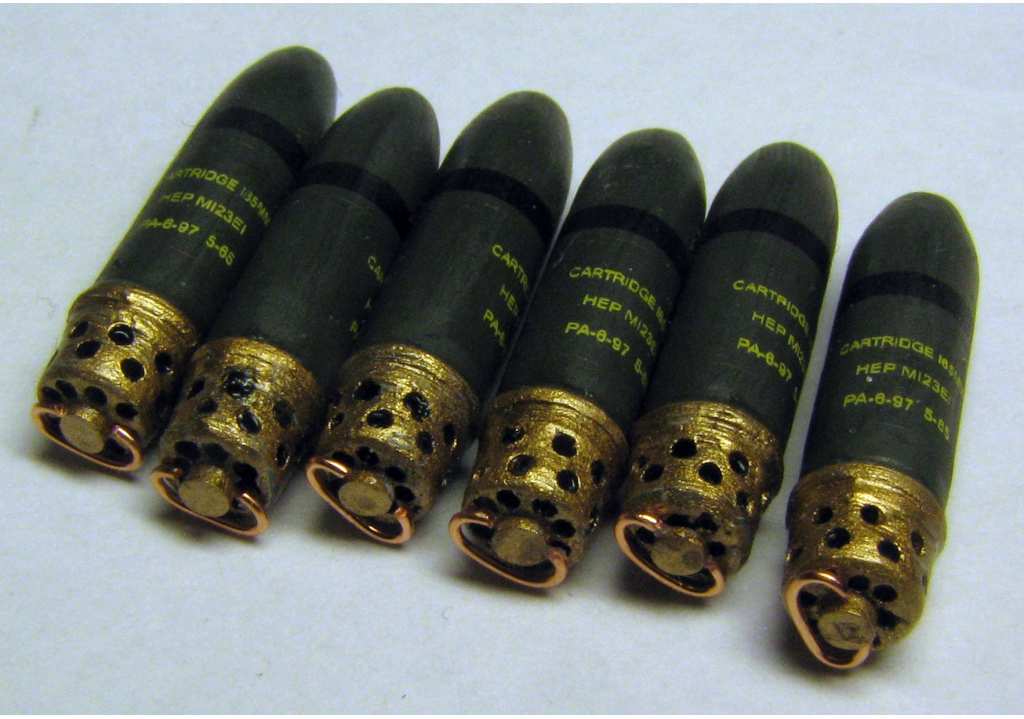
I've finished the shells for the gun of my CEV! Just for practice I've designed the decals for it and let them be printed at the Polish MeliusManu company. Shells are OD (Humbrol 66) with Brass (Humbrol 16) propellant baskets and handles made from copper wire. I had to drill the holes in the propellant baskets:
I hope you like 'em - thanks for looking and have a nice day
Paweł