SEARCH FINESCALE.COM

Enter keywords or a search phrase below:

1:35 M728 CEV Patton-Mover! WIP

26438 views
164 replies
1 rating 2 rating 3 rating 4 rating 5 rating
  • Member since
    May 2009
  • From: Poland
1:35 M728 CEV Patton-Mover! WIP
Posted by Pawel on Thursday, June 18, 2015 1:44 PM

Hello everybody!

I'm starting a new Vietnam-related model - this will be an M728 CEV - standing for Combat Engineer Vehicle. It's one of two versions of the M60 Patton tank that served in Vietnam (the other was the bridgelayer - M60 AVLB). The CEV was created by adding some engineering features to the standard M60A1 tank. It got a dozer blade, the cannon was switched to a 165mm short barreled demolition cannon, and a winch and A-frame boom were fitted to the turret to give the vehicle a 6 ton lifting capability.

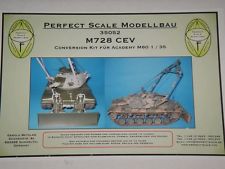
The idea for my model is to take an M60A1 kit, put the Academy dozer blade on it and then to replace the turret with the resin kit coming from a German company called Perfect Scale Models:

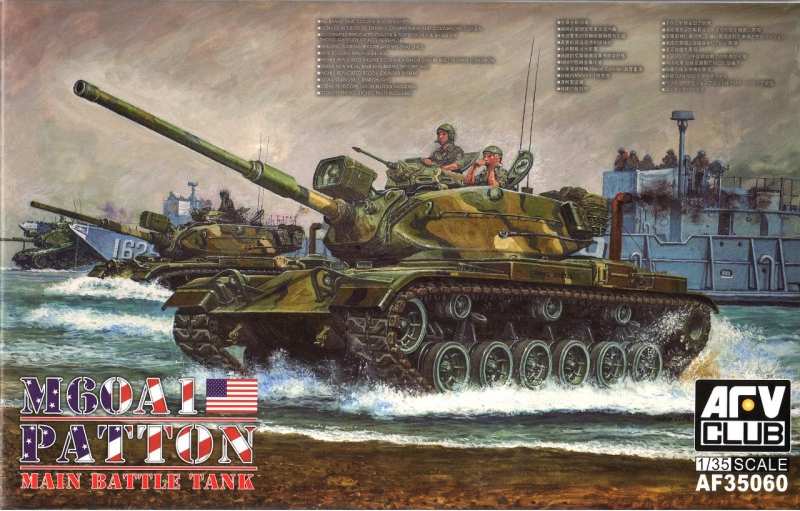
I started to work with the ESCI/Italeri kit of the M60A1 tank, but while cleaning it up and looking for references it got obvious, that I might put tens of hours in it and still not get the results the new AFV Club kit get you right out of the box. So I ordered the AFV Club kit and now I'm working on it:

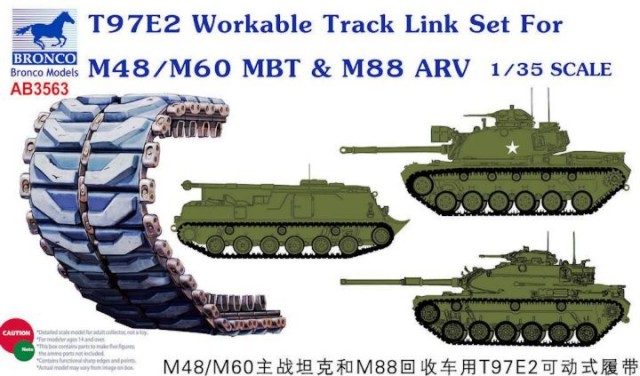
I also have fancy Bronco tracks for it:

To top off the goodies there's also the Eduard 35725 PE detail set.

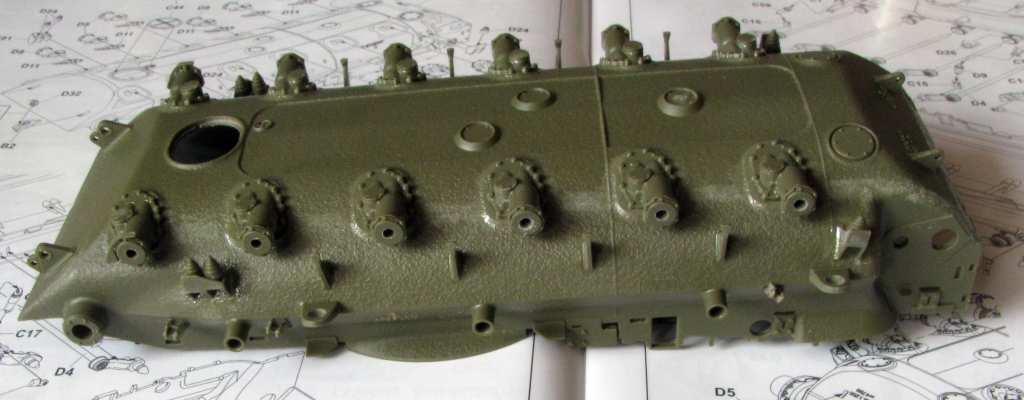
Of course I wouldn't bore you if I didn't have some work to show. So that's what the ESCI/Italeri hull looks like after some cleanup:

As stated before I'm not going to use it. Instead I have this:

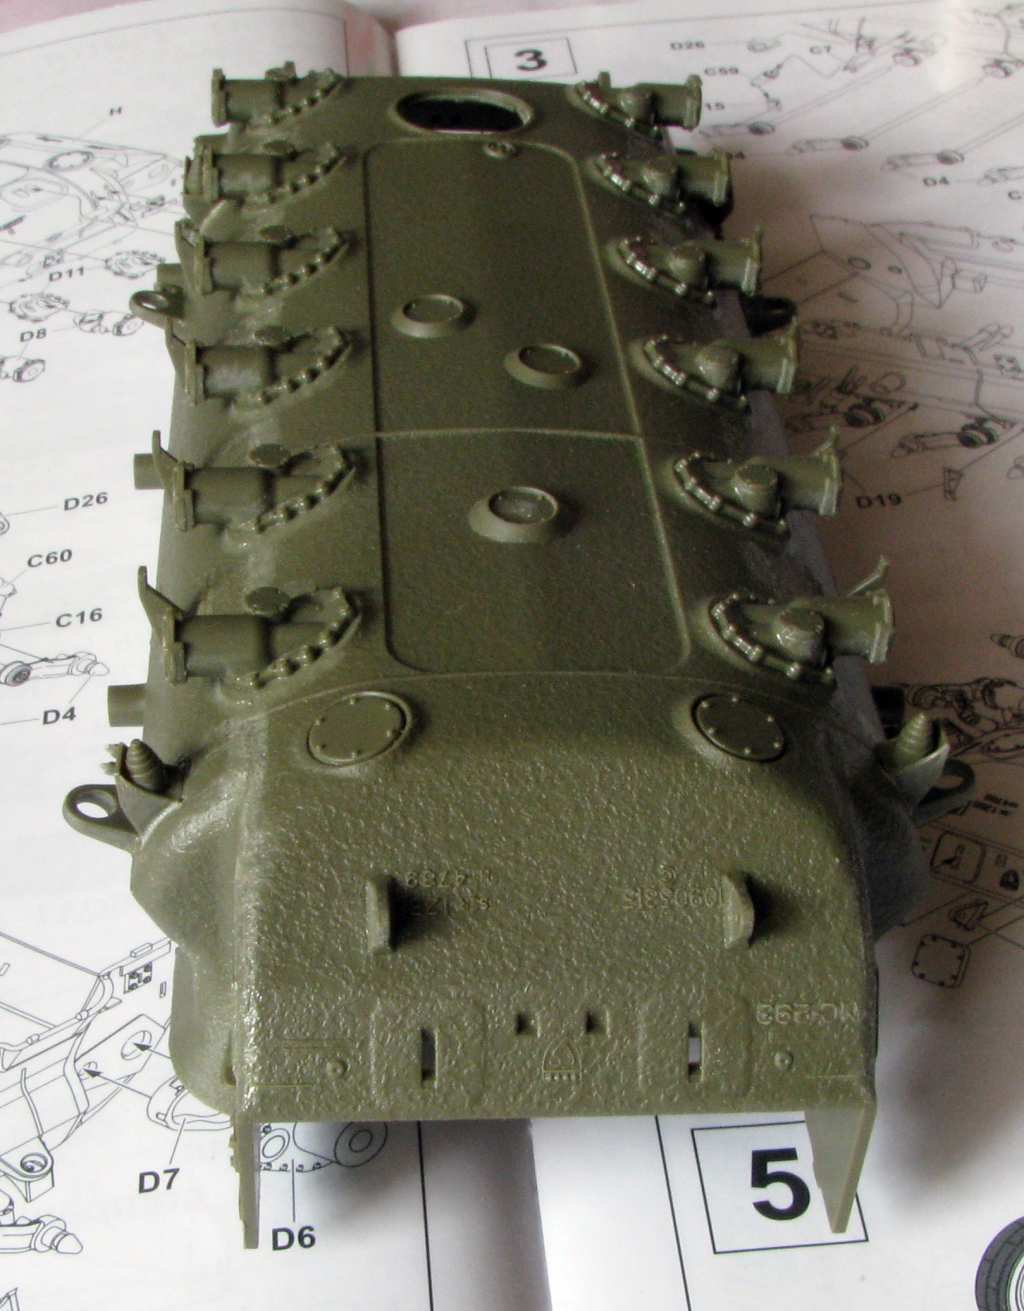
This doesn't look like much, but it's still 53 parts put together. The kit really has lots of them and I don't mind, looking at the nice detail the kit gives you after the little extra work.

I already would like to ask you for help - it's about the emergency exit hatch. What colour should it be on the inside - white, OD or some other colour?

OK, now I'm movin' on to build the rest of the suspension - thanks for reading and have a nice day

Paweł

All comments and critique welcomed. Thanks for your honest opinions!

www.vietnam.net.pl

  • Member since
    December 2002
  • From: Bury St Edmunds, Suffolk, England
Posted by Bish on Thursday, June 18, 2015 1:51 PM

Interesting subject. Hard to believe there 53 parts in just that. Anyone would think it was a Dragon kit. Wink

I am a Norfolk man and i glory in being so


On the bench: Airfix 1/72nd Harrier GR.3/Fujimi 1/72nd Ju 87D-3

  • Member since
    December 2002
  • From: Valrico, FL
Posted by HeavyArty on Thursday, June 18, 2015 2:48 PM

Looking good so far.  The AFV Club kit looks really nice.

As to the escape hatch, it would be white on the inside, just like the rest of the hull interior.  However, remember the hatch is at the bottom of the hull, so any dirt, debris, and junk would settle there.  So the hatch would be a very dirty white.

I built an M728 CEV a long time ago (1999'ish), using plans in an FSM mag.  I think it came out really nicely.

Gino P. Quintiliani - Field Artillery - The KING of BATTLE!!!

Check out my Gallery: https://app.photobucket.com/u/HeavyArty

"People sleep peaceably in their beds at night only because rough men stand ready to do violence on their behalf." -- George Orwell

  • Member since
    September 2006
  • From: Dripping Springs, TX, USA
Posted by RBaer on Thursday, June 18, 2015 3:19 PM

Watching, Pawel.

You know just as soon as you get about ready to paint, AFV will have the kit out in plastic, right? Something about "Murphy's Law of Conversions Using Expensive Aftermarket Parts"?

Big Smile

Apprentice rivet counter.

  • Member since
    July 2004
  • From: Sonora Desert
Posted by stikpusher on Thursday, June 18, 2015 3:29 PM

Bish, in my experience AFV Club kits are on par with Dragon and Bronco for "over engineering". Not to say that they are not beautiful kits to build. But I think the Chinese mindset for designing plastic model kits is: Why build it in five parts when we can do it in 25?

Pawel, this is gonna be a great one to watch! I love the 728. A beautiful beast from my time in Green. The AFV kit hull sure does look top notch!

Gino, that is sharp! I remember those plans in that issue. I am pretty sure I have them around still in my FSM library. Of course with my luck, if I ever was to do that project like you did, somebody WILL release the kit in injection plastic as soon as I were to be done with mine.


F is for FIRE, That burns down the whole town!

U is for URANIUM... BOMBS!

N is for NO SURVIVORS...

       - Plankton

LSM


  • Member since
    May 2009
  • From: Poland
Posted by Pawel on Thursday, June 18, 2015 3:31 PM

Bish - Nah, it's AFV Club - as many parts as Dragon has, they just don't do Sci Fi (MBT 70, M103, you know).

Gino - nice machine! Which issue had the plans of the CEV? Thanks a lot for the info on the hatch. I suspected they might have been painted in some other colour to aid in locating the hatch in emergency.

RBaer - good to have you onboard! I suspect it might be so, but that law doesn't bother me much - I already bought the resin a long time ago and now I feel is the time to finally use it up.

Thanks a lot for your comments, gentlemen - good luck with your builds and have a nice day

Paweł

All comments and critique welcomed. Thanks for your honest opinions!

www.vietnam.net.pl

  • Member since
    December 2002
  • From: Bury St Edmunds, Suffolk, England
Posted by Bish on Thursday, June 18, 2015 4:03 PM

Ye, I have started to realise that about AFV club kits. Despite having a few in the stash, I built my first one a couple of months back, and it certainly reminded of Dragon in the parts count.

I am a Norfolk man and i glory in being so


On the bench: Airfix 1/72nd Harrier GR.3/Fujimi 1/72nd Ju 87D-3

  • Member since
    December 2002
  • From: Valrico, FL
Posted by HeavyArty on Thursday, June 18, 2015 8:50 PM

Pawel
Gino - nice machine! Which issue had the plans of the CEV?

Thanks.  It was a fun build and one I am really proud of.  I had to search the back issues page here at FSM to find when it was from.  Apparently it was from the March '95 issue.

Gino P. Quintiliani - Field Artillery - The KING of BATTLE!!!

Check out my Gallery: https://app.photobucket.com/u/HeavyArty

"People sleep peaceably in their beds at night only because rough men stand ready to do violence on their behalf." -- George Orwell

  • Member since
    November 2009
  • From: SW Virginia
Posted by Gamera on Friday, June 19, 2015 1:07 PM

Very cool Pawel, I love seeing different stuff like this!

And your's is very cool too Gino, I'd love to do more conversions but I build slowly enough as it is without modifying kits.

I love AFV Club kits so don't get me wrong but I'll say they're like a Dragon kit but take even longer to finish due to the injection pin holes everywhere that need to be filled.

"I dream in fire but work in clay." -Arthur Machen


  • Member since
    May 2009
  • From: Poland
Posted by Pawel on Saturday, June 20, 2015 4:22 PM

Gino - thanks a lot for finding that back issue. I'm gonna have to check it out - see if I can use those plans.

Gamera - that might be, but still, their choice of subjects is excellent, isn't it?

Right now I'm waiting for the filler to harden, maybe tomorrow I'll have some more photos.

Thanks a lot for your comments and have a nice day

Paweł

All comments and critique welcomed. Thanks for your honest opinions!

www.vietnam.net.pl

  • Member since
    May 2009
  • From: Poland
Posted by Pawel on Monday, June 22, 2015 1:53 PM

Hello everybody!

The work to put it on the wheels continues. The kit is trying to get you "working suspension" - that could almost work, as the torsion bars are there, attached to the road wheel arms and going all the way across the hull. Very informative, but also makes the model harder to build. But once you put the shock absorbers in, you are locking the first, second and last road wheel arms in place - that's where the suspension stops working. I decided to use it in my advantage and show the vehicle in the often seen "nose down" stance - caused by the weight of the blade and maybe some load on the deployed A-frame. That's why I shortened the fron shocks by some 1,5 - 2 mm, like on the photo below. The left shock is before shortening, the right is after:

Then I glued one side of the suspension together and set it under weight for the glue to set:

You see there was some filling necessary for the parts to look nice.

I also detailed the insides of the escape hatch:

There also was something I had to do about the drive sprockets. The kit gives you two sets of definitely M60-looking sprockets - but in Vietnam the vehicles used the M48 style sprockets, with flat faces. I pondered many ways to redo them, but in the end I decided to sand them lightly. The photo below shows you the sprocket out of the box on the left and after my sanding on the right:

Now both of them are done this style.

That's it for now - I'm starting to work on the road wheels. Thanks for looking and have a nice day

Paweł

All comments and critique welcomed. Thanks for your honest opinions!

www.vietnam.net.pl

  • Member since
    September 2006
  • From: Dripping Springs, TX, USA
Posted by RBaer on Monday, June 22, 2015 2:19 PM

Nice work.

I like your idea of building it nose-down, I think it adds to the animation of the model.

Apprentice rivet counter.

  • Member since
    May 2009
  • From: Poland
Posted by Pawel on Tuesday, June 23, 2015 5:58 AM

RBaer - thanks a lot for your kind words! I don't think I will put this machine on a diorama, but I sure would like to show with it some action! The crew will be there - or at least these are the plans for now.

Thanks again and have a nice day

Paweł

All comments and critique welcomed. Thanks for your honest opinions!

www.vietnam.net.pl

  • Member since
    April 2013
Posted by KnightTemplar5150 on Tuesday, June 23, 2015 7:21 AM
Nice work, Pawel - looking forward to seeing how your suspension modifications work out!
  • Member since
    November 2009
  • From: SW Virginia
Posted by Gamera on Tuesday, June 23, 2015 7:30 AM

Yeah the nose down attitude is one of those things that give something character, very cool!

"I dream in fire but work in clay." -Arthur Machen


  • Member since
    March 2013
  • From: Puebla, Mexico
Posted by garzonh on Tuesday, June 23, 2015 9:41 AM

Oh very nice, yep, I did an AFV SPG and it was nice but yes, lots and lots of parts and very britle light plastic. I have not done any other AFV kit since it was not that fun to build.

Yours is looking good.

  • Member since
    May 2009
  • From: Poland
Posted by Pawel on Tuesday, June 23, 2015 2:58 PM

KnightTemplar5150, Gamera - thanks a lot for your comments! The road wheel arms are drying and the road wheels themselves are coming up, so I hope to have some results soon.

Garzonh - for me it's the second AFV Club kit after the Duster, and I have to say I enjoy those kits a lot. I have some more stashed (2,5T trucks, guns, M88) and I look forward to build them. Complicated to build - yes, but the results are worth it IMO. Thank you for your comment and for your kind words.

Please stay tuned and have a nice day

Paweł

All comments and critique welcomed. Thanks for your honest opinions!

www.vietnam.net.pl

  • Member since
    December 2002
  • From: Bury St Edmunds, Suffolk, England
Posted by Bish on Tuesday, June 23, 2015 3:40 PM

Nice work on those shocks, I like your ide of lowering the front. Nice delicate sanding of those sprockets as well.

I am a Norfolk man and i glory in being so


On the bench: Airfix 1/72nd Harrier GR.3/Fujimi 1/72nd Ju 87D-3

  • Member since
    May 2009
  • From: Poland
Posted by Pawel on Wednesday, June 24, 2015 8:09 AM

Bish - thanks a lot for your comment, and for your kind words! I thought - you see a lot of tanks swaying under the load of the dozer blade but not so many models of them - so let's change it! Thanks again and have a nice day

Paweł

All comments and critique welcomed. Thanks for your honest opinions!

www.vietnam.net.pl

  • Member since
    January 2007
Posted by the doog on Friday, June 26, 2015 7:02 PM

Pawel, you always hit a home run on these special projects-I can't wait to see how you kill this one! Should be goood!

Gino, killer job on that model!

  • Member since
    May 2009
  • From: Poland
Posted by Pawel on Saturday, June 27, 2015 4:21 PM

Hello Karl - thanks a lot for your kind words! I'm glad you dropped by. Now you know me - this is going to take some time, but good models need time, so let's hope for the best. Thanks for your comment and have a nice day

Paweł

All comments and critique welcomed. Thanks for your honest opinions!

www.vietnam.net.pl

  • Member since
    May 2009
  • From: Poland
Posted by Pawel on Sunday, June 28, 2015 8:17 AM

Hello everybody!

So here's another update. I have the suspension glued together and it looks like this:

I also have the wheels done:

While the AFV Club has the option to build the suspension, wheels and track workable, I decided to glue everything in place. You are supposed to put a small rubber O-ring between the wheels - it makes the road wheel pairs go on easy on the axles (with a conical end) and turn freely, but they are almost impossible to take off the axle once in place. So I left the O-rings out. I also glued the road wheel arms in place.

As for the road wheels, on the picture above you see two kinds of wheels that the kit gives you. In the top row there are aluminium cast wheels, typical for the M60. In the bottom row there are stamped steel wheels, typical for the M48 used in Vietnam. I want to show them mixed, which can be seen on many photos of the CEV - as the wheels were changed as necessary. I also tried to show a slightly different degree of wear for each wheel.

I'm trying the new Bronco track for the M48. Here's what it says on the box on how to put them together:

You see it's theoretically possible to put them together so that they will remain movable, but it sure is a challenge. So I will have to find a way of glueing them together. I already meda some tests:

You see, alone the left sample consists of 16 parts - something tells me this one will be tedious!

But before I start putting tracks on this baby I have to close up the hull - meaning I have to detail the driver's compartment first. So that's what I'm on now.

Thanks for reading and have a nice day

Paweł

All comments and critique welcomed. Thanks for your honest opinions!

www.vietnam.net.pl

  • Member since
    December 2002
  • From: Bury St Edmunds, Suffolk, England
Posted by Bish on Sunday, June 28, 2015 8:52 AM

Your coming on nicely, not seen those Bronco tracks before. They do look a bit tedious.

I am a Norfolk man and i glory in being so


On the bench: Airfix 1/72nd Harrier GR.3/Fujimi 1/72nd Ju 87D-3

  • Member since
    May 2009
  • From: Poland
Posted by Pawel on Sunday, June 28, 2015 3:01 PM

Hello Bish - thanks a lot! Those tracks look nice when done, but I'm not so sure if I could really recommend them, because of the workload necessary to complete 'em. Have a nice day!

Paweł

All comments and critique welcomed. Thanks for your honest opinions!

www.vietnam.net.pl

  • Member since
    May 2009
  • From: Poland
Posted by Pawel on Tuesday, July 21, 2015 2:39 PM

Hello!

It's been a long time, but now I've got an update for you - I'm starting to tackle the driver's compartment. At first I planned to add a driver's figure, but now I decided against it - for two reasons. Number one - it would be a pity to cover such a nice detail. Number two - it's hard to mate the driver shown outside the hatch with the turret. And so the driver stays out.

I started with building the subassemblies, such as the driver's seat base or gear shift lever:

Then I started painting the insides white. First I put on a layer of Tamiya grey primer from a spray can. After this dried well, I sprayed everything with Tamiya white primer, also from a spray can. And so I managed to have everything white in just two layers:

Now I'm starting to paint the details and then I'll go on weathering everything. In parallel I still work on the tracks - lots of sanding there!

Thanks for reading, I hope you liked it - good luck with your projects and have a nice day

Paweł

All comments and critique welcomed. Thanks for your honest opinions!

www.vietnam.net.pl

  • Member since
    July 2004
  • From: Sonora Desert
Posted by stikpusher on Tuesday, July 21, 2015 3:20 PM

Yeah, a nice drivers compartment like that should be shown off.


F is for FIRE, That burns down the whole town!

U is for URANIUM... BOMBS!

N is for NO SURVIVORS...

       - Plankton

LSM


  • Member since
    December 2002
  • From: Valrico, FL
Posted by HeavyArty on Tuesday, July 21, 2015 5:14 PM

Looking good.  I had seen the driver's area parts and thought they looked good on the sprues.  Seeing them built up shows they are really nice.  Can't wait to see it all painted up and assembled.

Gino P. Quintiliani - Field Artillery - The KING of BATTLE!!!

Check out my Gallery: https://app.photobucket.com/u/HeavyArty

"People sleep peaceably in their beds at night only because rough men stand ready to do violence on their behalf." -- George Orwell

  • Member since
    November 2009
  • From: SW Virginia
Posted by Gamera on Wednesday, July 22, 2015 9:05 AM

Cool, happy to see you're still plugging away on this.

"I dream in fire but work in clay." -Arthur Machen


  • Member since
    February 2010
  • From: Maine
Posted by Stage_Left on Wednesday, July 22, 2015 12:00 PM

Very nice Pawel- I'm a big fan of support/ recovery vehicles and your progress looks very good on this one. Great choice on a not-so-common subject!

Dave

  • Member since
    September 2006
  • From: Dripping Springs, TX, USA
Posted by RBaer on Wednesday, July 22, 2015 12:30 PM

Good progress Pawel. I'm really liking what I've been seeing of this kit, I guess it's time to pony up....

Apprentice rivet counter.

JOIN OUR COMMUNITY!

Our community is FREE to join. To participate you must either login or register for an account.

SEARCH FORUMS
FREE NEWSLETTER
By signing up you may also receive reader surveys and occasional special offers. We do not sell, rent or trade our email lists. View our Privacy Policy.