SEARCH FINESCALE.COM

Enter keywords or a search phrase below:

Dragon 1/35th Pz II Ausf F Completed page 4

7349 views
112 replies
1 rating 2 rating 3 rating 4 rating 5 rating
  • Member since
    December 2002
  • From: Bury St Edmunds, Suffolk, England
Posted by Bish on Tuesday, July 11, 2017 12:42 AM

Thanks PJ.

managed to start on the turret last nigth, no PE there. Thankfully.

I am a Norfolk man and i glory in being so


On the bench: Airfix 1/72nd Harrier GR.3/Fujimi 1/72nd Ju 87D-3

  • Member since
    December 2002
  • From: Bury St Edmunds, Suffolk, England
Posted by Bish on Tuesday, July 11, 2017 11:56 PM

I am just about ready to get this down to the spray booth and start painting. Finished off all the PE i was going to add and got the two halves of the hull together. I used some beading wire for the armoured cable for the lights.

I am leaving the exhaust off the rear and will paint that seperatly and add later.

I have left the turret is several sections. I'll paint the inside as wel as the gun and other fitings, then finish putting it together and doing the outside. I do like the Lion Marc barrel, very nicley detailed.

Once i start getting the paint on, i can start on the tracks. that will be fun.

I am a Norfolk man and i glory in being so


On the bench: Airfix 1/72nd Harrier GR.3/Fujimi 1/72nd Ju 87D-3

  • Member since
    November 2008
  • From: Central Florida
Posted by plasticjunkie on Wednesday, July 12, 2017 6:38 AM

That pe really adds tons of details specially the barrel. Yes

 GIFMaker.org_jy_Ayj_O


Too many models to build, not enough time in a lifetime!!

  • Member since
    December 2002
  • From: Bury St Edmunds, Suffolk, England
Posted by Bish on Wednesday, July 12, 2017 6:57 AM

Thanks PJ, ye, i do like that barrel. Lion Marc does some nice ones, unfortunatly they don't sell them locally so i get them direct from Hong Kong.

I am a Norfolk man and i glory in being so


On the bench: Airfix 1/72nd Harrier GR.3/Fujimi 1/72nd Ju 87D-3

  • Member since
    November 2009
  • From: SW Virginia
Posted by Gamera on Wednesday, July 12, 2017 9:28 AM

Splendid work there Bish, love those tool boxes! 

"I dream in fire but work in clay." -Arthur Machen


  • Member since
    December 2002
  • From: Bury St Edmunds, Suffolk, England
Posted by Bish on Wednesday, July 12, 2017 9:32 AM

Thanks G. Close up its a little dodgy, especially some of the hinges. But i don't woprry to much with armour as it soon gets bashed and dented anyway.

I am a Norfolk man and i glory in being so


On the bench: Airfix 1/72nd Harrier GR.3/Fujimi 1/72nd Ju 87D-3

  • Member since
    July 2006
  • From: San Francisco Bay Area
Posted by bufflehead on Saturday, July 15, 2017 11:19 PM

Its really coming along nicely Bish!  All the PE and detail work is going to make this one look awesome!

Ernest

Last Armor Build - 1/35 Dragon M-26A1, 1/35 Emhar Mk.IV Female


Last Aircraft Builds - Hobby Boss 1/72 F4F Wildcat & FW-190A8


  • Member since
    December 2002
  • From: Bury St Edmunds, Suffolk, England
Posted by Bish on Sunday, July 16, 2017 5:05 AM

Thats Ernest. These voyager do includ a lot of un needed PE. I still have quite a few to use but will be thinking twice before buying any more.

I am a Norfolk man and i glory in being so


On the bench: Airfix 1/72nd Harrier GR.3/Fujimi 1/72nd Ju 87D-3

  • Member since
    March 2003
  • From: Rain USA, Vancouver WA
Posted by tigerman on Sunday, July 16, 2017 11:56 AM

Fine work on all that PE Bish. Really makes everything stand out.

   http://i7.photobucket.com/albums/y269/wing_nut_5o/PANZERJAGERGB.jpg

 Eric 

  • Member since
    December 2002
  • From: Bury St Edmunds, Suffolk, England
Posted by Bish on Sunday, July 16, 2017 4:42 PM

Thanks Eric.

I am a Norfolk man and i glory in being so


On the bench: Airfix 1/72nd Harrier GR.3/Fujimi 1/72nd Ju 87D-3

  • Member since
    December 2002
  • From: Bury St Edmunds, Suffolk, England
Posted by Bish on Tuesday, July 18, 2017 2:31 PM

Short update on the Pz II as i just finished off the construction and have been working on the building as well.

The tank got its coat of primer followed by the pz Grey and then some Dark yellow. Had a bit of an issue with the grey as it came up very flat rather than the gloss it should have been, so shot a coat of Alclad Aqua gloss to apply the decals. No great problem as its one less coat i will ahve to add before weathering.

The building got a coat of tan for the mortar followed by a flat brush for the brickwork useing tamiya red brown. Still got some touching up to do on that and then add some colour variation.

I did make a start on the tracks but soon realised this would not be a good idea. I thought they would be the click together type, but there not, and i will need to get the road wheels dry fited so i get get the right shape around the sprockets, idlers and the raised road wheels, so just a small section got done. But pretty easy to put together for such small links.

Thats all for now. Going to get the decals on, but will then focus on the building, figures and getting those tracks built.

I am a Norfolk man and i glory in being so


On the bench: Airfix 1/72nd Harrier GR.3/Fujimi 1/72nd Ju 87D-3

  • Member since
    April 2015
Posted by Mopar Madness on Tuesday, July 18, 2017 3:06 PM

That diorama base is looking great Bish!  Quick question on those tracks.  I bought my first Dragon armor kit a couple days ago and I beleive it comes with those same kind of tracks (i.e. Magic Tracks).  What will you use as a binding agent?  Liquid cement?  Thanks buddy!

Chad

God, Family, Models...

At the plate: 1/48 Airfix Bf109 & 1/35 Tamiya Famo

On deck: Who knows!

  • Member since
    December 2002
  • From: Bury St Edmunds, Suffolk, England
Posted by Bish on Tuesday, July 18, 2017 3:21 PM

Thanks MM. ye, i assembly a small length, half a dozen links or so, and then brush on some plastic weld where the links join. When it come to the area that curves around wheels or to create sag, i will do the same but then before it sets i'll shape it.

What kit do you have.

I am a Norfolk man and i glory in being so


On the bench: Airfix 1/72nd Harrier GR.3/Fujimi 1/72nd Ju 87D-3

  • Member since
    April 2015
Posted by Mopar Madness on Tuesday, July 18, 2017 3:30 PM

Excellent! They were having a good online sale last week so I took the plunge and purchased a 1/35 Sd.Kfz.265 Kleiner #6597.   Looks to be a bit more complicated than the Tamaya kits I started on but I appreciate the intricate details offered with the Dragon kit.  Beer

Chad

God, Family, Models...

At the plate: 1/48 Airfix Bf109 & 1/35 Tamiya Famo

On deck: Who knows!

  • Member since
    December 2002
  • From: Bury St Edmunds, Suffolk, England
Posted by Bish on Tuesday, July 18, 2017 3:33 PM

O, that will be nice to see. I have a couple of Dragon Pz I's, my guess is the tracks are similar to the Pz II. But do check, they do vary between subjects, the 251 tracks are meant to be workable. Notice the words meant to be lol.

I am a Norfolk man and i glory in being so


On the bench: Airfix 1/72nd Harrier GR.3/Fujimi 1/72nd Ju 87D-3

  • Member since
    November 2009
  • From: SW Virginia
Posted by Gamera on Tuesday, July 18, 2017 3:53 PM

Wow, you're moving right along there Bish. Yes


Personally I like the 'workable' track. You can put it together over the running gear and then apply a little liquid cement to lock it the way you want it. I tried leaving them workable without cement but they never wanted to stay in one piece.

"I dream in fire but work in clay." -Arthur Machen


  • Member since
    December 2002
  • From: Bury St Edmunds, Suffolk, England
Posted by Bish on Wednesday, July 19, 2017 1:53 AM

Thanks G.

Ye, i agree about the tracks. These ones have a fairly tight hold,so i might try doing that across the top rollers and see how that goes.

Got the decals on last night, all 4 of them, so going to hit the tracks tonight.

I am a Norfolk man and i glory in being so


On the bench: Airfix 1/72nd Harrier GR.3/Fujimi 1/72nd Ju 87D-3

  • Member since
    July 2003
  • From: On my kitchen counter top somewhere in North Carolina.
Posted by disastermaster on Thursday, July 20, 2017 1:00 PM

This paint job should be interesting.

                                  http://i20.photobucket.com/albums/b232/gluetank/Animated/th_Disastermastermotion-3.gif?t=1303709089

http://pic100.picturetrail.com/VOL351/12291693/21864322/413474780.jpg

Save

Sherman-Jumbo-1945

"I was so much older then, I'm younger than that now"


  • Member since
    July 2006
  • From: San Francisco Bay Area
Posted by bufflehead on Saturday, July 22, 2017 1:07 PM

Nice looking camo Bish!  The dio/base is looking sharp too...looking forward to seeing more!

Ernest

Last Armor Build - 1/35 Dragon M-26A1, 1/35 Emhar Mk.IV Female


Last Aircraft Builds - Hobby Boss 1/72 F4F Wildcat & FW-190A8


  • Member since
    December 2002
  • From: Bury St Edmunds, Suffolk, England
Posted by Bish on Saturday, July 22, 2017 2:29 PM

Thanks guys.

Did some dry brushing with oils so leaving that to dry for a couple of days before clear gloss and dot filters. So ben working on the inside of the buidling and figures.

I am a Norfolk man and i glory in being so


On the bench: Airfix 1/72nd Harrier GR.3/Fujimi 1/72nd Ju 87D-3

  • Member since
    December 2002
  • From: Bury St Edmunds, Suffolk, England
Posted by Bish on Saturday, August 5, 2017 3:13 PM

Been a couple of weeks since i updated but been chugging along slowly by surely.

So i'll start off with the tank. With painting done i aded the decals, all 4 of them, and gave it a couple of shades of dry brushing before sealing with a couple more coats of Alclad aqua gloss.

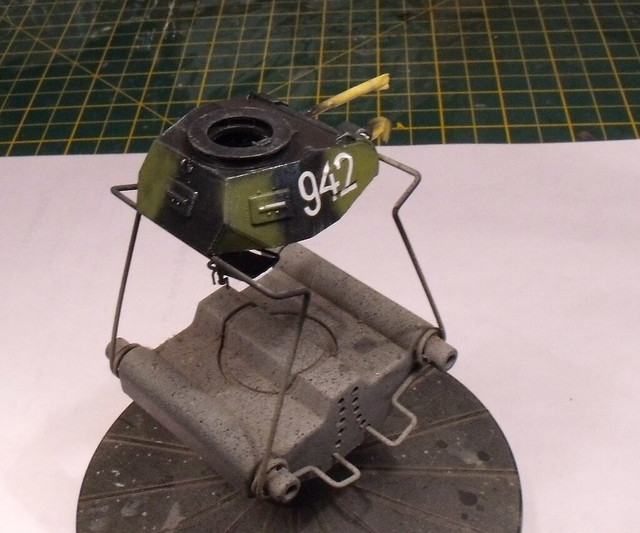
And then on with the oil. Firstly i did an overall coat of thin raw Umber. But, despite the 3 coats of what i thought were properly applied Alclad, i stil had a few small areas were the paint reacted to the white spirits. This is the 3rd armour build in a row this has happened and nopt sure if its me or the Alclad. But i do know it never happened when i was useing future. I am thinking about switching to one of the new acrylics such as mr Paint or Mission Models. But it will still take me a few kits to use up my enamels.

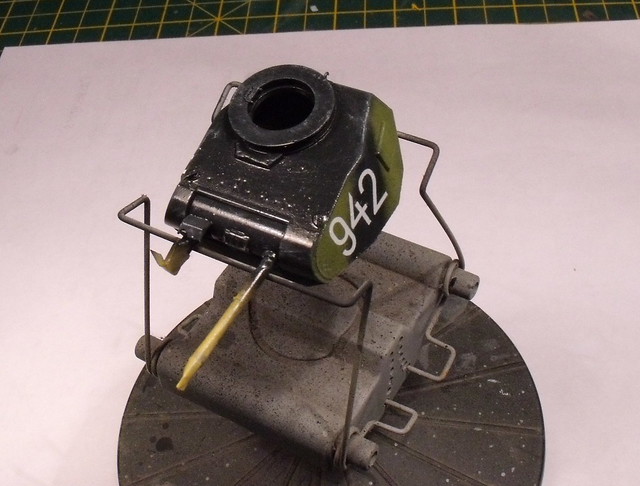
I can cover the affected areas with equipment.

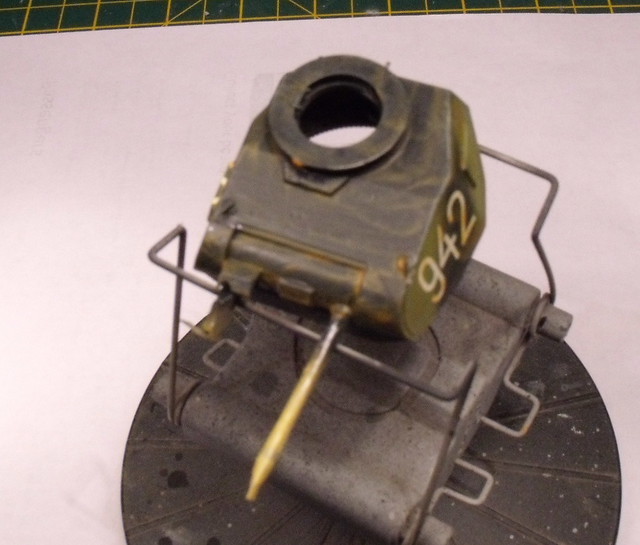
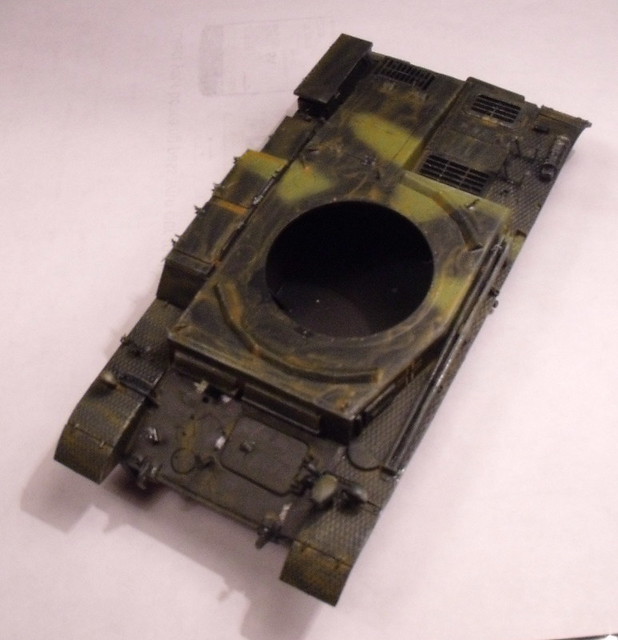
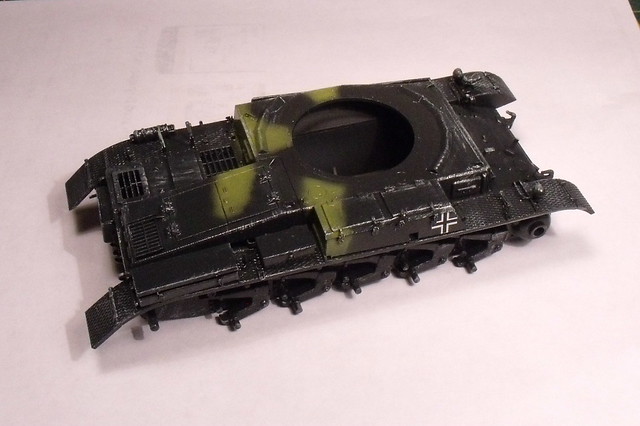
This was followed by pin washes useing 2 shades of grey and a white oil. The completed tracks were fitted along with all the tools.

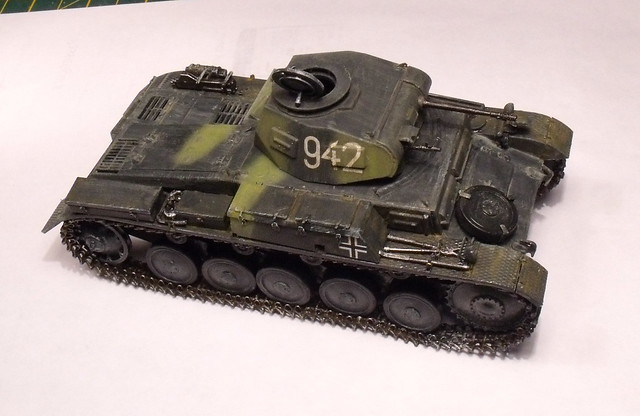
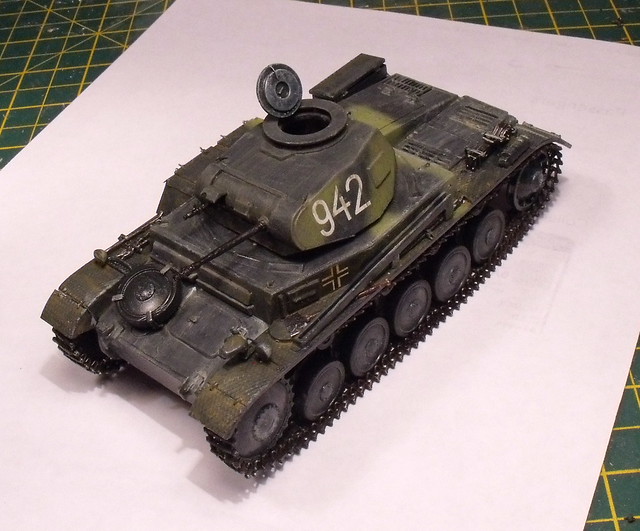
Next step with be some streaking followed by dust efefcts. But i won't add the efects until i have loadd some stores onto the back. I realised i didn't have what i wanted so have ordered some boxes. So apart from the streaking, thats the tank done for a few days at least.

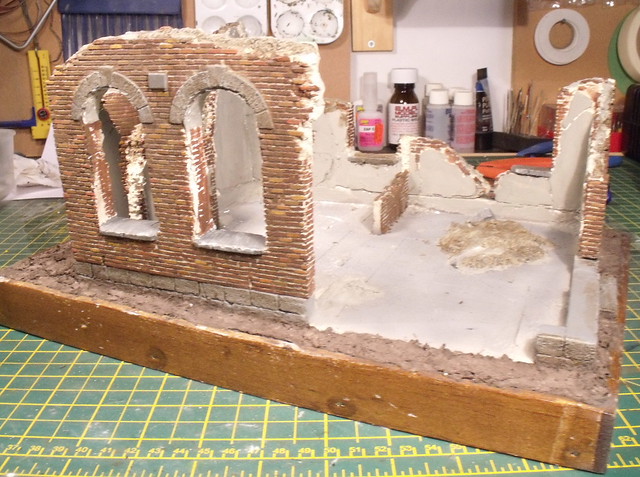
In the meantime i will get on with the building and figures. Speaking of which, the inside of the building was painted, cement for the floor and a light grey for the walls.

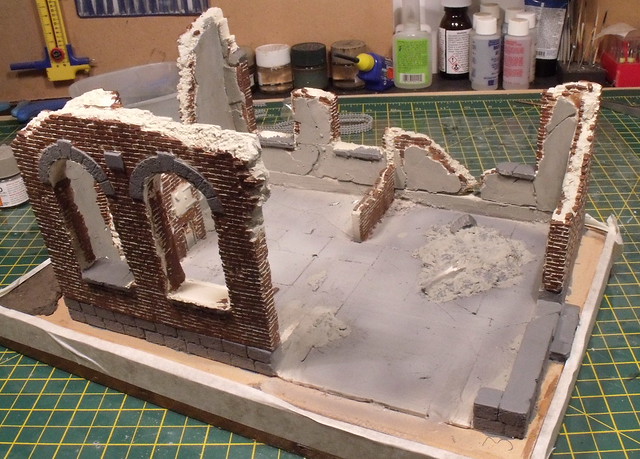
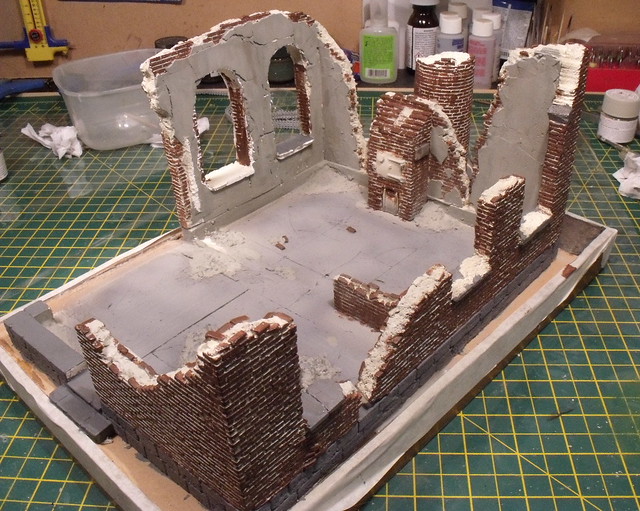
And then added some variation to the outside brickwork. This was done with a selection of tamiya acrylics.

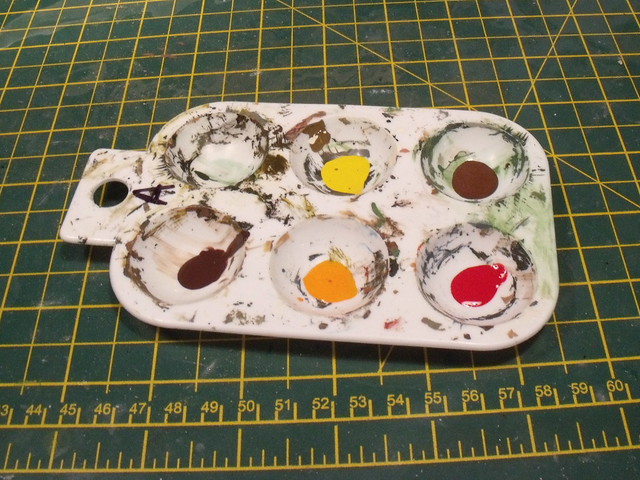
I used a small flat brush and randomly applied mixes of colurs to the bricks.

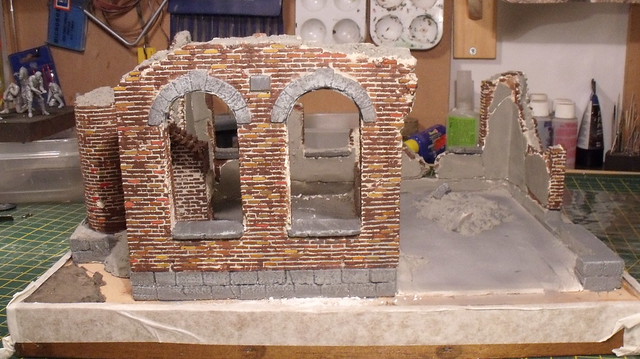
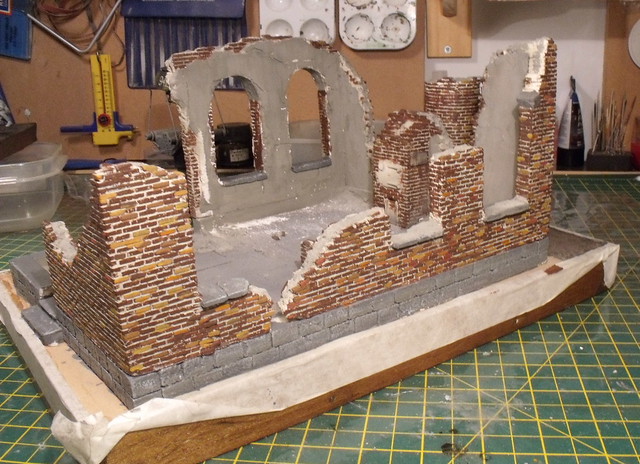
Followed by a wash of raw umber oils. Also added the celluclay groundwork around the building.

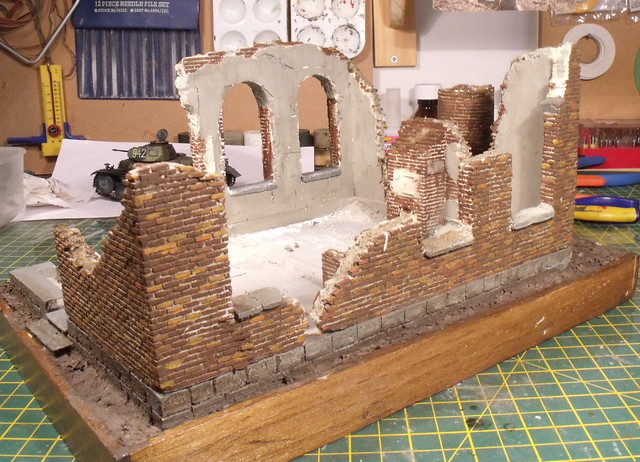
So next i'll finish off the inside and add vegitation to the soil, then start on the rubble.

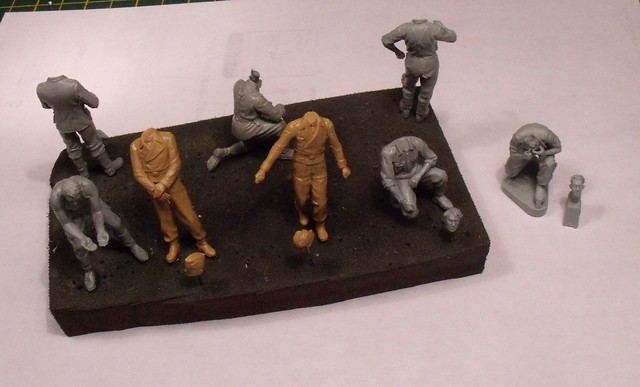
And finally the figures. I am useing 8, a mix of Dragon, Tamiya, Mini Art ICM and my first resin figure from Bravo 6.

Given a coat of black primer, these are now ready for painting.

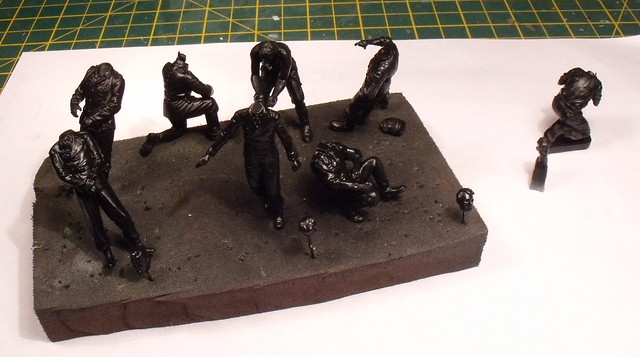
So, while i am waiting for the boxes to arrive, i will be getting on with the smaler details on the building and get to painting the figures.

Thats all for now.

I am a Norfolk man and i glory in being so


On the bench: Airfix 1/72nd Harrier GR.3/Fujimi 1/72nd Ju 87D-3

  • Member since
    September 2013
  • From: San Antonio, Texas
Posted by Marcus McBean on Saturday, August 5, 2017 5:16 PM

Bish,

Love the work you did with the bricks.  The colors are excellent and seem very real to me. You must have the patients of a ship builder.

Marcus

  • Member since
    December 2002
  • From: Bury St Edmunds, Suffolk, England
Posted by Bish on Saturday, August 5, 2017 5:28 PM

Thanks Marcus. It was a bit tedious, spread it over 2 nights, but i think the effect is worth the effort.

I am a Norfolk man and i glory in being so


On the bench: Airfix 1/72nd Harrier GR.3/Fujimi 1/72nd Ju 87D-3

  • Member since
    November 2008
  • From: Central Florida
Posted by plasticjunkie on Saturday, August 5, 2017 8:35 PM

The building looks great Bish. I like to use unscented crushed kitty litter for rubble. What will you be using?

 GIFMaker.org_jy_Ayj_O


Too many models to build, not enough time in a lifetime!!

  • Member since
    July 2003
  • From: On my kitchen counter top somewhere in North Carolina.
Posted by disastermaster on Sunday, August 6, 2017 12:33 AM

disastermaster

This paint job should be interesting.

Save


Yes, this paint job is interesting.
 
I use acrylic future for a glosscoat ~ never gives me a problem.
                                               http://i20.photobucket.com/albums/b232/gluetank/Animated/th_Disastermastermotion-3.gif?t=1303709089

Sherman-Jumbo-1945

"I was so much older then, I'm younger than that now"


  • Member since
    December 2002
  • From: Bury St Edmunds, Suffolk, England
Posted by Bish on Sunday, August 6, 2017 4:53 AM

plasticjunkie

The building looks great Bish. I like to use unscented crushed kitty litter for rubble. What will you be using?


Thanks PJ. I'll use unpainted celluclay as the core of the rubble and then add bricks and various bits of debry along with brick and cement dust. Being only my second building dio.i'l be taking what i did on the E-100 dio and trying to improve on that.

I am a Norfolk man and i glory in being so


On the bench: Airfix 1/72nd Harrier GR.3/Fujimi 1/72nd Ju 87D-3

  • Member since
    December 2002
  • From: Bury St Edmunds, Suffolk, England
Posted by Bish on Sunday, August 6, 2017 4:55 AM

disastermaster
 
disastermaster

This paint job should be interesting.

Save


Yes, this paint job is interesting.
 
I use acrylic future for a glosscoat ~ never gives me a problem.
                                               http://i20.photobucket.com/albums/b232/gluetank/Animated/th_Disastermastermotion-3.gif?t=1303709089
 

Thanks DM, ye, is a bit different.

I only had problems with future a couple of times and i know that was user error. Which is why i can't figure out whats going on here, not 3 kits in a row. And each time i have been getting more careful about applying the Alclad. And it only happens in small areas.

I am a Norfolk man and i glory in being so


On the bench: Airfix 1/72nd Harrier GR.3/Fujimi 1/72nd Ju 87D-3

  • Member since
    December 2015
  • From: providence ,r.i.
Posted by templar1099 on Sunday, August 6, 2017 6:10 AM

Bish
Which is why i can't figure out whats going on here, not 3 kits in a row. And each time i have been getting more careful about applying the Alclad. And it only happens in small areas.


Wondering if the 3 kits had anything in common? I've haven't used alcad but have found on a few kits that I too have had adhesion problems in small areas that I figured to be problems in the plastic itself.

"le plaisir delicieux et toujours nouveau d'une occupation inutile"

  • Member since
    December 2002
  • From: Bury St Edmunds, Suffolk, England
Posted by Bish on Sunday, August 6, 2017 6:20 AM

templar1099
 
Bish
Which is why i can't figure out whats going on here, not 3 kits in a row. And each time i have been getting more careful about applying the Alclad. And it only happens in small areas.


Wondering if the 3 kits had anything in common? I've haven't used alcad but have found on a few kits that I too have had adhesion problems in small areas that I figured to be problems in the plastic itself.


Not that i can figure. One was Tamiya, one Trumpeter and this one Dragon. All painted with Xtracolour enamels. 2 in the 3 colour scheme and this in grey.

Funny thing is, the first time i used it, on an Italeri kit, it was fine. But the 3 since i have had problems. And on this one, it happened on one of the side bins, which is PE.

But after what you have just said, it has me woundering if its down to my handling. I don't wear gloves when i model, i am woundering if the Alclad is reacting to somthing from my fingurs left on small spots of the model after painting. My next armour build won't be until the start of next yera, but i wil make a note of that and be sure to wear clean gloves when handling, see what happens.

I am a Norfolk man and i glory in being so


On the bench: Airfix 1/72nd Harrier GR.3/Fujimi 1/72nd Ju 87D-3

  • Member since
    July 2003
  • From: On my kitchen counter top somewhere in North Carolina.
Posted by disastermaster on Sunday, August 6, 2017 5:34 PM

Bish


disastermaster
 
disastermaster

This paint job should be interesting.

Save

 
Yes, this paint job is interesting.
 
I use acrylic future for a glosscoat ~ never gives me a problem.
                                               http://i20.photobucket.com/albums/b232/gluetank/Animated/th_Disastermastermotion-3.gif?t=1303709089

Thanks DM, ye, is a bit different.

I only had problems with future a couple of times and i know that was user error. Which is why i can't figure out whats going on here, not 3 kits in a row. And each time i have been getting more careful about applying the Alclad. And it only happens in small areas.

Check below for some interesting suggestions.

http://cs.finescale.com/fsm/tools_techniques_and_reference_materials/f/18/t/165803.aspx

                                                           http://i20.photobucket.com/albums/b232/gluetank/Animated/th_Disastermastermotion-3.gif?t=1303709089

Sherman-Jumbo-1945

"I was so much older then, I'm younger than that now"


JOIN OUR COMMUNITY!

Our community is FREE to join. To participate you must either login or register for an account.

SEARCH FORUMS
FREE NEWSLETTER
By signing up you may also receive reader surveys and occasional special offers. We do not sell, rent or trade our email lists. View our Privacy Policy.