SEARCH FINESCALE.COM

Enter keywords or a search phrase below:

Trumpeter KV-2

7411 views
48 replies
1 rating 2 rating 3 rating 4 rating 5 rating
  • Member since
    May 2011
  • From: Honolulu, Hawaii
Trumpeter KV-2
Posted by Real G on Friday, July 7, 2017 5:41 PM

Like a I need another project, here is Trumpeter's 1/35 KV-2.  The high, ugly box shaped turret makes it "so bad looking it's cool" to my rather distorted eyes.

https://flic.kr/p/VUVmW7] 
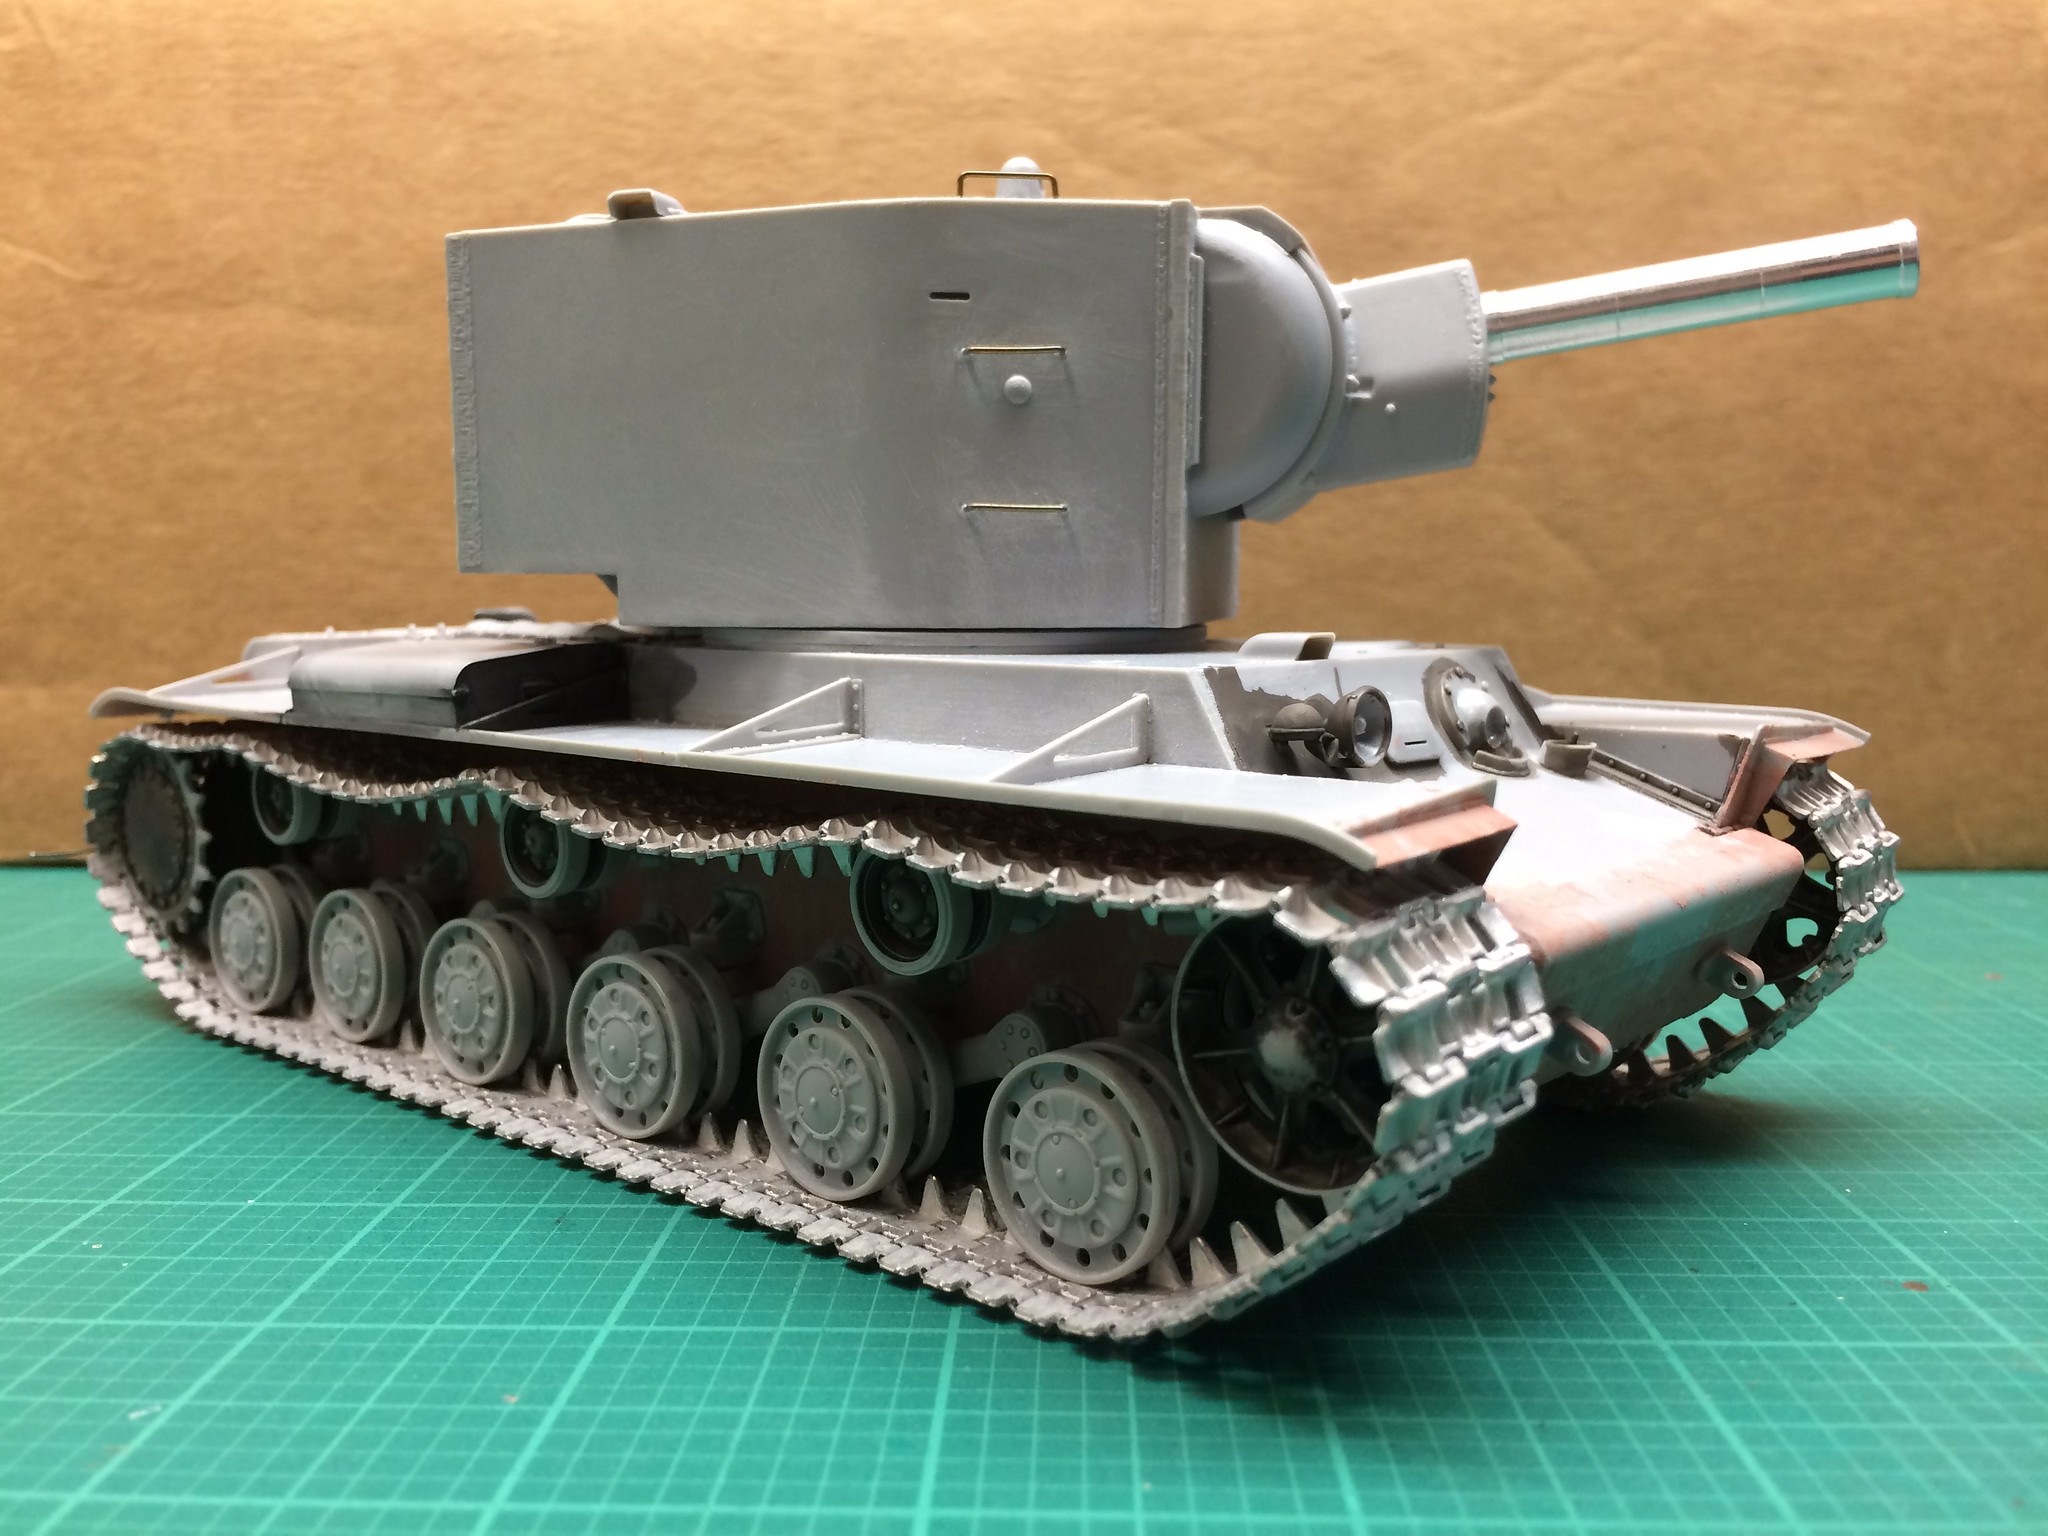
[/url]KV-2-01 by N.T. Izumi, on Flickr

https://flic.kr/p/VUVmNb] 
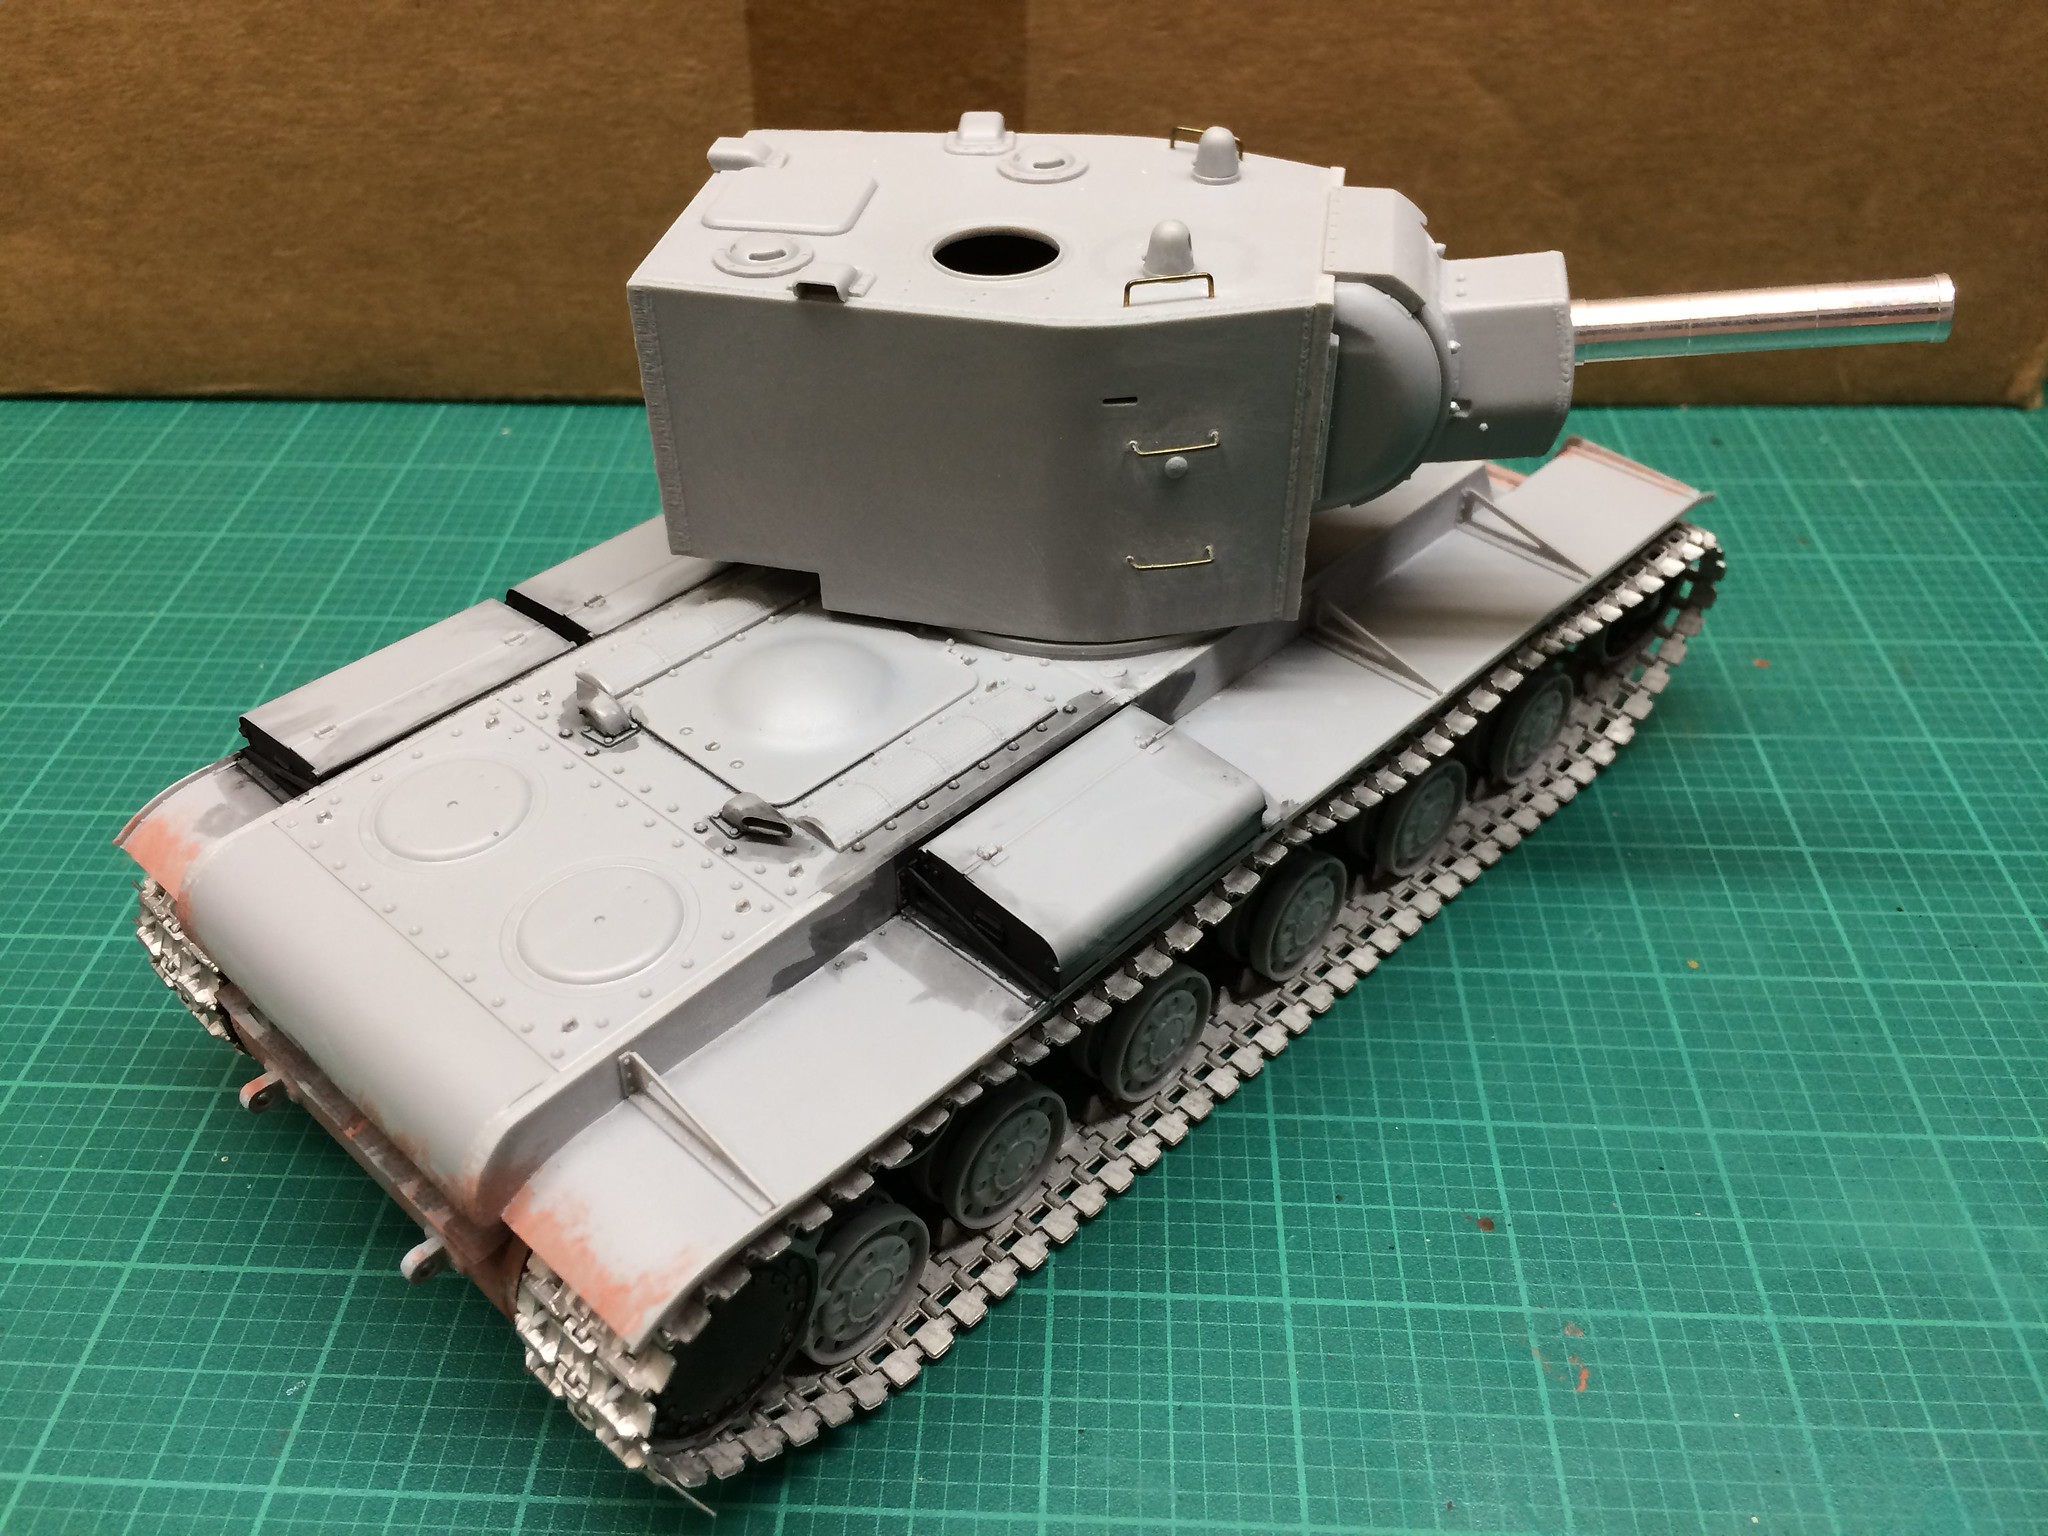
[/url]KV-2-02 by N.T. Izumi, on Flickr

This kit has been sitting on the sidelines for quite some time now, as I mucked up the road wheels.  The hubs are separate, but lack any keyed tabs so alignment is DIY.  I didn't pay proper attention and glued all of the hubs with the lightening holes aligned with the holes on the wheel, which is wrong.  It has been really bugging me and I could not seem to let it go, so I finally bucked up and bought another kit to do the wheels right.  (It's not a total waste, as the turret will go to another project that needs it.)

https://flic.kr/p/VVysrw] 
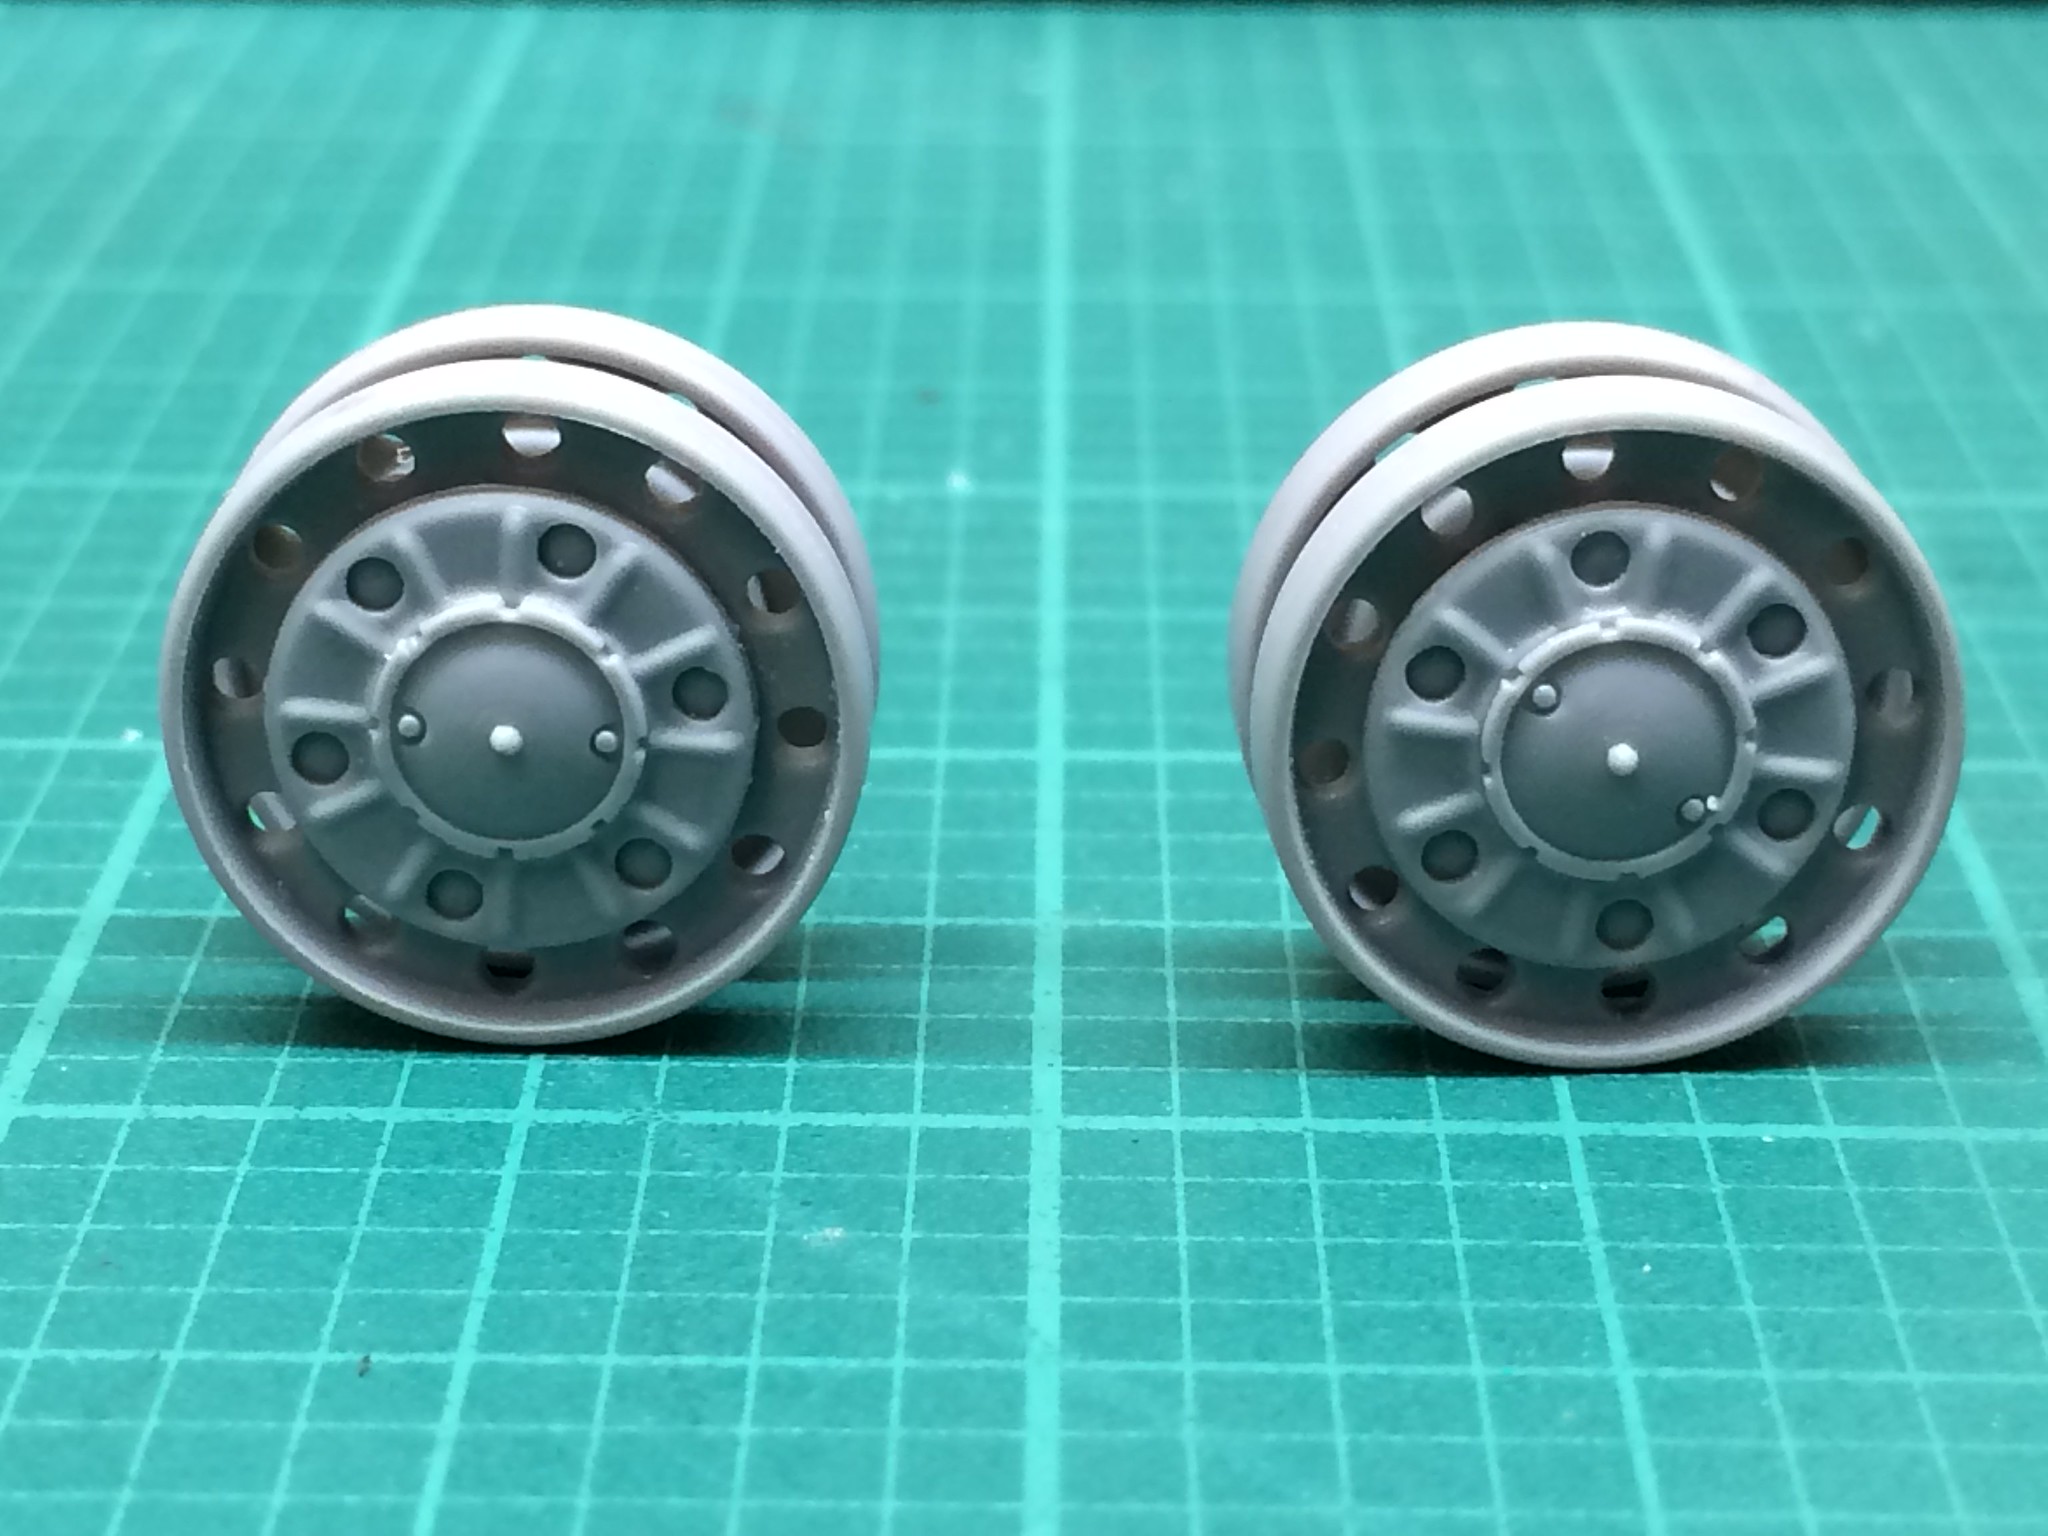
[/url]KV-2-06 by N.T. Izumi, on Flickr

The rest of the kit is pretty good, one of Trumpeter's better products.  The only not so good bit was the separate gun muzzle, which was poorly shaped and lopsided.  It was replaced with a turned aluminum barrel, which had internal rifling.  The turret grab handles are finely molded, but I replaced them to avoid having to clean them up, and also to make them more resistant to getting knocked off.  I glued blocks of plastic on the inside of the turret to provide secure anchor points for the grab handles.

https://flic.kr/p/WrANTW] 
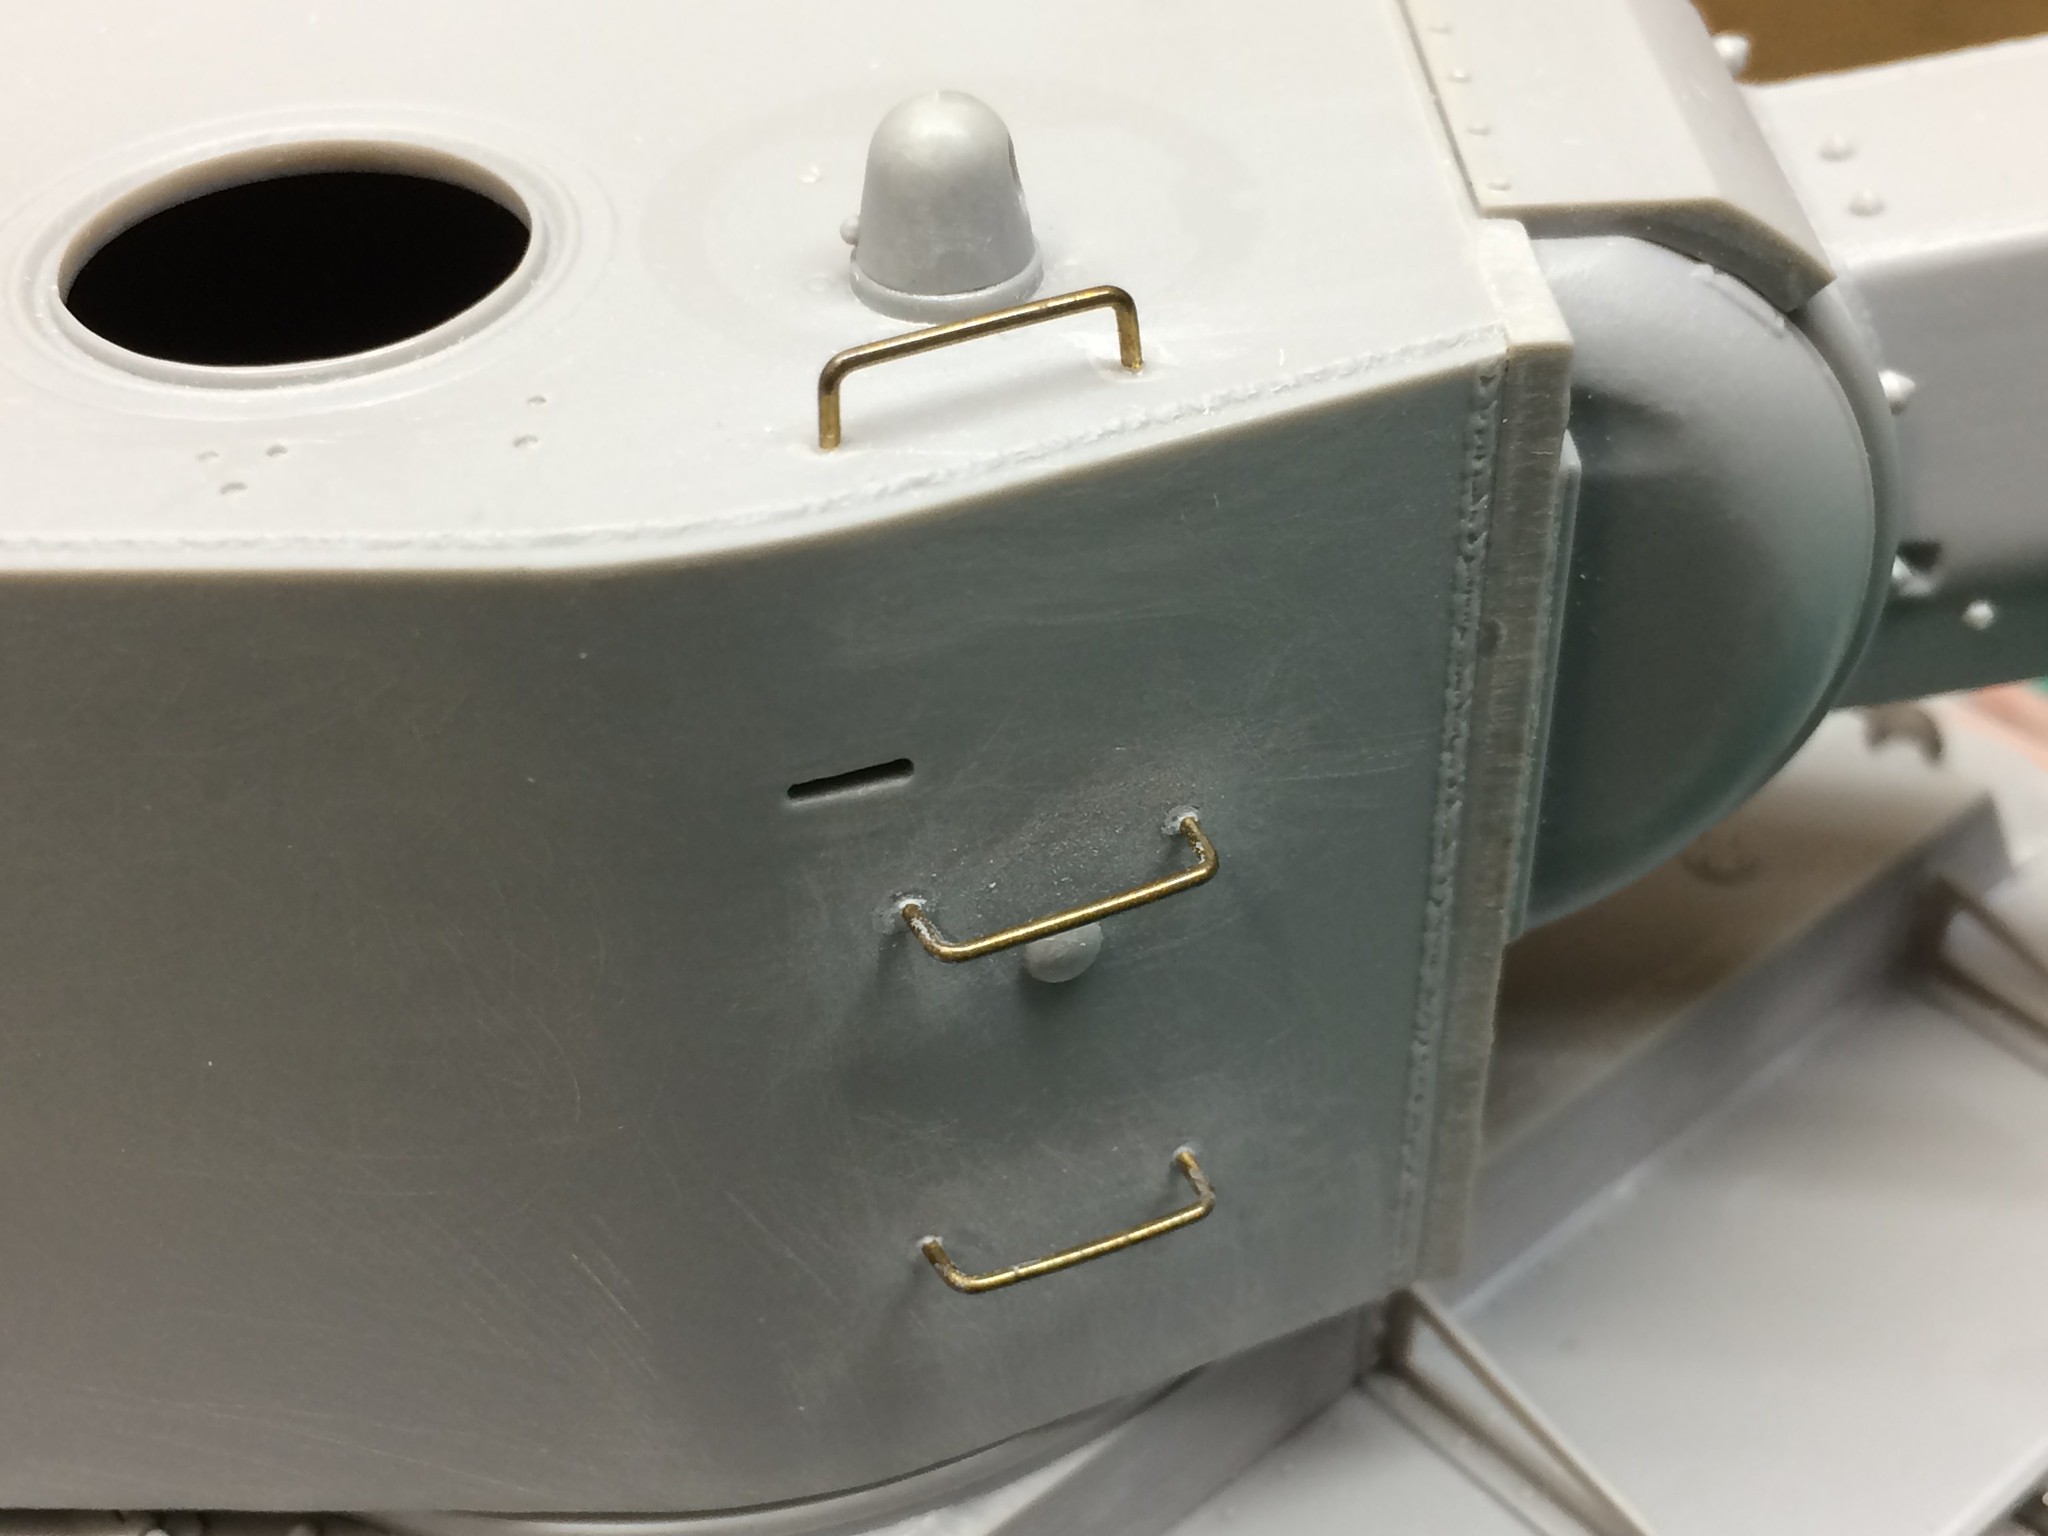
[/url]KV-2-03 by N.T. Izumi, on Flickr

https://flic.kr/p/VUVmxm] 
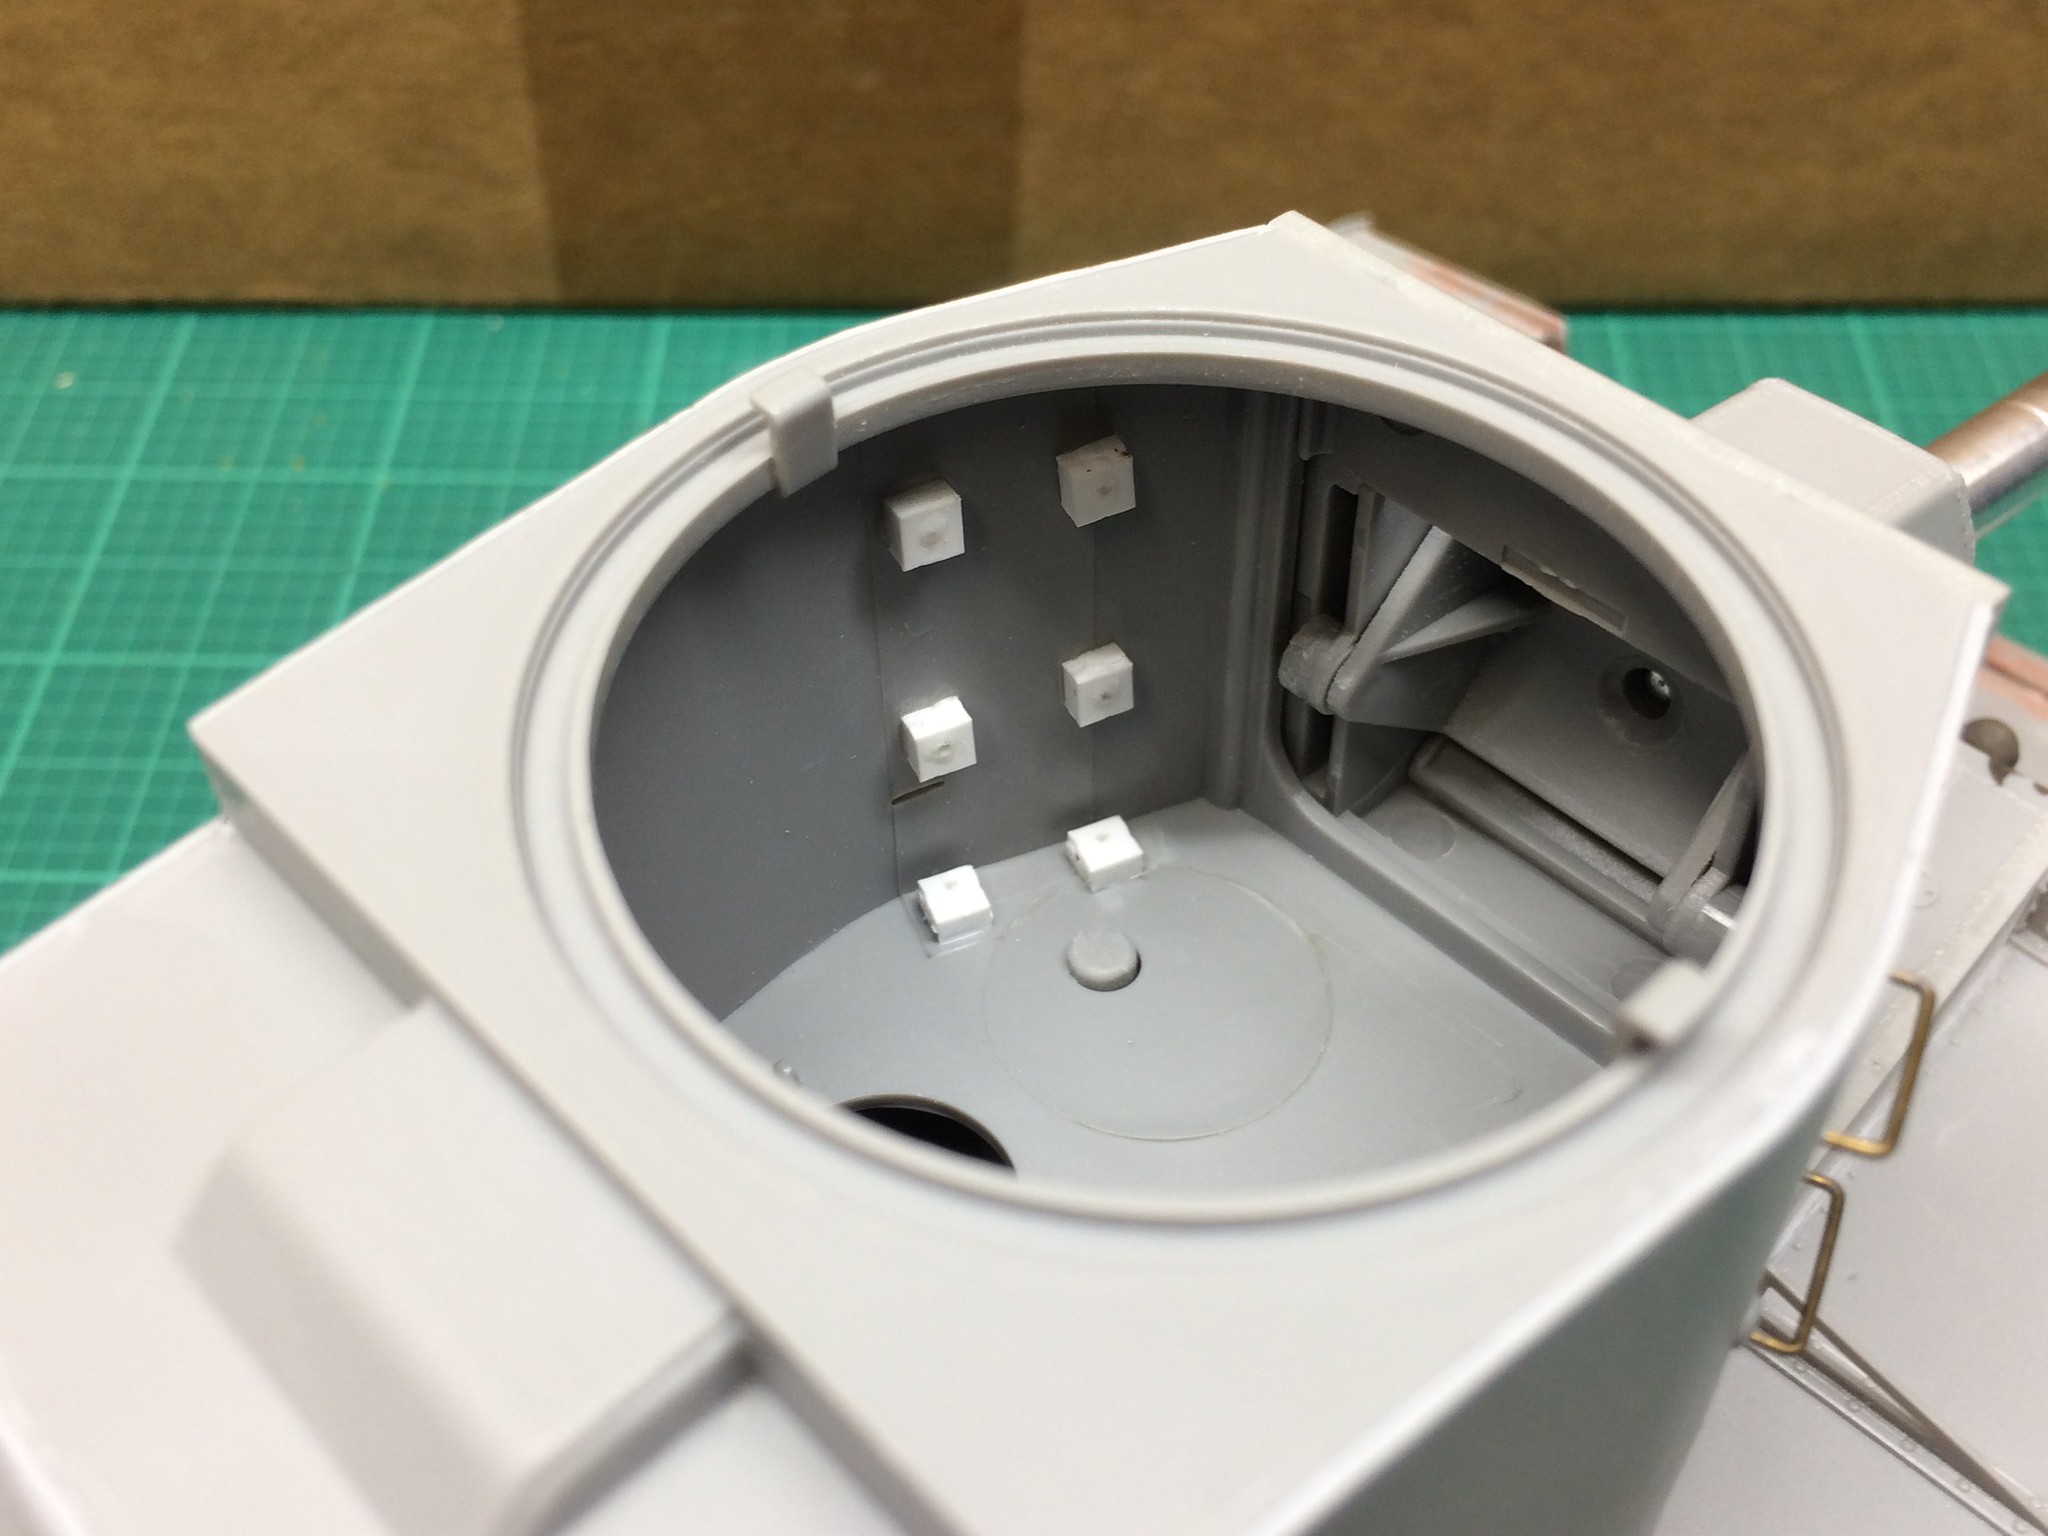
[/url]KV-2-04 by N.T. Izumi, on Flickr

The kit gives you the option of either belt type tracks or link and length plastic ones.  The l&l tracks impart a nice sag on the upper runs, but every single track link has a pair of ejector pin marks.  Being lazy, I replaced them with Sector 35 metal tracks.  These look exactly like Friulmodelissimo tracks, but come largely pre-assembled.

https://flic.kr/p/C1CWcc] [/url]Sector 35-KV-II-01 by N.T. Izumi, on Flickr

Anyway, just fartng around trying to get back into the modeling groove.

“Ya ya ya, unicorn papoi!”

  • Member since
    July 2003
  • From: On my kitchen counter top somewhere in North Carolina.
Posted by disastermaster on Friday, July 7, 2017 10:19 PM

Really smells like a good start.

Good idea with the grab handles.

                        http://i20.photobucket.com/albums/b232/gluetank/Animated/th_1-Animated-Disastermaster.gif?t=1296616998

Save

Sherman-Jumbo-1945

"I was so much older then, I'm younger than that now"


  • Member since
    September 2013
  • From: San Antonio, Texas
Posted by Marcus McBean on Saturday, July 8, 2017 1:35 PM

Off to a great start.  Really like your idea with the handrails.  I seem to have a tendicity to knock them off also.

  • Member since
    July 2006
  • From: San Francisco Bay Area
Posted by bufflehead on Saturday, July 8, 2017 2:31 PM

I like it!  Great idea for securing those wire grab handles!

Ernest

Last Armor Build - 1/35 Dragon M-26A1, 1/35 Emhar Mk.IV Female


Last Aircraft Builds - Hobby Boss 1/72 F4F Wildcat & FW-190A8


  • Member since
    January 2006
  • From: California
Posted by SprueOne on Saturday, July 8, 2017 2:37 PM

Good tip on the grab handles. That doesn't look like "farting" around to me though Big Smile

Anyone with a good car don't need to be justified - Hazel Motes


Iron Rails 2015 by Wayne Cassell Weekend Madness sprueone

  • Member since
    November 2009
  • From: SW Virginia
Posted by Gamera on Monday, July 10, 2017 12:31 PM

Great job there G. 

Love the looks of this tank, such a big ugly brute! 

"I dream in fire but work in clay." -Arthur Machen


  • Member since
    May 2011
  • From: Honolulu, Hawaii
Posted by Real G on Monday, July 10, 2017 5:24 PM

BTW regarding the plastic blocks for the grab handles, it is easiest if you pre-drill holes all the way through the blocks and then place them over the installed wire handles.  Use liquid glue to secure the blocks to the plastic turret and a dab of CA to secure the handles.

And now for a bit of entertainment.  I found this quite amusing:

https://flic.kr/p/VgBCjy] [/url]KV-2-Box02 by N.T. Izumi, on Flickr

I challenge anyone to dig up a funnier, more preplexing potted history on the side of a model box!

This is the aluminum barrel I am using for the build.  Kind of odd that Fine Molds produced it - perhaps they are selling someone else's product?  The rifling is a nice touch.

https://flic.kr/p/VjhKnF] [/url]KV-2-07 by N.T. Izumi, on Flickr

https://flic.kr/p/VgBCLW] [/url]KV-2-08 by N.T. Izumi, on Flickr

The kit includes two different styles of tow cable eyes, and copper wire - much better than that awful nylon string!

https://flic.kr/p/VjhKyH] [/url]KV-2-09 by N.T. Izumi, on Flickr

“Ya ya ya, unicorn papoi!”

  • Member since
    November 2009
  • From: SW Virginia
Posted by Gamera on Monday, July 10, 2017 8:20 PM

Thanks G- you're making me hungry. I could really go for some quick-fried tower right now...

Actually FineMolds does do a pretty extensive line of metal turned barrels for armour, not just their own models.

"I dream in fire but work in clay." -Arthur Machen


  • Member since
    January 2006
  • From: California
Posted by SprueOne on Monday, July 10, 2017 11:17 PM

Real G

BTW regarding the plastic blocks for the grab handles, it is easiest if you pre-drill holes all the way through the blocks and then place them over the installed wire handles.  Use liquid glue to secure the blocks to the plastic turret and a dab of CA to secure the handles.

And now for a bit of entertainment.  I found this quite amusing:

https://flic.kr/p/VgBCjy] [/url]KV-2-Box02 by N.T. Izumi, on Flickr

I challenge anyone to dig up a funnier, more preplexing potted history on the side of a model box!

Interesting Indifferent


Real G

The kit includes two different styles of tow cable eyes, and copper wire - much better than that awful nylon string!

https://flic.kr/p/VjhKyH] [/url]KV-2-09 by N.T. Izumi, on Flickr


Nice!

Anyone with a good car don't need to be justified - Hazel Motes


Iron Rails 2015 by Wayne Cassell Weekend Madness sprueone

  • Member since
    September 2016
  • From: Albany, New York
Posted by ManCityFan on Tuesday, July 11, 2017 8:53 AM

Thanks for the laugh.  You need to save that history, and display it prominently with the completed kit.  That barrel is very nice!

Dwayne or Dman or just D.  All comments are welcome on my builds. 

  • Member since
    December 2002
  • From: Bury St Edmunds, Suffolk, England
Posted by Bish on Tuesday, July 11, 2017 9:03 AM

Really nice work on this, i do like the grab handles.

By the way, quick fried tower, does that taste like chicken.

I am a Norfolk man and i glory in being so


On the bench: Airfix 1/72nd Harrier GR.3/Fujimi 1/72nd Ju 87D-3

  • Member since
    November 2009
  • From: SW Virginia
Posted by Gamera on Tuesday, July 11, 2017 11:42 AM

Bish

Really nice work on this, i do like the grab handles.

By the way, quick fried tower, does that taste like chicken.


Actually I think Trumpeter being a Chinese company Quick Fried Tower tastes something like Kung Pao Chicken- hence the Thermodynamic Power in it's spicy nature.  

"I dream in fire but work in clay." -Arthur Machen


  • Member since
    May 2011
  • From: Honolulu, Hawaii
Posted by Real G on Tuesday, July 11, 2017 5:12 PM

I was about to respond saying it tastes like roast duck, but Gamera has a point.  But maybe it's the mild version for Gringos, as the box states "the thermodynamic power inhibit"!  Regardless, we must all proceed to the virtuous soldier, less our quick fried towers all revolve very diffcult.  Except on the horizontal plane, of course.  Stick out tongue

All kidding aside, the kit is very pleasant to work with, being simple and good fitting.


“Ya ya ya, unicorn papoi!”

  • Member since
    April 2015
Posted by Mopar Madness on Tuesday, July 11, 2017 9:46 PM

That's great, quick fried tower!  She's an impressive beastly looking thing.  Nicely done thus far.

Chad

God, Family, Models...

At the plate: 1/48 Airfix Bf109 & 1/35 Tamiya Famo

On deck: Who knows!

  • Member since
    May 2011
  • From: Honolulu, Hawaii
Posted by Real G on Thursday, March 19, 2020 5:13 PM

The slow-fried tower now hopefully proceeds to the virtuous soldier in that backstroke backloggged build war.  Not that the Trumpy kit is hard to build or anything like that.

A little problem I had with the Sector pre-assembled metal tracks was that whoever put them together had lots of CA glue all over their fingers.  The glue prevented the blackening fluid from completely doing its job.  I think I also didn't scrub enough detergent into the tracks as a lot of the recessed areas did not blacken, even after multiple washes and soakings.

So anyway, I glued most of the small remaining bits onto the tank in preparation for painting.

I figure I'd take advantage of the current crisis by staying home and rolling out the airbrush.

“Ya ya ya, unicorn papoi!”

  • Member since
    November 2009
  • From: SW Virginia
Posted by Gamera on Friday, March 20, 2020 8:56 AM

Well I'd forgotten about this one Real G! 

Looking forward to seeing her all painted up. 


And the discolouration on the tracks- smear a little mud on there and no one will ever notice. 

"I dream in fire but work in clay." -Arthur Machen


  • Member since
    July 2004
  • From: Sonora Desert
Posted by stikpusher on Friday, March 20, 2020 12:37 PM

Looking good RG! And yeah, ya gotta chuckle about those Trumpeter Babblefish translations. 


F is for FIRE, That burns down the whole town!

U is for URANIUM... BOMBS!

N is for NO SURVIVORS...

       - Plankton

LSM


  • Member since
    May 2011
  • From: Honolulu, Hawaii
Posted by Real G on Tuesday, March 31, 2020 9:58 PM

Slowly moving forward...just about ready to crank up the airbrush.

But it will have to wait for the weekend, as I tend to get carried away and stay up till the wee hours.  I'll just make sure everything is ready to roll by Friday evening.

“Ya ya ya, unicorn papoi!”

  • Member since
    November 2009
  • From: SW Virginia
Posted by Gamera on Wednesday, April 1, 2020 7:20 AM

'Does the black have a slimming effect on my giant turret?' 


Cool to see you moving forward on this! 

"I dream in fire but work in clay." -Arthur Machen


  • Member since
    July 2004
  • From: Sonora Desert
Posted by stikpusher on Wednesday, April 1, 2020 9:55 AM

Gamera

'Does the black have a slimming effect on my giant turret?' 


Cool to see you moving forward on this! 


Does this make my bustle look fat? 


F is for FIRE, That burns down the whole town!

U is for URANIUM... BOMBS!

N is for NO SURVIVORS...

       - Plankton

LSM


  • Member since
    November 2009
  • From: SW Virginia
Posted by Gamera on Thursday, April 2, 2020 11:44 AM

stikpusher


Gamera

'Does the black have a slimming effect on my giant turret?' 


Cool to see you moving forward on this! 


Does this make my bustle look fat? 


'No, you look GREAT!' *


*If someone has a 152mm gun I'll tell 'em whatever makes 'em happy... 

"I dream in fire but work in clay." -Arthur Machen


  • Member since
    May 2011
  • From: Honolulu, Hawaii
Posted by Real G on Thursday, April 2, 2020 12:13 PM

Hee-hee, you guys are killin’ me!

I’m taking the day off tomorrow because the long delayed fixes for my house begins (contractors doing the work, not me).  So I’m hoping to get some bench time and finally roll out the airbrush while the contractors demo concrete out front.

“Ya ya ya, unicorn papoi!”

  • Member since
    May 2011
  • From: Honolulu, Hawaii
Posted by Real G on Tuesday, April 28, 2020 12:59 PM

This project is moving as slow as the real KV-II, but it is moving.  Last night I was priming another kit white, and I underestimated the opacity of Tamiya's white bottle primer so I ended up with lots of leftover paint.  So not wanting to waste it, I pulled out the KV-II to start the painting process.


“Ya ya ya, unicorn papoi!”

  • Member since
    November 2009
  • From: SW Virginia
Posted by Gamera on Thursday, April 30, 2020 11:52 AM

I like that mottling effect. Cool!!!

"I dream in fire but work in clay." -Arthur Machen


  • Member since
    May 2011
  • From: Honolulu, Hawaii
Posted by Real G on Tuesday, May 26, 2020 2:03 PM

I had a little bench time and realized I have been away from the airbrush too long.  I started painting the KV and ended up with a disaster.  All the black basing was for naught, as I messed up and everything just looks awful.  At least the paint was highly thinned so the finish is smooth and easily over painted.  Arrrrgh.

Oh well, I just have to get back and redo it the right way this time.  Super Angry

BTW, an age old question that gets asked a million times, but I gotta ask again.  Was Soviet early WW II armor painted a greenish or olive color?  I understand that there were significant variations, but what is the general consensus?  Looking at some of Tamiya's WW II Soviet armor kits, their color recommendation of XF-58 is very green.  Is it a case of "paint it any color you like, so long as it's OD or green"?  Inquiring minds want to know.

“Ya ya ya, unicorn papoi!”

  • Member since
    July 2011
  • From: Armpit of NY
Posted by MJames70 on Tuesday, May 26, 2020 2:28 PM
  • Member since
    May 2011
  • From: Honolulu, Hawaii
Posted by Real G on Tuesday, May 26, 2020 5:52 PM

MJames70,

Wow, a SITE called 4BO?  Greenish it is then.  Many thanks!

“Ya ya ya, unicorn papoi!”

  • Member since
    November 2009
  • From: SW Virginia
Posted by Gamera on Wednesday, May 27, 2020 11:28 AM

Hmmm, looks like there's some pre-shading there to me. Am I seeing things?

MJames: Interesting site, thanks for posting it. 

"I dream in fire but work in clay." -Arthur Machen


  • Member since
    May 2011
  • From: Honolulu, Hawaii
Posted by Real G on Wednesday, May 27, 2020 11:58 AM

Gamera

Hmmm, looks like there's some pre-shading there to me. Am I seeing things?

MJames: Interesting site, thanks for posting it. 


Yeah, there is pre-shading, but not so good pre-shading.  Sad

Okay I had a read thru of the 4BO website, and decided I had to choose a different base color.

Before:

After:

I need to add some more highlight color, as this is where I have ended up in past builds.  Gotta move that ball further down the field to reach the goal.

“Ya ya ya, unicorn papoi!”

  • Member since
    November 2009
  • From: SW Virginia
Posted by Gamera on Thursday, May 28, 2020 11:20 AM

She looks good to me. Nicely big and brutal. And the shading looks good. 

"I dream in fire but work in clay." -Arthur Machen


JOIN OUR COMMUNITY!

Our community is FREE to join. To participate you must either login or register for an account.

SEARCH FORUMS
FREE NEWSLETTER
By signing up you may also receive reader surveys and occasional special offers. We do not sell, rent or trade our email lists. View our Privacy Policy.