SEARCH FINESCALE.COM

Enter keywords or a search phrase below:

Swedish S Tank - let's see if I can do it OOB

13753 views
81 replies
1 rating 2 rating 3 rating 4 rating 5 rating
  • Member since
    May 2009
  • From: Poland
Swedish S Tank - let's see if I can do it OOB
Posted by Pawel on Thursday, September 21, 2017 2:45 PM

Hello!

Some of you know I have a lot of strted projects underway. They are all complicated and got somewhat mired, so what did I do - I have started another one. BUT I'll try to do this one OOB, just to see if I still can...

We're talking about Trumpeter's Swedish S tank - the Stridsvagn 103C to be exact. I have first seen this tank in a book that I was learning readin on - so that would be like 35 years ago. Can't get it out of my mind since :-)

Here's the boxtop:

1:35 Trumpeter Strv 103C

And I'm working on the hull - did some work on the underside and on top. On the underside I have changed what I look at as an error in the instructions - they make you install the return rollers "face to the wall" - that is the detailed side of them are supposed to be installed so that the detail can't be seen. I have changed that, wasn't hard, I just had to drill the hole through and glue the axle to the other side:

1:35 Trumpeter Strv 103C

The top required drilling some holes and enlarging the opening for the rear hatch (the hull top is used for this = C Variant and the B variant with smaller hatch). It is well detailed, but has some sink holes on the sides, that I had to fill, and the filler is drying right now:

1:35 Trumpeter Strv 103C

So I'm building on, thanks for looking and have a nice day

Paweł

All comments and critique welcomed. Thanks for your honest opinions!

www.vietnam.net.pl

  • Member since
    December 2002
  • From: Bury St Edmunds, Suffolk, England
Posted by Bish on Thursday, September 21, 2017 3:24 PM

Nice subject. Looking forward to seeing this.

I am a Norfolk man and i glory in being so


On the bench: Airfix 1/72nd Harrier GR.3/Fujimi 1/72nd Ju 87D-3

  • Member since
    July 2014
Posted by modelcrazy on Thursday, September 21, 2017 3:52 PM

Looking forward to it.

Steve

Building a kit from your stash is like cutting a head off a Hydra, two more take it's place.


http://www.spamodeler.com/forum/

  • Member since
    November 2009
  • From: SW Virginia
Posted by Gamera on Thursday, September 21, 2017 7:47 PM

Oh very cool!!! I saw one first hand owned by a private collector a few years ago. Seeing how it could lift, drop, and wiggle around on the hydraulic suspension was pretty awesome.

"I dream in fire but work in clay." -Arthur Machen


  • Member since
    November 2008
  • From: Far Northern CA
Posted by mrmike on Thursday, September 21, 2017 9:52 PM

Very interesting subject, Pawel. I've been tempted to buy the kit many times, so I'm looking forward to your WIP. Having followed several of your builds, odds of your doing it OOB are not so good - you tend to drift into detail, as do I.

Happy in my work;

Mike

  • Member since
    August 2007
  • From: back country of SO-CAL, at the birth place of Naval Aviation
Posted by DUSTER on Thursday, September 21, 2017 10:24 PM

Pawel 

Out Of the Box ????     .................OH,

you are trying to be serious?

Sorry.....Good Luck, I know you will do the right thing and I shall enjoy watching and learning as you go 

Steve

Building the perfect model---just not quite yet  Confused

  • Member since
    May 2009
  • From: Poland
Posted by Pawel on Friday, September 22, 2017 2:01 AM

Gennulmen - thanks a lot for your comments!

You're right - I have to watch myself, but I'm determined not to bog myself down on this one. The kit looks relatively nice and the fit of the parts is good. The parts count is high and they all require some cleanup, mostly it's the mold partition line. Not too many sinkholes, but they are there. The knockout pins are nicely placed, so that is a good thing. I didn't find good info on dimensional accuracy of this particular kit, but from what I see the model is a bit narrow for true 1:35 scale. Of course I'm not touching that :-) The details on the model match walk-around photos well, at least so far. Anyhow, I'm building on - thanks again and have a nice day

Paweł

All comments and critique welcomed. Thanks for your honest opinions!

www.vietnam.net.pl

  • Member since
    December 2002
  • From: Fort Knox
Posted by Rob Gronovius on Friday, September 22, 2017 10:48 AM

I picked up one of these a long while back at the end of a show and the vendor was trying to get rid of it. I paid $10 for it. I ended up also getting the Fine Molds barrel for it, but it was $12. So what should have been a cheap project doubled because I decided I had to have an AM gun tube.

I haven't touched it since I bought it. I don't even remember if I have the -B or -C model. I was only interested in it because I have a fondness for modern kits that once existed as old Aurora kits.

I hope your project will motivate me to take another look at my kit. If I had to guess, I'd say mine is the -C.

I've read that the parts A13 & A14 were reversed in the instructions, but the parts were keyed so they can't be put in wrong.

  • Member since
    May 2011
  • From: Honolulu, Hawaii
Posted by Real G on Saturday, September 23, 2017 12:44 AM

Pawel,

You have an interesting project going!  I also had a fascination with the S-Tank, ever since childhood.  I loved the fact that it had a diesel engine, but it was also equipped with a gas turbine to boost output during combat.  I believe those Jerry cans on the sides were supposedly filled with diesel fuel?  I would think a HEAT round would ignite the fuel and barbecue the crew!

Masking the kit is going to be a chore!  I look forward to seeing your build progress, as I have the "B" model in the stash.  It's just one color, so it's much easier to paint! My kit came with gunpowder residue in the lower hull - the box smelled of fire crackers when I opened it.  I collected the powder and lit it - yup, gunpowder!

i have read somewhere that Trumpeter goofed on the overall hull length by including the rear bins.  This causes the model to be too small.  Try fitting a 1/35 figure into the hatch and you will see the problem.  BUT - it looks like an S-Tank to me, and the scaling error is not obvious.  Plus it scores 10 out of 10 in cool factor.

“Ya ya ya, unicorn papoi!”

  • Member since
    May 2009
  • From: Poland
Posted by Pawel on Saturday, September 23, 2017 3:16 PM

Hello everybody!

Rob - I don't think I'll buy any aftermarket for this one. Let's hope I can prevail in my OOB quest! As for the road wheel arms - it might as well be that there is a bug in the instructions. So far I have cut out one pair of those babies for a test fit and I hope I can install them correctly:

1:35 Trumpeter Strv 103C by Pawel

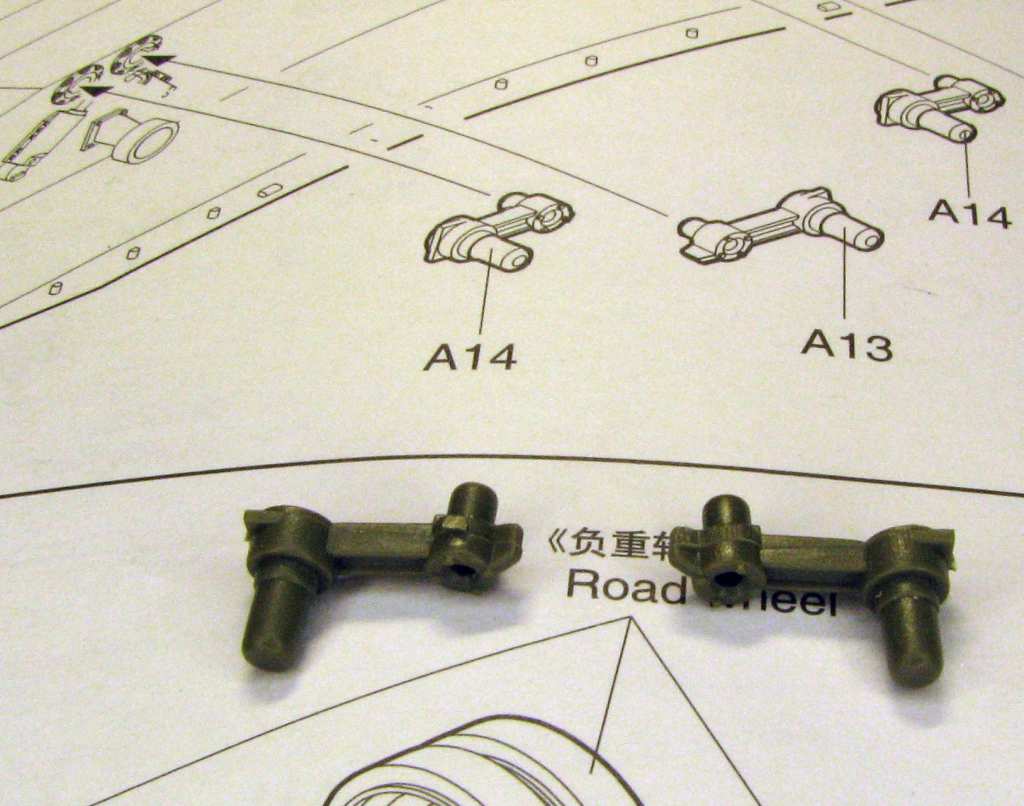
The rule I follow is: the arms themselves point down, and those little baffles point up. That should take care of it. I have the temptation to modify the stance of the tank to show it's lowrider suspension in action. Trying to resist that, the decision still isn't made. But I'll be adding the wheels and tracks as a last step here, at least that's the plan for now.

Real G - that paint scheme is a big reason for building this baby. But I'll worry about the masking when it's ready for paint. After researching the net I noticed that the C's could also be seen in one-colour camouflage, so that's an option for somebody that doesn't want to do all the masking.

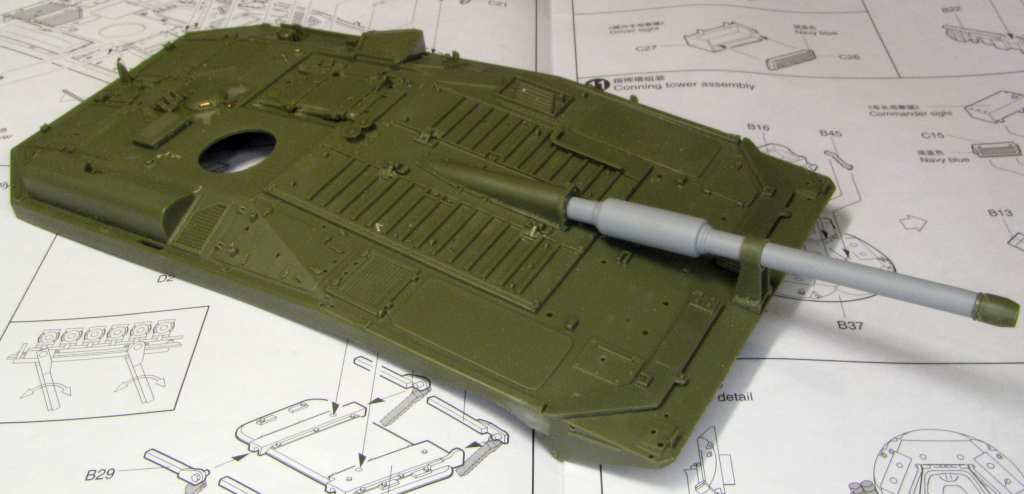
As for the accuracy of the kit - there are definitely problems with it. But nos as bad as you described them. Here's a photo of the hull top against plans by mister George Bradford, taken from his book AFV Plans: Cold War Armored Fighting Vehicles, page 85. I have scanned them and scaled on my computer, then printed out:

1:35 Trumpeter Strv 103C by Pawel

As you can see the bins would be no real problem here, but the hull is a few mm short in all directions. It's hard to say how this error came to be.

As you can see on the above photo I already made some progress. I have glued, filled and sanded the gun tube. I have primed it to check for flaws, but it's all right, so I have dry-fitted it to the top of the hull:

1:35 Trumpeter Strv 103C by Pawel

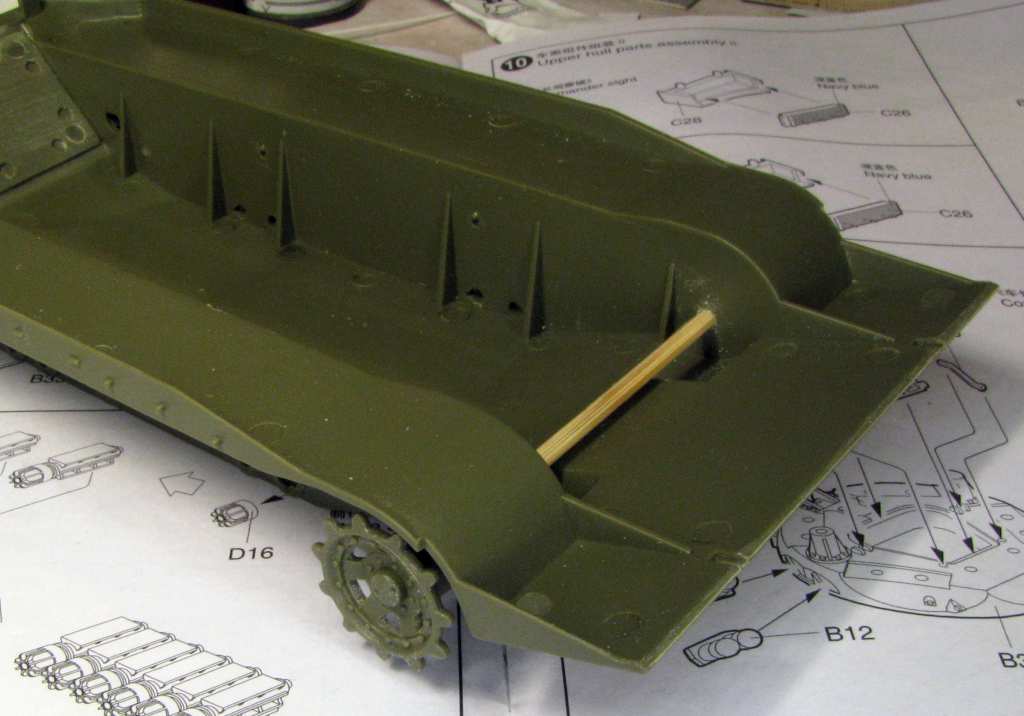
I have read, that the fit of the sprockets to the hull stubs is a little iffy and I'm afraid the rubber trucks will pull on them, so I drilled the stubs out and modified the sprockets a little to mount them on an axle going through the hull in one piece. Maybe later I'll find a nice metal 3mm axle (84mm long), for now it's bamboo, still a lot stiffer than a piece of sprue:

1:35 Trumpeter Strv 103C by Pawel

The next one shows how I modified the sprockets:1:35 Trumpeter Strv 103C by Pawel

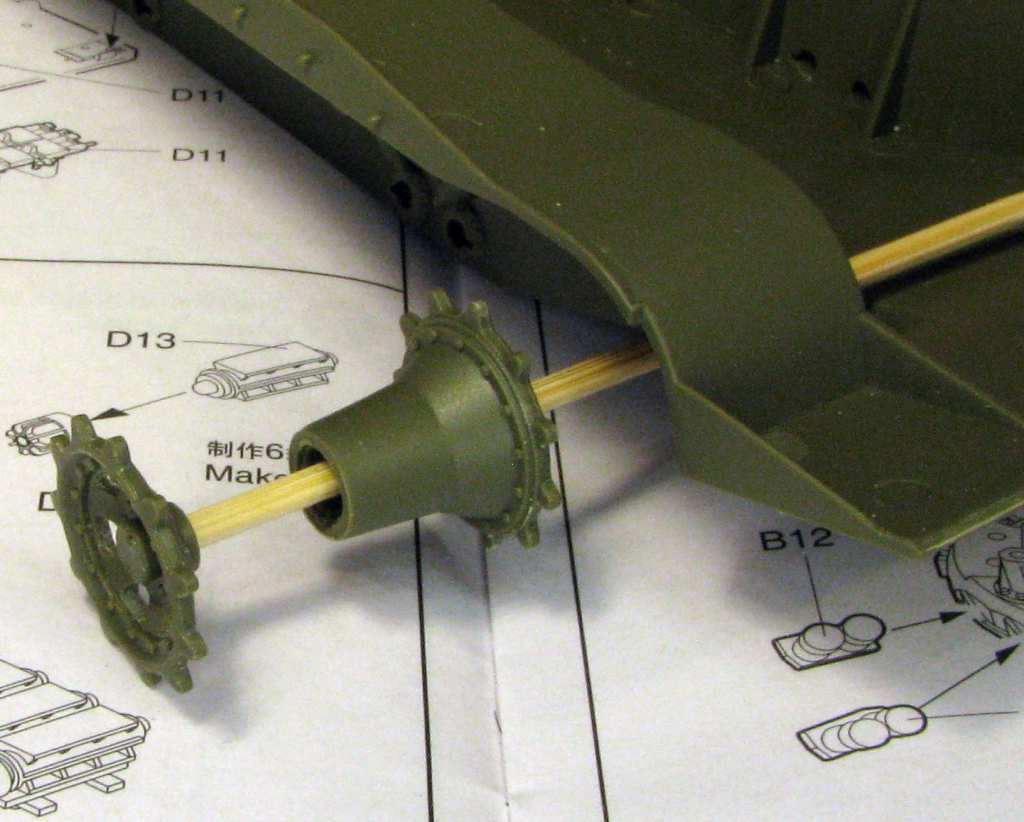
I have also worked on subassemblies. The commander's cupola is pretty complicated:

1:35 Trumpeter Strv 103C by Pawel

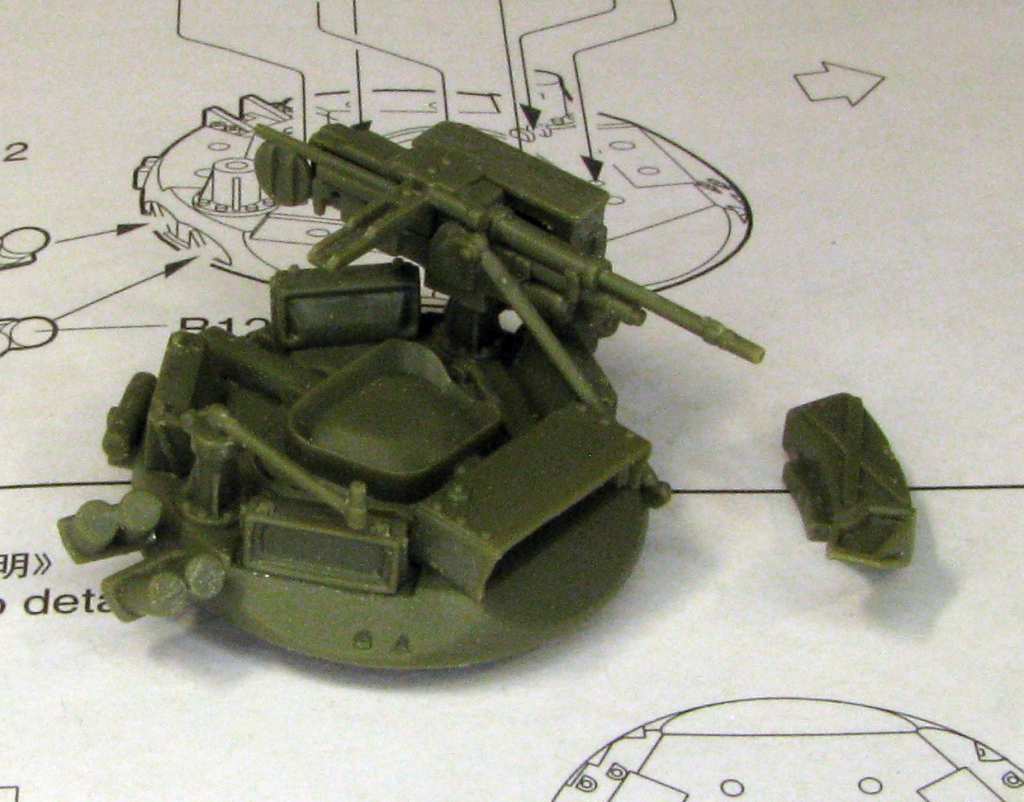
The MG (called Kulspruta 58 Strv - it's actually an FN MAG) is still detacheable for painting. I have holowed the barrel out a little. And I'm very sceptic about the fit of the part on the right. Can somebody tell me what it is? Does it attach to the ammo box or not? I have also left out the commander sight's window for painting. All the scopes lack armored "shutters". Gonna have to do something about it.

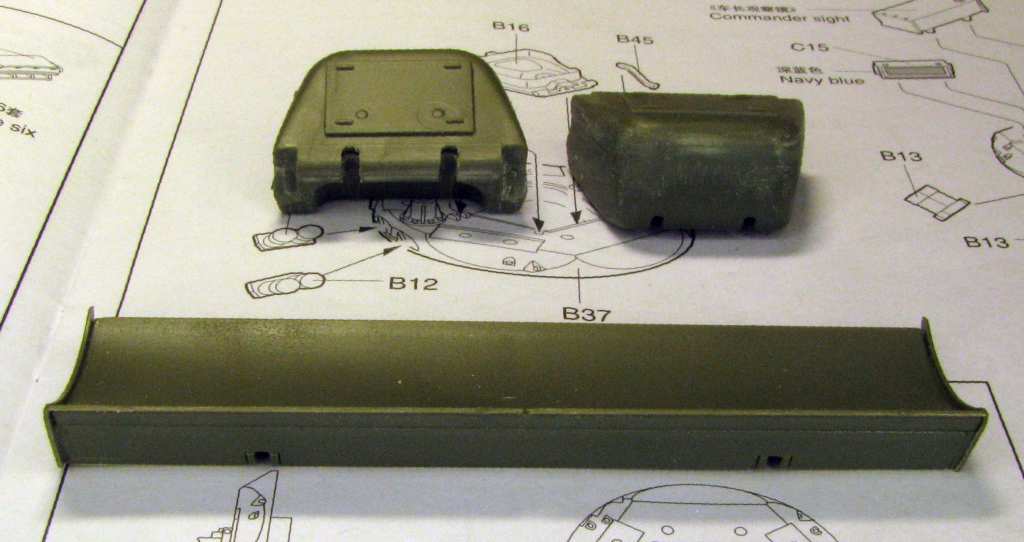
Other subasseblies that I tackle right now: dozer blade and the stowage bins (fiberglass style):

1:35 Trumpeter Strv 103C by Pawel

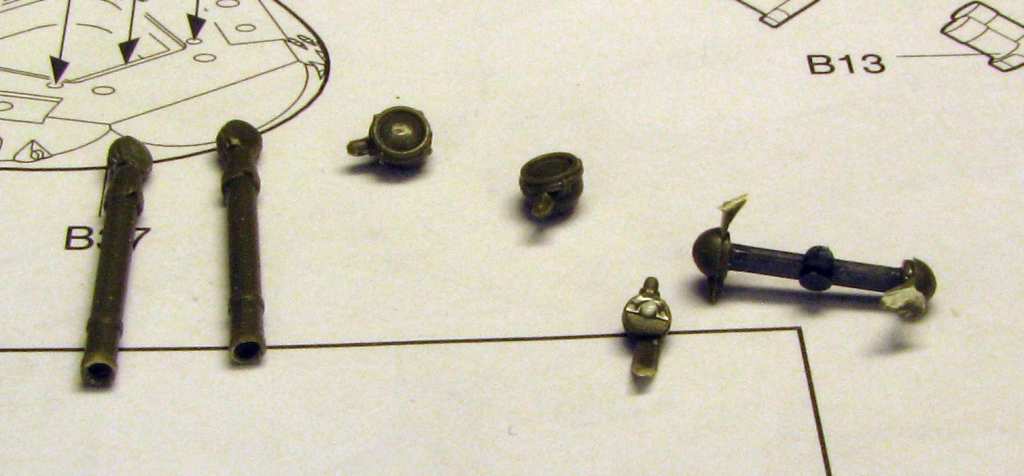
There are also smaller parts and almost all of them need attention. I have hollowed out the tubes of the illum mortars (what a gizmo!). The small lights on the rear were plagued by sink holes, so I have drilled those sink holes out and plugged them with (stretched) sprue:

1:35 Trumpeter Strv 103C by Pawel

No I plan to join the hull halves, there's a lot of filling and sanding to do there and I don't want to break anything in process - that's why the gun tube isn't permanently installed yet. Thanks for looking and have a nice day

Paweł

All comments and critique welcomed. Thanks for your honest opinions!

www.vietnam.net.pl

  • Member since
    December 2002
  • From: Fort Knox
Posted by Rob Gronovius on Saturday, September 23, 2017 7:38 PM

I think it is the curved ammo chute that rests along the side of the cupola.

  • Member since
    May 2009
  • From: Poland
Posted by Pawel on Sunday, September 24, 2017 5:21 AM

Hello Rob!

It's yet another time when you are such a great help with my modelling project!

Great photo, just what I've been lookin' for! Where did you find it?

By the way, I find it interesting to see that rubber collar there. I guess it's for collecting spent brass. Looks like some armies dont give a dang about a case or two, while in other peace-time armies you have to account for every one of them babies!

Anyhow, looks like in the Trumpeter model the part B24 doesn't fit like it's supposed to. I have just cut it up and it WILL fit when I'm done with it.

Thanks again Rob, and have a nice day!

Paweł

All comments and critique welcomed. Thanks for your honest opinions!

www.vietnam.net.pl

  • Member since
    December 2002
  • From: Fort Knox
Posted by Rob Gronovius on Sunday, September 24, 2017 10:23 AM

Pawel, I am always happy to assist you; you are one of the ones who appreciate the help and don't try to turn it back into some nitpick or rivet counting accusation. I literally know virtually nothing about this tank beyond the user (Sweden) and that the main difference visual between the versions is the track style. But I do know where to find reference photos of army tanks.

My gun tube purchase was a moment of self doubt, because I had had difficulty working some gun tube seams on a previous 105 mm gun tube.

Here is the link to the walk around, one of many. I hope it doesn't lead to a more extensive project than you intended!

http://data3.primeportal.net/tanks/roger_johansson/strv_103c/

As far as that rubber boot, it looks like it is designed to collect the brass. Since the hatch appears to slide backwards to open, it probably prevents spent brass from showering the commander as he opens his hatch.

  • Member since
    May 2009
  • From: Poland
Posted by Pawel on Sunday, September 24, 2017 5:11 PM

Hello Rob!

I'm glad you're reading the forums and that you are ready to help. I don't really know why people get so defensive sometimes when offered good advice.

Who knows - if I didn't want to have a kind of "break" with this one, maybe I'd buy a metal barrel too. But my experience with filling and sanding the plastic ones has been rather good.

After checking the photo you posted I grabbed the razor saw and have made the cut:

1:35 Trumpeter Strv 103C by PawelAfter some filing, filling and sanding I have made the "funnel" part fit nicely under the ammo box. Much beter now:

1:35 Trumpeter Strv 103C by Pawel

I'm also filling and sanding the hull:

1:35 Trumpeter Strv 103C by Pawel

1:35 Trumpeter Strv 103C by Pawel

On the rear there are some lines to be scribed (penciled in), to show where the flotation screen frame detaches along the hull top. The front plate has to be smooth, at least in the portion that the dozer blade doesn't cover (it will be installed in the stowed position).

I'm using liquid sprue for filling. About the only downside to it is the long drying time. This can be partially helped by applying it in thin layers.

I have been working on the subassemblies. On the photo below there are the fittings for the side skirts/jerry cans and brackets for stowing the flotation screen poles. I had to glue in those white plastic sheet triangles - in this place the parts were so thin, they were just not there :-)

1:35 Trumpeter Strv 103C by Pawel

Then there are the fender boxes - on the real thing there are two forward firing MS in one of them! I had to sribe two lines in every one of the boxes, to show where the cover ends and the box base begins:

1:35 Trumpeter Strv 103C by Pawel

Then there are other parts - like the exhaust duct and the telephone box. Lots of filling and cleanup. I'm making all the handles out of wire - I feel this saves me time, first on cleaning up the plastic ones, second on re-doing the ones that were knocked off :-)

1:35 Trumpeter Strv 103C by Pawel

So - the work continues. Tomorrow I'll have to go to work, so that will give the filler plenty of time to dry! Thanks for reading and have a nice day

Paweł

All comments and critique welcomed. Thanks for your honest opinions!

www.vietnam.net.pl

  • Member since
    August 2007
  • From: back country of SO-CAL, at the birth place of Naval Aviation
Posted by DUSTER on Tuesday, September 26, 2017 1:54 PM


 Pawel,   This is coming along very nicely.    

Steve

Building the perfect model---just not quite yet  Confused

  • Member since
    February 2007
  • From: Bronze Squadron - Battlestar Cerberus
Posted by Lodni Kranazon on Wednesday, September 27, 2017 4:21 AM
Very cool build!

[Admiring Starbuck's space fighter] Cassiopeia: It's a perfect machine! Born to dance amongst the stars! Starbuck: Yeah, it's bumping into them that has me worried.

  • Member since
    November 2009
  • From: SW Virginia
Posted by Gamera on Wednesday, September 27, 2017 7:34 AM

She's lookin' good Pawel! 

"I dream in fire but work in clay." -Arthur Machen


  • Member since
    May 2009
  • From: Poland
Posted by Pawel on Thursday, September 28, 2017 3:33 PM

Steve, Lodni Kranazon, Gamera - thanks a lot for your kind words!

The week is pretty busy so I don't have too much time to work on the model, but I'm making the most of it. I've been outfitting the hull that is now filled and sanded, with a little primer on to check the quality. Here's what it looks like:

1:35 Trumpeter Strv 103C by Pawel

1:35 Trumpeter Strv 103C by Pawel

1:35 Trumpeter Strv 103C by Pawel

Now I'm working on the "jerry can and poles side armor" to make it ready to be painted separately. Thanks for lookin' and have a nice day

Paweł

All comments and critique welcomed. Thanks for your honest opinions!

www.vietnam.net.pl

  • Member since
    May 2015
Posted by Griffin25 on Thursday, September 28, 2017 5:26 PM

Looking good. So that tank doesn't have a turret eh? 


Griffin

  • Member since
    February 2007
  • From: Bronze Squadron - Battlestar Cerberus
Posted by Lodni Kranazon on Thursday, September 28, 2017 6:01 PM

[Admiring Starbuck's space fighter] Cassiopeia: It's a perfect machine! Born to dance amongst the stars! Starbuck: Yeah, it's bumping into them that has me worried.

  • Member since
    January 2015
  • From: Tumwater, WA.
Posted by M. Brindos on Friday, September 29, 2017 8:06 AM

You're making a bit of a fan of this tank out of me, my friend. It's looking great!

Are you adding figures, or just building this one for the shelf?

- Mike Brindos "Lost Boy"

  • Member since
    November 2009
  • From: SW Virginia
Posted by Gamera on Friday, September 29, 2017 9:44 AM

As I understand the S tank was inspired by assault gun/ tank destroyers like the Stug, Jadgpanzers, and SU-85 series. 

She's lookin' great Pawel, please keep the updates coming! 


"I dream in fire but work in clay." -Arthur Machen


  • Member since
    November 2005
  • From: Formerly Bryan, now Arlington, Texas
Posted by CapnMac82 on Friday, September 29, 2017 10:43 PM

Gamera
As I understand the S tank was inspired by assault gun/ tank destroyers like the Stug, Jadgpanzers, and SU-85 series.

Was part of it, but the Swedes were also trying to plan around a force that could be raised up quickly from Reserves.  So, a two-man tank-killer had great appeal.

At the time, the hydralic technology looked mature enough to support using that to elevate and depress the gun tube.  Having an attached dozer blade meant no having to wait for Engineer units to stand up in case of emergency.  And, being able to dig in defilade just added to the protection.

And, when the traverse was executed by moving the vehicle, it almost makes sense to have the gunner be the driver, too.

The fixed gun tube really simplifies the geometry of the autoloader, too.

Now, whether the terrain in Sweden was suitable for the range of elevation provided, is quite a differnt question.  The scheme also required much of the Reservists, to keep up skills so that they could go to their dispersed laagers and go face off the invading Soviet (or, worse yet, Norwegian) tank hordes.

  • Member since
    December 2002
  • From: Fort Knox
Posted by Rob Gronovius on Saturday, September 30, 2017 6:02 PM

It was designed as a purely defensive weapon system. As stated, a minimal crew can fight from prepared positions and the lower height allows greater survivability. Traditional tank battle positions require a "hull down" and "turret down" position. In turret down, nothing but the commander and turret optics are visible from the front. The tank then moves forward to a hull down position exposing the turret and main gun for engagement.

The Strv is useless in a traditional meeting engagement, i.e. two mobile forces meeting while traveling towards one another. However, in a deliberate attack, where the enemy positions are known; one set of tanks can overwatch from stationary positions and provide cover while another set of tanks can maneuver towards the enemy positions.

  • Member since
    May 2009
  • From: Poland
Posted by Pawel on Saturday, September 30, 2017 6:53 PM

Hello everybody!

Mike - I'm becoming a fan myself, I'm admiring the Swedes for how determined they were to design something themselves as opposed to buying foreign stuff, and how well thought out the tank is.

Capn, Rob - thanks a lot for that theoretical discussion, I find it fascinating and I think it adds immensely to the thread. Did you read about the comparison tests the British and Germans have done on that baby and found that as long as you have to stop a tank for firing the turretless design has no disadvantages over turreted tanks?

I, for myself, am building on. On one side I have test-fitted the jerry cans and the poles:

1:35 Trumpeter Strv 103C by Pawel

On the other side the jerry cans are not there yet, but I have fitted a reinforcement (white part) for the jerry can racks, I hope it will allow me to remove a whole jerry can "side" as one part after painting and before installing the runnng gear:

1:35 Trumpeter Strv 103C by Pawel

As you can see the poles are removable, too. The cleanup of them looked bad at first, because all 13 (bad luck!) of them have a prominent mold parting line. Some people are even building those poles from scratch, but I think I have found a cleanup method that saves a lot of work.  I have cut off the diagonal stubs and sanded the poles round. After that I have glued new diagonal stubs on, made from stretched sprue:

1:35 Trumpeter Strv 103C by Pawel

This doesn't have to be done on all poles neither - at least the front pointing ones are hidden inside the brackets and the tips are not visible, so don't bother with the cleanup too much.

1:35 Trumpeter Strv 103C by Pawel

I have alo been adding and refining some detail on the hull:

1:35 Trumpeter Strv 103C by Pawel

But it's hight time I start painting that baby soon, before my lady returns and starts complaining about the fumes again!

Thanks for looking and have a nice day

Paweł

All comments and critique welcomed. Thanks for your honest opinions!

www.vietnam.net.pl

  • Member since
    December 2002
  • From: Fort Knox
Posted by Rob Gronovius on Saturday, September 30, 2017 10:19 PM

Pawel

Capn, Rob - thanks a lot for that theoretical discussion, I find it fascinating and I think it adds immensely to the thread. Did you read about the comparison tests the British and Germans have done on that baby and found that as long as you have to stop a tank for firing the turretless design has no disadvantages over turreted tanks?

Having spent a good deal of my life tanking, I find that utter bs. Target acquisition is the key to winning a tank battle. My first tank required a short halt to engage a target and we trained it on the 60 series and M1 series as well. 

Stopping a tank to engage a target accurately requires skill and training. With a turretless tank, you can only engage, and see a tank to your direct front within a few degrees. With a turreted tank, you can continuously scan left and right independent of the direction of travel. You can traverse a turret much more quickly than you can try to adjust the direction of the tank to get an accurate lay of the main gun.

Any way, I am impressed at the amount of work you've done on a kit you intend to build OOB!

  • Member since
    May 2009
  • From: Poland
Posted by Pawel on Sunday, October 1, 2017 5:11 AM

Hello Rob!

I respect your tanking experience a lot! I just wanted to add, that in my research I have read that in that S-Tank both the driver and the commander have very nice, big periscopes. Maybe that could help with target acquisition? I have also read that while turning the tank when stopped is slower than moving the turret, the S-tank could very quickly turn and stop simultaneously when on the move. That said it's all theory as we all are lucky enough that we didn't have the opportunity to test them in actual battle. And the Swedes also phase them babies out as soon as they felt that the fire-on-the-move capability is already there.

I'm glad you like my work! At the same time I'm happy with my build as I didn't go into any aftermarket parts and I resisted any shots at serious modifications - that's pretty OOB for me! And a little over a week after starting this I'm almost ready for painting.

Thanks for reading and have a nice day

Paweł

All comments and critique welcomed. Thanks for your honest opinions!

www.vietnam.net.pl

  • Member since
    July 2014
Posted by modelcrazy on Sunday, October 1, 2017 10:08 AM

Pawel,

I've always been intersted in the S-tank and have even noticed them in 1/72 thaks to my intrest in this thread.
I have a question, for anyone, that I never noticed about the tank until watching your build. What are all the jerry cans for? they seem to be part of the camo as well. Are the used as armor as well as fluid containers?

Steve

Building a kit from your stash is like cutting a head off a Hydra, two more take it's place.


http://www.spamodeler.com/forum/

  • Member since
    December 2002
  • From: Fort Knox
Posted by Rob Gronovius on Sunday, October 1, 2017 10:41 AM
Yes, add on armor to defeat HEAT type rounds and RPGs.
  • Member since
    January 2016
  • From: A Galaxy Far, Far Away
Posted by Hunter on Sunday, October 1, 2017 11:23 AM

Pawel,

Great subject, and you are doing a great job. I look forward to the finished build. Enjoy friend!

Hunter 


JOIN OUR COMMUNITY!

Our community is FREE to join. To participate you must either login or register for an account.

SEARCH FORUMS
FREE NEWSLETTER
By signing up you may also receive reader surveys and occasional special offers. We do not sell, rent or trade our email lists. View our Privacy Policy.